Fully working TPM on X99D3M4
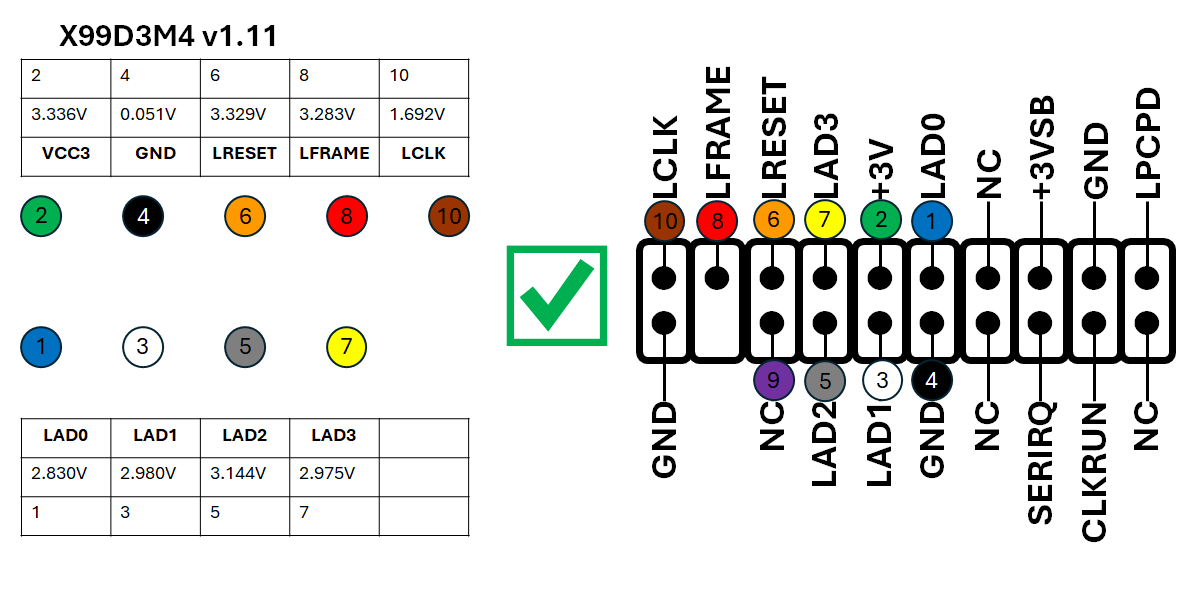
Some time ago I got help soldering on a 2.54mm header on the DEBUG port. So let us first start with the pinout. In short, it was exactly the same as the ZX-99EV3.
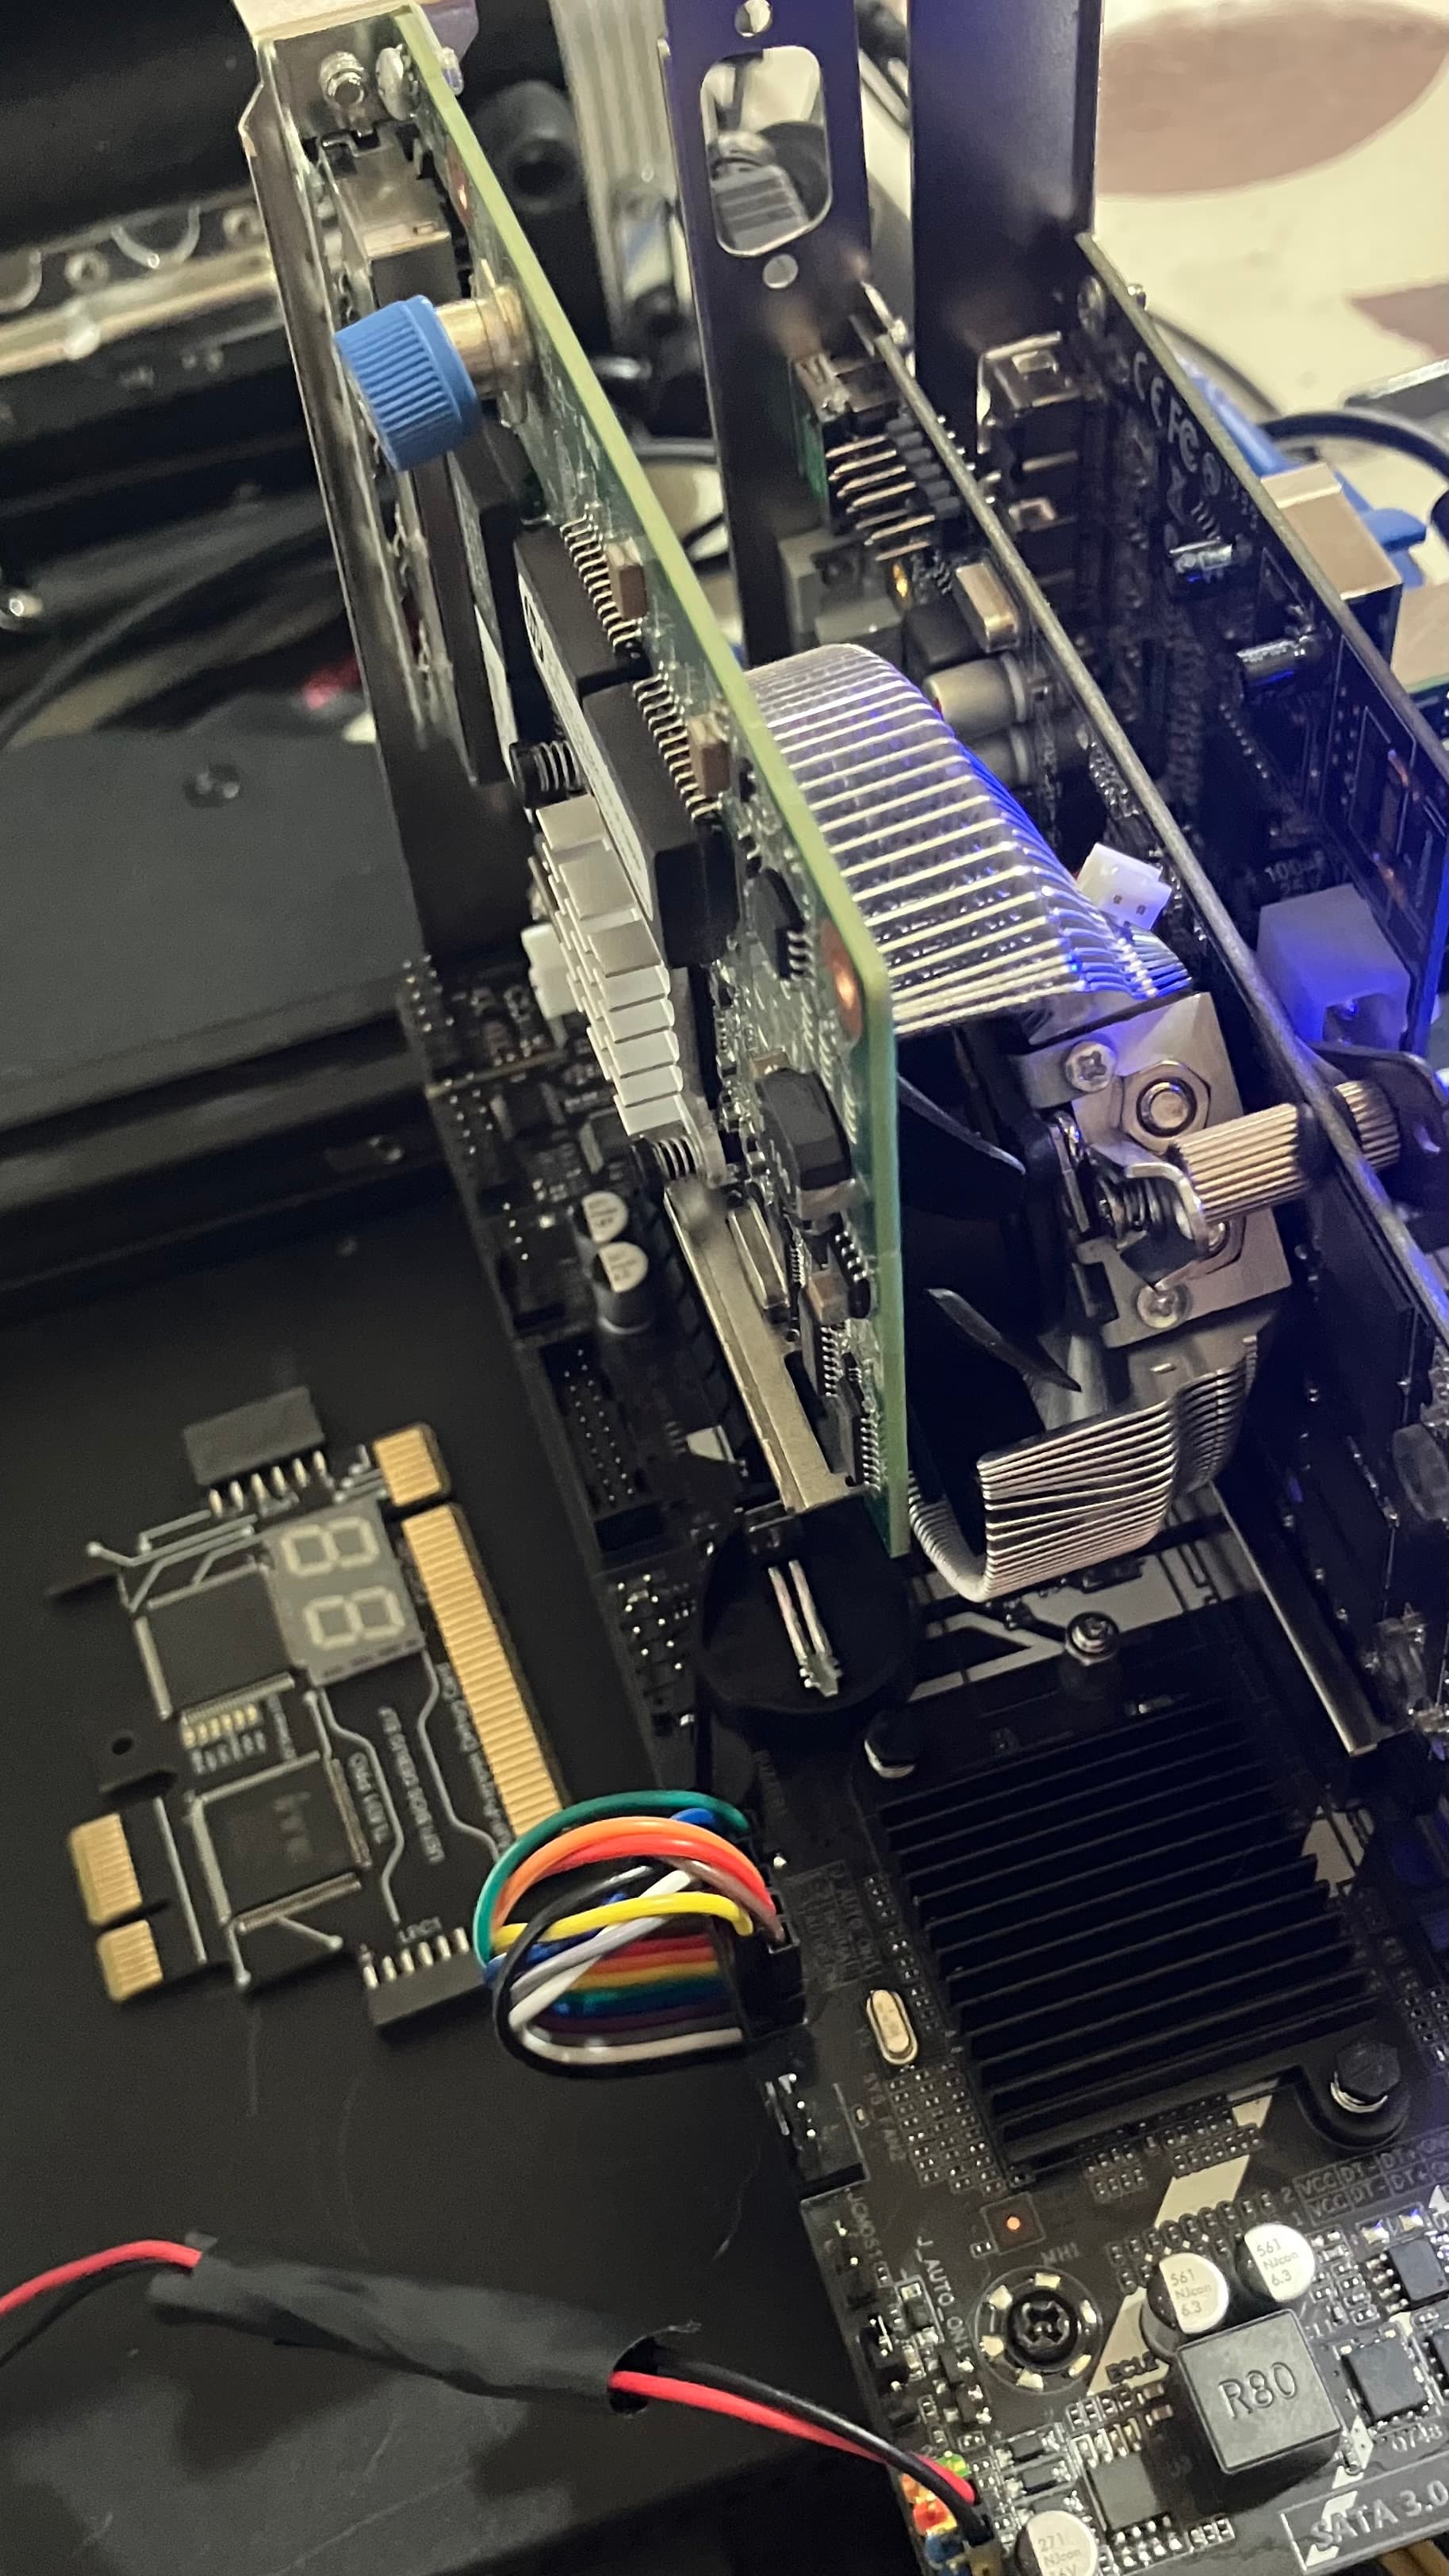
And then I could use my TL631 Pro debug card, which greatly simplified all further testing. After many, many hours of testing, I found that the JGINYUE X99-8D4/2.5G BIOS works perfectly on this board, and hence I could get a TPM up and running. Yes, I know, that is a dual socket board with a C612 chipset. But it does indeed work on the X99D3M4. No bugs or glitches observed in all my testing. And with this BIOS, RAM ECC functionality also work. Below is a picture of me testing all PCIe slots, with the TPM installed instead of the TL631 Pro debug card.
Files can be downloaded from here
Changelog for “FIB_J9984402_250914.bin”
- Fixed the PCIe X4 slot, by setting “IIO 0” to “Auto ; x4x4x4x4 ; Auto”.
- Secure Boot and Resizeable Bar is enabled by default
- Modified the Smart Fan curve to have lower RPM when idling
- Default values enables CPU overclocking with for instance Throttlestop. This was verified on a ZX-99EV3 board, but I am 99.9% sure it works on for instance X99D4M4 as well
- Most importantly: Changed the startup logo
Notes on startup after flashing:
- First there will be three short restarts
- Then there will be a restart where it ultimately hangs (B7 debug code). Just power off and start again
- And then the there will some beeps and a BIOS splash screen. Do not spam “Del” here, just let it continue. It will do yet another restart
- Finally on the fifth(!) restart, you can enter the BIOS and load optimal defaults
Known bugs
None.
Next steps
The only remaining feature that I would personally value, would be to overclock the CPU directly from the BIOS on a DDR4 board. I may explore this in the future.
