@snixel - It’s OK, we all need help sometimes, even I reach out often to others for help on issues, how to do stuff etc! 
Please link me to the BIOS download page for this system, and provide me with your BIOS region and “Full” backup in zip too.
It may be due to using FPT 64 version, I always advise NOT to use it. Or, it may be your full backup from FPT is not a full backup, if there is any FD restrictions in place for read then FPT would not be able to dump that region (mainly thinking ME region here)
For MX25L12873F we have to use CH341A v1.31(1.4) (CH341AFree) (This is the name of the folder), ASProgrammer 1.4 or 1.41, or CH341A v1.1.1.32 - So I assume MX25L12873F probably similar, but sounds like you are using something that should work, so probably issue as mentioned above.
Read/write/verify to the chip “just fine” does not always mean all OK. If you want to be 100% sure, you have to erase, blank check, open file, write/verify.
Then without powering on, close app, open app, read, verify, save and then hex compare that with the file you wrote, if 100% match then OK write is 100% OK (Sounds like you did that, but maybe not 100% correctly)?
Probably missing ME FW region in FPT dump
@Lost_N_BIOS I was already thinking it had something to do with the ME region.
I’ve uploaded a zip file containing the manufacturer bios as well as the full bios dump and bios region dump I took with FPT.
You can download it through this wetransfer link: https://we.tl/t-23IYm2Bd9e
Note: the ME version in the bios dumps is newer than the ME version in the manufacturer BIOS because I updated the ME to the latest available version using FWUpdate before I bricked it ![]()
So you are saying I could replace the bios region in the manufacturer BIOS with my dumped bios region and that should make a full bios image with a working ME region?
@snixel - What brand/model is this? If your FPT dump is complete BIOS dumped when system was working, you should be able to directly program that back. BIOS region would not have anything missing in any FPT Dump (Full or BIOS region only dump)
So, if that is complete FPT Dump and you wrote it back with programmer and it’s failing, then that means your write is not working properly with programmer (do as I mentioned above)
I checked, and yes, that FPT dump is complete. Both that, and the stock BIOS programmed as-is would be bootable, once properly written to the chip.
But, looks like Boot Guard is probably enabled here, since it’s set to FVME #5 in the ME FW side, so probably key burned in at PCH - you may not be able to write back the FPT Dump due to this, but should be able to boot with the stock untouched BIOS programmed in properly
You can edit that padding file in middle of BIOS region, at 490000h copy from FPT dump and place at 490000h exact write over current FF’ content, to put back in your sys specific info, this is not covered by boot guard.
If you want to test and confirm getting the write proper and nothing else being an issue, then write in the stock untouched BIOS only, using info above, until it boots.
@Lost_N_BIOS it’s a brand new MSI GS66 Stealth 10SGS, so it would be a real bummer if I can’t fix it.
I’m pretty sure the Boot guard option was disabled in the bios when I took a look in the the hidden menu’s (you can access the hidden menus on a MSI bios through a special key combo), but the signs the motherboard is showing sure point in that direction.
I will try your suggestion in a couple of days (I will be abroad for work on monday and tuesday) and report back.
Thank you for your assistance so far!
@snixel - Boot Guard and BIOS Guard are two very different things, and Intel Boot Guard is not something there is a BIOS setting for
This is set in ME FW and if enabled with key burned into the PCH you can’t edit any area of the BIOS that is covered by boot guard (at all) - This can only be checked with MEINFO once system is running again.
It should be OK to edit where I mentioned though, that is not covered by boot guard. But, go ahead and test programming in the stock BIOS as it is, then manually confirm the write is OK as mentioned at post #250, then we’ll fix the system info later via FPT
@flashrom What other information do I need that we don’t already have? I just got a reply back from ITE themselves who told me they are very sorry, but that document is covered by NDA for manufactory.
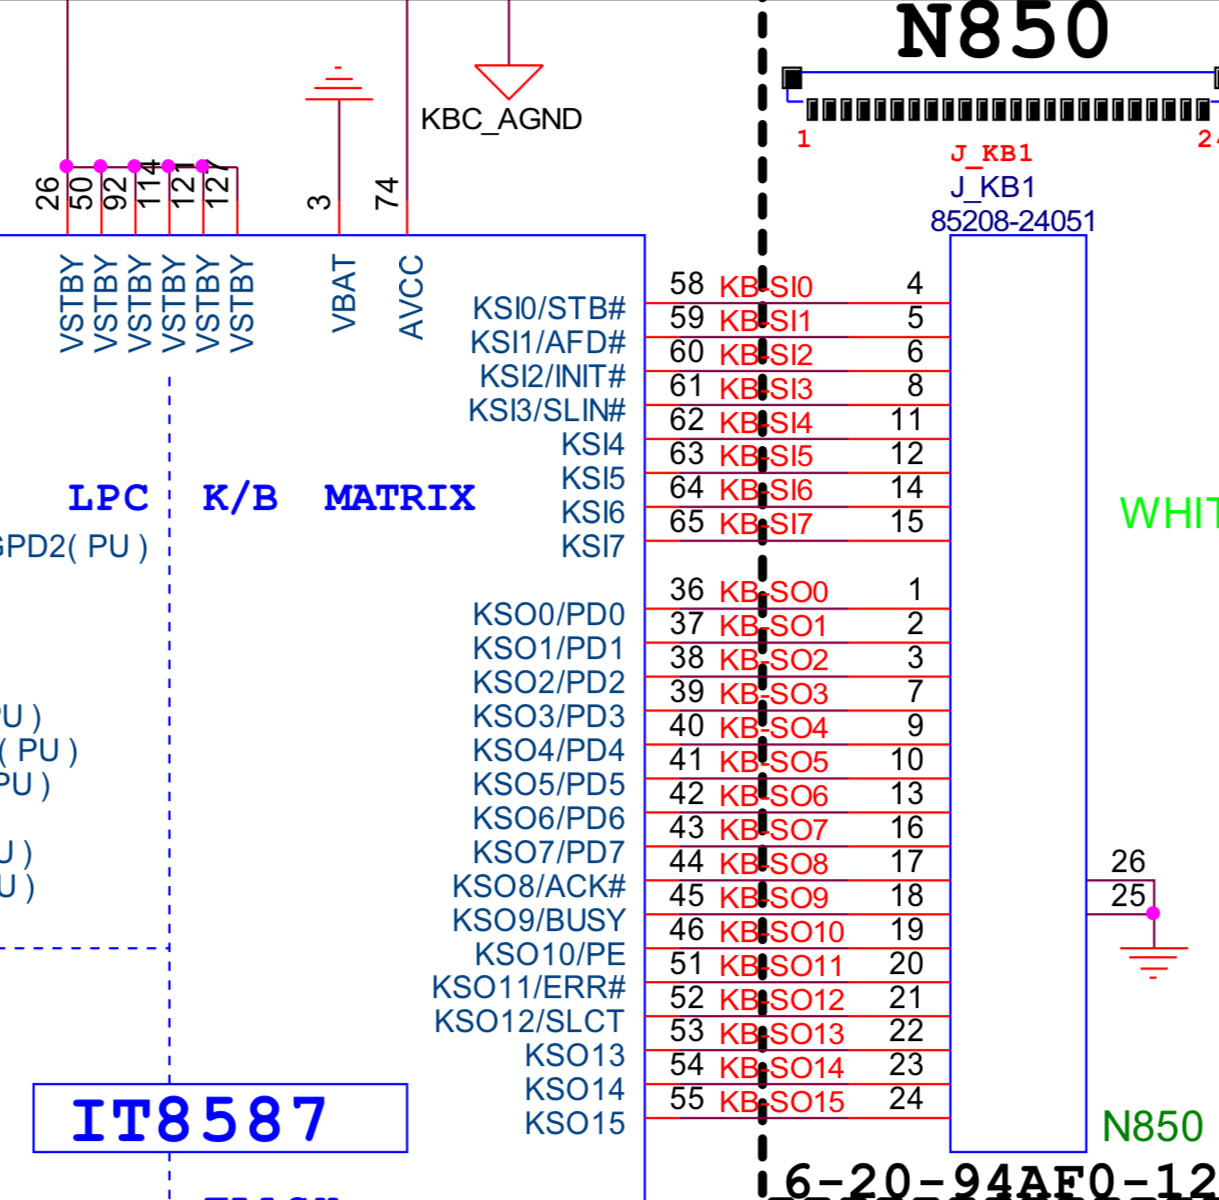
The guide involves interfacing with the chip through the J_KB1 keyboard connector. Looking at the pins used in the guide for that different chip, I matched up the same KSI numbers to the IT8587 and J_KB1 pins.
The only unknown is if those KSI numbers, and therefore the connected pins, have the same function. The guide specifically calls for CS (Chip Select), CLK (Serial Clock Input), MOSI/DI (Serial Data Input), MISO/DO (Serial Data Output) & GND (Ground/Enable EDI).
Edit: I just found some info on KSI/KSO as a whole. It’s related to the key matrix, which I’m assuming differs between models? https://www.ti.com/lit/ug/tidu521/tidu521.pdf (P6+)
@Lost_N_BIOS you did it again ![]()
I programmed the stock BIOS with my sysinfo copied over at address 490000h and the laptop finally booted again. Is there any other unique system info I need to put back? I didn’t see my MAC address in there, but all looks ok.
And indeed the setting in the BIOS was called “BIOS guard” and not Boot Guard (my mistake).
I assume I cannot disable this boot guard function? Is there any way in finding out which part of the bios region is ‘protected’?
@Lost_N_BIOS I checked with MEIinfo and I can see ‘Force Boot Guard ACM’ is Enabled.
Is there any way I can baypass this and still flash modified content? Would it maybe work if I modify the stock manufacturer BIOS and flash it through the build in UEFI BIOS update tool like I normally would with an official BIOS release?
Hey, I have bought 4 bios chips from different vendors, model MX25L12873F to replace my faulty one.
They all report the same:
“Possible protection is enabled. Press “Unprotect” and check datasheet” (that’s why I got 4 of them because I thought initially I bought a faulty bios chip and ordered more from different vendors just to be sure)
By now I’m pretty sure all those chips are not faulty, ASProgrammer seems to not work on them.
When trying to flash it using ASProgrammer, I’m using the original BIOS. I have read somewhere that when this message is displayed [“Possible protection is enabled. Press “Unprotect” and check datasheet”], it means it will not work. Any idea how to overcome that problem?
I offer 100$ to whoever is able to help me getting this fixed
@Lost_N_BIOS Hello, can you help me?
I have a asusk55vd laptop, it had bios chip problems it usually loses track of the time, that’s how I know its a bad chip, so yesterday I changed my cpu of the PC and started normal without any problems but after a restart by windows to update win 10 PC stuck with choose a bootable disk option I had 2 disks so I went bios and picked the one with win 10 and saved changes but then pc never booted. Stuck on a black screen with no nothing I searced and figured its bios chip corrupted.
So i bought the cha341 a programmer and downloaded bios file from asus’s site and renamed it to bin since it had 411 extension. And reprogrammed my chip with success, i even verified but now my pc wont even boot there is no led lights or whatsoever it has the power on motherboard but nothing happens with battery or anything i don’t understand why this happened? i don’t think the motherboard is dead since it was working perfectly but now nothing happens even when i plug ac the battery light is not on. Can you help me please.
@MisterBob I succesfully flashed a MX25L12872F using asprogrammer 1.41 and selecting the MX25L12873F as IC.
I also received the "Possible protection is enabled. Press "Unprotect" and check datasheet" message every time I tried to flash, but I think you can safely ignore that warning. In my case i just ignored it and the flash still succeeded.
@snixel
Thanks for the message, well I tried again and it didn’t work, it copied the bios successfully but the laptop just lights up green and nothing like always, no fan spin, nada. Also everytime I fucking try any bios chips on the motherboard they end up dying now, that’s a new thing in my bad luck, I’m fucking done with this shit, so unlucky with this stuff. Lost already 800$ on this brand-new laptop that worked one day, impossible to repair, I spend already 150$ just buying stuff to try to revive it, I’m fucked now, just gonna send that shit laptop in the trashbin and get done with it, fucking hell…
@snixel - Sorry for delayed replied, always buried here! 
Great to hear you recovered your system now! Does your Ethernet work? If yes, then all good to go  No, you can’t disable boot guard, unless you replace the PCH with clean non key fused PCH
You can tell what is covered by dropping BIOS into UEFITool 51, anything you see in Yellow/Cyan/Red you can’t edit.
ME FW side Boot Guard settings do not matter, there is a key burned into PCH side, so ME FW side can be totally disabled and boot guard still enabled until PCH is replaced.
@MisterBob - ASProgrammer always says that, you can go ahead, or you can press unprotect, it does not matter. If you want to be on safe side, hit unprotect first.
MX25L12873F use CH341A v1.31(1.4) (CH341AFree) (This is the name of the folder), ASProgrammer 1.4 or 1.41, or CH341A v1.1.1.32 << All confirmed working here by other members, all software mentioned here in below link
Try Colibri, v1.1.1.32, or v1.31(1.4) (CH341AFree) instead, maybe they will work better for you. If you use v1.31(1.4) (CH341AFree), be sure to pick correct type (25) and size of chip first
http://s000.tinyupload.com/index.php?fil…213094641136166
What file are you writing, maybe that is the issue? Aside from above issues you are having with ASProgrammer maybe, try the other software mentioned above, then if same issue send me the file you are writing so I can check it.
@mk4523 - BIOS chips do not loose or keep time, this is controlled by RTC chip and CMOS battery. Sounds like you need to replace CMOS battery.
Also, your boot issues sound boot settings related, unless just random glitch when you saved those changes. Can you remove all HDD/SSD and boot to BIOS? If yes, then it’s boot settings related, you need to choose win10 boot type, or UEFI boot type, or enable/disable CSM etc
DO NOT program in BIOS from Asus, those are usually not complete BIOS and or partial BIOS inside a capsule (almost always this part is true) and it needs removed first.
Yes, I checked, BIOS for this system is BIOS region only (partial) AND inside a capsule, you cannot program this as-is, capsule needs removed and BIOS region needs to be inserted into a complete BIOS before you can program it into chip.
Additionally, you need to make backup of your current chips contents first and have someone check it, before you erase or write. This is so you can keep/transfer over your system details (Serial, UUID, MAC), and so you know you are using compatible software/version, not all software/version can read/write to all chips.
And so that you have something to rebuild (ie a complete BIOS base) Did you make a backup first? What is your BIOS chip ID, read it with your eyes, do not rely on software
@Lost_N_BIOS Thank you for your reply, I followed all the guides and used the applications you linked in previous times. The attempt at repairing bios was always writted correctly so far, never had error except of unprotected, always choose the correct corresponding number in the application, and tried that way many times but the computer never recovered, but now I think I know what is wrong with my persistent problem…
To explain quickly, initially when powering the laptop after bricking occured I had the fans working, keyboard led on. I think it was partially corrupted, then I did something stupid and erazed the chip with the help of the programmer and put a bios from the only english website that have bios for this model online, it’s the same number for the bios as well that was originaly installed on the computer but because it’s a Clevo it’s a bit difficult to truly find the official website (afaik it should be official and there is no other english source for it but still it’s not like getting a bios from MSI for example, you go through websites that are third party).
Since I tried repairing with it by writting a new bios, the fans are not spinning anymore, I tried to write all type of bios for this model that I could find (some even from clevo chinese website) and even bought some new chips on ebay and writted on them but none of them worked, now the fan never spins, keyboard led always off when powering it.
Which makes me think that the problem is because the bios is incomplete, I regret so much to not have created a dump of a bios but the bricking surprised me, I wasn’t prepared for it and I did a mistake also to eraze it right after… I panicked and tried to fix it too fast without considering all the possibilities first.
Do you think this is something that could be fixed or without a dump bios, it will be better to consider selling it for pieces on ebay? I’m kinda considering buying a new computer now and just forget about the loss, sell the remaining pieces etc. but if something can be done I can try one more time at least, but for that I’ll need to buy more materials so please let me know what you think from your experience. Thank you.
Hey, my laptop’s bios got corrupted and now it doesn’t boot.
I already dumped my bios contents but I don’t know how to proceed from there or how to extract my PC’s details (MAC, SN, UUID, etc.) and how to transfer them to new bios or repair old bios. Any help would be appreciated, I really need to get my PC back up and running for working from home.
Thank you
Hi @Lost_N_BIOS
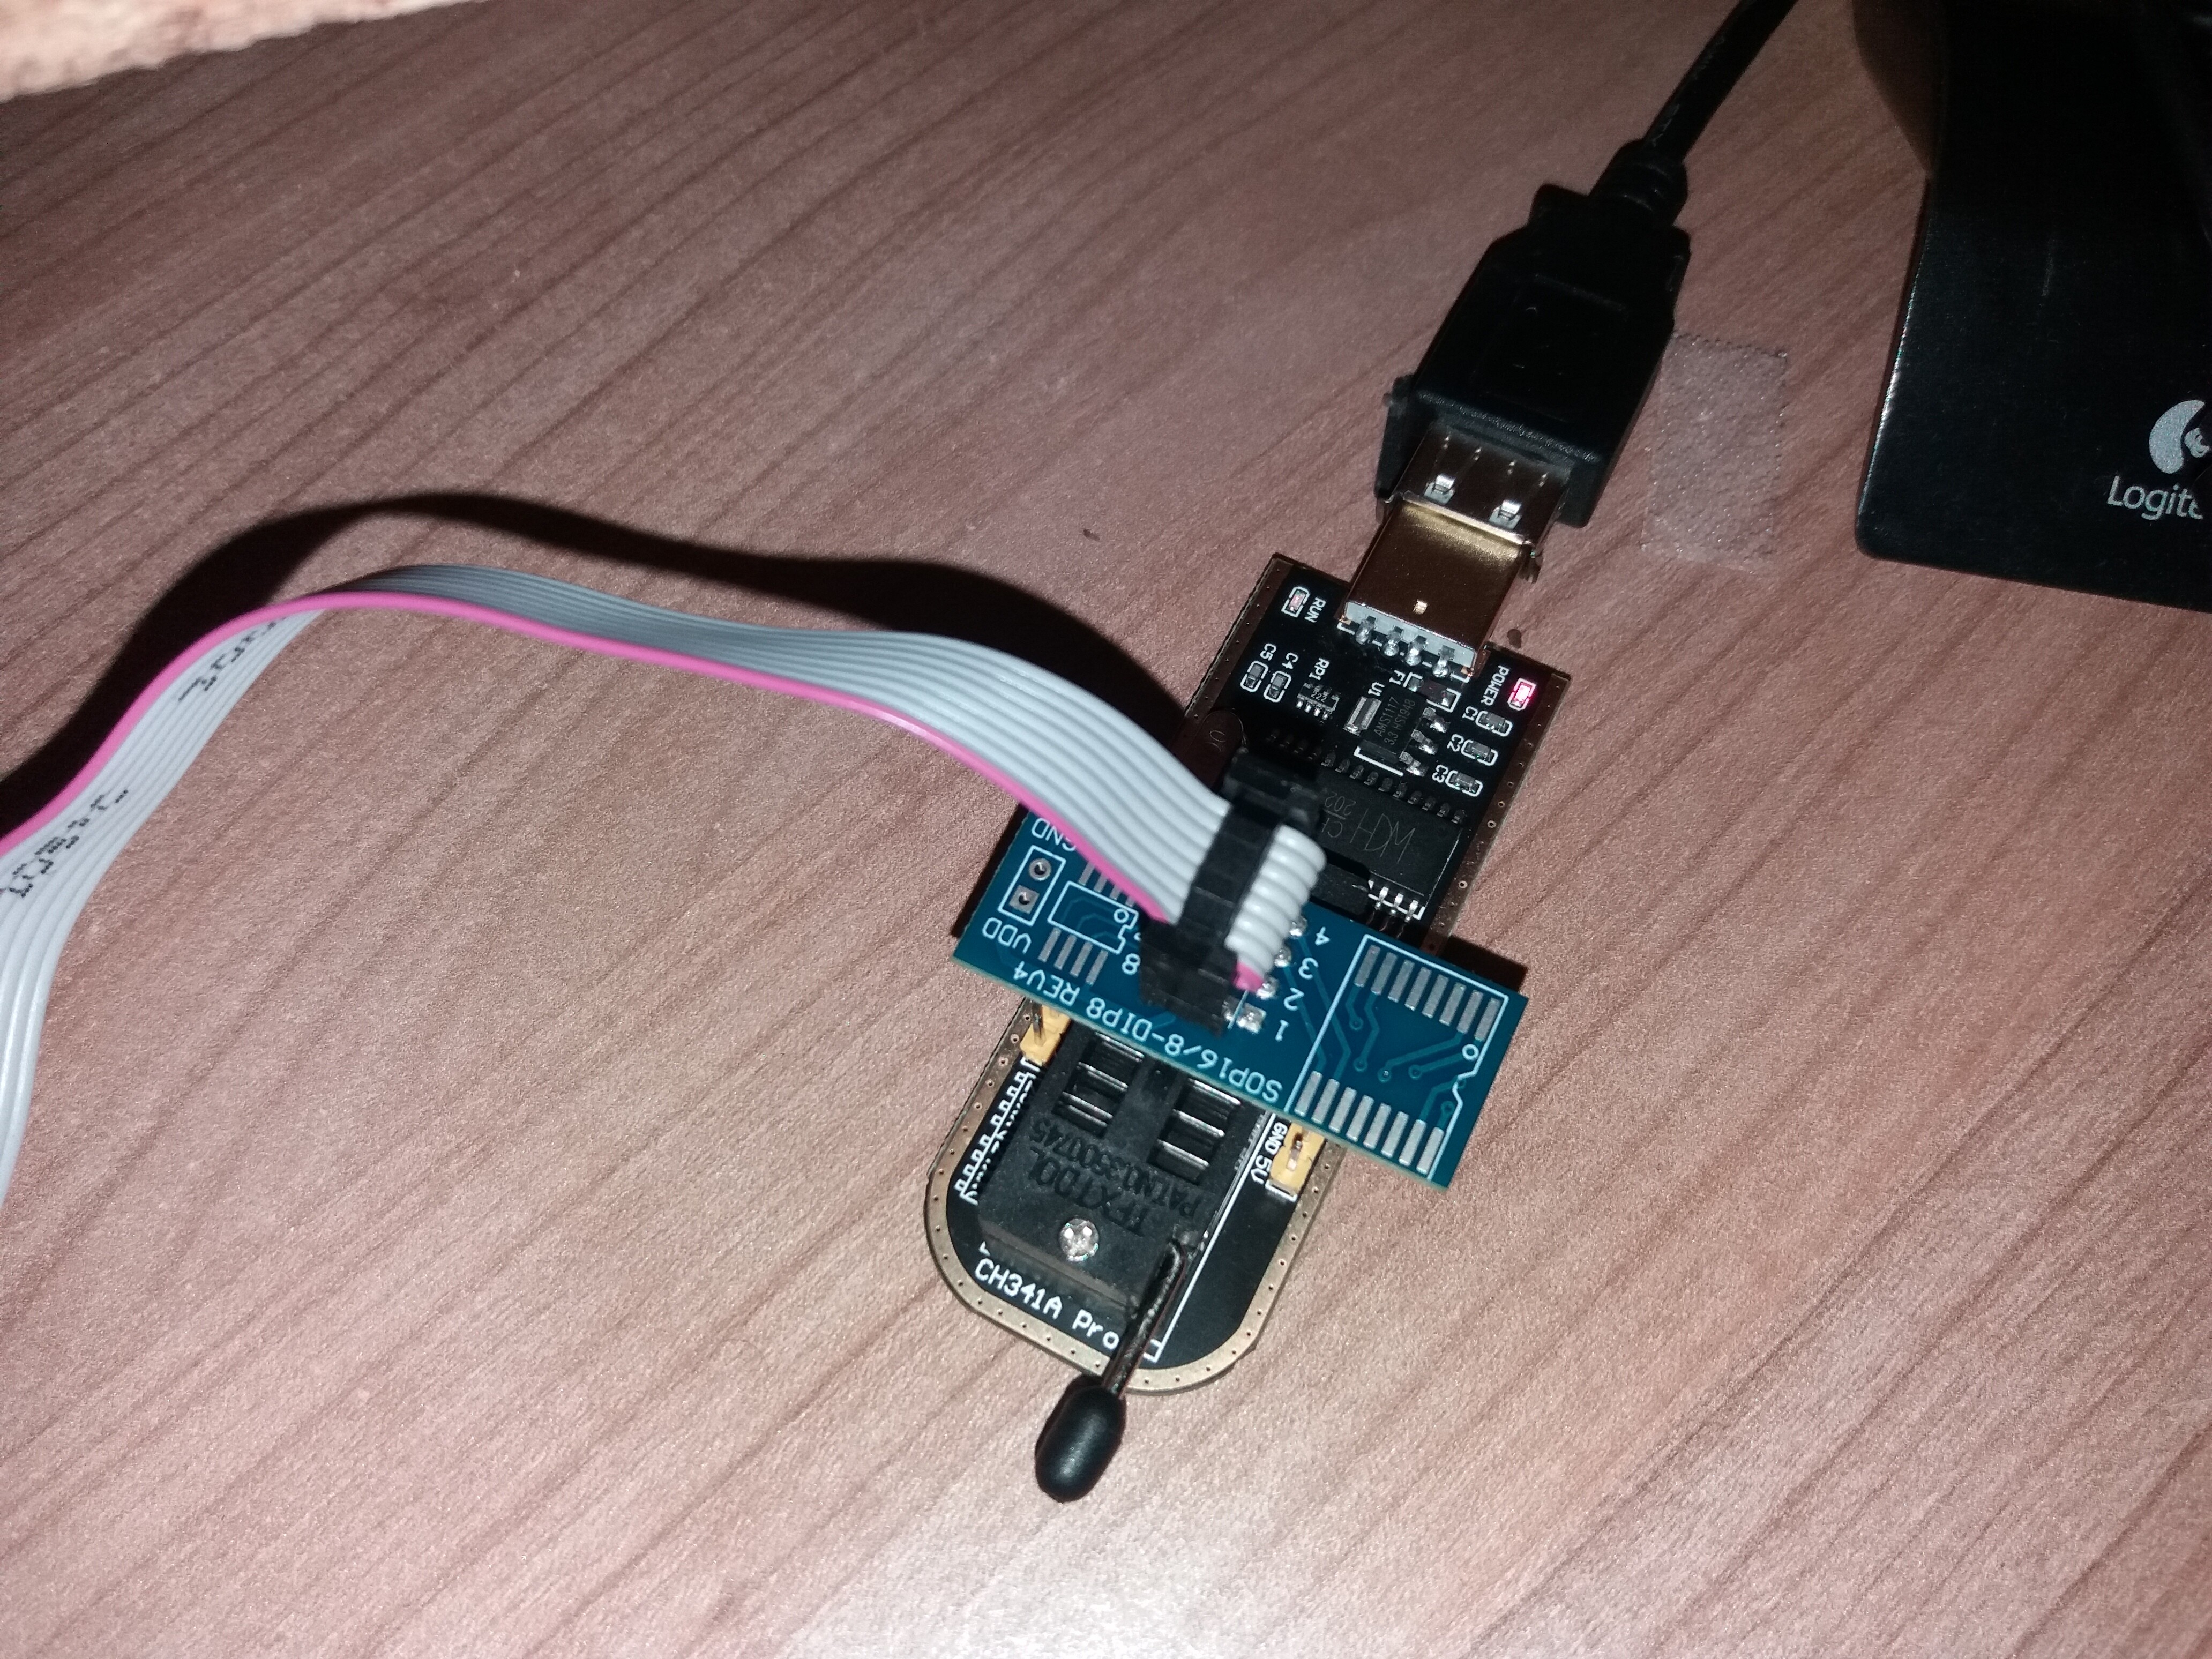
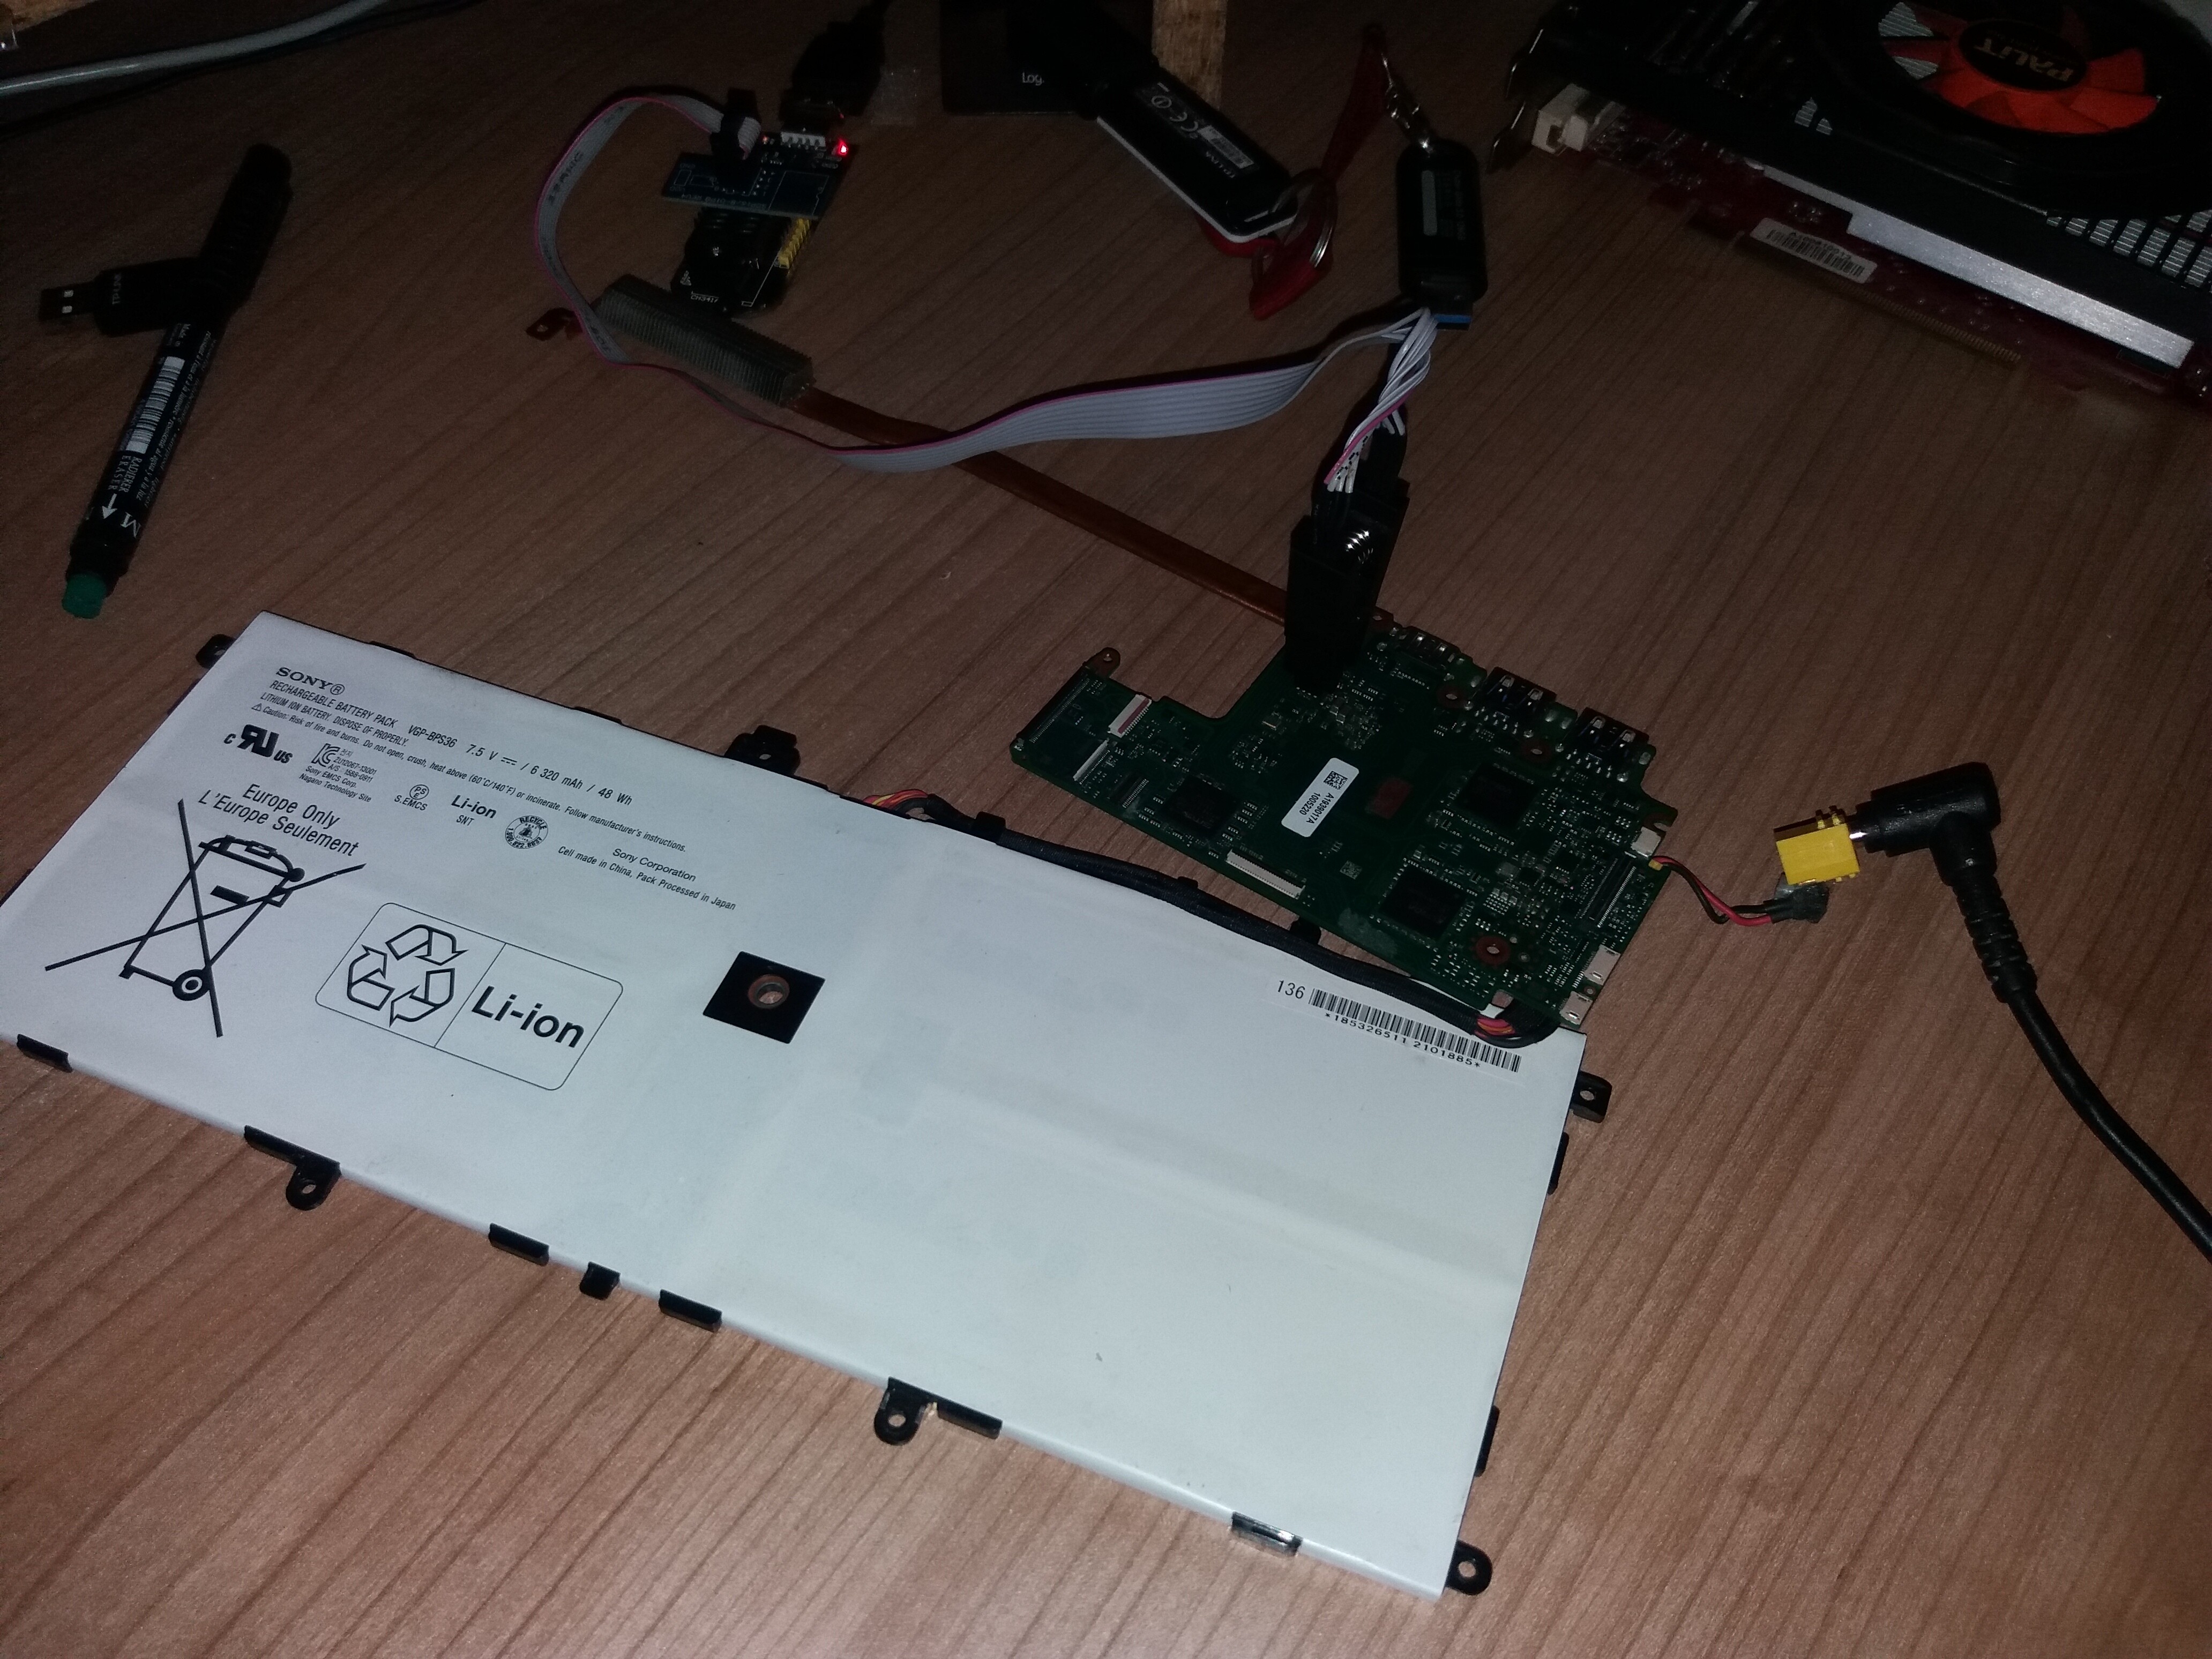
i have a mother board that sony vaio duo (svd132). This Board has w25q64fv chip. i want flash with ch341a but program not recognize this chip. I did everything. But i did not flash. When I plugged the clip yellow led directly open. normally yellow led open during flashing. but always open. And this motherboard has not bios battery. because of this i cant remove bios battery.
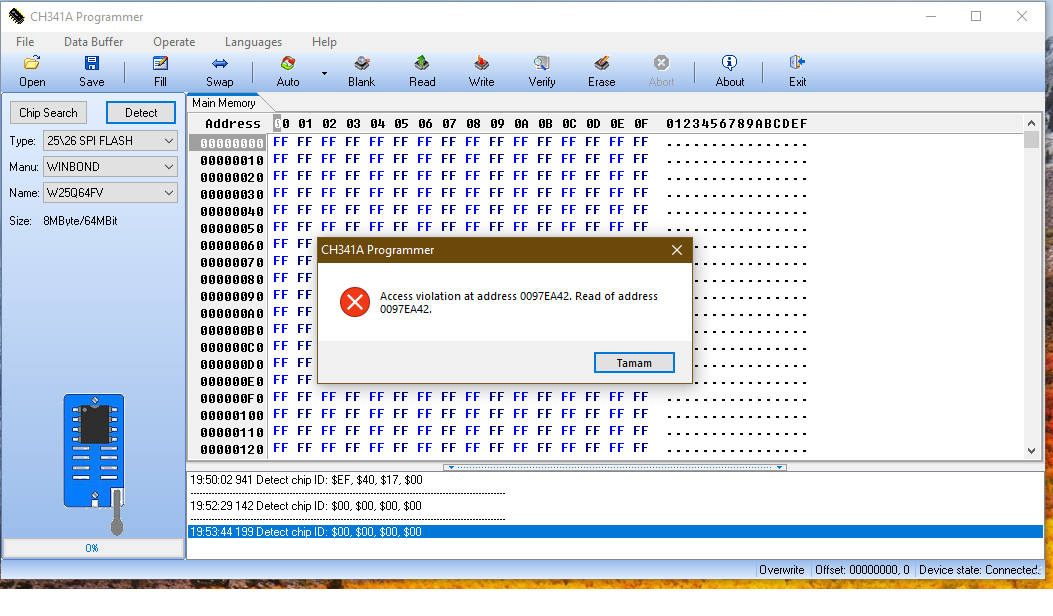
when i opened the program v 1.3 and detect button i taking this bug "acces violation at address 0097ea42. read of adress 0097ea42"
but when i opened v1.29 its ok.
please help me
by the way sory for my bad english.

@MisterBob - Please link me to the BIOS you are writing, I will check it out and see if all should be OK (ie is it a complete BIOS or not)
What is your BIOS chip ID, and what software version are you writing with?
For Clevo system, you need to make sure you have same BIOS + EC FW in the other chip
So, you need to write back the same version you were using before, if you know it, that way the EC FW matches the BIOS you put in there.
@ToxicCow19 - What is the system model? Please link me to the BIOS download page (not BIOS download), and also upload copy of the dumped BIOS and let me know what the BIOS chip ID is and what version of software you dumped the BIOS with.
@celaltopsakal - For W25Q64FV you need to use 1.30 or 1.34 and W25Q64BV ID or writes will fail. You can ignore the “Access Violation” error with 1.30, or just use 1.34 instead (Or Colibri also works, included here - http://s000.tinyupload.com/index.php?fil…213094641136166)
You may also need to connect main battery, and or Main Power supply plug. Some may need only one of those, or both, you’ll have to find out by trying to read the chip.
Once you can read, then you know if you need battery or power connected, or neither
Do not erase or write to chip until you’ve dumped a KNOWN good dump from the chip (ie someone looked at it, or you looked at it with tools and know it’s good dump
Don’t rely on verify function of the program to tell you, this is not always good way to check, in case of failed read it will still verify correctly.)
BTW, I deleted your post in the other thread, no need to post same in multiple places
Hi again @Lost_N_BIOS
I tried your said. But it did not.
I plugged battery and then both of them but I took same bug.
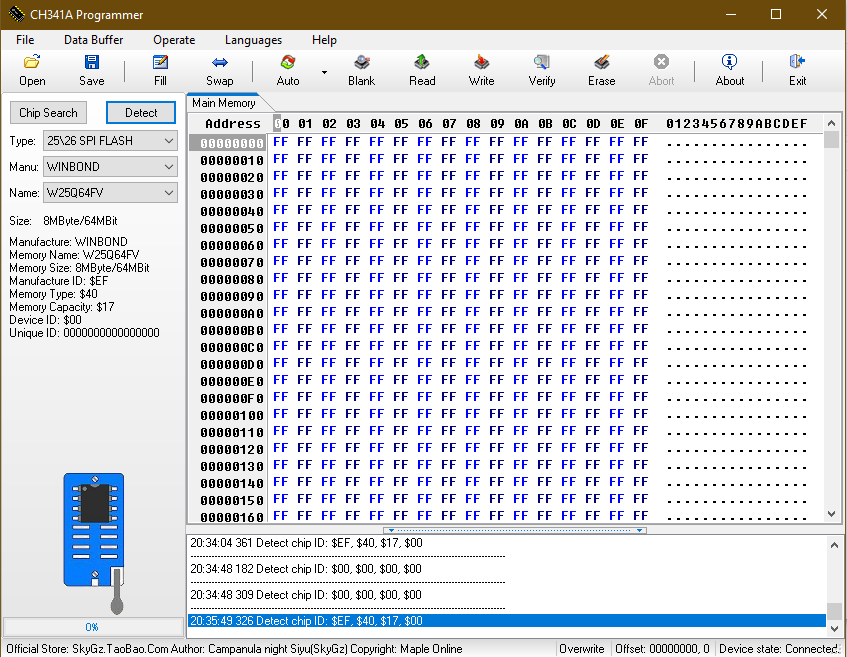
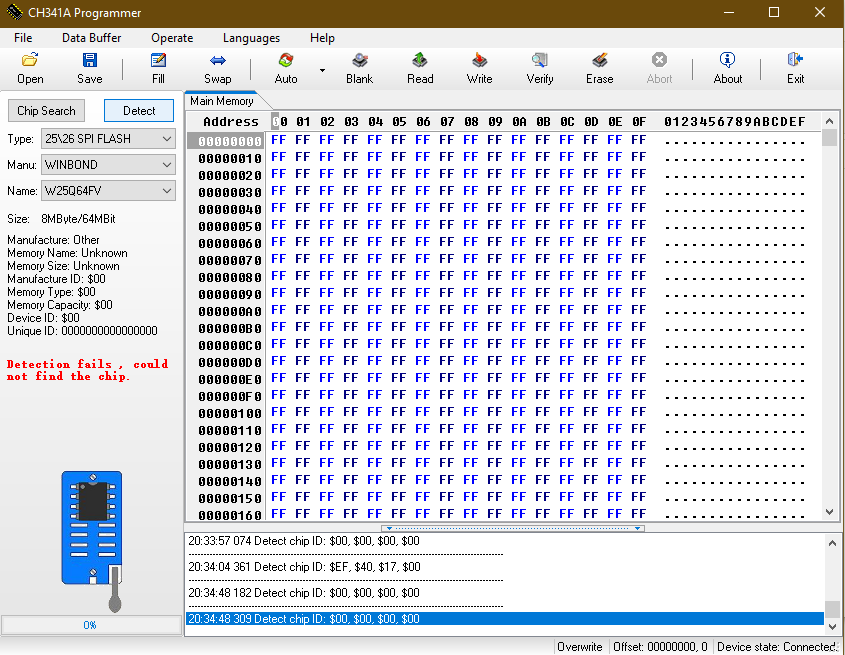
when i plugged clip first time and click detect on programer (1.34) read chip but device ID and unique ID 000 an then click again detect button I taking detection fails bug.
I tried both ID (FV and BV) but it didnt
I attached SS
what can i do? please help ![]()
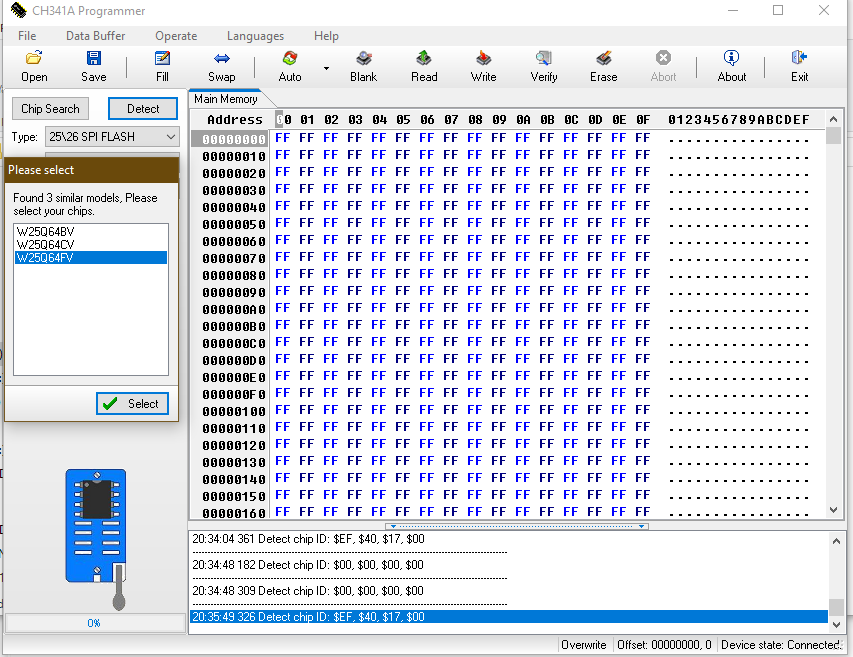
Use 1.30 or Colibri then. BV ID mainly needed for proper writes with 1.30 or 1.34, but best to just always use with that software (FV read may be OK, but not ideal, write will fail unless you use BV ID)
For colibri, you can use FV ID. Try without power/battery first, then if you can’t detect chip, connect main battery, then if still no, connect PSU cable, then if still no, remove main battery and have PSU cable only.