Responded to you via pm a few days ago ![]() Let me know how it goes!
Let me know how it goes!
@jkbuha
Please show to me detail document how to Dump the full chip first?. I have tried dump my bios but can not open with Flash Image Tools.
Thanks
There are a few ways to do it, but easiest (for Dell-based laptops) is to set Local ME FW Flash UEFI variable to 0x01, reboot and dump with FPT.exe or FPTW64.exe -D ALL.bin
i am a new member and do not know how to start it, please can you help me make a video or a clear docuemnt to me start do it:)
Thanks
Has anyone been able to get this to work on XPS 13 9343? It doesn’t seem to work for me (I get error 26 regardless). I just posted a separate thread in this forum (but I’m not allowed to link to it).
Also, for my machine I need to resort to a different NV editor (RU.EFI) because the setup_var patched GRUB picks the wrong Setup variable (!) - if it shows size 0x12 and displays a warning you should not proceed. Use RU.EFI instead.
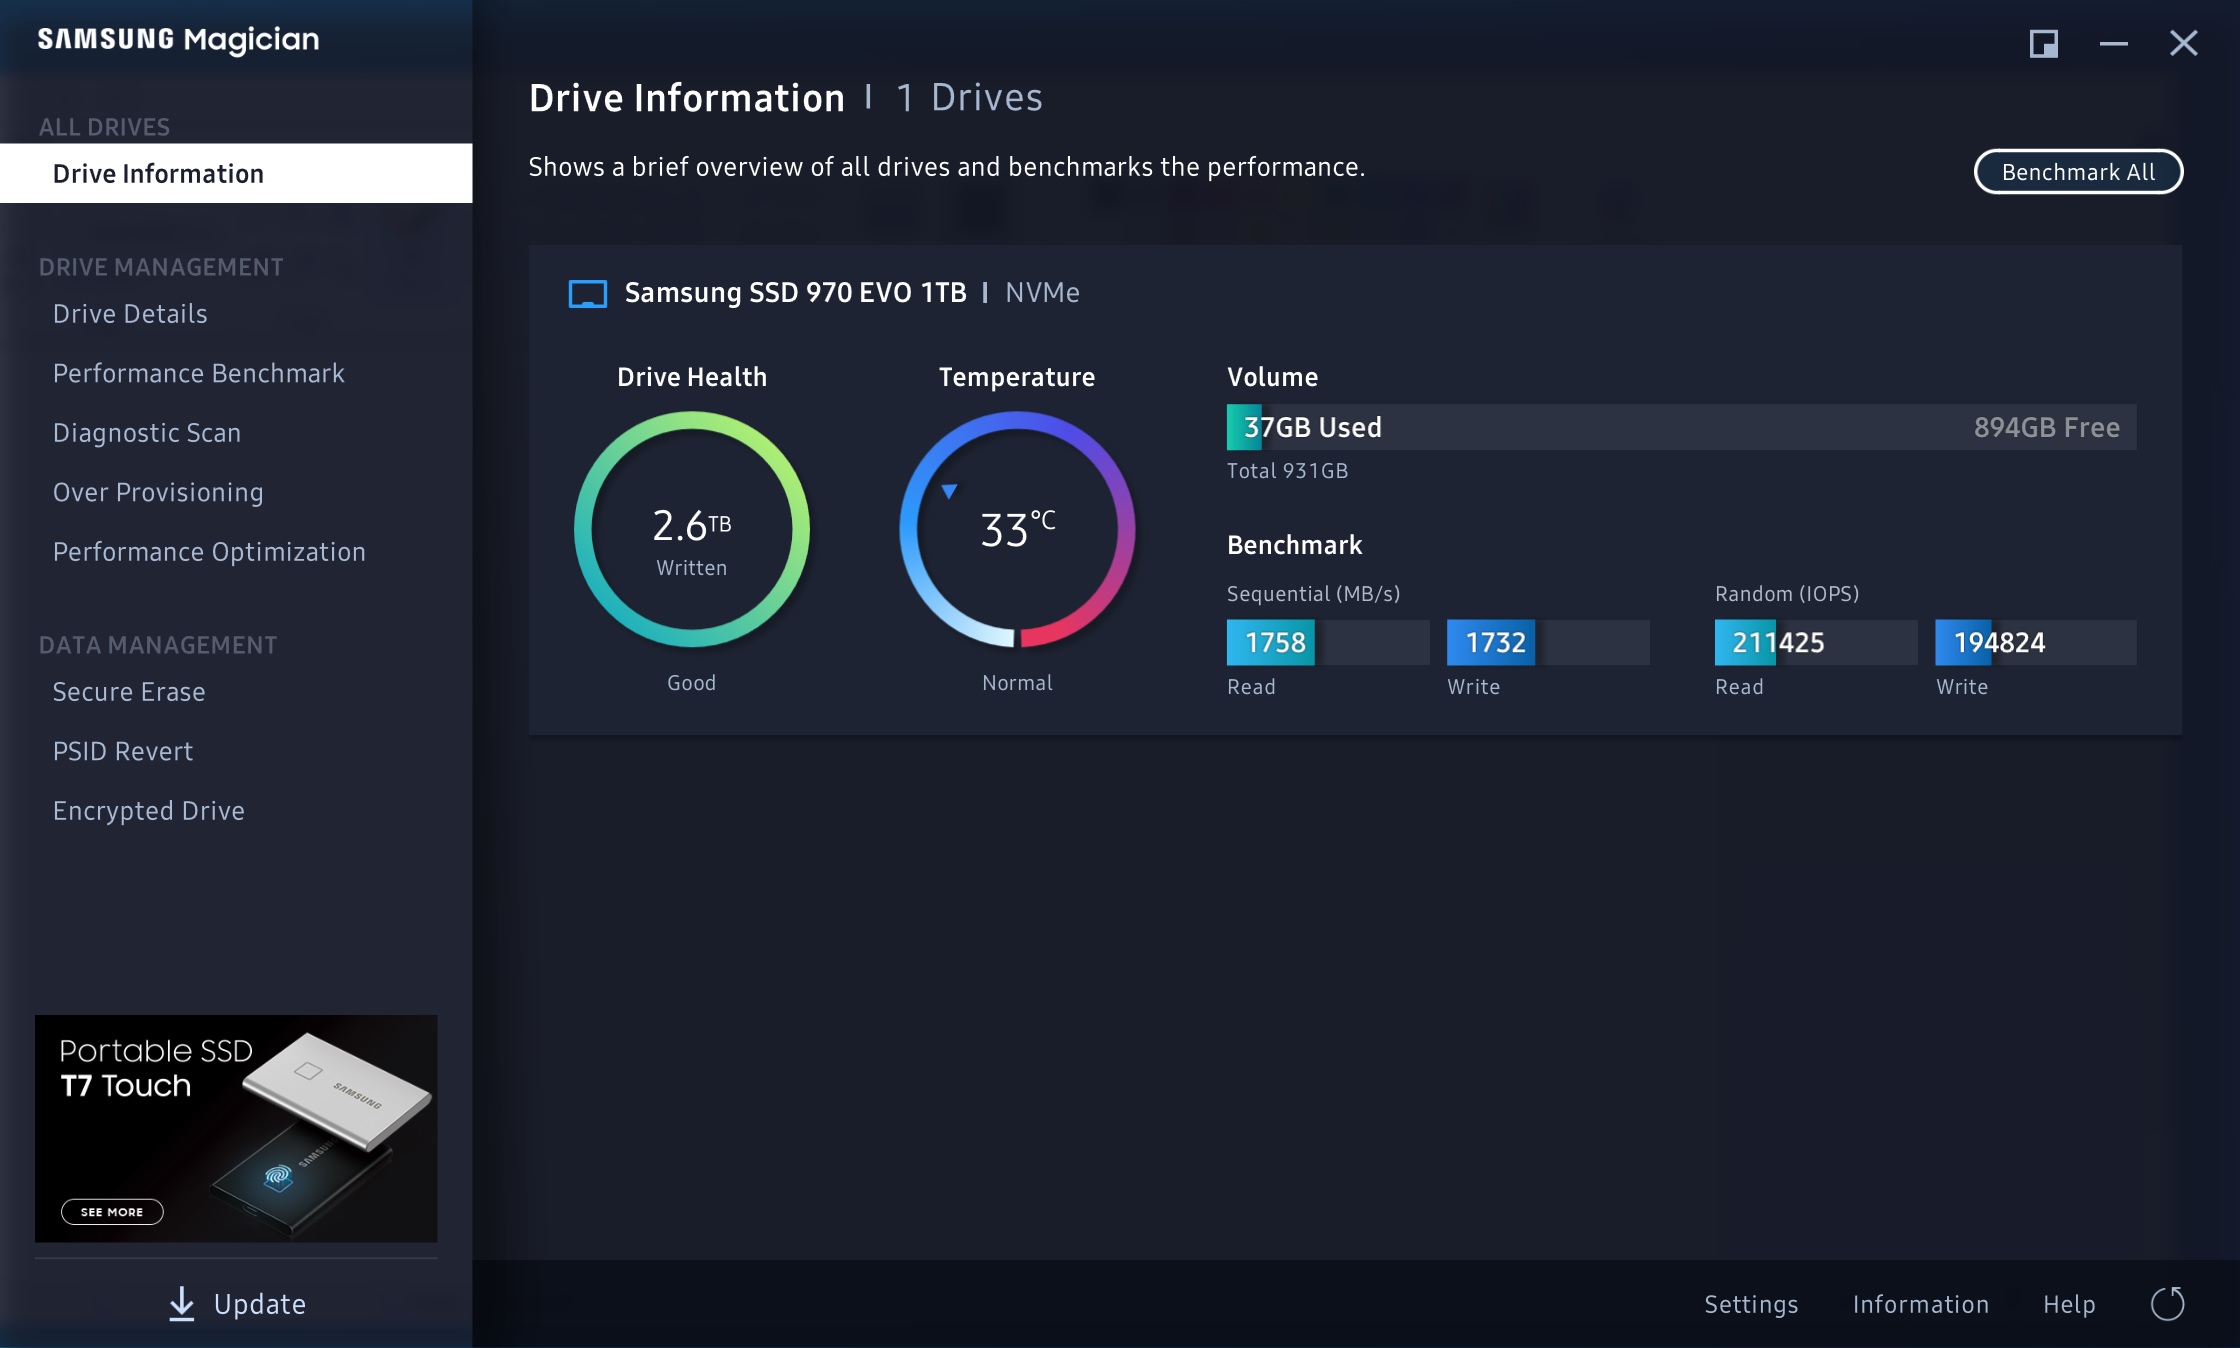
Before

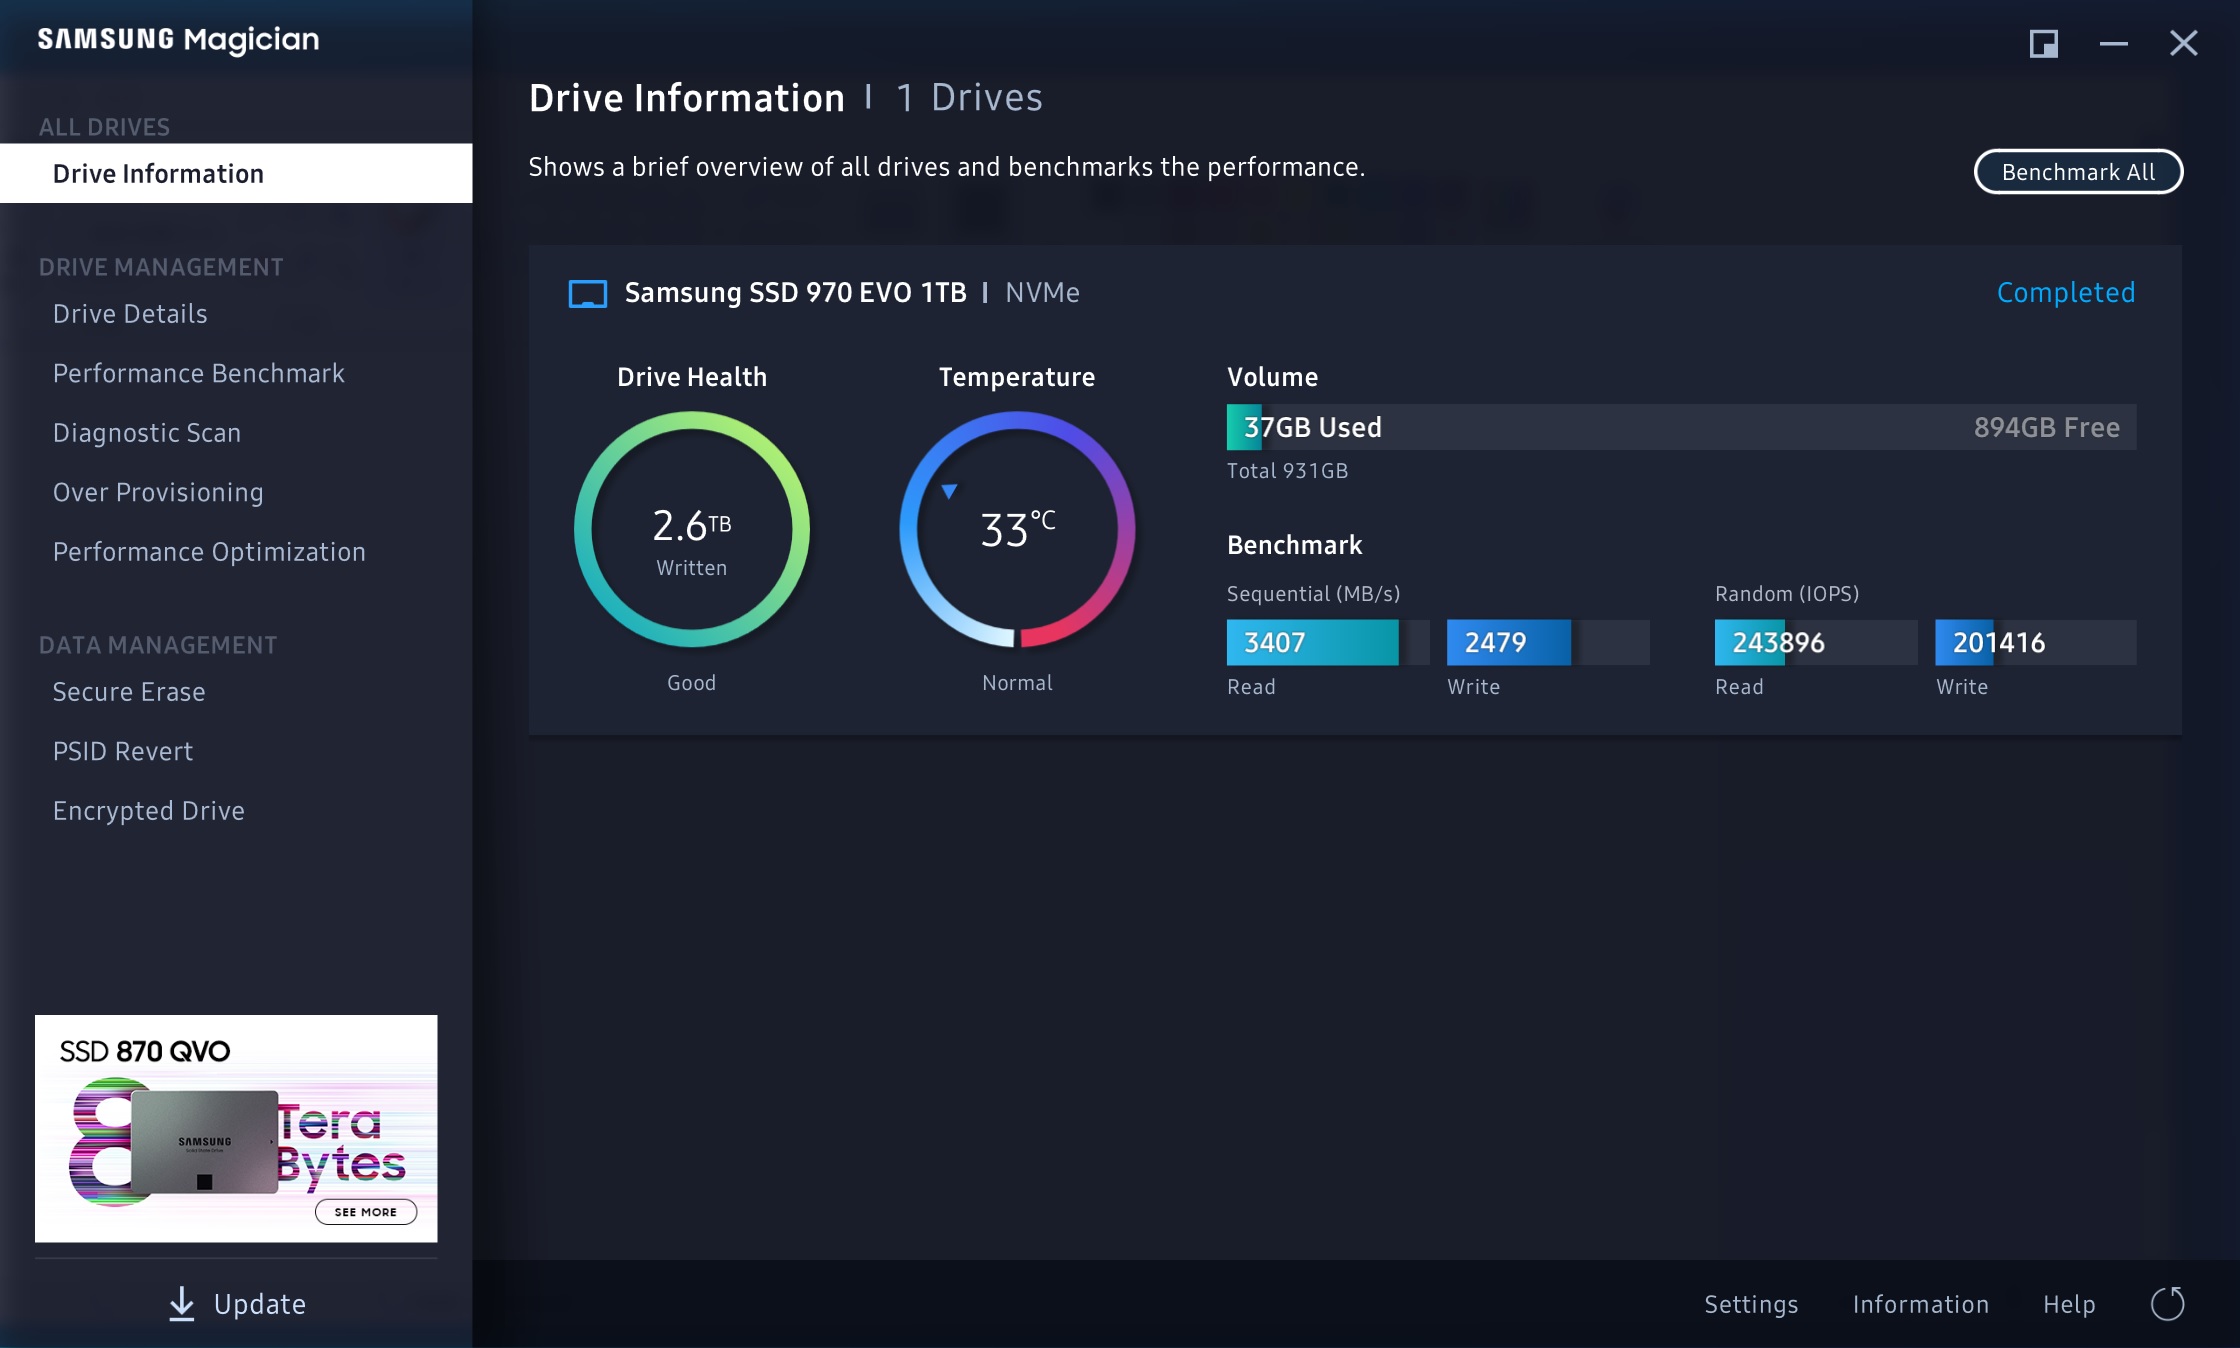
After

Finally successful unlock the Speed limit. Just use Realteck pinmod to unlock fd. thanks for your guide.
Thanks for proving that the Realtek pinmod works. I thought it wasn’t possible because the audio chip was located on the underside. It’s a much safer way of modding the chip as you can unlock the FD without having to flash the entire eeprom.
Could you share some photos of the exact pins to short? I’ll add your feedback to the original post and credit you with the discovery ![]()
Hi, would you be able to give me some instructions? I have an xps 9360 and also have a CH341A programmer
Hello P013onEr
I am so excited to see the way you could double the speed of your laptop. I have the same laptop as yours, xps 9350 with limited speed. I am using bpx pro 2 TB nvme drive. Would you mind help me to get my laptop access the speed like you, I am not an expert, I am searching in the internet and it leaded here. Very much appreciate if you could help.
Thank you for welcoming me. I am so excited to see the way P013onEr could double the speed of his/her laptop. I have the same laptop as his/hers, xps 9350 with limited speed. I am using bpx pro 2 TB nvme drive. Would you mind help me to get my laptop access the speed like him/her, I am not an expert, I am searching in the internet and it leaded here. Very much appreciate if you could help.
check the details here.
This is my first post here, so hello all ![]()
I have an XPS-13 9360 DE (i7-7560U Kaby Lake, Sunrise Point-LP) and I wanted to increase my OPI link speed as described in this guide. I think I may have completed successfully points 1 and 2 and now I have the following doubts and questions:
- I was able to obtain a full dump of my chip and as advised I dumped the data several times: 2 times using CSME tools v11 r46 from this thread and also just in case 2 times using r30 from this github repo. All 4 dumps had the same md5, however when I repeated the whole procedure just in case (ie rebooted again to UEFI shell, used setup_var, then rebooted to freeDos and used FPT (both revisions 2 times each again) to obtain a new dump), the new set of dumps had a different md5 than the first one (still all 4 dumps within this new set were identical to each other). I’ve repeated the procedure few times and it’s always like that: within the same boot all dumps are always identical, but dumps from separate boots are always different: is this normal?
- Does anyone happen to know in which part of 9360’s motherboard is the bios WSON chip located? Is it clearly visible after opening the case or is it hidden for example under the SSD or elsewhere? Does it have any specific markings that could help me identifying it?
I’m a total n00b in terms of bios programming and flashing chips, so please bare with me in case my questions seem stupid… Thanks! ![]()
Hey! Apologies as I don’t look at old posts regularly any more ![]()
So…
-
The dumps having different MD5s over a period of time is normal as your NVRAM changes on a regular basis. Dont worry. Just make sure you take them 3-4 times in a row and then use those.
-
The WSON chip is very accessible as soon as you remove the back cover, but likely covered by one of the black tape covers of the M2 or Wifi adapters. It is towards the bottom of the mainboard once you open the back cover. Once you remove one of the black tapes you’ll see it immediately.
Good luck!
Hi everyone, and thanks to @jkbuha for the tutorial!
Another 9360 user here trying to get the full speed out of his machine ![]()
I have managed to successfully dump the BIOS image but am stuck unlocking the Intel Flash Descriptor of my .bin file ![]()
I just don’t know how to unlock the FD using coreboot’s ifdtool ! I can’t find any release for Windows. Could anyone here who understands this process please explain to me how to find and open IFD tool or alternatively remove the FD lock for me from my BIOS dump?
Here is the file:
I have also found a BIOS dump for my motherboard being labelled “ME cleaned”. It’s from the BadCaps forum. Would it be possible to flash my chip with this one to obtain the option of unlocking the full potential or should I be sticking to my personal bios dump?
Since the creation of this tutorial in 2020, has since come out a tool to successfully flash the chip back from Windows or Linux without having to use a hardware programmer?
Thank you again for your work and time.
julesjules
unlocking the FD with coreboot is easy.
ifd -u -p sklkbl dump.bin
personally i wouldn’t use any other dumps from other boards that are not yours. not sure if it’s an issue for KBL machines but for CFL (10th gen) you get more problems such as iGPU issues etc. stick with your dumps and you’ll be fine.
there’s a way to unlock the flash descriptor using the pinmod (shorting two pins on the board) method, but I haven’t found out which pins they are. at least one other person has successfully managed to use this method for the 9360, so if they’re reading this please feel free to show a screenshot of the pin(s) to be shorted ![]()
Thank you for your replay jkbuha,
The only thing is that I couldn’t even figure out how to get coreboot onto my machine! Is it a UEFI install? External on a flash drive? Do I have to manually flash a chip?
Therefore I was hoping for someone who already has and uses coreboot, to FD unlock my BIOS dump and re-upload it to somewhere. Would pay for it for saving me the headache ![]()
You can compile (or download) the ifd binary for coreboot on any machine. You will need to know how to use git and make to clone the repo and make the binary. Alternatively if you have dumped the ROM, send it to me and I’ll do it for you ![]()
Thank you jkbuha. I would really appreciate if you could unlock the Flash Descriptor your end! It would save me a proper 3-4 hours of understanding the whole GitHub procedure ![]()
I do have the flasher already and the test clip waiting for me after finishing my bike trip! Can’t wait to finally get the full performance out of my machine and SSD!
Here is the link to the extracted ROM (which I managed to extract from the chip thanks to your tutorial using CLOVER EFI and FPT). I made 5 copies which were all identical in MD5.
Here is it:
Thank you!
Masterful! Thank you so much. Will give you an update on the process once I am home from the bike trip with access to my hardware flasher ![]()
I hope I will manage okay ![]()