No positive result as the search function in the UEFITOOL was not activated. I tried many times to replace the clip, even removed some plastic touching the condensator next to the bios chip but all in vain. Now I do not know how to continue. Can it be that the mainboard needs a running condition or could there be other reasons?
Thanks for all suggestions,
Cyanno
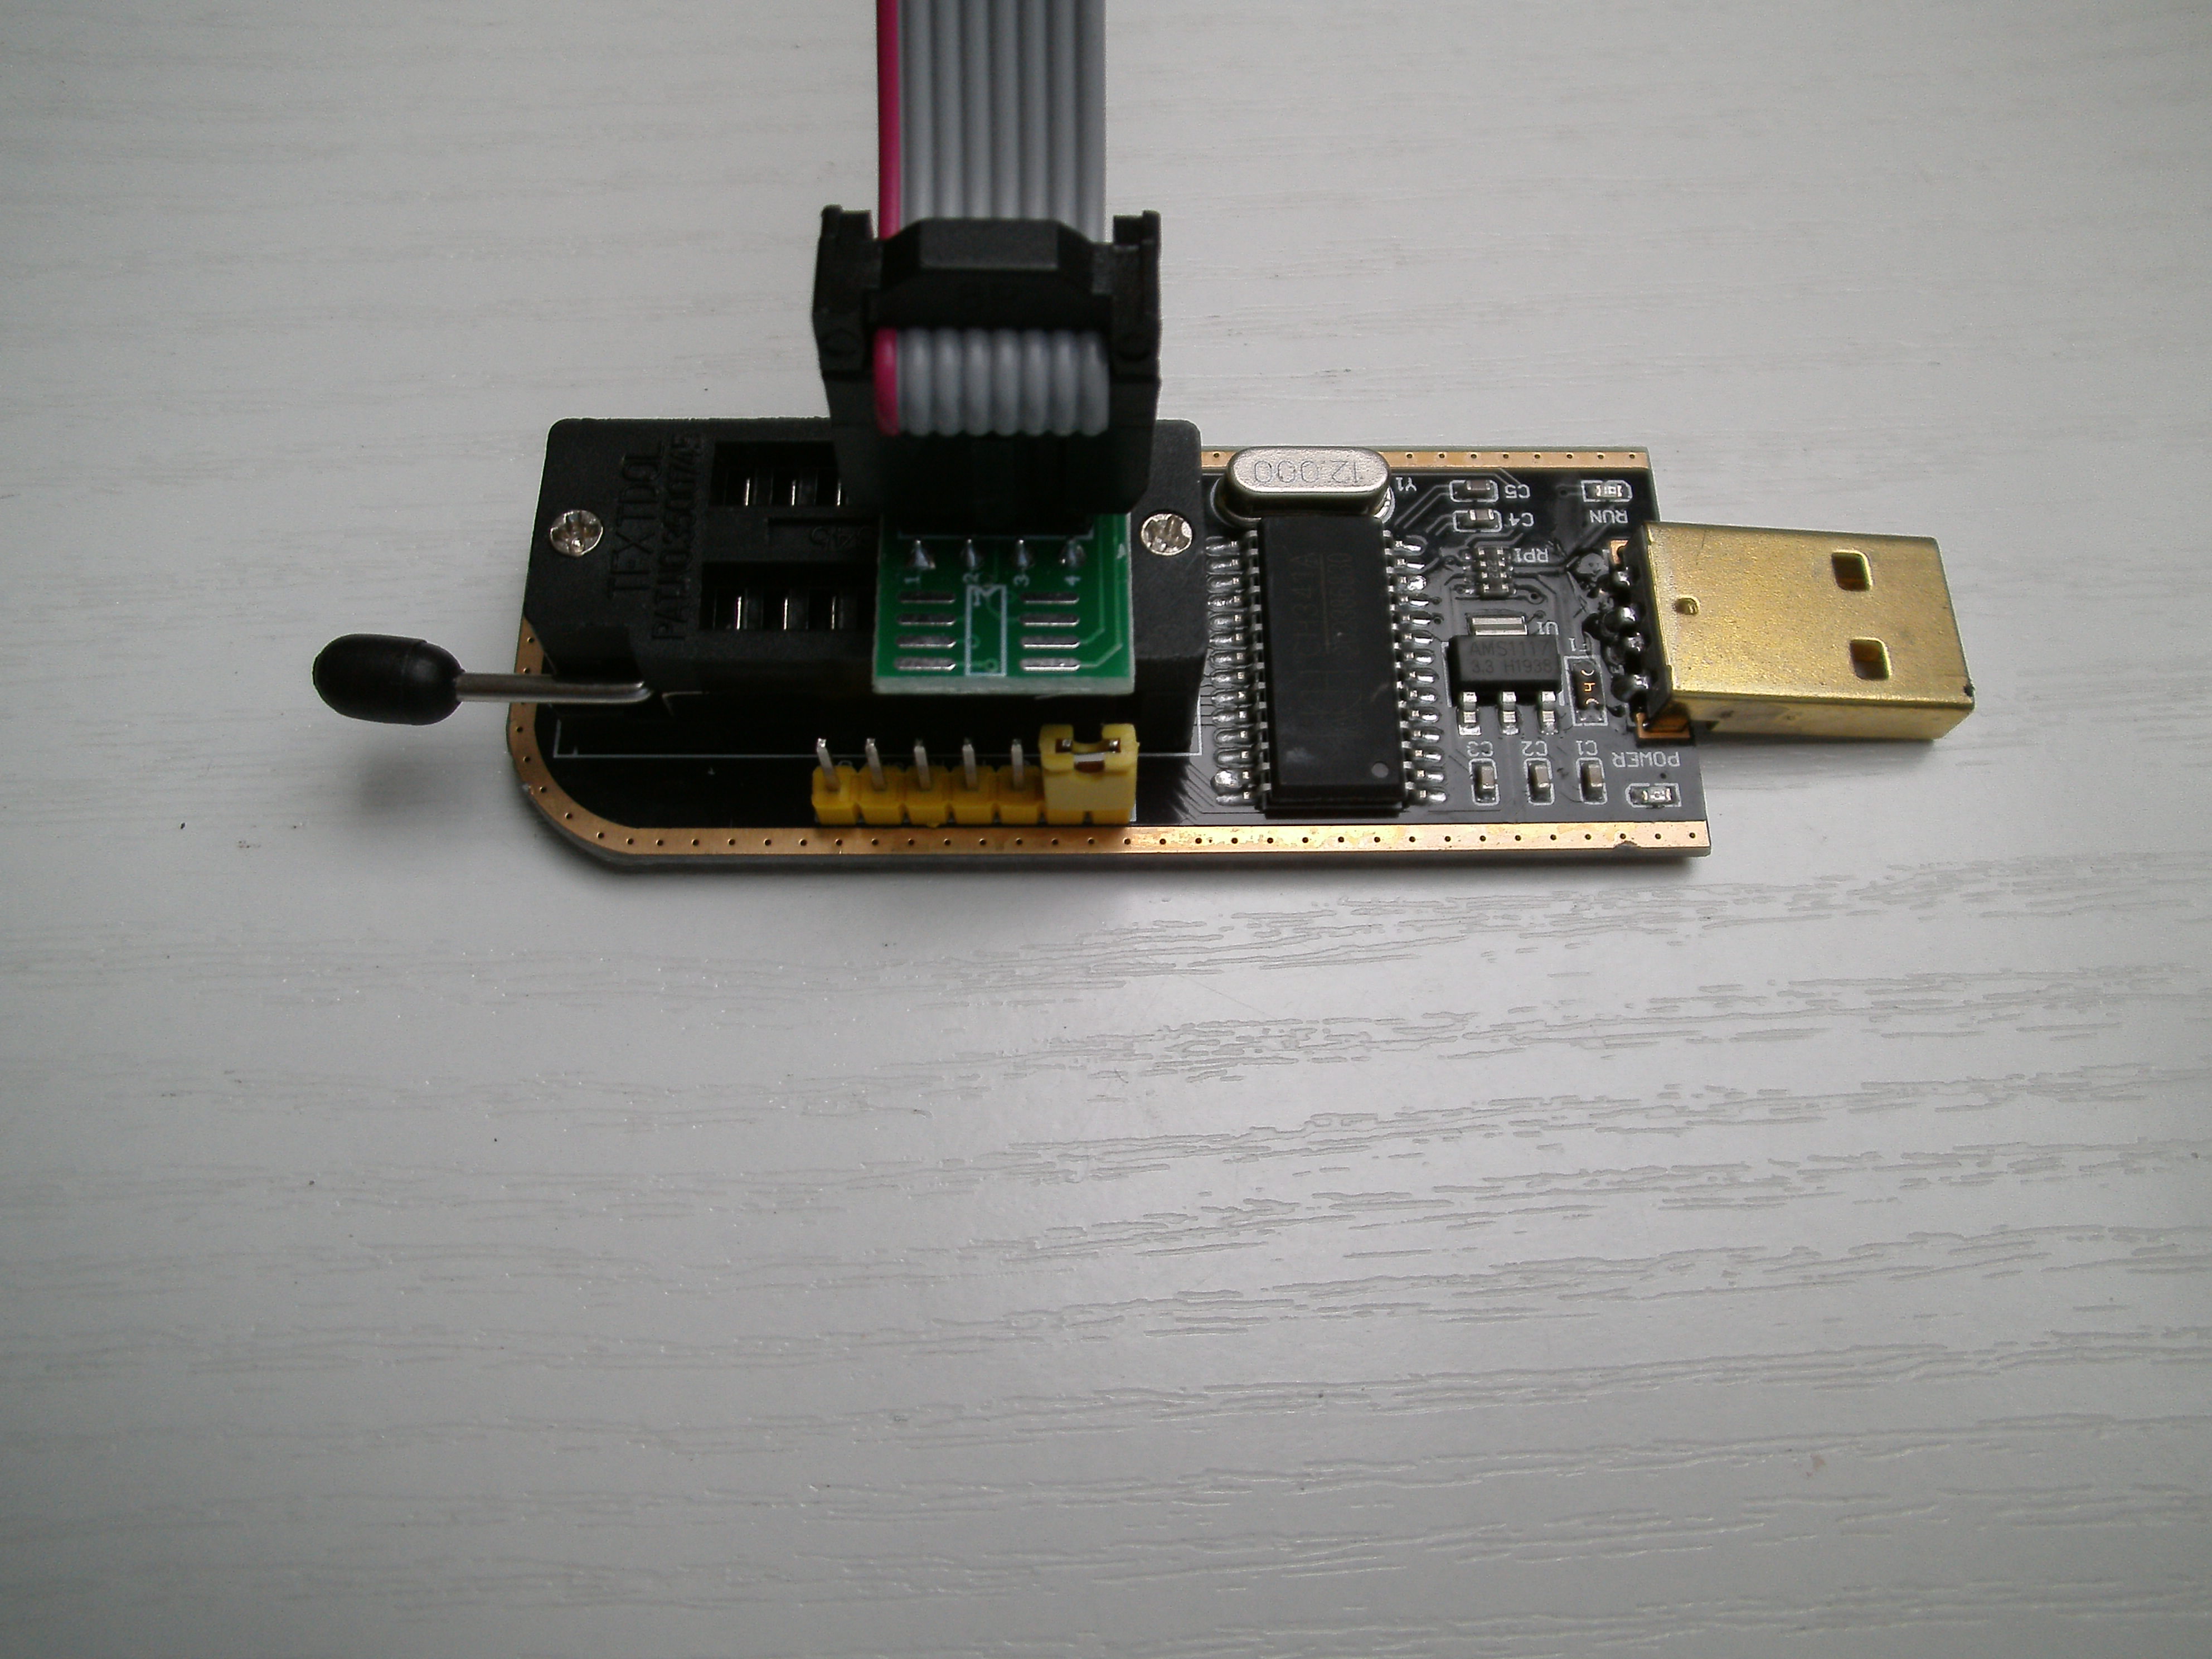
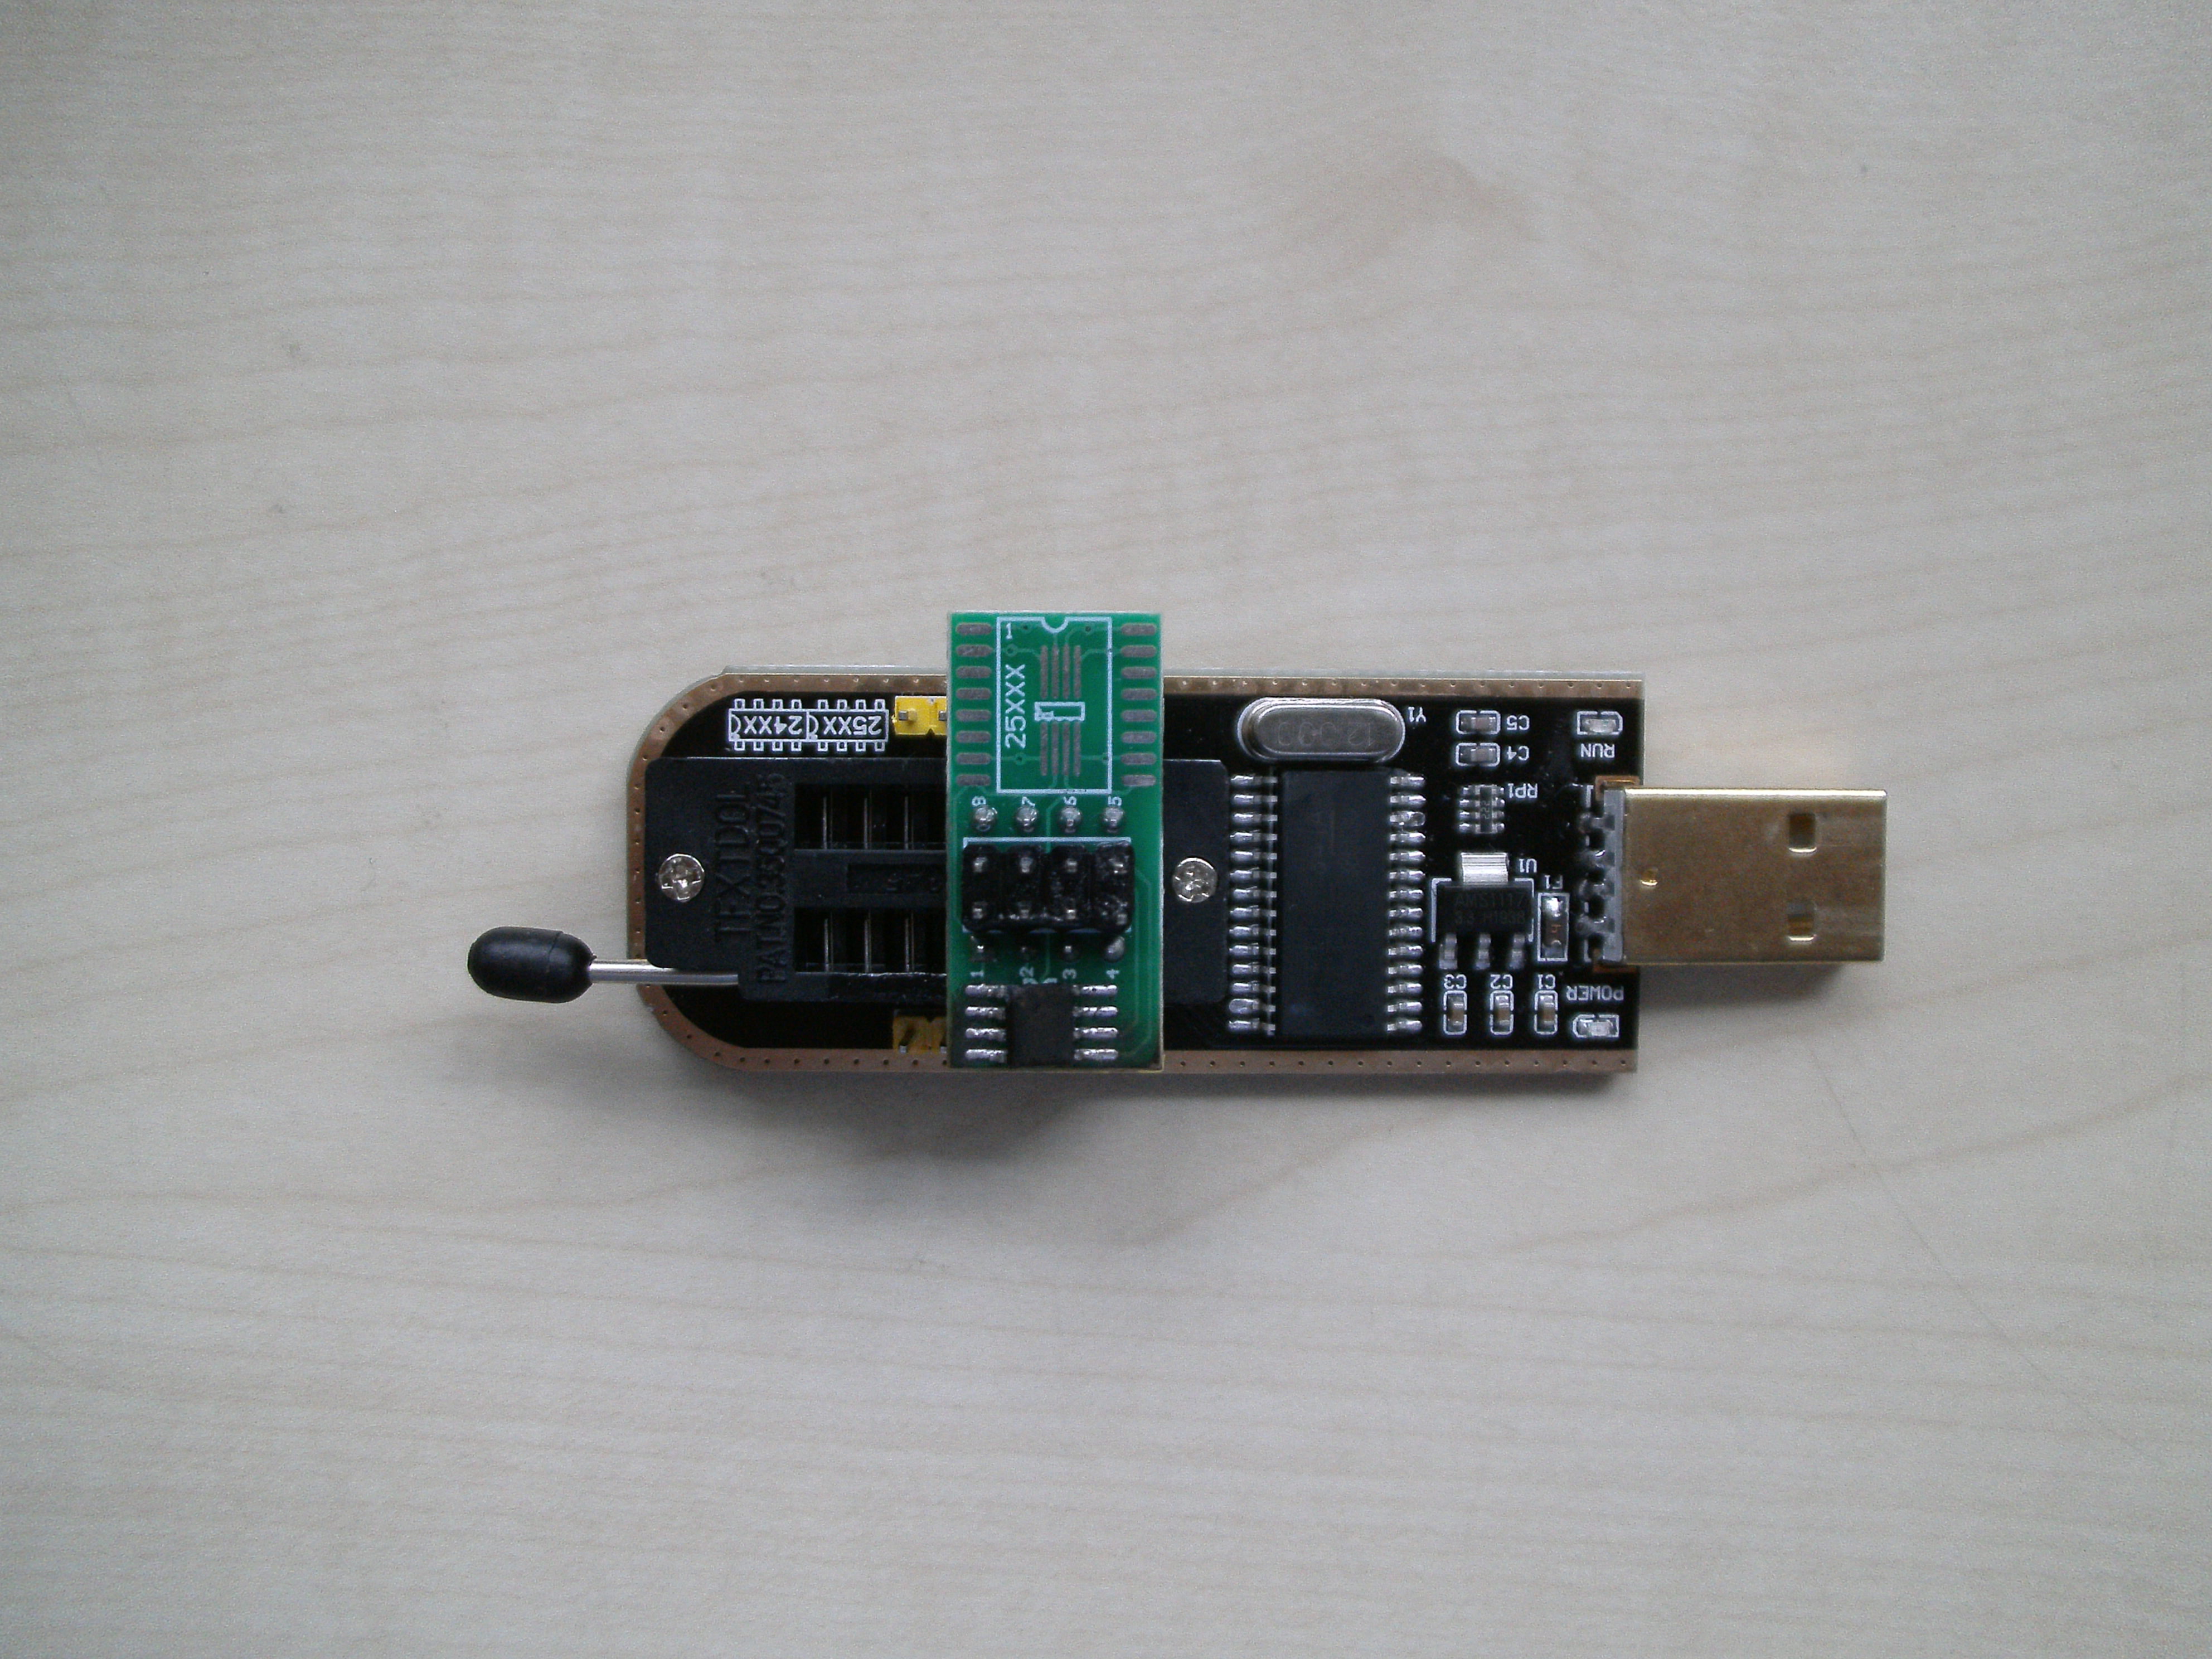
ps. attached 2 fotos mainboard and programmer
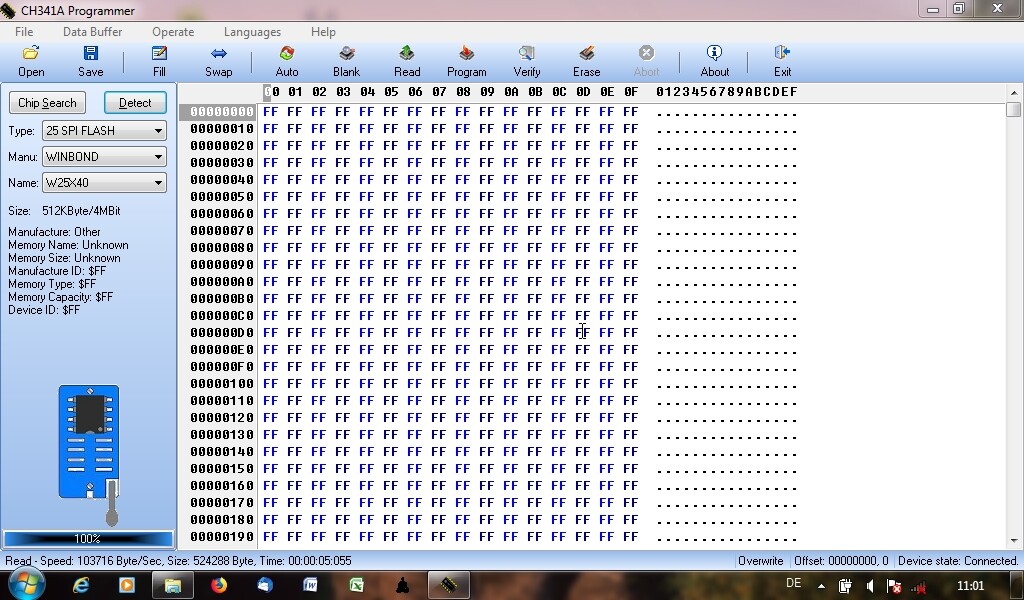
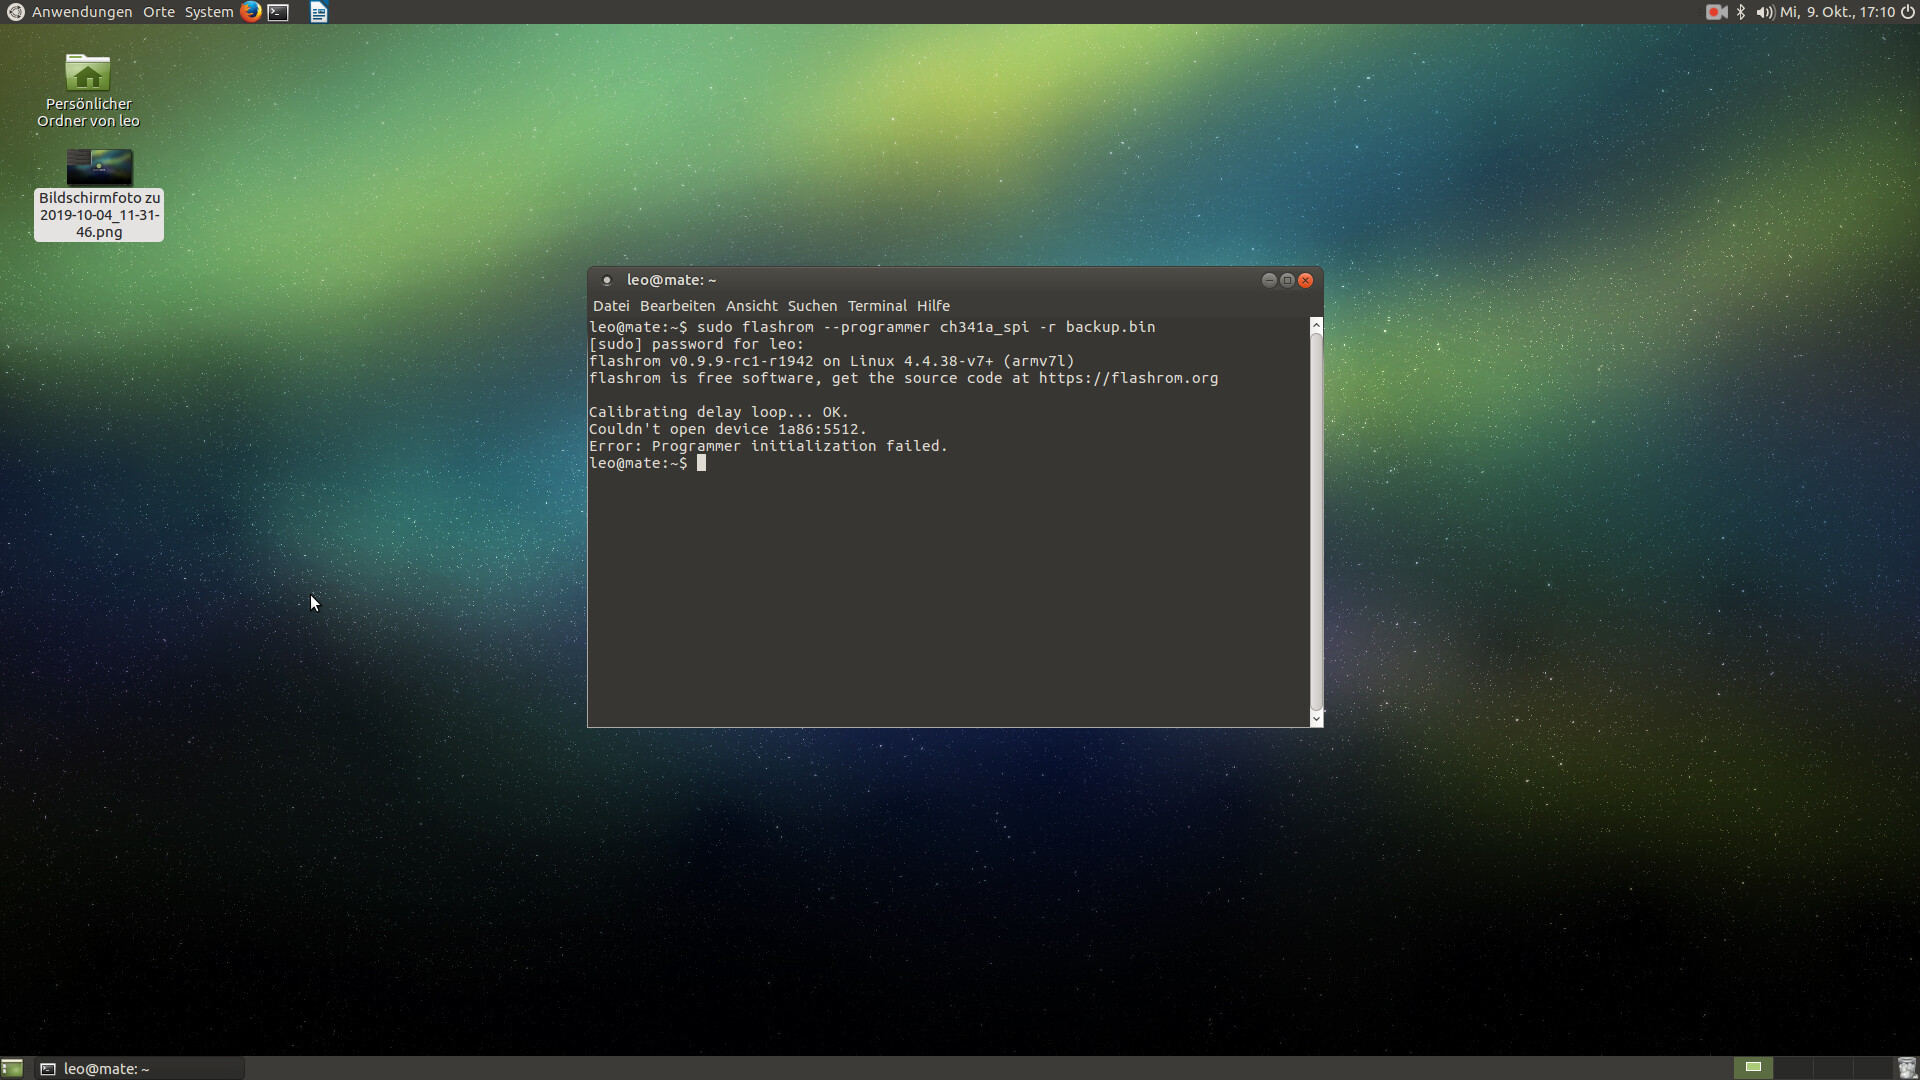
edit: forgot to mention, I also tried the CH341A Programmer -> Detect und Read but also negative. See attached screenshot.
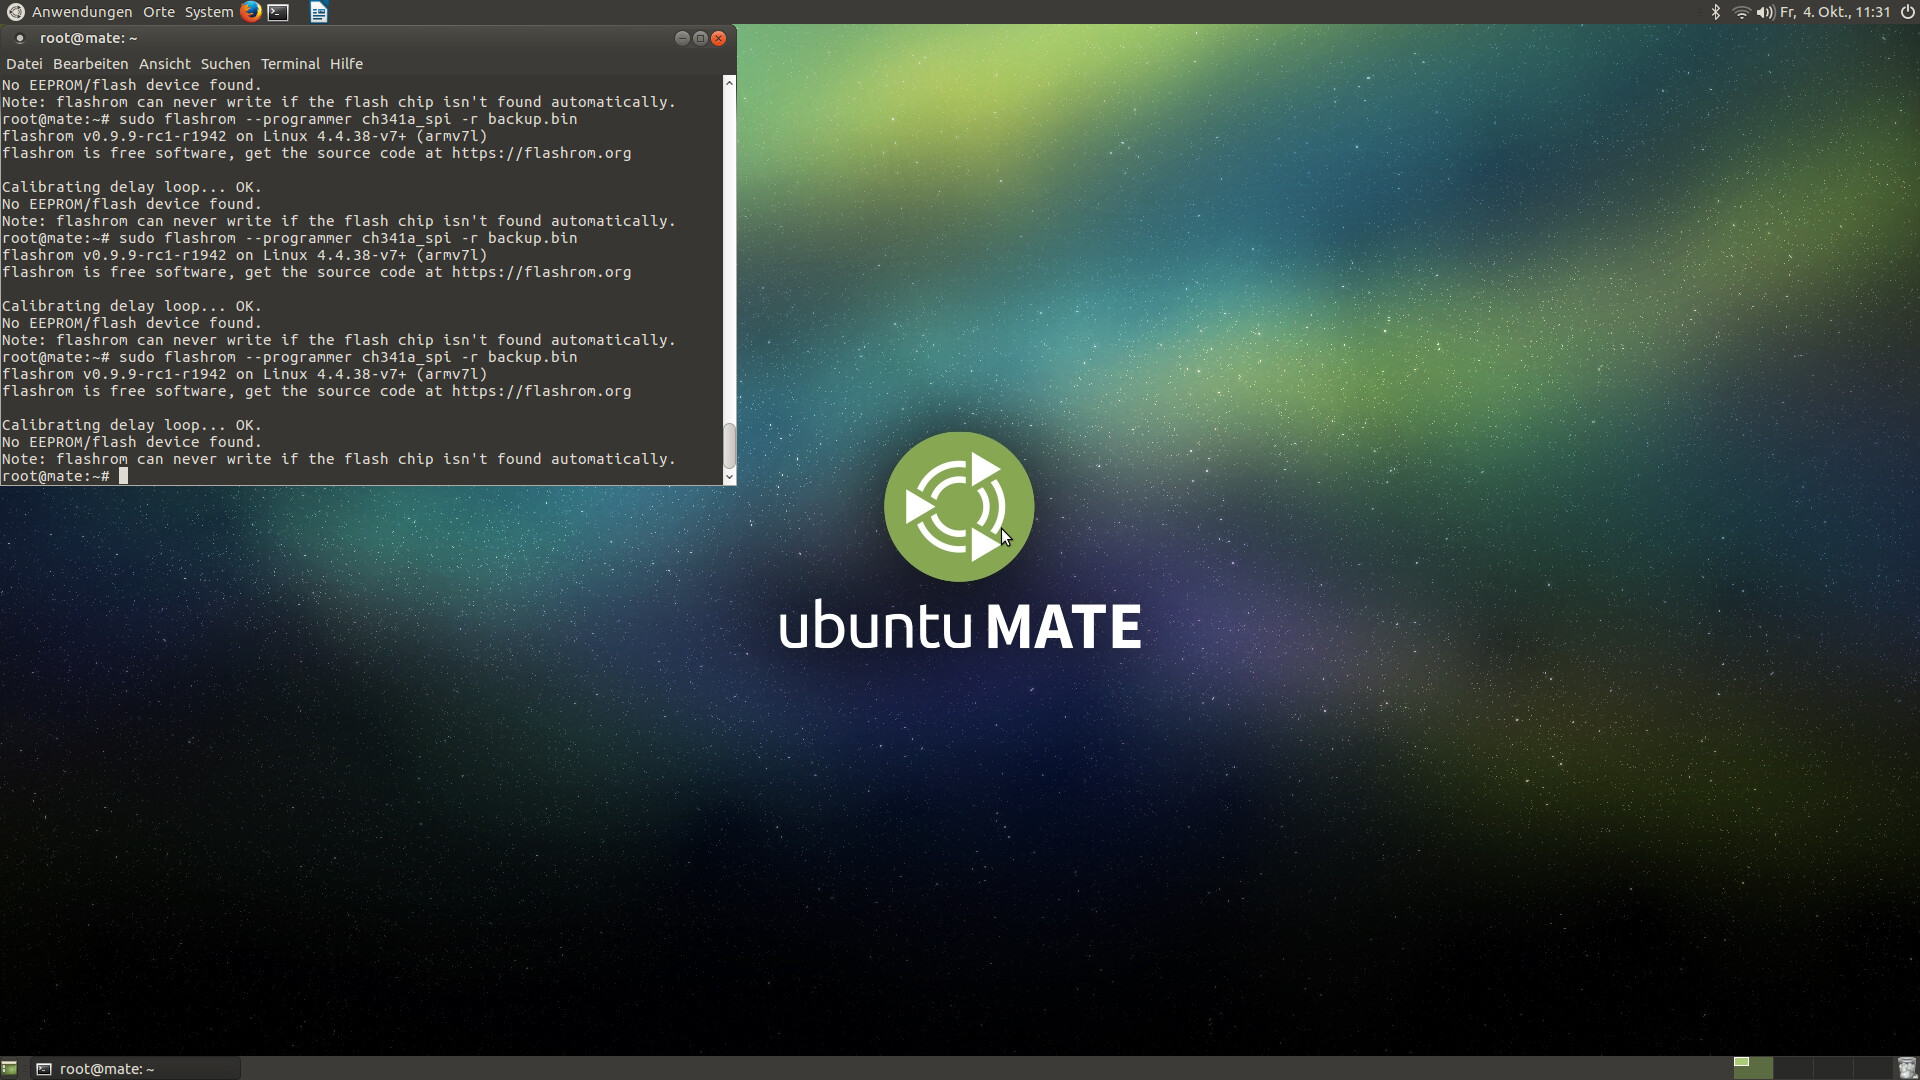
edit: a last trial was done using a linux based computer. At least here I got a message that the flash chip wasn´t found (see attached ss). I accept when _haru is mentioning the SOIC8 clip is extremely difficult regarding a stable connection, but in this case more than 30 times trying and never get even one connection? Another possibility is a non functioning CH341A programmer. Therefore I will first order a new one, this of course will take a few weeks and at arriving of the new programmer start another try!
@cyanno : Welcome to the Win-RAID Forum! To enhance your chances to get your problem solved, I have moved your request into this already existing thread. Addtitionally you may do a look into the start post of >this< thread. In addition to _haru (the Opener of this thread) our experts regarding your problem are the Forum members CodeRush and Lost_N_BIOS. If you shouldn’t get support very soon, a directly addressed request to these persons may be helpful. Good luck! Dieter (alias Fernando)
@cyanno : Unfortunately you didn’t yet get any help from a BIOS modding expert. Even our usually daily present Guru Lost_N_BIOS hasn’t been online since 5 days… AFAIK it is not possible to open the content of the BIOS chip directly via CH341A programmer. If you want to know or to save its content, you have to dump it as first step. Then you can try to open the BIOS Region (which is only a part of it) by using a tool like the UEFITool. By the way: the latest UEFITool version is v0.26.0.
@Fernando : thanks for your answer. But to my knowledge: in this case dumping means extracting the content of the chip in a file? But if there is no connection to the chip, as you can see in my screenshot, a dumping cannot take place. Is this correct?
@cyanno : Yes, the BIOS chip needs power. Otherwise its data cannot be dumped. Maybe >this< article will help you. Anyway I recommend to wait for @Lost_N_BIOS.
@Fernando I believe waiting is a loss of time… my pc is not starting at all, not even in BIOS. Possible I bricked my chip with the many times I connected the clip. Not to forget, the CMOS batterie was always connected, so a current on the wrong pin and thats it…
We can close this thread and I will now order a new mainboard!
@cyanno : If just the content of your mainboard’s BIOS Chip has been bricked, there is no need to buy a new mainboard. You should be able to flash the latest original BIOS Region by using the CH341A Programmer.
@Fernando , yes, you are right. Provided that the connection to the BIOS Chip is secured. And this connection was not there until now. So the question is why… is it while the CMOS battery was connected during my trias or do I need full current on the motherboard? What should be the correct procedure for the dumping process? Could you see my latest picture using Linux where the linux programm stated that no connection to the chip was etablished?
@_haru , yes I used Flashrom, result attached. There is no connection to the BIOS Chip. I already mentioned that I tried many times (<30 times) and never got a positive response. Everytime I replaced the clip und then restartet the programm. I have now dissembled the pc and wanted to desolder the BIOS chip and make a direct wiring between the BIOS chip and the CH341A. By doing so, do I need an additional voltage? And if yes, how? Would be really pleased for an answer.
Sounds like your SOIC8 clip is faulty. You can desolder and resolder the chip onto an adapter board that should have come with your CH341A, and program it like a socketed chip without extra voltage. Be careful not to lift a pad on your motherboard when desoldering.
My asus x555lb laptop bricked and I can look up the hardware. Can I use CH341a instead of service center. My chip is gigadevice 25Q and there is a g letter on the chip.
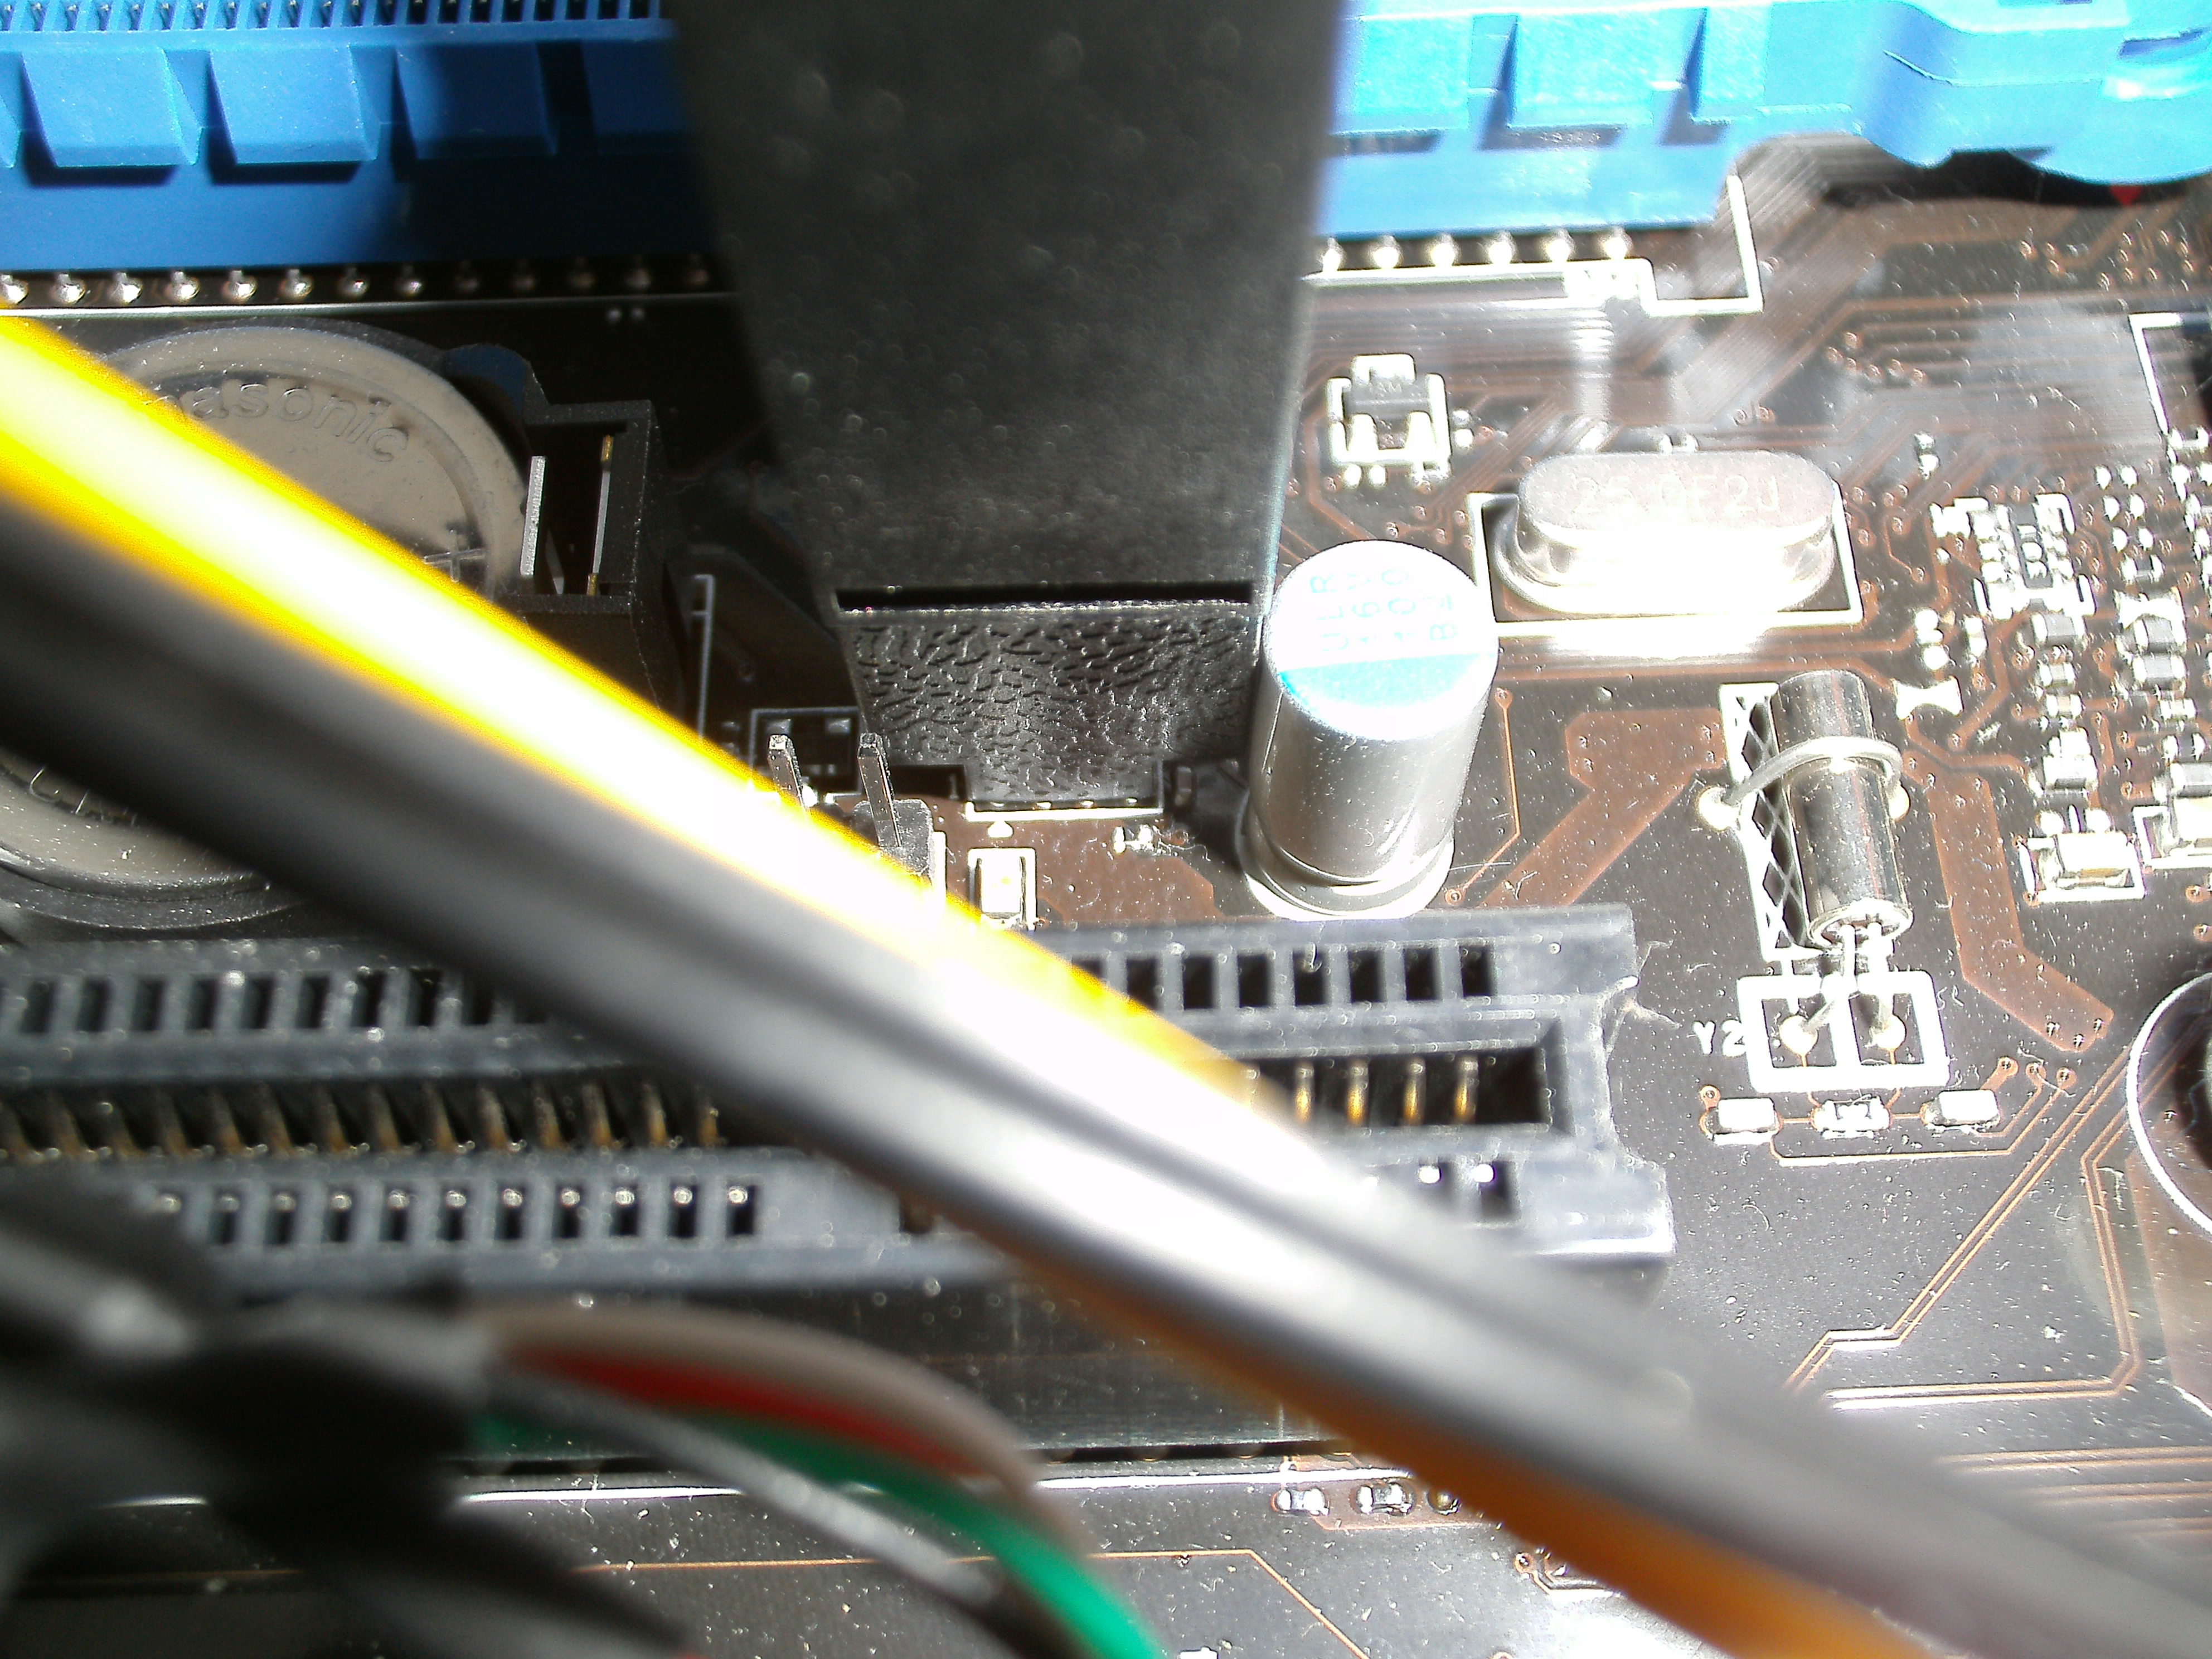
could you please have a short look on the latest screenshot attached hereby. I´ve unsoldered the BIOS chip and soldered it on the adapter. In your opinion, what could be the reason: A bricked BIOS Chip or a faulty CH341A programmer?
@cyanno - Programmer initiation error? I’ve not used flashrom before, but that could be faulty CH341A, I’m sure _haru will answer shortly on this.
Also, that chip you soldered on possibly does not look like BIOS chip to me, looks too narrow (ie not squared) and may be some other IC/controller etc. Can you read what is written on it? * Edit - Looking back at your post #91 and I think this is the issue, and probably why your clip attempts failed too! uP0104P is not a BIOS chip, this is a DC-DC converter (voltage regulator), linear regulator etc http://www.chipset-ic.com/UP0109P
yes you are right. I switched the layout of the motherboard with another one. Sorry about the inconvenience and thanks for the help.
cyanno
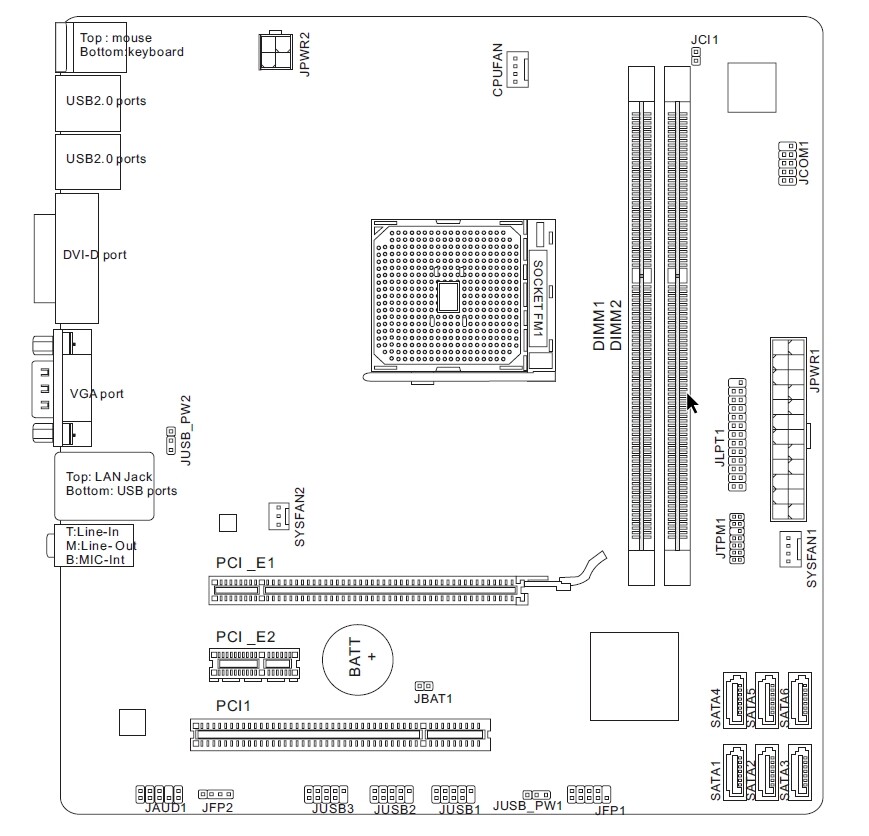
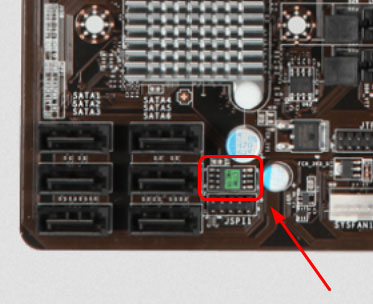
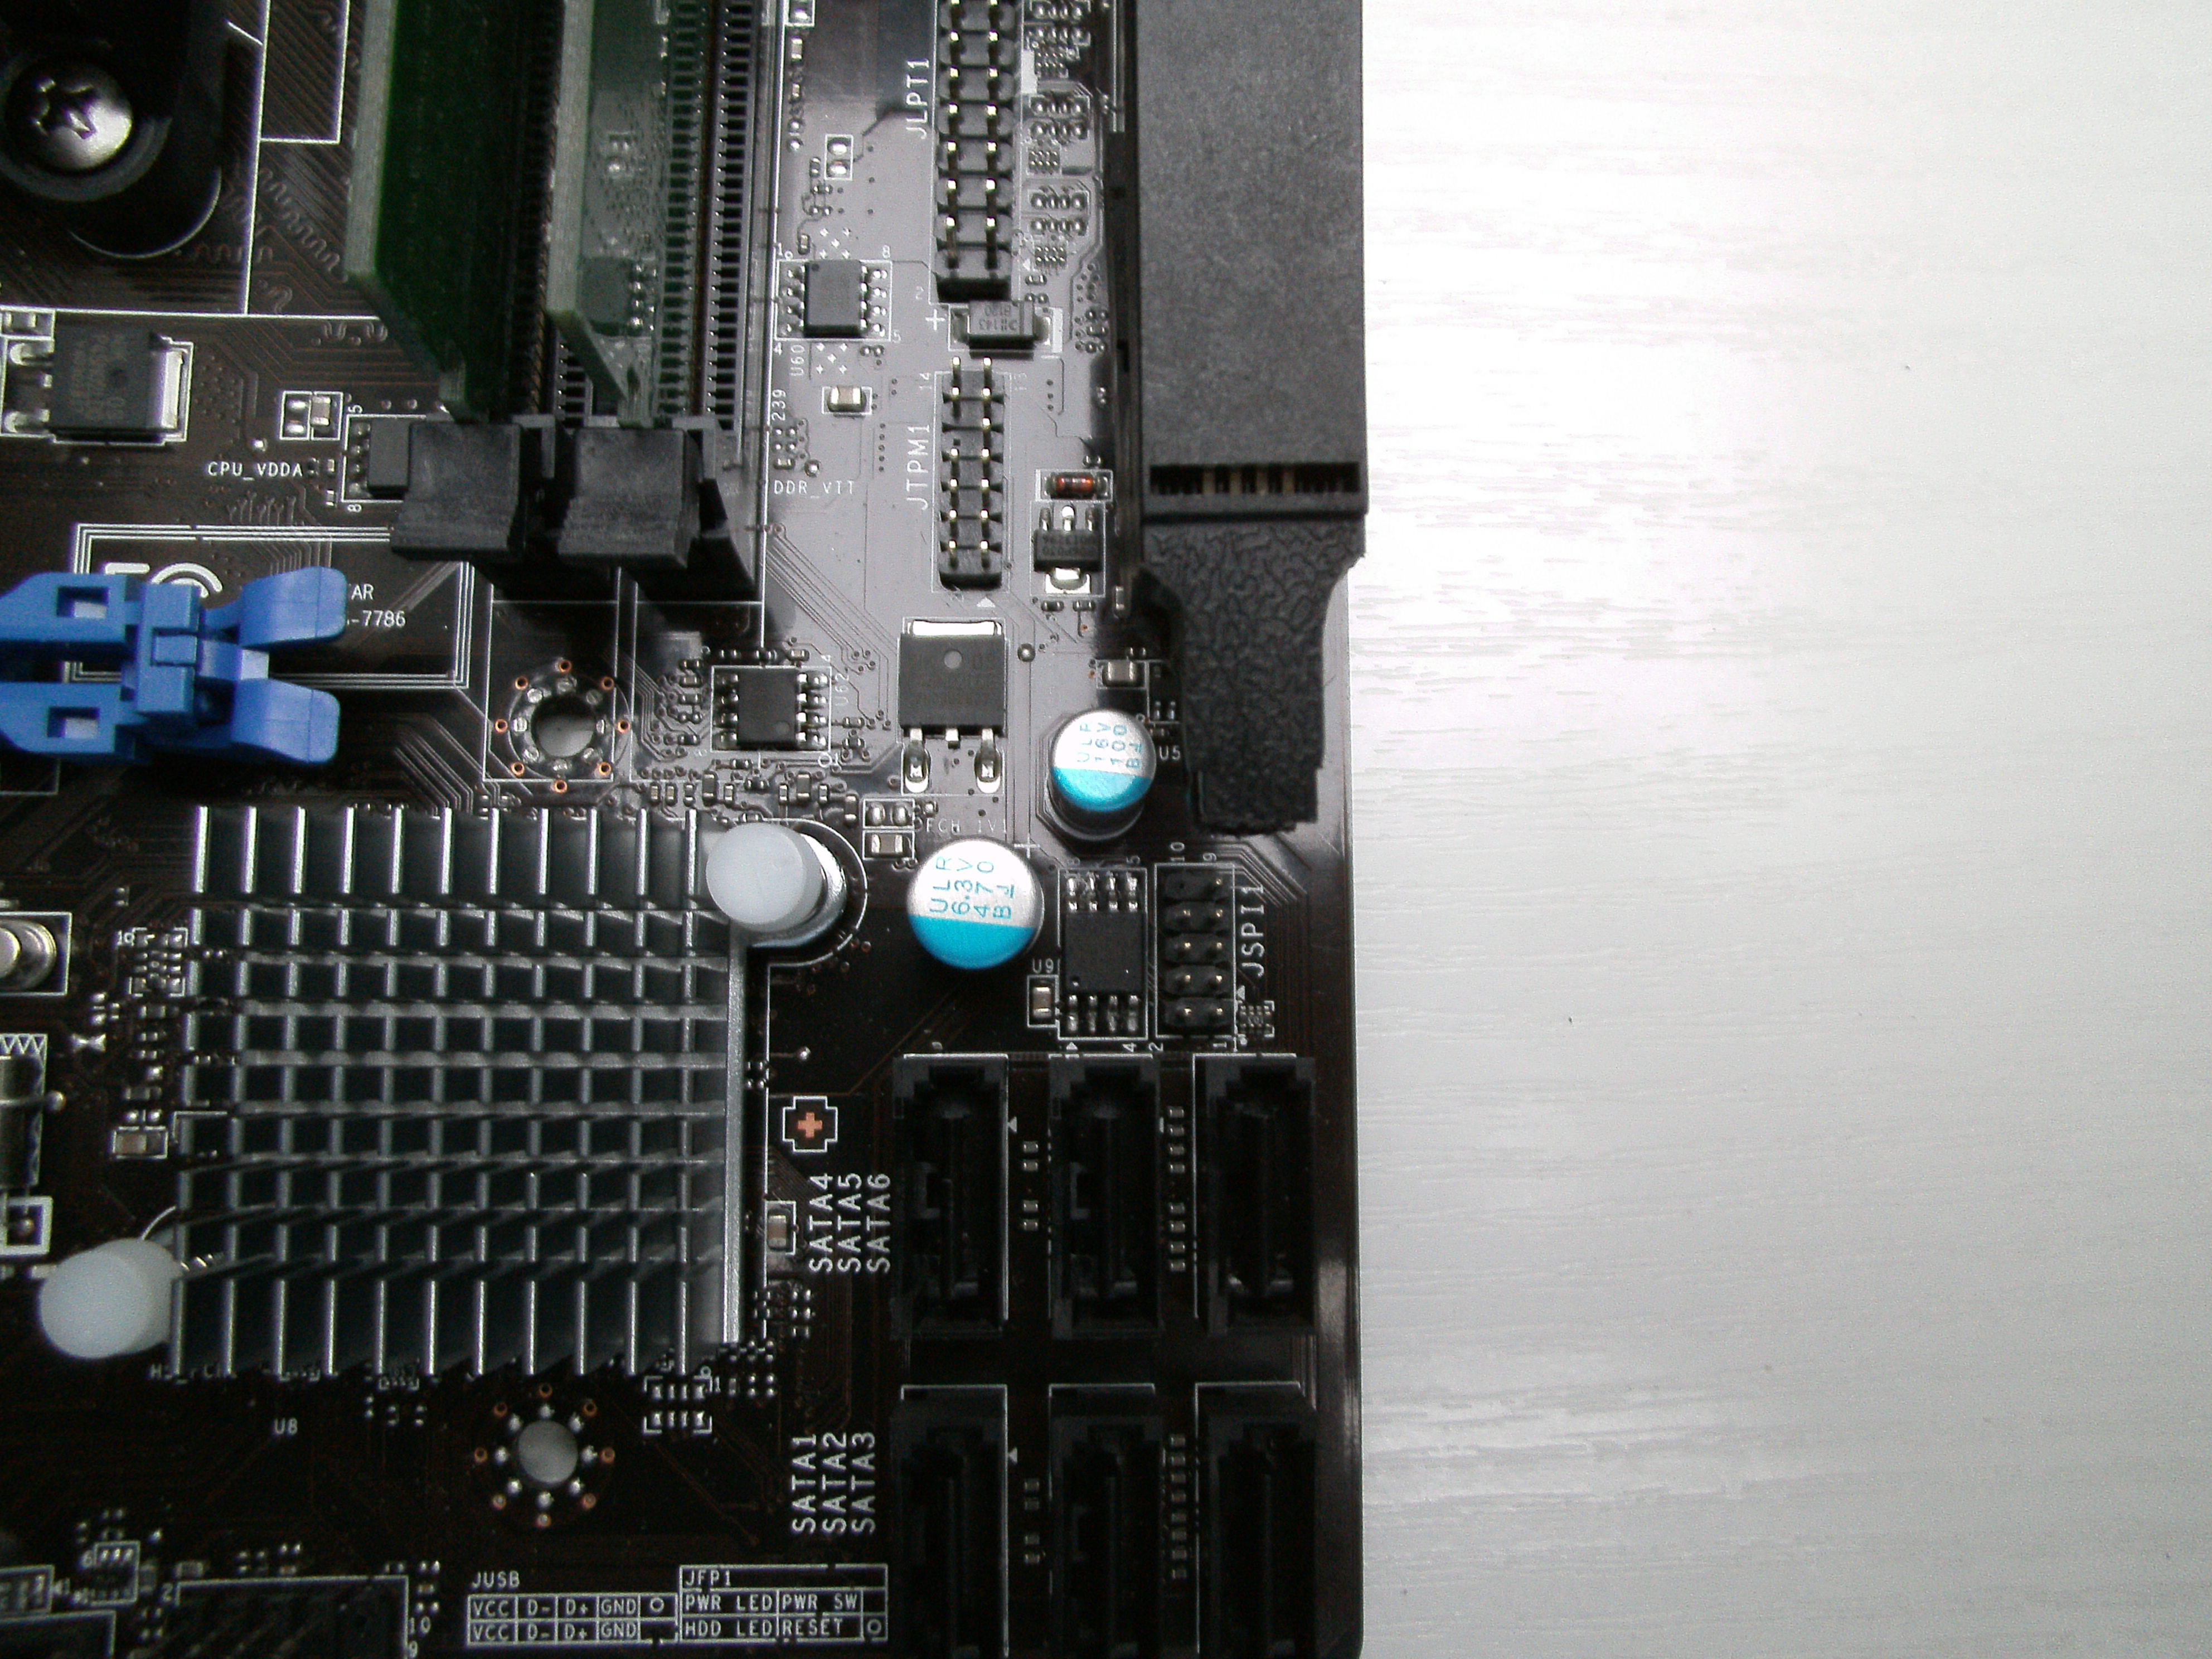
It is still hurting to admit such a mistake regarding the mainboard. Nevertheless, can someone tell me where to find this BIOS Chip on the mainboard A55M-P33?
@cyanno - it’s OK, don’t feel bad, we all have to make mistakes and learn sometime! Show me image of the actual motherboard and I will show you which is BIOS chip. Actually, I looked at MSI Stock images, the BIOS chip is here, directly above SATA ports, right beside JSPI1 header
@Lost_N_BIOS yes, I found the BIOS chip, thanks. As you can see in the attached foto, there is not enough place to fix the SOIC8 clip, I therefore removed some of the plasic body from the nose and tried again, unfortunately again without a result. The programm is not recognizing a BIOS chip. Perhaps a last question, same question a asked by nikey22 in post 93: shall we remove the CMOS battery or is this of no concern? cyanno
Yes, you may need to shave/file down the clip some and try to make it fit. MSI Always does this, usually it’s too close to PCIE slot Maybe you are not getting good connection yet? CMOS Battery does not need removed, but board may need power connected (24+8 pin), or may need it removed.
If you have wires and a spare BIOS chip, you can use JSPI1 header, here is pinout info - Flashing BIOS chip (MX25L3205D) with CH341A progammer - can’t detect chip You will need to solder wires to spare chip, unless you have a spring loaded socket like seen in the link above. You need to program the BIOS on the spare chip with CH341A, then connect this programmed BIOS to the JSPI1 header, then boot to BIOS and while in BIOS remove the connected chip from the JSPI1 header and reflash BIOS from M-Flash