[Request] HP HDX9000 BIOS mod

Hello!

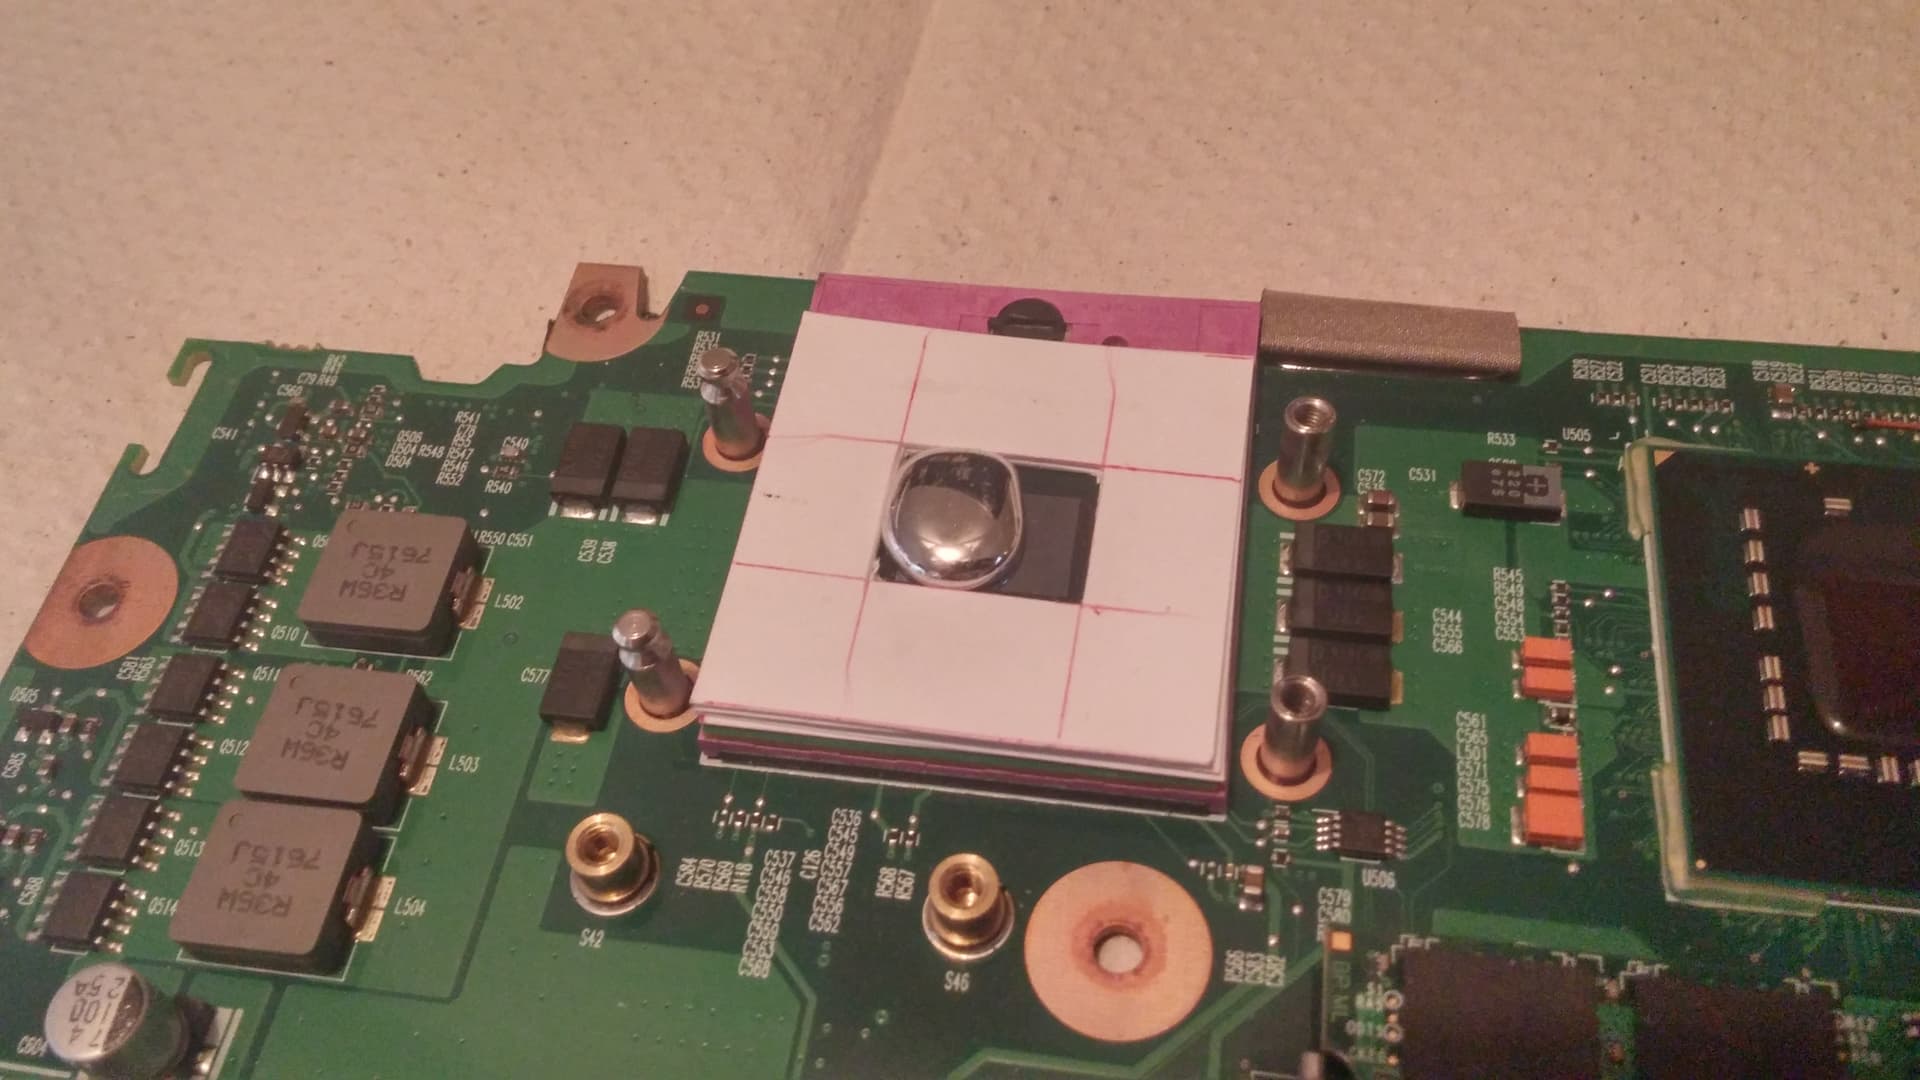
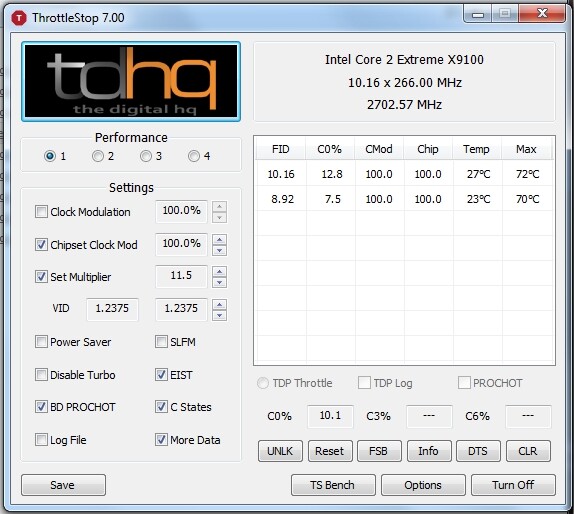
I’m using HP HDX9000 with legacy BIOS. Basically there are several things among the others that I want to do: add quad core CPU support and unhide BIOS settings.
Here’s a link to all the needed stuff http://www.mediafire.com/file/jazk5pu92u…0_BIOS.zip/file

Here’s some basic information about HPUnpack, but I’m not sure if it’s useful since I’m already providing the unpacked BIOS.
The tool is called HPUnpack which was originally created for HP 8710W. I’ve modded it for working with HDX9000.
Unpack BIOS file

1
 
HPUnpack bios.rom
 

Replace a certain BIOS module (e.g. POST module)
1
 
HPUnpack bios.rom replace 20100 POST 20100_POST_new.bin
 

20100 is the RAM address of the module.

Here's the BIOS structure:

First part ends at 0x1FFF0
The next part consists of compressed modules which start from 0x20000 and end with HPLO module at 0xB3E55 in the BIOS file.
The modules are
POST (0x20000) - (No idea)
POST (0x20100) - POST initialization
SETU (0x31000) - (No idea)
KBC (0x40000) - Keyboard controller
MESS (0x60000) - Text string messages
OSBI (0x9D000) - Startup Intel logo
NVID (0x9F000) - Startup Nvidia logo
VIDE (0xC0000) - Video BIOS
ROME (0xE0000) - Expansion ROMs
F000 (0xF0000) - Start of BIOS execution
MEBX (0x40000) - Intel Management Engine BIOS Extension
DSDT (0x65000) - Differentiated System Description Table for ACPI
SMM2 (0xA0000) - SMM (System Management Mode) setup to perform low-level system management operations while an OS is running using SMI (System Management Interrupts).
MBA (0xD0000) - Boot Agent PXE Base Code. Responsible for network boot
UNDI (0xD1000) - Universal Network Driver Interface. An application programming interface (API) for network interface cards (NIC) used by the Preboot Execution Environment (PXE) protocol. Used for network boot.
P16X (0x10000) - 16-bit PXE (Preboot Execution Environment), PXE Specification v2.1 or earlier. It is a network boot program that is run in DOS mode.
TPM (0x10000) - Trusted Platform Module. A dedicated microcontroller designed to secure hardware through integrated cryptographic keys. Used along with the fingerprint scanner
SEC3 (0x200000) - Responsible for chosing a bootable device
G8E_ (0xC0000) - Video BIOS (useless module, duplicated VIDE module, can be removed)
HPLO (0x90000) - Startup HP Logo (this is the last module)

The padding following after this module can be used for adjusting BIOS rom length after modding the modules.
Then CPU microcodes start at 0xC5BDC and end where the computrace stuff is starting at 0xCEBE0h.
All the other parts are unknown to me except for SLIC and TPM that can be found on the way down to the end.

The BIOS modules are all compressed, so the tool can compress/decompress any module and insert it back producing a new bios file called newBIOS.rom.
After opening the BIOS file in the tool, it will produce a set of files. Those are starting with 9D000 through F0000 are modules where .bin are compressed and .dec.bin are decompressed modules.
The header of compressed modules in the BIOS file consists of 16 bytes. Here's an example of one for the POST module starting at 0x20074h
1
 
01 00 14 01 40 E6 00 00 E4 A0 00 00 00 01 02 00
 

It has the following structure:

01 00 - module identifier?
14 - header length
01 - unknown (can be either 00 or 01)
70 00 00 00 - size after decompression 0x00000070
60 00 00 00 - compressed size 0x00000060. The compressed body of a module starts after its name which takes 4 bytes after the header
00 00 02 00 - destination address (0x00020000) in RAM after decompression

This is a basic information.
My question is about the APIC table which is located in the second POST module. You can easily find it in the decompressed module. I want to modify it for quad core CPU support, so I need to add some code to it, but it will result in a bigger size which won't then let the laptop start as the other offsets of the module will change. I can easily swap all the other ACPI tables inside that area, but if it comes to making the section bigger, it bricks the BIOS.
Can anybody find the way how I could increase the size of that section? It seems like relative addresses are used there, so it makes it difficult to do this.
I've tried to remove some useless ACPI tables, but the laptop froze during POST.

If you need more information about anything else, please let me know.
1 Like

I’m not so much active, but can answer some questions.
I cannot understand the point about changing device id. What are you trying to do and how?


I’m not aware of them or don’t really remember. The Notebook Review forum was the best one.

I assume that you have already downloaded 8800M schematics.
You can find DevID straps at the last page, but it’s not clear what the other 3 options would give to you.
I wasn’t experimenting with shaders as I was working on a complete replacement of the video card. As I have described in my reports, 8800M GTS is non-MXM compliant because it doesn’t have any MXM stuctures and so is recognized as a normal non-MXM PCIe video card. I wasn’t experimenting with my 8800M card much, so I can’t tell you if the change of DevID in the vBIOS would do the job. If you are tweaking the right resistors, the DevID change should be working fine I think. But it wasn’t much successful when I was working with FX3700M. The schematics is not describing what IDs are the available options, so I would recommend you to find schematics for 8800M GTX and check what resistance for straps is used there.

Sorry, I can’t help you much with this. I wanted to fit an updated APIC table into the BIOS, but I need someone skilled at disassembler.

Actually, I’ve started working on a motherboard swap. If you are interested, I need your help. HP 8770W is what I want to use for the swap, somebody who could help me with converting its schematics from PDF into Orcad. It’s so time consuming… What do you think of it?

Has image metadata been removed?


https://www.mediafire.com/file/hvynazanb…_Board.PDF/file


Of course it was recognized as 3700M from the very beginning. And then it changed to 260M, I don’t know why and I couldn’t sort that out. I didn’t have a compatible laptop to check the card in after the strange transformation…


In my post on the other forum I said that the most possible reason for the slow operation was the downshift to PCIe 1.1 mode instead of the cards default 2.0. It makes a lot of sense. Try to compare operation of a USB 2.0 device working at 1.1. Some functions may not work at all. My USB 2.0 sound card doesn’t work properly if I connect it to a USB 1.1 port.


I have one, but it’s not in use at the moment because I don’t have a machine with a suitable MXM port for 8800M. I could mod my board, but I’m feeling alright with my ATI card, it’s enough for browsing websites which is what I’m doing all the time while getting ready for a motherboard swap.
Why don’t you get 8800M GTX from some shop and find out how it works? I think it could help


If I recall well, it should be a 4-bit RLE-compressed bitmap format.


It’s a custom HP BIOS which is why there’s no tool which could work with it


Of course, it’s a much newer platform. But the problem is that I couldn’t find any schematics for its video cards


Why are you so much focused on this useless module and can be removed according to the results of my research. And both VIDE and G8E_ are identical to each other.


Could you probably help with drawing a board outline with pointing out all sizes including positions and sizes of holes and positions of each connector?

I’m glad to help and was really obsessed with upgrading the Dragon until I have come up with an idea that I can create my own laptop. Let’s see how it goes.


There’s no way to play around with PCIe revisions because the video card will always be working at 1.1 because of the Dragon’s chipset. I have come up with a conclusion that PCIe 1.1 is the bottleneck, but I didn’t even try to overclock the 3700M and see if it helps. Frankly, I’m not interested in figuring that out at the moment. If the core/memory overclock of 3700M does actually help then why does the performance decrease to the speeds of 8800M after the downshift to PCIe 1.1, but didn’t stay at the cap of the PCIe 1.1? It means that switching to 1.1 definitely degrades the performance without even changing core/memory clocks. But anyway, you are free to play around with core/memory overclock.


I wouldn’t agree here because we both didn’t see any nVidia or ATI datasheets to understand how the bus revision switching works there. The performance of 3700M and 8800M was almost identical. If it was capped because of the CPU, then there’s definitely no sense in playing around with the GPU performance because I was using a top X9100 CPU during the tests. All we can rely on is our practical tests.


Exactly, 280M does support PCIe 2.0. But if you read the specification of the PM945 chipset, you won’t find any mention of PCIe 2.0 meaning there’s not support for it. PCIe 2.0 was itself released after PM965 and introduced in later generations (PM45 etc). So any video card will be downgraded to PCIe 1.1 in the Dragon.


It’s a normal practice for Chinese to leave rubbish in BIOS codes. G8E_ is not picked up by BIOS at all and I can’t tell you if there’s any secret behind it.


I spent enough time experimenting with the laptop and have come to a conclusion that the other VGA module is useless. And I don’t know why they left it there. The other laptop like 8710W has 3 VGA modules at all and they all are different. But I don’t know which of them are actually used. Maybe their programmers were lazy enough that they didn’t clean up the BIOS code after testing? By the way, there’s a lot of useless stuff in the main BIOS itself.


Ok, no problem :slight_smile:
Actually, I’m thinking about if it’s correct to spam here about anything other than BIOS modding. Probably need to create another thread in the appropriate section.


As I described during the experiment, the 2.5v power source was not in use at all. There was no power consumption there, so I came to the conclusion that it’s useless. The reason was most likely the absence of an active SLI connection. But I kept 2.5v connected during the benchmark test.


The possible reasons why the FX3700M’s performance degraded was:
1) Inconsistent HP driver with vBIOS from Dell (but I doubt it since it’s still FX3700)
2) PCIe 1.1 mode (only nVidia or Intel can know the right answer, but PM945 chipset is old and most likely doesn’t support higher data transfer rates).
3) Detection as 260M instead of 3700M. Not sure if this is the reason because 260M is still better than 8800M.
4) Weak CPU (not sure if I checked CPU load during the test, but X9100 is a nice CPU and was still in use by newer laptops that used FX3700M)
5) Weak power supply (I doubt it was the reason because the max power consumption difference between 3700M (75W) and 8800M GTS (50W) is only around 1.3A at 19V.


I would have to spend money for getting 8730W just to figure out a couple of things. I’m not sure if I want this now since I decided to go with a motherboard swap.

But anyway, how can I help you at the moment?

Not a problem, here’s the link to the whole folder
https://www.mediafire.com/folder/7iaie3rkkmohz/GTS_8800M
Let me know if you need anything else

Ok, you are welcome!

I couldn’t believe that the powerful topic about HDX9000 was closed with the entire site. I see something going on here. I am the proud owner of an HP HDX9000. I will only write that this is the best laptop I have ever owned, and I had much more efficient laptops than HDX. I bought it for watching movies / Netflix / HBO MAX etc. and it works great, especially with an audio system as great as a laptop … well, almost great. The weakest link is the subwoofer, and more precisely its durability. This is the second subwoofer in which the membrane suspension broke. The entire subwoofer vibrated at certain frequencies, causing a creaking noise. I spent two days trying to find a way to silence the vibrations, but it was for nothing. The subwoofer enclosure is very susceptible to vibration. I am fed up with overpaying for a used subwoofer. I decided to design the subwoofer from scratch with a different speaker. I have a 3D printer so there will be no problem with matching the box. Is there anyone here who has studied the subwoofer channel? What is the capacity of the canal? Will connecting the 4 ohm speaker damage the power amplifier? I found a speaker that fits perfectly in height and width, but it has 4 ohms instead of 8, so it will get more power.

I bought an ATI Mobility HD4850 ​​512MB GDDR3 about six months ago and … it doesn’t work. Black screen from the beginning and to infinity. He is currently lying on a shelf waiting for a breakthrough. On another forum (old topic) I read that someone managed to run the Quadro FX3700 by uploading VBios to SBios HDX and it worked with full power, but the problem was the screen backlight, which was at a minimum level and it could not be changed.
After HDX, I also bought an HP Z1 workstation for … 125USD with Quadro K3000M 2GB, 8GB RAM and Xeon E3 1280 V2. The screen has a few scratches, but everything else works. Another great machine from HP (I think I’m becoming a fan of this brand). I decided to replace the graphics in the Z1 with a stronger one (it has an MXM slot) and the choice fell on the Quadro M4000M and what was my surprise when the graphics worked without any problems. I only modified the drivers for GTX to install on the quadro and that’s it. I am very disappointed that HP has artificially blocked the graphics enhancement in such a fantastic machine as the HDX.

I would be more pleased than graphics if the Quad series processors worked. Netflix / Youtube etc put a heavy load on the CPU and it would be great news for me that the quad-core processors are working. I would buy the QX9300 right away.

It’s definitely sad to know that forum is down forever, but still there pages saved on the web archive.
As for the subwoofer. Your idea sounds nice, I would get a couple of them from you if you succeed. But this datasheet for the TPA3007D1 amplifier is saying that the lowest resistance limit is 7 ohms.
https://www.ti.com/lit/gpn/TPA3007D1
So 4 ohms should definitely burn it down inside. Keep looking for another speaker.


For the Dragon? I’ve just tried to make a search, but couldn’t find anything compatible. Are you sure it’s HD4850?


At full power? Can provide a link to that post?


Not really, they simply didn’t develop it. They didn’t write BIOS code to support various cards. My opinion is that mobile video cards are made for specific laptops which is achieved with specific MXM callbacks. It makes sense because different laptops have different video interface setups unlike desktop PCs where it’s obvious that video interfaces are described in the VBIOS itself. If laptops didn’t have hardwired video ports on their motherboards, all mobile cards would be interchangeable too. The Dragon is MXM free which lets you use other non-MXM compliant video cards with MXM interface, but the main issues would be driver compatibility for brightness adjustment and available video interfaces.
They didn’t block the graphics enhancement, they just didn’t produce more compatible video cards.


The mod is achievable, but the problem is BIOS as always. I don’t know how to insert APIC table correctly to get the quad to work. I’m still in search for someone skilled at disassembler.


Thanks for the info about the power amplifier. It definitely has to be an 8 OHM speaker.
If my subwoofer will be better than the original, I will let you know. I have a crazy idea to fit there larger than the original without interfering with the laptop casing. If it succeeded, maybe then I would also think about improving the speakers under the screen. These speakers are great, but they have one downside … they are very directional. The person sitting next to me hears a sound differently (in my opinion worse) than me sitting in front of the laptop, but here I am not sure if it will be possible to surpass the Altec Lansing speakers.


There is such a card. It was pulled from the MSI GT725 laptop. It has the same MXM input as the HDX with the HD2600XT. I had to slightly grind the top of the memory heat sink as it got stuck on one part of the card.


The site does not allow me to add a link because I need more than three posts in my account. Google "HP HDX9000 GPU Issue" and select guru3D Forums page. Unfortunately, no one wrote back to the author.


I recently researched my HP Z1 workstation and one HP technician said the POST did not check if any MXM cards were plugged in. This situation makes it possible to connect any MXM card. The only problems that can be encountered in this case are the incompatibility of Vbios and drivers. In my case, it was enough to add my card ID to the list of driver.

Nothing happens when HDX boots up. Zero information mismatch (MXM structure error), the speaker does not give an error code, the screen shows nothing, so I suspected that something must be checking the ID of the video card. It was the same with the Wi-Fi card, where it could not be replaced by any other model, but now it has been resolved. In the case of HDX my experience and knowledge are ending. I do not have the appropriate tools for extracting and uploading the bios and I do not know how to modify the bios content.
But you, Remdale, have been solving this problem for years, so you have a lot more knowledge than I do. You are also perhaps the closest to success in improving this piece of art.

I must also say that the HDX is such a unique that I want to improve almost everything in it. I didn’t have another laptop like the HDX. All my friends were shocked that such equipment exists and it is called a laptop.

In the era of miniaturization, we will never see 20-inch laptops again. Even 18.4-inch laptops completely disappeared from the market a few years ago.

If the processors from the quad series can be run and can also be overclocked … sorry, I dreamed.


You can actually use the 4 Ohm one, but use a 4 Ohm resistor of the same wattage to compensate resistance (not sure if you will have space for it though).


But it’s obvious, ain’t it? The sound system was designed for just 1 user, so that the head should be centered between the 2 speakers.


https://forums.guru3d.com/threads/hp-hdx…u-issue.411873/
Thanks, I’ll try to get in touch with him somehow. But he didn’t say there that it was working at full. He just said great performance.


If it’s MXM compliant, I’m not sure if every such card can boot up in a different laptop. Could be the case or you’re doing something wrong. But you said you don’t have a tool for dealing with BIOS, so how did you do the VBIOS replacement in the SBIOS?
If you get it to work somehow, you will most likely be having troubles with hot keys for brightness adjustment. This is why I recommend to put in cards from other HP laptops to have a compatible driver.


It’s false, I didn’t have to do any manipulations with the ID. There’s no such a list in the Dragon except for Wi-Fi.


Here’s a tool for you https://www.mediafire.com/file/i7nz502uk…Unpack.exe/file
You will be able to decompose, modify and compose back BIOS as described in my first post as well as do useful things like replace POST logos, VBIOS and ACPI tables.


The laptop is awesome for sure, but it has quite a plenty of disadvantages to me:
1. 1 SATA port can’t be used.
2. The IDE port is locked down to Multi-Word DMA 2 which dramatically limits the port speed. But even if you install an IDE SSD, you won’t be able to boot from it. A DSDT tweak could probably do the trick.
3. Cannot use quads, but it could be achieved with enough reverse engineering skills I think.
4. PCIe 1.1
5. ESata controller is occupying PCIe instead of using the unused SATA port.
6. 1 PCIe can’t be used.
7. Webcamera image quality is bad
8. 8GB RAM is not enough.
9. Would like to have a better FSB
10. Terrible quality plastic body, especially the screen frame.
11. CCFL backlight

There are some other things, but these are the basics.
If you know how to work in Cadence software, let me know. I’m working on a motherboard swap.


I’ve managed to fix that. There was a piece of solder shorting 2 contacts, so now it’s back to its original state.
I’ve spent another 200 bucks to prove me right (I guess) regarding the PCIe 1.1 bottleneck issue. I got HP 8730W with another FX3700M of completely the same design and VBIOS. Let me remind everyone here the results of the Passmark GPU test on the first picture and show the same video card tested at PCIe 2.0 under Win7 x64

FX3700 @PCIe 1.1, CPU: X9100 3.06GHz FSB 266


FX3700 @PCIe 2.0, CPU: T9600 2.8GHz, FSB 266


I used two HDX9000 motherboards (both ATI and nVidia) for the first test and the result was almost the same with each of them. So can we now come to the decision that it’s all about the PCIe revision?

By the way, did anyone have a chance to boot up with x1.5 CPU multiplier? It happens now to those 2 boards after the GPU replacement. It seems like it happens after the first DC connection (without battery connected) and fixes itself after a reboot or shutdown and booting up again.


One thing I hate about HDX9000 is its random behavior after reassemblying it. Touch panels may stop responding, and now after another experiment I get CPU running at x1.5 and touchpad NOT turning off with the button.
When I installed FX3700M, the CPU was always beyond 50% loaded by the system. And it was happening to the second board too if I recall well. It seems like the video driver is causing the issue, but I didn’t try to check that out with the default VGA driver. Another thing is that the laptop couldn’t switch off when I shut it down in the menu OS. The OS shut down and the screen switched off, but the fans and the touch panels kept working. The compatibility issues would not let us accept FX3700M as a successful replacement.

I don’t know if any of you flashed your LCD, but I can now see the difference between 60Hz and 108Hz refresh rates. Windows can be moved around smoothly, the same applies to some web pages. Looks awesome. I recommend everyone with nVidia cards to flash your 1200p LCD with my EDID like I described on the other forum.
I’ve finished installation of the 8800M card on the ATI board. I didn’t want to deal with the MXM connector replacement, so I just soldered 2 thick wires instead. Nvidia software seems to be causing more load to the CPU compared to ATI drivers. First, I though I messed up with the heatsink, so I reinstalled it. But it’s still the same.

what do you think about the Quadro FX3600M?

It has the same GPU chip, so I wouldn’t like to waste my money this time. I’m going to try Quadro 5000M from Dell when my adapter arrives to me from China. They said it will probably be in 2 months.

I am sorry to read you had been experiencing issues with your CPU on 1.5x multiplier. This was a while back, I hope by now you managed to figure out what was wrong with it.

I wasn’t able to figure out. It’s just not happening anymore. Maybe because I’m always connected to AC.

the playback will stop suddenly at random

It could be that the touch panel is lagging. Mine is not working properly too. For example, the sound can be muted anytime (while the LED is still blue), but it doesn’t happen frequently. The touchpad can’t be turned off with the button anymore and the touchpad itself is also lagging: stops responding for several seconds, then it’s back on and then the same stuff repeats all the time every 10 seconds or so. The numlock and Wi-Fi blue LEDs don’t work anymore, but sometimes the Wi-Fi one comes back to life.
This is what happens after doing some mods. So try to disconnect the touch cables and see if the problems ever happens again.

All I can tell you is that I don’t install any updates at all and would recommend you to do the same. If anything is needed, I get to know about it from error messages.
By the way, I’ve just finished changing thermal paste and after reassembling everything the LEDs are back to work. I hate this magic.
But, I’ve got some good news. I’ve replaced thermal paste with pure mercury and it’s working just great.


I took a sheet of thick paper (around 0.23 mm), cut it into 4 pieces thus making everything as thick as the CPU die. The height of the die is around 0.8 mm and it is important to have the room higher than that to let the heatsink hold the paper tightly to isolate the mercury. Mine is 4 sheets x 0.23 mm= approx 0.9 mm in height. The hole size is 12.5mm x15mm to leave some free space for the mercury and also because of the compund on the die, I needed to avoid curved surface, so I made the hole bigger.
After installing the heatsink, the rest of the mercury blob just went off from the CPU. Be careful, all mercury balls have to be removed from the board as they can short something. Inspect the board attentively, especially under the CPU socket.

My Dragon is hosting X9100 working at its native 1066 FSB.
I ran a stress test through Prime95 to see the efficiency of such a replacement. Basically, the temperature was 67 degrees even though it reached as high as 72 degrees. I believe this is because the heat pipe can’t really deal with 44W CPUs.

The idle temp is 26-27

This is a great thing, so I hope the story of wasting money for thermal paste is over. If you want to use mercury for GPU, make sure you have isolated the whole surface of the GPU chip along with its elements.
One more thing to notice. The Dragon’s chassis is made of plastic and thus can be bent when taking the laptop as usual. It will cause movement of the heatsink which may result in some mercury leakage. But I don’t think it will happen because of the consistency of mercury. It’s not enough fluid to leak like water. But it will definitely do if enough pressure or high temperature is applied. This is why after filling the whole space around the CPU die, just remove a couple of drops from there to avoid leakage after installing the heatsink.

Now let’s cross the fingers and hope that my mercury won’t end up suddely anywhere on the board :laughing:
Hopefully, the CPU is installed on the bottom, so nothing will touch the board unless you spin the laptop. But tiny mercury balls are light and sticky and won’t move without physical contact.
Anyway, we need to think about a secure construction for using mercury like this.

Regarding the RAM mod. I know that hynix doesn’t allow SPD flashing. But you can easily flash through a programmer with DDR2 interface or just remove the SPD and flash it directly.
My RAM is running overclocked at CL4 (4-4-4-12)@700MHz because of the FSB overclock. So I had to raise RAM voltage. I had another option of something around 952MHz at CL5. But I decided to go for lower delays, but also lower frequency. I posted a report about this on the forum then. The RAM chips get pretty much hot when actively used. And this is the problem as we can’t install any heatsink on it.
I think I rememeber that timings are set by the BIOS regardless of the set up in the SPD, so I couldn’t choose my own timings except for telling the BIOS what RAM frequency was installed. I edited SPD, so my BIOS thinks that my DDR2-800 is 533, so this is why it’s working at CL4. If the BIOS is the one that sets up timings, I doubt that CL3 is possible for 667 MHz. Whatever CL I flashed, it wasn’t changing anything, while only the max frequency change did.
Anyway, there’s a book saying that RAM is used only 10% of the time, so trying to improve this 10% only by 1% is worthless to me. But it seems to be exciting anyway.

Click on this text to see my humble opinion on this

I think I don’t care since I didn’t see any proof of that with my own eyes or some trusted person didn’t tell me from their own experience.
There are many rumors around us, but it seems like not many people want to check if it actually stands up. Govts are the biggest liars that don’t have any interest in people living healthy or have free energy whatsoever. It’s enough to look around to see the proof. If you don’t believe them and try to expose their actions, you are called a conspiracy theorist. So I wouldn’t even trust them to tell me the time in a room full of clocks. The tactics of an invisible enemy and fear of the unknown are playing out well in the modern society. Imagine how many opportunities were wasted because of blindly believing something which would in fact be not true after checking out.
Red mercury is another example of how governments have banned free energy sources. I have a video of how powerful red mercury is and believe me, I think we wouldn’t need shitty Li-ion batteries anymore. Red mercury is used in production of nuclear weapons which is why it’s banned. If you want to ban a source of free energy, find a way how to turn it into something descructive in order for the public to accept your ban.
So I decided to do some myth busting for the good of humanity. Otherwise, what’s the point of living?
I heard mercury is a way to free energy which is why I want to keep experimenting with it to figure that out.

Nothing can stop a true modder, right? :grinning:

Have you thought anything about that thick heat pipe?

Yeah, the Dragon’s one is pretty weak. But it seems like we can’t make it thicker because of the subwoofer. The only way around is let it out through bottom which would require drilling and connecting an additional fan. Or maybe the same fan could be used if we lead the newly attached heatpipe to the same CPU fan and attach the new fins on this pipe to the existing ones on the old pipe.It would probably involve removing the plastic ventillation grids. Or maybe we could replace the existing fan with one that has 2 sides like this one


It would allow us to use 1 more side for the new heatpipe, but don’t know if the mod would look ugly enough to stop you from doing that :smile:
Remember, making holes in plastic weakens it. If you make a hole of that size on the right side of the Dragon, the mounting system may give up someday once you decide to move the laptop. Actually, I was thinking about designing a metal replacement for it. But I’m wondering how much time and money it would take.
But what if we pour mercury inside the existing pipe? What if the effiency improves dramatically? We never know until we try.

I had screwed in the wrong much longer screw rather than the short one that was used to hold the LCD frame. I could hit myself with a bat once I found out I made such a noob mistake.

Believe me, I got in the same situation with Dell M6400 except for my heatpipe servived the long screw. I was about to make a hole unknowingly. I think engineers who project chassis like that desire a fair panishment :smile:

I use a 35 watts CPU so I rarely hit temperatures beyond 37 degrees. I’m mostly in the low to mid 20s.
But the GPU always worries me.

I figured out that the CPU temperature depends on which GPU you are using too. Nvidia makes it hotter than ATI by 7 degrees or so. But you know, I guess my X9100 is running a little cooler with mercury when idle, so I’m wondering how much degrees it would be with ATI. I’m also wondering if copper surface is getting oxidized when it’s covered with mercury. And if it is, won’t it affect heat conductivity?

All we have to do is find a stock CL4 DDR2 4GB module and try to see if CL3 is doable at all by fooling the BIOS the way you did.

If timings are set by the BIOS, then there’s no way you could get CL3 with 533MHz memory set up unless it was precoded in the BIOS. Datasheet for PM965 chipset is reporting support for 533 and 667 memory. No mentions of DDR2-400 which could give us a hope for CL3. But we could give it a try anyway.

would you know how to inject a SLIC 2.1 on a newer ASUS UEFI notebook BIOS?

Sorry, I think you know better than me. I didn’t need to deal with SLIC. If Phoenix tool is able to work with your whole BIOS, then it should do its job well. If the size of the new SLIC is different, there is a length marker to be changed too. Otherwise, your UEFI won’t be able pick up your whole SLIC because of the wrong table size pointed out in the header. I don’t know if it has to be of fixed size, but in case if not, have you fixed it already? You can check out if the new SLIC was picked up correctly in RWeverything.

So, what do you mean exactly? Install win 7 plain or up to SP1 on the HDX?

What do you recommend?
I know the easier answer is: stop playing games then :slight_smile:

I just install pure Win7 and then run SP1 setup separately. Then install only things that are required for your programs and games. Don’t stop playing, games are the reason why we want to make mods I guess :grin:

That is based on the GTX 480M chip, didn’t that chip consume a ton of power? I’m sure you have a plan in mind for that. It will be interesting to see.

Yeah, I would mod the power system then. Actually, I think anything can be modded if you have enough intent :grin:

By the way, glad to hear your LEDs are back to life.

Yeah, I only forgot to tell you that the touchpad lags after I installed its driver. Maybe I need to find another one.

What I do is I utilize that two component glue I mentioned in the other post

Do you have a picture of the glue you’re using? I guess I need it to fix my broken stuff.

they were 4-4-4-15 @ 667

See? But I’m wondering why it wasn’t 4-4-4-12

RWeverything does not show the SLIC

This is because RWeverything sees only tables extracted into RAM currently while Phoenixtool only looks at raw BIOS files. So I assume that your table wasn’t extracted into the RAM probably because of a header error. You had to fix the checksum byte in the table header.

but they are in Russian (I believe) and even with online translators I can’t make anything about it.

You’re lucky because I’m a native Russian speaker :grin:
And that guy is writing articles in Russian, so I think I can help you somehow.

Post your Quadro 5000M findings here when the time comes. I’ll be eagerly wanting to know how that works out.

Sure, I only hope that I didn’t mess up with the design of my MXM adapter. And I expect to receive it somewhere in October. I’m also trying to figure out if a desktop video card can be connected to the mobile slot of Dell M6400. If it works fine, then that there’s a high possibility that the same can be done to the Dragon and we will probably have a desktop video card instead, but end up using a VGA/HDMI to LVDS converter for the internal screen.

It took me a while to get some photos for you.

I should have turned on the laptop and let it run hot for a bit

Or you could use a reflow station instead

I thought that Phoenixtool would take care of checksum corrections

I didn’t know it can do this job. You can figure it out by yourself. Just make some corrections in the SLIC table without touching the checksum and see if it will be corrected to understand if it actually works.

By the way I miss all that sanctuary of knowledge, the people and great place for all things HDX and not…

Yeah, me too…

see if you can open it with a VPN or other way

It’s working just fine. I will PM you after reading the article

Which manufacturer is your Quadro 5000M from?

I took it off from Dell M6500 and installed into M6400. When I was drilling 5000M’s heatsink, the drill bit suddently went through the area that turned out to be thin (I thought it was thick there) of the heatsink and bumped into the GPU chip at the edge, slipped off and drilled through 3-5 layers in the PCB🤦‍♂️

I was testing out my luck well as you can see. So I had the same feeling as you🤦‍♂️:

I could hit myself with a bat once I found out I made such a noob mistake.

I brought the video card to a local repair shop, they recovered it for $100. You can see recovered area on the PCB. Actually, they had to make the hole wider to get the job done.
Lesson: don’t drill installed heatsinks!

I could live with an external desktop card hooked to the HDX, but the LVDS mod stuff scares me quite a bit

Yeah, there’s no other way if you’re doing this mod

But, I’ve got some good news. I’ve replaced thermal paste with pure mercury and it’s working just great.

Why use mercury instead of liquid metal thermal compound like Conductonaut which can be had for around $12 ?

Mercury has worse thermal conductivity, is more expensive and mostly importantly creates highly toxic vapors which cause all sorts of health issues. I don’t know why you thought it would be a good idea to use it on a laptop.

I was just looking through the recently posted and saw this thread. Seeing someone use mercury as thermal paste was really weird.

What about on the back? There was likely nothing. What a miracle.

Yeah, the back is fine.

That card is extremely rare and can get very hot very quickly. How did you manage to get one?

From Ebay, back in August 2018. The card was coming with Dell M6500 for $700.

the seller did not want to ship to my location

You could use a delivery agent instead. I do it whenever the seller is not shipping to my country.

Why use mercury instead of liquid metal thermal compound

Because I would be having problems removing the heatsink when I need to do some mod.

Mercury has worse thermal conductivity

Instead, it seems to be a bit efficient to me.

creates highly toxic vapors which cause all sorts of health issues

Let’s see how it goes for me in a couple of years.
I got more mercury from a local seller and it stinks for some reason, but maybe that’s because of the environment where it was previously stored. But it didn’t smell when I extracted first drops from my mercury thermometers.