Warning!!!
This is NOT a guide or a do-it-yourself, nor any other helper. I always like to share my findings, even when it has a high chance of bricking your system, since I don’t like being a “keep it to yourself” person. It was also a request. I will not provide any support, nor will I be blamed for any damage. I will only assist on the first attempts, just out of curiosity, but I don’t plan to be a part of any “beautify UEFI” request.
The images:
- I will assume you are using UEFITool for the search, so […] will mean any byte match.
- png seems to be the easiest one, since it starts with 89504E470D0A1A0A and ends with 49454E44AE426082
- jpg starts with FFD8FF and ends with FFD9, which is not very reliable. It is easier to search for the common JFIF marker, FFD8FFE0…4A46494600
- bmp starts with 424D…00000000…28000000
- gif starts with either 474946383961 or 474946383761 (GIF89a | GIF87a) and ends with 003B
- tga might end with 54525545564953494F4E2D5846494C452E00 (TRUEVISION-XFILE), but other than that, no way to determine its presence.
- pcx has many variables, but a good pattern is 0AXX01…00…ZZ00…0000000000000000000000000000000000000000 [continue on next page]
00000000000000000000000000000000000000000000000000000000000000000000 where XX can be 00 to 05 (version of PCX) and ZZ can be 00 to 02 (color, b&w or grayscale). The easiest way is to use XX = 05 and reduce the number of searches.
- ico starts with 00000100 or 00000200, which is nothing useful for UEFITool. I can easily extract it from uncompressed files.
- if there should be any other image format used, please add it here.
Compression:
If the UEFI image has compression per module, there is no other way besides using UEFIFind.exe with the helpers attached. Drop UEFI image on UEFIFind.bat and type i for images or whatever you like. You will need UEFIExtract.exe and UEFIExtract.py for this to work.
If the UEFI image has compression per volume, you can just extract its body, if you want to take a quick look at the images contained within. It is also recommended to do this because I use more relaxed patterns in my scripts, so it is easier to find and extract images. However, for replacing, you must extract individual ffs files using UEFIFind.exe/bat
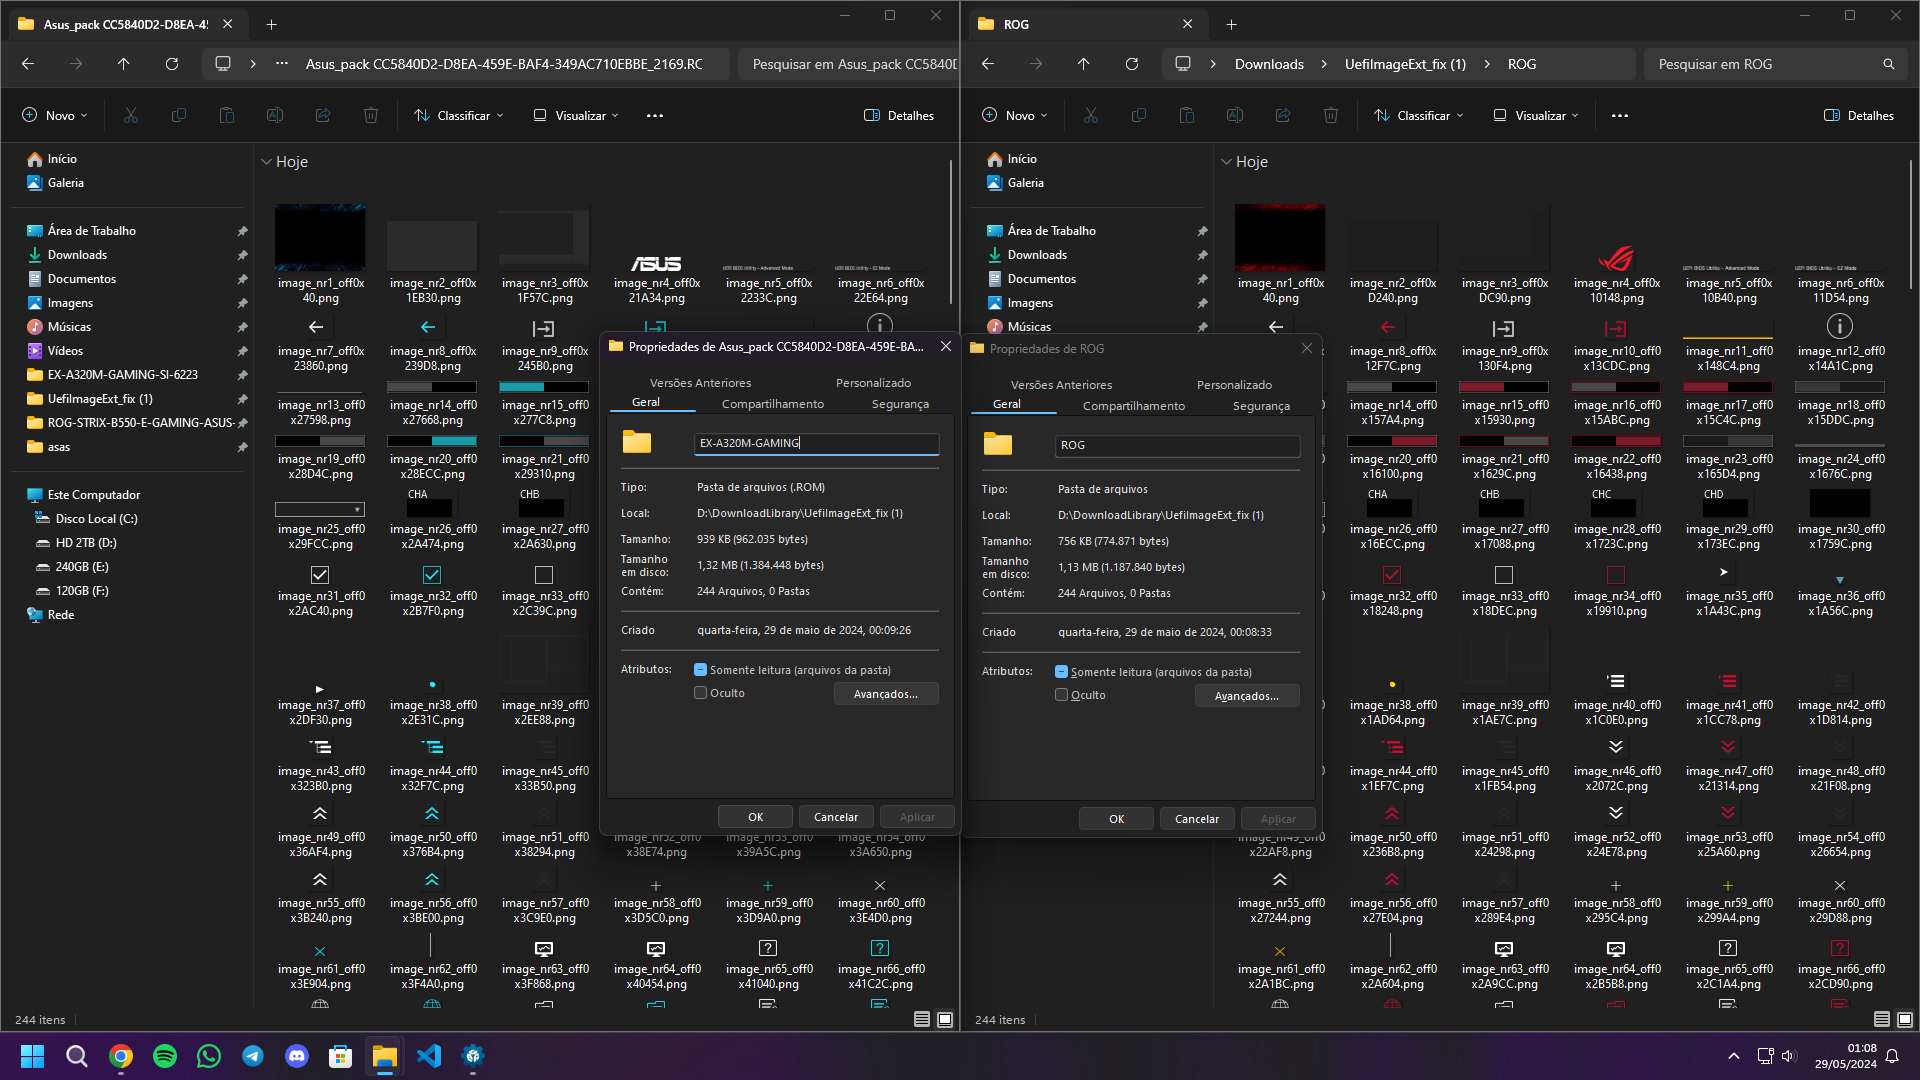
Packaging:
- Asus, MSI and Gigabyte seem to use a packer, but also images in raw sections. UEFIFind.bat can be used, which will produce around 10-20 ffs files.
- Asrock and EVGA seem to use one image per raw section. UEFIFind.bat can be used, but it will produce 100+ ffs files, depending on UEFI screen complexity.
- Gigabyte and EVGA can use up to 300-500 images, so let the scripts run for a few seconds. You will see a lot of messages.
Extract:
Well, there is no point in locating the images if you don’t know how to extract them, or if it takes too long to parse each 100+ files. This is where #imageext.bat and #imageext.py come in place. With a few minutes on reading the specs of each image format and a lot of trial and error, it produced a nice result. Just drop the files containing images on the .bat file, it will display and extract the images. So far I got: Asus packer, MSI packer, Gigabyte packer, png, jpg, bmp, gif, ico, pcx, tga, tiff, wmf. Only png and bmp are safe, the rest can produce false positives, because I have to parse the image. JPEG in particular is quite a beast, with all those markers.
MSI packer:
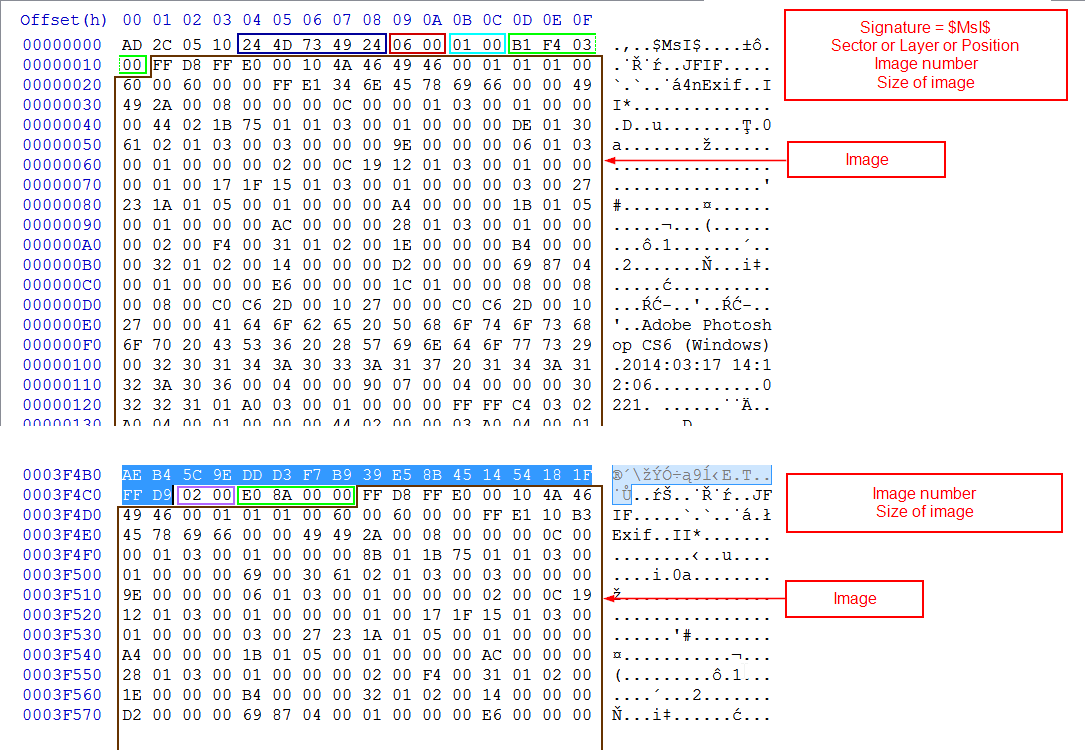
Asus packer:

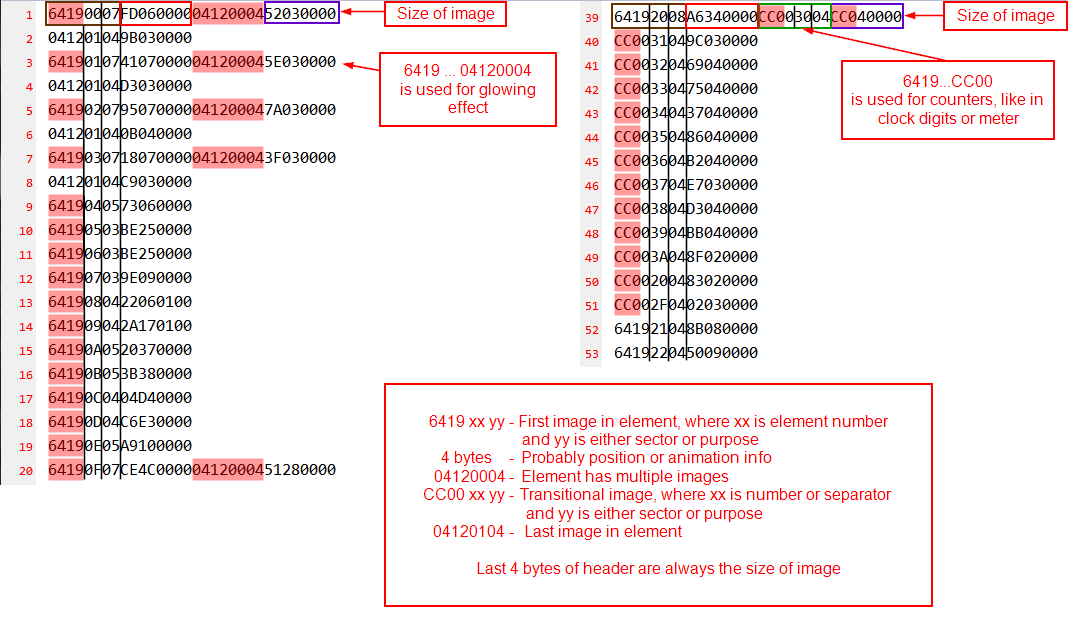
Gigabyte is a little complicated:
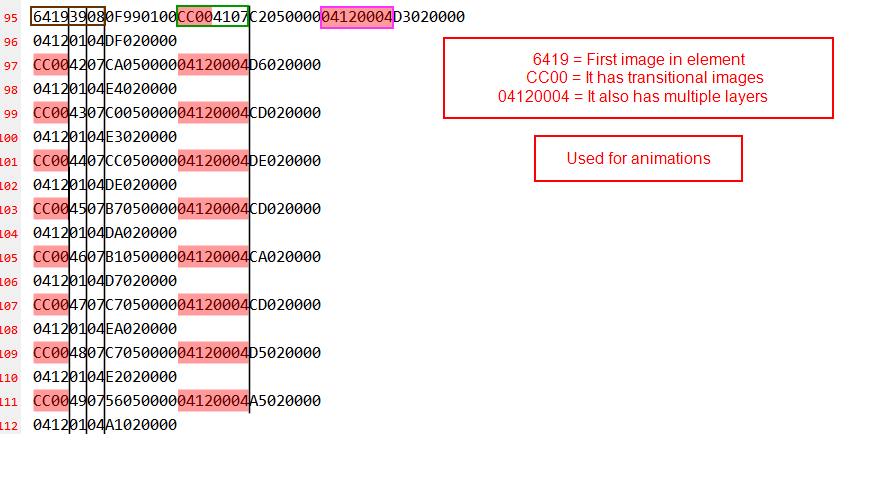
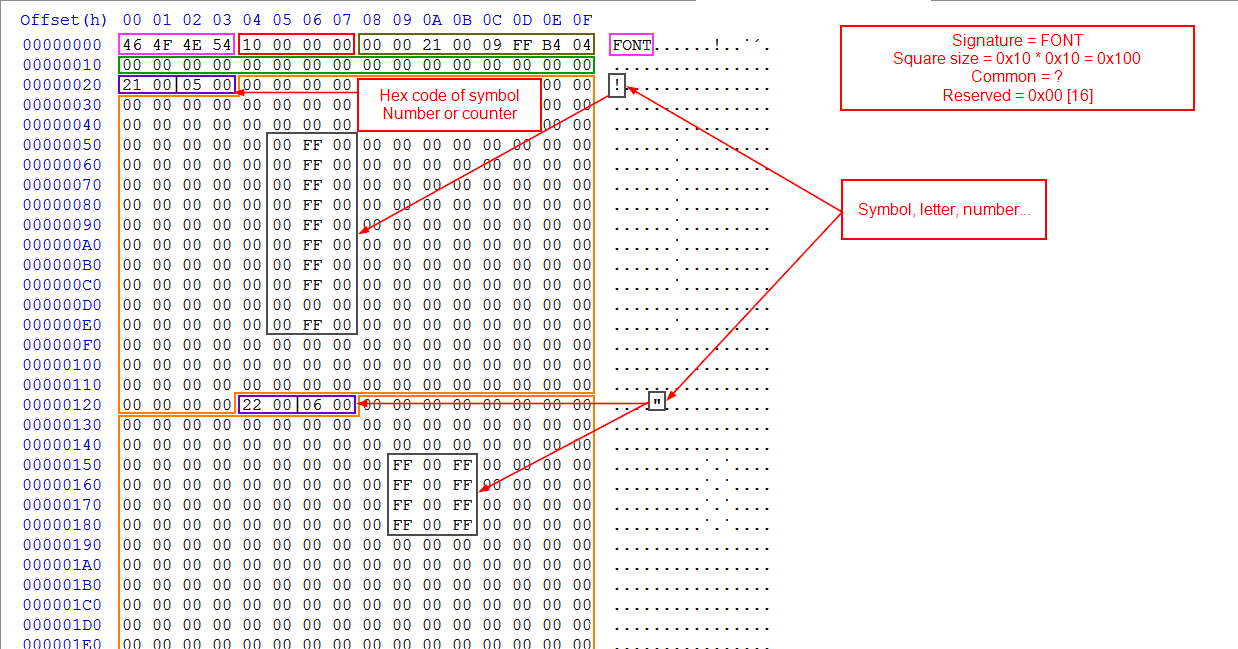
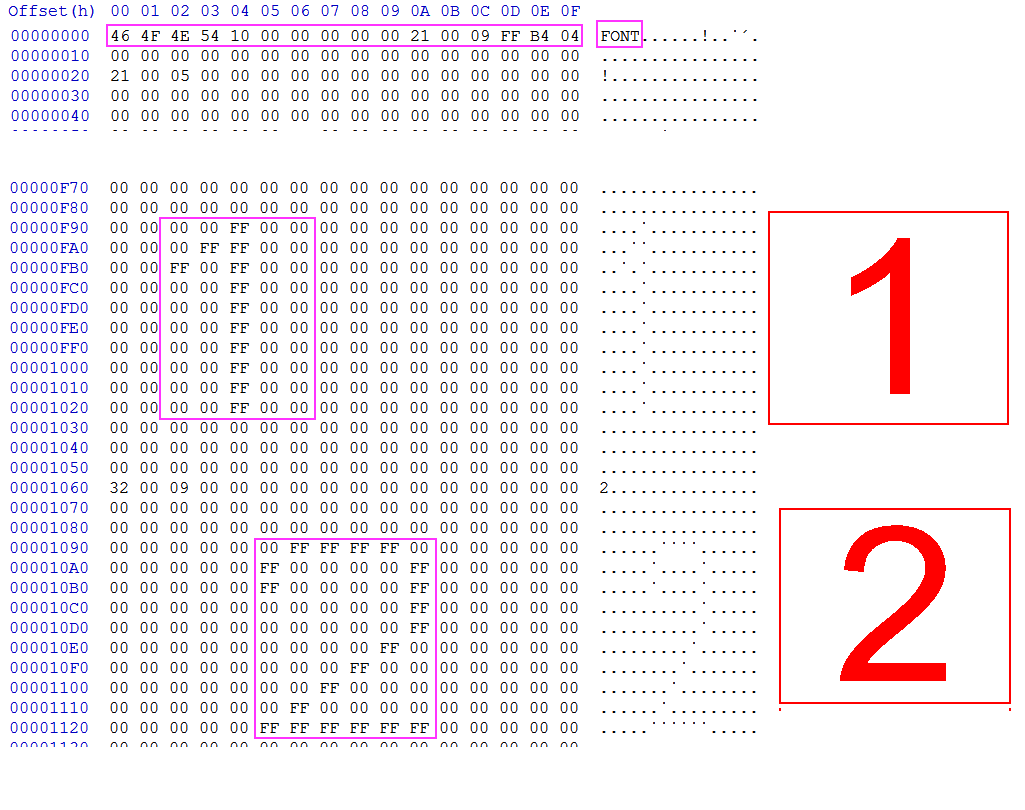
Gigabyte also has interesting "font" images:
When replacing the images, have in mind their location. If it is just one in raw section, use UEFITool. If it is in a pack, replace old image and fix the size in the image header. But also watch for:
- Asus padding
- preserve image resolution.
- preserve image properties. Replace with same type, bit-depth, complexity.
For viewing use IrfanView or XnViewMP or your favorite choice. If you want thumbs for all images, go for SageThumbs. For editing, pick your favorite.
In the end, let’s not forget that this would not have been possible without the tools from CodeRush. When using good software, you easily forget about its importance.
UefiImageExt.rar (1.66 MB)