Last week, I installed OpenCore based on someone’s Github Repo on my GA-Z97X-UD7 TH rev 1.0. Later, I found out the BIOS entered black screen with flashing underscore every time I wanted to access the BIOS menu after I installed macOS with OpenCore. I didn’t realized that it’s OpenCore corrupted the BIOS as it could still boot my Windows and macOS (OpenCore), so I simply cleared the CMOS, thinking I would bring back the BIOS menu but it didn’t. After I cleared the CMOS, it gave me back screen and won’t boot any OS (I assume it’s stuck at the BIOS reset warning menu and won’t auto load any boot device).
Unfortunately, what’s worse was that I just switched to boot with backup BIOS and then kept using it for another week until I realized it also corrupted my backup BIOS in the same way (now with both BIOS corrupted). I searched with Google and found many people mentioned this OpenCore bug 1-2 years ago on Tonymacx86, reddit, and other forums. At this point, it’s too late for me to realize that it’s OpenCore corrupted my BIOSes as I’ve also reset the CMOS with the backup BIOS. (I could have reflashed the BIOS in Windows or DOS if I didn’t reset the CMOS.)
Yesterday, I unsoldered both chips and flashed them with CH341A as I couldn’t get CH341A detect both chips when they are soldered on the MB. However, it’s in the same infinite reboot loop after I flashed the chips and soldered both back.
I’ve tried flashing the chips with the stock BIOS downloaded from Gigabyte website, and I’ve also tried flashing the stock BIOS with the GbE region replaced from the BIOS image I backup from the corrupted BIOS to transfer the GbE MAC address. However, both gave me the infinite reboot loop (switching between the main and backup BIOS).
I also suspect it might has something to do with the SERG1,SERG2,SERG3 of MX25L12873F as it gave me error when tried to erase the chips before. I had to “unprotect” the chips with ASProgrammer.exe or NeoProgrammer.exe before I could flash the chips. After flashed both chips with NeoProgrammer (because the CH341A.exe rev 1.29 and rev 1.4 won’t flash the chips but showed timeout error every time I wanted to flash the chips), I checked the SERG in ASProgrammer, the main BIOS chip gives me SERG1=0x40, SERG2=0xFF, and SERG3=0xE7; the backup BIOS chip gives me SERG1=0x40, SERG2=0xFF, and SERG3=0x07.
TL;DR: What could I do to flash both the main and backup BIOS chips (MX25L12873F) if I have tried flashing both with CH341A and it didn’t work? I have checked the CH341A has successfully flashed both chips; however, after I soldered both chips back, it was still in the infinite reboot loop. I have attached the BIOS images here:
https://drive.google.com/file/d/1z1et2RW…iew?usp=sharing
Z97XUD7TH.F7a is the stock BIOS from the manufacturer website.
Z97_backup.bin is the corrupted BIOS I backup with CH341A.
fix.bin is made from the stock manufacturer BIOS (Z97XUD7TH.F7a) with the GbE section replaced from Z97_backup.bin through UEFITool.app.
Edit by Fernando: Thread title specified, shortened and customized
so to be clear there is no backup of your bios before the mod? one thing that came in my mind is getting a used gigabyte h81 motherboard, then use intel fpt -f fix.bin to flash the fix.bin file, shut it down and desolder h81 chip, put it in your z97, and see if it boots.
You should’ve dump the motherboard bios using intel fpt or your progammer since it contains all the value you needed when everything didnt went well… also afaik before skylake, gigabyte motherboard bios chips could operate independently, that if you flash the bios update, the backup bios wont get any write (depends, you could see in intel FIT that if the flash number is 1 or 2, if it’s 2 then all of your bios chips will get flashed). and the way to force backup bios to recover main bios only (not using b_bios for boot) is by press and hold power + reset for 11 seconds (it will power on, and off) , release it, and power it on, that way you will have a message to restore main bios using backup bios… atleast on gigabyte motherboard before skylake, as it worked on my b75 and my friends b85 gigabyte motherboards.
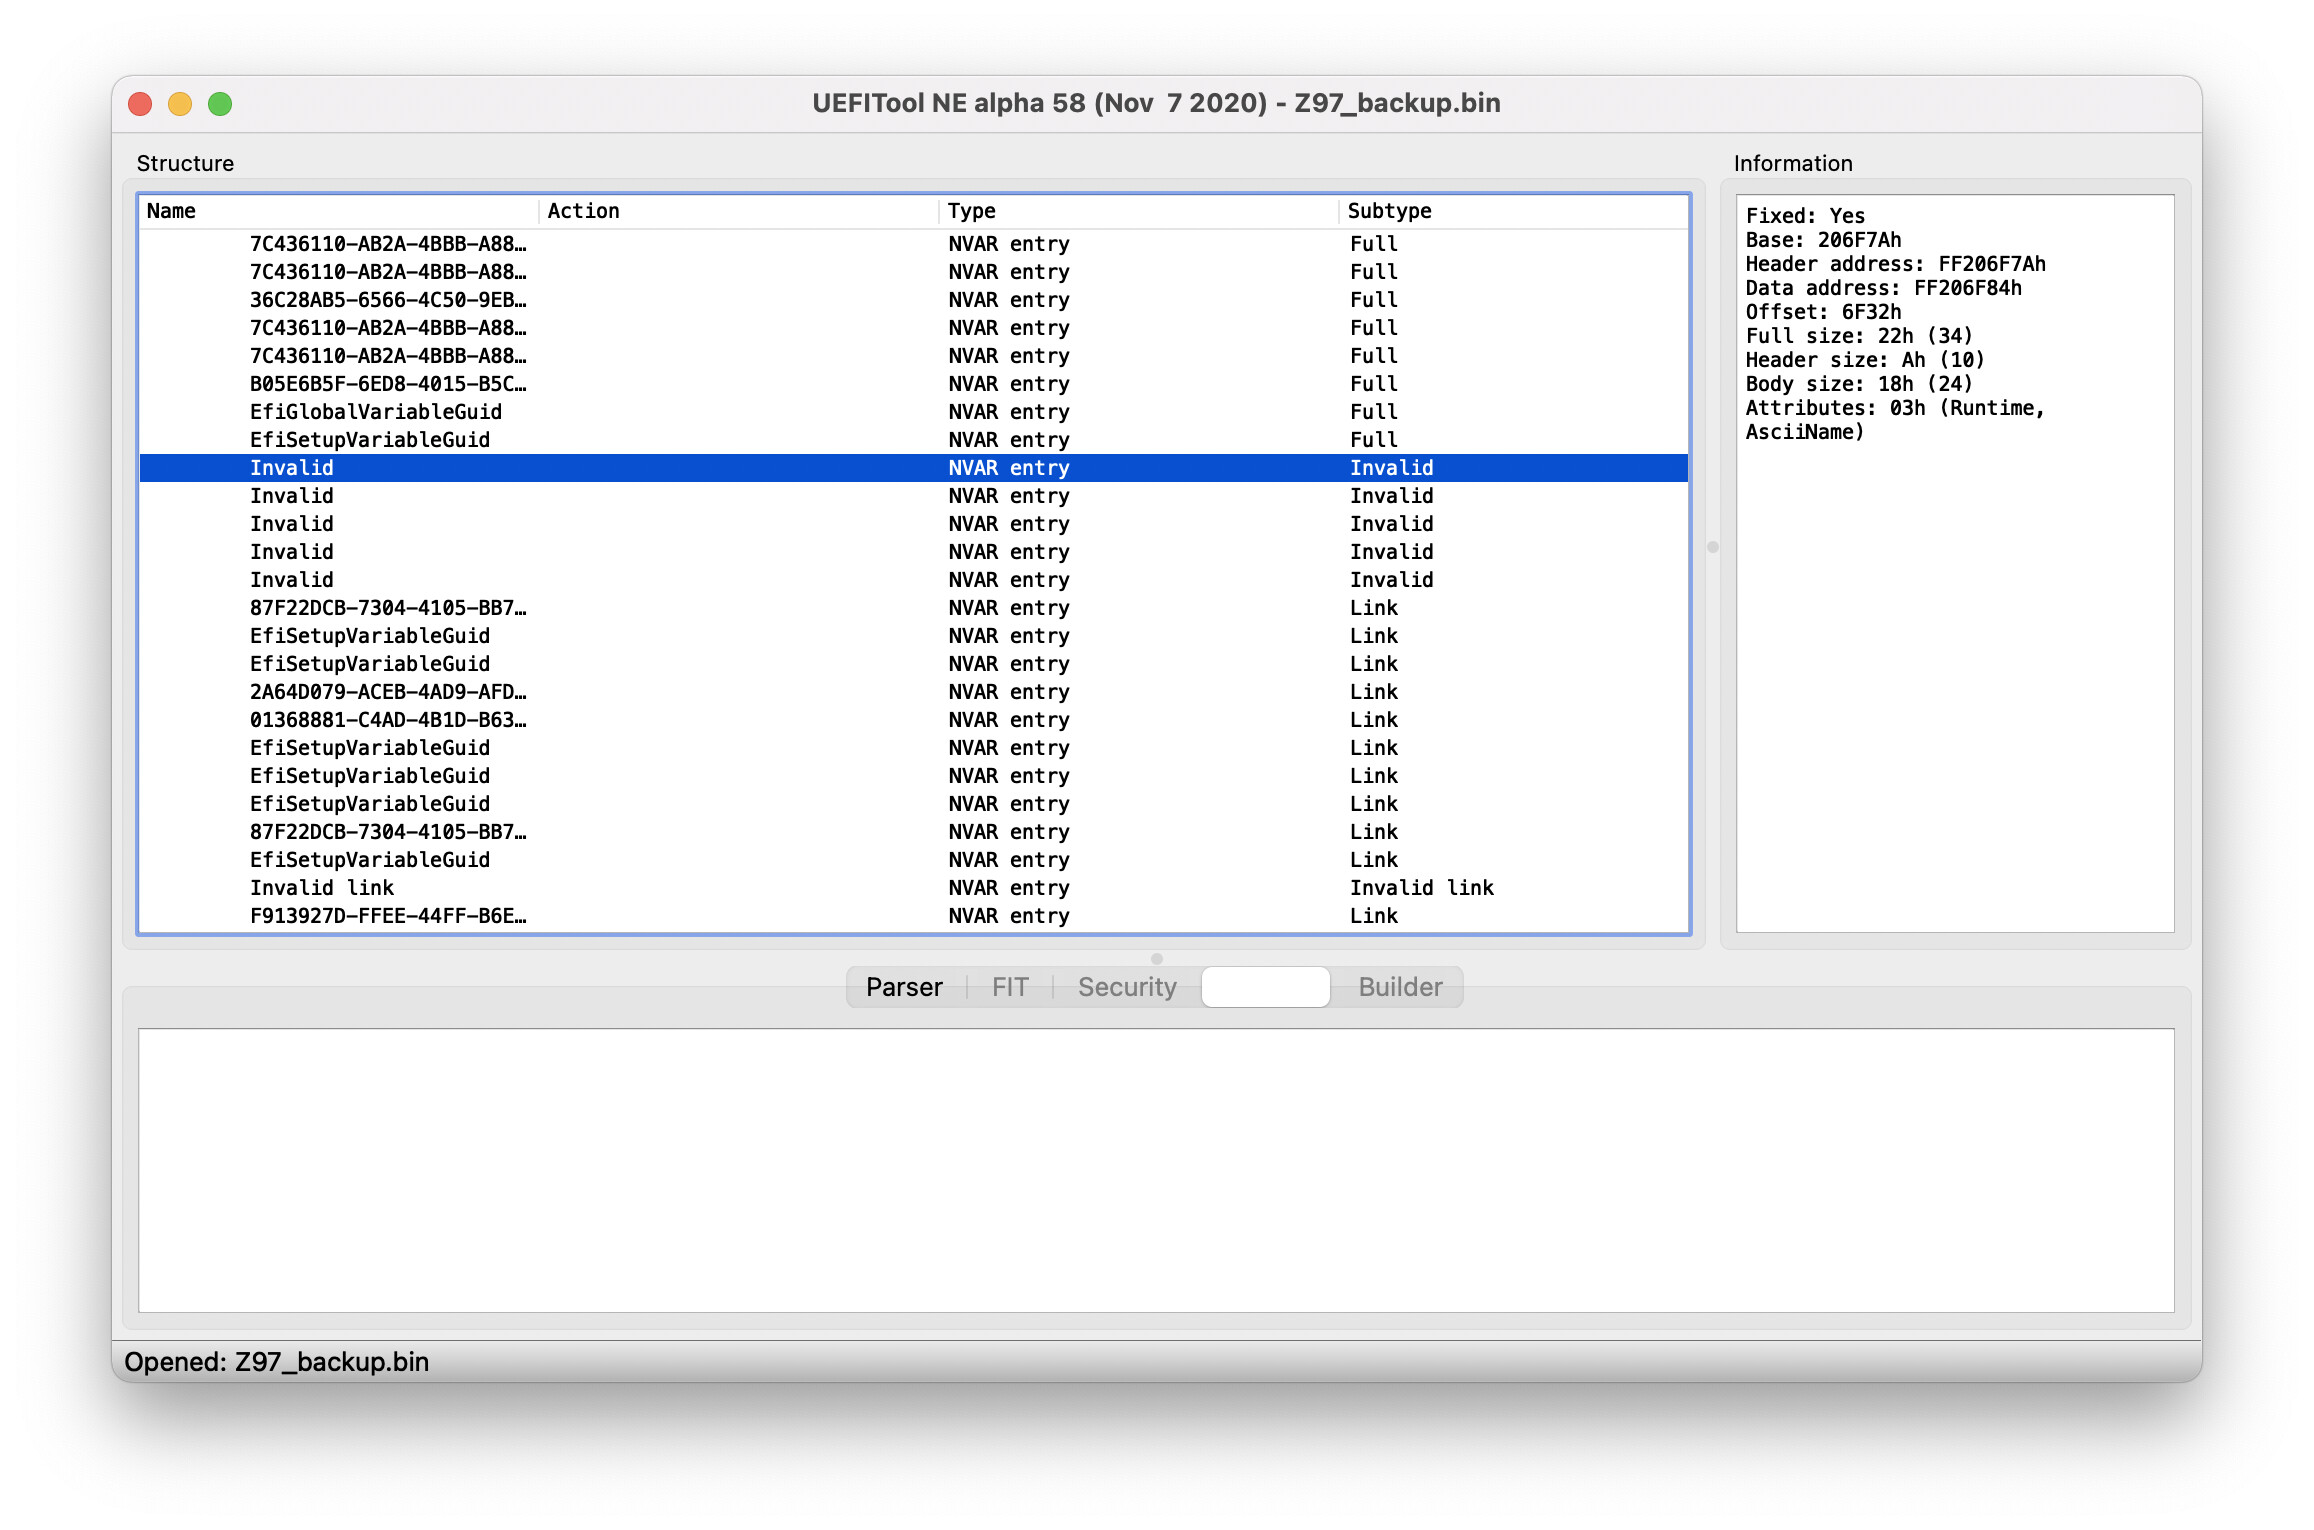
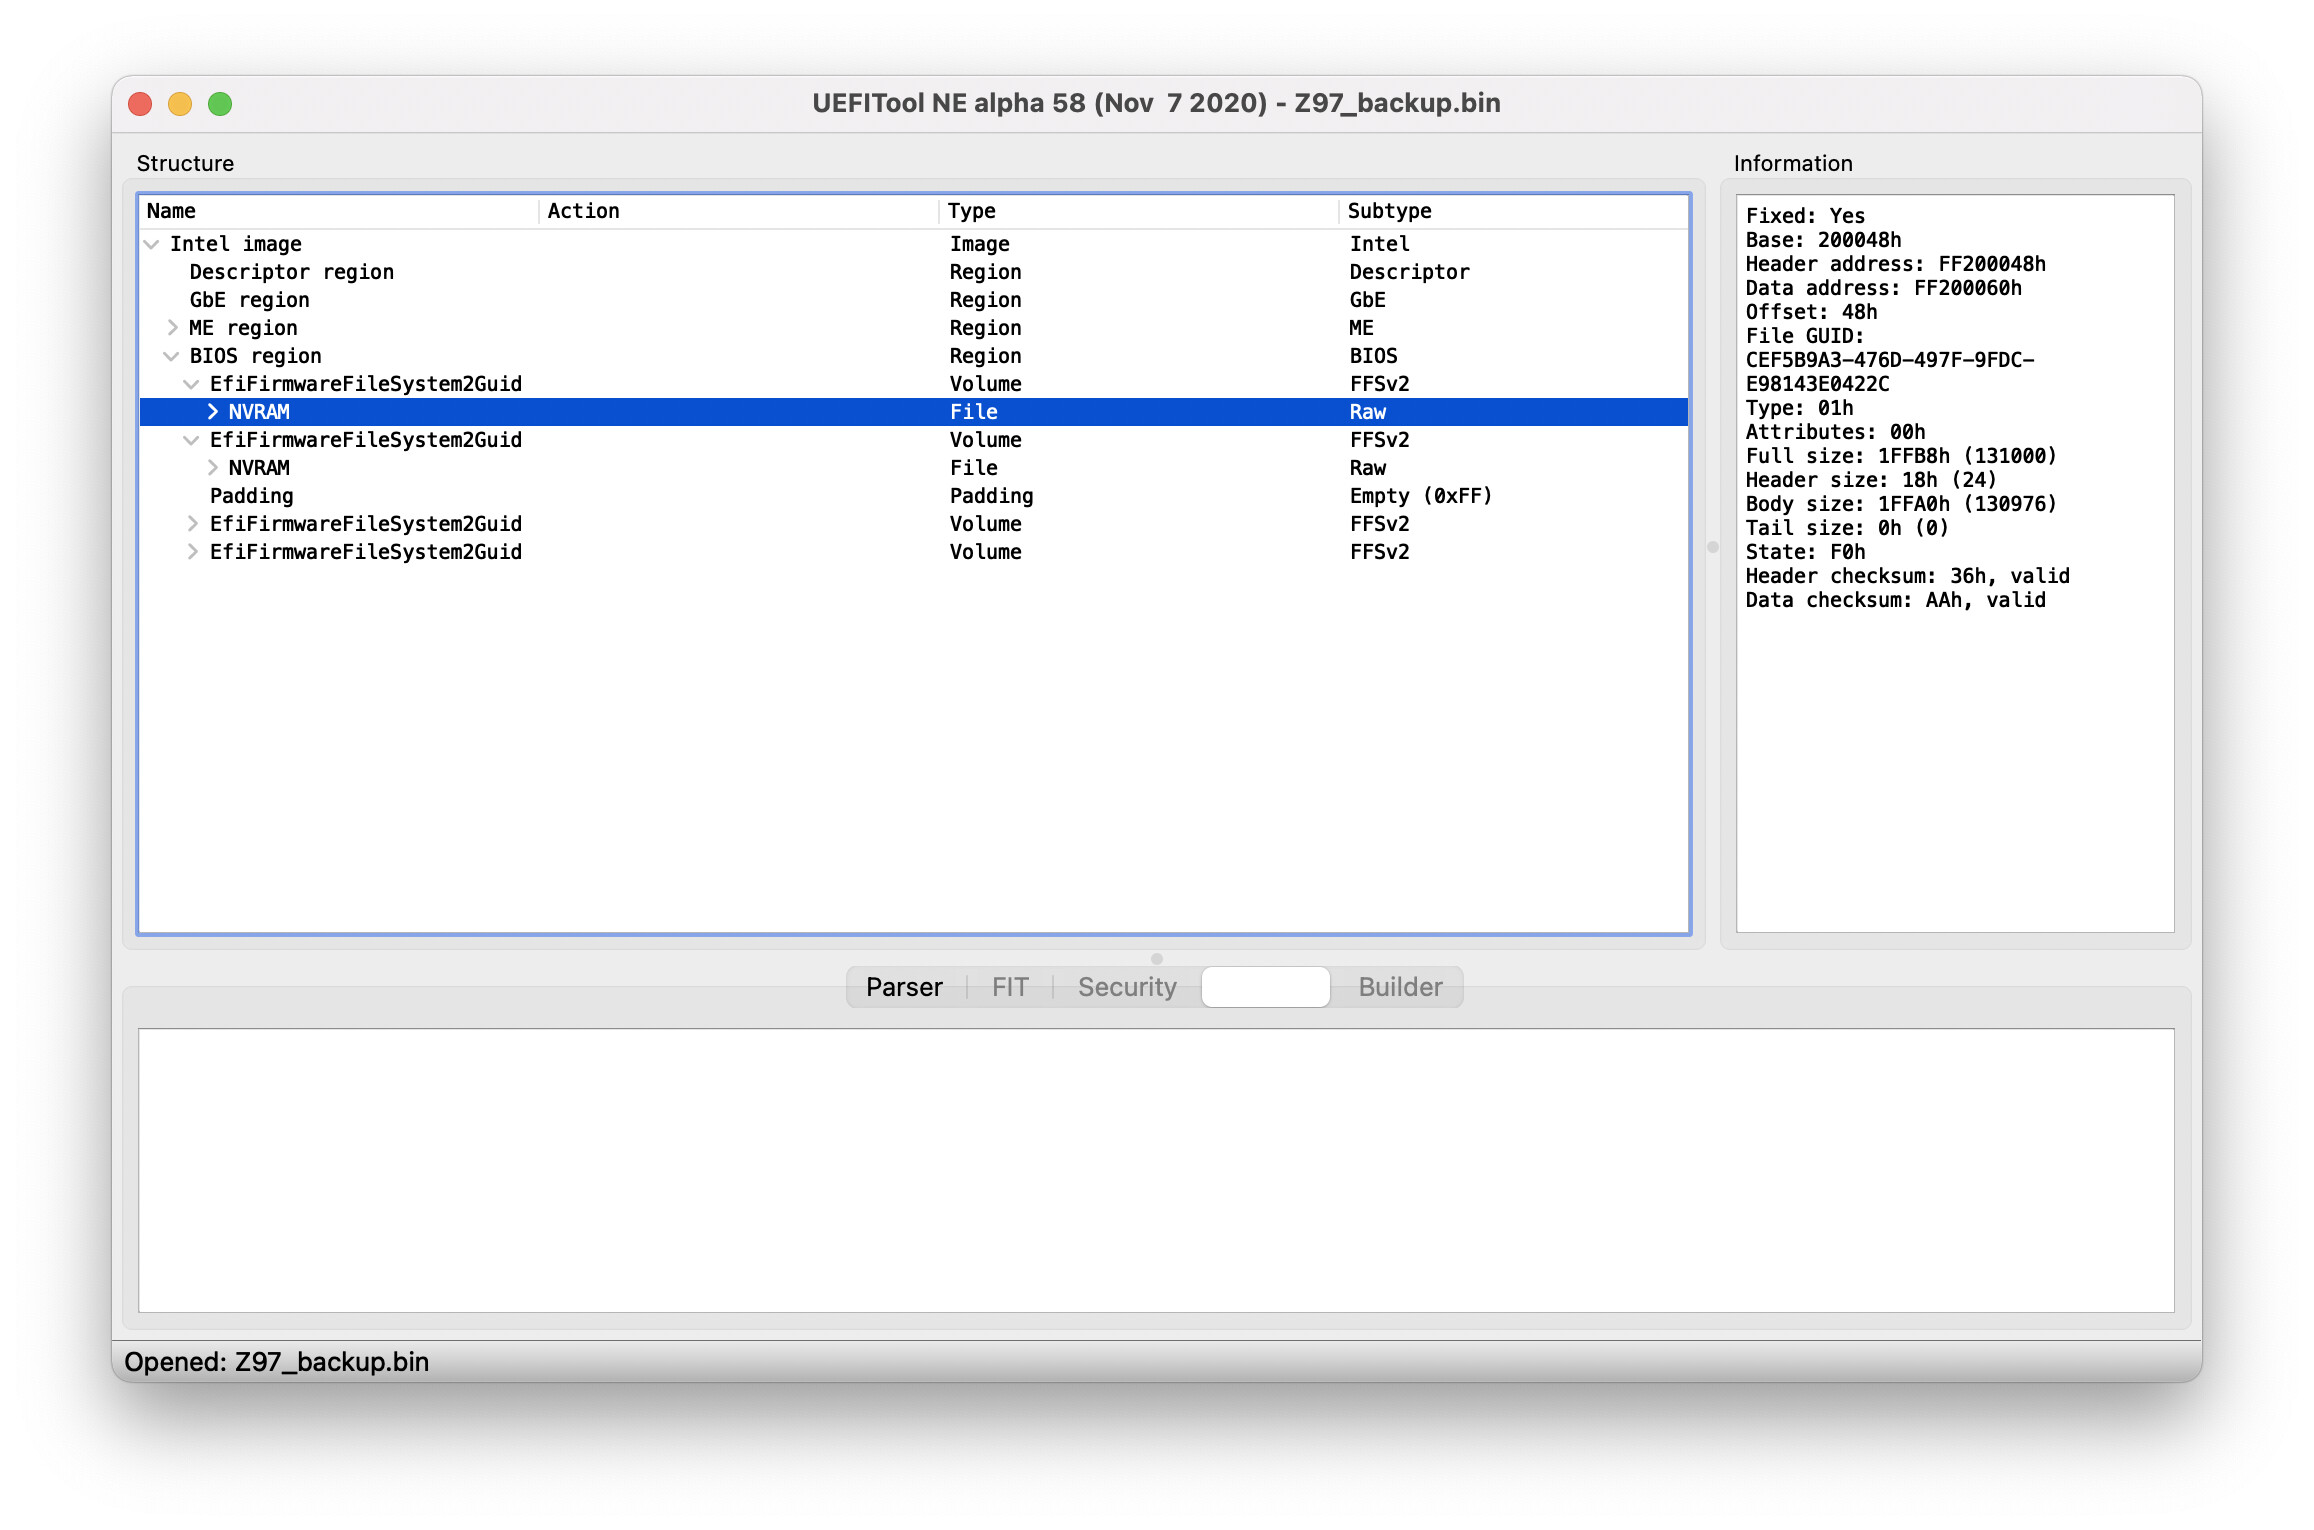
Unfortunately, no. I did not backup/dump the original BIOS. I thought it was unnecessary (I thought it’s simply the same image from Gigabyte website; and I was wrong) until I realized Q-FLASH seems to be tweaking the BIOS with the info from the onboard chip (MAC address, and maybe UUID, SN, etc) after I bricked the MB. I’ve checked with UEFITool.app that the corrupted BIOS, Z97_backup.bin, still can be read by the app and it seems to have most regions and modules intact except the NVRAM part but I could be totally wrong. (Maybe some bits might already have been overwritten by OpenCore bootloader.) I do see some parts in the NVRAM shows Invalid in UEFITool. app:
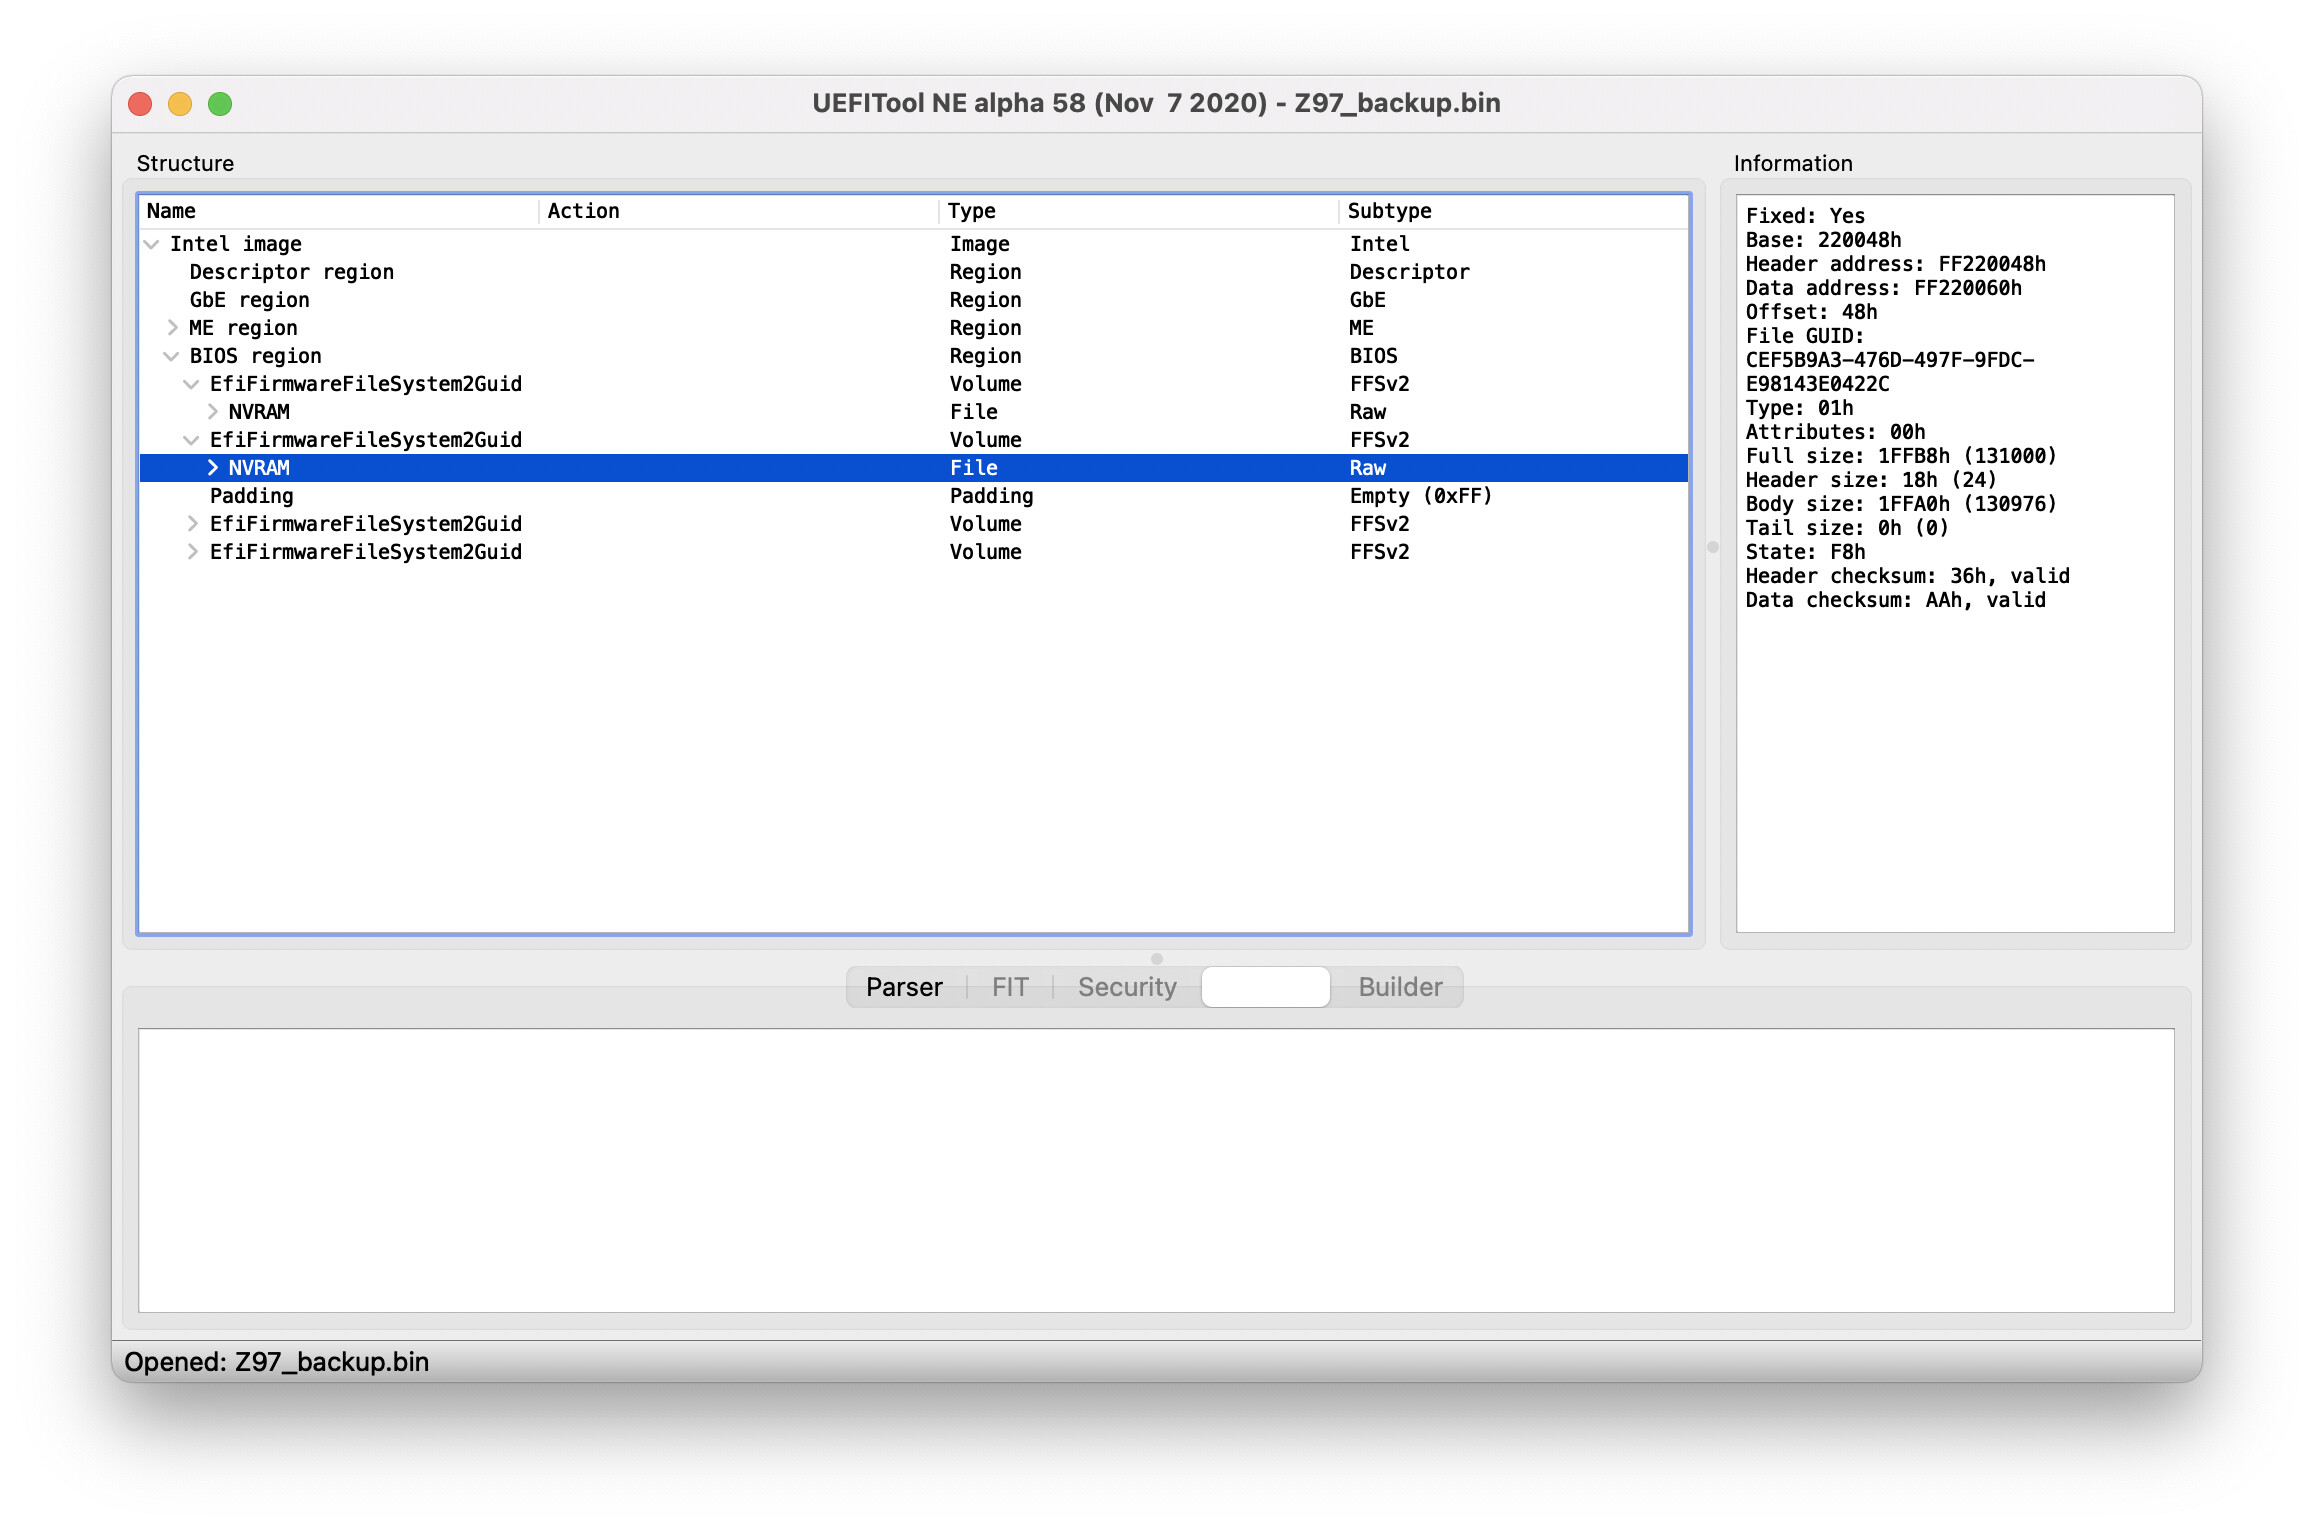
I tried to replace the the first NVRAM GUID (CEF5B9A3-476D-497F-9FDC-E98143E0422C) with the one from the stock BIOS image and remove the second NVRAM GUID (also CEF5B9A3-476D-497F-9FDC-E98143E0422C); flashed it, and it didn’t work either. (There are two NVRAM GUID (CEF5B9A3-476D-497F-9FDC-E98143E0422C) in Z97_backup.bin, while the stock BIOS from Gigabyte’s website only has one NVRAM GUID. However, I dumped the UEFI BIOS from my working P67 MB, and it has two NVRAM GUID too, and the stock has one NVRAM GUID only.)
As for the backup BIOS, unfortunately, I’m sure it’s corrupted too, as there are switches on this MB, which I can choose which BIOS (main or backup BIOS) to boot, and which mode (Single BIOS or Dual BIOS) to boot. After I corrupted the main BIOS with OpenCore, I switched to the backup BIOS and it was also corrupted.

The BIOS switches are at the bottom-right corner.
I also confirmed with Gigabyte customer support and I was told that I would have to RMA the MB if I need their help since both BIOS are corrupted so Q-FLASH won’t work, neither would the backup BIOS reflash work (since it’s already corrupted too).
I think it’s a good idea to flash it with another MB. I actually I thought of that too but my MBs are Gigabyte P67, HUANANZHI X99, ASRock Z390, ASRock X570, and ASUS X570; and mostly, I don’t want to brick another working MB. I might not think of this option at this moment.
I’m suspecting the brick is mostly caused by the BIOS image’s checksum as someone posted here regarding Gigabyte BIOS:
Flashing Gigabyte while avoiding "Invalid BIOS image"
However, another guy seems to have the BIOS semi-work with CH341A flash on Gigabyte MB:
Gigabyte Z390 Designare - BIOS Flashing with CH341A possible without desoldering?
With a properly flashed Gigabyte stock bios the board will boot, otherwise it’s something else.
Flash Gigabyte stock bios to the spi chip, read it back in a separate process, save the newly read content to a new file, compare this file to stock bios- they have to be a 100% identical! Clear CMOS! If the board doesn’t boot it’s no longer the bios.
The NVRAM content will be rebuild (except board specific information if stored there), it’s normal that stock bios does have only one volume, second volume will be built and filled automatically. Board specific information isn’t necessary for booting/ working properly!
Unfortunately, flashing with the stock BIOS from Gigabyte through CH341A doesn’t work after another try. Also, it seems only NeoProgrammer.exe can flash the MX25L12873F BIOS chip. I’ve tried CH341A.exe rev 1.29 and rev 1.4 and ASProgrammer.exe but all of them showed me errors when I flashed the chip. Searching the posts of MX25L12873F shows me many users having the similar problems when flashing this chip. I’m suspecting maybe the flash isn’t done right with NeoProgrammer.exe either but after the flash, the verification shows success with all the flashing program I listed above.
I am not sure if it’s possible that the reboot loop could be caused by the BIOS chip being locked as read-only and making the MB can’t be functioning correctly. The clue comes from the SERG values are varying to different values sometimes when I flash, erase, or unprotect the chip; it is also not allowing me to assign the SERG values I want.
Anyway, I decided to RMA this MB through Gigabyte.
I really hope I can find out the root cause of this problem (OpenCore bricks BIOS chip) as from all the posts I could find, the MB owners either RMA their MB or flash back their Gigabyte MB with the backup BIOS.
Hey @shiecldk, I’ve also have this problem with installing OpenCore with the same motherboard Z97X-UD7H. Have you figured out a solution for the bios and the cause of why OpenCore bricked it?
Also is there by any chance you can buy a new bios chip with the firmware pre installed? Or is the CH341A the only way.( I have one on hand ready to go)
I’m hoping to get this up and running too since I wanted a cheap Thunderbolt 2 board That is actually reliable without any add-on cards. I need it for audio interfaces so I can’t live without thunderbolt ![]()
Any help would be appreciated ![]()