Dear all forum members, i have a problem with my motherboard bios. i’m newbie,so i’m sorry if may be this is not the correct section.
the point is: i need to add an EDID data into my bios since there are no one of preinstalled EDID data in the bios suitable with my lvds screen resolution (1024x600). and there are no option in the bios to upload any custom EDID data.
last condition: 1. i try to make .inf file with this panel EDID to override the driver (i use windows7 sp1) and i found that intel hd graphics doesnt support EDID override method.
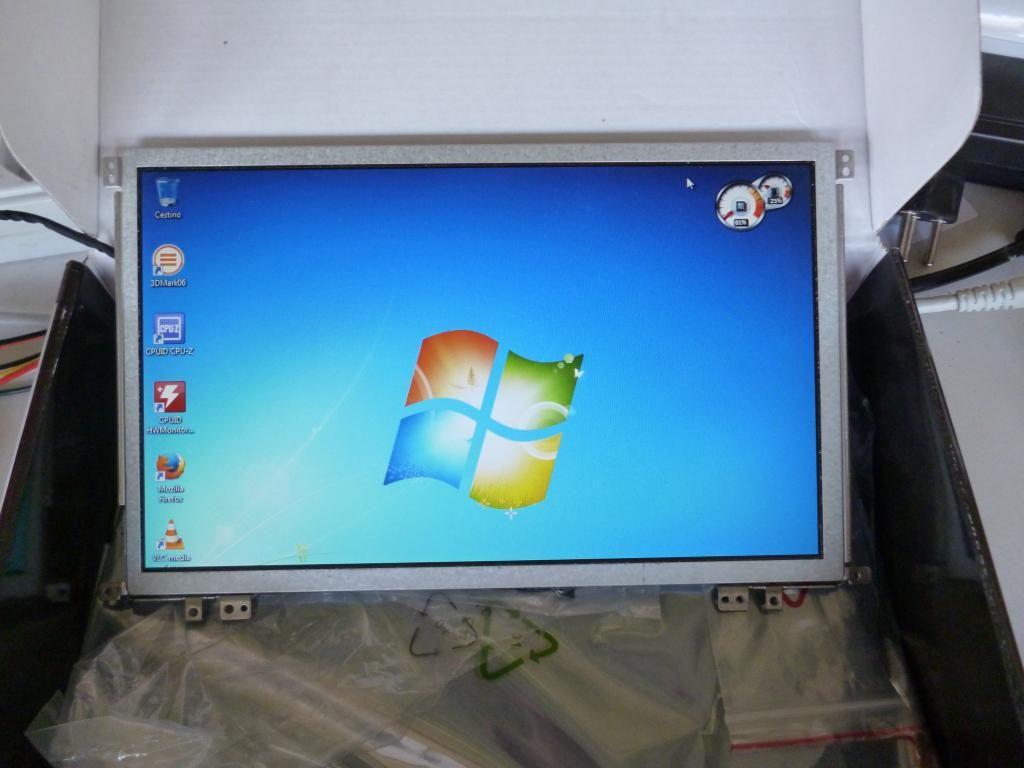
2. the best one that i can do is use 1024x768 EDID from the bios. it makes the screen works, but i cant see the lower part of the screen (windows task bar) since i “lost” 168pixel of vertical size. so i think, i have no other choice except modding the bios. but i have no any experience to mod the bios.
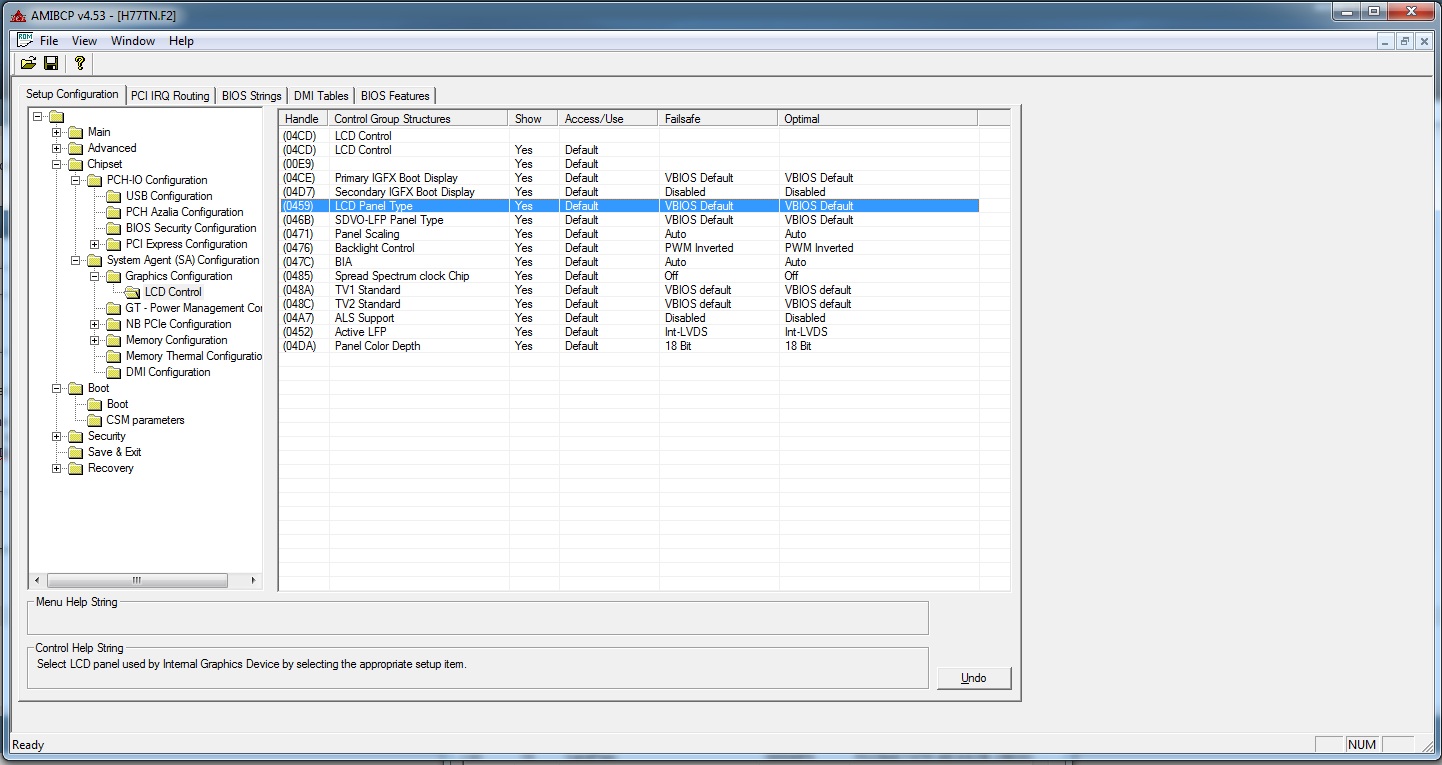
3. i try to open the .f2 bios file with MMTool Aptio and AMIBCP v4.53 but, i dont know which module that i need to edit, and how to do it.
please give me a guidance how to solve this problem…
I have attached a VBIOS with a 1024x600 resolution. Open BIOS file in MMTool, go to Replace, check link present, select 8086,162 and browse for the attached 8086-0162.bin, then hit replace button and save. Flash this and test. If I were you, I would start by updating everything with UBU (which you will find here) and then use MMTool with the file I provided, to avoid any compatibility problems.
Dear Lordkag & Fernando, thank you so much, already downloading UBU and your mod file. but i left the computer in the company’s workshop where i’m working for. As in Switzerland, there are easter holiday until monday. so i can try this on next tuesday. I will reporting to you soon.
Actually, I think you should avoid using that VBIOS and rather keep it as a last solution. The resolution may only work while booting, but not after. You should have provided more info, like what video card is used (exact model) and type of the connection. There is a way to input DTD (EDID Detailed Timing Descriptor) data, but I don’t know how you could obtain that. The links you provided do not work, but I managed to get the datasheet and it is blank, no EDID info.
You should instead create a custom resolution. For Intel you have this page.
here is the datasheet with edid data. i’m sorry about the datasheet dead link, because 3 days ago, it still works.
for the costums resolution, i already try it, but since in bios i select 15" 1024x768 screen, i make costum resolution with 1024x600, and set the porch. the results: it works to 1024x600, but there are a big black frame on the top of the screen even i try to “play” with front and back vertical porch settings
Another things that make me confused, why in the bios update download from gigabyte website, there are two bios files? what the differences between "H77TN.f2" and "H77TN_M8.f2"? which one of them that i need to modify?
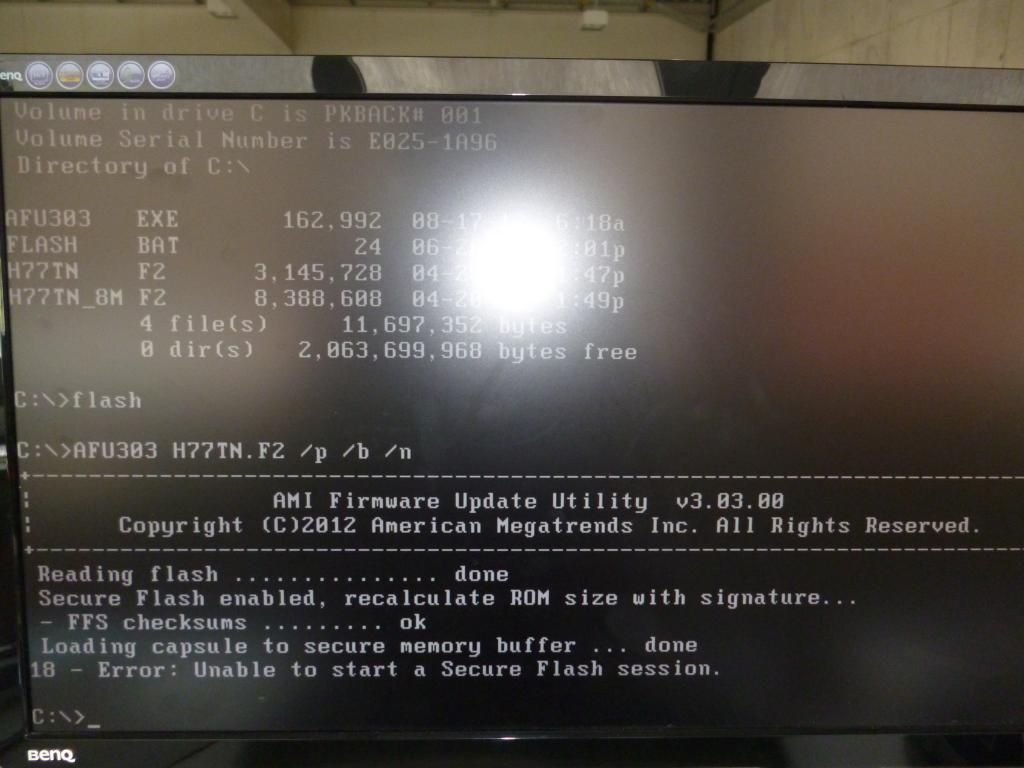
1. without ubu update, i replace the 8086-0162 files to both “H77TN.f2” and “H77TN_M8.f2” using MMTool Aptio and flashing the motherboard with this files, but it failed with message: "unable to start a secure flash session"
2a. i replace the 8086-0162 files to both “H77TN.f2” and “H77TN_M8.f2” using MMTool Aptio and update everything with ubu. but when try to flashing it at motherboard, it also failed: "problem opening file for reading"
2b. because i think when we running ubu, it change the H77TN.f2 become bios.bin that makes afu303 cant read it. i rename it back to H77TN.f2 and try to flashing it again, but failed again with message: "unable to start a secure flash session"
any idea, why it happen like this?
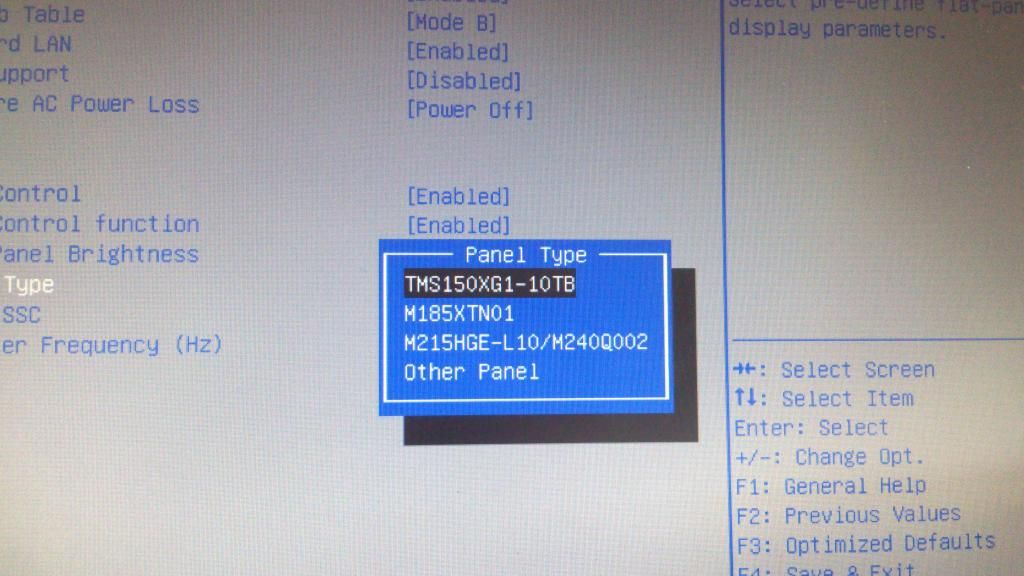
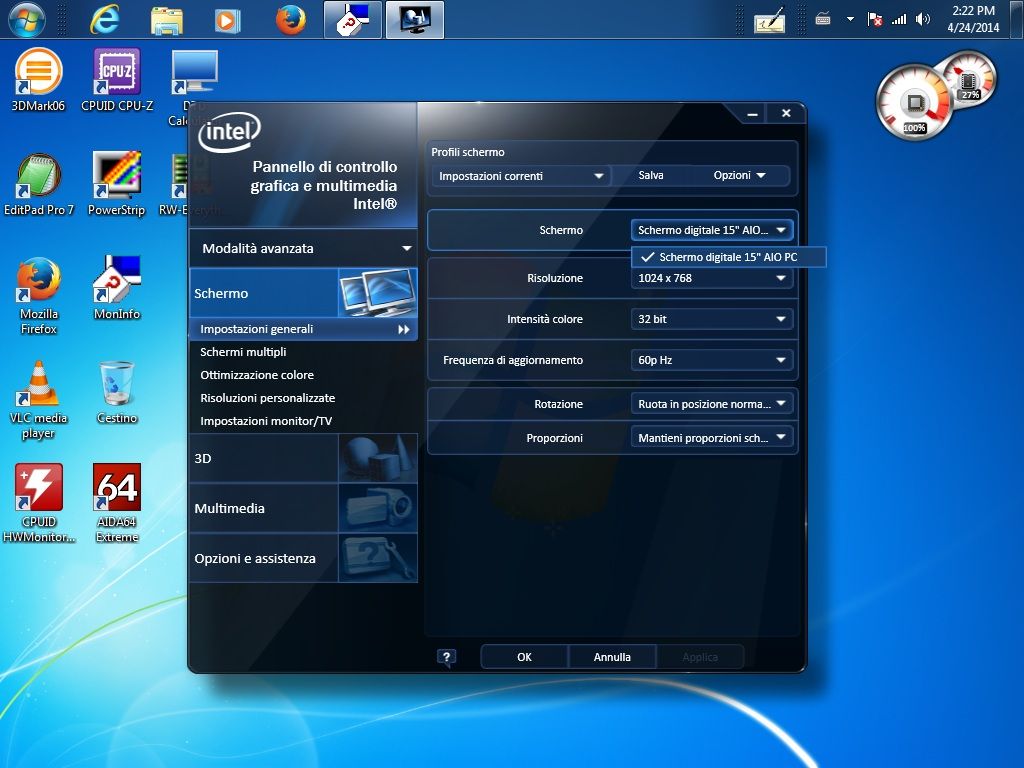
here is the original lvds screen selection in bios
tms150xg1-10tb: 1024x768 (the one that i use) m185xtn01: 1366x768 m215hge-l10: 1920x1080 other panel: i dont know the function of this. it must be made to detect the edid from the lcd panel automatically, but doesnt works
intel hd graphics driver always following the edid data from this bios.
Your BIOS is protected against modding. Maybe it can be bypassed, but you should rather start with this. You should get the EDID from your monitor, because the pdf is missing some bytes. Use MonInfo or madVR and get the raw data. Then you can use this for your work.
If this doesn’t work, there is a way to input this in the VBIOS. But you haven’t provided the basic info that I requested: what video card is used (if Intel, what CPU), how is the monitor connected. This might not seem important, but it is a step in the right direction. Until now you provided one useful information - the BIOS to extract the VBIOS - and one half good information - standard EDID.
I was about to abandon this, because the datasheet I have found had no EDID info, leaving me to think that you haven’t even searched or read anything. If you provide all the info, including raw EDID data straight from monitor, maybe I will take a look. But only after you have tested the above method and all the others you could find. There is however no promise that I will start to work on it right away.
ok, i will try it…and will try to extract the raw edid data directly from monitor also.
basic info as your request: 1. intel hd graphics celeron g540 2. the monitor connected via lvds cable and 40pin lvds port from motherboard
but during bios flash & windows installation, i use normal benq monitor via hdmi port. because the default lvds settings in motherboard bios is disabled. and after enabling lvds port from bios, windows recognize it as main monitor (and hdmi monitor as secondary screen) more or less similar like windows behavior in laptop/all in one pc.
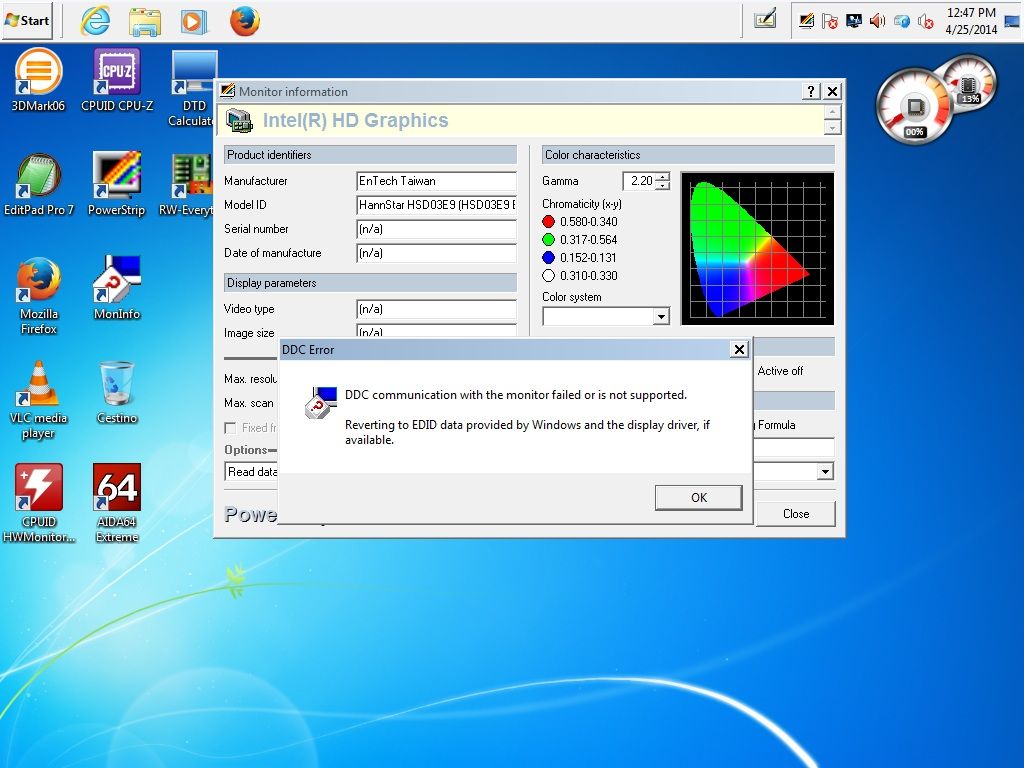
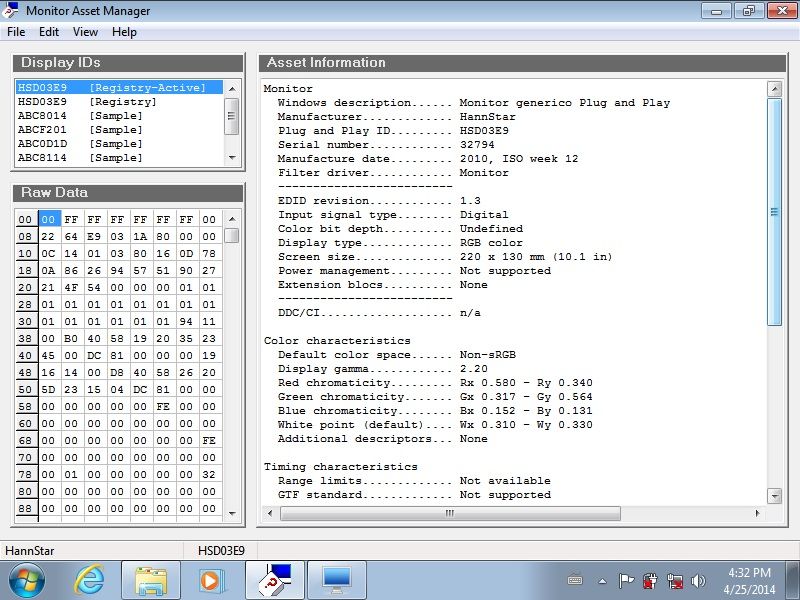
@lordkag i try DTD calculator. but i dont know why, the dtd calculator cant access the edid from intel hd graphics. and i try to put the edid manually from hannstar data sheet and put it in registry hack, but there are still no effect. the intel hd graphics seems only following the edid which sets from bios. screenshooted below:
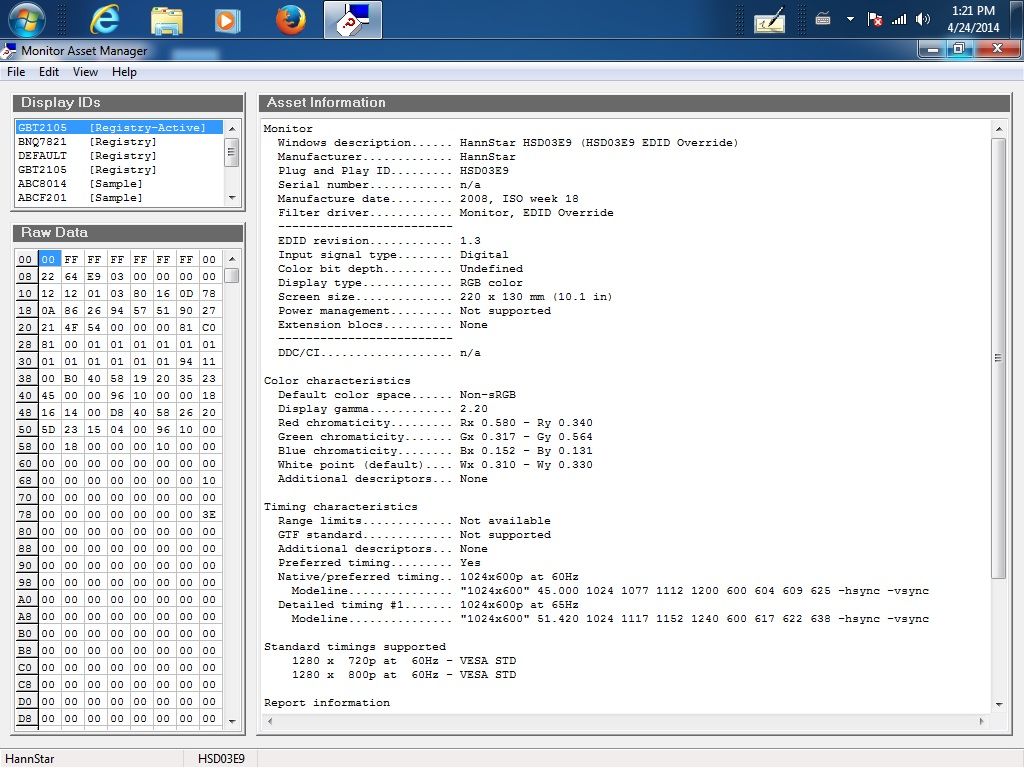
i try to check the raw edid data from moninfo, but it shown the edid that i overriding it with edid data from datasheet (remember when i trying to override the edid registry). screenshooted below:
You should try to change the resolution from Windows, maybe it will work.
Also, I told you to first read the raw EDID data with MonInfo, madVR and every software you can find. Only then you should have used EDID override. It may be possible that the raw data can’t be extracted (I get a real-time mode in MonInfo with direct access), but now it should be impossible, since you messed the registry with incomplete data.
I have asked the raw EDID data from monitor and instead you posted a picture of the registry override. I don’t know if you expect me to confirm the obvious or to extract the data one byte at a time. Let’s put aside that you are trying to connect a laptop screen to a desktop. While I am left with the heavy work of inserting this to VBIOS and tweak it to work like in a mobile VBIOS + avoiding the BIOS protection, I have only requested from you to provide the data for immediate use. Instead you post a picture with some bytes that might not even be right for your monitor. I’m sorry, but I think you are on your own on this one.
i’m sorry for your inconvinience…the edid in registry already override since i try to solve this problem at the beginning…and when i try to get it today, only the override one appeared…i know, we need the original one, but please tell me how to get back the original edid data? should i format&reinstall the windows? be patient, please…i’m trying to looking the way to get it back…
i’m sorry for your inconvinience…the edid in registry already override since i try to solve this problem at the beginning…and when i try to get it today, only the override one appeared…i know, we need the original one, but please tell me how to get back the original edid data? should i format&reinstall the windows? be patient, please…i’m trying to looking the way to get it back…
but wait…the original edid that i override at the beginning is not the raw one from the screen,i remember…its edid that windows/intel hd driver taken from bios (tms150xg1-10tb)…
from entech web site i get this statement: "Monitor Asset Manager is a Plug and Play monitor information utility that works under all 32-bit and 64-bit versions of Windows."
so i realize that it moninfo only can read the raw data for pnp monitor…and my hannstar are not pnp… thats why in moninfo that i screenshooted there are no monitor with (real-time) status…its only shown the (registry-active) one…
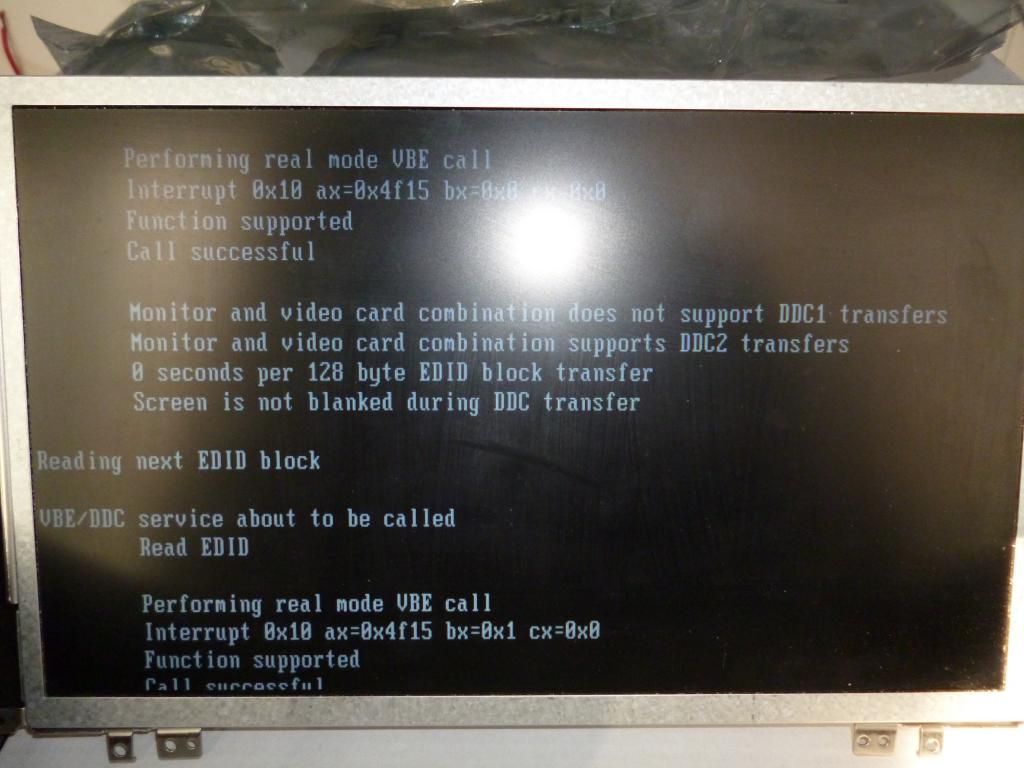
today i try many software to extract the raw edid data from the screen, for example: powerstrip:
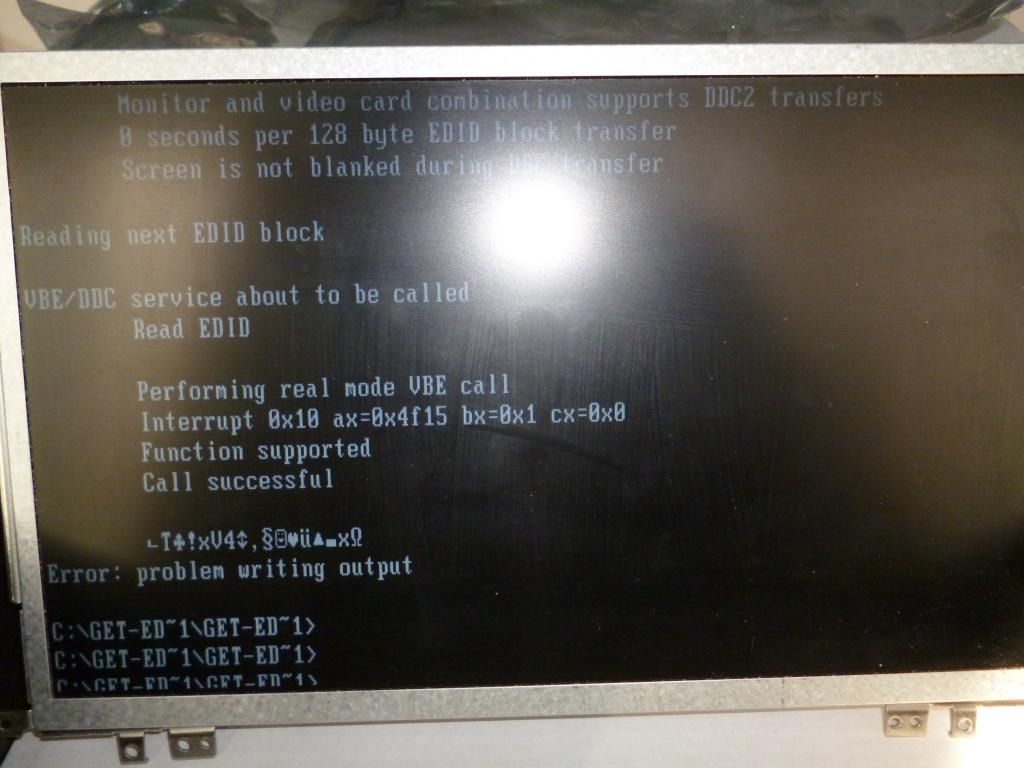
get-edid/read-edid:
but still can’t get the raw edid data.
finally i put back the screen to the original laptop from where it taken (asus eeepc 1001p), installing new windows on the laptop and try to get the raw edid data from there. but also still can’t get the raw data.
powerstrip: failed, the error messages are similar like in the one in gigabyte
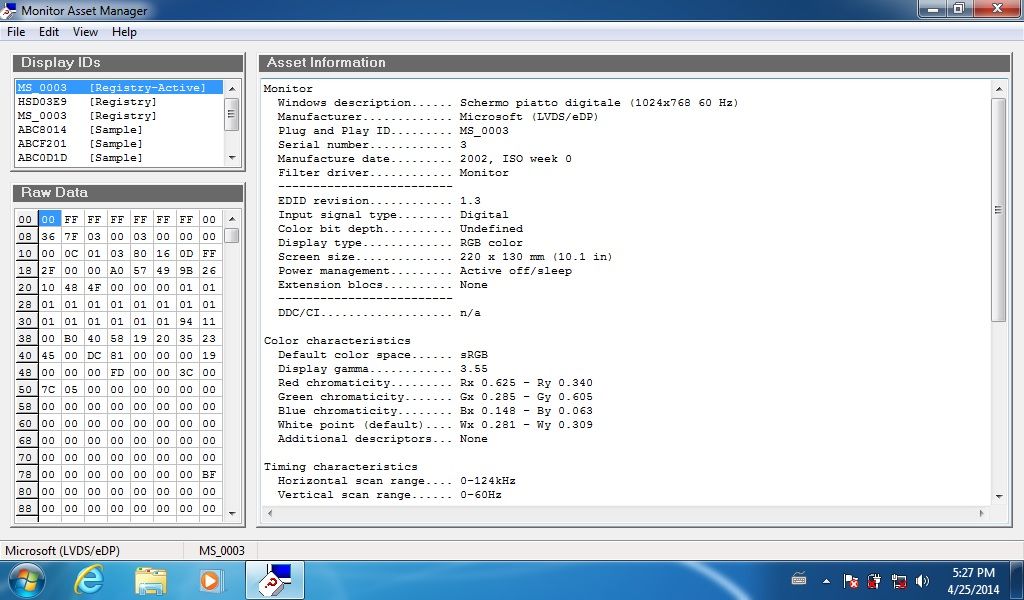
moninfo:
the edid data from here also only from registry (of course without override), not from monitor. there are some difference compare with the edid from hannstar datasheet: the serial, batch, prod date for example
but the timing data still blank. so strange isn’t it?
attached the whole raw data from there in .txt format.
and then, i install the notebook’s graphics driver (intel gma 3150) and grab the raw data again. but the data here is very strange, it cant take even the manufacturer of the screen.
moninfo intelgma3150:
but if you think that this one better, i provide you also the raw data attached.
this is the best that i can get for today. i think no other way, we need to use one of them as edid data and hope its working well.
Providing the model of the laptop is the info I needed, as I can extract some profiles from the BIOS. I will start with some warnings: - I am not responsible for the data you provided. You have provided until now 4 different EDIDs, the EEE PC BIOS has another 3 DTD for 1024x600 resolution. Choosing the right one(s) is not an easy thing. - I am not responsible for the VBIOS mod. Even if I input right timings, I may screw something else, so it is your entire choice of flashing it. I don’t have a 100% success rate in modding, two users here can vouch for my failures. - I am not responsible for the BIOS flashing process, which will be done with special Intel or AMI tools to avoid the secure flash. - I am not responsible for the screen malfunction because of bad timings. I will use the timings from Asus 1001P, to be as safe as possible, but beyond that, is just luck. - I am not responsible for anything that happens. Let’s review what you are trying to do: connecting a netbook screen to a desktop mainboard that has LVDS connector for only a few standard screens. The mobile VBIOS has an entire section for inputing special timings for LVDS screens, the desktop one does not.
If you agree with all the above, we can move on. It is helpful to know why you need this strange connection and for how much time. This is to determine if I need to make permanent changes for all situations and accommodating with other screens, or just a temporary patch until your work is done with this screen.
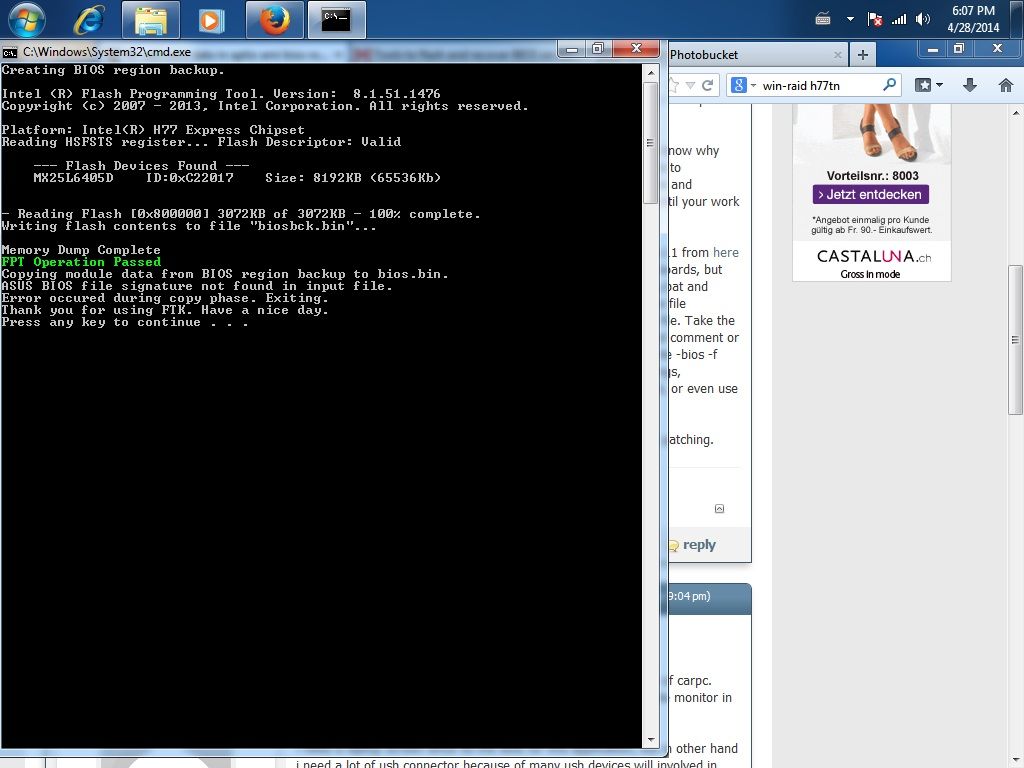
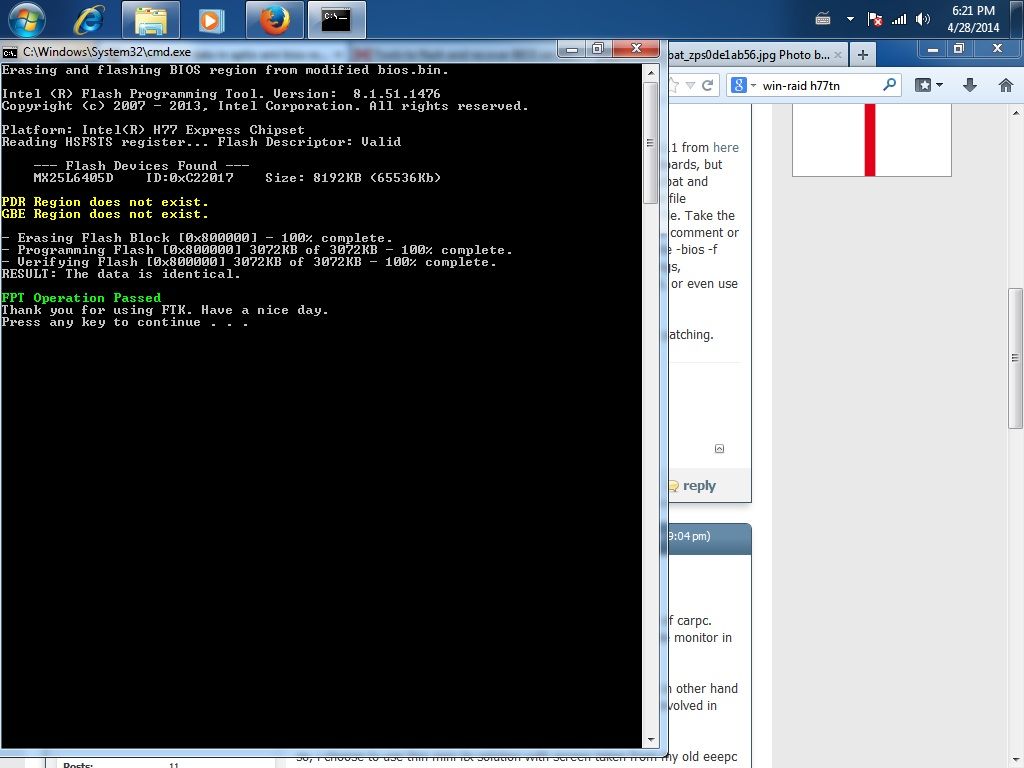
Next is to test whether the BIOS is moddable. Download FTK8 0.11 from here (CodeRush work detailed here, that offers some tools for Asus boards, but also a wrapper for Intel tools, which you will need). Run backup.bat and biosbck.bat, keep safe a copy of the .bin files you obtain. Get the file biosbck.bin. Use UBU and update only Lan ROM and EFI for this file. Take the modded bios.bin and place it in FTK folder, open biosrefl.bat and comment or remove lines 4-10, run biosrefl.bat, which will pass “fptw -rewrite -bios -f bios.bin”. If you succeed, I can update the VBIOS with new timings, otherwise you will need to use a method like this to remove lock, or even use a programmer.
Once you report back with your results, I can proceed to VBIOS patching.
ok, let me tell you the background…actually, i have a project of carpc. one of the problem of this project is very difficult to get a suitable monitor in terms of resolution and size. i have two option: using laptop based or pc based. i need a laptop screen since its the best for this application, but in other hand i need a lot of usb connector because of many usb devices will involved in this project.
so, i choose to use thin mini itx solution with screen taken from my old eeepc that not to be used anymore. one of my friend already done also with this solution. he use intel dq77kb motherboard. he can add his own edid to the bios easily more or less as the picture below
but when i try to buy, its difficult to find dq77kb and its quite expensive. thats why i move to gigabyte thin mini itx board as alternative and i think it will be no so many difference since they has similar basics structure. but i was wrong, i stuck with this problem.
if its possible, can you keep the other preinstalled 3 panel selection as original? so, the modified bios has 4 panel selection. but if we need to replace one of them, just replace the last one (m215hge-l10).
i planned to keep this couple (motherboard and screen) permanently inside the car dashboard, since i also modified the dashboard center panel to accommodate this screen, there are very2 small possibility to change again the screen except if they are broken. i know the risk of bios mod, the worst case, they will become a brick (both the screen or the motherboard). but i have no choice,so i will take the risk.
wait a moment, i need to do this all at my gigabyte desktop board, right? but you mention it for asus boards? whenever also capable with gigabyte-intel h77 series?
I think I was pretty clear on the actions to be taken. Because of this I had to make something error-proof, so please read the steps carefully and do as it is written. Once you run biosrefl.bat in its original form, two things will happen: it will replace biosbck.bin with a copy from your BIOS region (no modding!) and then it will fail for not finding Asus info. If you had run it the second time with editing, it will write the clean/original biosbck.bin, so we still don’t know if some protection is still there. Let’s hope that we are lucky.
Change the following in BIOS: - BIOS → Chipset → Panel type = Other Panel type - BIOS → BOOT → Launch CSM = Enabled - BIOS → BOOT → Launch Video OpROM = Legacy First / Legacy Only (you should see VBIOS version 2170 in Intel Graphic Panel → Informations)
Unpack the attached rar. Then do exactly this: 1. Run biosbck.bat only once, to obtain biosbck.bin. Store a copy of biosbck.bin somewhere safe on a USB flash. This step only once! 2. Run VBIOS_Update.bat and wait until “Update is done…”. It also tells you the next step. 3. Run biosrefl2.bat to flash this modified BIOS. 4. Reboot and test. Watch the screen during boot (POST screen), also in Windows. Change resolution in Win graphic panel and in Intel control panel, see if anything changes. Try in BIOS with “other panel type” or 1024x768, see if other displays are affected. 5. Loop 2-3-4 until you succeed or get "Testing VBIOS is done. Try #Addon-VBIOS_update.bat" 6. Loop 2-3-4 with #Addon-VBIOS_update.bat (at point 2. instead of VBIOS_Update.bat) until you succeed or get "Testing is complete!"
Report which one worked, what happened with others. I will say again that I only copied the timings from your laptop, so I’m not responsible for any accidents involving your screen.
EDIT by Fernando: The attachment has been deleted at 02/16/2017.
dear @lordkag , you’re correct, vbios is version 2170 (in bios video oprom i choose legacy only) thank you so much for your bios mod. i’m following your instructions carefully until succeed at the last step. but there are nothing change from the bios menu, windows screen resolution and intel hd graphic menu options. does it means my bios are protected for mod?