Hello!
I have been researching a lot over the past year or two learning more and more about BIOS and ME.
Now i have a NUC7i7DNH2E here with a BIOS issue (looks like it, it wouldn’t show anything after a windows update, running remote.
It powers up, ramps fan up and down and reboots after about a minute.
I would like to know, if there is still a way to get BIO2AMI or another tool, to get a flashable BIN file from the .BIO intel provides?
Or if someone could provide a known working BIOS dump for this model (BIOS seems to be identical between NUC7i7DNHE, NUC7i7DNBE and NUC7i7DNKE).
Best regards.
There’s as far as I can see not a complete image of the bios region, alle the UEFI volumes are separated and can be taken/ compared for themselves, but there’s no complete image. Dump your bios with a CH341, post it here or a link to it, mostly it’ll be possible to repair.
Thank you for the response!
Unfortunately i cannot yet link to the file i uploaded.
It is on google drive with file/d/ string being 1TTbCfZPRa2GMCSLO5RxeTjzyKA17Ibrh
Should this really be fixable, please do teach me, since i want to learn how to do this, i get quite some requests with likely dead NUCs due to BIOS.
Best regards,
REDHEAD93
This post is specifically meant for the firmware of this thread! Don’t use it for other machines- you risk a brick! Other systems will have another structure, other addresses, other places where machine specific information is stored!
Checking an Intel NUC firmware- for the example in #3: This is bios 0070, a little harder to find, but softpediastill has DNi70070.bio
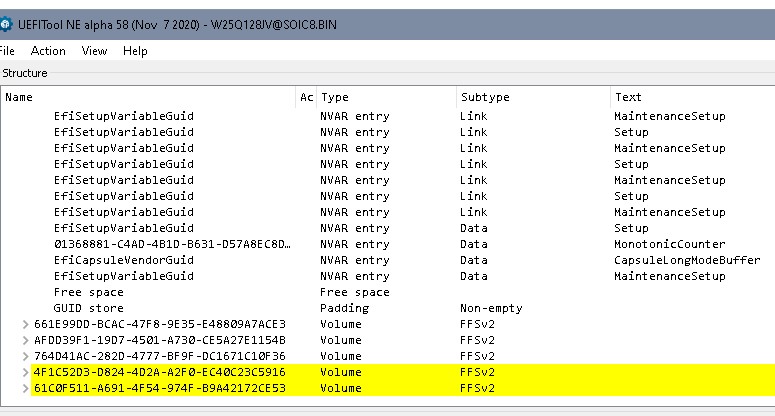
Open the bricked bios in UEFIToolNE:
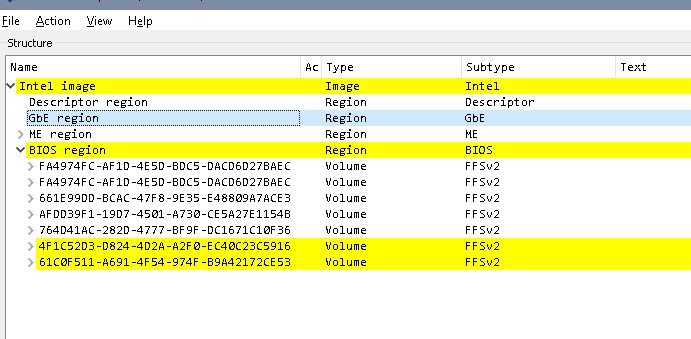
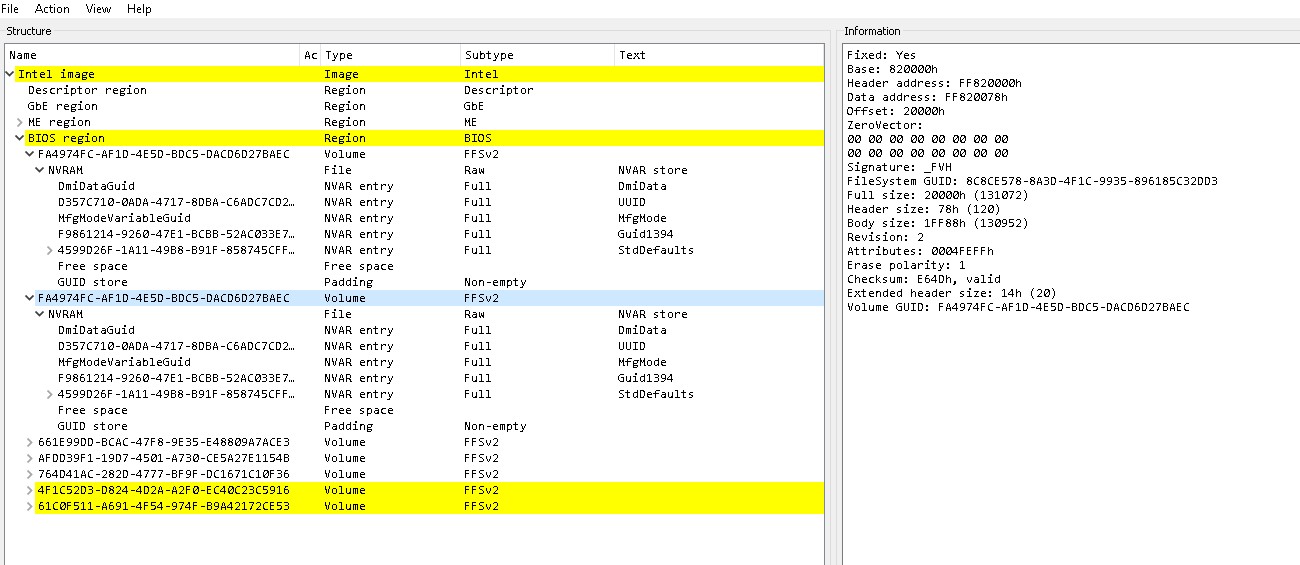
Check the bios region, the first 2 volumes with identical GUID are NVRAM, the other 5 volumes are static, meaning they should be identical to the update file.
Open the update file (corresponding verion) in UEFIToolNE:
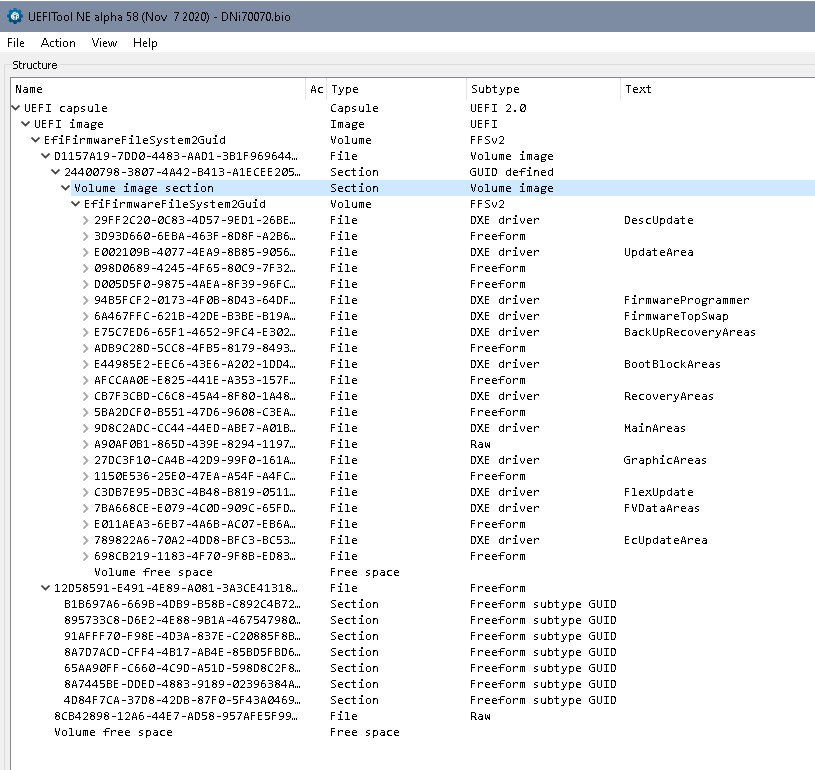
and open the tree:
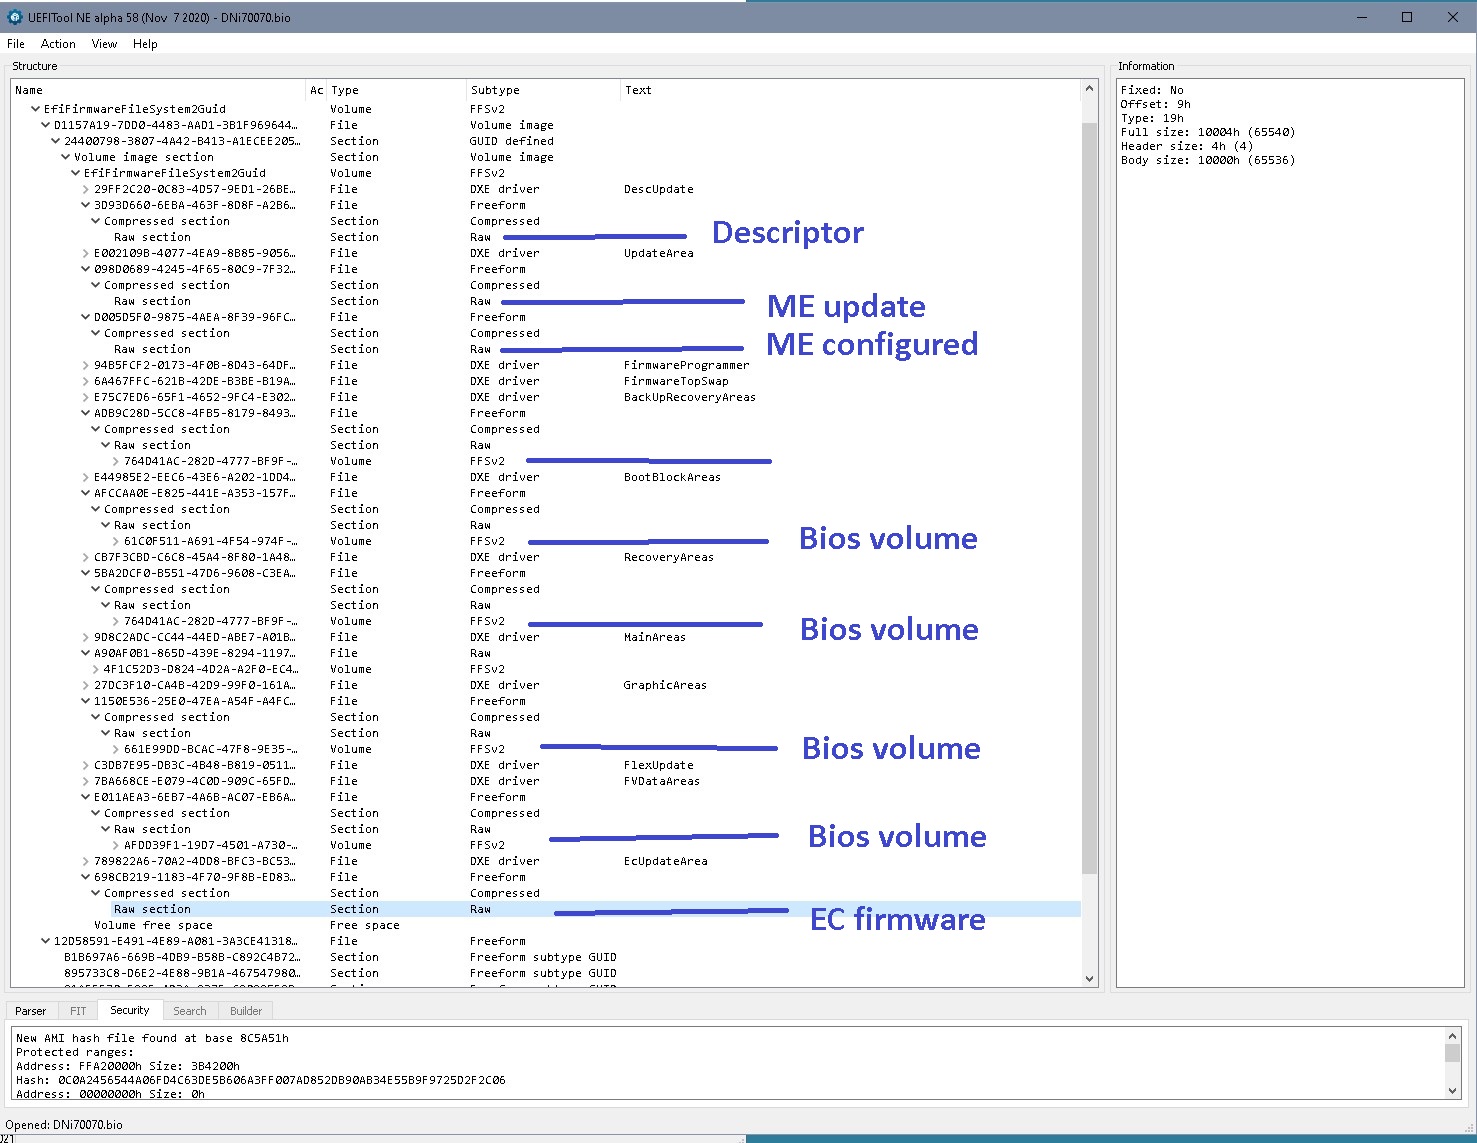
Extract all the volumes from bios-/firmware- dump and from update file (right click- “extract as is”) and compare them one by one with the corresponding volume from the update file. They have to be a 100% identical (which they were for the bios used here). If they’re not identical, try to find out where the update stopped, find out which parts of the firmware already were updated, so that you can decide to which version you want to go to. The release notes will give you the necessary information which downgrade might be possible. Look for ME version and/ or mcodes if you’r unsure whch version this might be.
For example: IF the last UEFI volume in the dump was already updated, and the update process stopped in the second last volume- take these to volumes and replace them with the stock volumes from the update file of the old bios version. Use UEFITool025 or UEFITool028- replace as is.
(Volumes can be extracted from the update file “as is”, for raw files use "extract body"
So there are few other things that could be wrong: corrupt ME, corrupt NVRAM, corrupt flash decriptor. Corrupt GbE wouldn’t keep a machine from booting, normally.
ME can be cleaned as described in [Guide] Clean Dumped Intel Engine (CS)ME/(CS)TXE Regions with Data Initialization
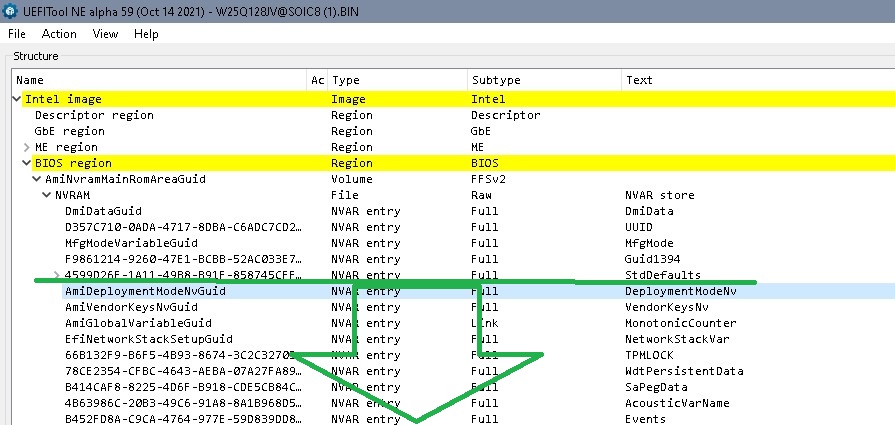
NVRAM can be emptied easily- there are two NVRAMs in the beginning of bios region:
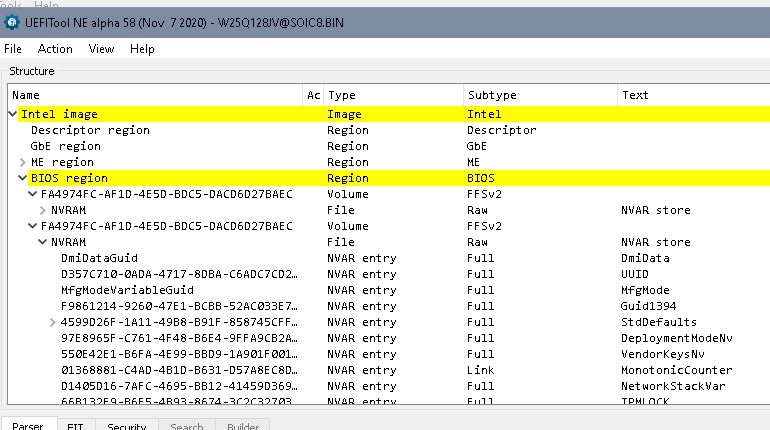
,
First picture shows beginning of NVRAM, in second picture look for the line ‘GUID store’, that’s the last part of the NVRAM, a list over all GUIDs built up bottom- up.
Some NUCs seem to have the machine specific informations stored in NVRAM, these should be kept (the GUID for the entries isn’t stored in the GUID store). In addition the default values need to be kept, too. For these models it’s safe to clear data after StdDefault and empty the GUID store for the GUIDs now no longer in use.
Save to delete:
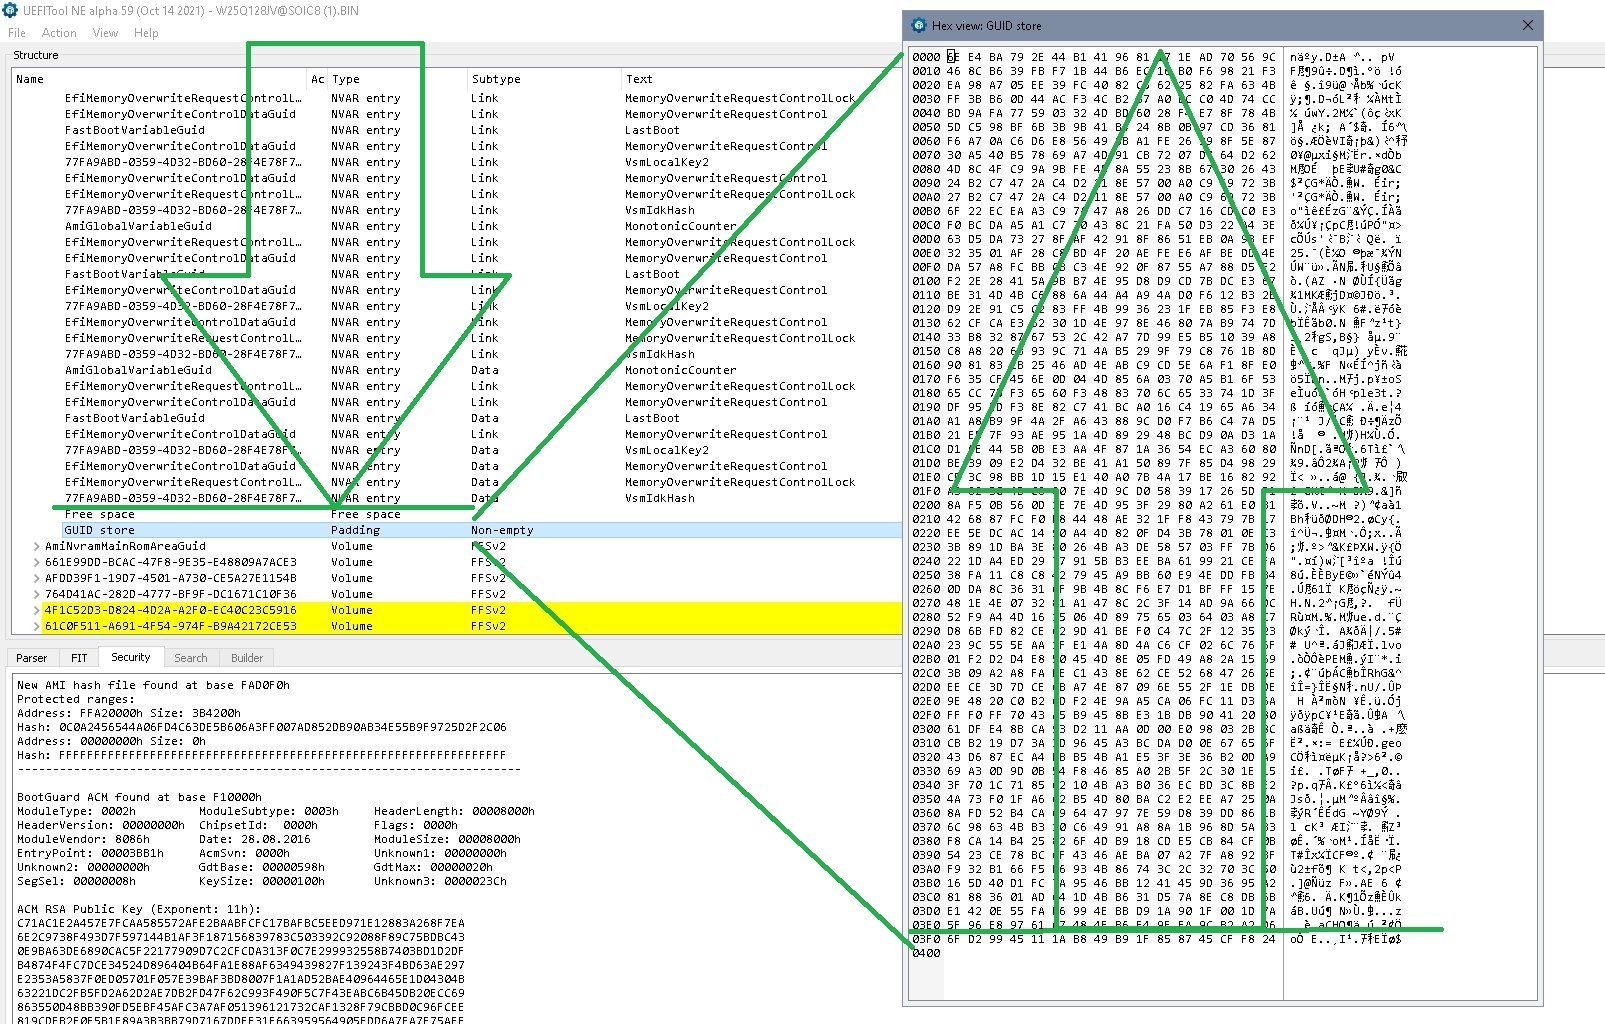
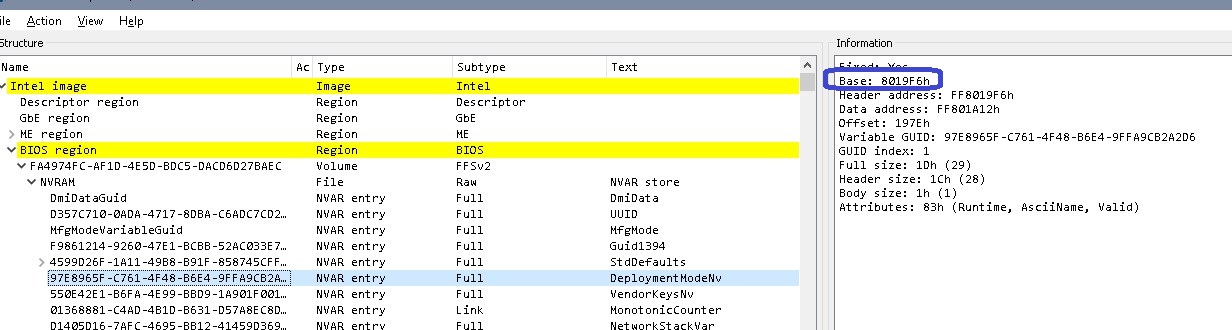
Search for the start adddress of the first NVRAM entry after StdDefaults in UEFIToolNE, note it (here 0x8019F6)
Search for the start adddress of the next volume in UEFIToolNE. The last bytes before this next block is the GUID store, containing all the GUIDs of the NVRAM, one line one GUID, all blocks despite the last in reverse notation and all GUIDs written from bottom (=last line) up.
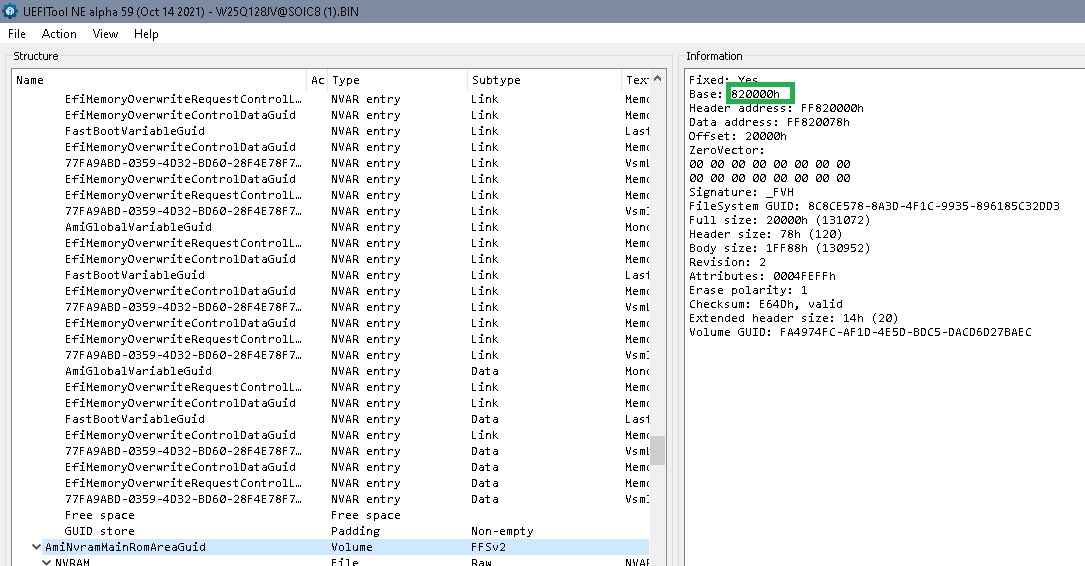
Start address of next volume or next padding is here 0x820000, since you want to keep the last line of the GUID store the block you want to empty/ fill with ‘FF’ ends at 0x81FFEF
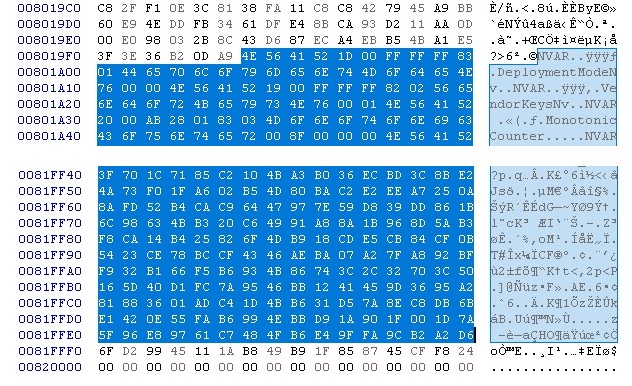
Open the firmware image in an Hex editor (HxD for example), right click, ‘select block’, put in the start- address (0x8019F6) and of end- address (0x81FFEF)
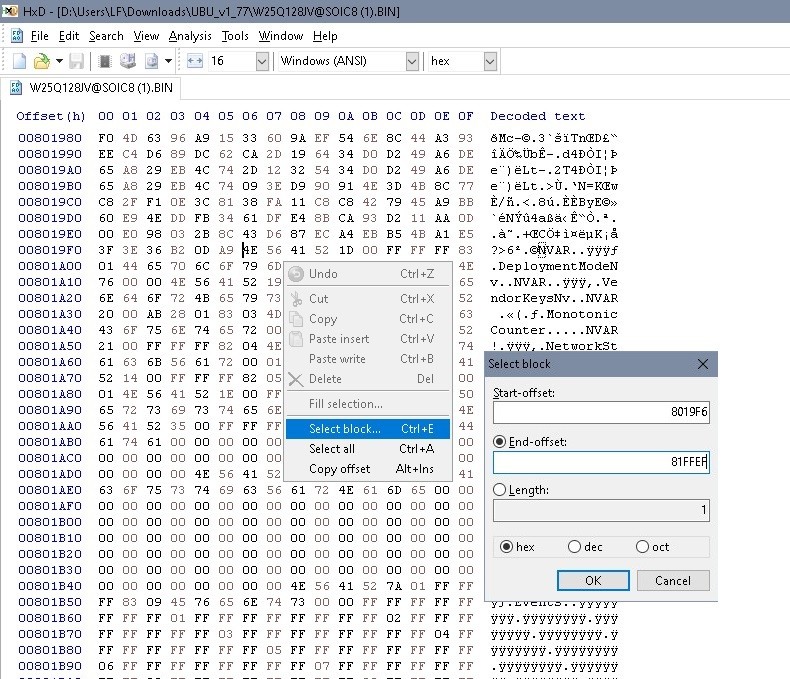
Block should look like this:
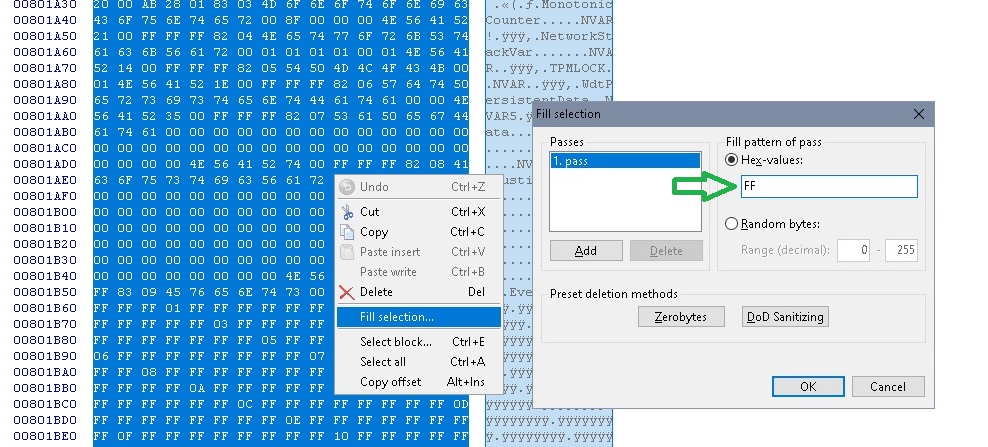
Right click into the block, select ‘Fill selection’, change ‘00’ to ‘FF’, OK
Check the results: Open the modified file and view the first NVRAM entry. It should still show the 4 machine specific entries, the volume for the StdDefaults (with its own GUID store), followed by FreeSpace and then the GUID store of the NVRAM volume. Last line of the NVRAM volume contains only the GUID for the StdDefaults? Next volume starts same address as before? File size hasn’t changed?
Do this for the second NVRAM, too. Result should look like:
@REDHEAD93 : Since the static parts of your dump were a 100% identical with stock, i emptied NVRAM. This should give you a 100% fine stock bios region with machine specific data saved. If this doesn’t work, one could as mentioned clean the ME. Another rare thing: GbE starts at 0x1000, GbE information (MAC) is at 0x2000. Might be an Intel- ‘trick’?
This post is specifically meant for the firmware of this thread! Don’t use it for other machines- you risk a brick! Other systems will have another structure, other addresses, other places where machine specific information is stored!
Dear @lfb6 ,
thank you for the nice explanation and file!
I have unpacked and flashed the file, however sadly to no avail.
It still Boots up, after pressing the Powerbutton, running the fan for 1 minute, resetting itself for a couple of seconds, just to start anew.
I first thought i had some blinking LED code, however it seems to just have been the Memory code, (3 white blinks) as it stopped after the first cycle.
I have tried clearing ME, however it seems to have changed nothing in the behaviour of the NUC.
I fear the CPU or something else that cannot easily be diagnosed/fixed, like the descriptor may be damaged (the nvmeSSD did blow up :think:)
I thank you profusely for the help, i will try to use the knowledge when i run into other NUCs with BIOS issues.
Just one question:
how did you know the BIOS version of the bricked BIOS was 0070?
Best regards.
Checked some other NUC firmware, GbE is definitely not OK. But- again- I don’t think a corrupt GbE will keep te system from booting and I don’t have a possibility to give you a 100% correct one.
You might try the attached file, this is firmware 0075 with all parts taken from the 0075 update file, GbE ‘repaired’. Just rename the files to 75_2.zip.001 and 75_2.zip.002 to get the image. EC firmware didn’t change between 0070 and 0075- since machine starts up there seems to be at least something ‘left’ of it. I doubt that this file will work either- but maybe wotrth one more try. Just as you wrote there might’ve happened other things to the machine. (What do you mean with descriptor might be damaged?)
Regarding version: You might search after version numbers in UEFIToolNE, often used µcodes or ME version does give a hint, Intel does have good release notes (DNi7_0075_ReleaseNotes.pdf).