On my G752VS ASUS notebook I have been experiencing problems for a while, latency issues mostly, slow folder opening, hangs on copy pastes. I had a flashed ROM running with updated MC, Network, and RST, nothing else as it’s a notebook. When I ran SIVx64 there were a lot of incorrect parameters, incorrect functions, in ACPI and PCI devices. I deciced to revert to as close as factory as I could get, cant do real factory cause I lost the drive that holds it and asus dont offer any media. So after first resetting my 960 evo with parted magic, i clean installed WIN10 (downloaded in Ubuntu), used the ASUS driver DVD for my model (which i luckily found at asustreiber.de) to install original drivers.
Ran SIV again, allready looked much better less of the same errors but still a few, system devices in win was also showing differences, significantly better scores with userbenchmark, and explorer way more responsive. But since SIV was still showing ACPI errors, I decided to also revert my BIOS to an original since I had wiped out one of the 2 MC files and only left a single one and figured that could be of influence, also wanted original RST back since SSD didnt score as well as before after reset. I used winflash /nodate to flash the freshly downloaded (latest) BIOS from ASUS.
Had minor improvements, still issues. So i thought i should use the /GAN method to flash the whole region and I will do so with the ASUS file. Since this is 2 kb bigger this didnt work. I decided I wanted to know what the difference between these 2 files was so i extracted the ROM with AFU and opened it and the ASUS in UEFITool 40, obviously the header changed the offset but the second padding was also not-empty instead of empty. I thought this was strange, so i checked in Hxedit and there there was also differences.
Figured I would winflash earliest available did that, compared still same differences. Opened the original in UBU, saved it without changging anything, flashed that with AFUWIN, and was slightly better, the padding file was ok now, but the other differences remained. Im attaching screenshots from those last differences, with the question, is it normal that these differences arise when flashing because I wouldd think not. And if no what to do, I allready tried ctrl+home+power on to restore factory image but it says recovery file not found…
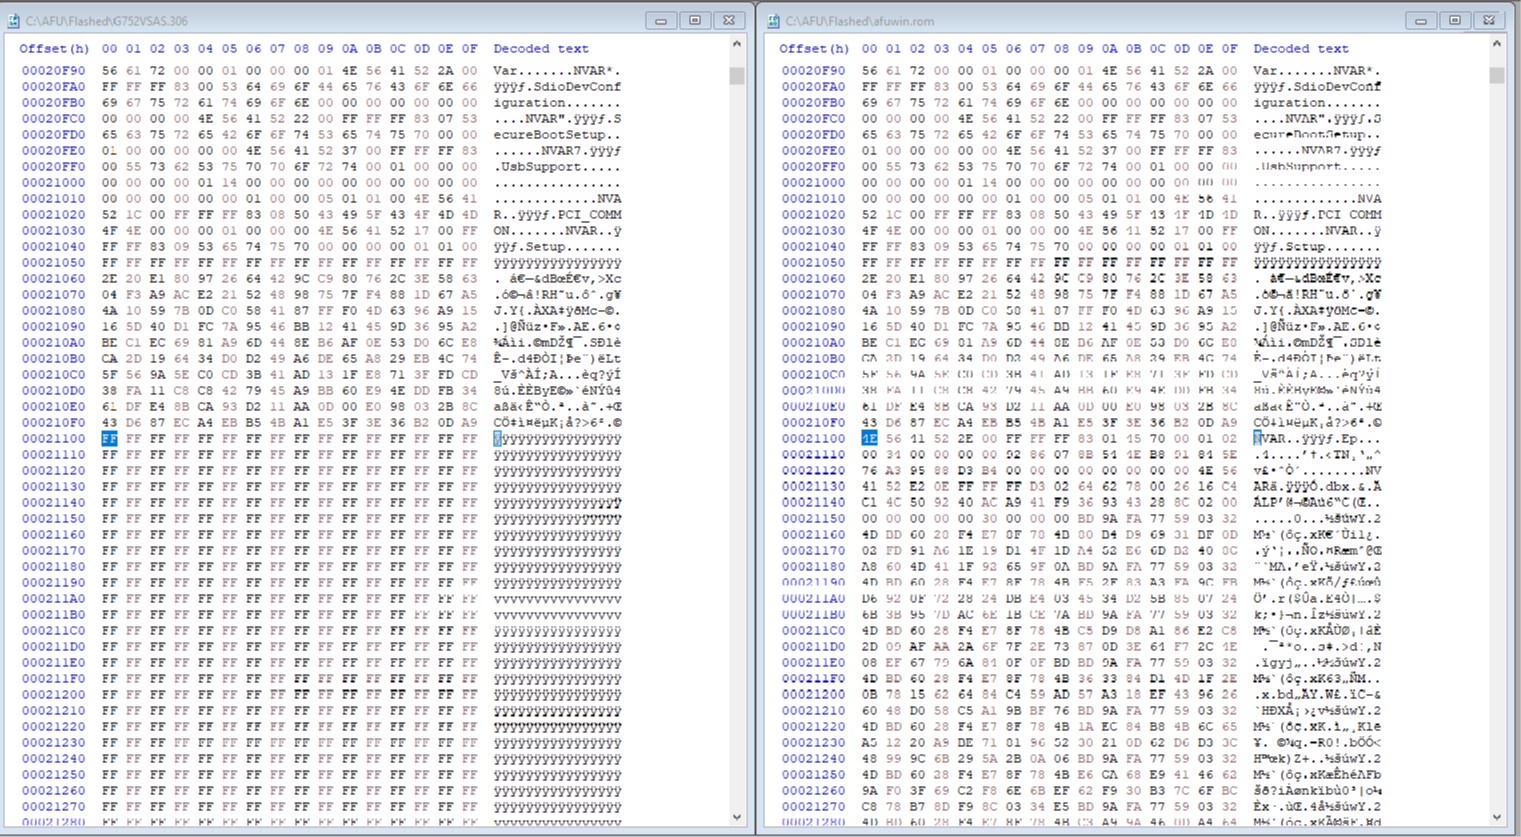
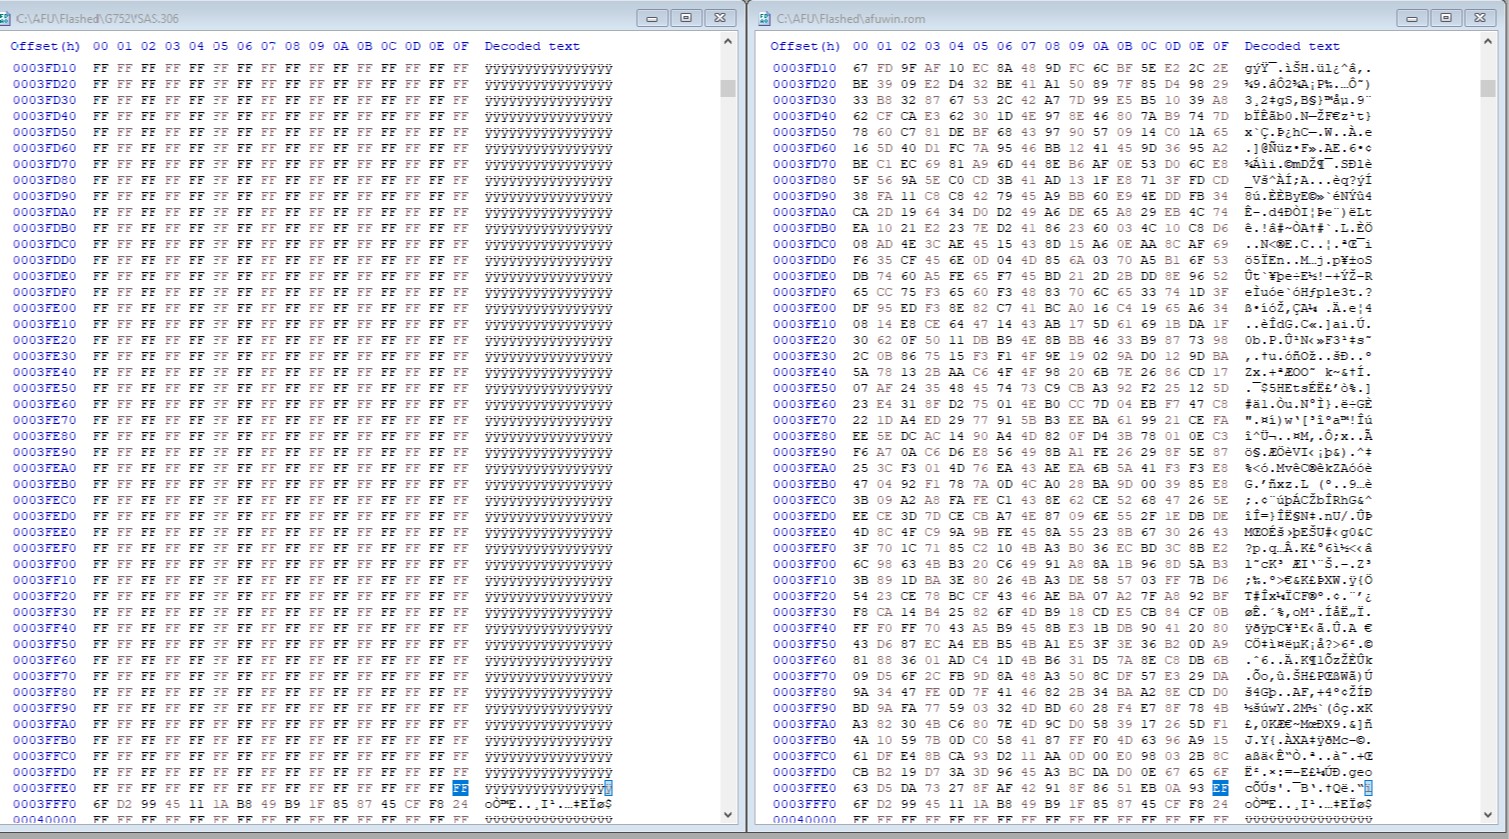
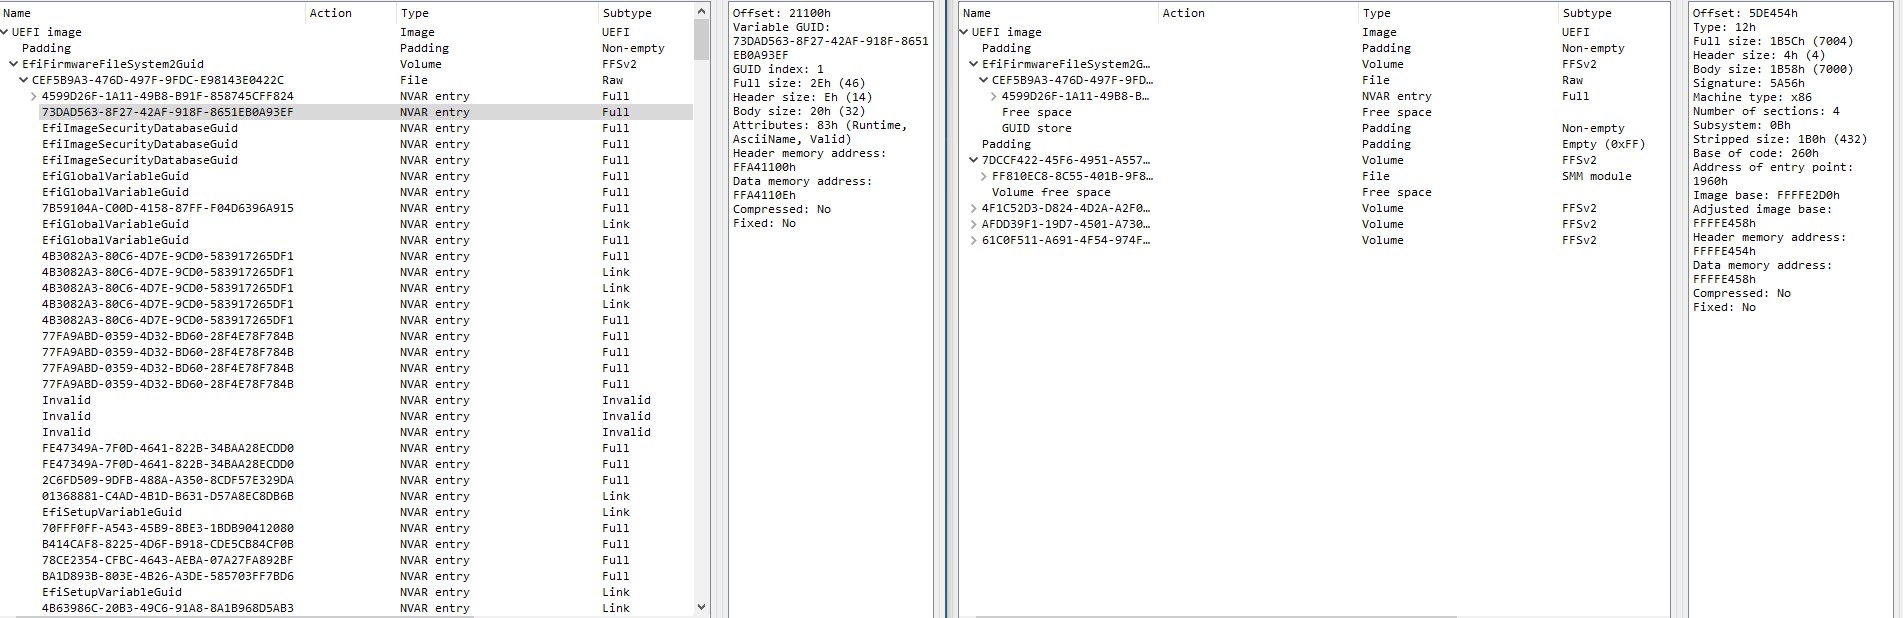
This differences are in NVRAM volume, and they are 100% expected. The firmware creates lots of NVRAM variables to skip slow operations like memory training, support user-settable BIOS setup values, and so on.
ok so no worries. How about the differences that were less when reverting back to an original ROM ?
The “padding” you speak of is a NVRAM volume you want as explained above, and possibly another padding file you may see contains your board specific details such as serial, UUID, etc. ALL of that you want to remain original, not what is in the partial BIOS “Upgrade” provided by Asus download.
BIOS you download from Asus is not a complete BIOS region, and should never be your goal to get on chip, much of is a blank/placeholder that is not written to chip and instead original info is left in place for proper functionality.
My advice to you is stop playing around before you brick the device 
Nothing you are looking at or trying to do is going to help you solve any issue you’ve mentioned, except maybe obvious differences that happens between many BIOS versions (properly and normally flashed the correct way (not with /GAN))
Factory restore has nothing to do with BIOS, that is a windows/disk thing. And what you describe sounds like a faulty HDD, or one going bad, or something with the windows install itself, since you did a clean install then you know if that helped any or not, if not time to start looking at the drive health.
I meant factory BIOS restore asus has a function for that.You hold ctrl + home, then press power, hold ctrl + home untill ezflash starts. Normally it would than flash the factory image, but like I said for me it said “recovery file not found”. You are referring to f9 factory reset which i cant cause I lost the drive that holds that partition.
I think i deleted that recovery image before.
I allready bricked it and semi bricked it before, then I used the method described in this post https://rog.asus.com/forum/showthread.ph…-For-dead-G75VW to do CMOS reset.
I reckon you dont brick it a few times you dont learn.
What I thought is that I may have offset some data when I used that trick to cirumvent write protection, by first flashing the original ROM as a CAP first , and then the modded as a rom.
I know what you mean now, thanks. For that to function file must be on the root of a FAT32 USB Stick, and must be a certain name (Either G752VSK.304 or G752VSK.FD - or VS without K if that is your model)
BIOS Body may also need to be removed from capsule first (using UEFITool), so you’ll need to try two sets, once with stock BIOS as-is renamed to G752VS/G752VSK .304 + G752VS/G752VSK .BIN) on all USB Ports.
Then if no luck, remove BIOS body from capsule, and rename two copies to each of the same two names mentioned above per your model, and try again.
I wasn’t referring to either recovery method, this BIOS recovery or F9, I’m not familiar with use of any of that, only know how it works on some models. I simply thought you meant system recovery (as in windows)
Bricked system cannot be recovered from clearing CMOS, so be lucky that was all you had to do to recover in certain situations, that’s not a bricked BIOS, maybe “Semi-brick” if you wanted to call it that 
Nothing wrong with flashing cap then mod method, nothing will be written incorrectly, AFU knows what goes where based on the BIOS region offsets programmed into the FD and BIOS file itself.