Long story short, I foolisly disabled USB support (EHCI, XHCI…) and now I can not operate with tablet since nothing on USB ports work. And damn tablet does not have reset switch, button, jumper, battery remove did also not help.
Ta tablet is Odyn Windesk plus 3G V2, Intel Atom tablet with win 10 installed.
So far what I managed to is:
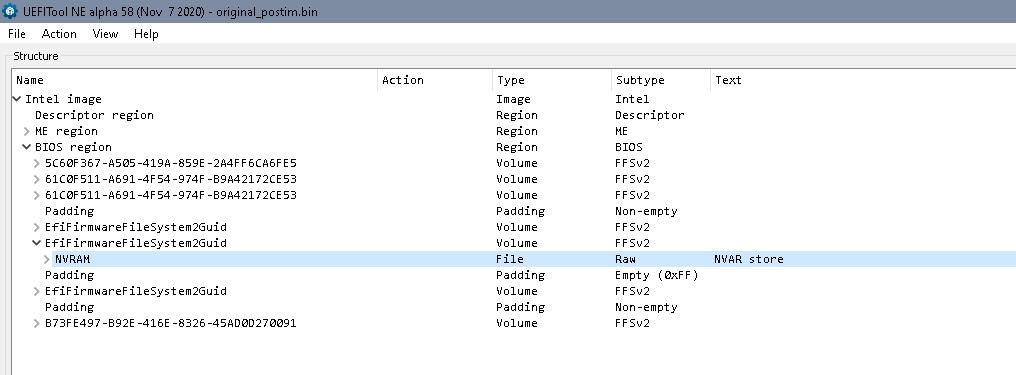
1. Make bios dump with SPI programmer CH341A and AsProgramer 1,41 2. Installed software on my laptop for managing Ami Aptio 5 bios (UEFITool NE A58, MMTool 5.02.0025, AmiBCP 5.02.0031 and HxD 3. Surf through forums for posssible solution 4. I also found same tablet and try to swap bios chip but the tablet wasn’t working, but works again with original chip.
Now I don,t know what to do next, I was thinking about clearing NVRAM volume on bios chip? Do I assume correctly that volume will be populated with default values? I need advice from professional. Or maybe find settings for USB and edit hex code to enable it.
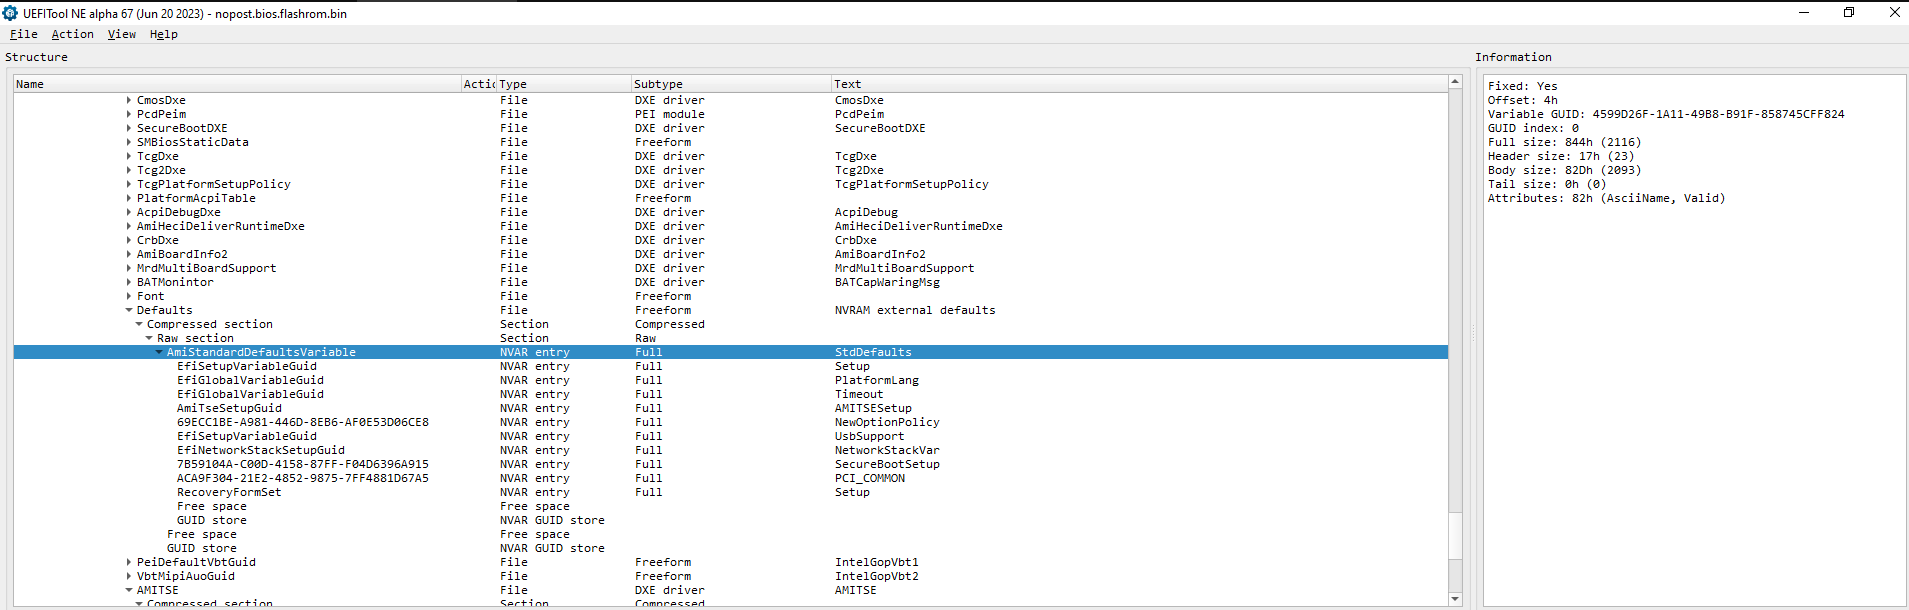
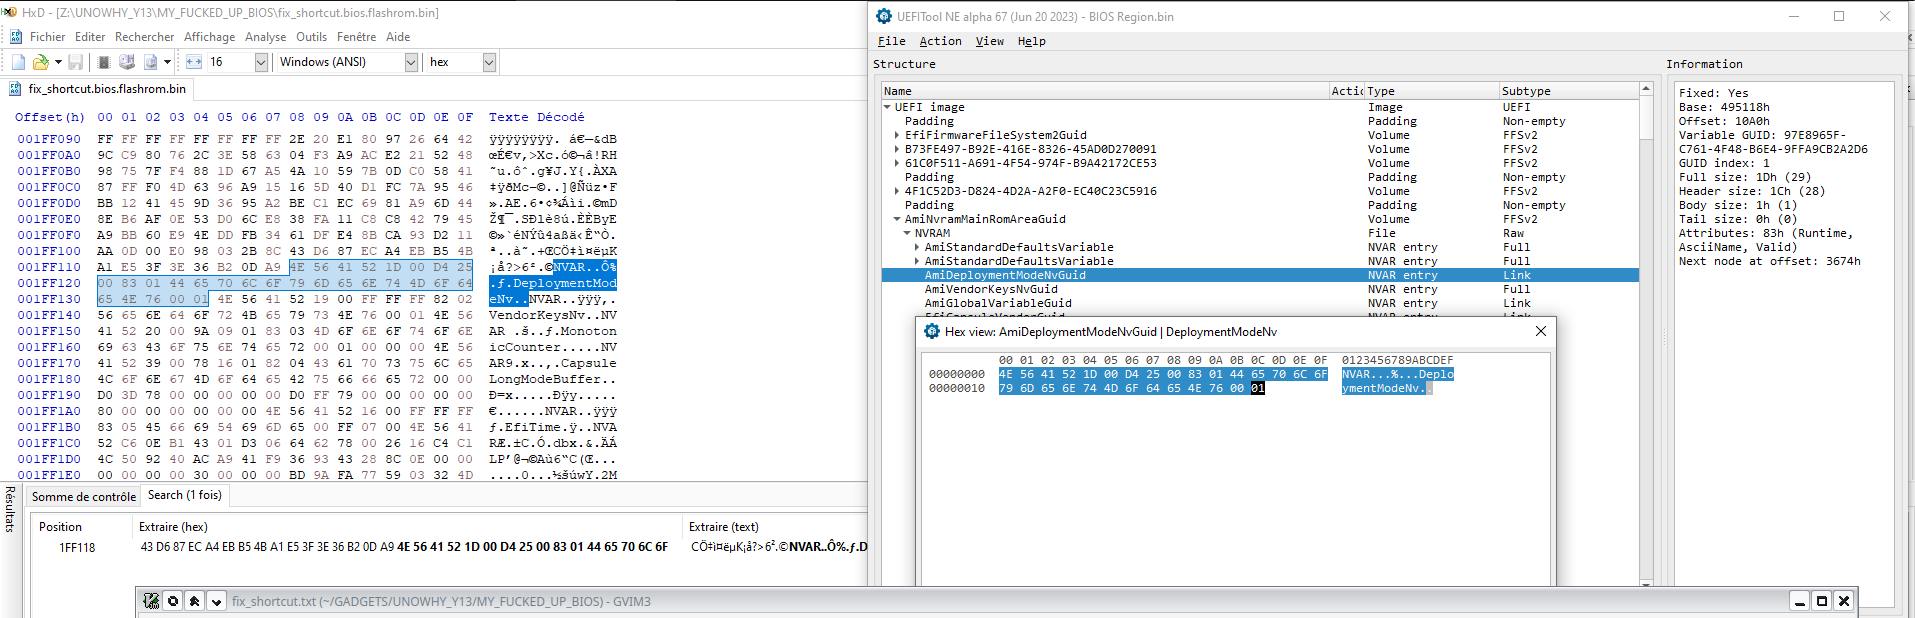
More info about device: Device: Odys Windwsk plus 3G v2 Bios: Ami Aptio 5 version 5.0.0.7 Bios chip: Winbond 25Q64FWIG Motherboard info: ME_I8_v3.0
I’m NOT 100% sure about correct dump. I will make new dump according to your guidance (3 dumps and then I’ll check hash values if they are equal.) Than I’ll fix values between 770368h and 787EC0h with FF using HxD and check the correct start of GUID store at 787EC0h and padding at 788000h with UEFItool.
I believe about the flaw in BIOS, because missing reset switch is Mobo design flaw too, all this Intel Atom Windows 10 tablets without reset button are crapy and should be prohibited by law.
I will post back with results tomorrow, but I’m quite confident about your solution.
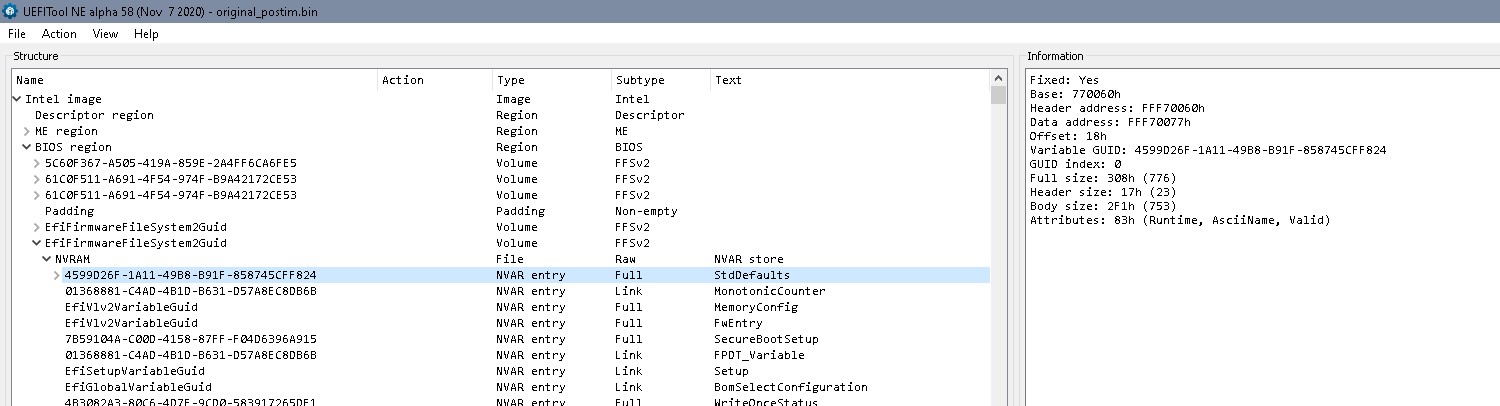
I thought the GUID store would be static, contaning a defined list of GUIDs, but that seems to be wrong.
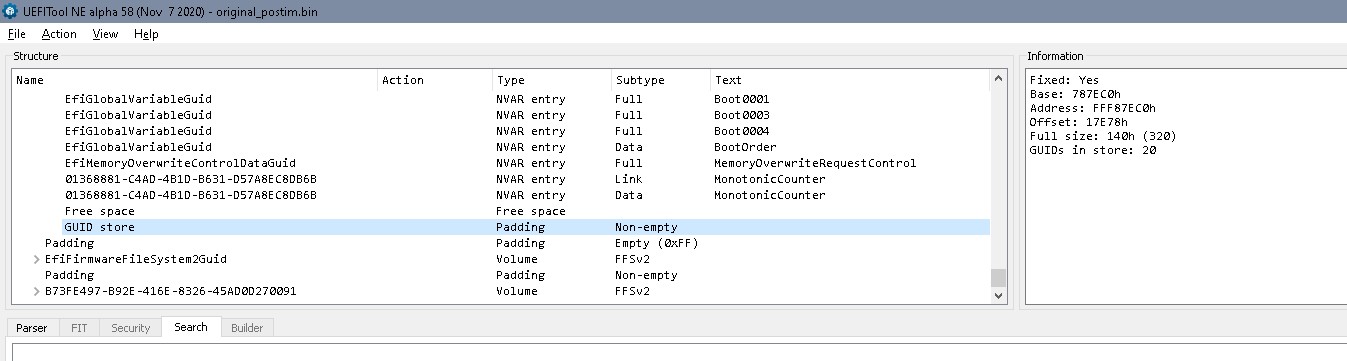
Seems the correct way is that it’s built bottom up and the position of the last line defines the end of the store. Would mean one should possibly change the procedure from
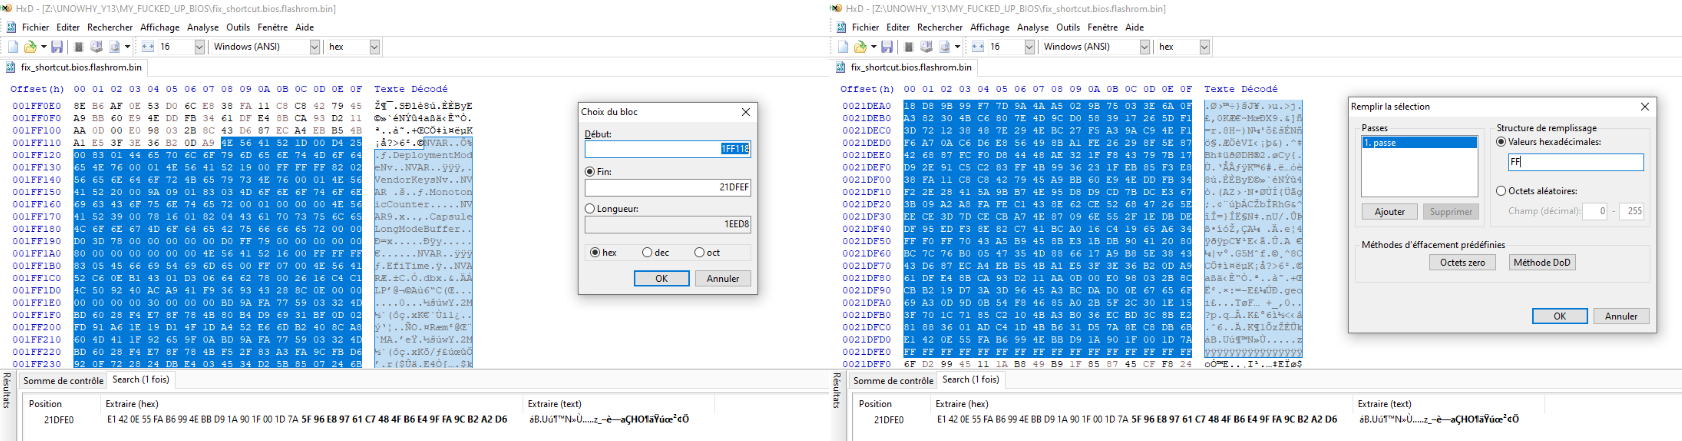
Use HxD, delete everything between 770368h and 787EC0h, fill with FF. GUID store should still start at 787EC0h, Padding should still start at 788000h to
Use HxD, delete everything between 770368h and 787FEFh, fill with FF. GUID store should still end at 787FFFh, Padding should still start at 788000h
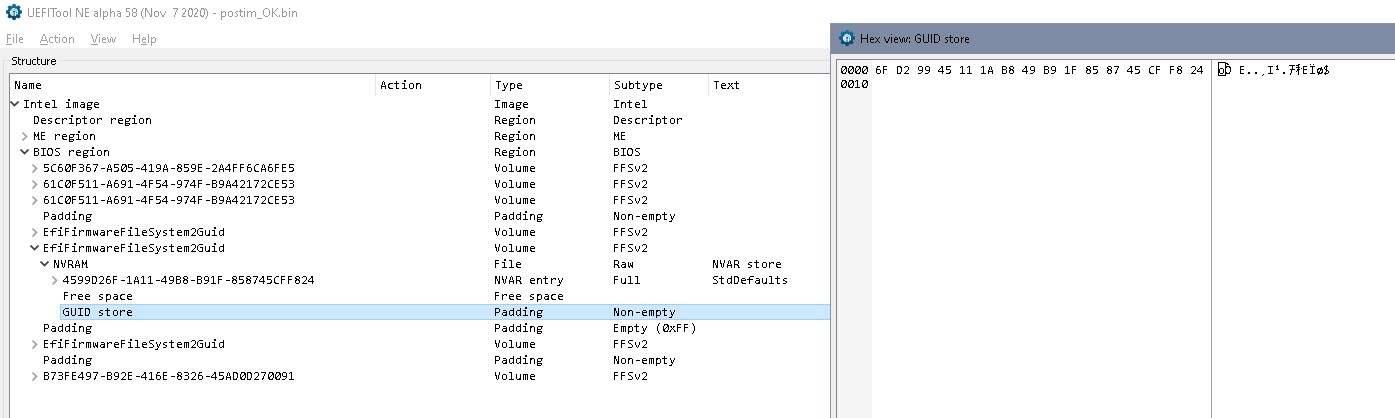
Result should look like this, only difference is that the empty space between NVRAM entries and GUID store now really is empty…
My Unowhy Y13 (Intel® Celeron N3450 - 4 cores (1,1 GHz up to 2,2 Ghz), 4 Go memory, 64 Go SSD) refuses to post since I modified 2 settings in BIOS :
OS Selection which I changed from “Windows” to “Linux” - as I wanted to install Linux
USB Support which I changed from “Partial initial” to “Full Initial”
After reading this thread which had a similar issue and a solution I:
Bought a ch341a programmer
Dumped, with said programmer and flashrom (under Linux), the Bios from the (Gigadevice 25LB64CVIG) bios chip twice and checked both dumps had the same md5 checksum
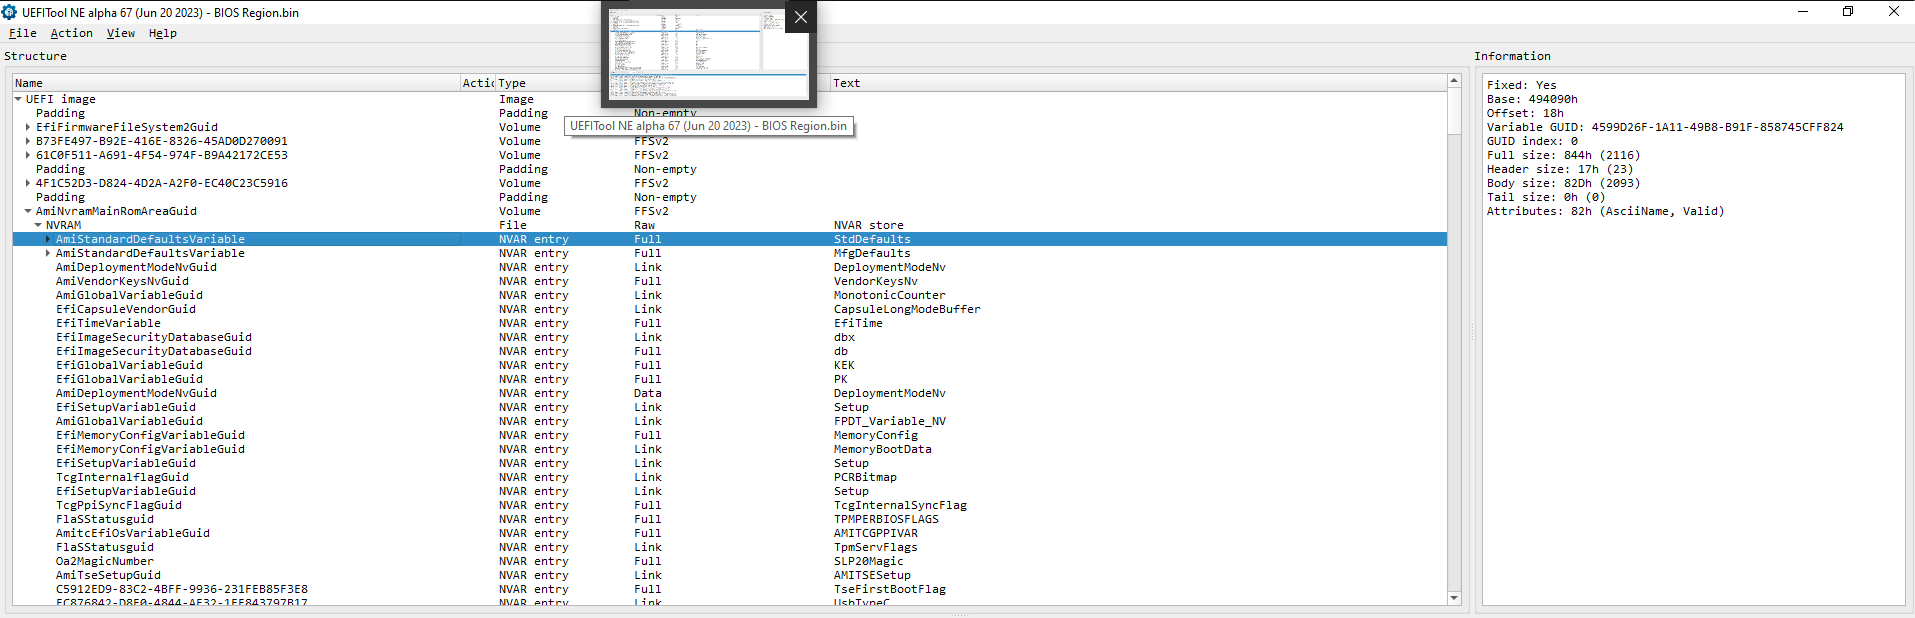
Opened a copy of the dump with “UEFItool NE” to look for NVRAM, StdDefaults and GUID Store in the hope of applying the fix from the other thread…
Unfortunately they seem to be in a compressed section so I’m not able to figure out adresses and what to do…
Many bios regions do have a copy of the NVAR/defaults in the DXE driver section.
You should find the NVAR volume(s) ‘in use’ possibly in the beginning of the bios region. (Celeron N3450??- If Intel ME is TXE type you might have to decompose the firmware)
If you can’t attach your firmware here, there’s lots of free providers.
Yes, that’s unfortunately TXE. Bios region and Intel ME are interewaved.
Learn to disassemble your firmware according to:
After having decomposed the firmware you’ll find the bios region in a decomp subfolder.
You might search for the GUID of NVRAM for example in the decomposed bios region and try to find the correponding areas in your dump and make the changes there.
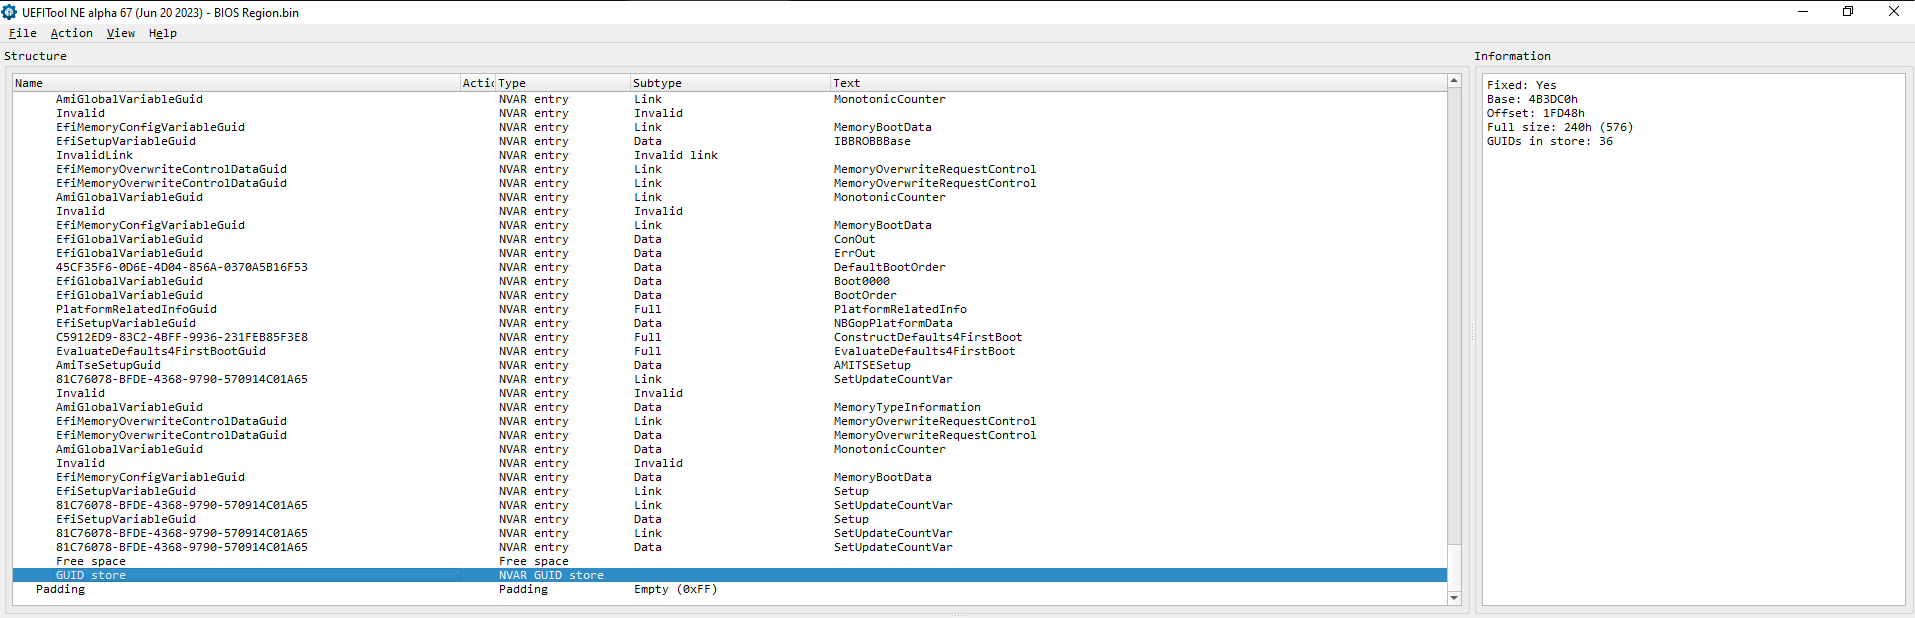
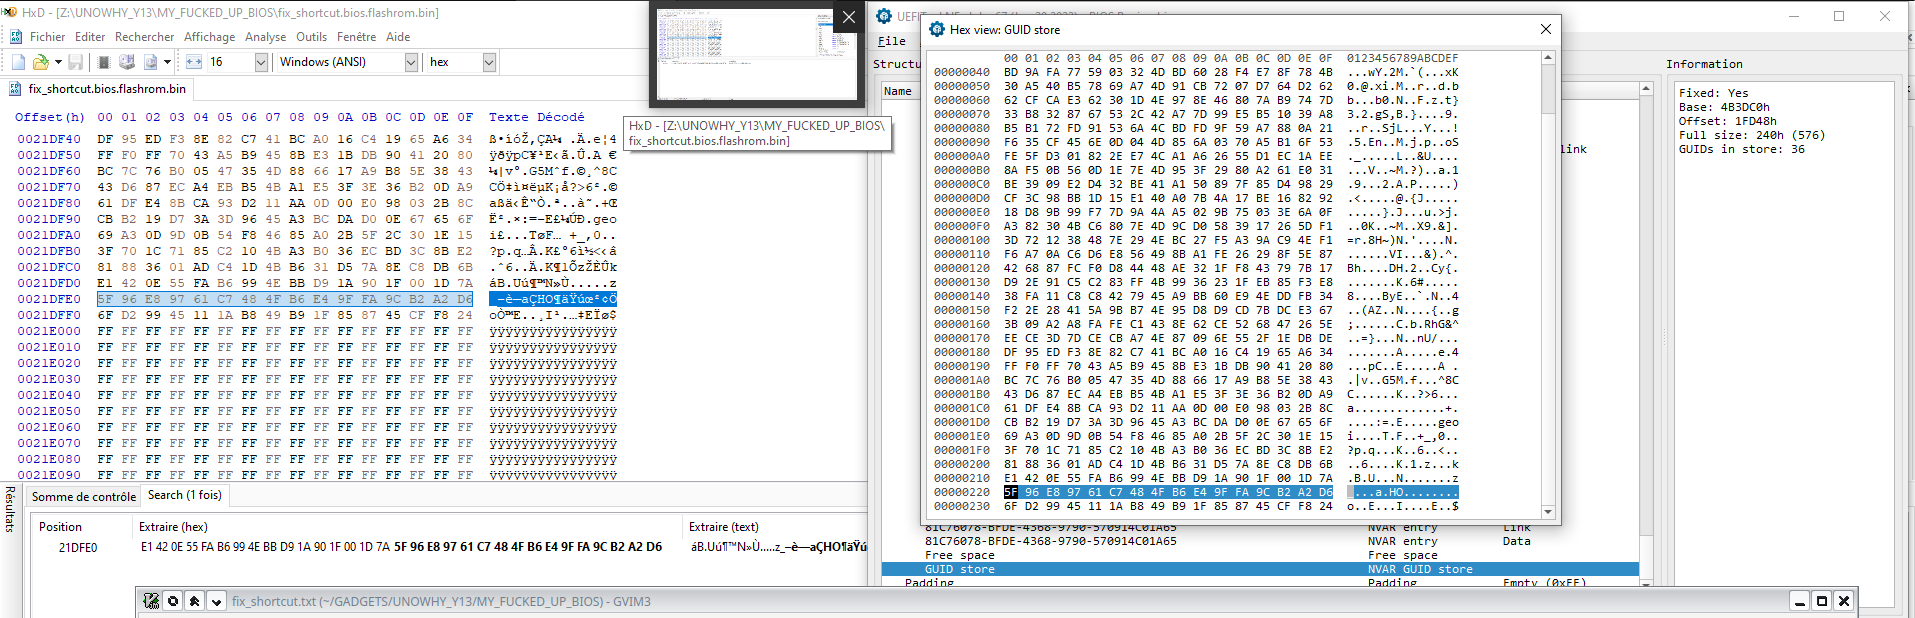
Erase (replace by FF everything after MfgDefaults and until before last line of GUID-Store i.e. from 495118h(=4948D4h+844h) to 4B3FEFh (=4B3DC0h+240h-1h-Fh)
Rebuild outimage.bin with FIT with modified BIOS Region.bin
Restore the original OEM-signed SMIP module in outimage.bin
Yes, that seems to be correct (I don’t remember the single steps for the rebuild process- since you mention reinserting the OEM signing module separately)
There might be a shortcut though: The NVRAM is built into the TXE structure unchanged, just not recognizable for UEFIToolNE.
You might search for the corresponding byte sequences you found in the bios region in the complete dump and do the FF-fill operation there. In theory the result should be the same, since this area isn’t changed and doesn’t affect signing.
You have by the way two default folders (Std, Mfg), but they do have the same guid, so it will still be just one single line in the guid store in the end of the volume.