Hi
After a BIOS update, the laptop won’t start anymore. I have a CH341A programmer, that I could use, but I do not know if I should flash the bios file found on ASUS support page, or if/how it needs to be modified to preserve the serial, UUID and Lan MAC ID (the laptop does not have a ethernet port).
Any help is much apreciated.
thanks
Needed: Type of laptop, old bios version before update, new bios version tried updated to, link to valid (!) dump of bricked bios (meaning at least 2 times read with 100% identical result).
Sorry
I’ve been caught up with some other stuff. I had some time today to work on this, so here are the details:
Laptop model: ASUS X403FA
BIOS chip model: WINBOND 25Q128JVSQ - 1850
I have used a CH341a programmer and AsProgrammer 2.1.0.13 for software.
Asprogrammer detected the chip as W25Q128JV-xQ (WINBOND)
I have clicked the ‘Read IC’ button, and after the process ended successfully, I have clicked on the ‘Verify IC’ button. When that was finished successfully, I have repeated the verifying process again. After that I have erased the IC.
I went to ASUS page //supportonly/X403FA/HelpDesk_BIOS/ and downloaded the latest BIOS file.
but when I have loaded it into Asprogrammer and tried to programm the IC, i got the error “File size larger than IC size”.
As far as I understand, I need to edit something in the newly downloaded BIOS file, so I can preserve the original UUID, serial and windows licence. I am a bit skeptical of uploading the original dump of the BIOS here, because someone might use that info improperly. Is my skepticism relevant or not?
Anyway… thanks for reading all this, and if you cand help, please do ![]()
That’s not exactly what I wrote. And it’s an interesting idea trying to flash something you don’t know what it is or what structure it has. And by erasing the chip without having checked at least the structure of your backup/ dump you’re still on the adventorous side. I hope your backup is valid, you’re going to need parts of it.
The Asus file i found is not a complete firmware image, it has got a capsule, bios region and a ME region/ some additional information at the end of the bios region. Missing at least the flash descriptor.
It’s OK not to post the file, but this means that you’ll have to read a little about UEFI firmware structure to understand what you’re doing.
Check the structure of the old firmware (do that on a copy of that dump, not the original file!!), extract the bios region from update file, replace it in the copy of your backup thus creating a new firmware. Find the board specific information, transfer it to the new firmware.
Thanks for the quick reply lfb6
I understand the first part of your message but you lost me at "Check the structure of the old firmware"…
how do i do all that?
sorry, but I am very new to BIOS mods and all this
You don’t need many tools, UEFIToolNE, UEFITool 0.25 or 0.28 and a hex editor will suffice for the start.
I have played around a bit in UEFItool.
I can find "BIOS region" under "Intel image" when loading the bios dump.
But when loading the downloaded BIOS file, I get a "UEFI image" in the first linem and under it a lot of "Padding" and other lines, but no "BIOS region".
When I try to open the original dump using UEFItool 0.28, I get a error window "Invalid UEFI volume"
if i hit ok, the file is still loaded, and a message shows: "parseBios: one of volumes inside overlaps the end of data"
I don’t know how to post the original dump file, but I uploaded to: lukasig.go.ro/s/P9Q5jRjSa29ABBn
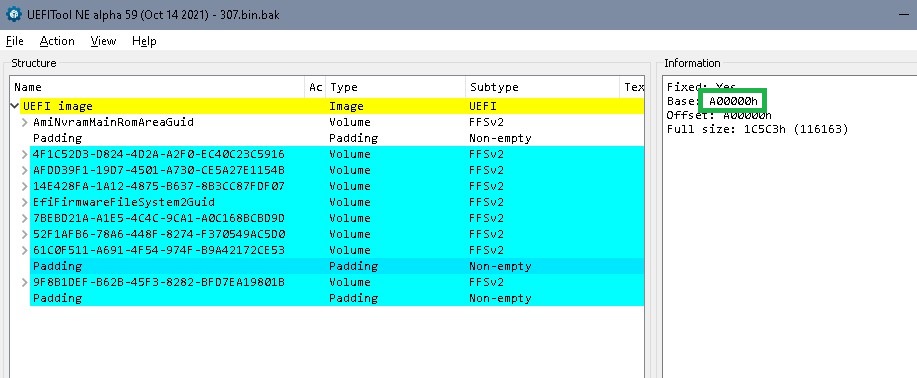
OK, bios updates are an AMI BIOS Guard (PFAT) protected image they have to be extracted (“AMI BIOS Guard Extractor” from https://github.com/platomav/BIOSUtilities), then it looks like the picture on the left side, that’s just what should be in bios region, and just the first volumes including 61C0…, the rest is additional stuff. Your dump on the right side looks slightly different- no structure left… (I wouldn’t erase a chip before I’d found out what happened here- ist this a bad dump or is this really the chip content??)

Find the starting address of the additional stuff, cut it off.

Well, lets compare your dump to one of the bios region updates:

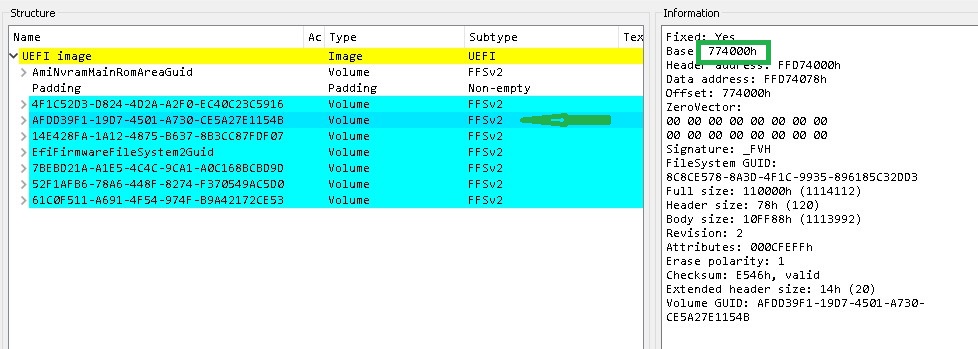
In HxD Ctrl-K starts a comparison, F6 searches down, Shift-F6 up, go to the end, search upward and the first difference found at stops at 0x774000 (address for bios region in asus update file).
Use UEFIToolNE for the update file to check where that is:

OK, that is the start of the second static UEFI volume in the bios region, even if the structure isn’t recognized by UEFIToolNE it’s still there…
=> Lets replace this first volume and see how your bios file looks thereafter:
‘Extract as is’ the volume with GUID 4F1C52D3-D824-4D2A-A2F0-EC40C23C5916, find start and end- address for a complete firmware image (start of the bios region of a complete image is at 0x600000), start address in bios update is 0xA0000 (+ 0x600000), end is 73FFFF (+ 0x600000) => 0x6A0000 to 0xD73FFF

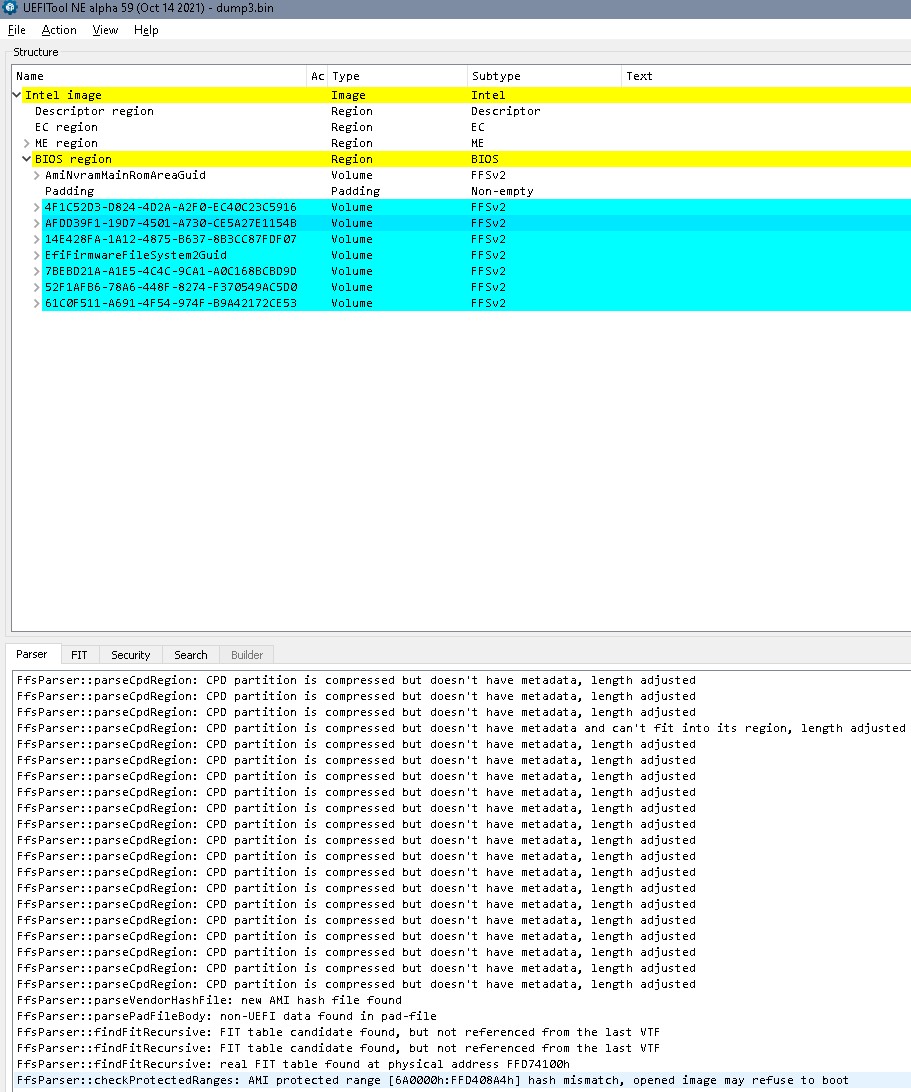
Looks like a bios region again.
Two things:
There’s no board specific information hidden in the bios region / NVRAM (or I simply can’t see it) and
There’s a message about a hash mismatch in the parser
And since there’s as far as I can see no machine specific inforation there one could’ve done it an easier way by simply replacing the complete bios region, thus starting with an empty / fresh NVRAM…
If you’re eager to try, use the attached zip, rename the files to dump3.zip.001 and dump3.zip.002… I’ll have a second look into this tomorrow, maybe.
dump3.001.zip (6 MB)
dump3.002.zip (959 KB)
Dear lfb6 ![]()
Let me start by thanking you for the time you took to help me.
I had a hard time understanding the process you have described, but nevertheless I have written the image you provided to the bios chip, and … VOILA… the system started up.
If I can "buy you a coffee" online, let me know
PS - the serial no of the system seems to have been changed, but the system is usable.
Thanks sincerely again
Thanks for the feedback- I don’t know what happened to your bios, but you can actually narrow it to one 4k block which sits ‘on the wrong place’: If you take 730000 - 73FFFF and copy it to 6A0000 to 6AFFFF, replacing 730000 - 73FFFF with FF, you have the file I sent you. That’s as surgical as one can be to your dump…
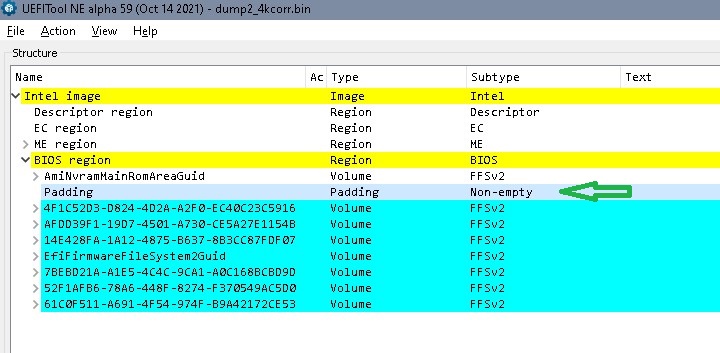
Regarding your serial- I can’t find any machine specific information in this dump (pic)- comparing it to similar models it should be in this padding:

If this dump2 is the only dump you have, there’s nothing in it, might be that a serial is stored in other places (TPM?), but I can’t help you here. The bios I attached is as much your own bios/ the dump you posted as it can be- just 4k moved to the right place. Did you try something else before or modified this dump? (NVRAM looks quite ‘empty’ and 2nd NVRAM not yet created)
I have not tried anything before creating the original dump. That is exactly as it was after the BIOS update failure.
I forgot to mention that I DID do two reads and created two separate dump files and compared them using the hex editor, and they were exactly the same.
Anyway… the original serial no on the back of the laptop is 24M K40JX00926xxxx
Well, then I’m sorry, I can’t help you. (It’s always a good idea to take a backup of at least the bios region when everything is fine.)
You might look into the firmwares linked in #9 and #10 if this thread, (registration needed) so that you might get an idea of the structure. I don’t know a reliable mode to put these values in, I don’t know the structure, are there checksums or…