Hi everyone,
This is my first post on Win-Raid, so please forgive me if I’m asking stuff that has already been covered.
I accidently killed the power during a BIOS update on my DELL desktop and the system is now bricked. When I power it on the fans run and that’s about it !
The motherboard is a Tahoe SFF 14087-1 DF9DH$FA
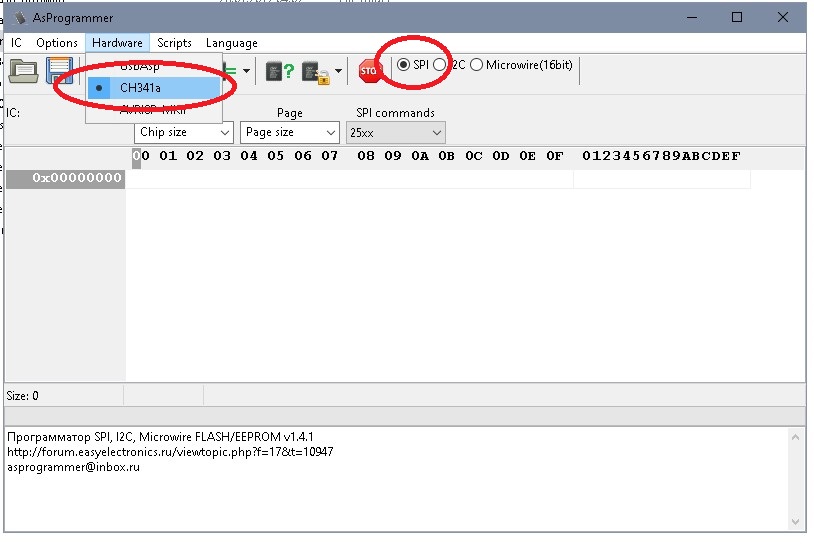
I’ve bought myself a CH341A programmer and by using a clip (rather than de-solder) I’ve managed to get what I think is the 8Mb BIOS read out of the existing chip
(MX25L6473E) next to the memory banks - when I search the dump I can find references to Vostro, etc.
OK, so now I understand that my challenge is to try and lift the motherboard specific data from the image (MAC, Motherboard id, etc) from the current BIOS image and transplant these into a good image.
Resources on the interweb seem to be scarce for doing exactly what I’ve after on a DELL - found a really good video for an ASUS but …
Anyway, my questions are “is it possible ?”, "has it been covered by anyone else where materials exist online and if so where?"
Any assistance (even if it’s to tell me it’s not possible) would be appreciated.
p.s I have an identical working DELL machine that I could read the BIOS from if that would help.
Greg
@GregP It should be possible. Post the dump, let’s see what’s left again. Somtimes it can be easier to replace the static parts of the bios and leave specific information untouched.
Do you have a link to the download page, and old and new version numbers?
Unfortunately I don’t know which version it was on and was going to latest from DELL support website.
I see I can’t post links until I’ve done at least 3 postings ![]()
---------------------
Let’s try and .rar file dump
DELL BIOS BACKUP.rar (4.35 MB)
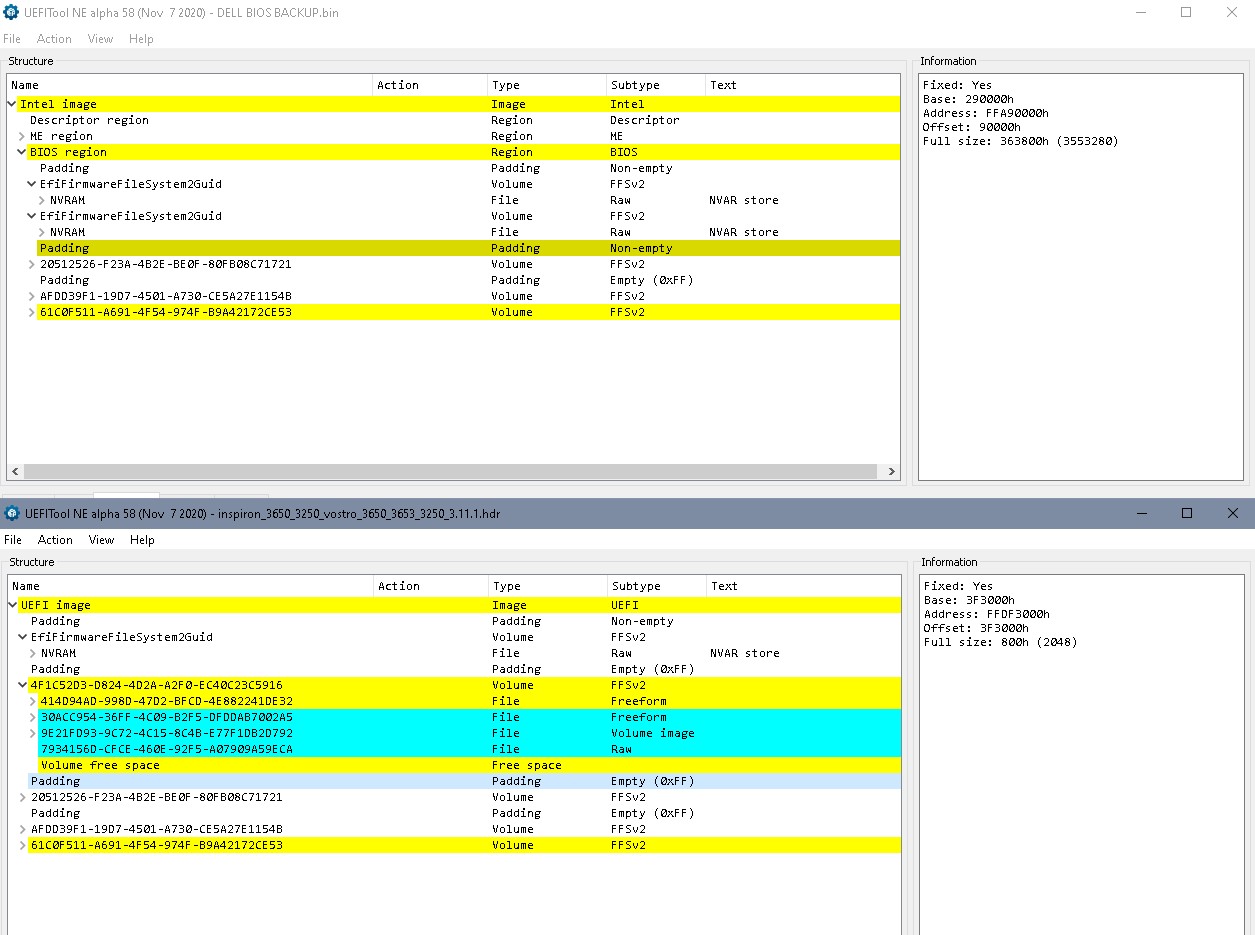
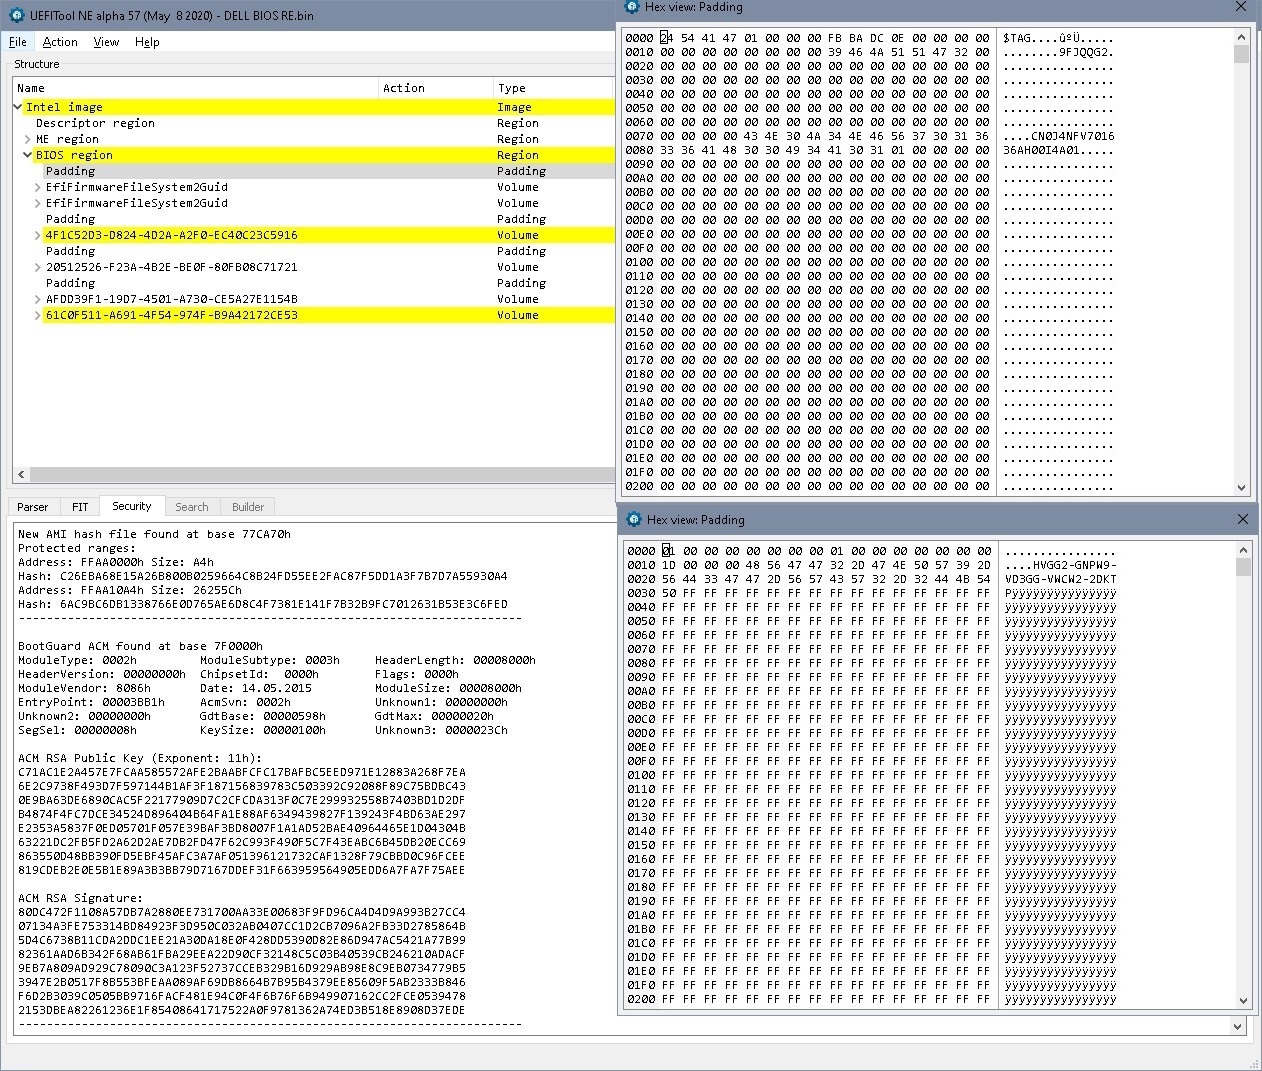
@GregP You can see where the brick is: In the upper part there is a padding of about 3MB which should be 2kB, hidden in this ‘padding’ is the volume beginning with 4F1C…, of course with some data missing.
Which program did you use for reading the content of the chip? Did you use 2 different programs and did you compare the resukt afterwards or at least read the chip two times and compared the results? Just to be sure there wouldn’t be a read error and your old bios’ backup is correct…
There’s a recovery bios on the Dell page as well. Did you try to recover this way? (I’m not sure if your system has this ability)
https://www.dell.com/support/home/en-hr/…0-small-desktop
https://www.dell.com/support/kbdoc/en-hr…puter-or-tablet
If you’re 120% sure and double checked that your backup is reproducable correct and you couldn’t recover the bios by the dell procedure you might try to flash the attached bios. That’s first try- minimal repair, just recovered the one defective volume and left the rest alone. That way there’s a chance that your board/ system specific data in NVRAM are unchanged.
Please clear CMOS content by removing any battery/ power source and pressing the power button several seconds afterwards.
DELL BIOS RE.zip (4.54 MB)
I used the software that came with the CH341.
I didn’t use 2 different programs, but I did a read and verify and the second read was consistent with the first.
There were no read errors.
I looked at the .RCV method on a USB stick but couldn’t get this to work.
Can the RCV image be applied using the CH341 ?
@GregP No, that’s just a bios region without fd, me, and personal settings, not a complete bios. Actually it’s the same file that’s packed into the ‘normal’ update file. So there din’t happen anything when starting with Ctrl - Esc pressed?
See the picture, the first 2 volumes are nvram (=bios/ hardware settings), there’s just a very basic set included in a stock bios. System specific information can in addition be hidden in bios region padding, here it’s serial, probably service tag, and in second padding a windows key…
Try Asprogrammer 1.41
https://github.com/nofeletru/UsbAsp-flas…ases/tag/v1.4.1
Read the chip again with asprogrammer, compare to the images read before. If they’re identical, flash the file from #5, clear cmos, try to boot, it may use several boots.
Nothing happened when starting with CTRL- ESC
OK, just downloaded, configured and run AsProgrammer and loading the file read into Hexedit shows its exactly the same as the one I uploaded earlier so that’s good.
In terms of prepping the USB first time around should the USB have been formatted FAT or FAT32 ? There seems to be conflicting information here, I actually formatted FAT32 and not FAT. Could this have been my problem ? Perhaps I should try this first ?
@GregP If there’s nothing happening with Ctrl - Esc seems there isn’t much more to do here.
Thanks for confirming good correct backup. Sorry for being pedantic here, but this is the only file where you don’t have the original and if there happens to be a systemtic error with one setup you’ll get always identical files but still with an error.
Program the file from #5 into the chip, clear CMOS, let’s see what happens. Please don’t rely on ‘veryfy’ here, too. Read the chip content after programming in an extra step, save it and compare files.
Will try that later after I’ve finished my day job ![]() thanks and will let you know
thanks and will let you know
----------------------
Just to say IT WORKED ! Thank you so much for your guidance, like everything else, relatively easy when you know how, I just didn’t know how.
Just a couple of questions before I close.
I was convinced from reading many articles that the motherboard id’s, MAC addresses, etc were stored in a region of the BIOS.
I thought the method would have involved extracting (if the information was still in the old BIOS) this system specific information and transplanting it into a fresh BIOS. What I did today was much easier, so clearly all the system specific information was stored somewhere else. Where ?
Are there any conditions that would have bricked this info ?
@lfb6 - Great work here, nice to see, thanks!! 

@GregP You’re welcome, glad to hear it worked
“Bios” = different regions, like flash descriptor, ME, bios region
*bios region" has UEFI structure, and is partly used to store things. Bios is no longer completely static, but contains non volatile memory (‘nvram’) which is continuously written to, deleted, stored again. And there are vendor specific modes to store information in non- uefi structure/ padding, like shown in the picture in #6. Normally a bios update will spare this regions and keep the information there. There might be some dummy- or absolutely necessary information in these locations in a recovery bios. And service tags, serials, … might be stored in other chips.
If the error is clearly in the static area of the bios region you can always try a copy - paste from a healthy update file. For you bios it was clear that the complete volume 4F1C52D3-D824-4D2A-A2F0-EC40C23C5916 was now no longer recognized/ had become part of the padding (pic in #4). One can still find the start- bytes in HxD, and then there’s a region partly rewritten and deleted, actually where the update stopped. Complete Volume is included by Bootguard has, so no specific information can be there. Padding after is empty, padding before has a windows key and since the start of the next volume is still there, you can be quite sure, that this padding wasn’t corrupted. Last two volumes in bios are identical to stock bios.
So it’s just a little bit of copy paste in HxD and you can be quite sure that all of your information is kept.
If this hadn’t worked out, next step would’ve been to try a stock bios, then restoring service tag, windows key from padding, look into bios info screen which info might be missing and asking Lost_N_BIOS where to find other specific information since I’m not good at this.
Bricking this info might be possible. Corrupting NVRAM is possible and these errors are almost impossible to find (at least for me) and restoring additional info in padding isn’t that easy either. One has to start from stock/ recovery bios region and see through the bios backup afterwards…
Good luck, and keep the bios backups, you never know 
Thank you so much for the timely and accurate assistance @lfb6. Aside from saving a perfectly good motherboard, I’ve really enjoyed the technical challenge, with the icing on the cake being a working PC - result ! Thanks again, expert forums really are great !