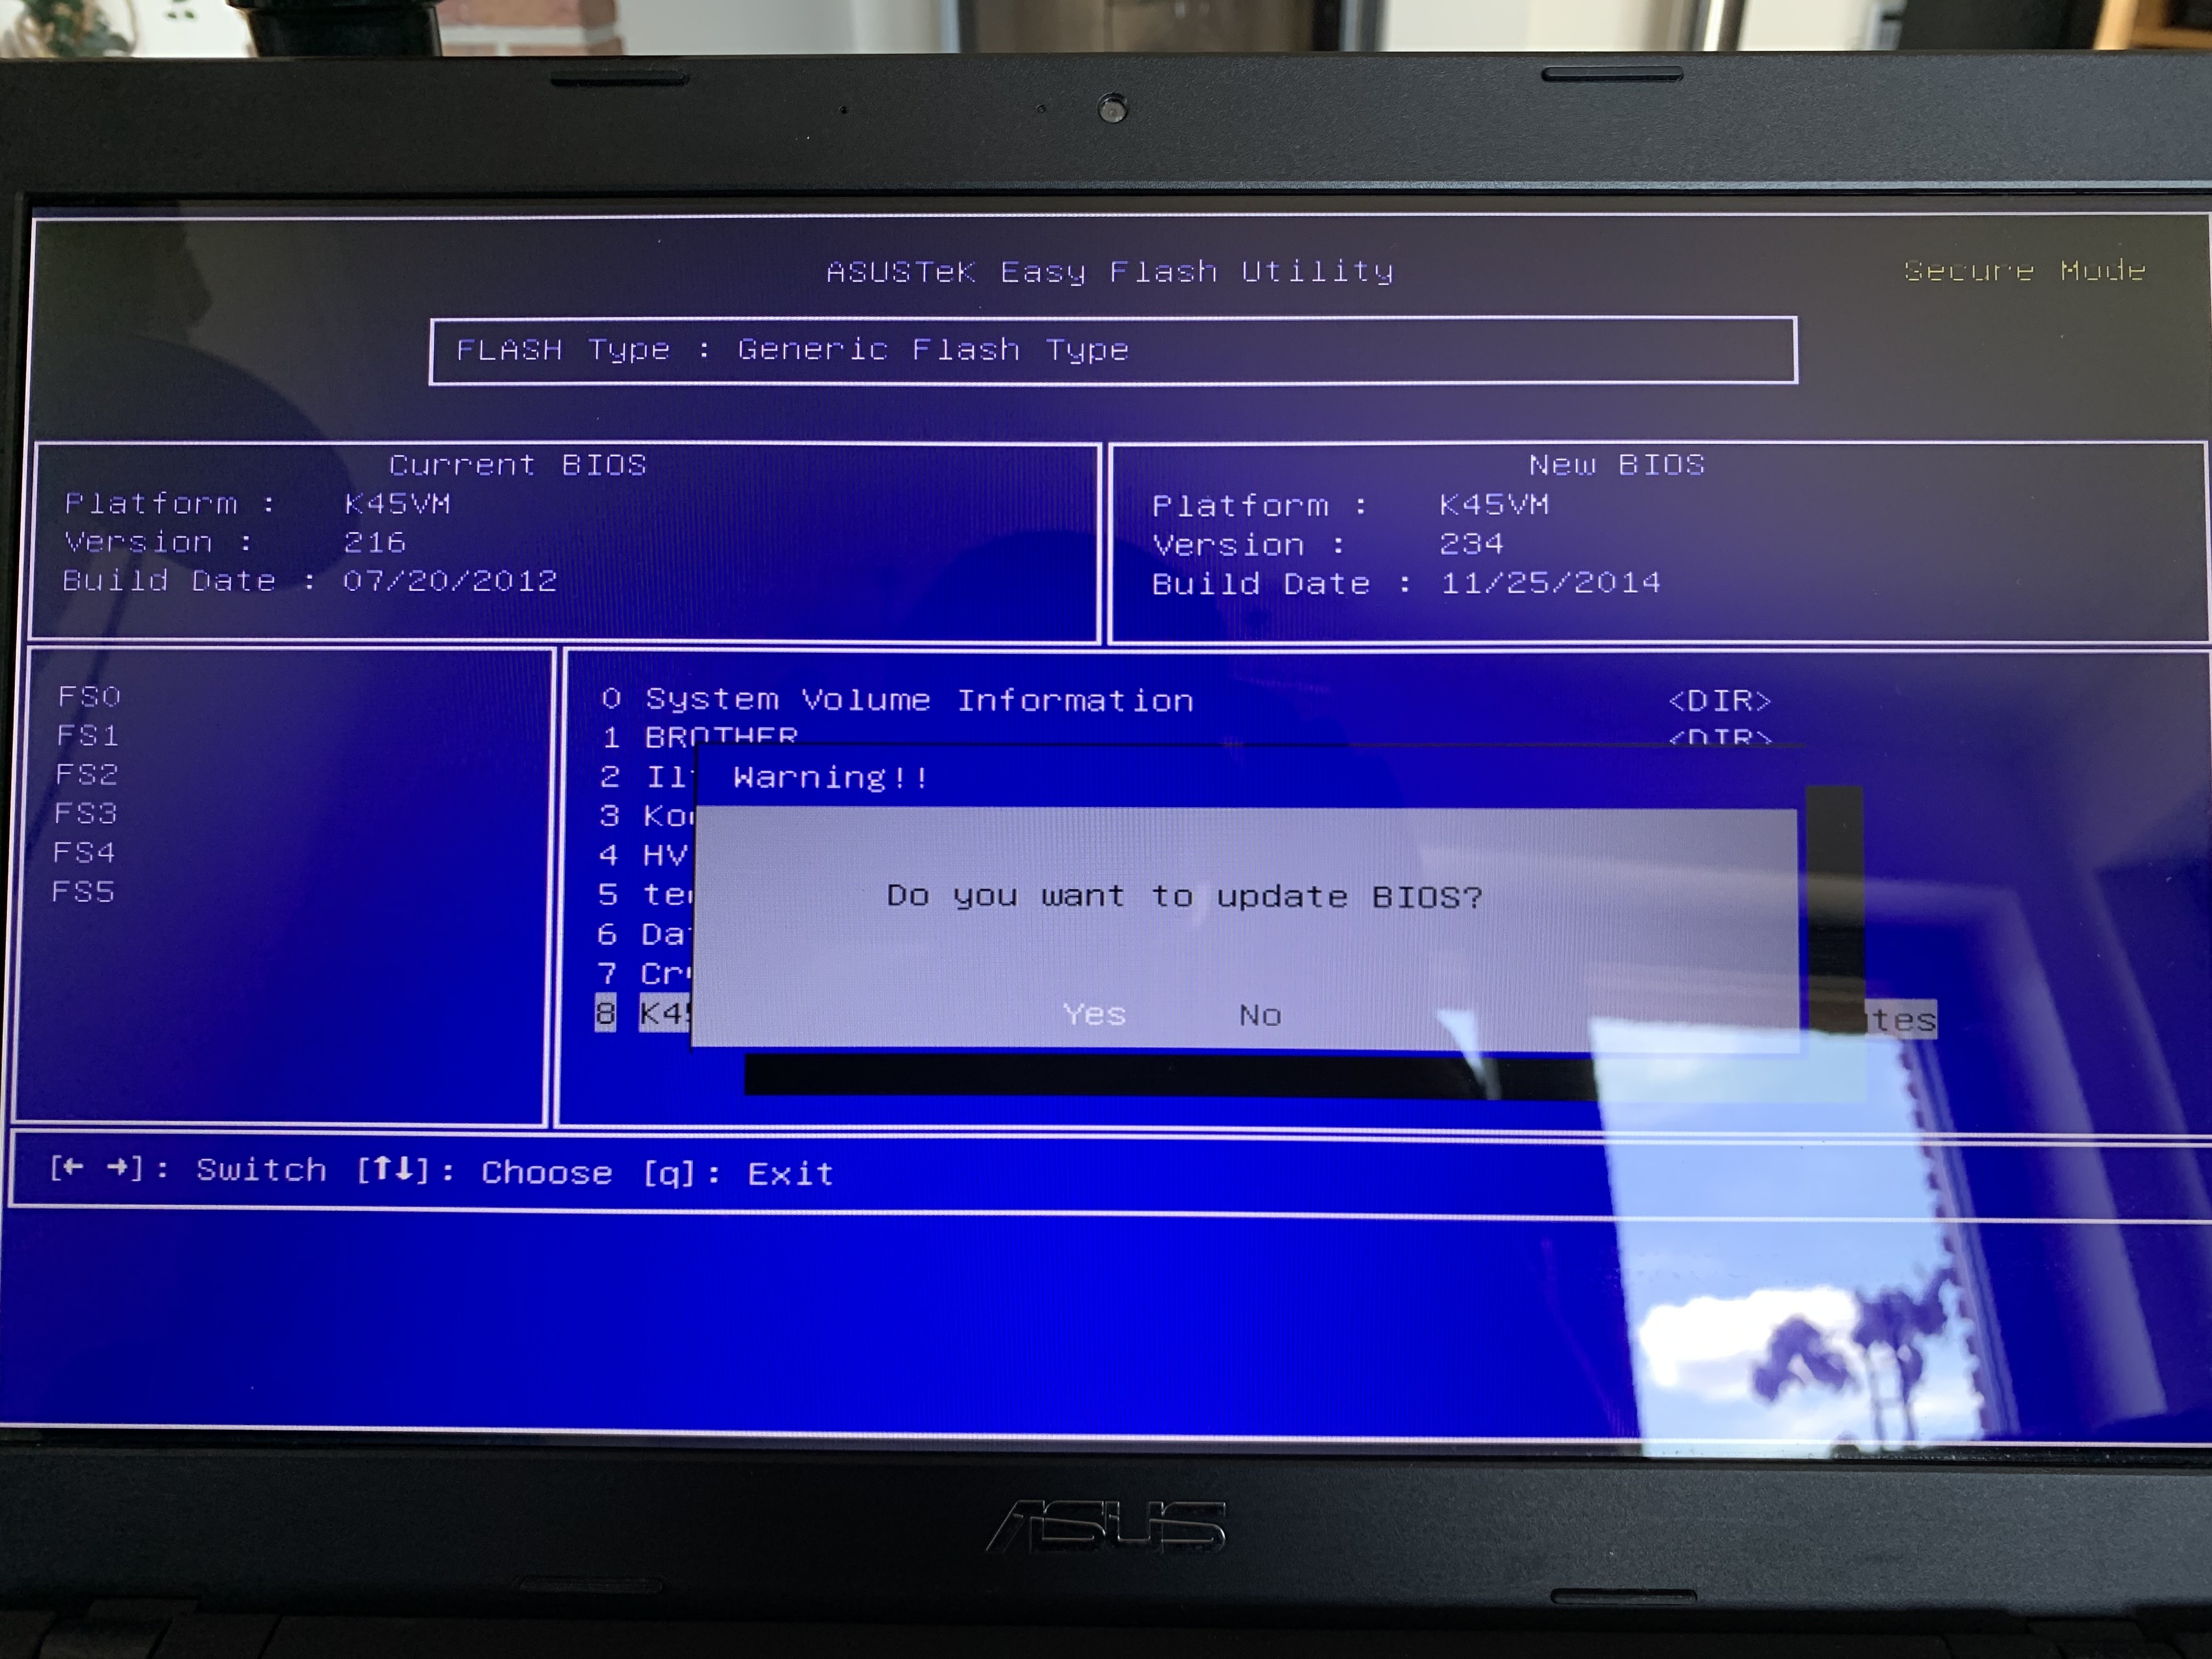
Dear all, my name is Stefan and I am new in this forum. I tried to help a friend with his old Asus A75V Laptop (board is called K75VM). As the new (not defect) SSD did not work properly, I made a BIOS update from Version 216 to 234. At the end of the BIOS update the flash tool reported “verify error!! ROM Update not Success”. I would say I did nothing wrong, but the result is that the computer shows a strange behaviour. It boots up after 10 times pressing the button and finally it did not boot at all. Then I decided to fix the BIOS. I used a 341a and a clip to read the BIOS. This worked. I did it 2 times and the CRC sums are the same. The next step would be to generate the new BIOS file using FD44. But the tool can’t open the BIOS file and can’t open the BIOS file that I downloaded (and extracted with UEFItool) from ASUS webpage. The message is: “error parsing bios data”. Could anyone please help me? I attached the BIOS file. Could I do the job with another tool? I understand that the next task must be to bring the Information from the Original BIOS file to the new file. The MAC, etc. I have available, as I made some screenshots before cracking the device. Thanks in advance.
Never mind, both BIOS are exact same! That’s lame Asus, bad practice!
This is MAC, correct? 56 4C 31 35 31 43
If not, it may not be stored in BIOS, only serial and UUID or DTS ket etc, without MAC being part of UUID MAC may be stored on-chip only, but for us to know for sure you’ll have to tell me MAC ID if above is not correct
Thanks for the help and quick reaction The device called ASUS A75V and the sticker says “MB Ver. K75VM”. The mainboard is called QCL 70 LA-8222P. The LAN MAC address (from the sticker on the board) is 30 85 A9 72 B2 B6 Attached you find the screen that was shown before I started the update. There it shows K45VM (confusing these figures).
@Iltis - Original dumped BIOS, and stock BIOS (but this is now flashed to what you downloaded) has the following BIOS names in recovery area K45VM.bin K95VJ.bin
And that seems to lineup with the odd name version seen in your pre-BIOS update image, so I can only assume it would be correct You don’t have any BIOS backup from before you attempted BIOS update, do you?
Thanks for MAC ID, I see it now, right below where I copied the guessed MAC ID above, that must have been part of serial or UUID instead. Here, program this in and it should all be corrected now. This has stock/sparse NVRAM, should repopulate after you load optimal defaults and start running the system. If Windows does not activate or something odd, LAN doesn’t work etc, we can try sticking back in your original NVRAM, or it’s backup, but those both may be messed up so I’ve left them out for now.
Actually, I’ve also included a build with both your original NVRAM volumes in place, it will have OGNV in name, if you want to try that first, up to you. The one without your original NVRAM will have stockNV in name, and should work without issue, provided write occurs properly. http://s000.tinyupload.com/index.php?fil…793946751758191
What is the BIOS chip ID? In case I need to tell you to do write with a certain known working software/version.
Also, before you do anything here, please test removing both memory sticks, boot attempt, then put them back and try to boot again. Sometimes if it’s just NVRAM or CMOS issue this will get it going again.
Thanks. You are right, the MAC address is part of the UUID. The idea was to use the 341a and the clip to write the files that you sent. Flashing from USB stick I tried before, but actually it did not start. The chip is called MXIC MX 25L6406E (3K456400A1 L122083 written on it).
You’re welcome. Yes, you can’t flash from USB due to the ID, unless we made you mod BIOS with the ID of whatever is in there and then you’d need another to fix it (ie more hassle that way)
Do you know how to use linux or ubuntu? I ask this because Flashrom may be best to write to chip with, and if you can’t boot windows then flashrom from linux/ububntu may be your next best option.
And then, dump again with programmer, using software version 1.30 and send me this as well. Send both in single zip, thanks! Ohh, also, if you can, from EZFlash, make a backup there as well and include it. his way, we can see which programs are reading properly, so maybe which is best to write for your system, this chip ID is an issue sometimes Here’s a guide - [GUIDE] Flash BIOS with CH341A programmer And here is software package - http://s000.tinyupload.com/index.php?fil…213094641136166
Thank you. I read the guides yesterday before reading your last post. I can’t boot Windows on the defect board. I did not manage to write the chip with the files that you sent, using CH341a and a WIN10 Laptop. Erasing works after isolating PIN8 as you described in the guide (excellent document!). But after writing, the result on the chip is always different from the file. I hope that the file that I sent to you was read properly. But as I read it 2 times and the checksum was the same, it must be ok. Now I will try to get familiar with USB Linux and flashrom. I will keep you updated.
Send me dump from EZ Flash, if it lets you make backup. Also, send me one of the files you’ve dumped with programmer. Sorry, that is not my guide, and I don’t know what you mean about isolating Pin8, but it doesn’t sound like something you should be doing. Ohh, I see now, I guess, if that works for you. I would remove that after erase, and then try to write using both the Flashrom windows and 1.30 software, you can also try ASProgrammer 1.41 and see if you can get verify after write (may need to hit “Unlock” icon first, not the drop out just the lock icon)
What you sent me does not mean read was proper just because you get same checksum, that only means file was dumped same each time (could be correct, could be wrong, I’m not looking at it now just saying this in general) I’ve got to run for now, I will be back later, hopefully by then you sorted this out with Linux
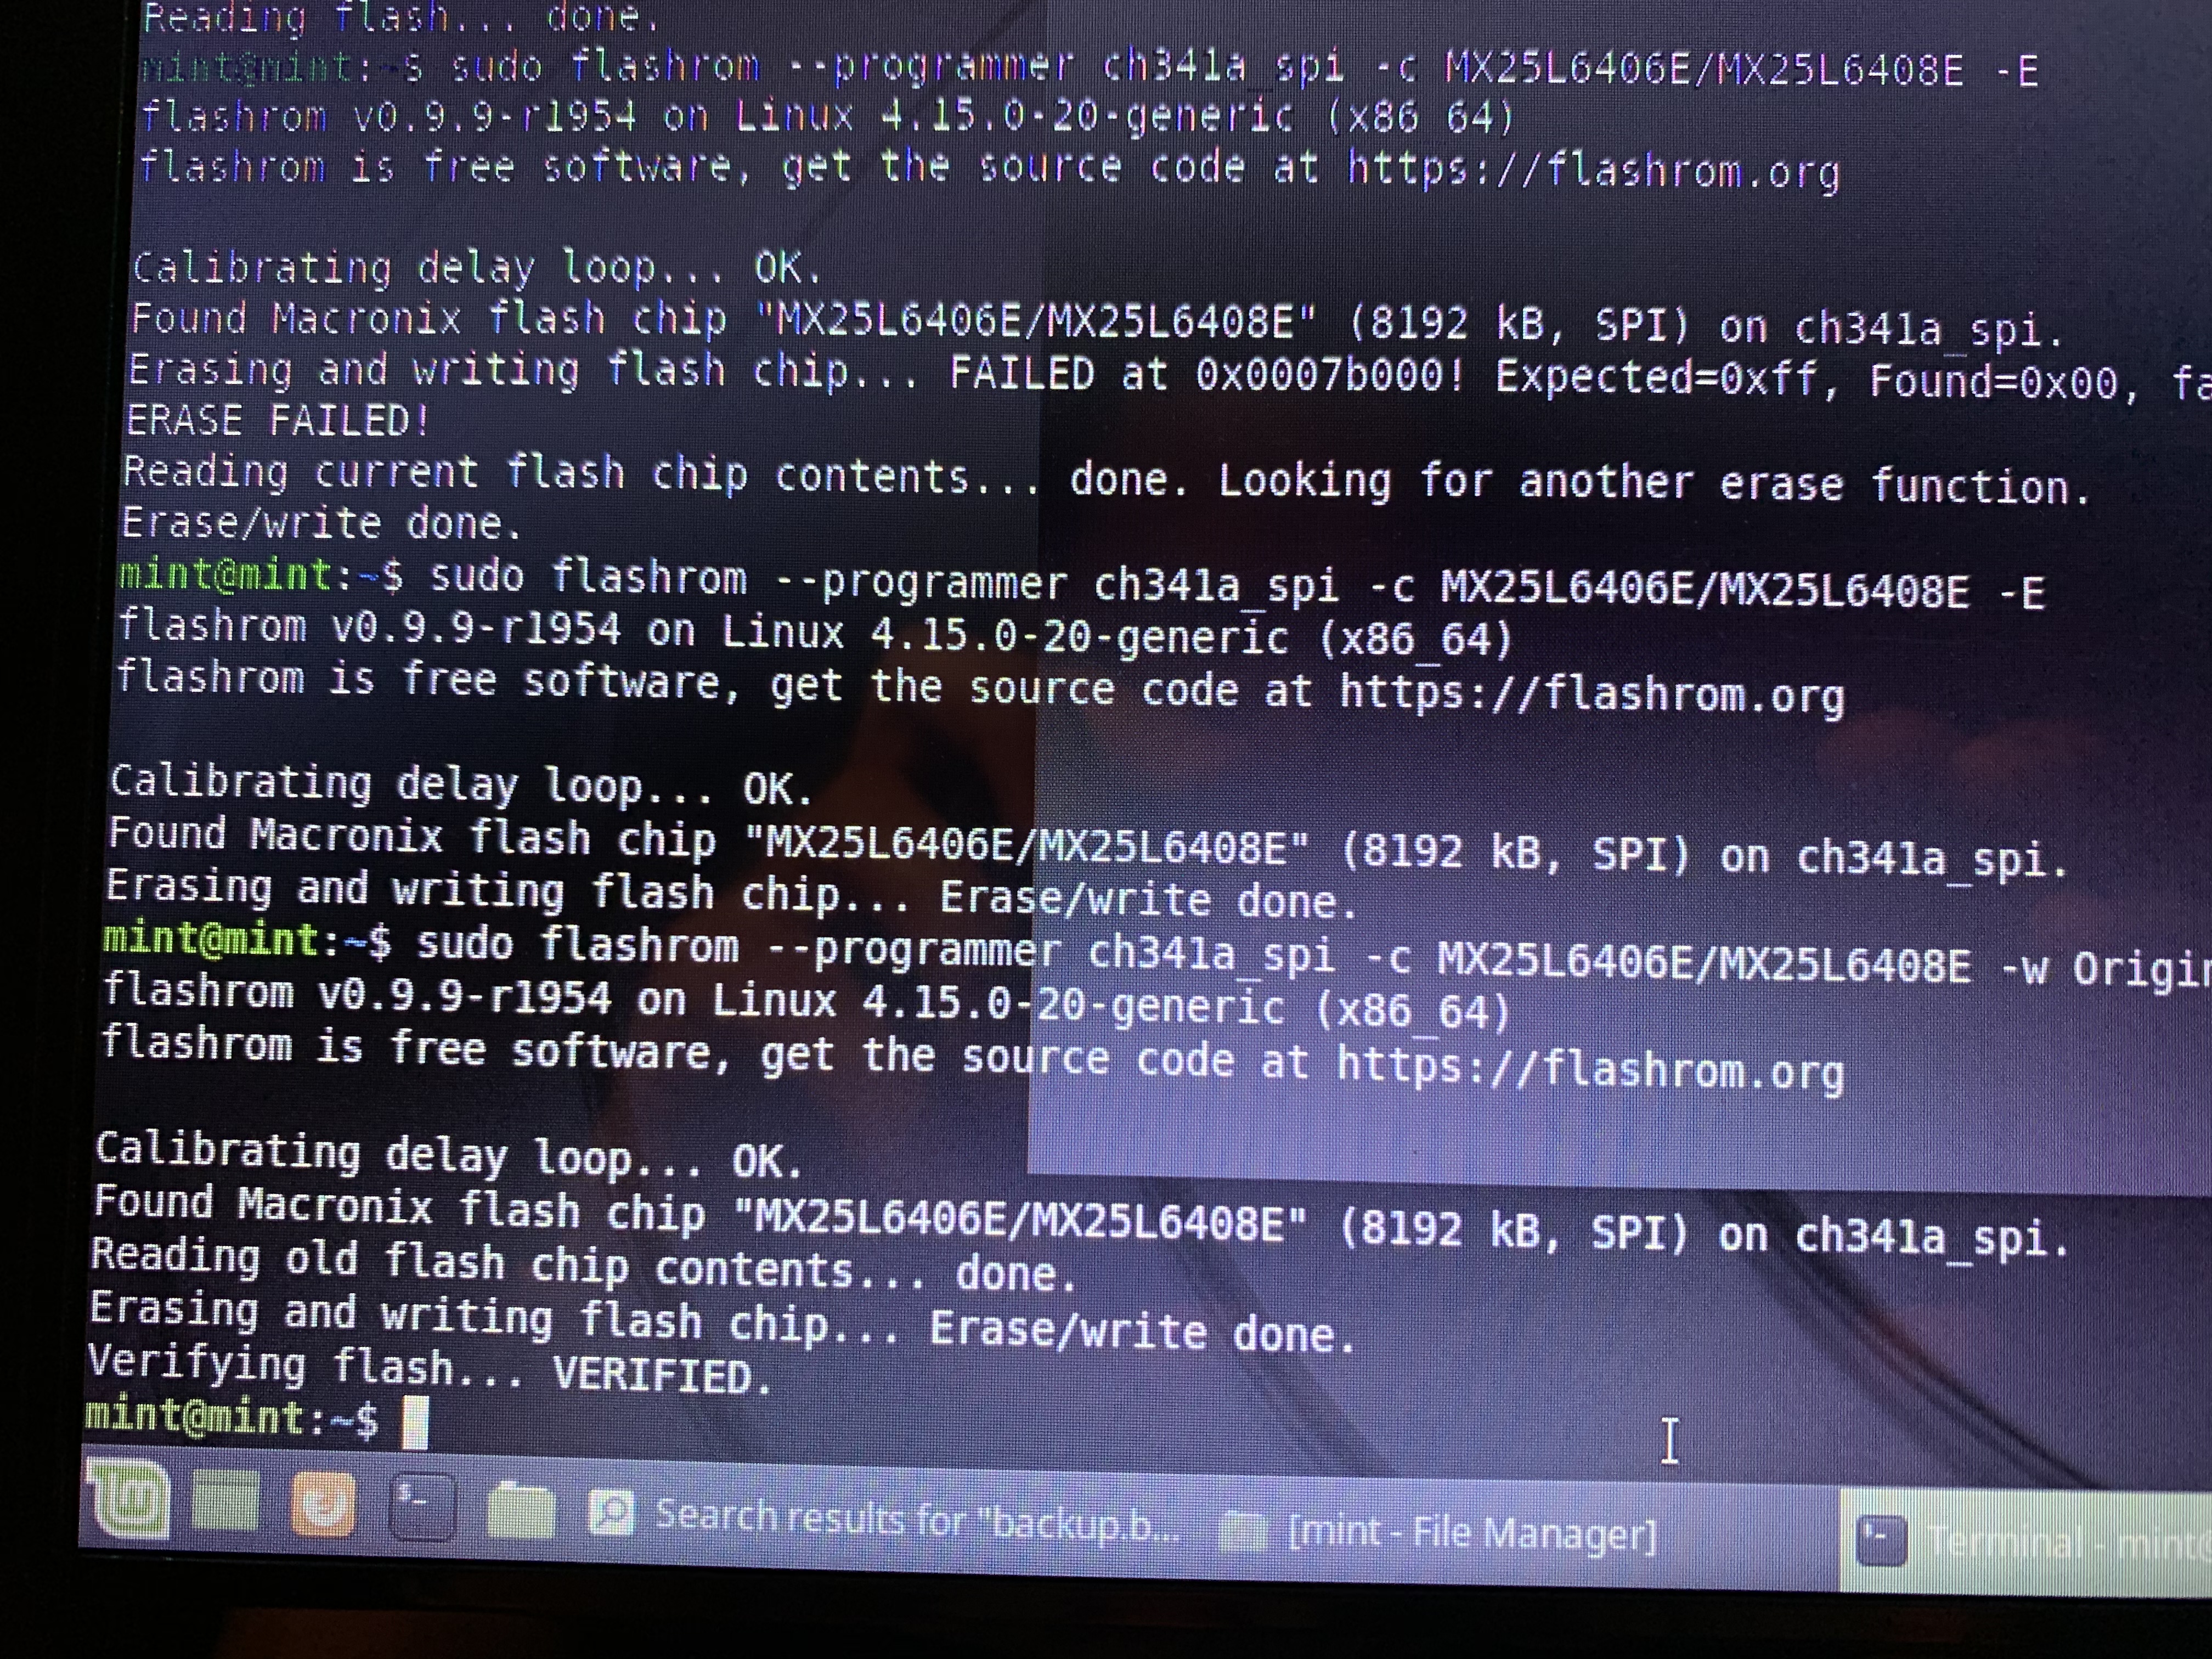
Now I used Linux according to the beginners guide of _haru. The isolation of the pin I removed after there were errors when erasing the chip ( I found this in the junjoo flash guide part 3). Then I erased the chip without problem. After that I wrote the file (OriginalFDVol1MEOGNV.Bin) that you sent and it was VERIFIED (see attachment). Very good! First try with Linux and it works! Now I will assemble the device partly and see if it will boot. Do I have to send another dump file to you after rebooting?
Thank you @Lost_N_BIOS !!! The laptop is working again. The first file with the original NVRAM did not work but the second file (stockNV) brought the laptop back to life! Thanks for all your efforts.
@Iltis - Great to see you are back up and running now!
So, looks like your original NVRAM was messed up, due to your test results. Does Ethernet LAN work, or not? You can see serial, UUID etc in BIOS now, correct? You’re very welcome!