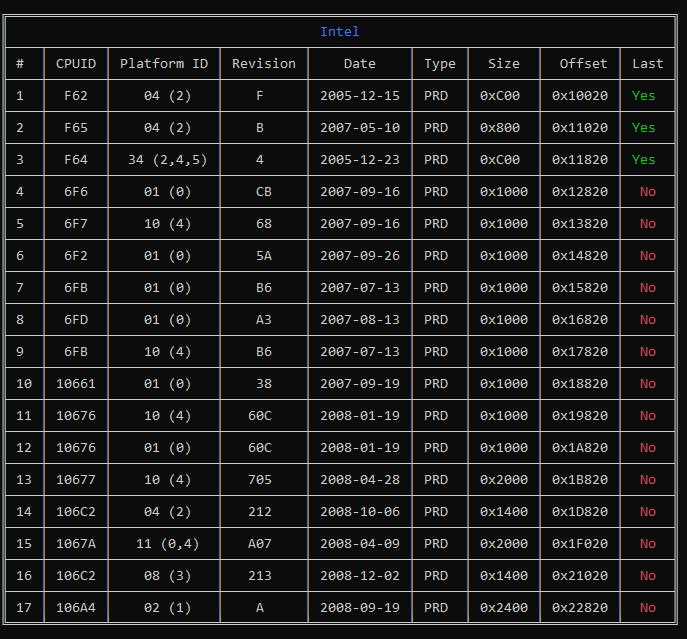
For 306F2 38 is in bios 3801, 43 in bios 4101, and 44 is latest, version in mcupdate_genuineintel.dll depends on your Windows version
OK, the registry query gives two lines for me and since I’m on 306C3 28 in bios they’re both identical despite 27 in mcupdate_genuineintel.dll: reg query HKLM\HARDWARE\DESCRIPTION\System\CentralProcessor\0 | find “e R” Update Revision REG_BINARY 0000000028000000 Previous Update Revision REG_BINARY 0000000028000000
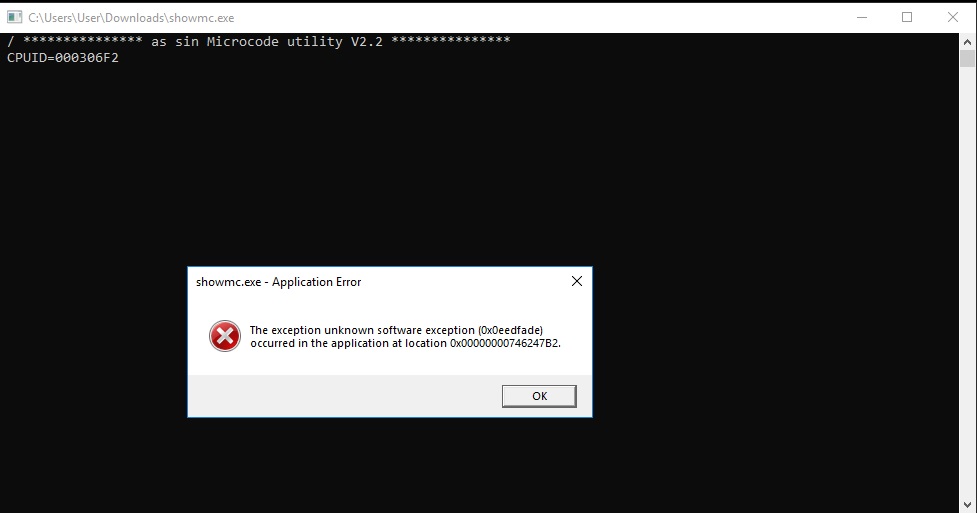
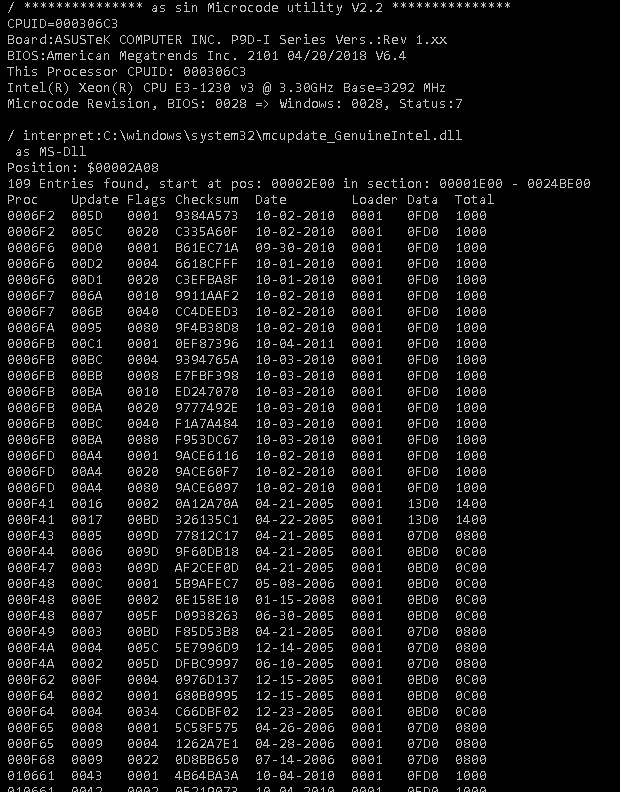
You might like to try the attached tool, it’s displaying µcode informaton and for older Windows versions content of mcupdate_genuineintel.dll, too.
Beg your pardon, sorry that it didn’t work! This tool functioned well for me in Win 7, 1607, 1709, 1809, 2909, 20H4 (but stopped showing content of mcupda…dll after 1607)
But this is the thread of davidm71 regarding updating µcodes for AMI bioses. I think it's getting a little off-topic now.
@lfb6 Well thanks for helping me with getting my cores back , to be fair no one helped me when i asked what should i do to get rid of the microcode update that has spectre patches, if i knew that i can flash older bios and would get an older microcode without the spectre patch i wouldnt had to deal with so many problems that i had these days…
Anyway still want to experiment with microcodes, i know how to use UBU now, i can update to latest microcode 0x44 but i would like to choose, i mean how i can put 1 specific microcode and install it with UBU and then flash it with flashback?? I would like to use latest Bios 4101 but with a different microcode and try them till i find the perfect one
Basically what you do is lookup the microcode repository (https://github.com/platomav/CPUMicrocodes) and search by cpuid and platform id for your microcode. There use to be a way to find older ones within the directory tree listed but not working right now or I can’t figure it out. In anycase you can also find your microcode via searching the thread on Winraid called Repository discussion: Intel, AMD, VIA & Freescale CPU Microcode Repositories Discussion or extracting it from an old bios file. After that its a relatively routine matter just replacing only the microcode in bios version 4101 with the one you want for your specific processor. I wouldn’t delete anything else. You can either do it manually or even easier use MMTool as we have discussed. Before flashing your mod have others on this thread to look it over to make sure its safe. Then go ahead and give it the right name for Flashback…
@davidm71 Whatever i do with MMTOOL i cant flash it with usb flashback, only when using UBU i can flash it, i just need to understand how to install one microcode on UBU, right now when i search for updates and it says to replace them it installs many microcodes
hello, i don’t know if its the correct thread I want to know if this old bios can support Intel Quad-Core, I used mc extractor and this is what I got 10677 rev 10 (old LGA775 G41 chipset)
Need more information,like which cpu exactly,motherboard name Lets say new cpu is Q9550 and G41 chipset supports it,so, If your new cpu fits into the soket,pretty possible. All you have to do add your new cpu’s microcode into bios
Thanks for reply, for example, QuadCore Q8200S, Q8400S, Q9550S, motherboard is generic Foxconn 2A8C from HP computer. Yes, new cpu is LGA775 too, I need to add the new microcode? I thought that all cpuid on the list are supported, isn’t it? thanks
Yes exactly like that. Some motherboards/brands offers limited support,like in low budget products,a short list of cpus,but that generally does not mean the motherboard cant handle it.means they are just cutting corners in order to save time and expenses (no bios files at all,nor any support files,cut back chipset versions etc you got the idea) Lga775 has wide range of 45nm and 65nm cpus So,all you have to do to add the new cpu’s microcode into the bios and thats it (preferably into latest bios released,if there are none by doing a complete bios dump) you may need to watch bios size though,like if you add one (rom,microcode etc),you may need to remove one
Anyhow just in case anyone is interested we figured out how to search for a specific microcode based on CPUID or list all the available microcodes that are available in the MCE CPU Microcode Repository using a Git-Bash command line. I had the idea but couldn’t get it right without help. Credit goes to Thurask and Plutomaniac:
What you do is you install the GitBash command prompt and clone the repository into it and then CD into the folder and run that command. It will show you for example every microcode version for 406F1 out there. Extracting the specific microcode using the command line I haven’t figured out yet though I can do it using the Github browser for windows.
Will post further updates on how to once I know more …
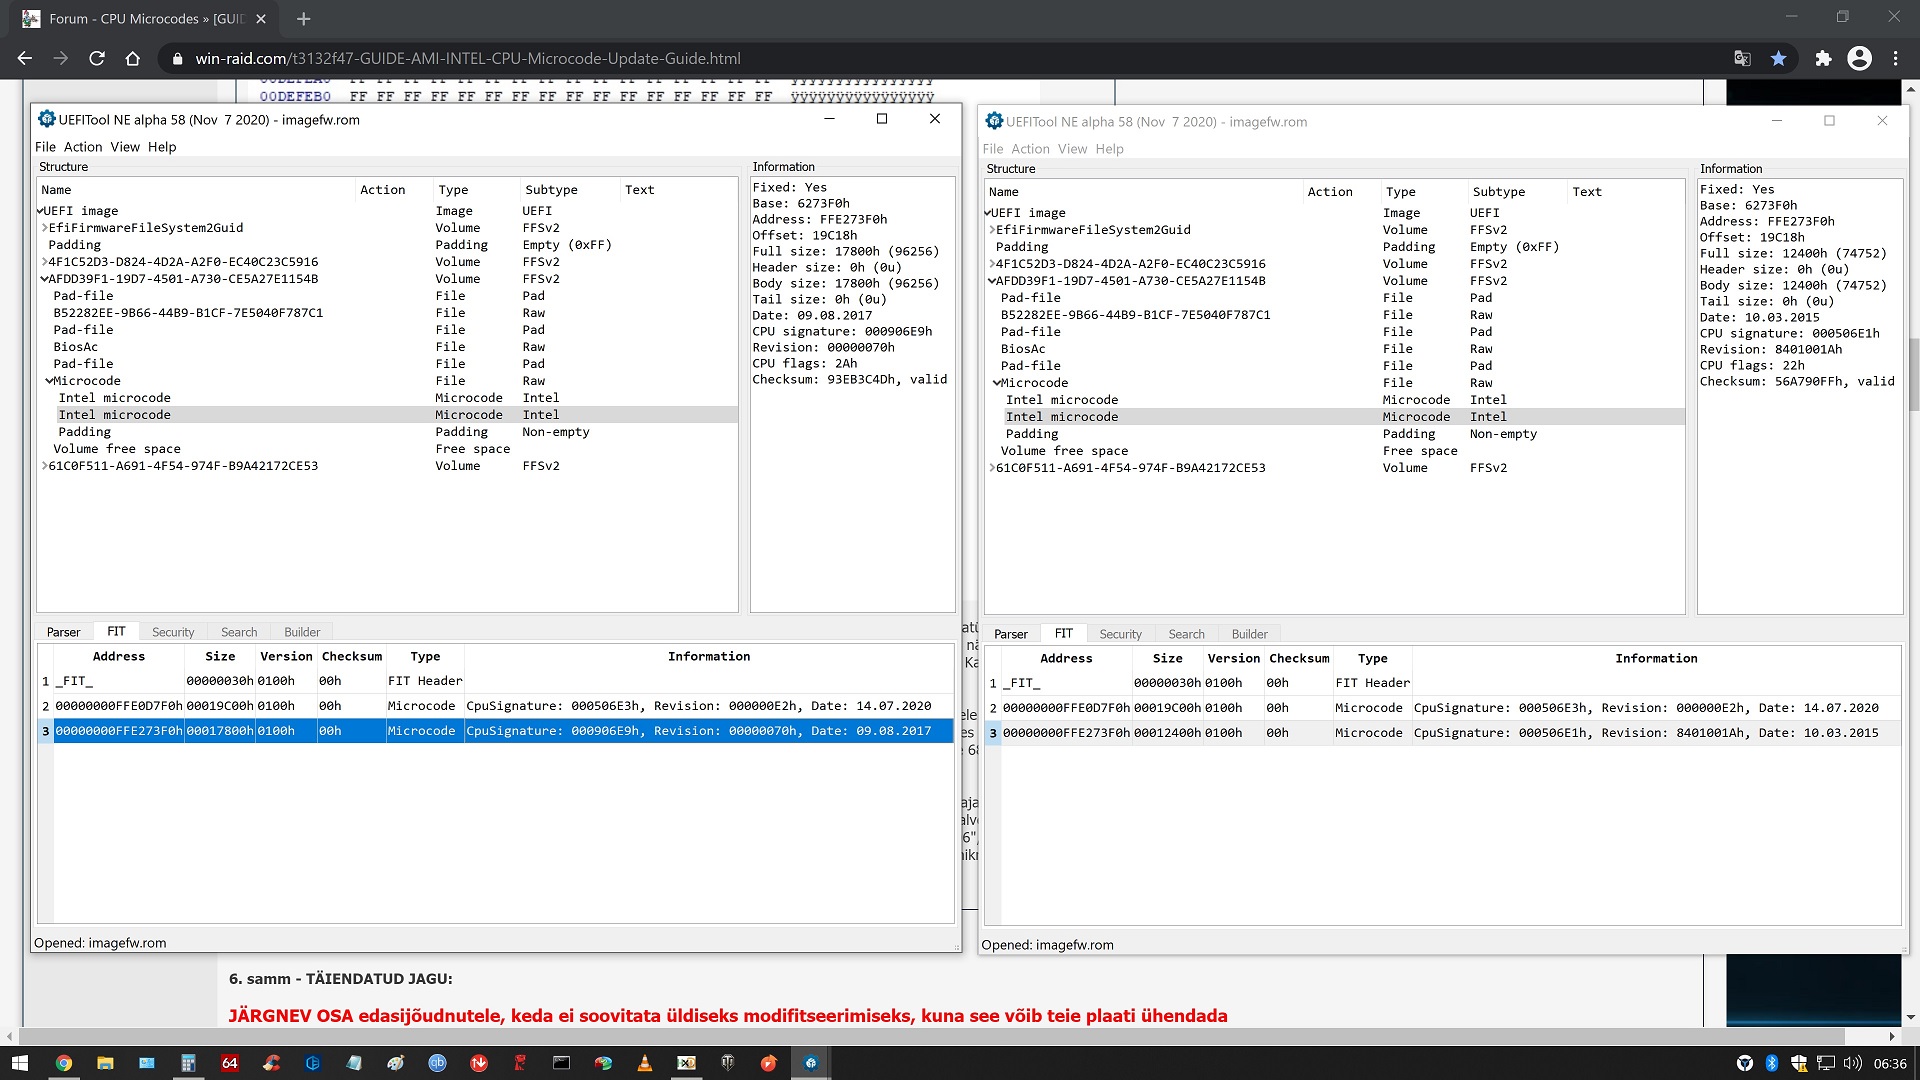
Hi davidm71 Could you check my modded bios rom which I made so that there wouldn’t be any errors. I’m a beginner in hex editing world but I needed it because my current pc lenovo thinkcentre m900 tiny with i7-6700T does not satisfy me so then I bought a i7-7700 and because of that I have to complete this thing. Anyway, by using your guide and also with help by “Lost_N_BIOS” user threads and from elsewhere I got the info to do this. Basically I swapped the unnecessary microcode with my needed microcode for i7-7700 which you can see in the image. The only thing that changed was the microcode body size which is recognizable because the swappable microcode was smaller size. During the swap I also used old empty body read FF to reduce body changes even though I saw that it does not change much. Image rom did not change but if I go by your tutorial then the address bar can change. FIT stayed the same, the only thing that changed was the microcode size and header checksum. I would be grateful if you looked over it.
Will take a look later tonight when have time. However what is a good "test" is to scrub the file with Ubu and see if it reads the microcodes and also with Uefitool NE. If you did it correctly hopefully your microcode files will be displayed.
thanks for replying. I will wait. currently gives such an error message in a flash. afuwin.exe imageFW.rom /p /n /r /sp /b /defans /capsule ±--------------------------------------------------------------------------+ | AMI Firmware Update Utility v5.09.02.1384.07.B608.LV | | Copyright (C)2017 American Megatrends Inc. All Rights Reserved. | ±--------------------------------------------------------------------------+ Reading flash … done - FFS checksums … ok - Check RomLayout … Ok. Loading capsule to secure memory buffer … done 18 - Error: Secure Flash Rom Verify fail.
i Have 3x ASUS X299 SAGE-II Motherboards, buy 3x INTEL XEON W-2223 CPU (same x299 chipset), but this CPU’s not allowed by ASUS Motherboard. Can anyone say please can i add microcode of XEON W-2223 in BIOS of my ASUS?
my ASUS motherboard full name "Pro WS X299 SAGE II"
and ASUS motherboard support my Xeon name "WS C422 SAGE/10G"
bad news. Xeon W-2xxx chipset is C422 not X299. its the same microcode 50657 for W-2255 and I9-10900X (both 10core) it requires a huge bios hack (ME) to get a regular Xeon W-2xxx work on a X299 board. for what i know nobody made it.
 , to be fair no one helped me when i asked what should i do to get rid of the microcode update that has spectre patches, if i knew that i can flash older bios and would get an older microcode without the spectre patch i wouldnt had to deal with so many problems that i had these days…