The operation to be performed to the BIOS basically consists in updating to the latest versions of vBIOS and GOP driver besides the insertion of a microcode compatible with the Coffee Lake CPUID.
The first operation is the most complex because it must be done manually (in the volume there are too many manufacturer’s customizations to use an automated process) while the other two can be done more easily through UBU Tool.
VBIOS UPDATE:
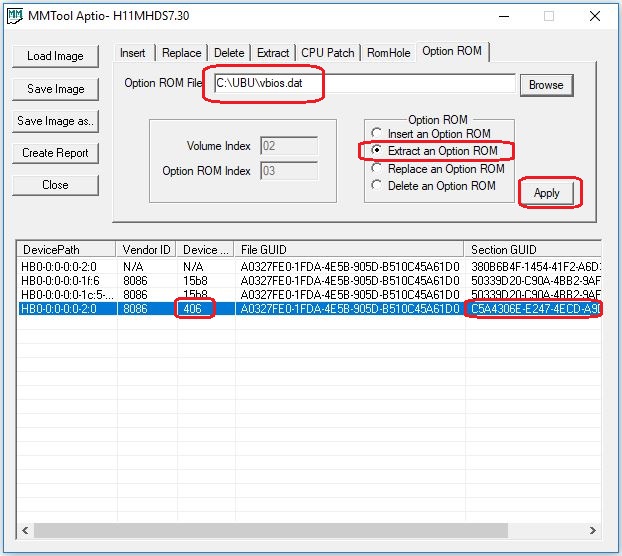
1. Open the BIOS to be modified with the MMTool program, select the “Option ROM” tab, in the table click on device 406, note the relative value of the “GUID section”, extract the OROM naming it “vbios.dat” and click on “apply”. Close MMTool.
2. Open "vbios.dat" with notepad and look for the first string "Intel(R)": just before it, there must be a number between 1034 and 1054. This number represents the version of the original vBIOS. Take note and close without saving.
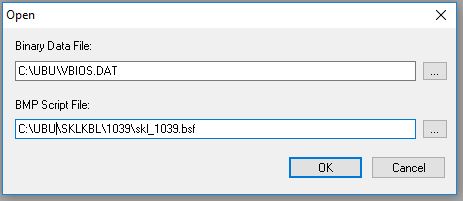
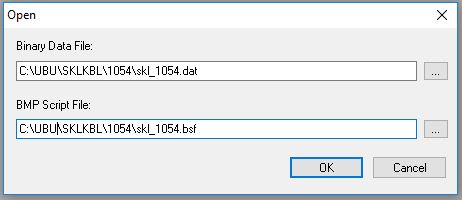
3. Open the previously saved "vbios.dat" file with the Intel BMP program, using as a script file (.bsf) that of the corresponding version taken from the SKLKBL folder (in this example it is 1039).
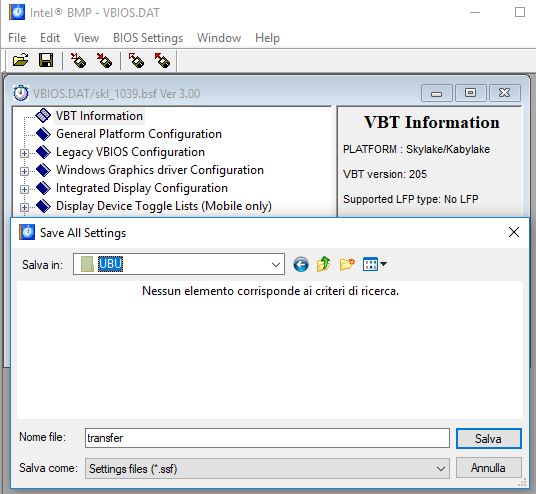
Once opened, save the settings from: "BIOS Settings" -> "Save All" by naming the "transfer" file with the extension .ssf. We have thus saved the settings of the original vBIOS that will be transferred to the new one. Close the program.
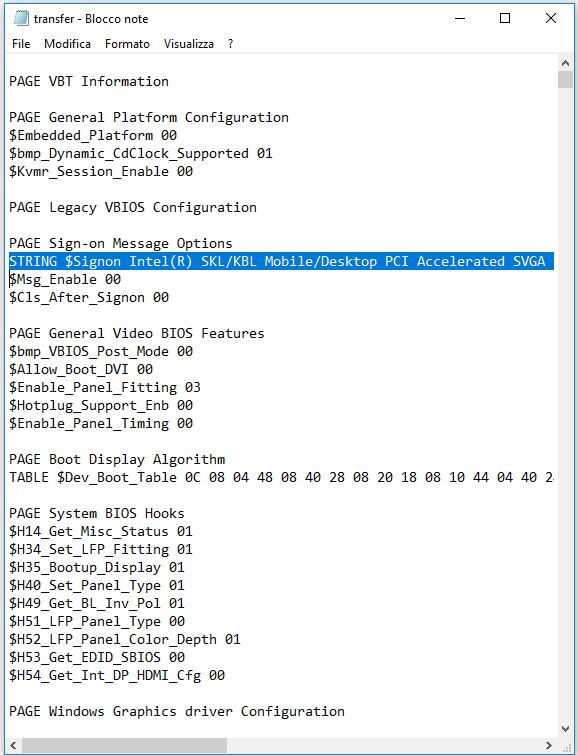
Open "transfer.ssf" with notepad and remove ALL the line that starts with "STRING $ Signon Intel (R) …". Save the file and close it (Doing this you have removed the old vBIOS description).
4. Open the "skl_1054.dat" file and the corresponding .bsf file in the SKLKBL folder with the Intel BMP program.
Apply the original settings to the new vBIOS with: "BIOS Settings" → "Apply All" by selecting "transfer.ssf". After a few moments of processing the file is ready. Save the file as new_vbios.dat and close the program.
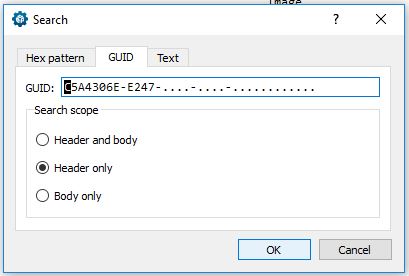
5. Now you need to replace the OROM in the original BIOS. Open the BIOS with the UEFITool program (it is also located in the UBU folder). Using the "Search …" function (File menu) in the GUID tab, enter the first part of the values noted in step 1. (Section GUID), select "Header only" and confirm.
The result of the search with the address should appear below (Messages). Double-clicking on the line in the "Messages" window highlights a line in the "structure" window. Double-click on this line.
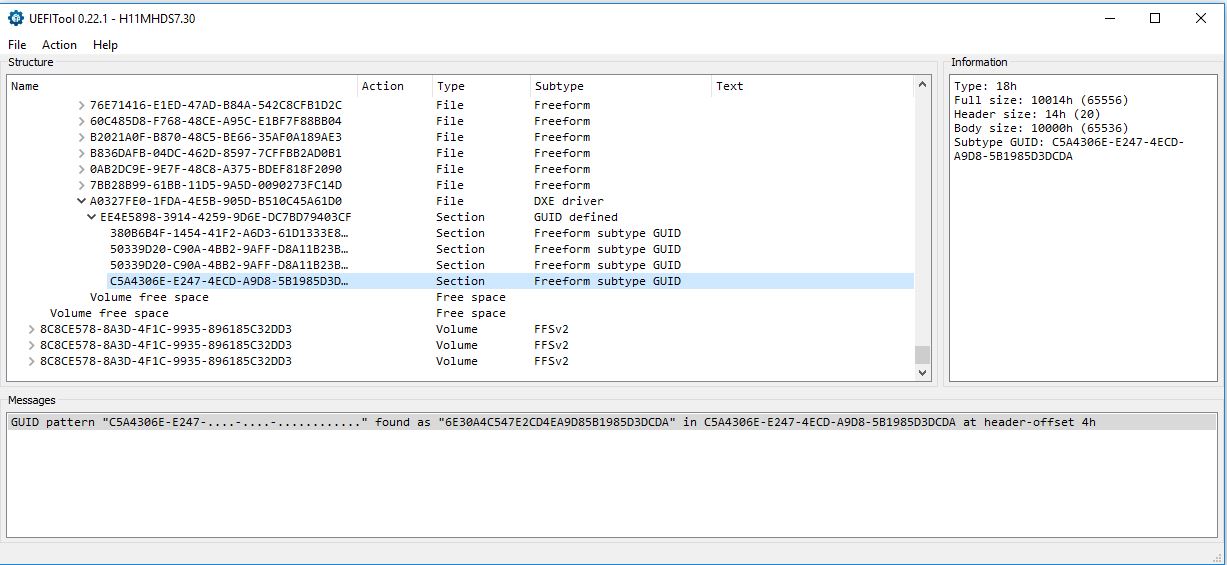
6. (OPTIONAL) to verify that the correct OROM portion will be replaced, from "Action" -> "Section" -> select "extract body", choose the name vbios1.dat and save. Check with an editor (for example HxD) that vbios1.dat and vbios.dat are identical.
7.with the line selected in step 5, from "Action" -> "Section" -> "replace body" and select the file new_vbios.dat. Confirm, then save the file (Save image file) with a new name and exit UEFITool. Now the BIOS has a vBIOS updated to version 1054.
Make a copy of the file to be kept for security in another folder.