This guide originated as a support request in another post, which turns out to be similar to what these other users wanted to achieve in a ThinkPad X201.
@Fernando suggested me to open a new topic, and so I’ve done. I’d like to share how I ended up with this solution in case that anybody else wants to correct any point, suggest an alternative way or add more information.
Please understand that I take no kind of responsibility at all. Do not follow this guide nor flash the uploaded BIOS unless you really understand the possible outcomes. Your computer may break and stop working.
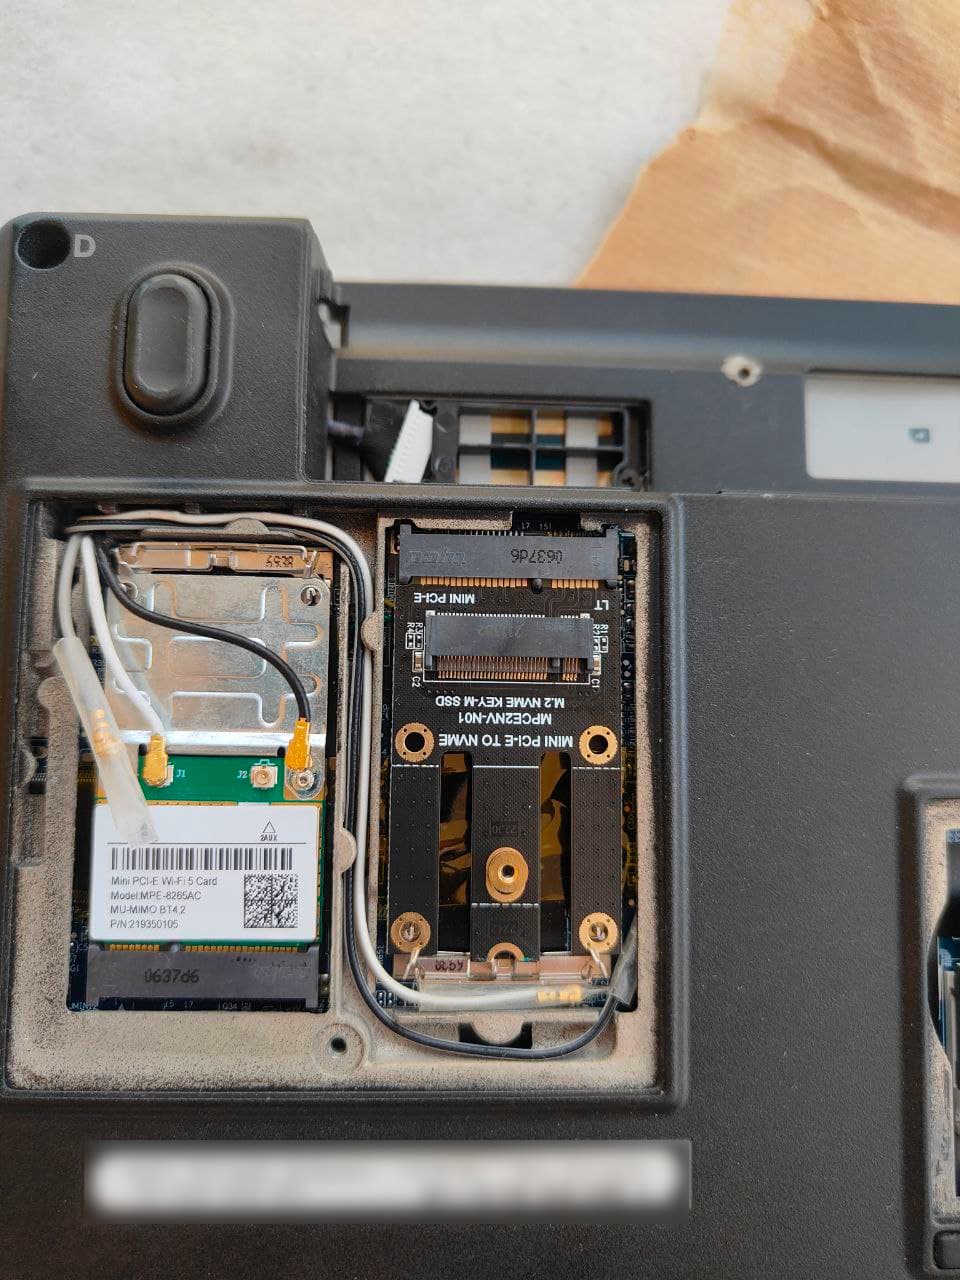
Regarding the rationale of this mod, I’m having a hard time sourcing quality SATA SSD drives. And those I can find are really expensive. Today, a quality 2230 nVME drive can be had for less money than an equivalent SATA one (or so have been my experience). You’re not going to gain a performance boost (the SATA controller tops at a theoretical 150MB/s and I have only measured about 170MB/s on the mini PCIe slot). Speaking of which, this is my adapter:
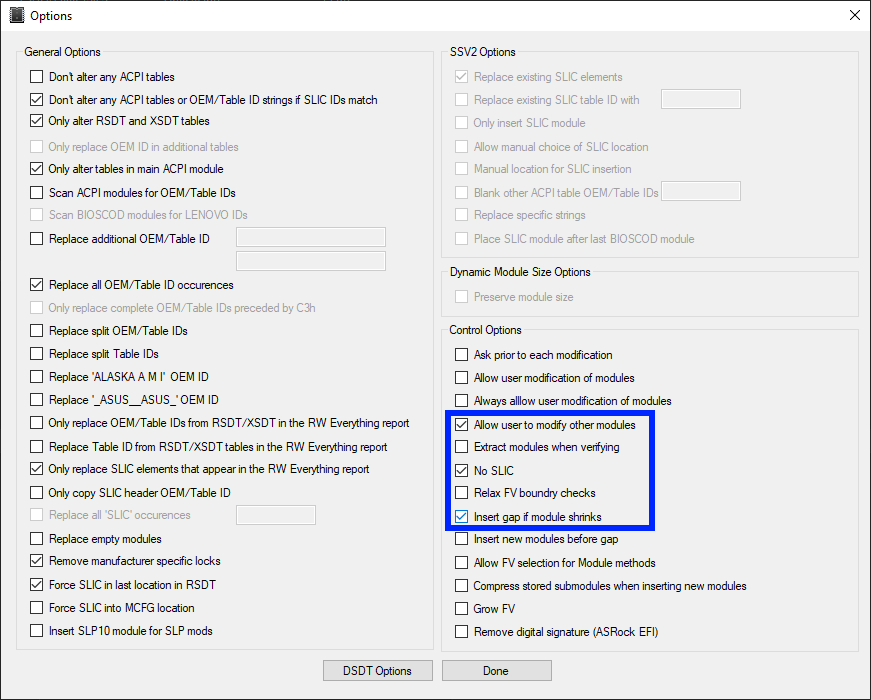
First of all, I’d like to thanks andyp for this Phoenix Tool. It has been the only one (that I’ve tried) to understand this BIOS structure, and running it with no SLIC injection or module modification results in a binary exactly to the unmodified BIOS. These other tools didn’t:
- No version of CBROM or modbin (as they seem to be meant for AWARD BIOSes)
- Phoenix Bios Editor v2.0.18E or 2.2.1.3
- phnxdeco as found on Endeer.cz
As for reading or writing the BIOS, I can confirm that flashrom works really well. So does the CH341 programmer using IMSProg (both under linux).
Regarding the BIOS structure, there are 4 option roms + an extra one:
- Intel (GMA) video BIOS
- GeForce Go 7400 vBIOS
- Broadcom 440 PXE boot
- Intel UNDI PXE boot extension
- CompuTrace V80.845
At first I tried replacing the Intel BIOS (as my unit has the GeForce Go) but the option rom is not loaded at all. I used both eierhals’ VMWare code and Manawyrm’s optiom ROM (which is larger and didn’t work for me in the past).
Replacing the Broadcom optiom ROM surely works but (obviously) you have to force booting into PXE.
As for the Intel ROM, it is chainloaded by Broadcom’s ROM. Effectively this means that by replacing the Broadcom ROM I have no working integrated PXE boot. I can always use a iPXE USB or CD.
So what about CompuTrace? Well, that option can’t be enabled in the BIOS. It seems like that option can only be enabled by the Windows software once you’ve paid for it. I wonder if that uses the small ATMEL flash that’s on the motherboard (1 or 4KB IIRC). So I don’t see any feasible way of replacing this option ROM by the nVME one and booting off it.
TL;DR:
-
Build Manawyrm’s code. You’ll probably need Linux for that. Make sure to make the ROM for the broadcom card:
$ make -j 12 NO_WERROR=1 bin/14e4170c.rom -
In Windows, run PhoenixTool. Load the ROM (or exe), go to advance, check both No SLIC and Allow the editing of modules (or something alike) and I also enabled an option to fill with padding in case a module gets shrunk (as it’ll be the case).
-
Go on. Once it tells you that it’s the time to replace the modules, go to the DUMP folder and replace 13_15.ROM by the 14e4170c.rom that you built earlier on.
-
If you want to put the cherry on the top, you might as well modify the Dell URL that is displayed on POST (12_8.ROM) to add the nVME logo. You may also replace any text that references PXE boot to indicate that it’ll boot off nVME (01_1.ROM for the BIOS setup text, 03_4.ROM for the boot menu text).
The resulting BIOS should result in something like this:
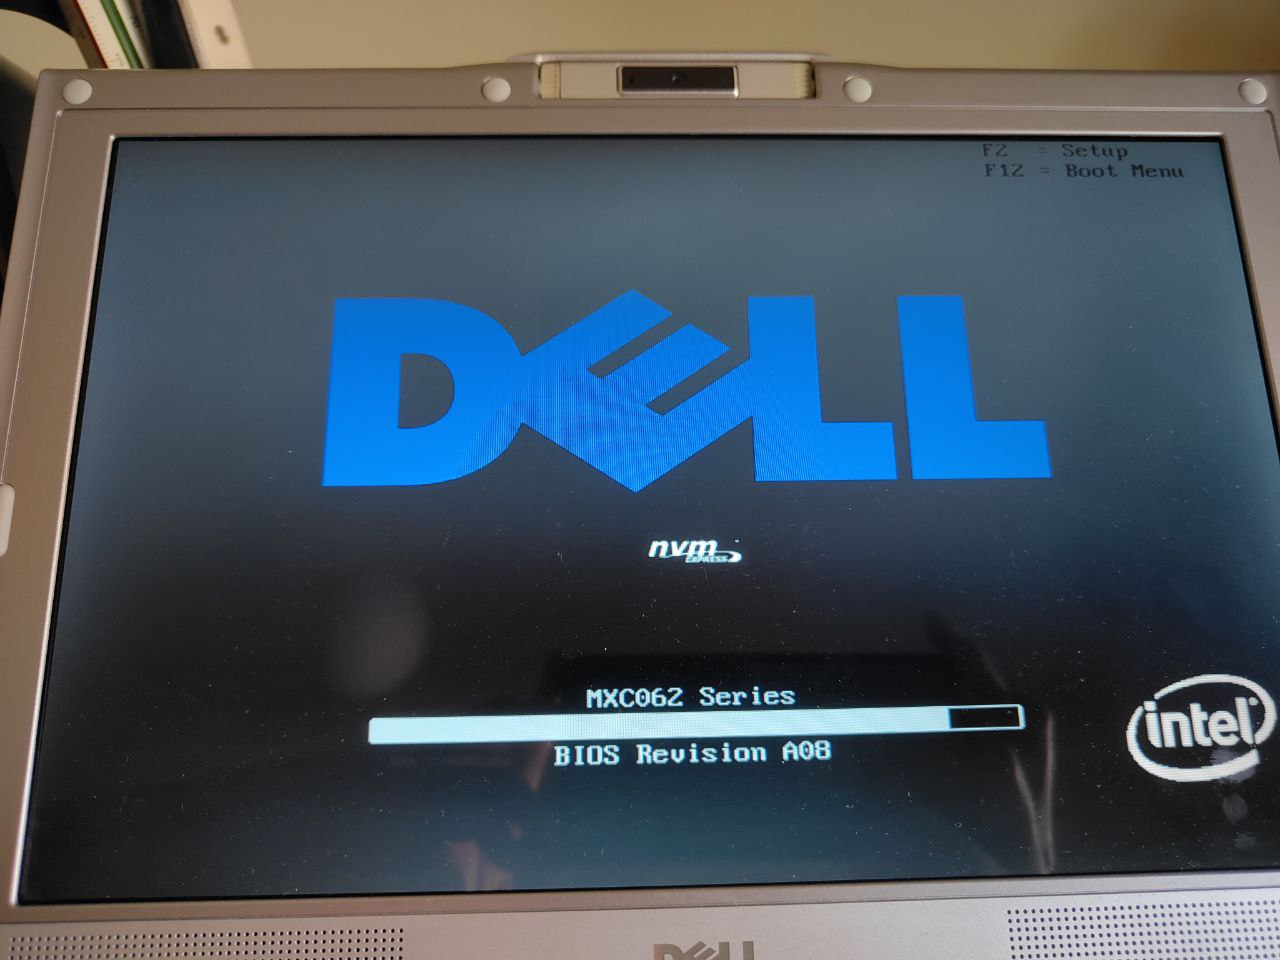
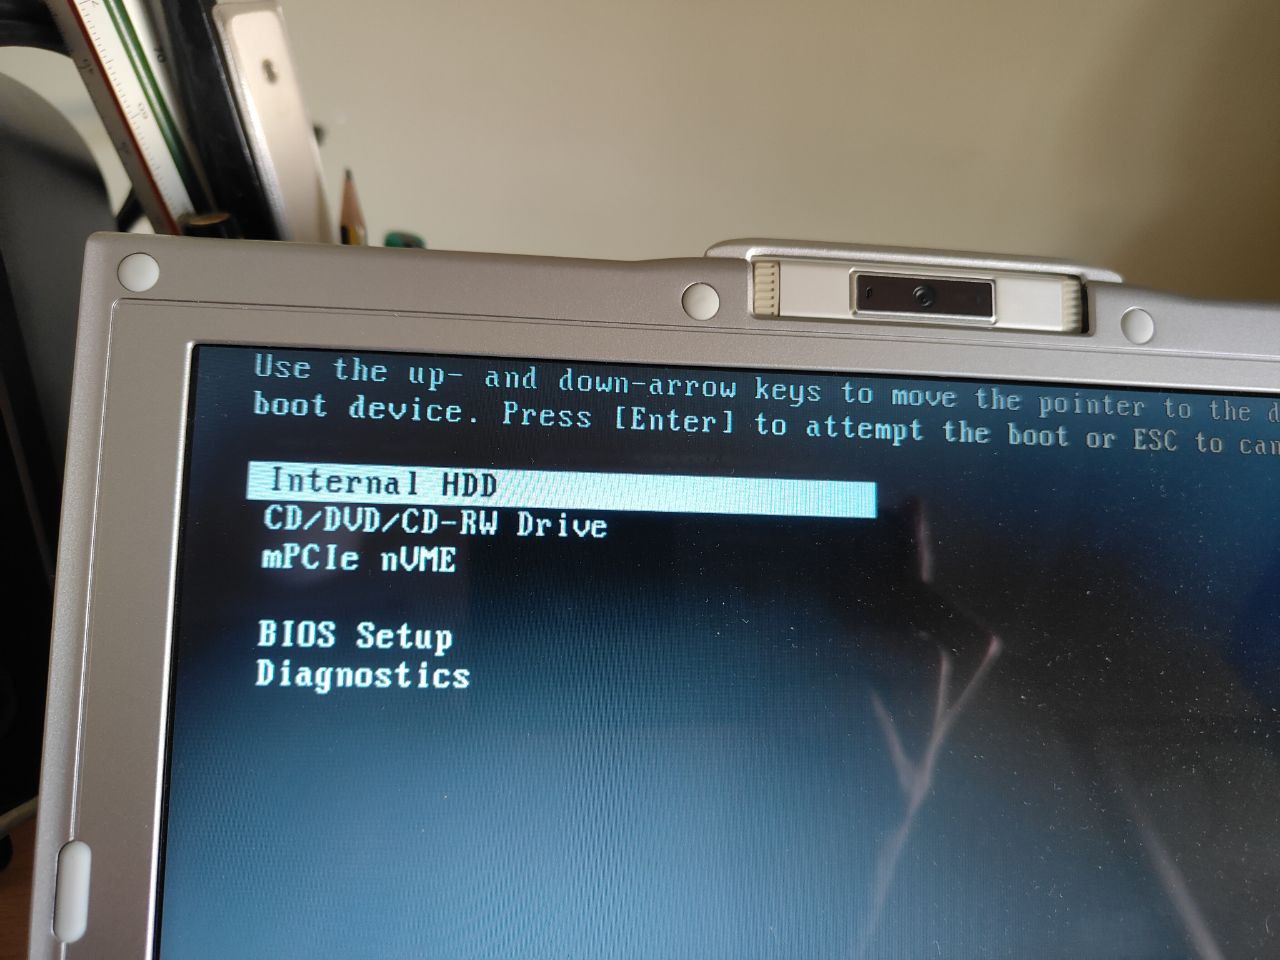

And here’s the final BIOS.
MXC62A08_pxe_logos.zip (689.9 KB)