Introduction:
This guide will tell you how to make your motherboard SLI compatible or integrate any DSDT edit without modding the BIOS. This guide works only with UEFI enabled and secure Boot disabled!
Things needed:
USB Stick min. 500MB
DSDTEditor-Linux-Mac-Win (search on google, or another one of your choice)
BootDiskUtility (BUD_v2.1.2016.020b) Get it here
EasyUEFI_Free (Version 2.9!!! not 3.0 or newer!!!) Search for it on google
The SLI DSDT License string (find it on google or in any BIOS that has SLI support)
DSDTEditor-Linux-Mac-Win (search on google, or another one of your choice)
BootDiskUtility (BUD_v2.1.2016.020b) Get it here
EasyUEFI_Free (Version 2.9!!! not 3.0 or newer!!!) Search for it on google
The SLI DSDT License string (find it on google or in any BIOS that has SLI support)
DSDT Edit:
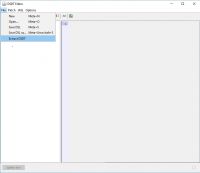
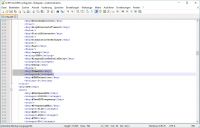
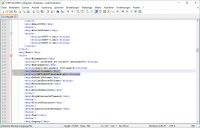
1. Open DSDT Editor
2. Click file and Extract DSDT
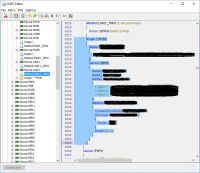
3. Insert your SLI Code (Device PCI0 -> Device SBRG, select Method UAR2._PRW and insert it in the right ‘Code window’ under this selection)
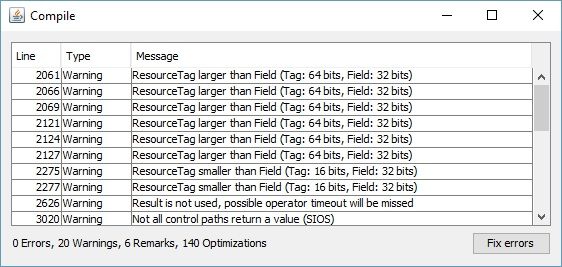
4. Press F5 to compile it or IASL -> Compile
5. If there are any errors simply press "Fix errors" close the window and the DSDT Editor
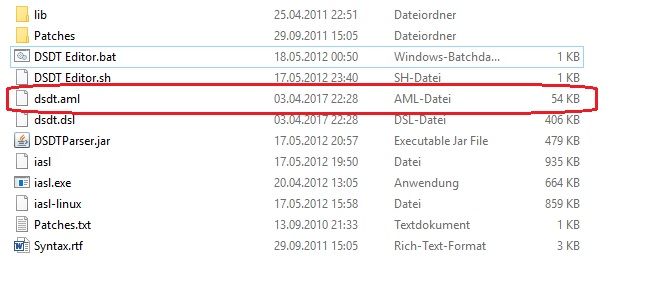
6. Now you have a dsdt.aml in your DSDT Editor Directory

Make a Clover Stick (for testing if everything works correctly):
1. Open Bootdisk Utility
2. Go to Options -> Configuration…
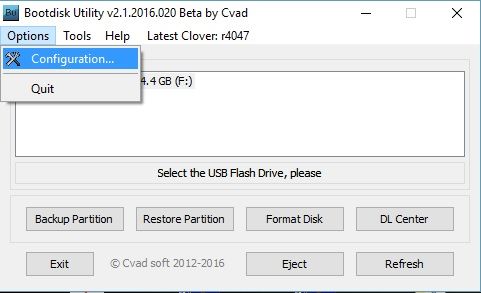
3. Click on check now, wait a few seconds and it should get the latest version number, click on OK (please be sure to check ‘DL’)

4. Click on Format Disk (ATTENTION please be sure you selct the right USB stick everything on your USB stick will be removed) and click OK, wait a few seconds until it says ‘All done’ and close the window
5. In Windows explorer go to your usb stick:\EFI\CLOVER\ACPI\WINDOWS and copy the dsdt.aml from your DSDT Editor folder in it

Once everything is done reboot your computer press F8 or F12 (depends on your BIOS) and choose your usb stick as boot device (don’t forget to choose the UEFI Bootdevice if you have UEFI & Legacy boot enabled), on the Clover screen select ‘Boot Microsoft EFI boot from EFI’
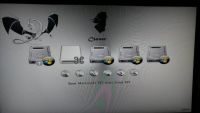
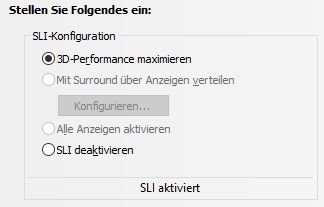
Now that it’s up and running you can see that the SLI certificate is installed and you can enable it in the NVIDIA Control Panel
(check it with AIDA64)

2. Go to Options -> Configuration…

3. Click on check now, wait a few seconds and it should get the latest version number, click on OK (please be sure to check ‘DL’)

4. Click on Format Disk (ATTENTION please be sure you selct the right USB stick everything on your USB stick will be removed) and click OK, wait a few seconds until it says ‘All done’ and close the window
5. In Windows explorer go to your usb stick:\EFI\CLOVER\ACPI\WINDOWS and copy the dsdt.aml from your DSDT Editor folder in it

Once everything is done reboot your computer press F8 or F12 (depends on your BIOS) and choose your usb stick as boot device (don’t forget to choose the UEFI Bootdevice if you have UEFI & Legacy boot enabled), on the Clover screen select ‘Boot Microsoft EFI boot from EFI’

Now that it’s up and running you can see that the SLI certificate is installed and you can enable it in the NVIDIA Control Panel
(check it with AIDA64)


Move Files from your Clover USB stick to your EFI Partition:
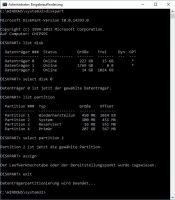
1. Open a Admin Command Promt (Windows 10: right click the Windows button and select Command Prompt (Admin) and click Yes)
2. Type ‘diskpart’ after diskparts loads type ‘list disk’
Diskpart now shows you all the drives that’s connected to your computer, find your system drive and remember the number
3. Type ‘select disk X’ (X stands for the number that’s your system drive in my case 0)
4. Type ‘list partition’
Now you see all your partitions on your main drive, locate the partition wich is named ‘System’
5. Type ‘select partition X’ (X stands for the number that’s your system partition in my case 2)
6. Type ‘assign’ (a new drive will show up in Windows Explorer that you cannot open but there is a way out)
Don’t close the Command Promt!!!
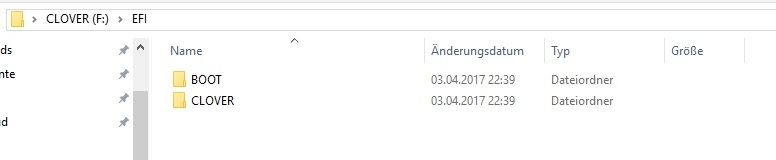
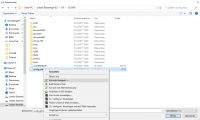
7. Bevor we go to the EFI partition open the windows explorer go to usb stick:\EFI, right click the folder ‘CLOVER’ and copy it to the clipboard
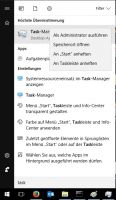
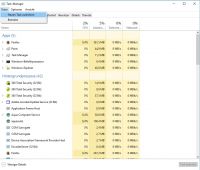
8. Click on the Windows button, type ‘taskmgr’, right click on it and run as administrator
9. Click on File -> run new task, click on browse and go to your new assigned drive, in my case E:\EFI and paste the folder ‘CLOVER’ from your usb stick
If you don’t want to see the Clover bootscreen continue reading, if you have a multiboot system with Linux or others then you can continue with step 10
10. Close the browse windows and taskmanager, open again your command promt
11. Type ‘list volume’ (locate the volume wich is your EFI parititon)
12. Type ‘select volume X’ (X stands for the number that’s your efi partition in my case 2)
13. Type ‘remove letter=X’ (X stands for the drive letter from your EFI partition)
14. Type ‘exit’ and close the command promt and remove the USB Stick

2. Type ‘diskpart’ after diskparts loads type ‘list disk’
Diskpart now shows you all the drives that’s connected to your computer, find your system drive and remember the number
3. Type ‘select disk X’ (X stands for the number that’s your system drive in my case 0)
4. Type ‘list partition’
Now you see all your partitions on your main drive, locate the partition wich is named ‘System’
5. Type ‘select partition X’ (X stands for the number that’s your system partition in my case 2)
6. Type ‘assign’ (a new drive will show up in Windows Explorer that you cannot open but there is a way out)
Don’t close the Command Promt!!!

7. Bevor we go to the EFI partition open the windows explorer go to usb stick:\EFI, right click the folder ‘CLOVER’ and copy it to the clipboard

8. Click on the Windows button, type ‘taskmgr’, right click on it and run as administrator

9. Click on File -> run new task, click on browse and go to your new assigned drive, in my case E:\EFI and paste the folder ‘CLOVER’ from your usb stick

If you don’t want to see the Clover bootscreen continue reading, if you have a multiboot system with Linux or others then you can continue with step 10
9a. Enter the CLOVER directory (in the right lower corner click on All Files .) right click on ‘config.plist’ and open it with Wordpad, Notepad++ or the editor of your choice
9b. Find the key ‘Timeout’ and change the integer to ‘0’ (this will disable the GUI of Clover, but only if you do the next step correctly)
9c. Find the key ‘Default Loader’ and change the string to ‘\EFI\BOOT\bootx64.efi’ save and close the file (this will tell Clover to boot right into windows, with the patched DSDT)

9b. Find the key ‘Timeout’ and change the integer to ‘0’ (this will disable the GUI of Clover, but only if you do the next step correctly)

9c. Find the key ‘Default Loader’ and change the string to ‘\EFI\BOOT\bootx64.efi’ save and close the file (this will tell Clover to boot right into windows, with the patched DSDT)

10. Close the browse windows and taskmanager, open again your command promt
11. Type ‘list volume’ (locate the volume wich is your EFI parititon)
12. Type ‘select volume X’ (X stands for the number that’s your efi partition in my case 2)
13. Type ‘remove letter=X’ (X stands for the drive letter from your EFI partition)
14. Type ‘exit’ and close the command promt and remove the USB Stick

Make Clover bootable from your UEFI Partition:
Continue only if you know what you are doing, you can destroy your boot manager if you don’t follow these steps exactly (especialy if you delete a option in BUD)
1. Install and open Easy UEFI Free
2. Click on ‘Manage EFI Boot Option’ and locate the little green ‘+’ icon

3:
1 Select the type ‘Linux or other OS’
2 Description: ‘Clover’
3 Select the EFI Partiton
4 Browse
5 Locate the Clover efi in \EFI\CLOVER\CLOVERX64.efi and press OK
6 Press again OK
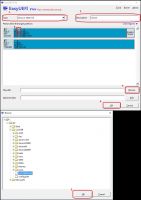
4. Select the ‘Clover’ entry and move it with the green up arrow to the top, once that is done close the windows (eventually uninstall EasyUEFI) reboot your computer and enjoy your work.
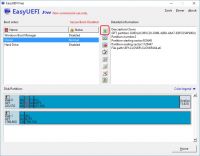
You don’t have to change the boot order from your BIOS menu you’ve already done that in EasyUEFI.
Good Luck,
Christoph
This guide is dedicated to @CodeRush who gave me the tip to solve this problem with CLOVER.|addpics|ekl-8-8837.jpg-invaddpicsinvv,ekl-9-2ba8.jpg-invaddpicsinvv,ekl-b-0f49.jpg-invaddpicsinvv,ekl-c-4b07.jpg-invaddpicsinvv,ekl-d-7cd5.jpg-invaddpicsinvv,ekl-e-3924.jpg-invaddpicsinvv,ekl-f-852c.jpg-invaddpicsinvv,ekl-g-d2ba.jpg-invaddpicsinvv,ekl-h-5380.jpg-invaddpicsinvv,ekl-i-75d5.jpg,ekl-j-90db.jpg-invaddpicsinvv,ekl-k-271e.jpg-invaddpicsinvv,ekl-l-0519.jpg-invaddpicsinvv,ekl-m-47a6.jpg-invaddpicsinvv,ekl-n-0907.jpg-invaddpicsinvv,ekl-o-592b.jpg-invaddpicsinvv,ekl-p-88af.jpg-invaddpicsinvv,ekl-q-b30a.jpg,ekl-r-6b3f.jpg-invaddpicsinvv,ekl-s-6e8c.jpg-invaddpicsinvv,ekl-t-0a4e.jpg-invaddpicsinvv|/addpics|
Edit: New EasyUEFI Versions doesn’t allow to create new entry, corrected the link.