Super slow boot. It takes about a minute to get to the POST screen and another minute to start the bootloader (from Windows).
Once I make changes to the BIOS settings, pressing save freezes the laptop for about a minute.
When I use the bootable setup_var tool (which allows me to pretty much write anything to any address. I use it to undervolt the CPU by 100mV), making a change takes about a minute before I can do something again.
So there’s something wrong with writing to the BIOS. Could it be a dying BIOS chip or something else?
I ordered the clip so that I can at least make a backup. Maybe it’s worth a shot to replace it?
It never occurred to you that fiddling with the NVRAM this way might itself be the cause? I thought we’re talking a stock firmware here…
Dump the firmware, replace your NVRAM with a stock NVRAM EFI volume and check then how the system reacts.
NVRAM isn’t like CMOS where you simply can reset by removing the battery…
One of these histories where you get told the relevant parts first completely at the end…
I used the efi tools to figure out which address contains the voltage for the CPU by extracting the v1.18 bios.
I have to add to this that this happened before I ran the setup_vars. It was already slow at around bios v1.20 up to the latest 1.24. I then flashed 1.18 (but since it didn’t downgrade ME, I couldn’t undervolt with the Intel XTU tools, but I was able to use setup_var with success). So the things I did with setup_var did not affect the system. I obviously first did a read to check the value before changing
I’ll read out the BIOS chip once the clip arrives.
Unfortunately the Dell bios recovery 3 on my laptop doesn’t specifically mention NVRAM reset (as in the documentation), so I’m not sure if it resets (nor do I know if it picked the recovery file from the USB or one saved on the hard drive). The automation of recovery 3 is annoying to say the least.
By the way, won’t the service switch on the motherboard be useful in this case?
Can you post a couple pictures of what you believe is the service switch on this motherboard? I would love to be wrong on this for a few reasons, but I don’t think the board has that.
OK, I missed that. If you can get the computer into physical service mode, you shouldn’t have to mess with a programmer. You’re only looking to clean NVRAM and ME (even though that’s probably not a problem), flash, and move on.
Have you tried to get it into service mode, and then run fptw64 -d backup.bin?
If you can get it into service mode, you should be in great shape. Take a look at my last post in this thread, and give it a go.
If you can flash a clean NVRAM and ME and you still have a problem, then it may be a hardware issue.
I would discontinue worrying about undervolting for the time being. I don’t want to read about this issue, but with new Precision 1.40 firmware, it shouldn’t be an issue.
I moved the switch and held it (as it’s spring loaded). Booted windows and ran the command, unfortunately error 318, no read access.
Running the meinfo program shows that it indeed has no read access.
I also came across this thread stumbling on the same issue (when it comes to dumping the bios without a programmer).
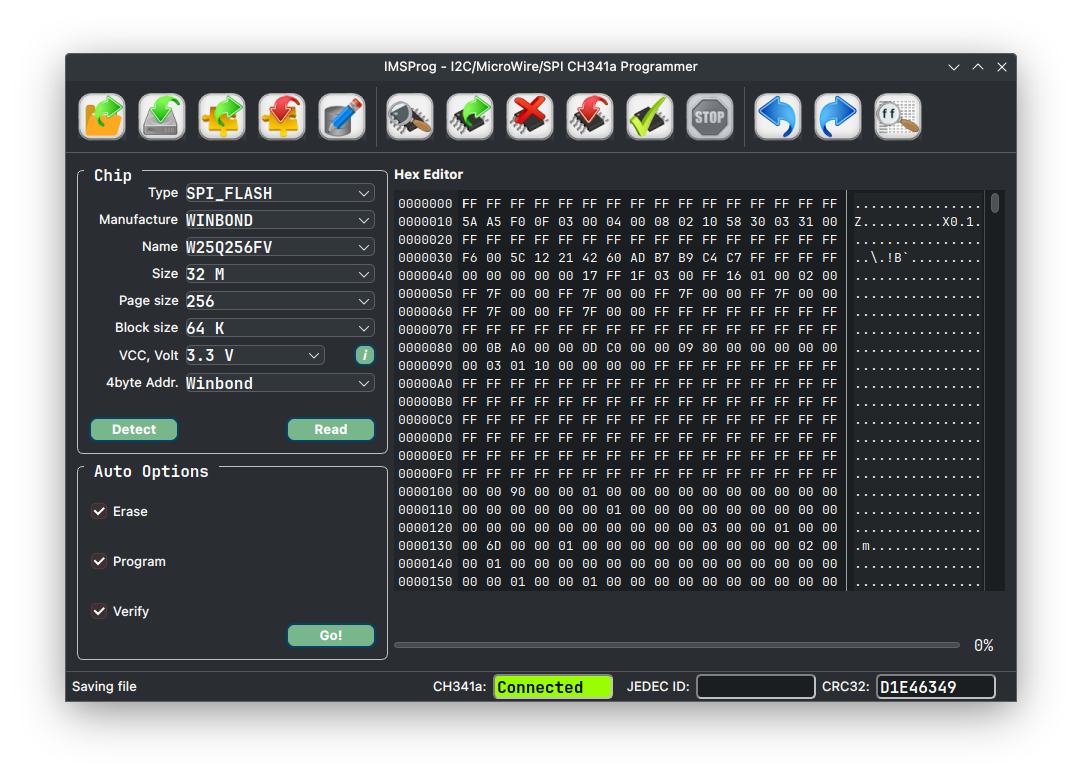
Hi, I received the programmer clip. I used IMSProg to read the BIOS twice (it took about 3 minutes to read it once) and compared the SHA512 of each saved binary to verify that it is read correctly.
Included the dump of my BIOS. I’m definitely not experienced with using the BIOS modding tools (I’ve only successfully injected ReBarUEFI on a Z97 Asus VII Ranger).
What would be the next steps? Or can someone take a look and verify if there’s actually something wrong with it?
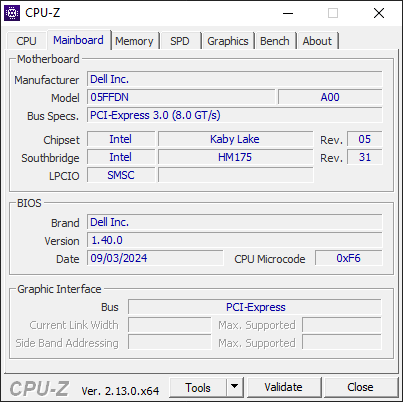
Note: this is with the Dell 5520 1.40.0 bios flashed on my XPS15.
Hi. I think all you really have to do is replace the nvram with the stock nvram from the Precision 5520 v 1.40 bios upgrade, and then clean the ME per the directions you’ve already been pointed to.
What CPU do you have in your laptop? The only real mod you may want to consider is upgrading your CPU microcode.
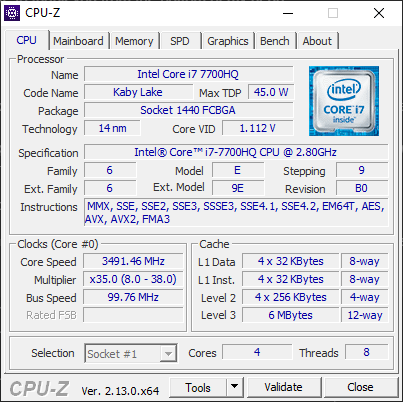
I believe it has an i7-7700HQ inside. Unfortunately, the laptop now doesn’t boot after reading the BIOS.
It throws 3 orange lights and 3-5 white lights. The blinking pattern isn’t consistent, as it flashes very rapidly in between. Not sure if I blew up something while reading the chip…
Edit: It’s not bricked, just again takes ages to boot…
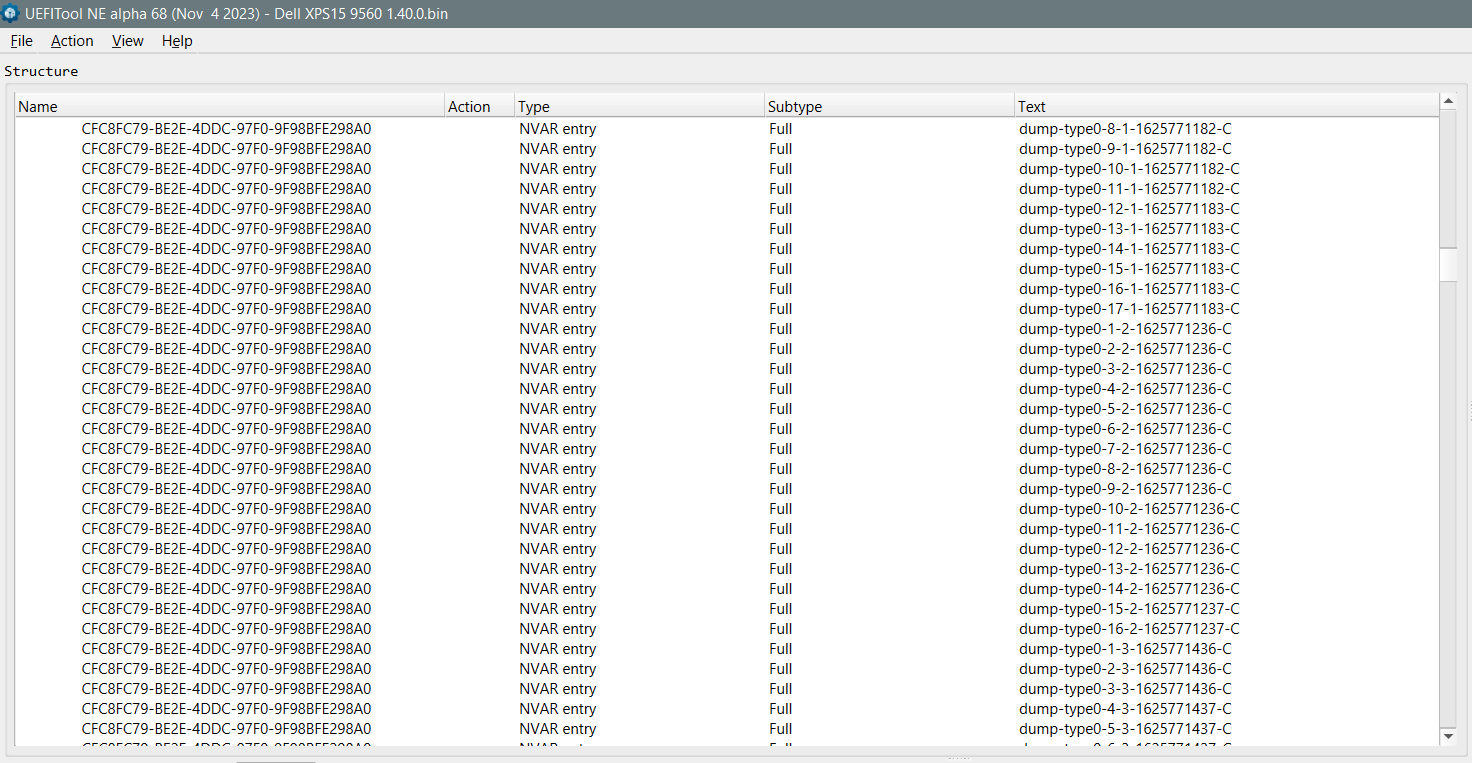
I was going to point you back here, but your dell bios update structure is slightly different than that one (and the XPS 15 9570/Precision 5530). Instead of being sure about it, I think you’re going to save the first two EfiFirmwareFileSystem2Guid volumes (in the extracted 1 Precision_5520_1.40.0 – 1 System BIOS with BIOS Guard v1.40.0 bin) “as is” with UEFITool NE, and then replace what’s in your full bios with them using UEFITool_028.
Maybe lfb6 will hop in here to advise. The more intense procedure will be cleaning the ME.
When you read the winbond bios chip, did you unplug the battery and hit the power button for good measure? Glad you got it to boot.
Pretty sure there’s a cpu microcode update you can easily apply with UBU - check cpu906E9_plat2A_ver000000FA_2024-03-07_PRD_E8FA415B.
Don’t do any ‘modding’ on a semi bricked device! You add an additional variable which potentiates the amount of uncertainty especially if you don’t have a clear reason for undesirable behaviour.
NVRAM is 80 % of its size filled with a sort of dumps which definitely shouldn’t be there!
lfb6, thanks for doing this, and the confirm on the nvram emptying/cleaning. And thanks for pointing out nvram errors.
I think we could have checked this by running fptw64 -d backup.bin -bios. His laptop should allow for that - and he should be able to run that after putting it back together.
I ran it on my laptop, and noticed some (Text-less) Invalid NVAR enty(s), but no dump thingies.
That command with the -bios option doesn’t dump the full bios. A full bios dump attempt using fptw64 -d backup.bin won’t work for me either - I get this error: Error 185: FCERR is set
But I can dump just the bios region. You wouldn’t think there would be difference between these laptops, but my ME version is a 12.
I successfully flashed the bios and did a readback to check. The laptop seems to misbehave (as it did yesterday evening). disconnecting the cmos helped yesterday, but not today.
The flashing sequence makes no sense, as the pulses aren’t of equal length. Difficult to decipher the issue. It seems to either be 3 2 or 3 5. XPS diagnostic indicator
3 2 PCI or Video card/chip failure
3 5 SBIOS Flash Corruption
I’ve done Dell’s extensive test some months ago and it showed no issues with the video cards, so I doubt it’s 3 2.
lfb6 and everybody else, I would like to thank you from the bottom of my heart.
Absolute legends!
The laptop boots up like it used to!
To fix the boot issue I had is to follow the simple procedure. Remove the battery and CMOS. Wait until the power is drained.
Then plug back everything and importantly, plug in the AC adapter. Wait until it figures out how to boot itself (if it stays off for long, press the power button).
The issue was indeed a clogged up NVRAM.
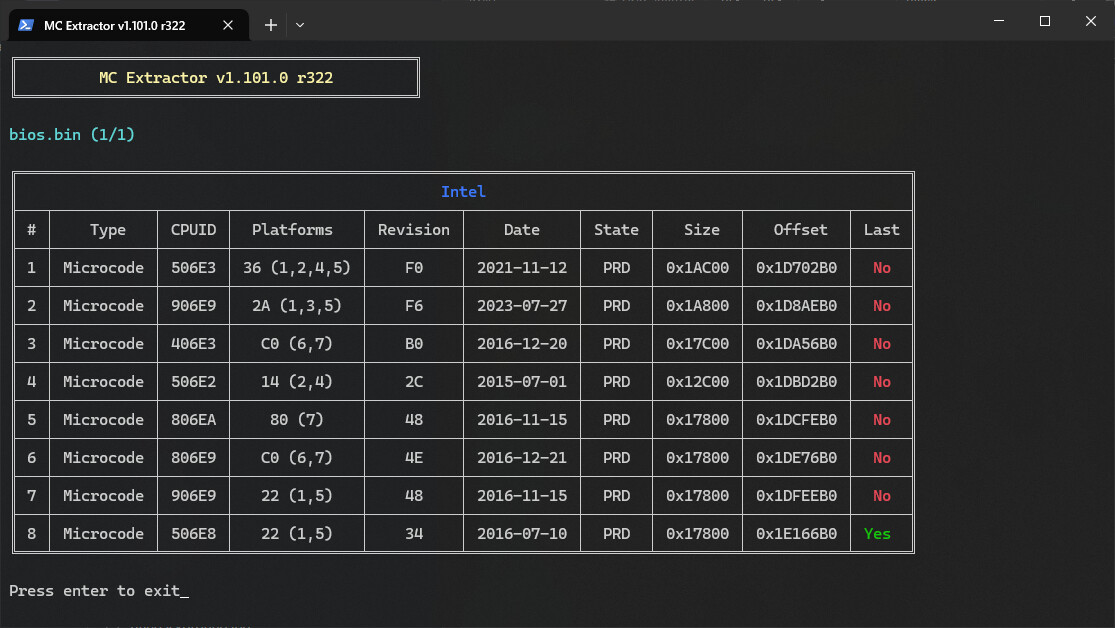
In case there’s a need for newer microcode, I opened the bios (1.40.0) with MCExtractor and it shows these:
Yes. UBU will update other microcodes that won’t apply, but no problem. The microcodes in UBU might not be the latest, but you can add newer ones without an issue.
I was really hoping you could get that laptop into physical service mode, but I read the reddit link you posted, and it wouldn’t apply to the 9570 anyway.
This was a great topic. Glad it worked out for you.
Thanks for the feedback, a clear CMOS procedure is indeed included in a standard flashing procedure.
Invalid entries are normal and normally just outdated, a new entry has been written, sometimes it’s kinda a chain with offset to next entry included, sometimes it’s managed just by the GUID