AWARD-Phoenix Legacy-BIOS How to Add Bootable NVMe M.2 SSD Support to Legacy Motherboards?
As you can understand from the topic title, how to add NVMe SSD Support to old motherboards with AWARD-Phoenix Support? I will try to explain this to you in a simple and understandable way.
Other details will not be here.
If this topic is similar to previous topics and is considered unnecessary by the Forum administrators, it can be removed.
This topic is open to all kinds of comments and support.
I would appreciate if you do not make any other off-topic additions other than adding NVMe SSD Module in Phoenix-AWARD Legacy mode.
Again, this explanation will be focused on the topic, short and clear.
I think it will be a guide for users who have old motherboards with AWARD-Phoenix Support but without Bootable NVMe M.2 SSD support.
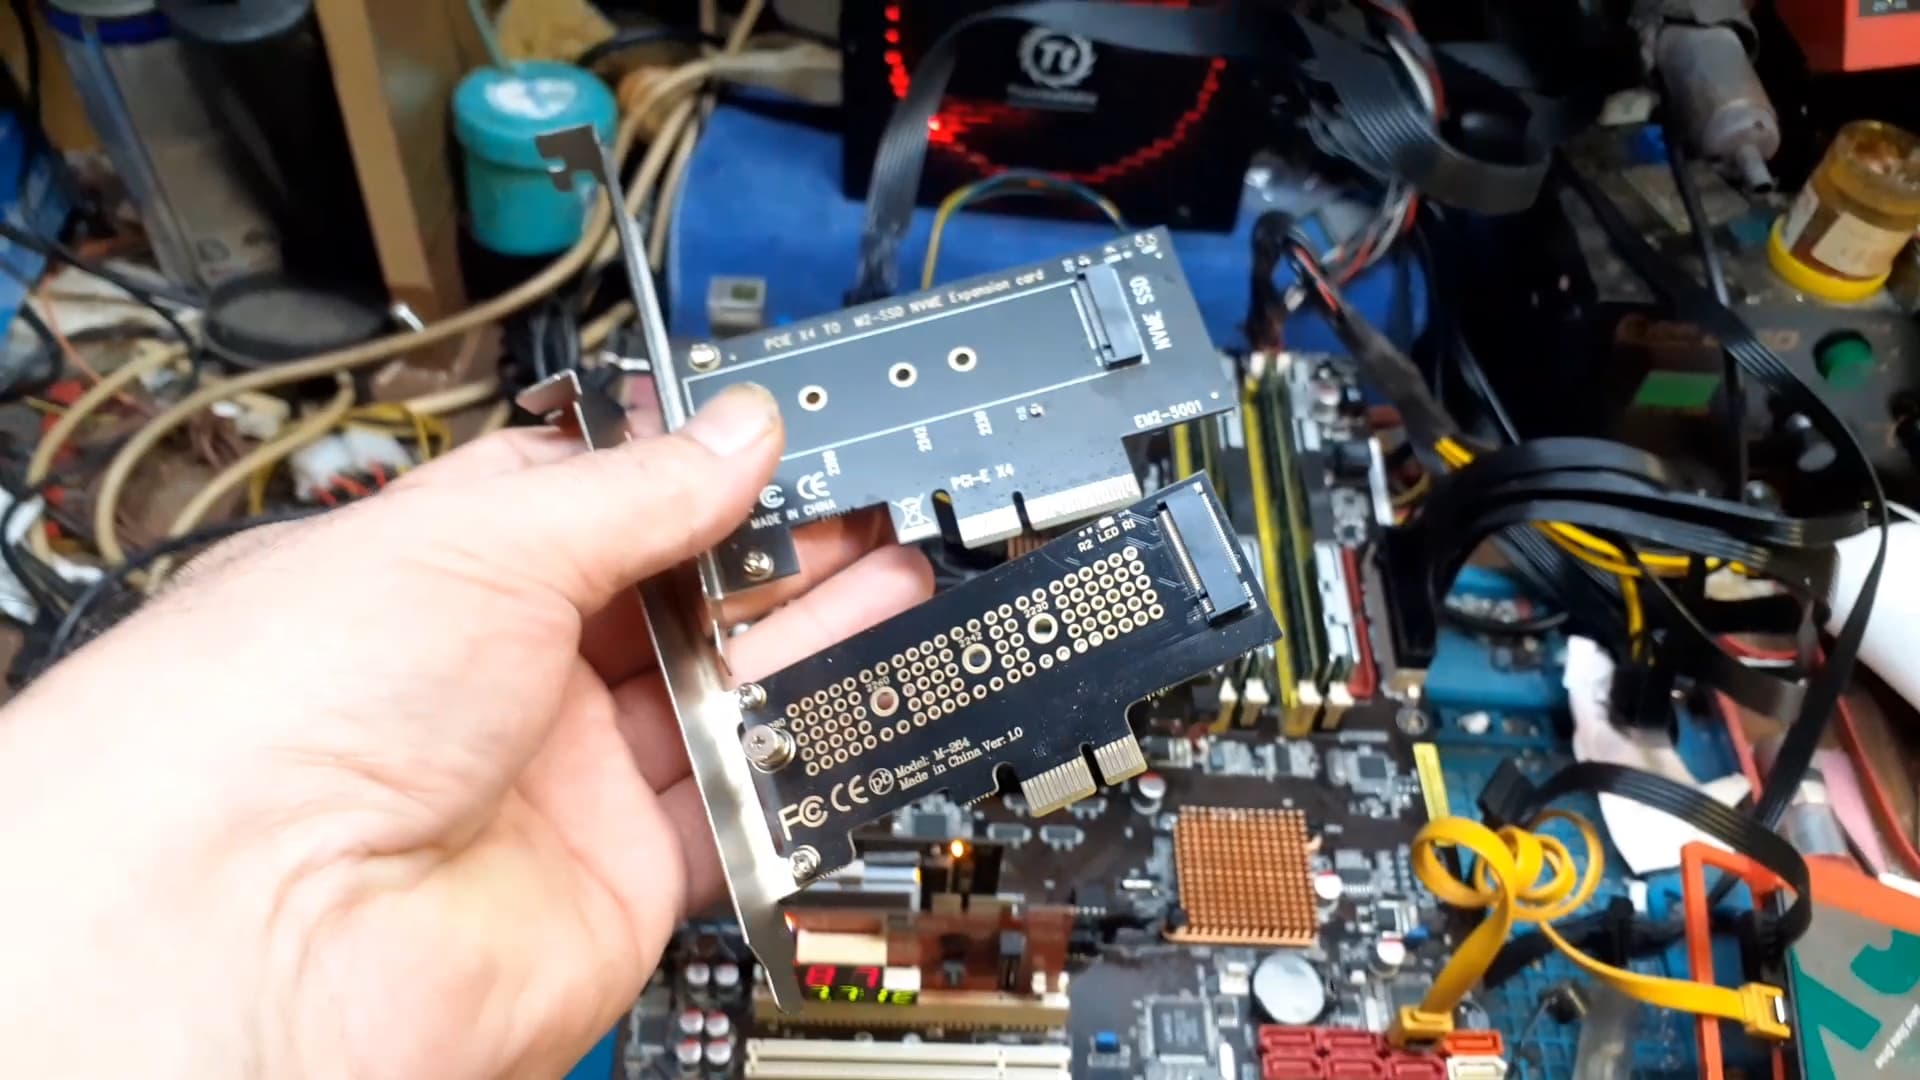
First, what you have is similar to the pictures I showed below:
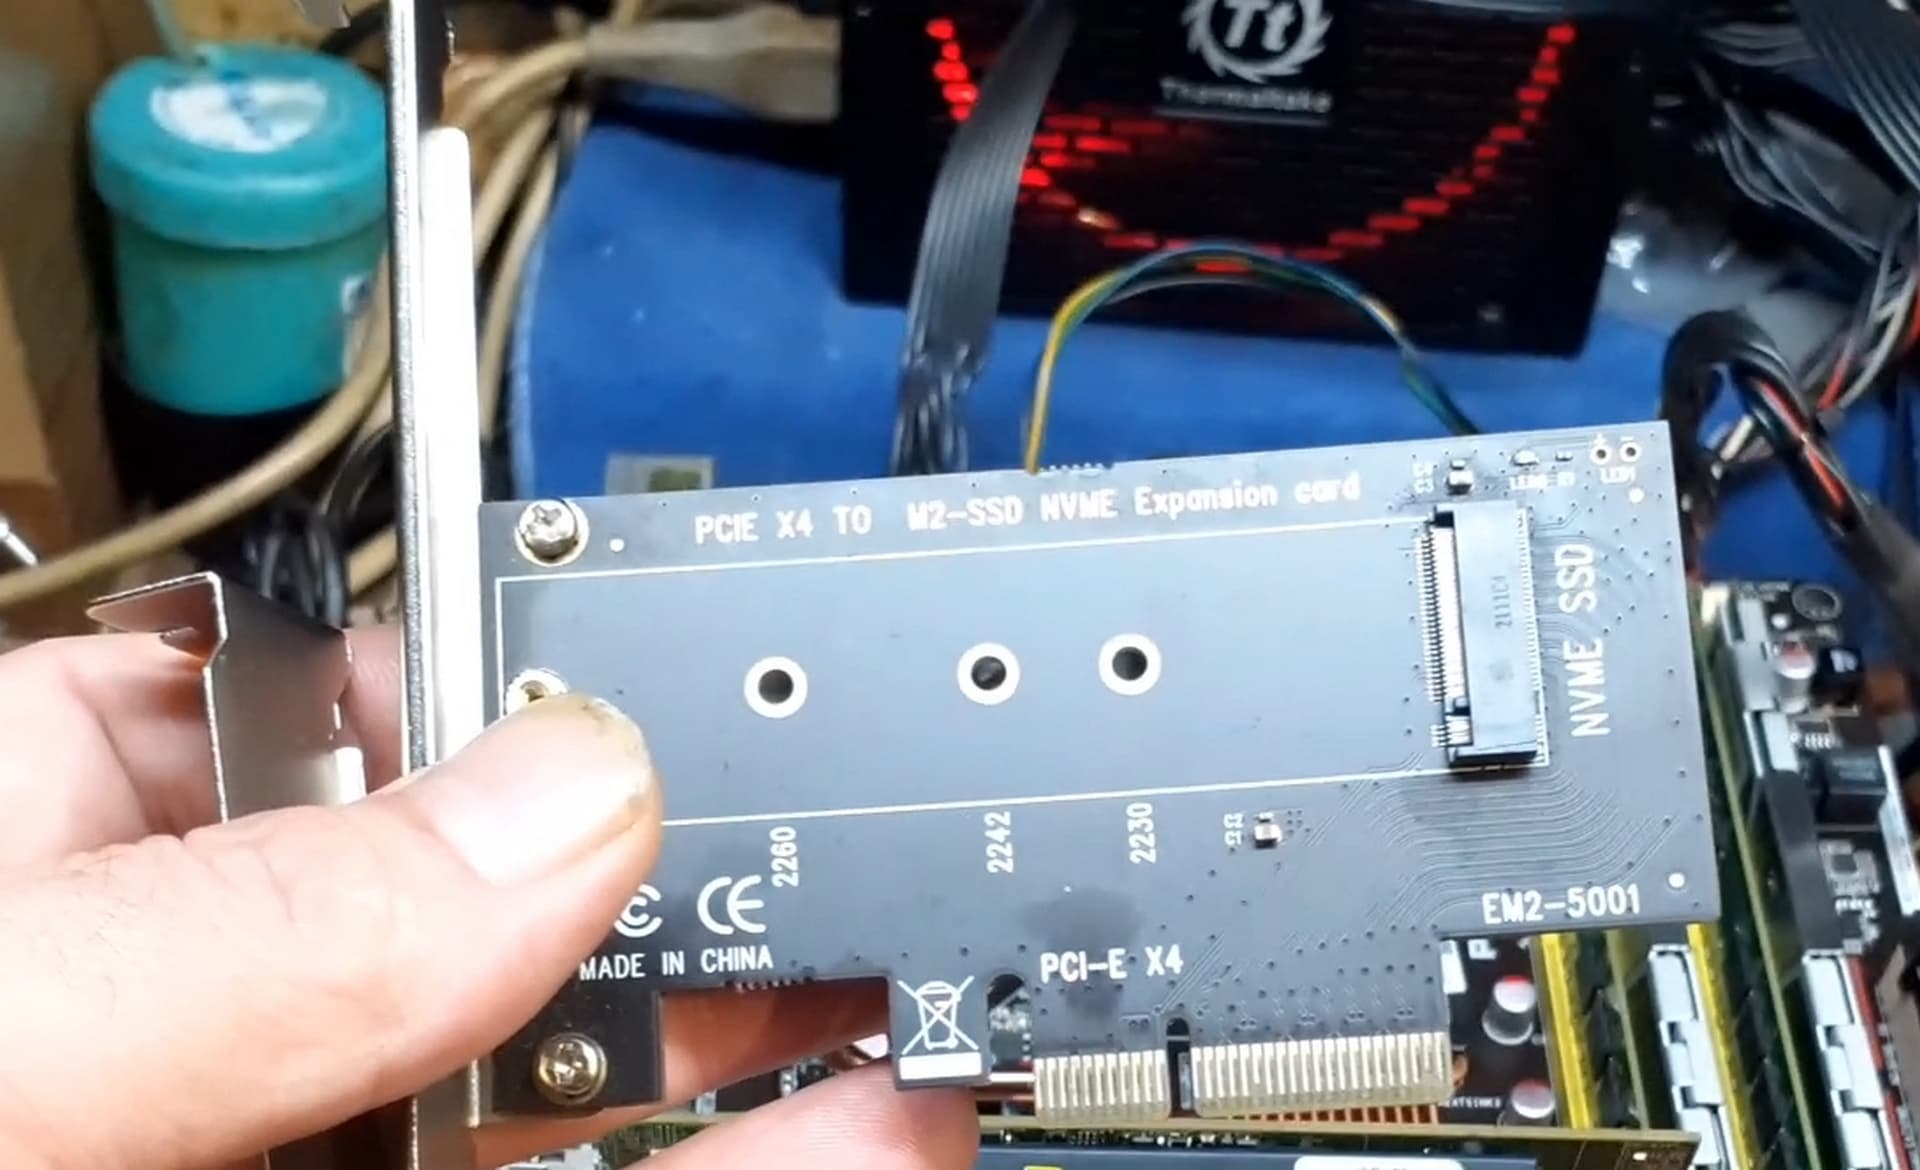
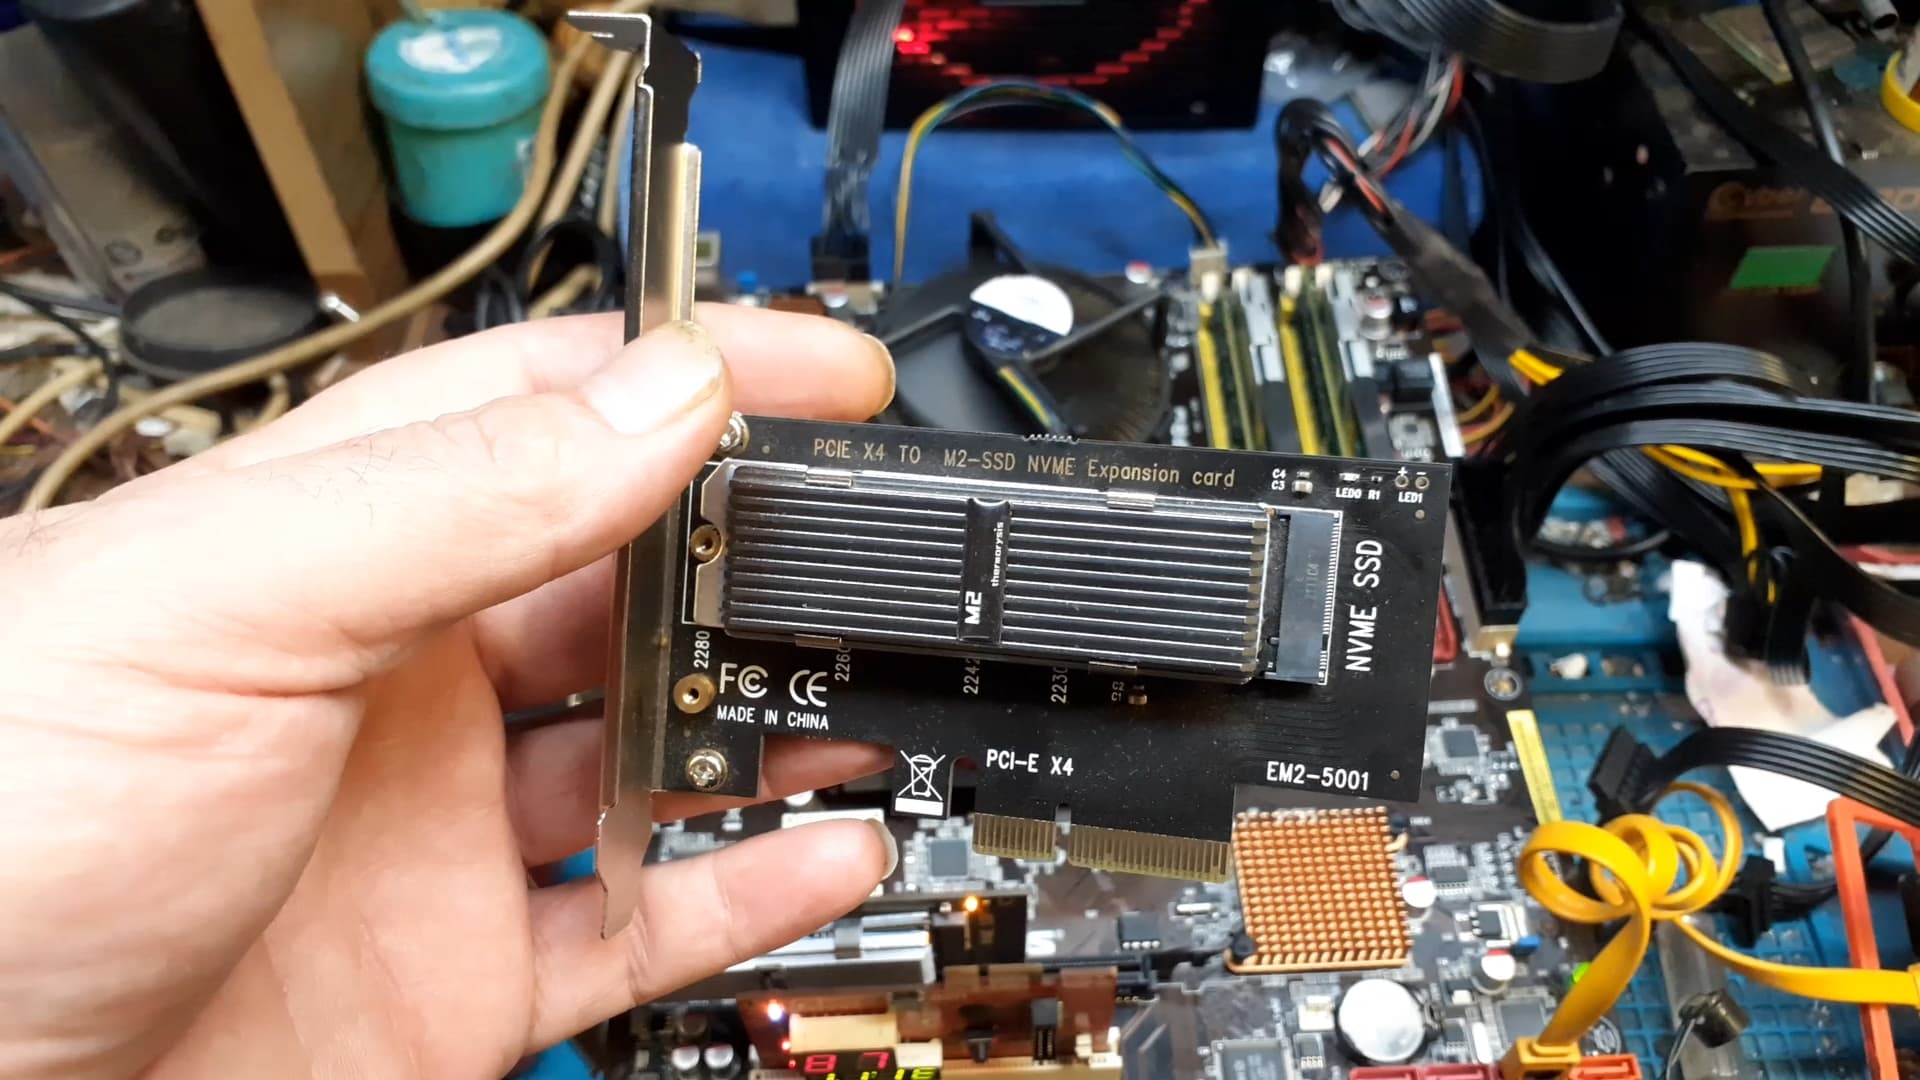
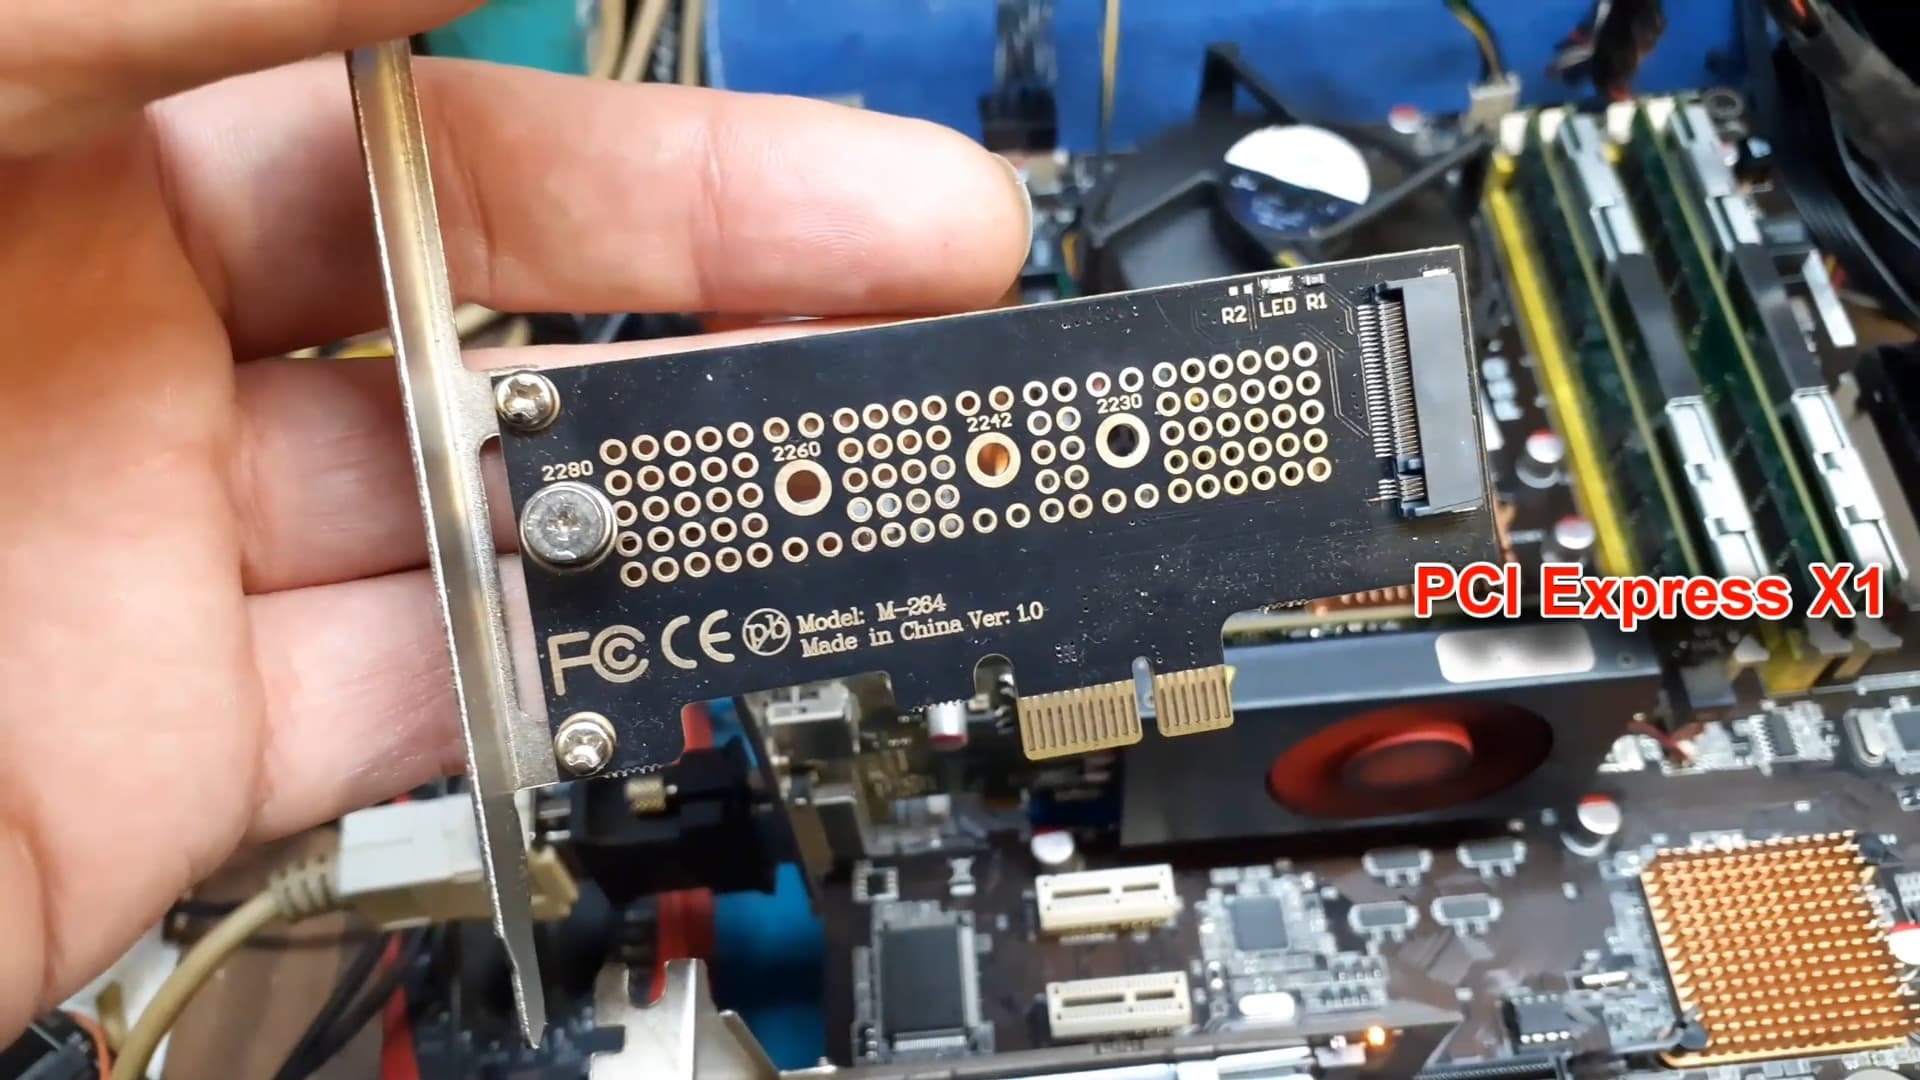
PCIe x4 NVMe M.2 SSD Adapter
PCIe x1 NVMe M.2 SSD Adapter
Additionally NVMe SSD Drive: 256GB+512Gb+1TB+2TB+8TB…
These 2 adapters do the same function, but for those who do not have a PCI Express X16 or X8 slot on their motherboard, I recommend the PCIe x1 NVMe M.2 SSD Adapter.
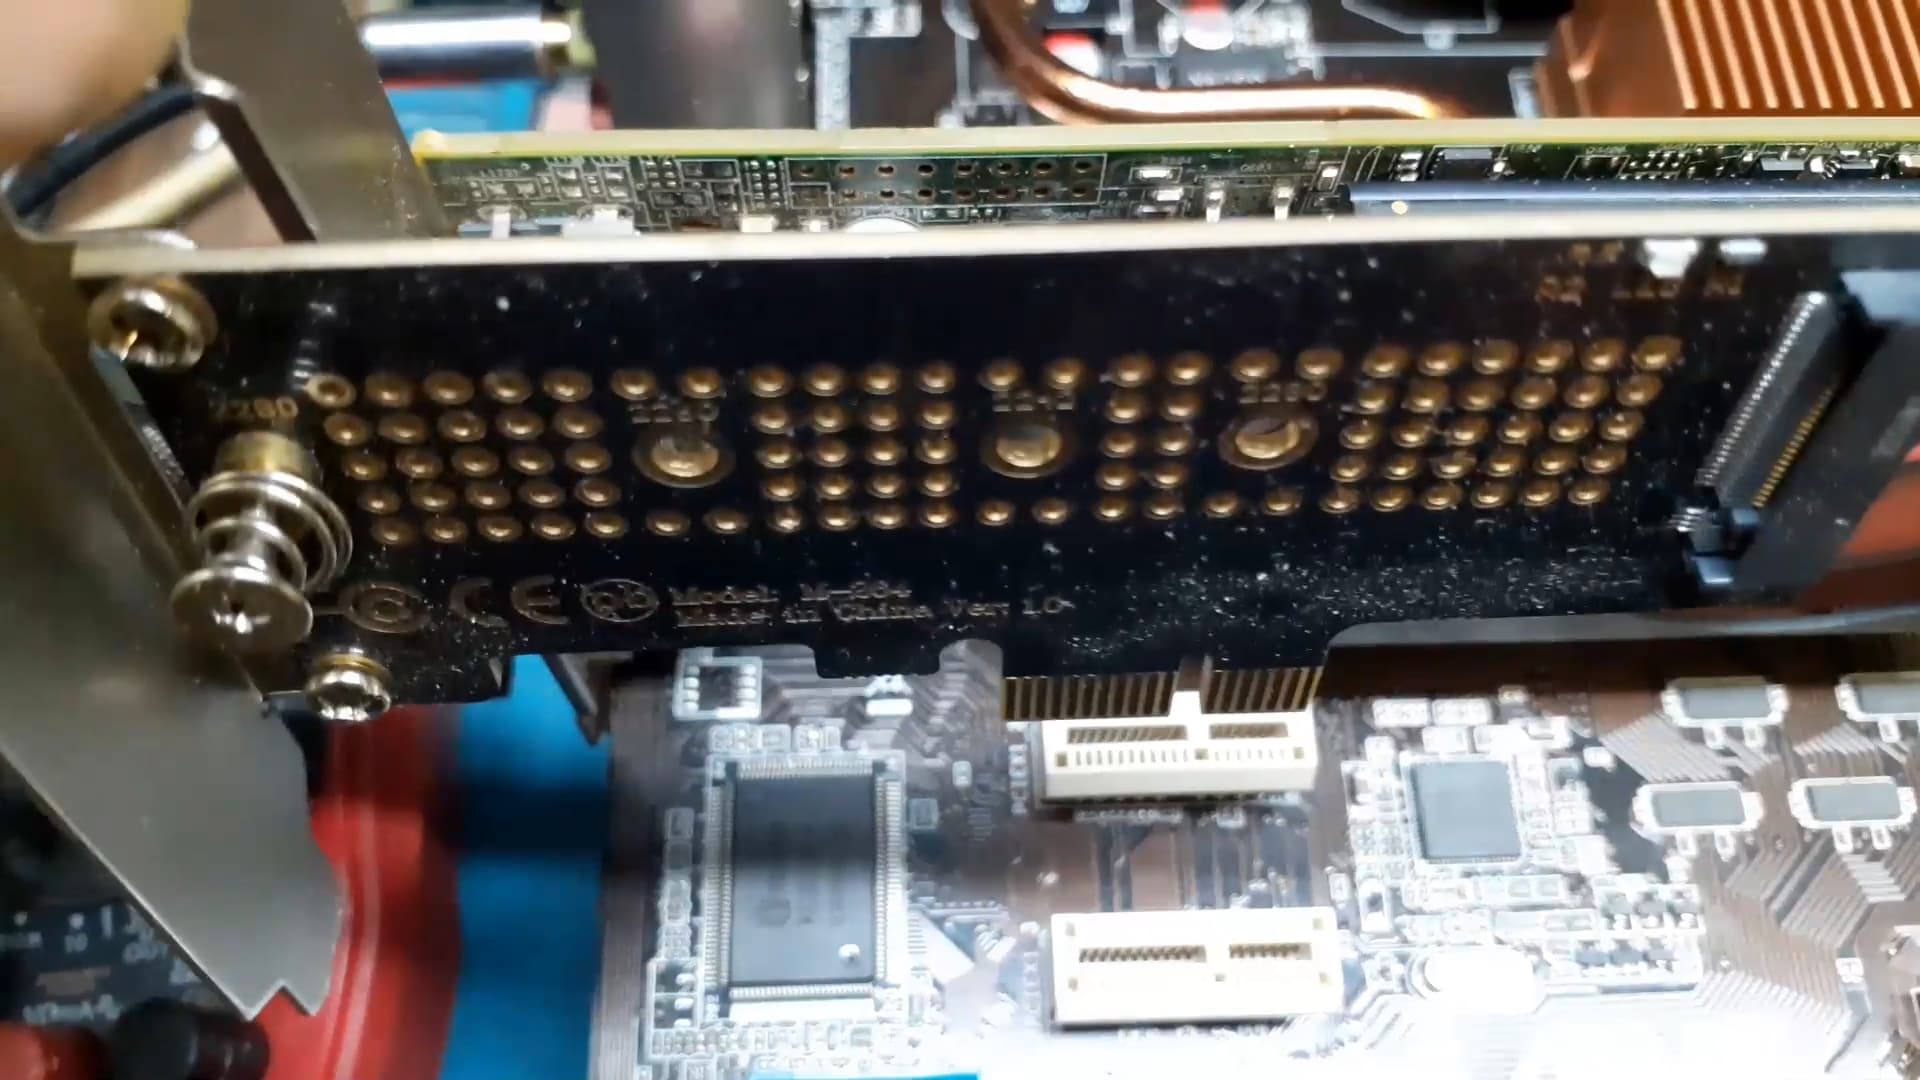
PCIe x4 and x1 NVMe M.2 SSD Adapter
PCIe x4 NVMe M.2 SSD Adapter

PCIe x1 NVMe M.2 SSD Adapter

First of all, the bios files of each old motherboard with Phoenix-AWARD bios support were created with different methods and compression techniques.
In short, there is no standard bios file for each motherboard.
The articles I will explain below are valid for more specific bios files.
This is not valid for every bios file. Remember this.
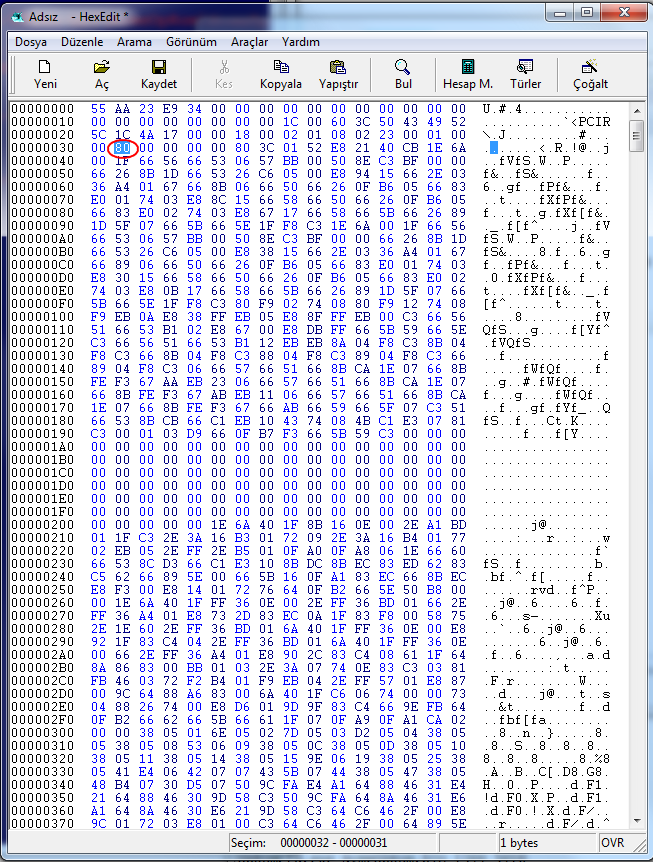
Some motherboard bios files have padding in the first lines, some do not have this padding at all.
The reason for this is that when motherboard manufacturers create a new bios update to fix some errors and problems that users have encountered with the motherboard they have released, they foresee that the bios file size will exceed, and add bios chips to larger sizes of motherboards.
Then, with the new update, the bios file size reaches the desired consistency, that is, the full size. After this, the bios update is not published.
For example, a 2048Kb chip loads the main bios file as 1024Kb.
However, in order for a motherboard with a large chip size and a smaller bios file size to read the 1024Kb bios file, it places padding with “FFFF…” starting from the first line, which is processed until exactly half of the bios file.
The motherboard starts reading after these padding lines end. It ignores the “FFFF…” padding in the first lines and skips these areas.
(Bios Chip sizes are standardized as 512Kb+1024Kb+2048Kb and 4096Kb as its layers.)
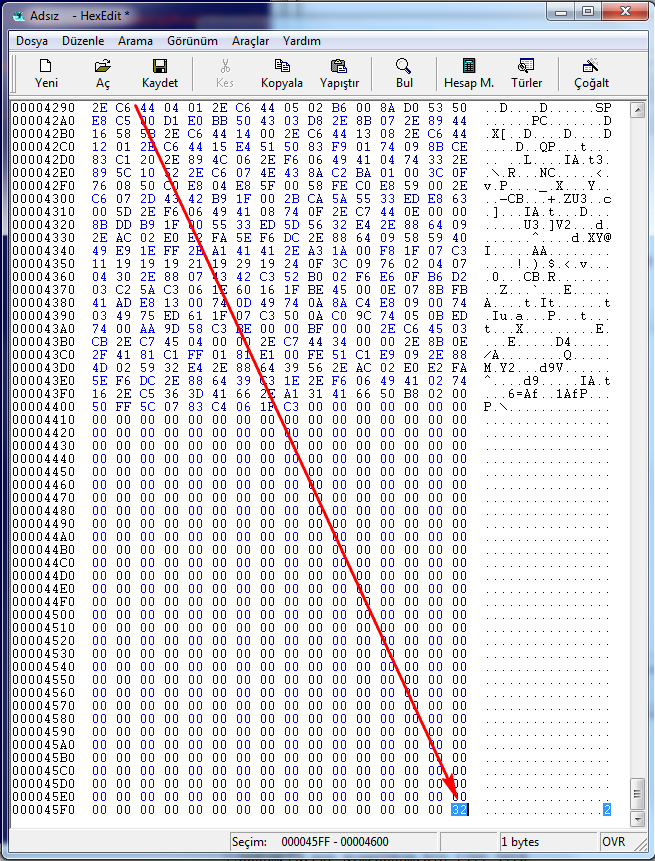
I tried to explain in detail in the picture below.
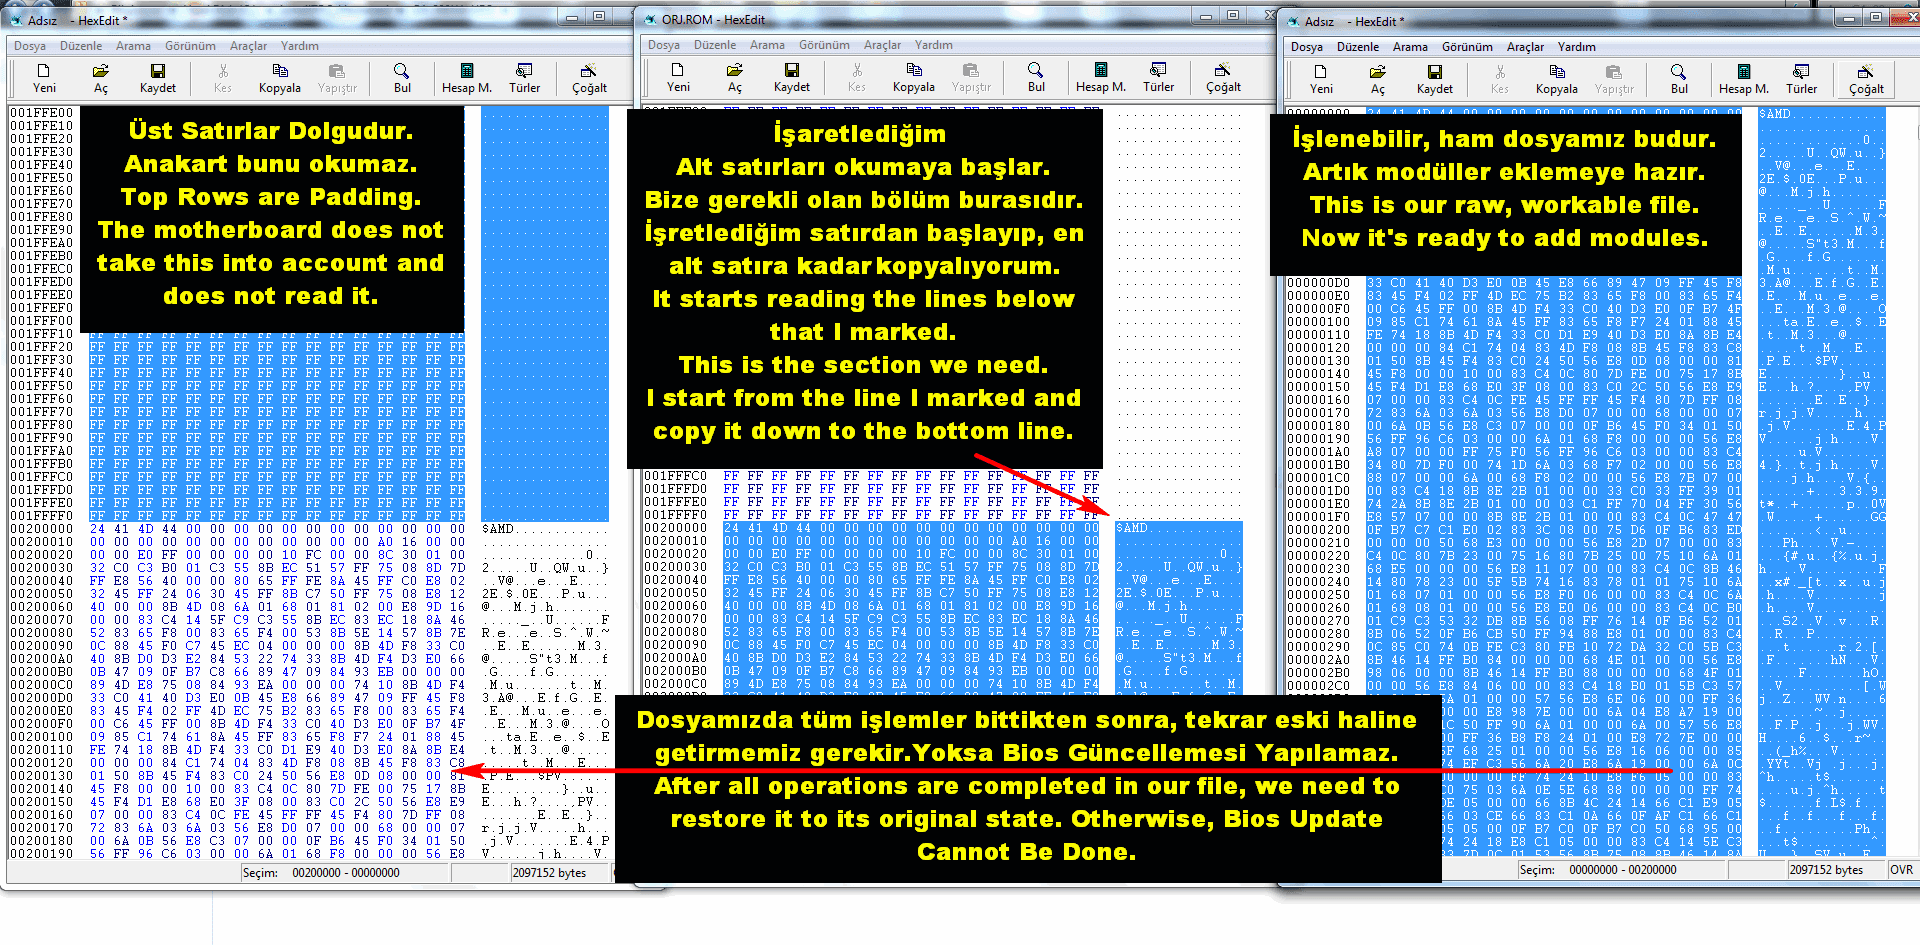
We will need to remove this fill in the Bios file. Otherwise, CBROM.EXE cannot read.
Hexeditor application will be required to remove this fill.
HxD - Freeware Hex Editor and Disk Editor Download: Downloads | mh-nexus
You need to remove the fill sections in the Bios file with Hex Editor.
Fill “FFFFF…” represents these characters.
The motherboard does not read these characters, does not take them into account and passes them blank.
Note: There is no fill in every AWARD-Phoenix Bios file. Only an example is shown here.
Now let’s get to our main topic:
To add NVMe SSD Support to old motherboards with AWARD-Phoenix Support, we need 2 software and NvmeOpRom module.
1- OpRomCfg.exe and NvmeOpRom.bin Download from here.
NvmeOpRom.rar (14.5 KB)
.
2- CBROM.EXE (@Fernando has explained here before)
BIOS Modding: Introduction and Preparations
CBROM.EXE
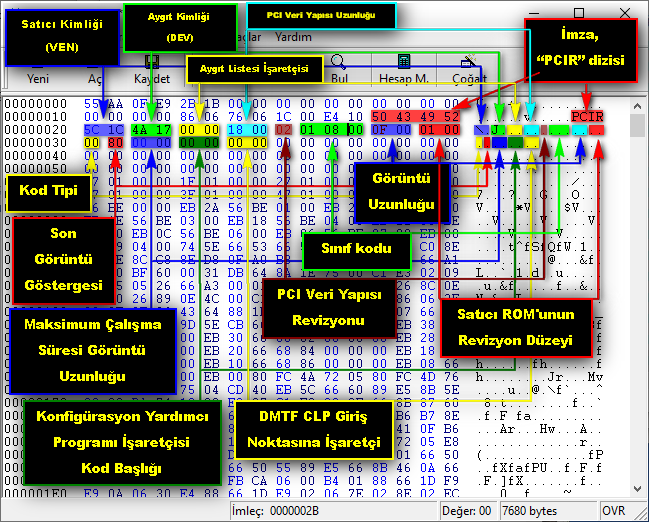
a) First, the Device hardware IDs of the NVMe SSD drive you purchased or have in your possession will be required.
I explained how to do it in the animated picture below.
How to Get Device-Hardware Identity Information?
How it is done is explained in the moving picture below.
NVMe_DEVICE
For this, you need to know and provide the NVMe SSD Device Hardware IDs you use.
For example: PCI/VEN_1C5C&DEV_174A should be something like this.
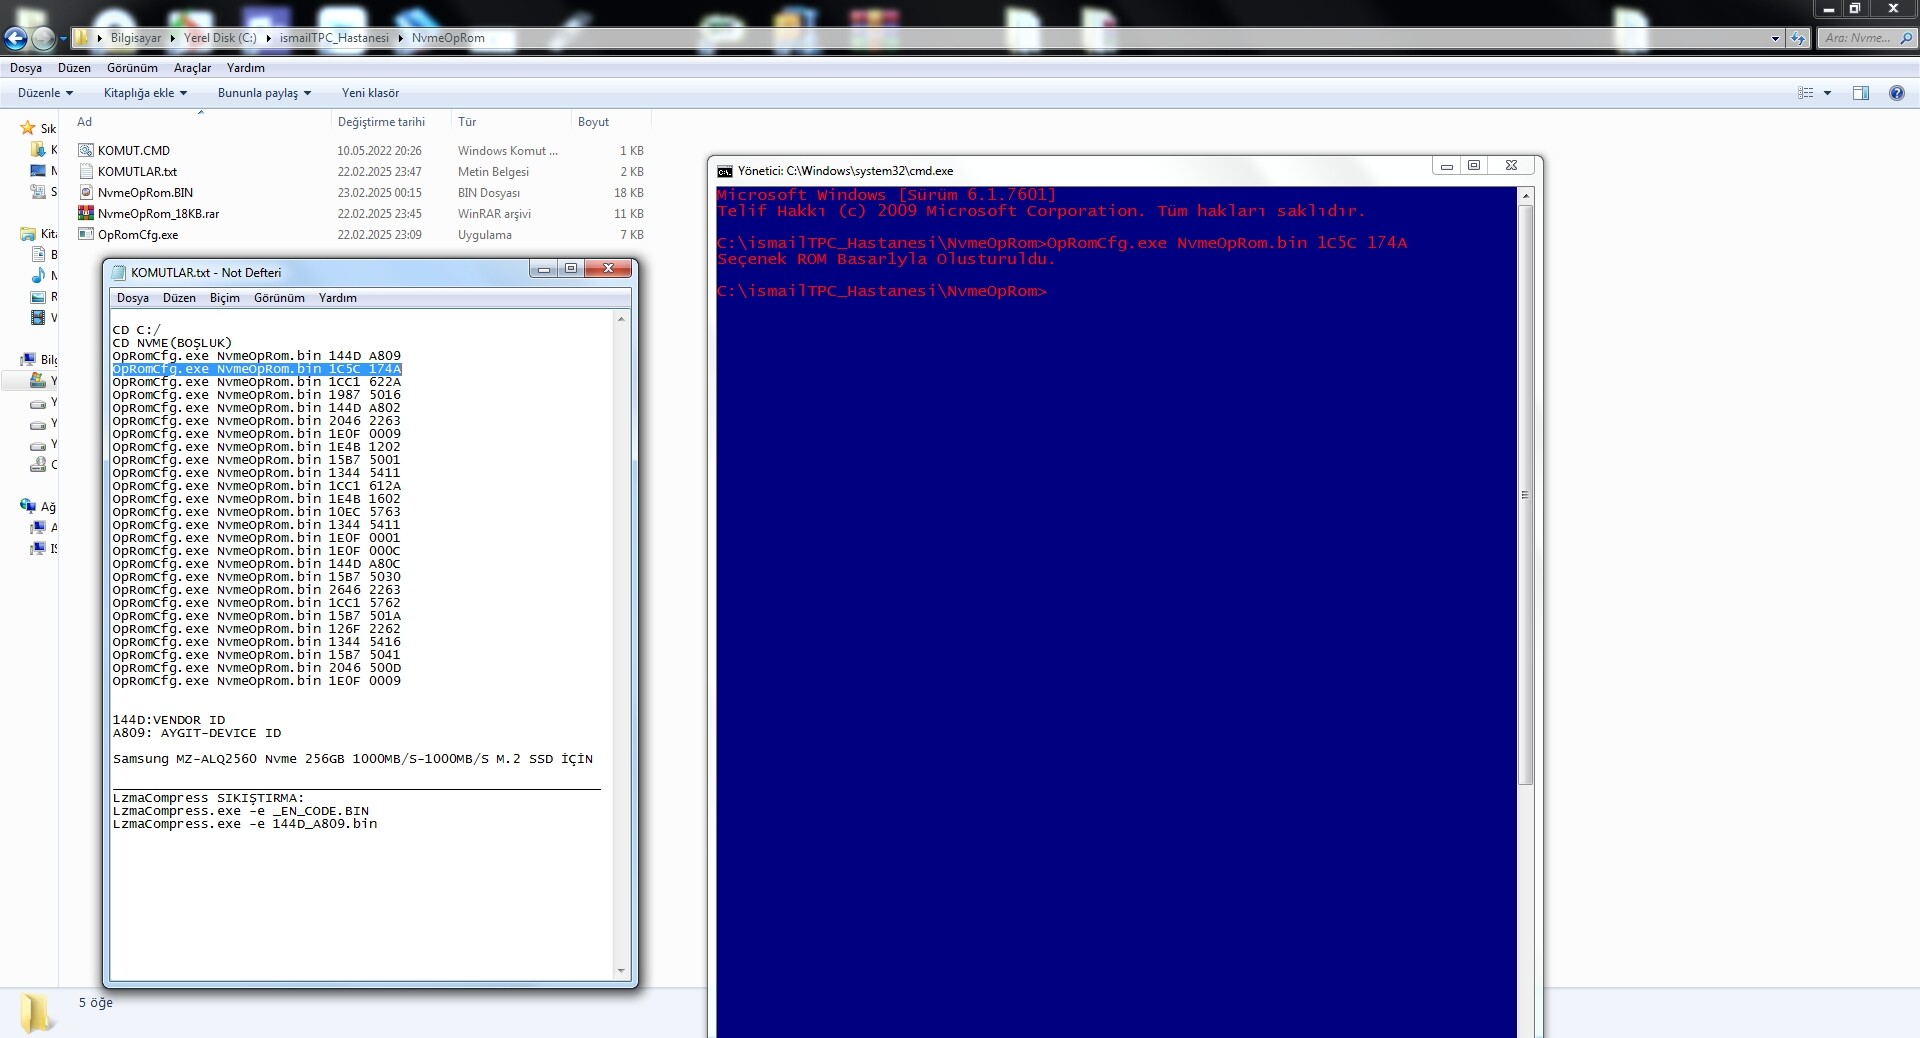
b) With the OpRomCfg.exe Application, we enter the Device hardware IDs of your NVMe SSD drive into the PCI NvmeOpRom.bin module.
I explained how to do it in the picture below and on my YouTube channel.
HOW TO ADD NVMe OptionRom WITH CBROMTR.EXE SOFTWARE?
AWARD-Phoenix Legacy-BIOS How to Add Bootable NVMe M.2 SSD Support to Legacy Motherboards?
Example:
OpRomCfg.exe NvmeOpRom.bin 144D A809
OpRomCfg.exe NvmeOpRom.bin 1C5C 174A
OpRomCfg.exe NvmeOpRom.bin 1CC1 622A
OpRomCfg.exe NvmeOpRom.bin 1987 5016
OpRomCfg.exe NvmeOpRom.bin 144D A802
OpRomCfg.exe NvmeOpRom.bin 2046 2263
OpRomCfg.exe NvmeOpRom.bin 1E0F 0009
OpRomCfg.exe NvmeOpRom.bin 1E4B 1202
OpRomCfg.exe NvmeOpRom.bin 15B7 5001
OpRomCfg.exe NvmeOpRom.bin 1344 5411
OpRomCfg.exe NvmeOpRom.bin 1CC1 612A
OpRomCfg.exe NvmeOpRom.bin 1E4B 1602
OpRomCfg.exe NvmeOpRom.bin 10EC 5763
OpRomCfg.exe NvmeOpRom.bin 1344 5411
OpRomCfg.exe NvmeOpRom.bin 1E0F 0001
OpRomCfg.exe NvmeOpRom.bin 1E0F 000C
OpRomCfg.exe NvmeOpRom.bin 144D A80C
OpRomCfg.exe NvmeOpRom.bin 15B7 5030
OpRomCfg.exe NvmeOpRom.bin 2646 2263
OpRomCfg.exe NvmeOpRom.bin 1CC1 5762
OpRomCfg.exe NvmeOpRom.bin 15B7 501A
OpRomCfg.exe NvmeOpRom.bin 126F 2262
OpRomCfg.exe NvmeOpRom.bin 1344 5416
OpRomCfg.exe NvmeOpRom.bin 15B7 5041
OpRomCfg.exe NvmeOpRom.bin 2046 500D
OpRomCfg.exe NvmeOpRom.bin 1E0F 0009
144D: VENDOR ID
A809: DEVICE ID
1C5C: VENDOR ID
174A: DEVICE ID
Reminder:
Samsung 950 Pro SSD also uses NAND-FLASH like chip technology.
In other words, since there is an additional chip for operating system installation, cache and partition table creation on Samsung 950 Pro NVMe SSD, there is no need for the operations described here.
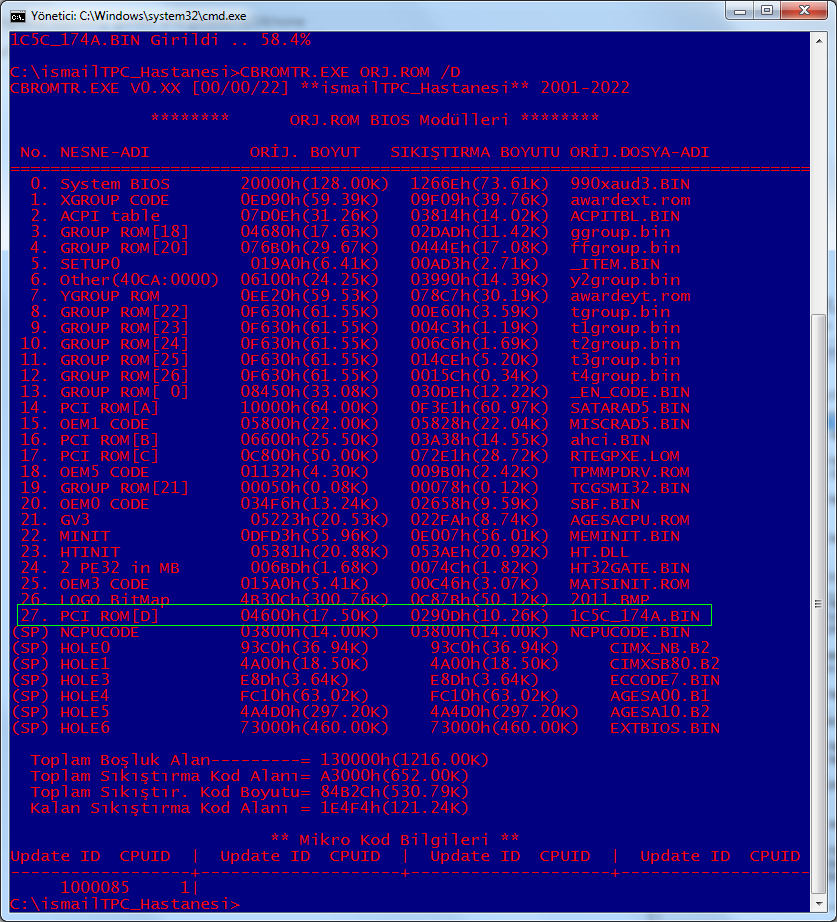
c) We type “CMD” in the Windows search bar and open CBROM.EXE in the folder it is located in in administrator mode.
(If this is too difficult to deal with, I have prepared a Ready Command Prompt file for you. Download it here)
KOMUT.rar (339 Bytes)
d) With the OpRomCfg.exe application, we copy the completed NvmeOpRom.bin module to the folder where CBROM.EXE is located.
You can change the name of the NvmeOpRom.bin module as you wish.
For example, I changed it to 1C5C_174A.BIN.
You can also change it according to your own Device Hardware ID information.
However, the name of the Module file you changed, CBROM.EXE will be needed by us during the command prompt. Remember.
You can add multiple modules in this way, but remember that each module name must be different.
e) Double-click on the “KOMUT.CMD” I gave you above.
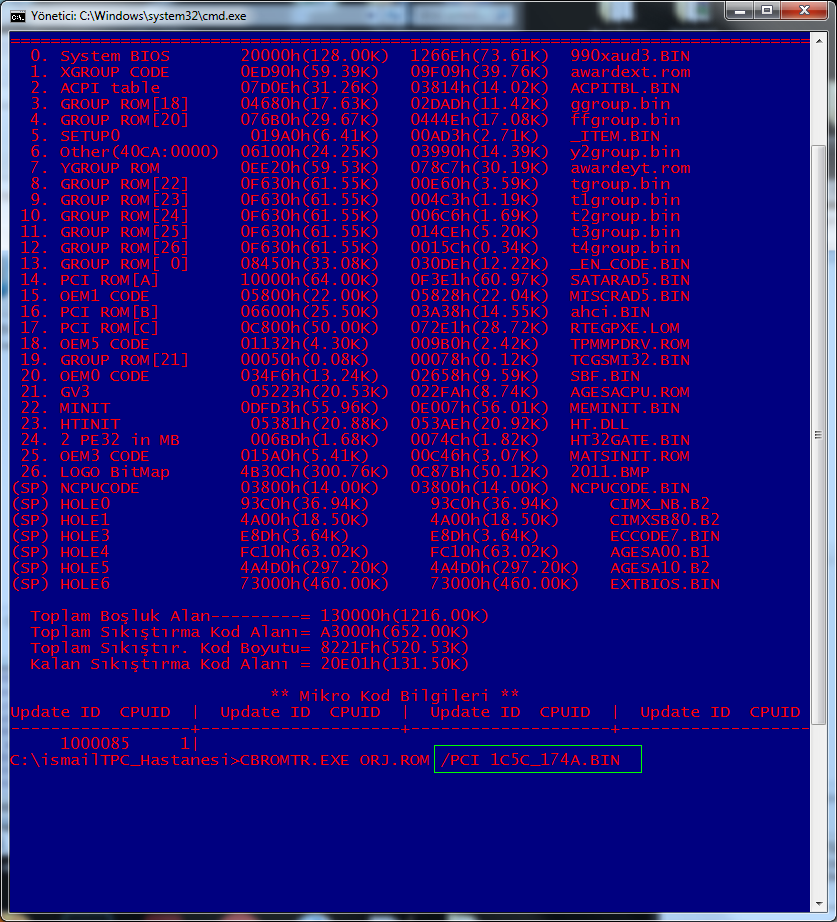
Type “CBROM.EXE ORJ.ROM /D” in the Command Line. (I changed the Bios File name to “ORJ.ROM”. You can do it this way if you want.) You will see a window like the picture below.(As I showed, if you see all the modules in this window, go to the next process.)

2nd Command Prompt:
“CBROM.EXE ORJ.ROM /PCI 1C5C_174A.BIN” (Since the Device hardware ID information I will add is “1C5C 174A”, I enter the “PCI 1C5C_174A.BIN” command with the file extension. You can also enter this command according to the file name and extension you created.)
Details are given in the pictures below.
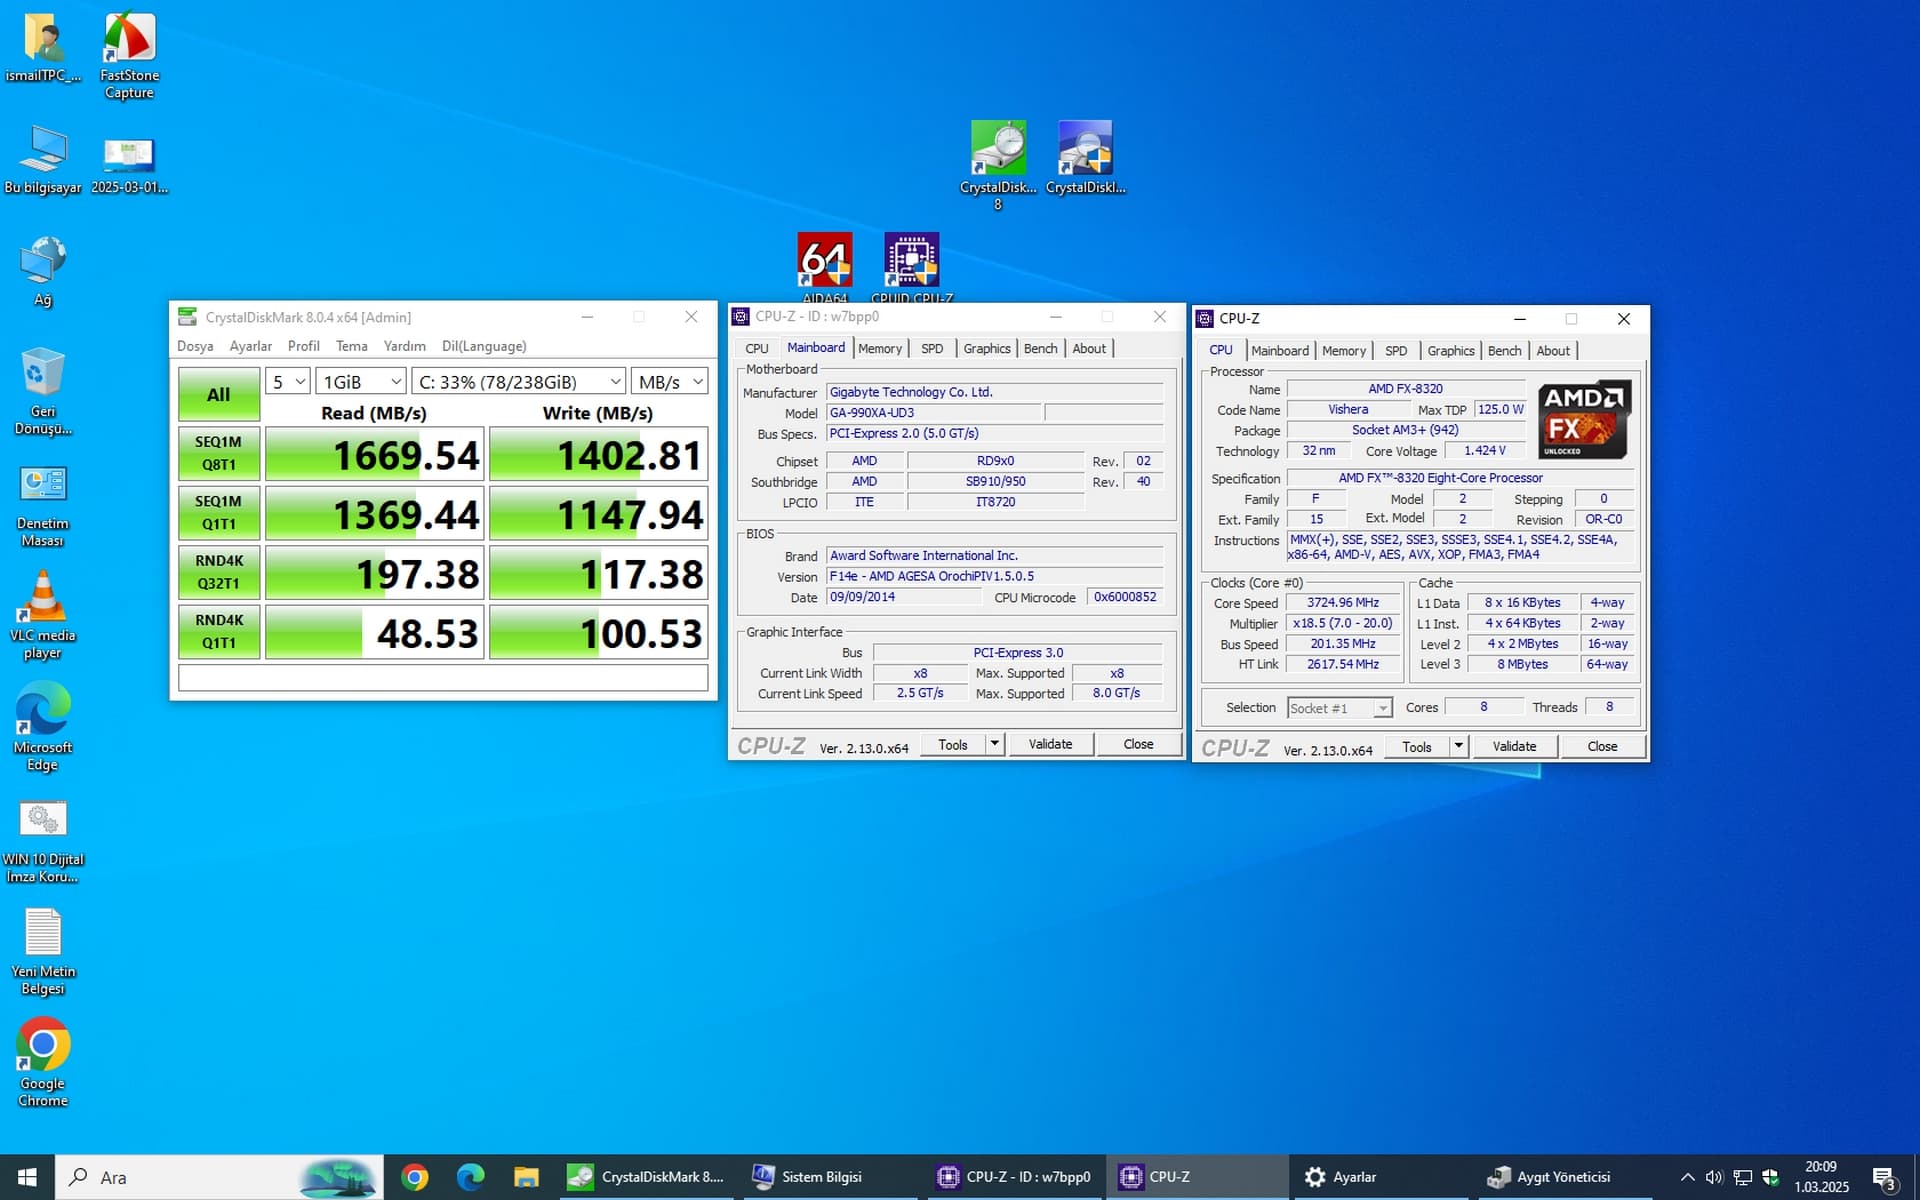
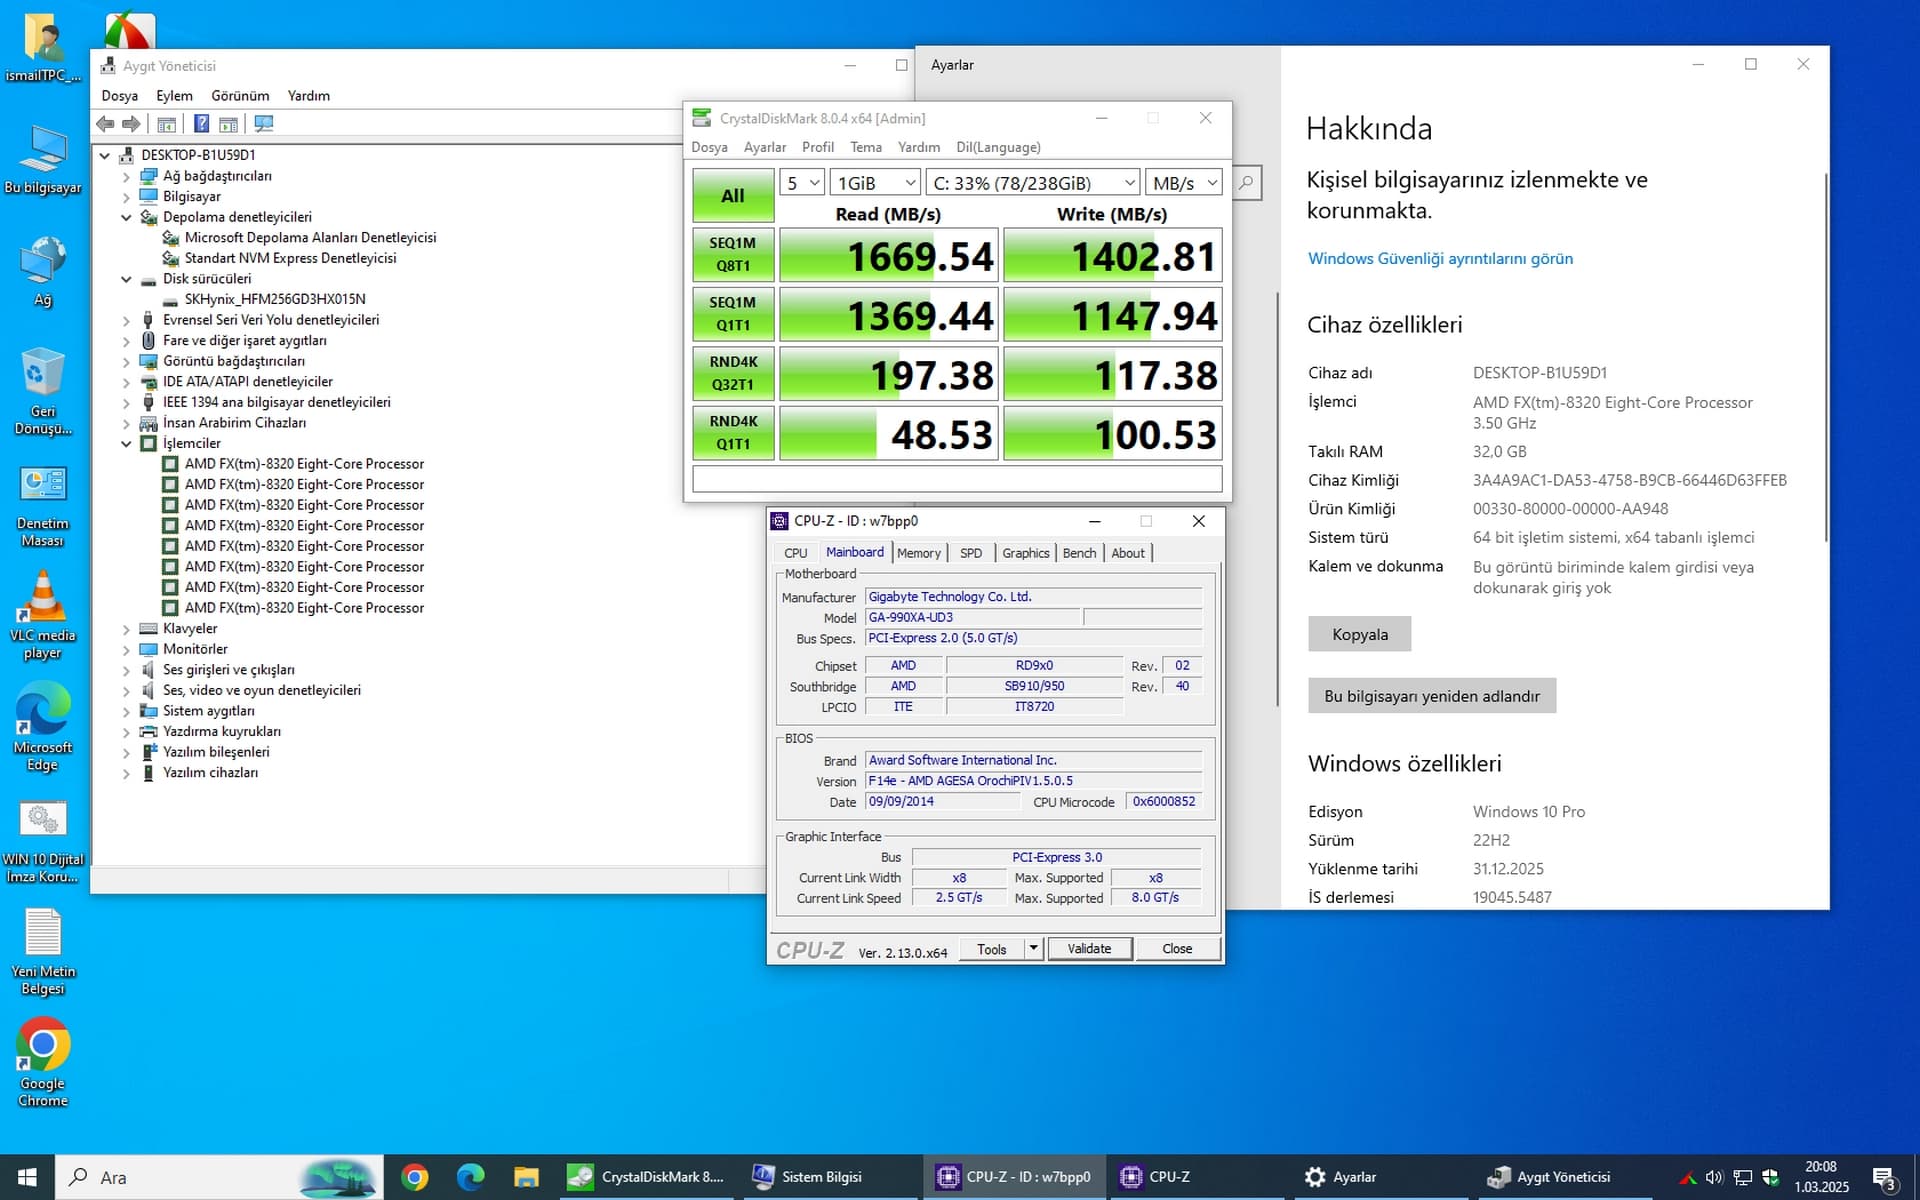
RESULT:
NVMe M.2 SSD Read and Write Data Speed Values
Other details:AWARD-Phoenix Legacy-HOW TO ADD BIOS NVMe M.2 SSD SUPPORT TO OLD MOTHERBOARDS?
Youtube watch:How to. Watch on Youtube
Additional Note:
1- There is no request for Modded Bios about the Motherboard here. Help Requests will not be answered. You can only ask questions about the content of the subject
2- In layman’s terms, all the desired Pickaxe-Shovel-Sand-Gravel-Iron-Cement was given to you. It is in your hands to construct the building.
3- The user who downloads the files is responsible for any problems that may arise. As “ismailTPC_Hastanesi”, I do not accept any responsibility.
4- I do not accept any problems that may arise from uploading the Bios file you created. All responsibility belongs to the user who uploads the file.
Finally:
All the software projects and products I develop create a financial burden for me.
Very soon, I will release the permissions of all files with restricted file access permissions.
As a result, I have been working hard and putting in effort for these files for years.
I never ask for any fee from you, I don’t want it.
Of course, maybe you will agree with me, but these projects cost me something.
In short, I would be very happy if you support my Youtube Channel.
I would like to thank everyone who supports me or not.