Ive successfully completed setting everything the way i want it on my x470 gaming7 wifi with AMIBCP, however id like to jazz up the BIOS background a bit to make it look a bit better, is there any tool around that would allow me to do this?
I mean the actual gigabyte wallpaper thats shown when i enter the BIOS
Cheers.
@POE_UK - You mean the actual BIOS background image? If so, yes, it’s easy to do, I will show you 
Did you see what I did here? 
 - [OFFER] Gigabyte Z390 M Gaming UPD + Completely Revised Blue Theme
It’s done with UEFITool and hex editor, I suggest 25.0 for replacing, but you can use 51-57+ for extracting.
If this is Gigabyte BIOS, the following applies to the module I will give you GUID of, once you reply back
In this module all BIOS images are present, you must 00Fill out the image area you want to replace in it’s entirety and then fill that same space
You cannot add or remove bytes, changing the size or other info in image header info does not help, no matter how you try to change the size = broken BIOS, I tried for weeks  Re-arrange also = broken BIOS
CC 00 = Start of new entry
xx 04 = jpeg >> Followed by image size in Little Endian >> then 00 00 before image start
xx 07 = PNG >> Followed by image size in Little Endian >> then 00 00 before image start
xx 02 = Data >> Followed by content size in Little Endian
Switching Image Types OK, just change the marker and keep within same size constraint (watch transparency!)
General Image header/footer info >>
Jpeg/jpg starts with FF D8 FF & ends with FF D9
BMP (bitmap image) files start with a signature BM (42 4D) and next 4 bytes contain file length
GIF87a (47 49 46 38 + 37 61 / 47 49 46 38 37 61) or GIF89a (47 49 46 38 + 39 61 / 47 49 46 38 39 61)
PNG = Starts w/ 89 50 4E 47 0D 0A 1A 0A & Ends with 49 45 4E 44 AE 42 60 82 (IEND®B`‚)
I suggest you use Photoshop CS3 or above and use save for web option (PNG (Not interlaced) or JPEG Optimized but Not Progressive or ICC profiled), gimp, or pain.net.
Other programs may work fine too, but sometimes you DO run into image compatibility, so you have to try to save again other way instead. Sometimes “Save As” = compatible when save for web fails for example
And of course, each tool you can save/export images many ways. I try to look at start of original vs how I’m saving, and make sure they start same way
If you are not 100% sure, and you do not have flash programmer, or board does not have physical BIOS switches or some USB Flashback-like function, then you may want to have me make you image at first so it’s for sure compatible.
When image fails, you often cannot enter the BIOS, but you can boot to windows, so you can flash from there if needed and do not have programmer, switches, or flashback like feature
Please link me to your BIOS download page, and tell me what BIOS version, and I will give you the image GUID.
Expand GUID to RAW module, select that, extract it’s BODY via UEFITool, then do what you want, then replace body same way you extracted
Thanks m8 ill send it you soon
@POE_UK - Do you still need help on this, or can I close out this tab for now?
I only needed the know your exact board brand / model, or a link to your BIOS download page, so I could be sure to give you the correct GUID
Yea m8 just the bios background (not boot image)
this is my board:
https://www.gigabyte.com/uk/Motherboard/…-WIFI-rev-10#kf
------------------------
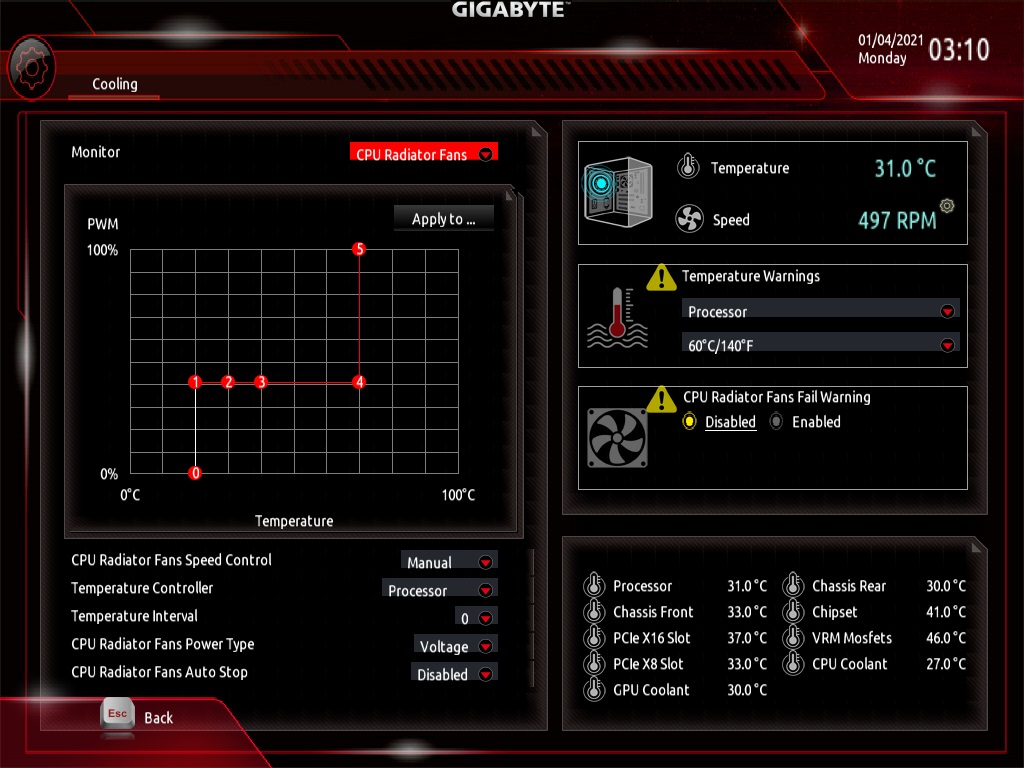
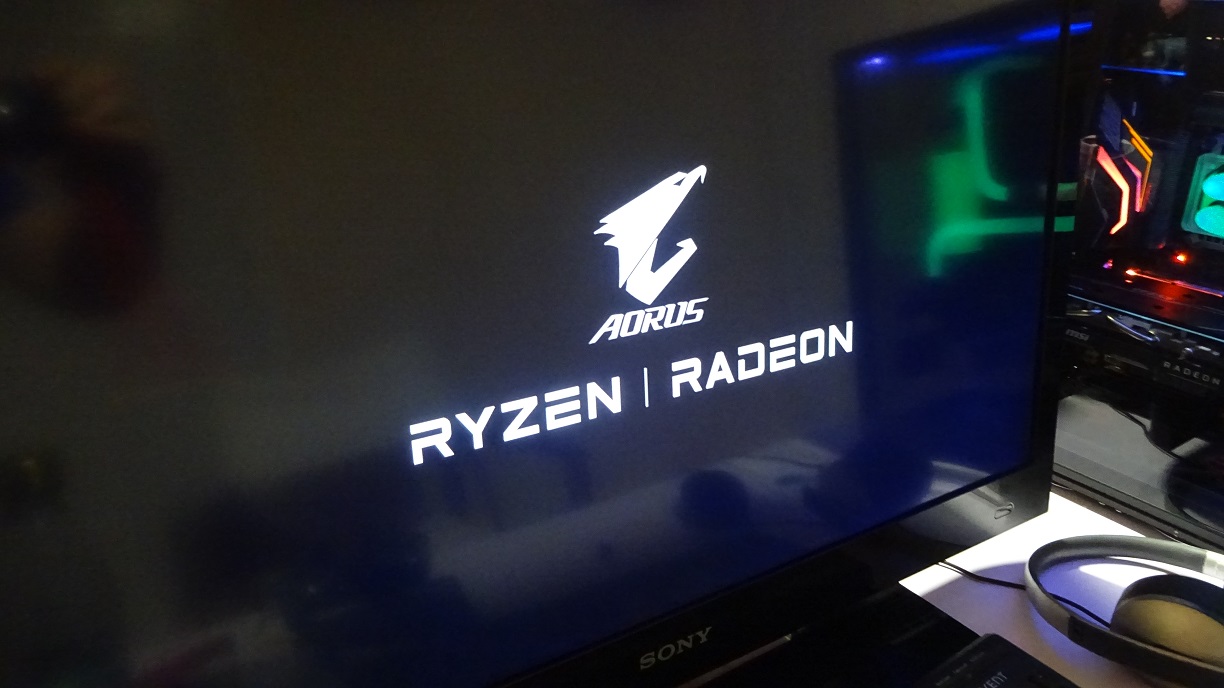
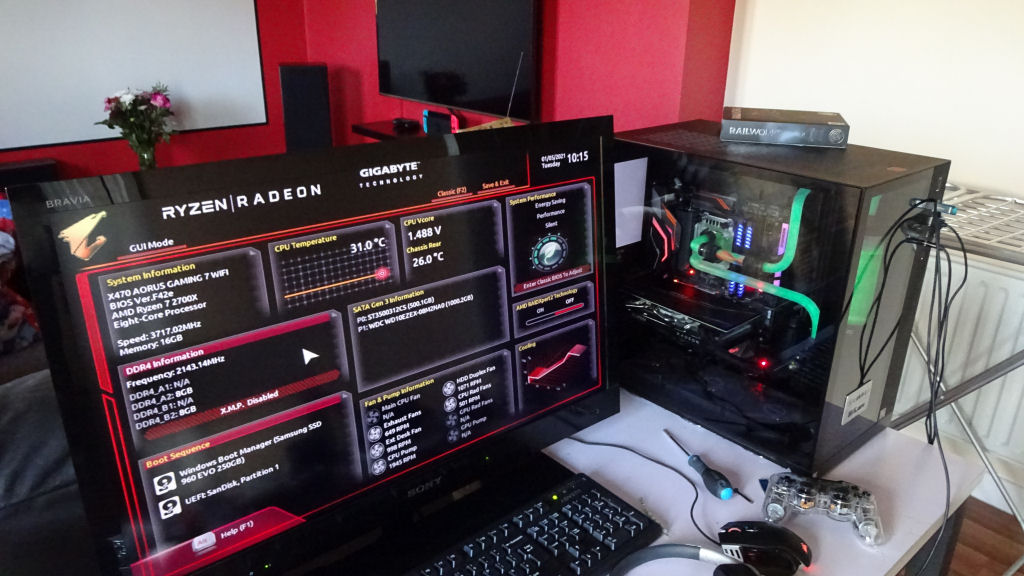
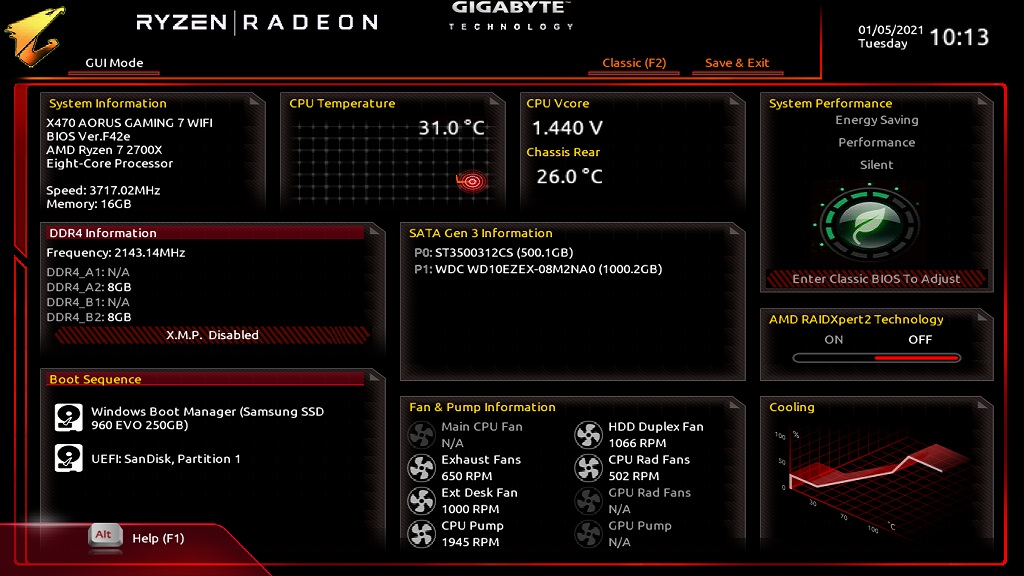
This is what ive done to my uefi so far, labelled everything properly and sorted the menus, next id like to change the backgrounds in some way by adding the aorus logo if possible or something along those lines.
[[File:210104030949.jpg|left|fullsize]]
@POE_UK - Thanks I checked BIOS F60e - WOW, that is a LOT of BIOS revisions!! Must be some engineers favorite board! 
Using info above, the GUID that holds all the BIOS images is >> 4B2E0988-9E44-49AE-8B77-F544B1CAF03F
Use UEFITool 51 or 25.0, expand the module, select the inner “RAW” section, and then extract body of this, then use above info to edit image. First image is the background image.
I’m surprised to see this model is still using Gigabytes older BIOS style/theme/format!
If you need me to do the edit for you, let me know and send me your edited image
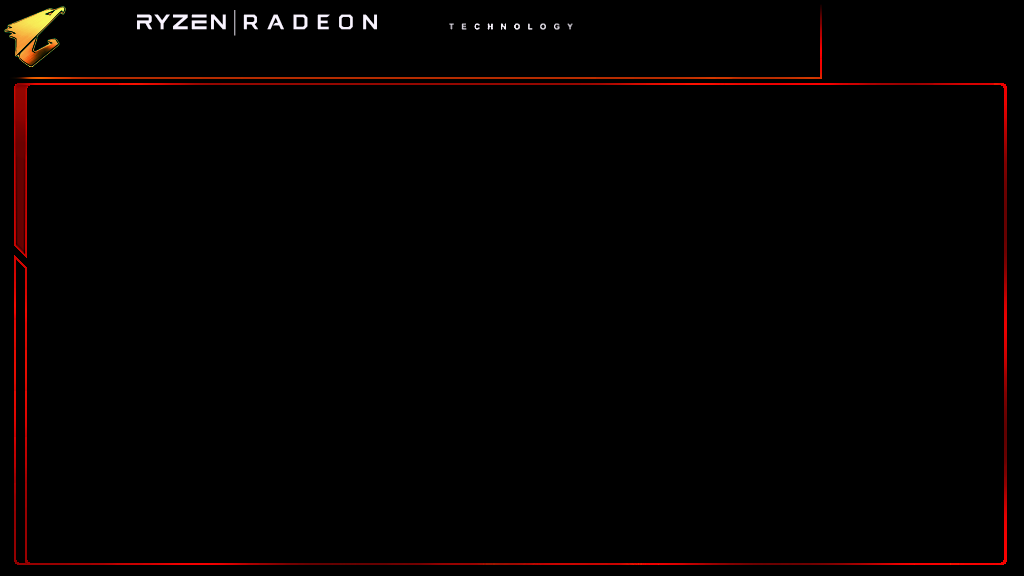
Here is the stock background image - http://s000.tinyupload.com/index.php?fil…640803611466434
* Edit - Ohh! I did not see your 2nd post/images until I posted my reply, let me look at those a second
Hmm, seems one image is missing (1st one), and I even checked your original post before I merged, missing there too
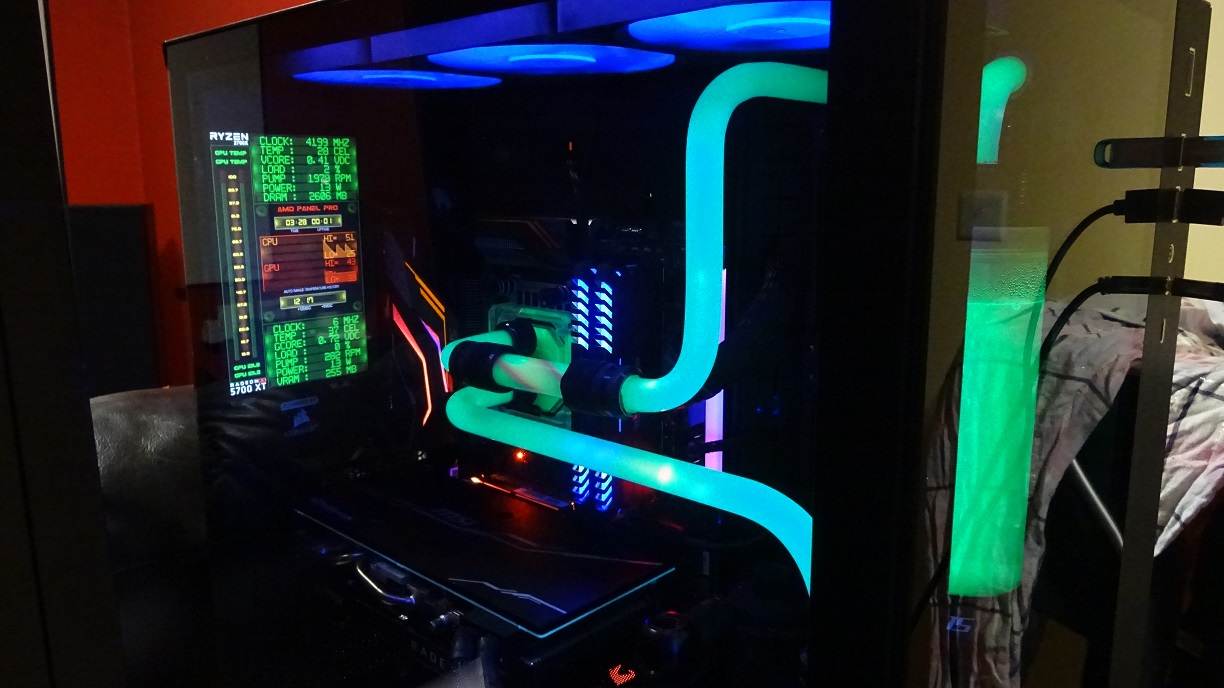
Nice build, great UV glow on that tubing/liquid!
I’d have to have side by side original/mod to see what you’ve done in the BIOS menus 
Thanks my friend, you’re a star.
Yea i was shocked too when i bought the board its using the same colour scheme as the old x370 and a320 boards!
This board is a powerhouse for overclocking and i’m shocked they didn’t change this colour scheme, i will have a tinker as i have a spare bios chip for this board as its dual bios and socketed.
i’m also shocked they didnt use 1920x1080 images! instead 1024x576
Ive got my old paintshop pro9 installed and ill alter this image and let you merge it for me as i have no clue what im doing in uefi tool!
this is the bios mate:
[REMOVED BY OP]
@POE_UK - You’re welcome! I didn’t even notice that huge LCD in your system until just now, cool!! I guess I didn’t notice since I was checking out the liquid glowing so much 
You’re welcome! Yes, I’m surprised about the old style BIOS, I thought they moved all boards over to the newer style now?? With so many revisions on this one, it’s even more surprising they didn’t upgrade it! 
Did you add the socketed BIOS? If not, was this some ES sample? I’ve never seen retail Gigabyte with sockets, only ES samples with SOIC8 sockets
Not sure if Paintshop Pro9 image will be compatible? But, at least you can recover if BIOS screen is blank
So, if you aren’t familiar with using UEFITool, what did you rearrange the menu with, AMIBCP?
So, when I put the image back for you, you want me to use the BIOS above, correct? If yes, OK, just checking to be sure
Yea thanks m8 ive toned down the image, this is what ive come up with, it looks basic but tasteful i think, if you could add this to my bios that i added above that would be fantastic!
the board came socketed thank god lol
this is a PNG file
Yea i used the AMIBCP tool hehe
@POE_UK - Very nice that it came w/ socketed BIOS, that’s always convenient! I wish all boards came that way, DIP8 socket or socketed SOIC8.
Is your DIP8 or regular SOIC8 in a socket? << If this, then sounds like an ES or beta sample, did you purchase used or at a retail place, or get directly for review/testing?
Very nice image work, I wish I could make such things for my BIOS re-theme/re-works!!! I’m jealous!
The “Technology” will be covered by “Gigabyte” Logo/image that’s in stock BIOS. So you’ll probably need to move that to down under RYZEN | RADEON
Also, hopefully the center area matches up with the stock overlays
If stuff does not line up properly, take a F12 screenshot, and then use that open side by side with new image while you do the rework again so you can see what needs adjusted and how etc.
Here you go, I inserted it “As-is” first (meaning I did not edit or resave your image), after changing the image type in the BIOS module to PNG, so we can see if your image saving method/app is OK for this BIOS.
If it does not let you in BIOS, or BIOS is blank, you will have to reflash from windows, or recover however else you want to. Then I’ll resave it using CS3 or Paint.net
I removed the Qflash block, so you can now Qflash this BIOS too
*** Link removed per OP request *** I will make a final public BIOS w/ his background image for anyone to use, it he don’t mind
Ohh wait!! What is going on with your BIOS??!! I went to check it vs stock to be sure all OK post my edit (Same for your sent file), and I see two major volumes missing, and some volumes resorted/moved.
Is this a saved Qflash or EFIFlash dump you edited or something? Ohh yes, I see it is, from the populated NVRAM volumes…
So, it’s OK (For you and current setup), but that’s not ideal and you really shouldn’t do it this way. You should apply your edits to stock BIOS instead, especially once you’re done with it all and have it how you want
Otherwise if you switch CPU later it may not work, and if someone else uses this BIOS it may not work for all users. Ideally, as of now, NO ONE should use this BIOS since it has your NVRAM in there.
The volumes missing and re-arranged may also be a saved AMIBCP edit issue, which I also would advise against using then if that is the case.
I’d have to see some dump from you same way, right after flashing stock BIOS, with no edits, to see if this is AMIBCP issue or just system specific thing.
Mate thank you for going out of your way and doing this for me i really appreciate it!
As far as i know the x470 gaming7 wifi is the only modern ryzen board that comes with a dip8 socket, it has 2 doors that you open up and just drop the chip in, i contacted gigabyte and they sent me a spare last year just as a safeguard as im well aware that some gigabyte boards love to brick the bios rom for no reason at all, especially the x370 gaming5 that i bought previously, this is the only gigabyte board i recommend tbh, its been an absolutely rock solid performer from day one, it runs my 2700x at 4.3ghz all cores and 3600mhz ram no messing. you ought to see how tight my ram timings are its incredible with corsair ram 14,12,11,11,21 1T
I will try this out right now and let you know how it goes, if all is well this will be great, you will be my no1 go to person for future mods if you dont mind. yea the display in my case is a DisplayLink 480x800 TFT and its powered and controlled by a single USB motherboard header so no messing about with hdmi cables is needed and looks cleaner, basically it has its own videocard on board with brightness settings at the back, i use it for aida64 to display system stats and temperatures, you can get really creative and come up with some nice templates in aida64 once you know what youre doing, including animations etc…
Painsthop pro9 has a grid feature that lets you compare 2 images in the same way an artist paints (from a grid) i bought it years ago (about 2001) and it still works on windows10 perfect, ill install this bios you have done on the second bios by flicking the mainboard switch and let you know how it goes fella.
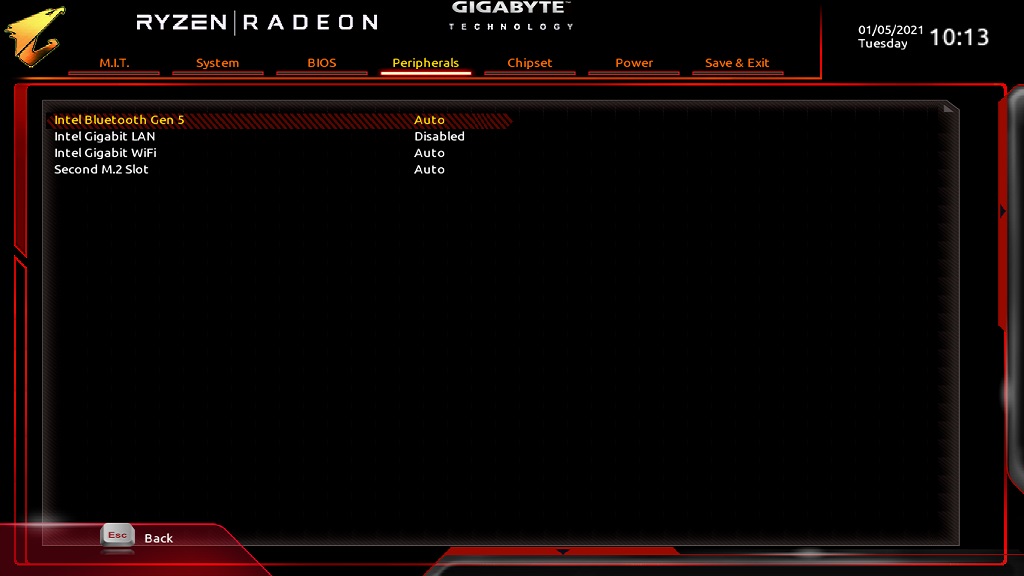
I removed all the unused languages, Portuguese, german, french, russian, italian, swedish, bulgarian, chinese, japanese, nordic. as they will never be used i thought it was pointless them being there wasting space really so i removed them with AMIBCP
Thanks again!
---------------------------------
Mate you are a legend, it worked first time no issues whatsoever!
Im a happy dude now, as i spend a lot of the time in the bios tinkering im glad to get rid of the old boring theme, looks so much better!
You are right, could you please take down the bios you did here for me as i have saved it to a USB drive, it has all my details inside including home address for theft/insurance purposes, i will delete the one i uploaded straight away cheers my friend.
@POE_UK - You’re welcome!! Where is the SOIC8 sockets, I don’t see them on stock board images? Maybe you have an ES/beta sample that made it off the line into retail packaging?
Yes, I don’t mind, ask me anytime you need help tinkering with BIOS! If I can help I will
So how much did it cost you overall to setup this 480x800 TFT? Aside from your mounting of course, I assume I’d have to figure out and make my own for my case if I make one of those (ThermalTake P3)
Thank you! And, you’re welcome too!
Very nice to see it worked first time without issue! Also, great to see that “Technology” was not covered up too!
Looks like you lined everything up perfectly on the first try, awesome job!
Removed your BIOS If you don’t mind, can I put your background image into a stock BIOS here for everyone to use if/when they find this thread later?
Thank you m8t yea go for it fella i dont mind at all, im going to make a couple of others so people can get rid of the dated stock image.

Theres 2 doors you open up to drop the chip in.
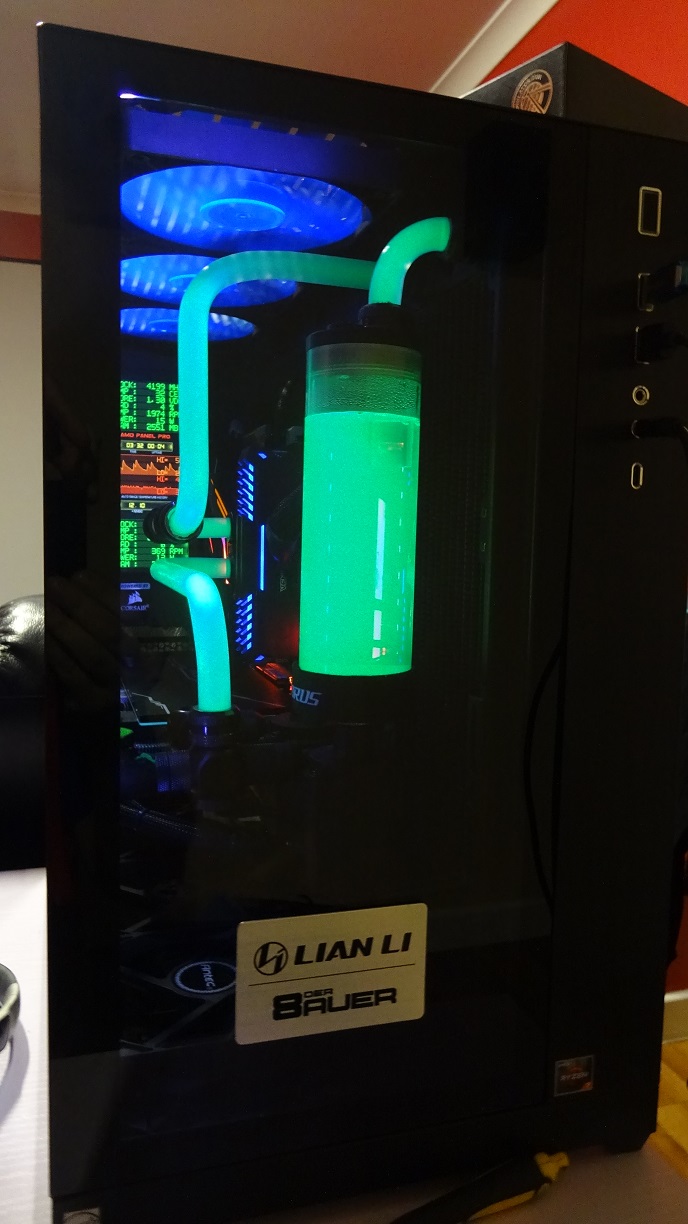
Note: The LIAN LI dynamic case has a spot to add an 80mm fan on top of the hard drive cage too, even though theres no mention of this in the manual.
This is the display: all you need to do is take the shell off and theres 3 mounting screw holes ready done for you, i used 3xradiator screws and drilled them out the back of the case with my trusty black and decker:
I only paid £35 for it on ebay “DoubleSight 800x480 display” http://www.doublesight.com/doublesight-d…cd-monitor.html
Put a search in ebay mate and wait until someone is selling one cheap, they are 10x better than those cheap chinese hdmi panels. windows installs the driver for it instantly and it takes stress off the graphics card as it uses USB 2/3.0 and has its own video memory.
Or you could leave the screen in its shell theres a mounting screw for it at the back.
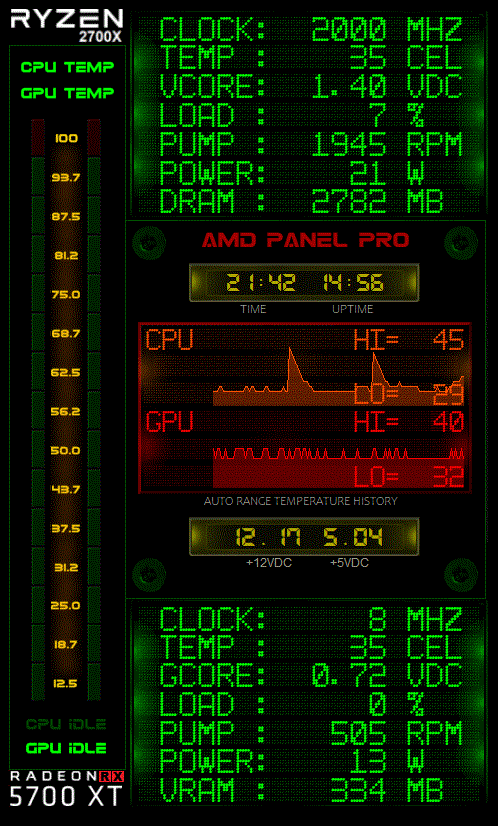
This is the aida64 sensor panel i made for it:
Great, thanks! I will wait then, until you’ve made a few more background images, then I will put together a public set for you, and then you can share in here or other “Offer” thread if you want.
I see the SOIC8 drop in socket now on stock images, thanks! I was looking down at bottom and on left, in the usual places, totally missed it being located where it is
Thanks for the info, I will see if I can pick up one of those cheap on ebay! Can the colors, font and light green behind it be customized in AIDA64?
I ask because I hate that green and would have to have blue text to go with my white/blue theme, otherwise it would drive me crazy to use green font like that.
You can have it any colour you want m8 yea, the built in aida64 template is basic but it gets you up and running, basically you make your own background image then add the sensors, there are no limits to what you can do with it really.
Well that certainly sounds better than I was thinking, I’ll have to check it out and see if I can find one of those LCD’s on Amazon on the cheap
how about rog bios? the evangelion background looks cool