Hi I m new to the forum,
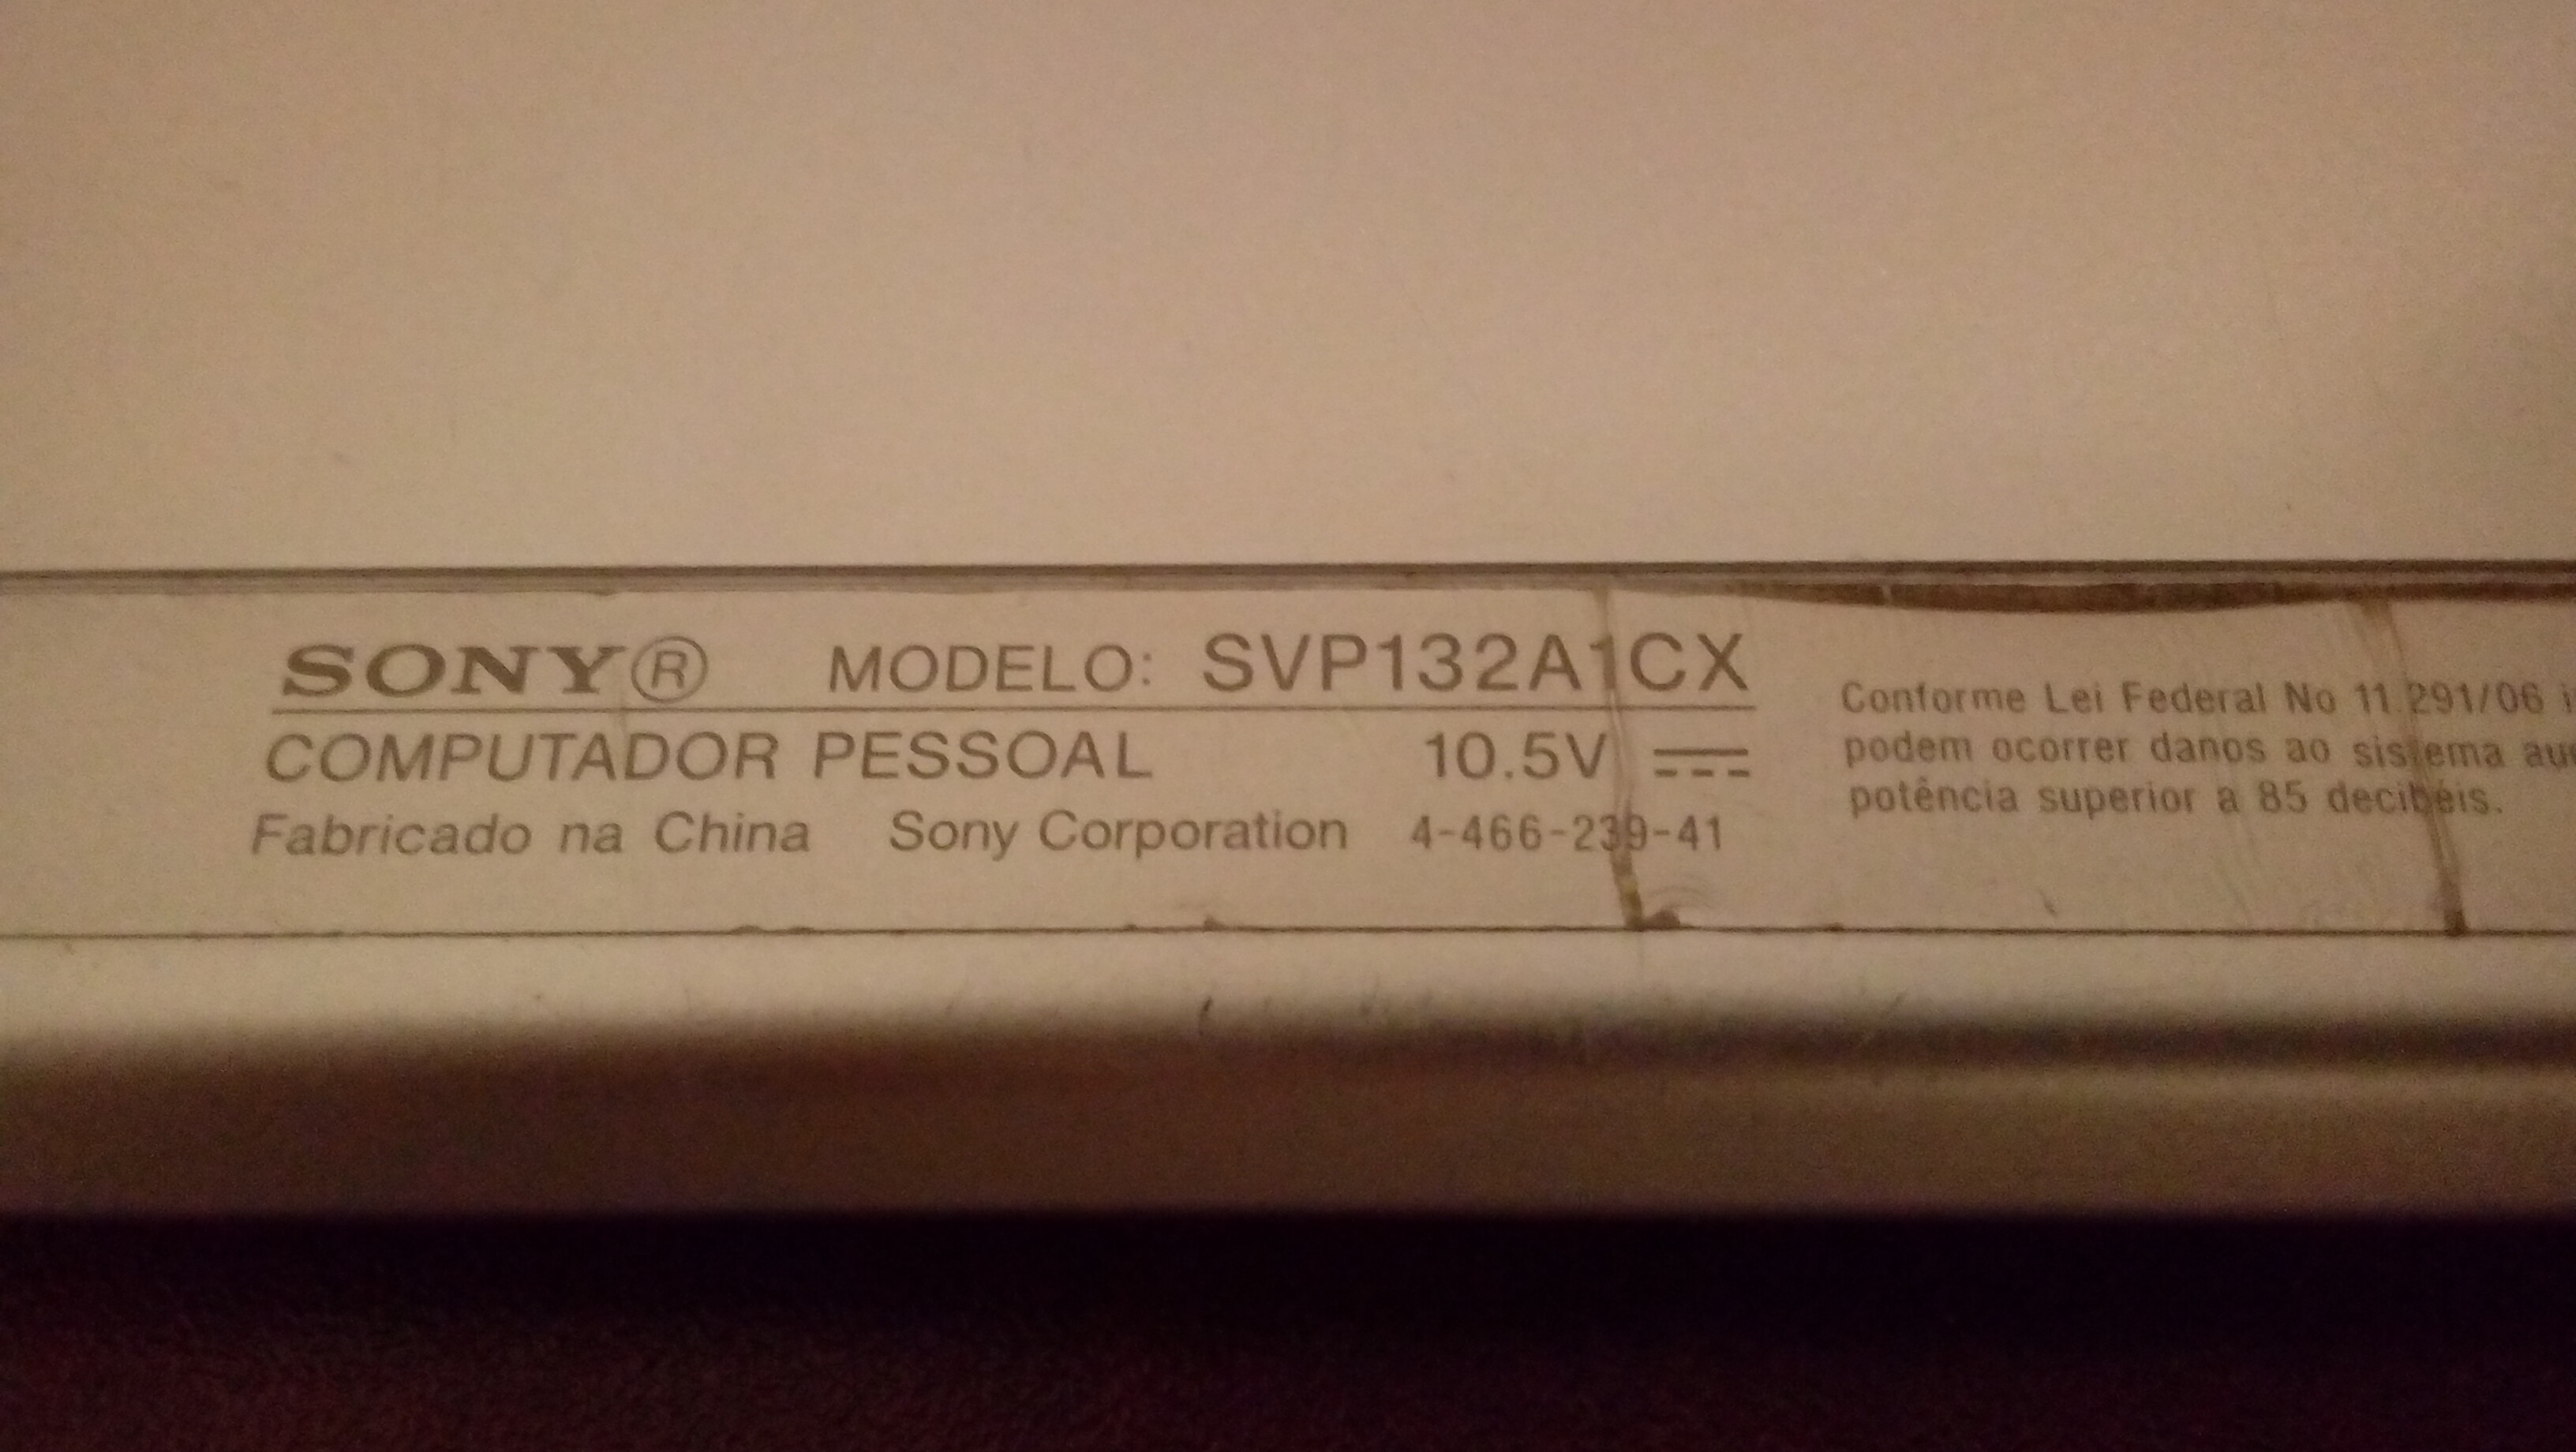
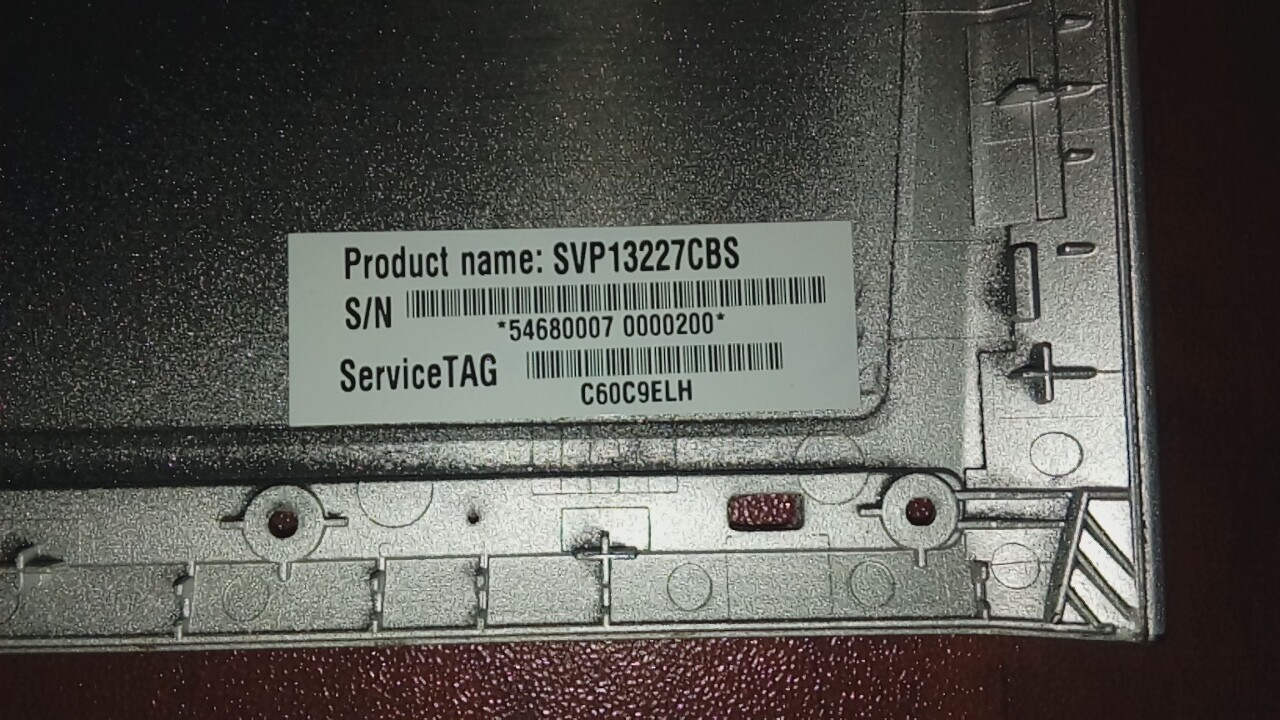
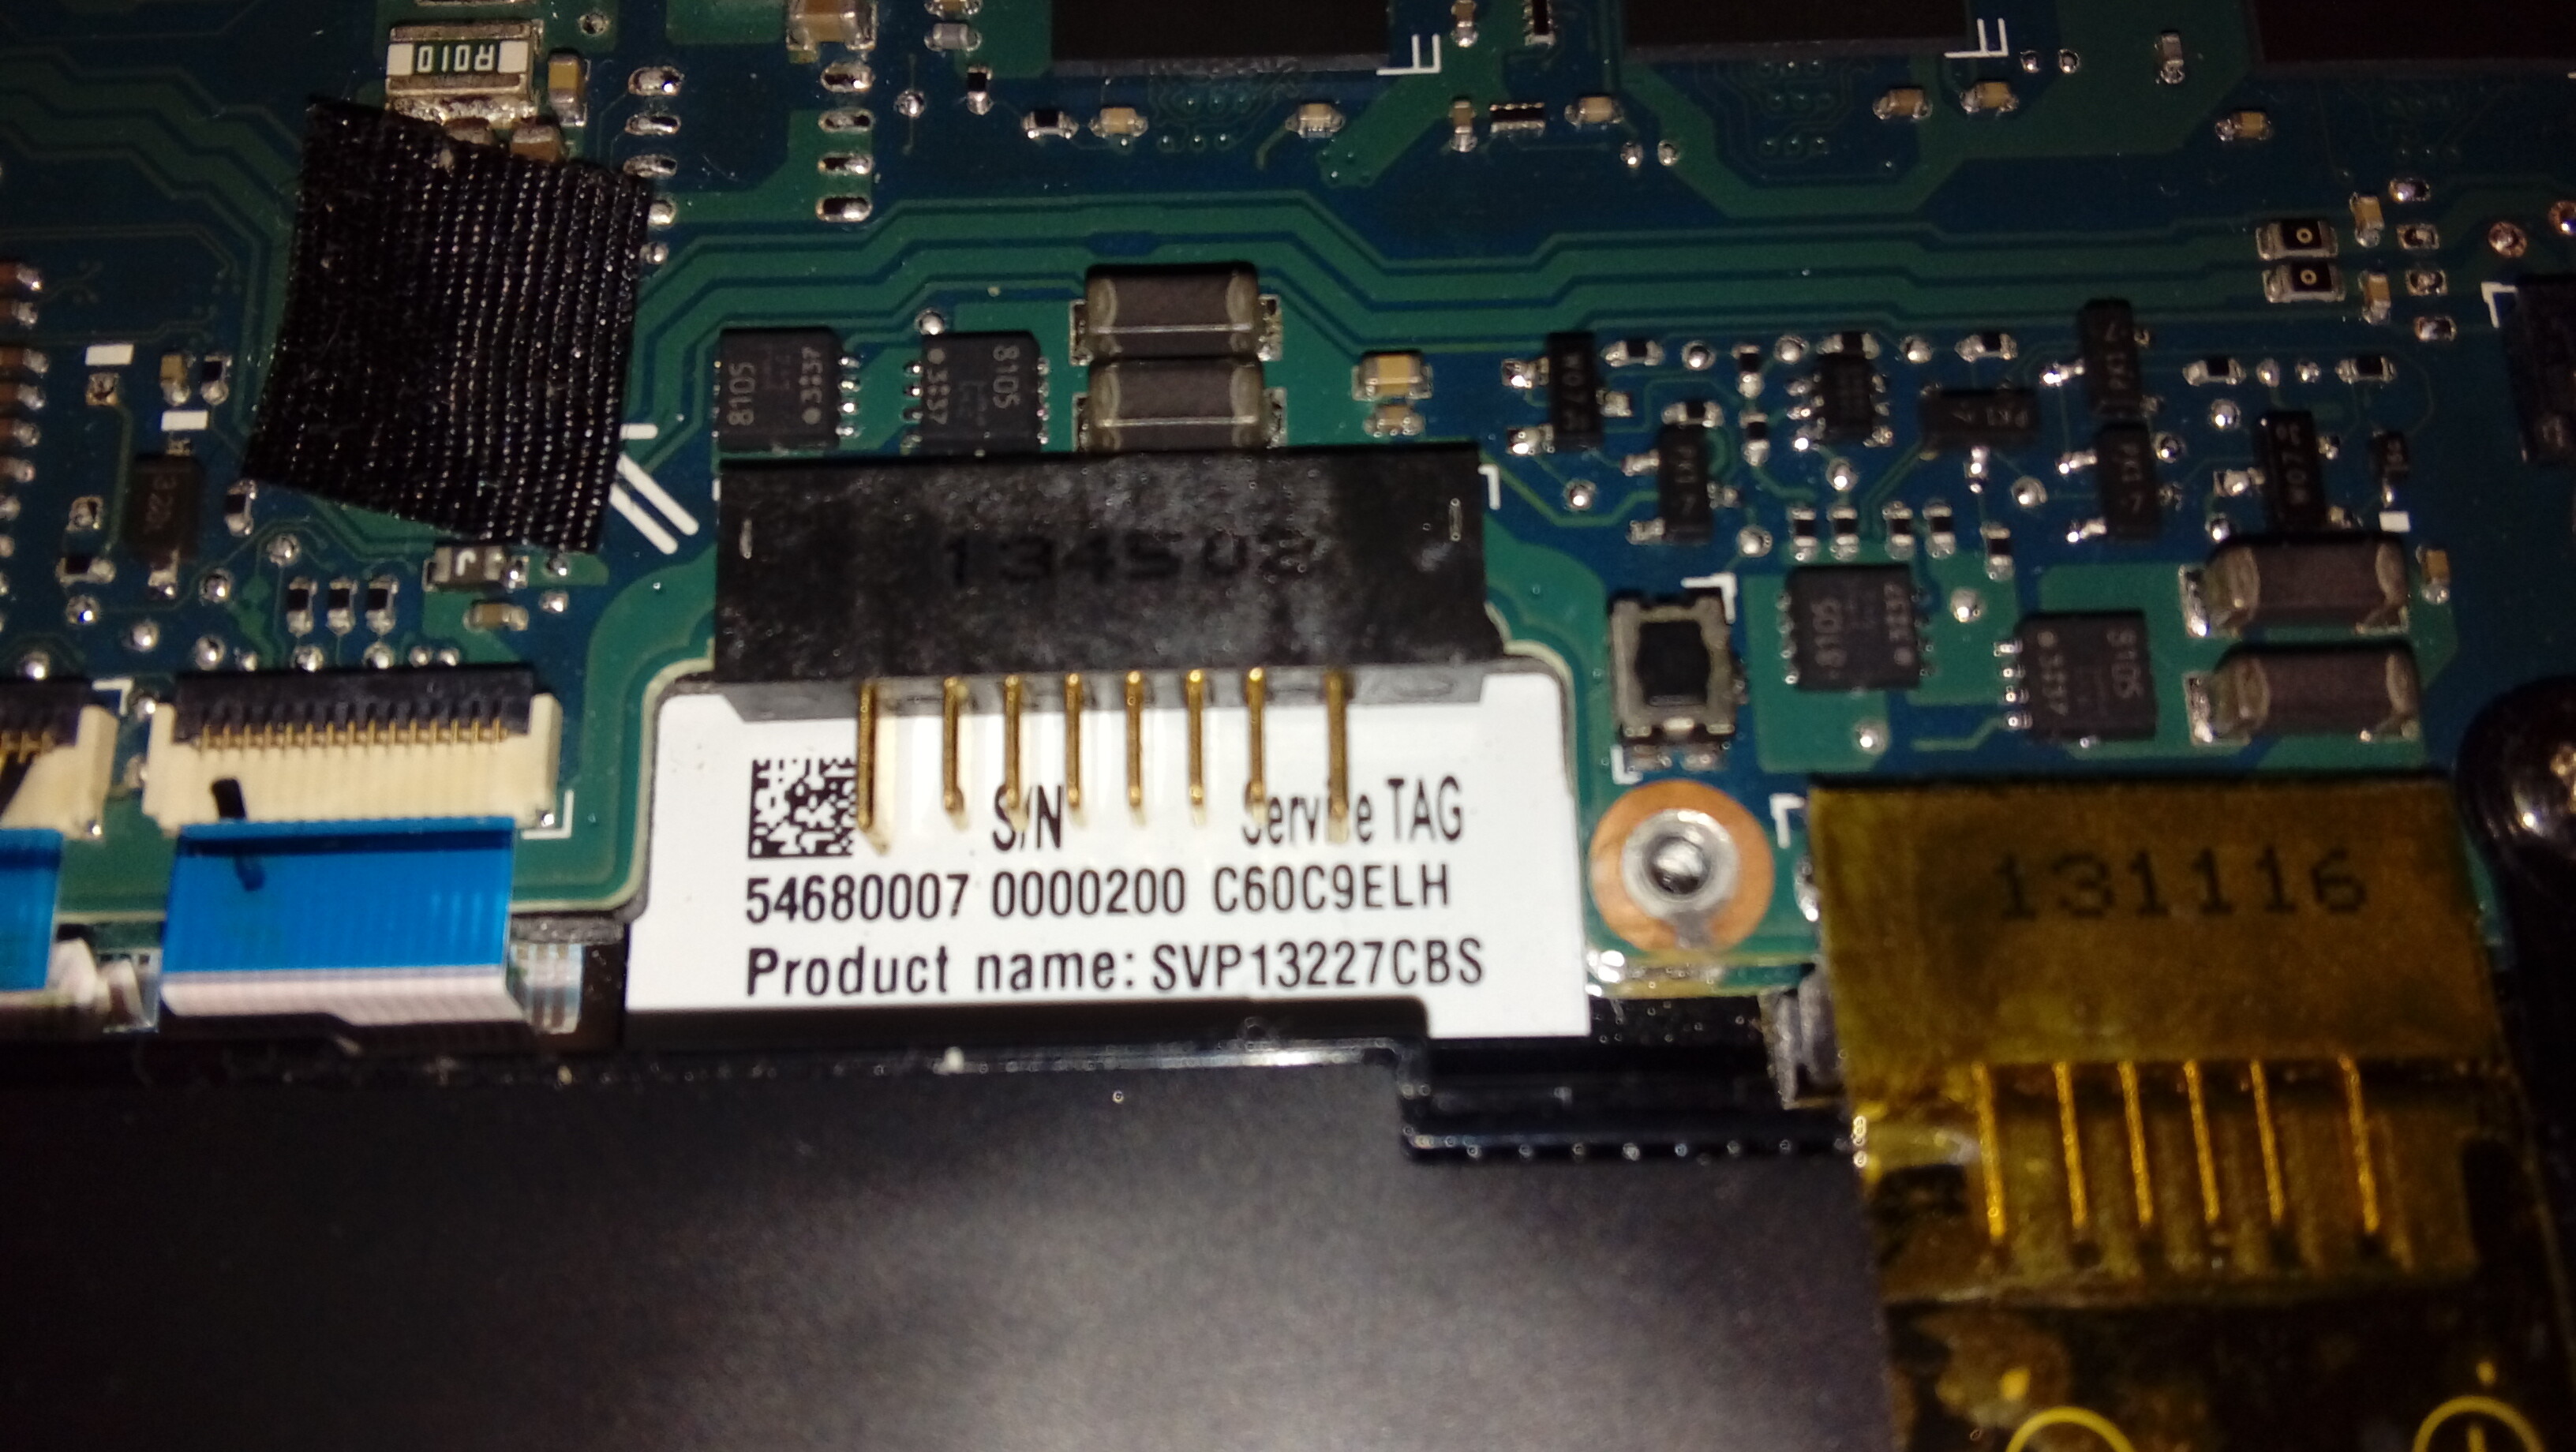
I have a SONY VAIO Pro 13, Model : SVP132A1CX, Product name : SVP13227CBS
I tried to reinstall Windows 10 in UEFI mode (before it was installed in Legacy (not by me)) so after checking bios configurations then set them to defaut and set boot mode to UEFI, after rebooting it seems there is a BIOS FAILLUR, the screen stays OFF, the power button lights on steady and the keyboard backlight glows then went off. I tried to remove CMOS battery and Intergrated battery but no result at all. After that I toke it to a technician and told me he needs a BIOS dump of the same model to fix it. I look in the internet but I didn’t find it I only found for SVP132A1CW picture shows the same motherboard (the technician told me it will not match).
link : https://www.laboneinside.com/sony-vaio-p…2a1cw-bios-bin/
I need help to solve this, if someone have the bios dumb for my laptop or can confirm that the one I found can match with mine.
and Thank you.
@BrahimS - since it is not working now, dump the current BIOS with programmer and make sure it’s a valid BIOS (upload for someone to check if you are not sure). Then test writing the other BIOS you found, that is only way to know if it would work or not.
Please give me more details, any numbers you see on back labels, labels inside, labels on the motherboard etc. If you did not already, search for both those Model and Product names without the S on the front, like VP13227CBS
@Lost_N_BIOS - thank you for replying, actaully I didn’t understand the 1st part, all I know is BIOS DUMP is making a complete copy of a BIOS as .bin file in my case its size is 8MB. I don’t even have a programmer, I m only looking for the BIOS DUMP so the technician will take care of the rest.
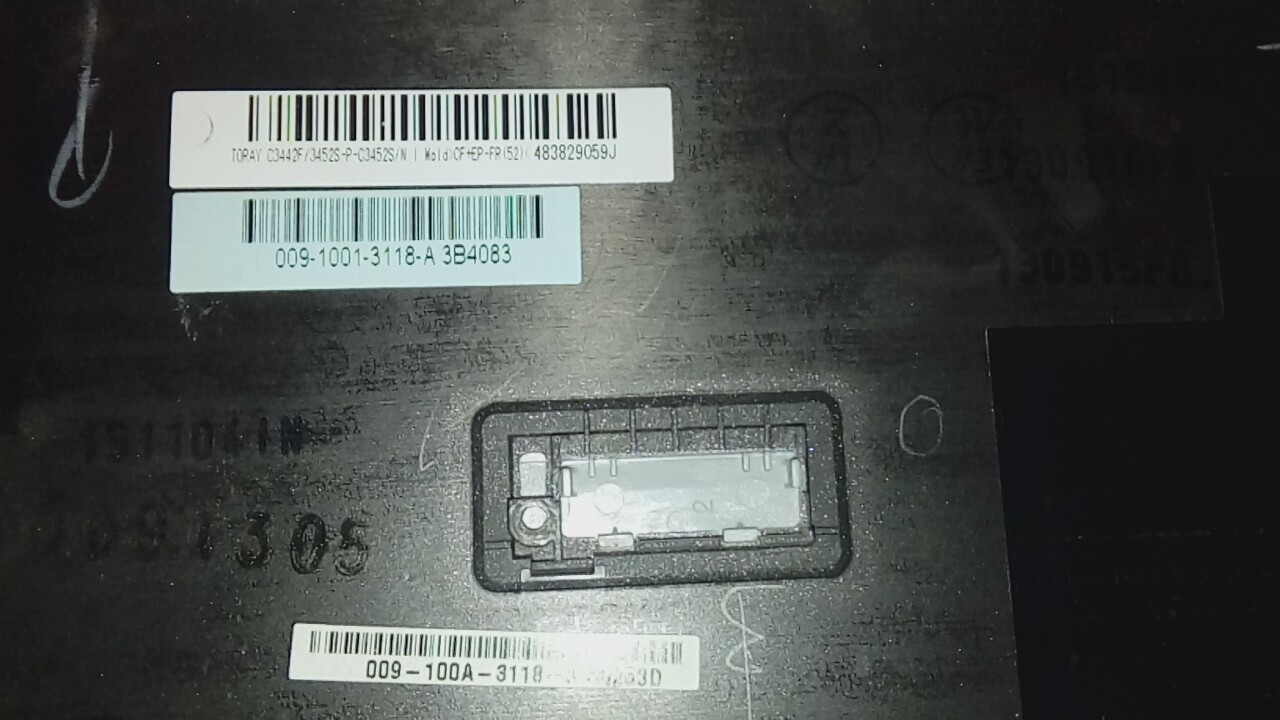
These are pictures of the laptop :
Back of the laptop
Inside of the laptop
Picture of the Chip (model : Winbond 25Q64FVSIQ)
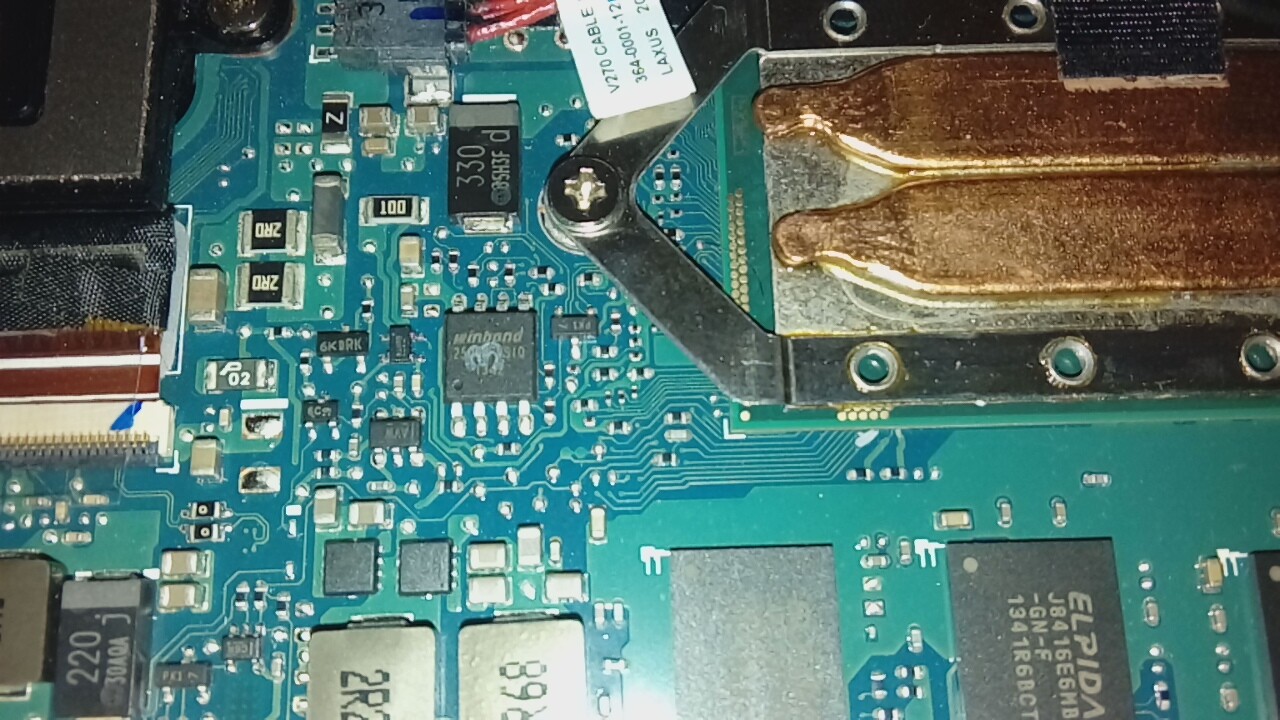
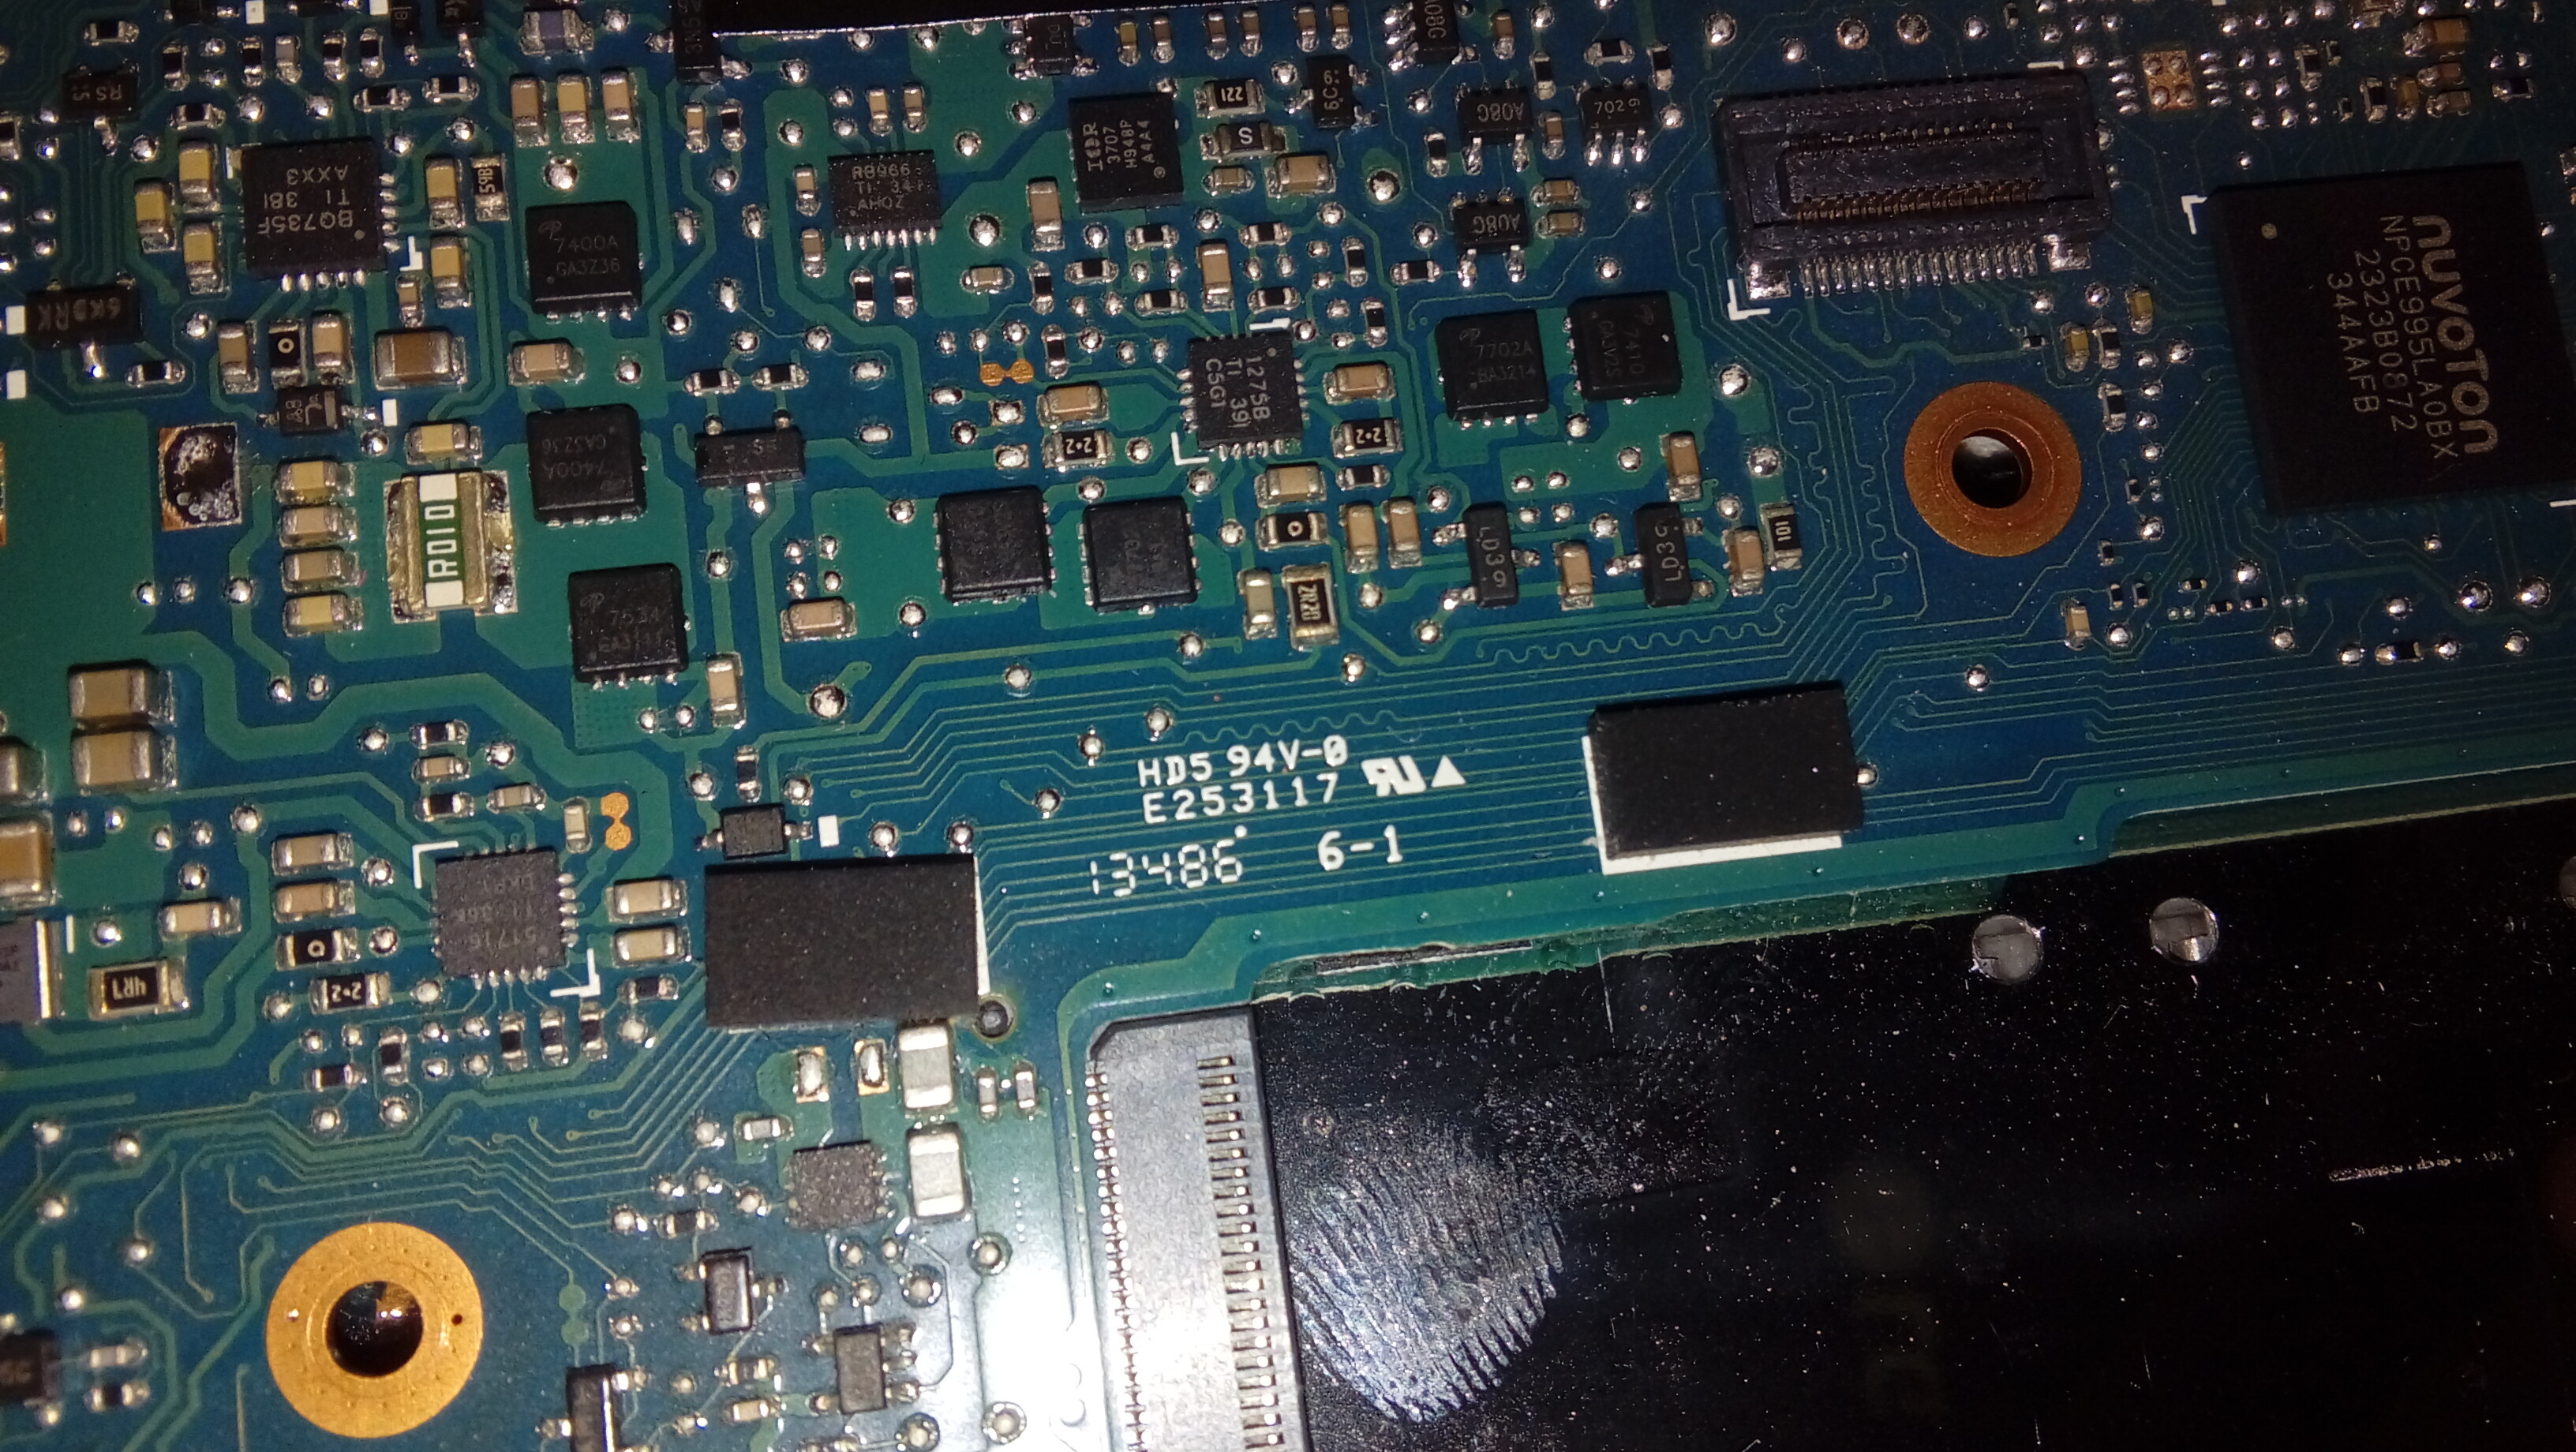
Picture of the motherboard

Additional informations :
-Searching in SONY offical support web site the model number SVP132A1CX (the one in the back of laptop) didn’t give any result, instead of the other product name SVP13227CBS (found inside of the laptop also in bios informations befor it fails) has shown results but only in the Brazilian website link that explain the Portuguese language in the back of the laptop also when accesing assist menu (using assit button befor the bios fails) it shows in Portuguese.
-I tried to search in dr-bios.com (even I don’t have membership) and it shows 3 bios bins for the model SVP132


@BrahimS - What are you dumping the BIOS with? Ohh, you are not, someone else is? So technician wants you to get him a file? What kind of tech is he then? 
Did he give you a dump of your current messed up BIOS? If yes, upload for me to look at, and a link to the stock BIOS download for this system. If you have a dump from your messed up BIOS, I can probably fix new BIOS for you to give him
Also, I can get you these BIOS files, but looks like none are exact and or some may be but you need to remove everything from your motherboard and or get the board out of the case, so you can find the motherboard PCB printed name (in white printed on PCB, not on a sticker)
SVP132A1CW V270_MBX REV 1.1 1P-0134J00-8011
Bios Sony SVP13213CYB
SONY SVP1321 V270-MBX REV 1.1 BIOS
SONY SVP132A3AT.BIN
V270_MBX_1P-0134J00-8011_REV.1.1_SVP132A1CV_25Q64FV_OK.BIN
BIOS / FIRMWARE / IMOBILIZADOR / ECU / Solicito Bios Sony SVP13213CYB
@Lost_N_BIOS - No, he didn’t make a dump of the current messed BIOS, he don’t want to unsold the chip unless he gets the exact bin file to work with. May be I can ask him for a BIOS dump if this will definitely solve the problem.
About the motherboard, these are other pictures from the other side.
I think this is the PCB name because it’s the only thing printed in white on the motherboard :
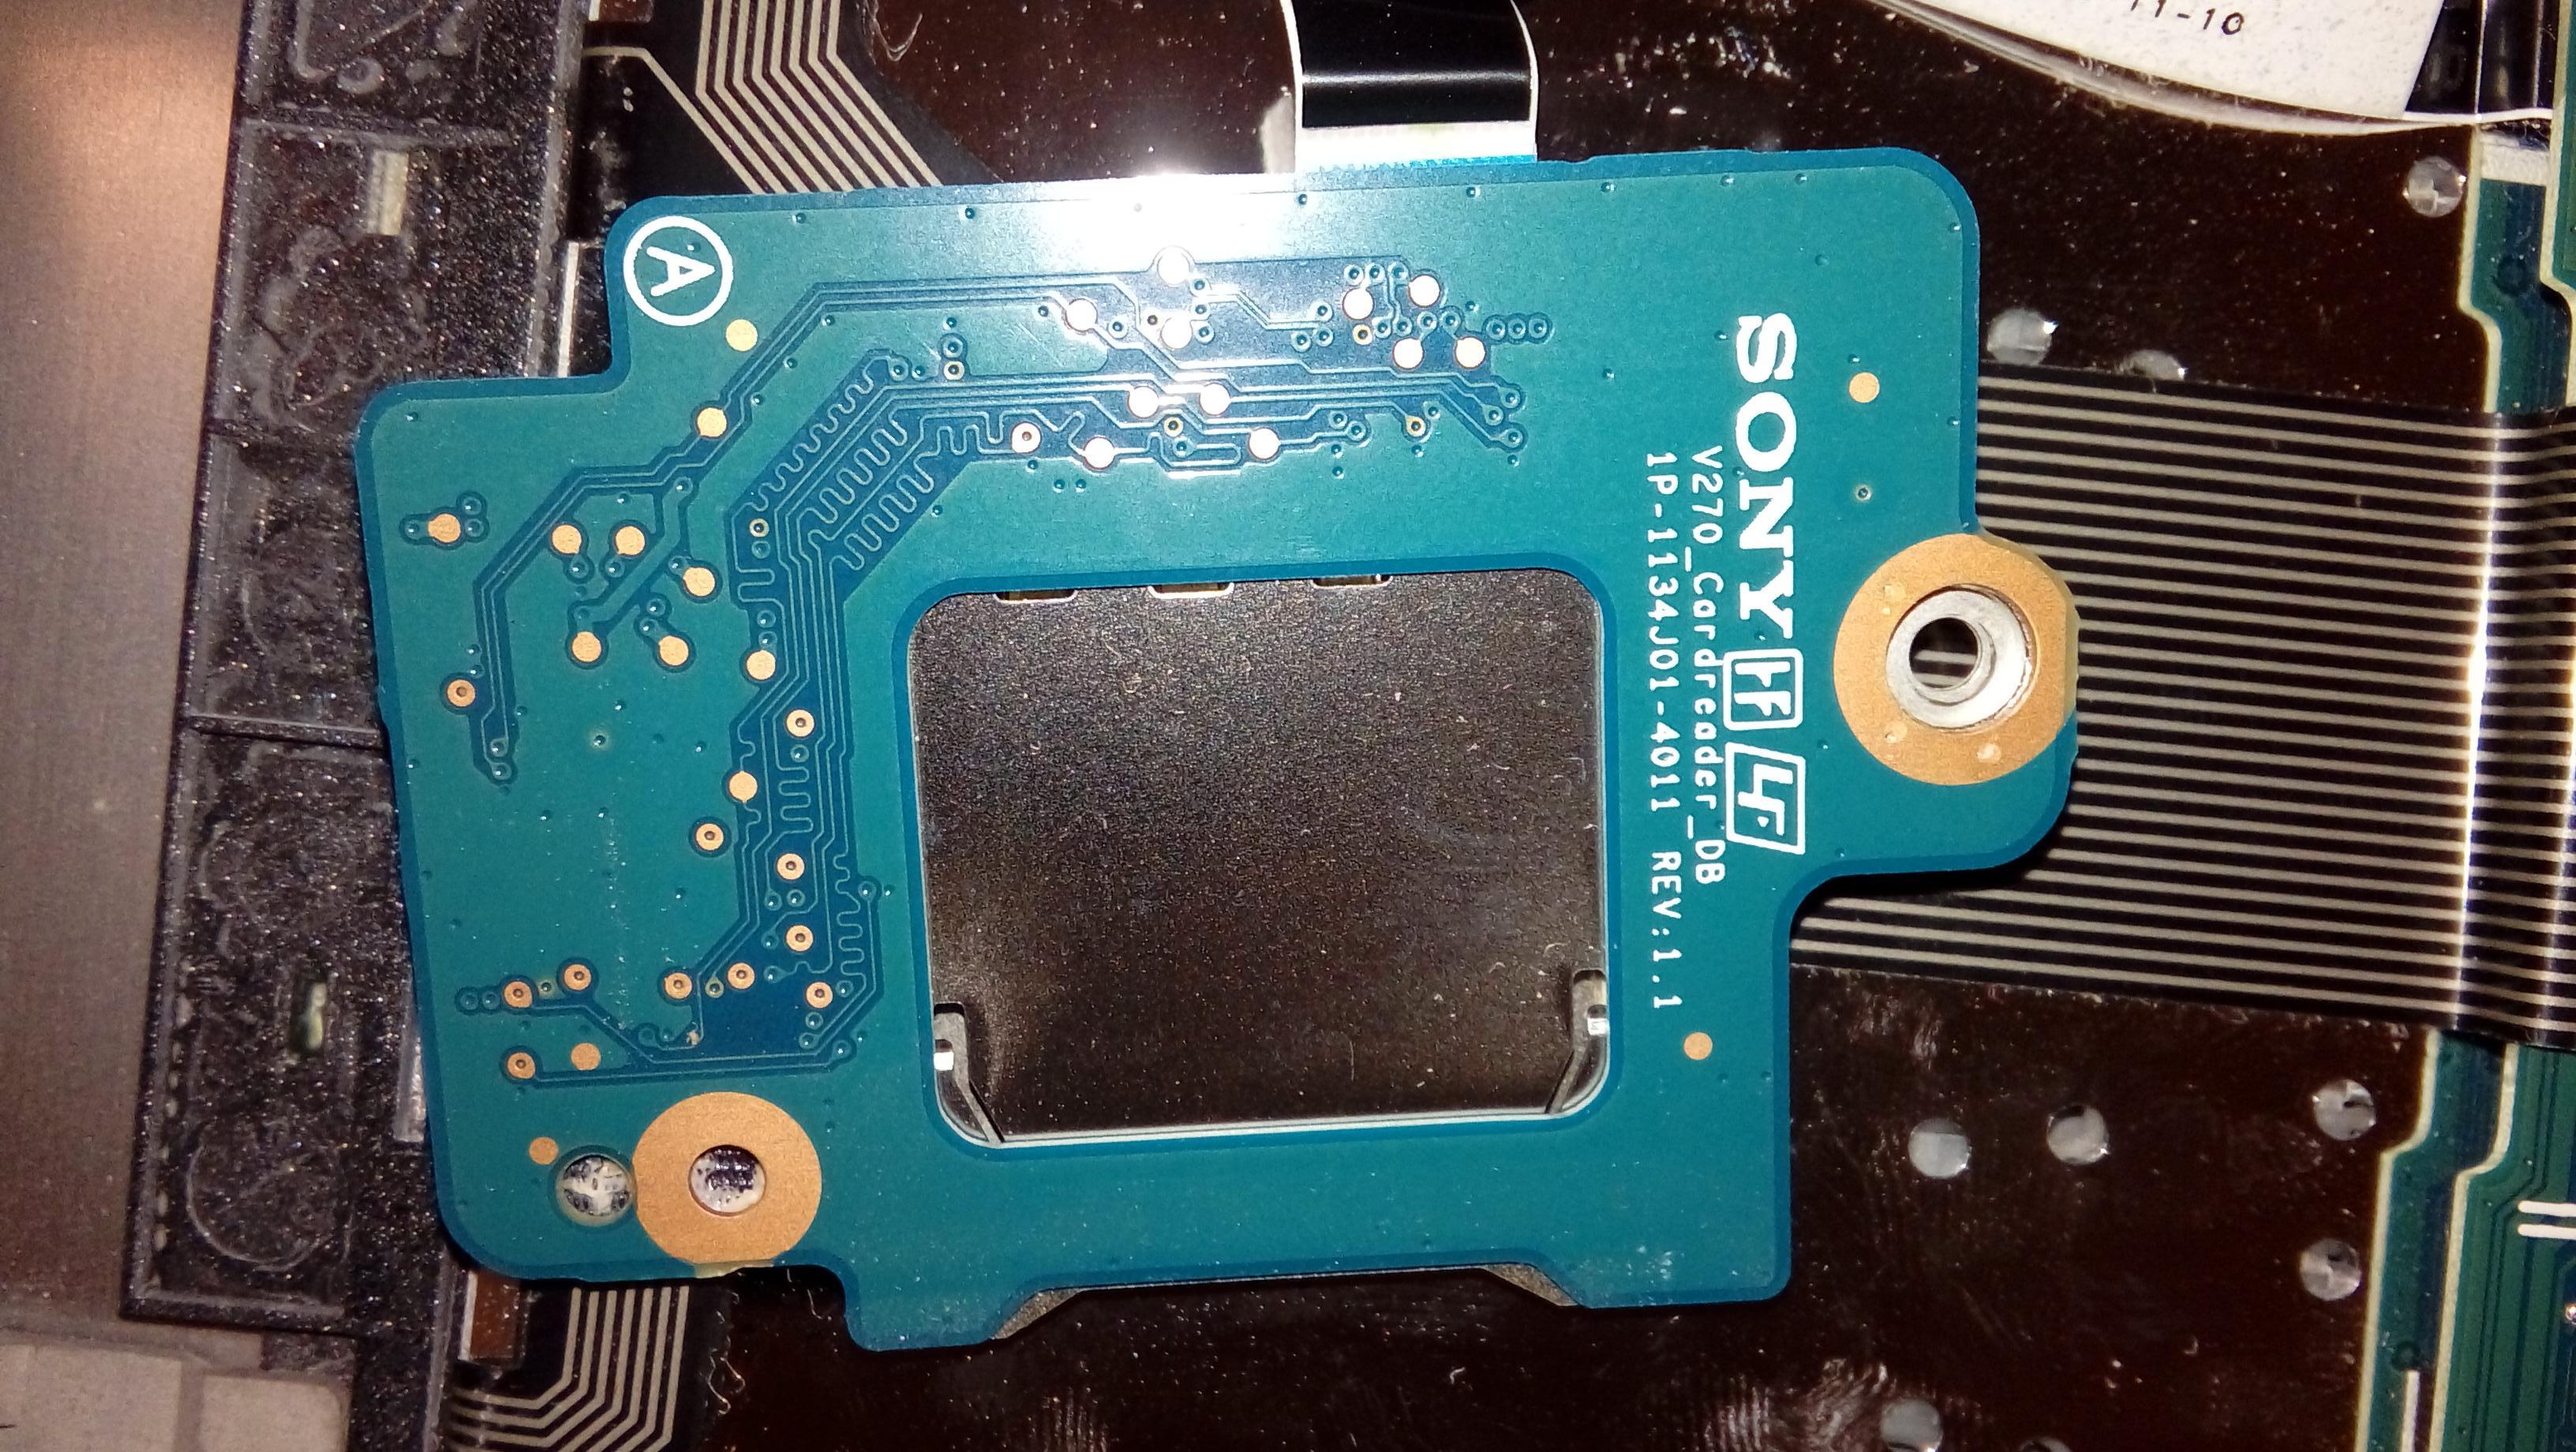
I also found this on the cardreader may be it can help
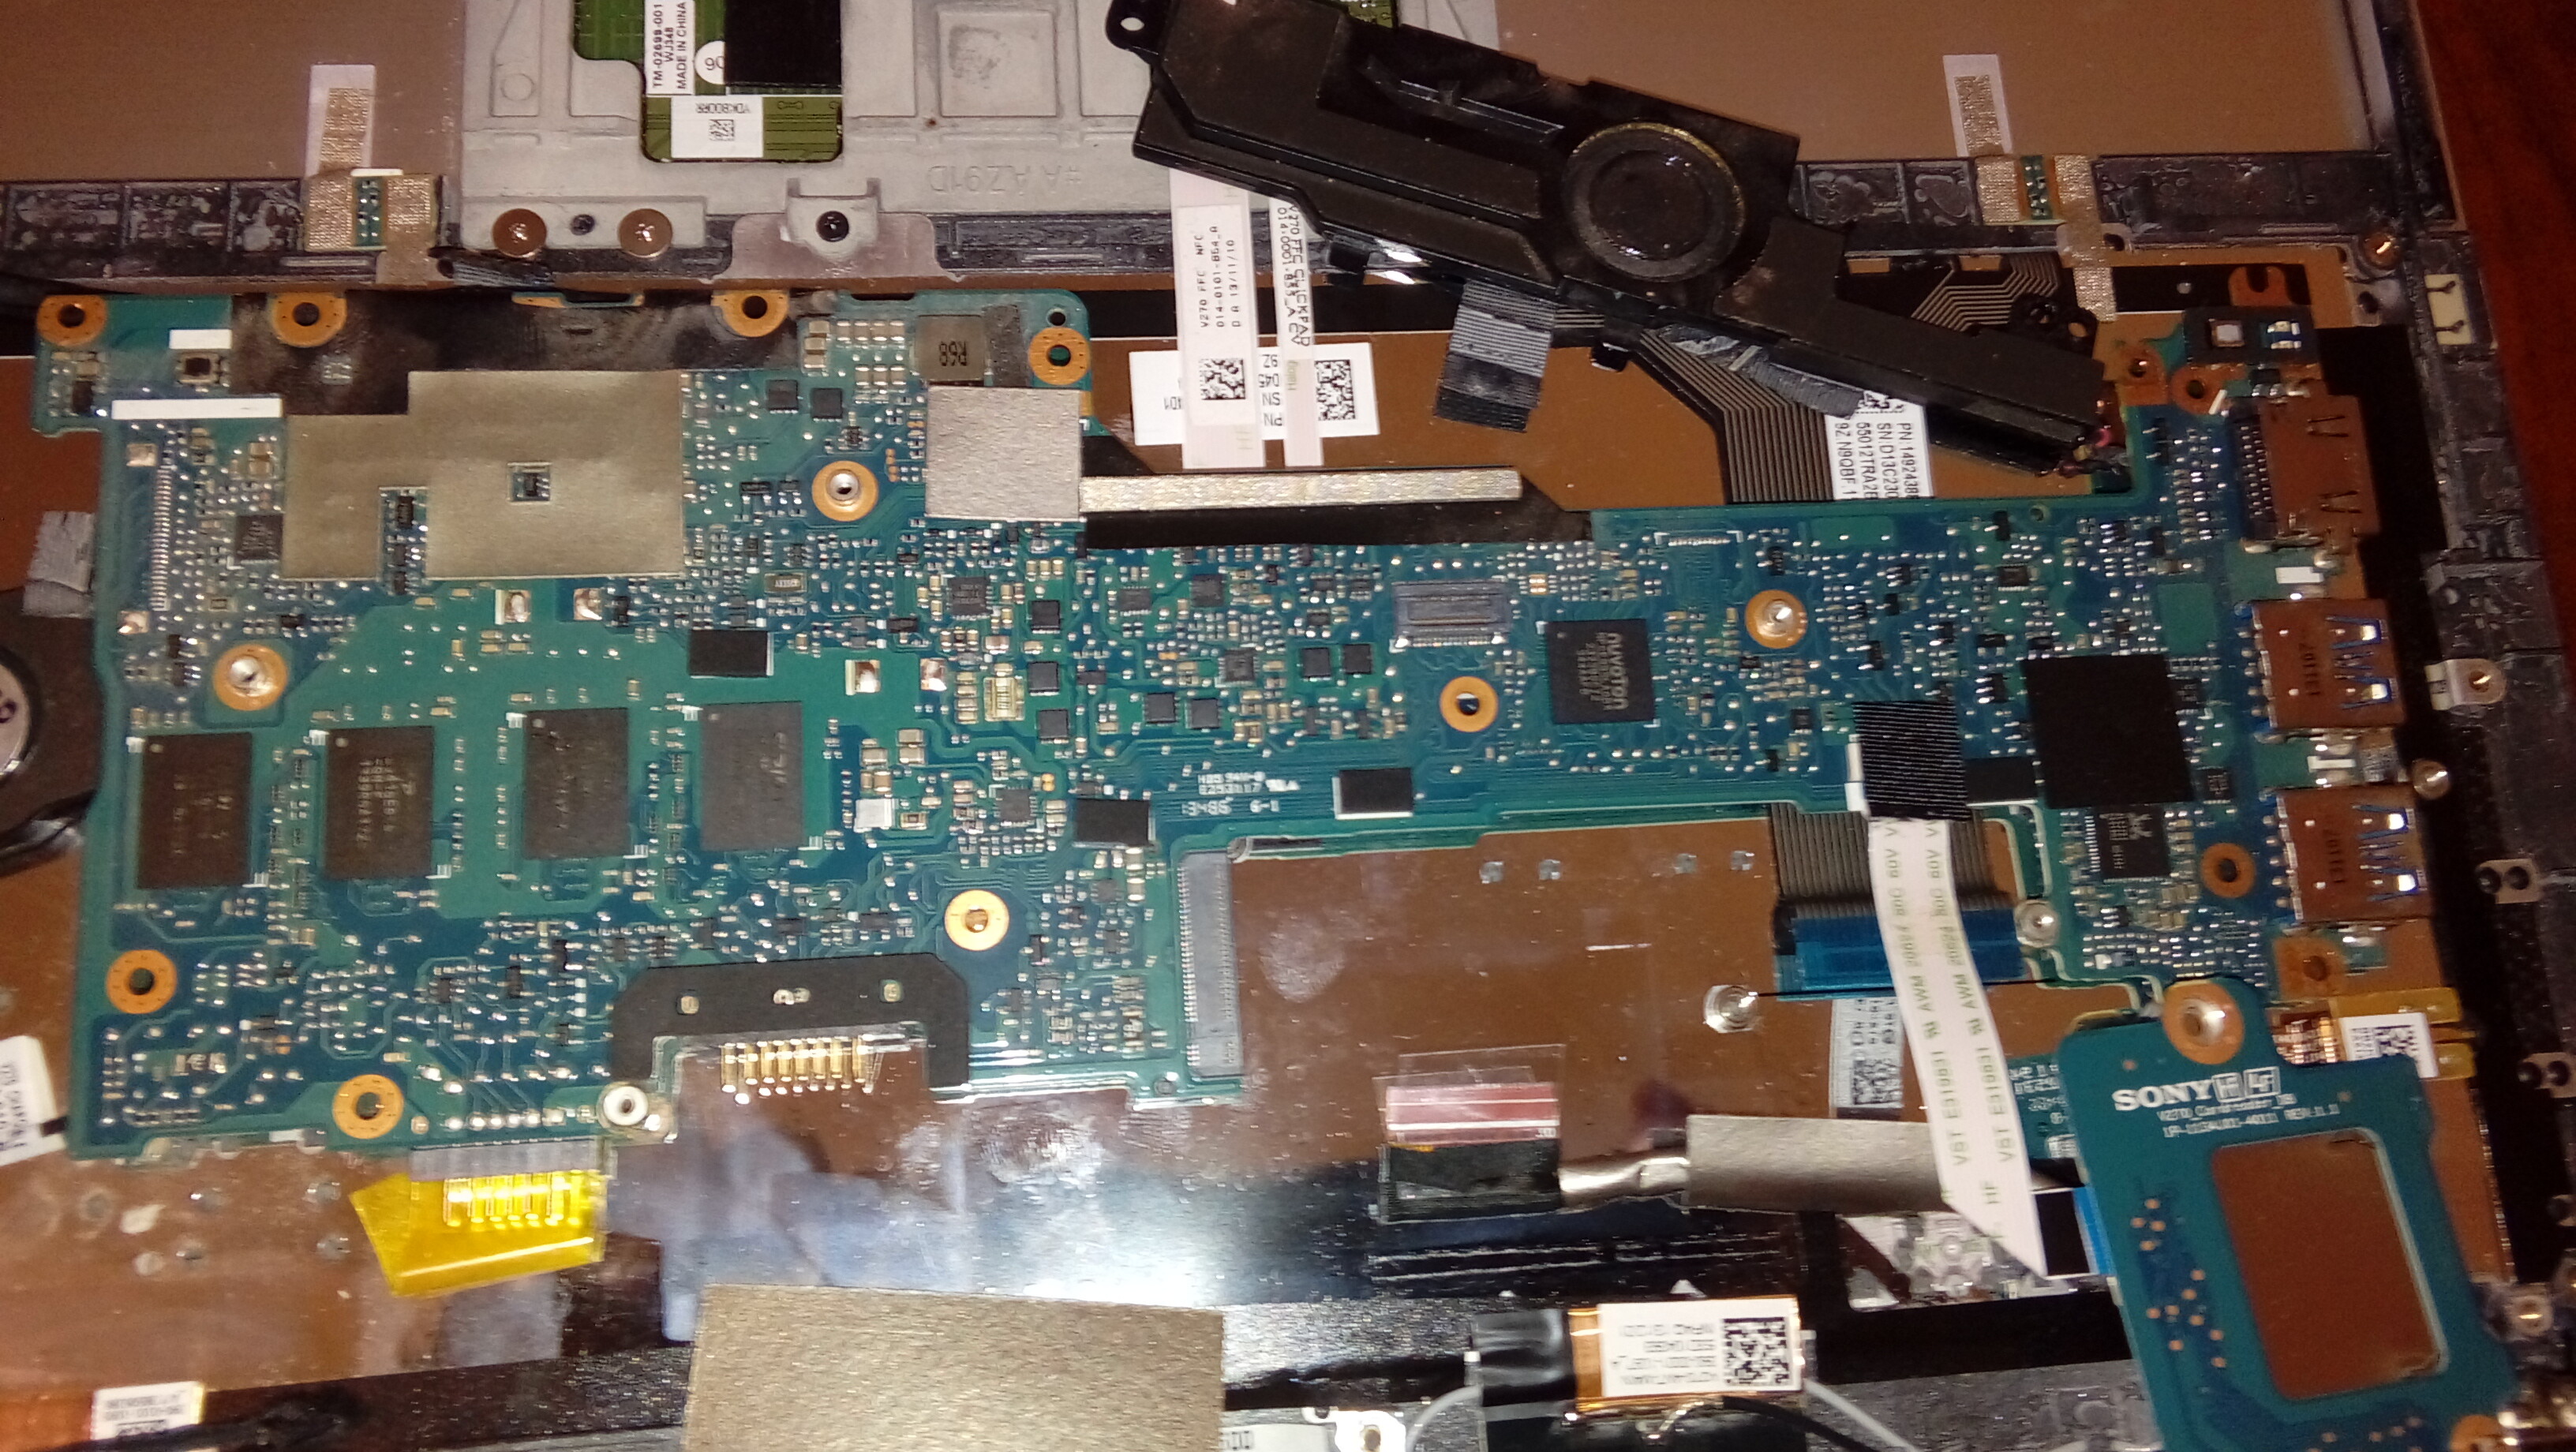
a complet picture of the motherboard
tech should not have to desolder chip to give you a dump either, really sounds like you need a new capable tech. Or, to do this yourself, the tools only cost around $5-6 total shipped, but it’s a long wait from China for cheap like that, you can usually find locally, or from sellers that charge more/ship faster for more $$
What you need is a CH341A flash programmer + SOIC8 test clip cable. If you need links to those on ebay for examples, so you can try to find locally or from places that ship faster let me know.
Giving me a dump from the messed up BIOS may or may not help, but for me this would be the best start for me to possibly give you a fixed BIOS. I could use stock BIOS, your broken dump to get board details from, put back into stock BIOS and then it would be all sorted out usually.
You would need the tools I mentioned above to put the BIOS on though, but no soldering would be required.
Thanks for the images, not sure if any show the numbers like used in above examples. The one shown on the card reader is similar to first example I gave, but no luck using it to find BIOS dump  I found 8 BIOS for SVP112A1CW / 1P-0134J01-8011 (but none for your 1P-0134J01-4011)
Is there anything under the M.2 SSD?
@Lost_N_BIOS At last I got what we need.
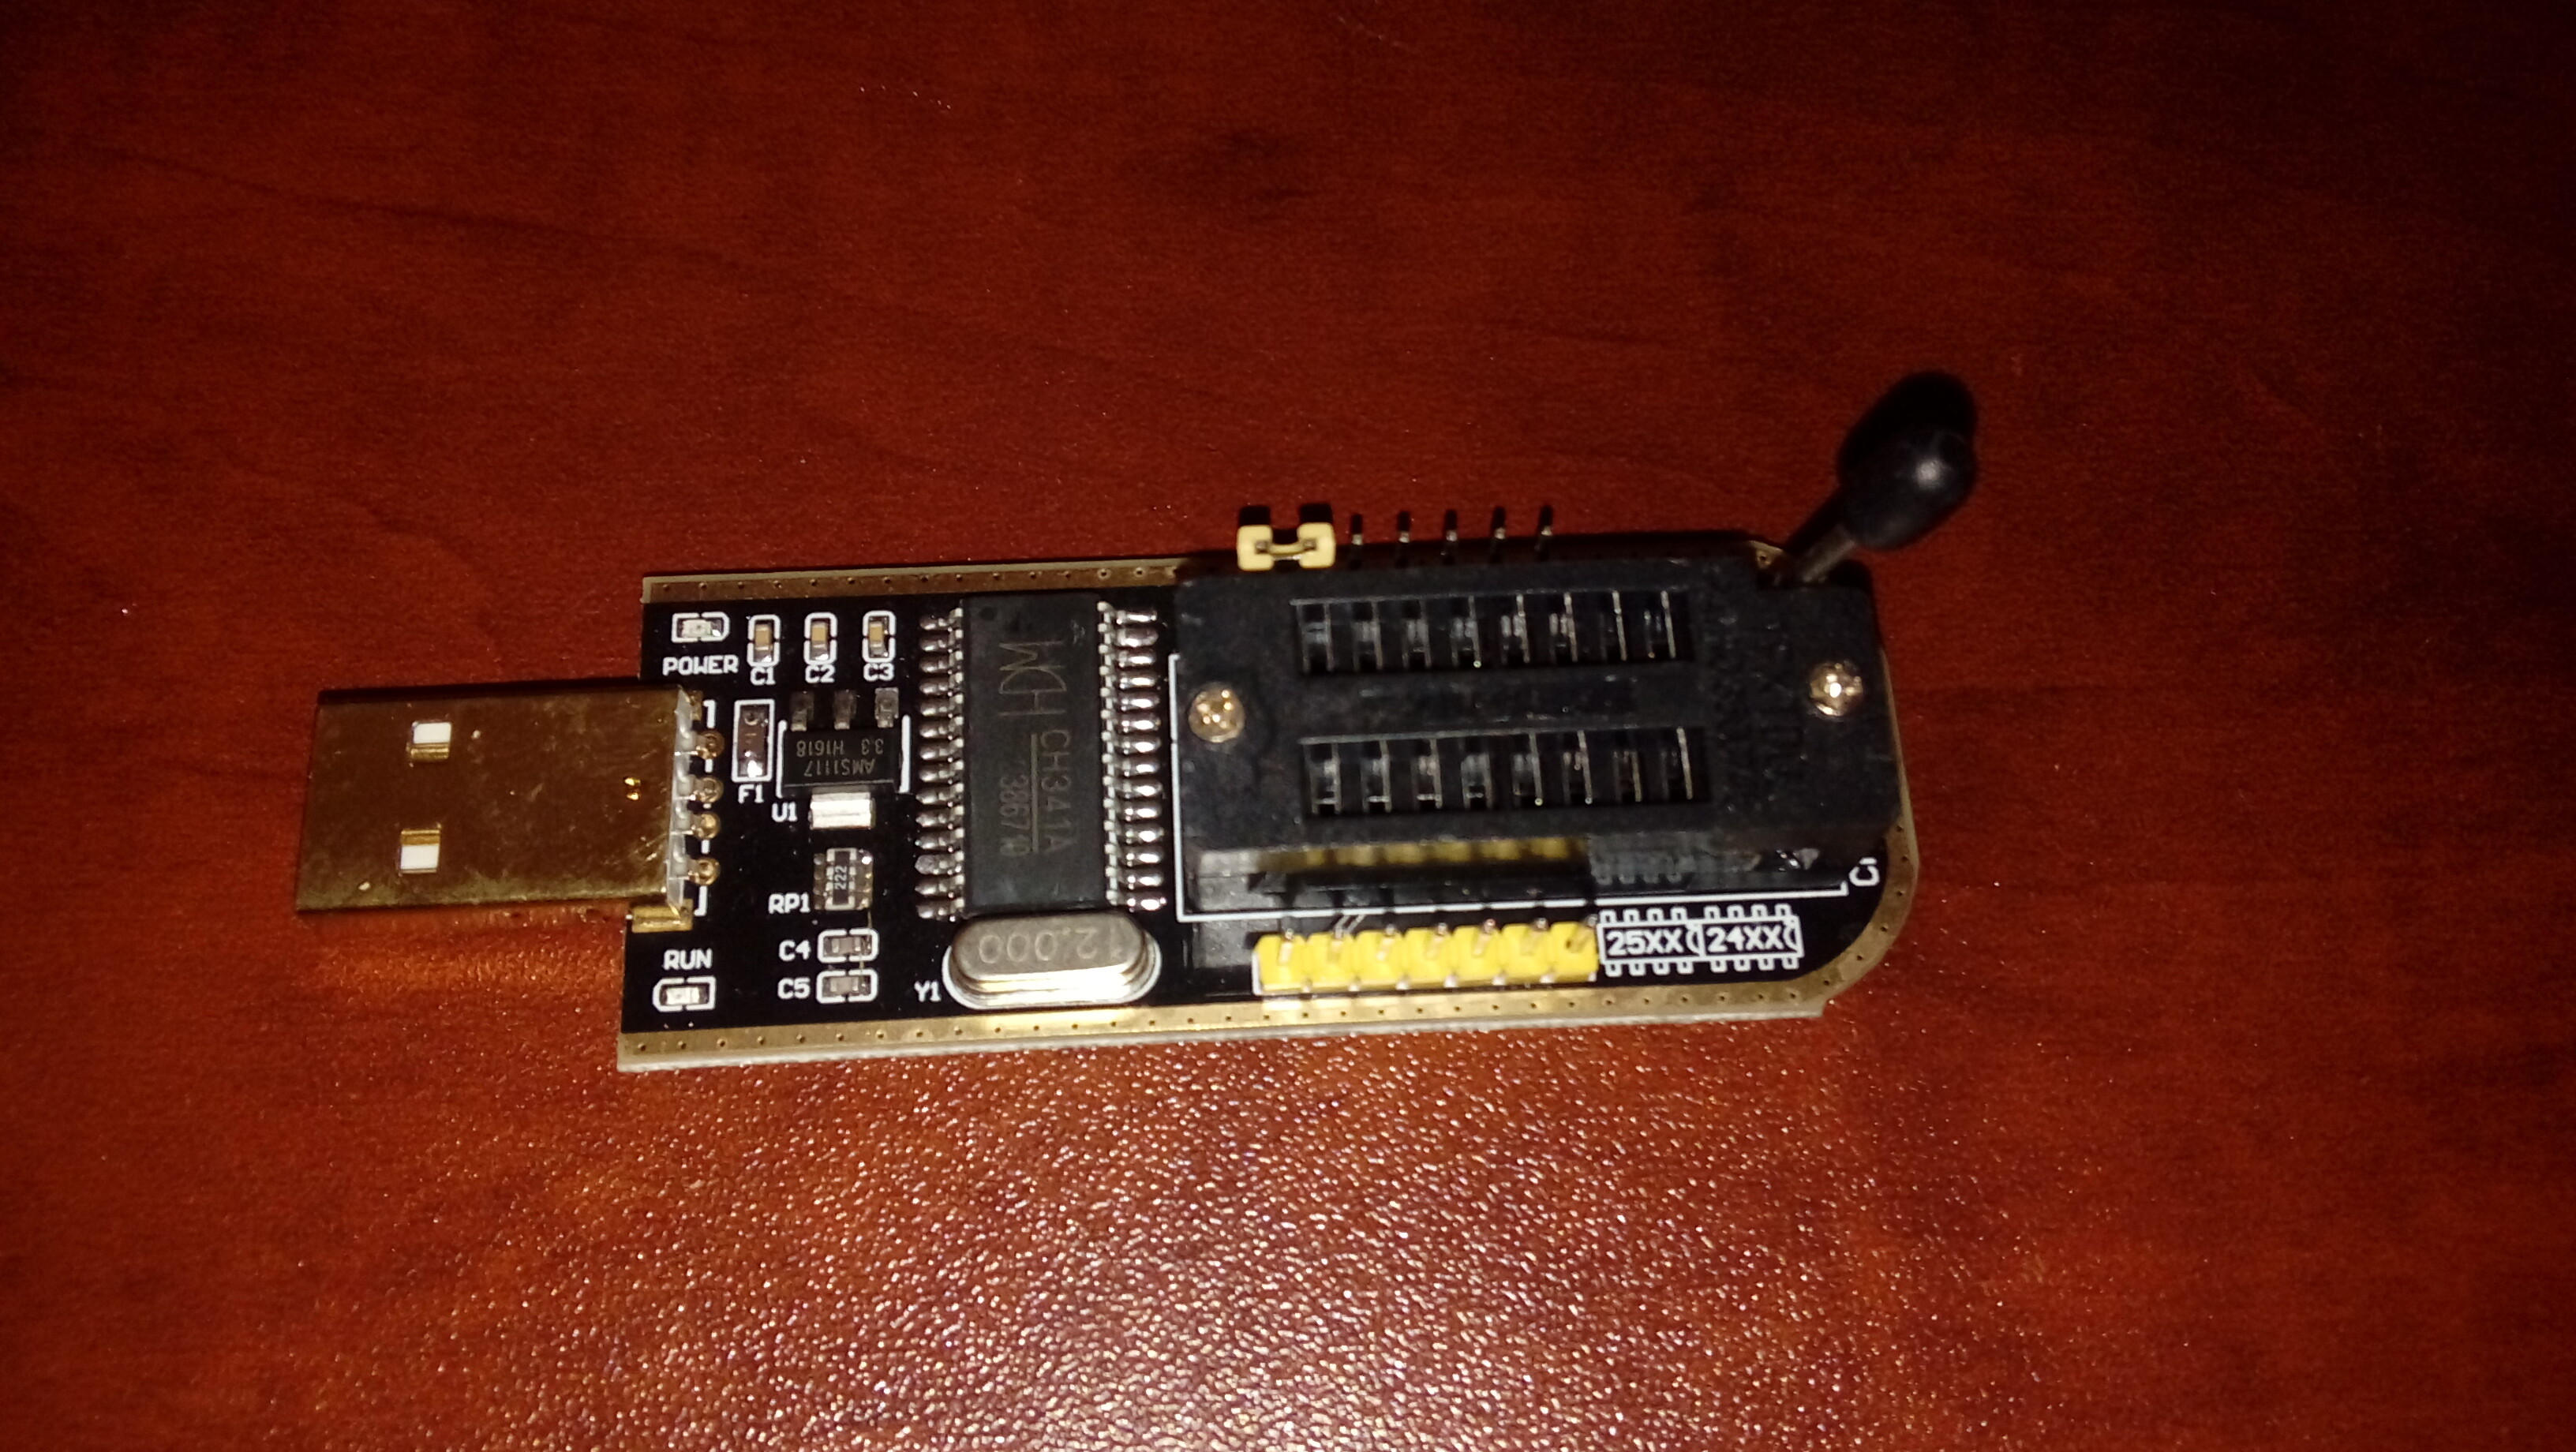
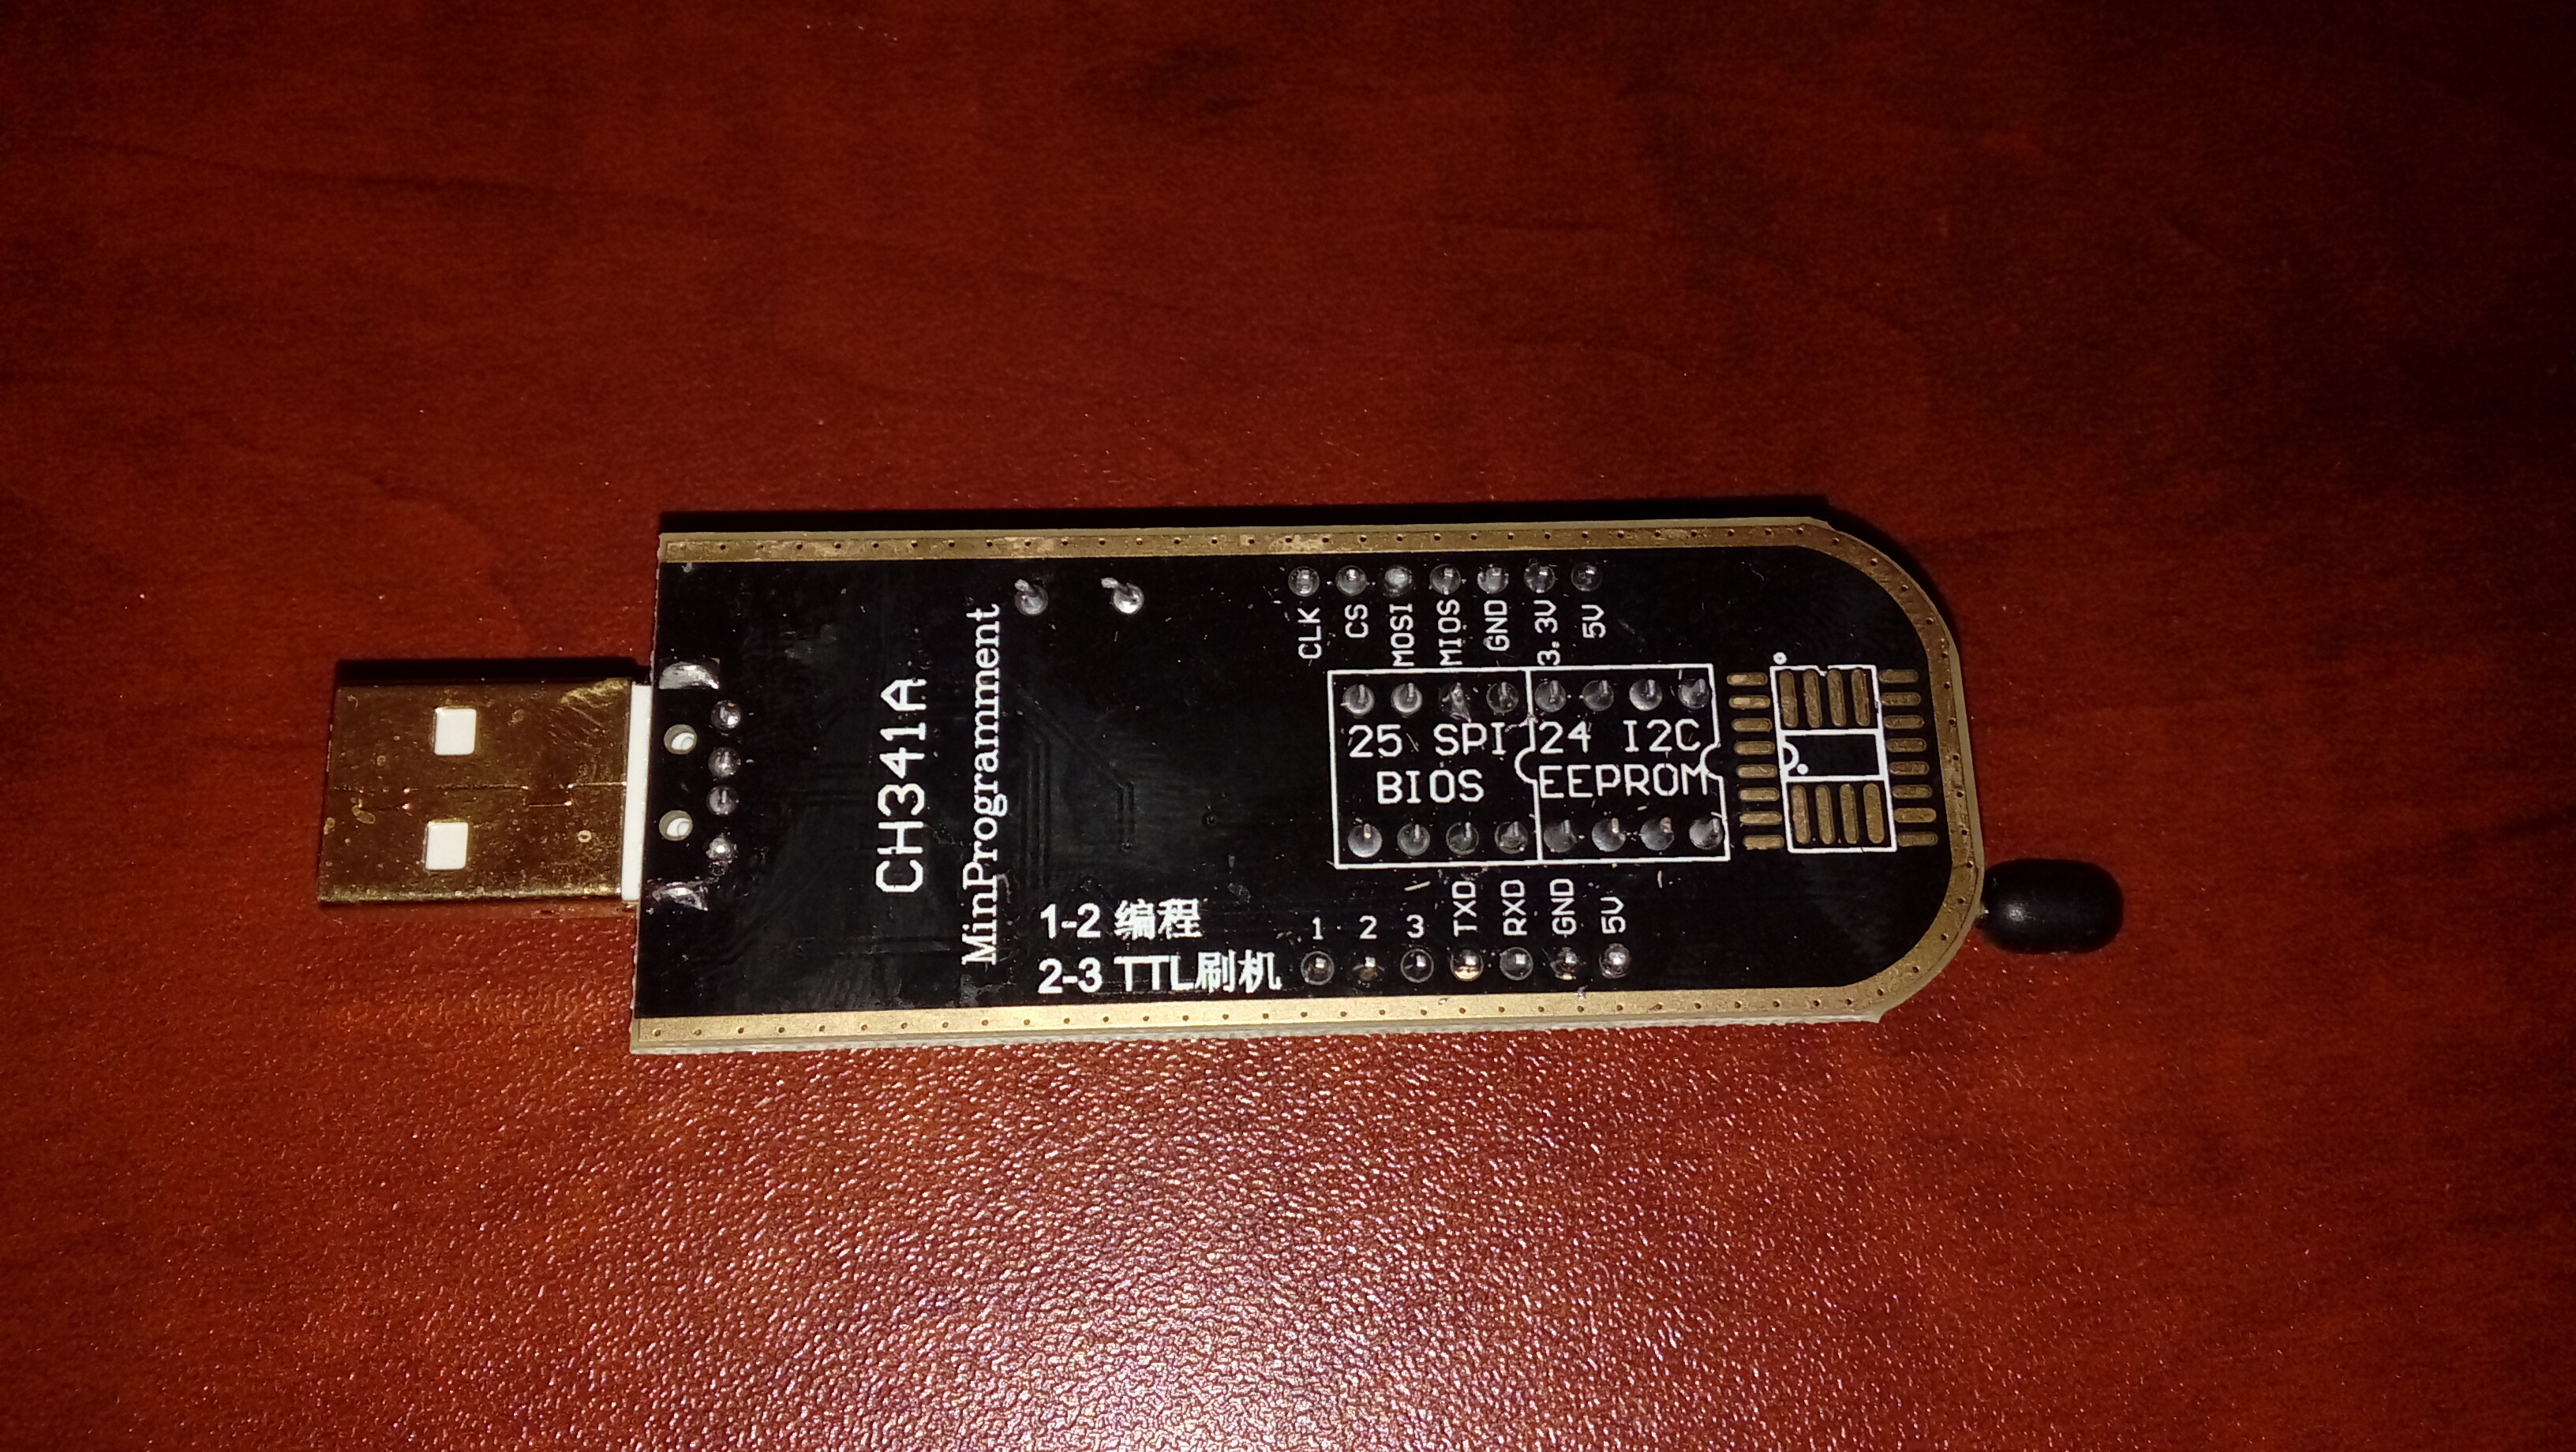
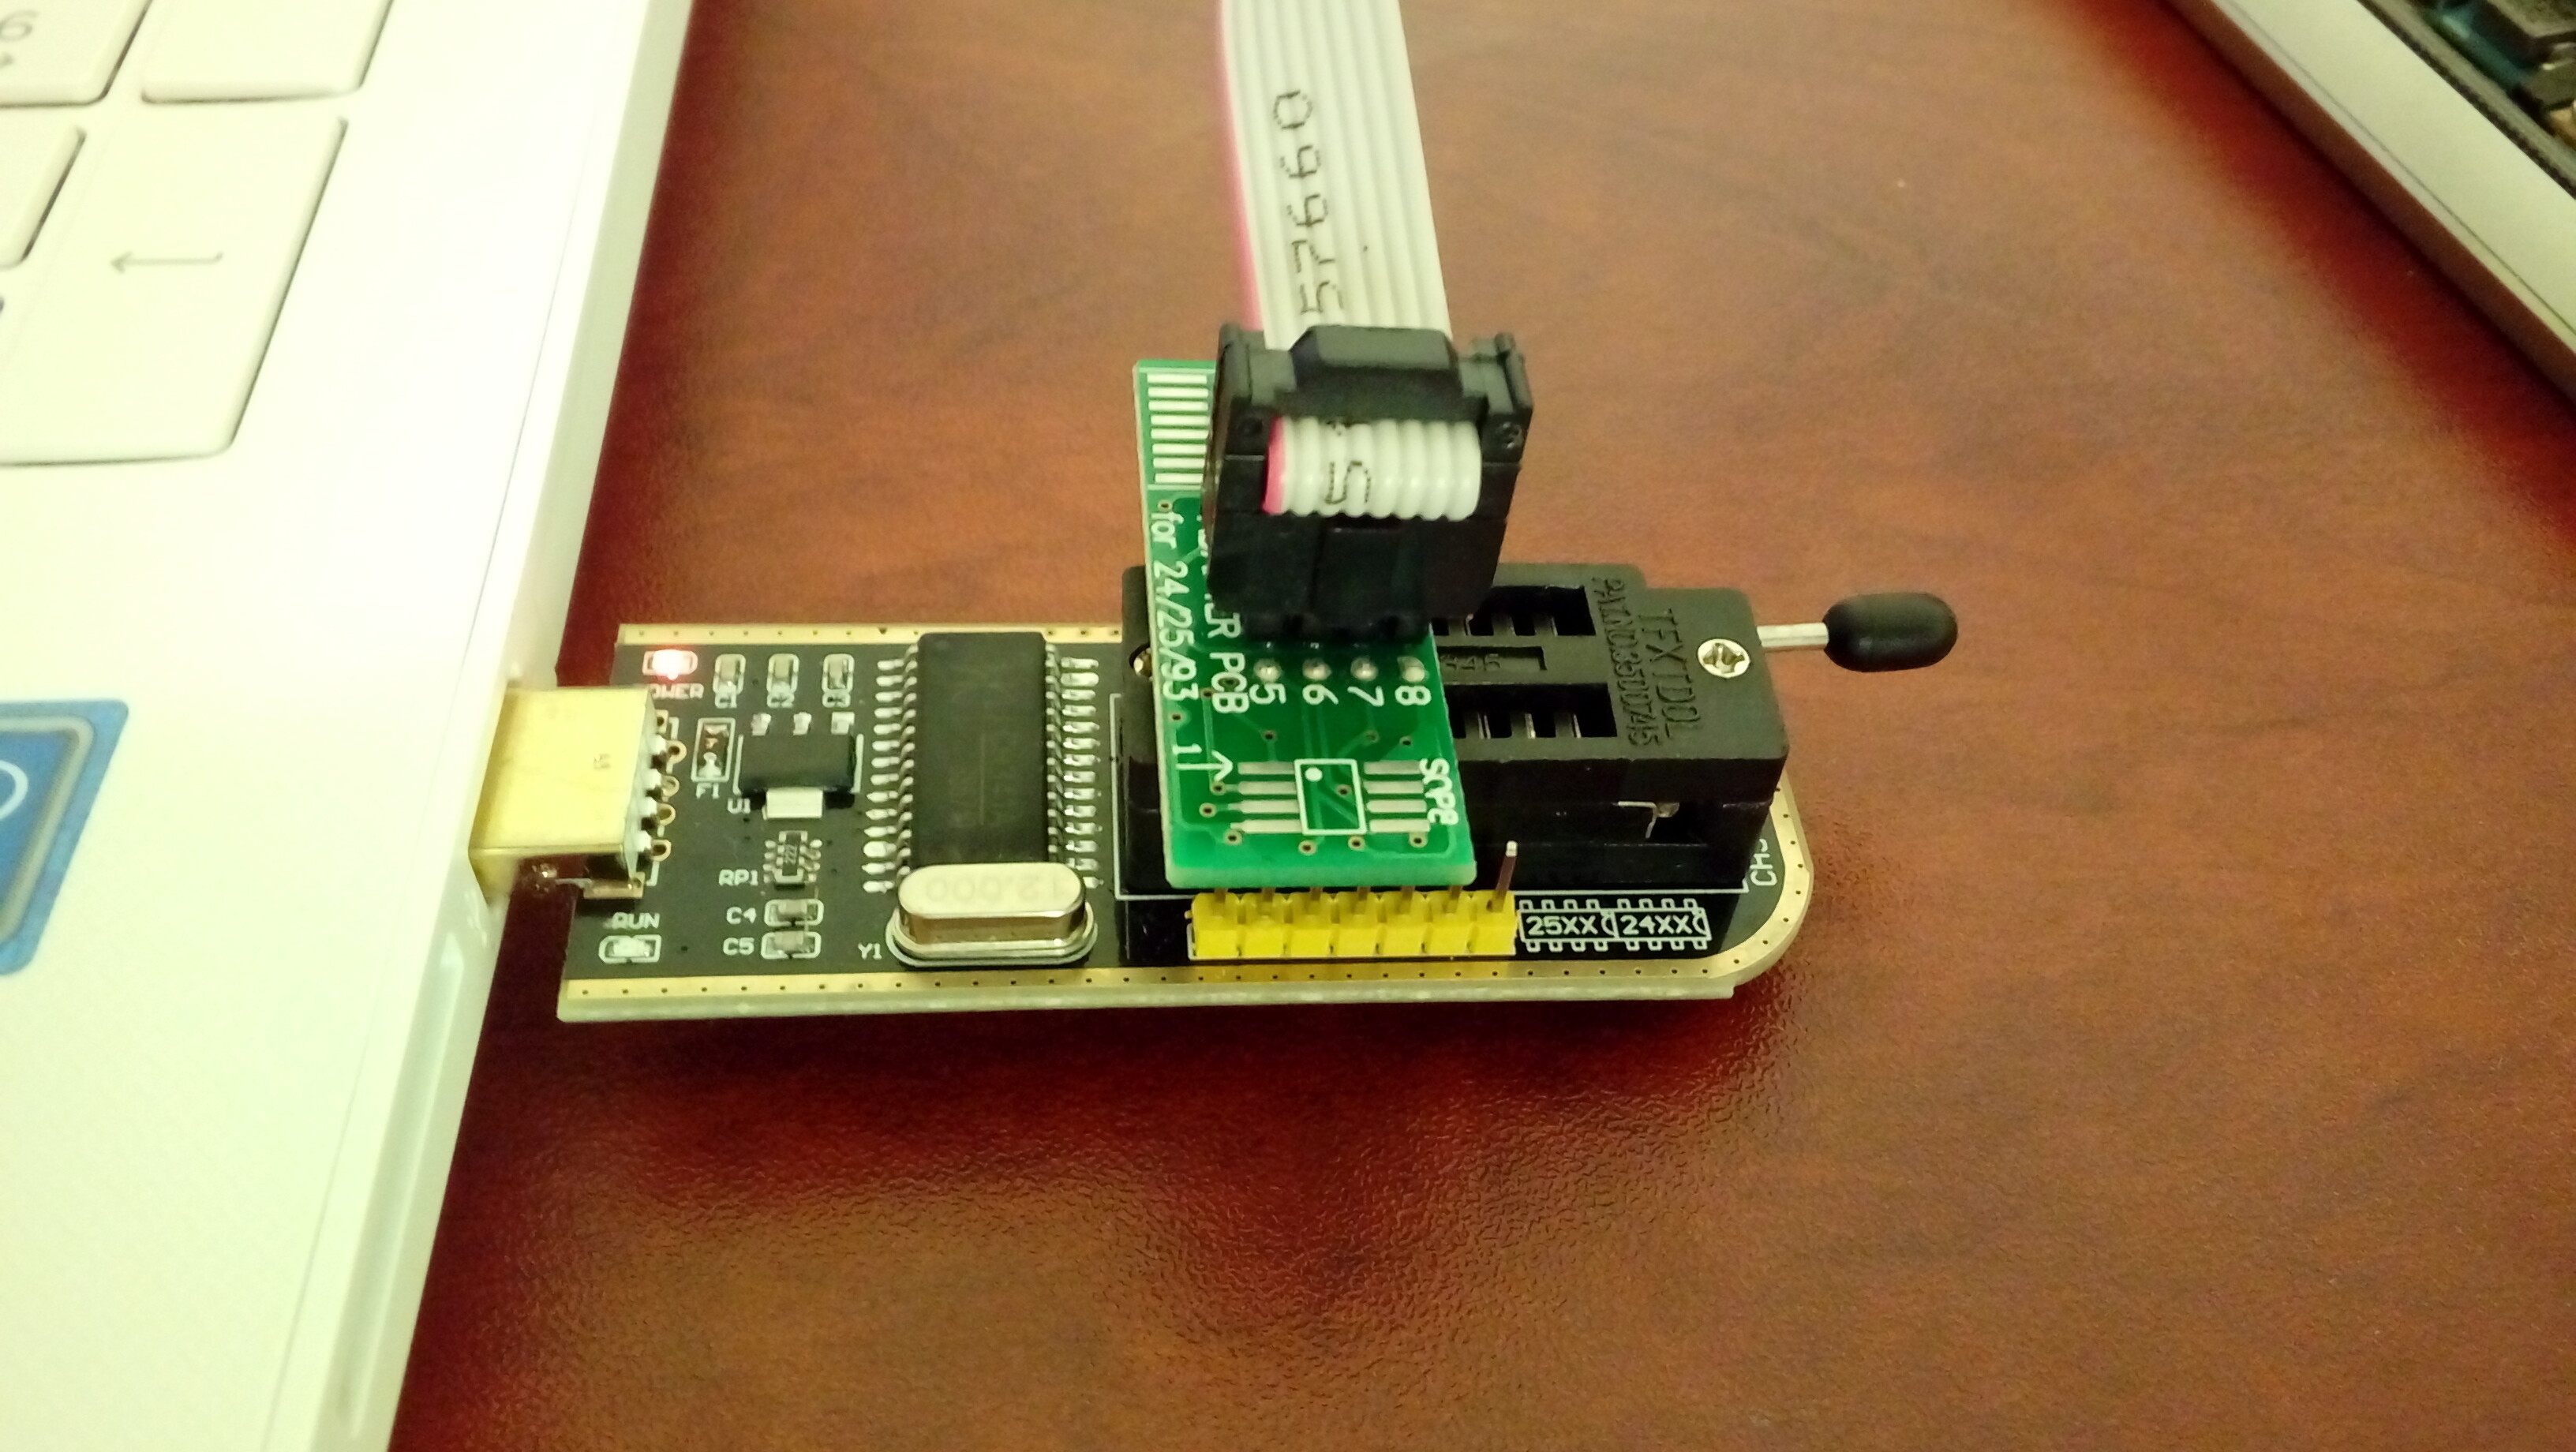
This is the CH341A mini programment :
and this is the SOIC8 test clip
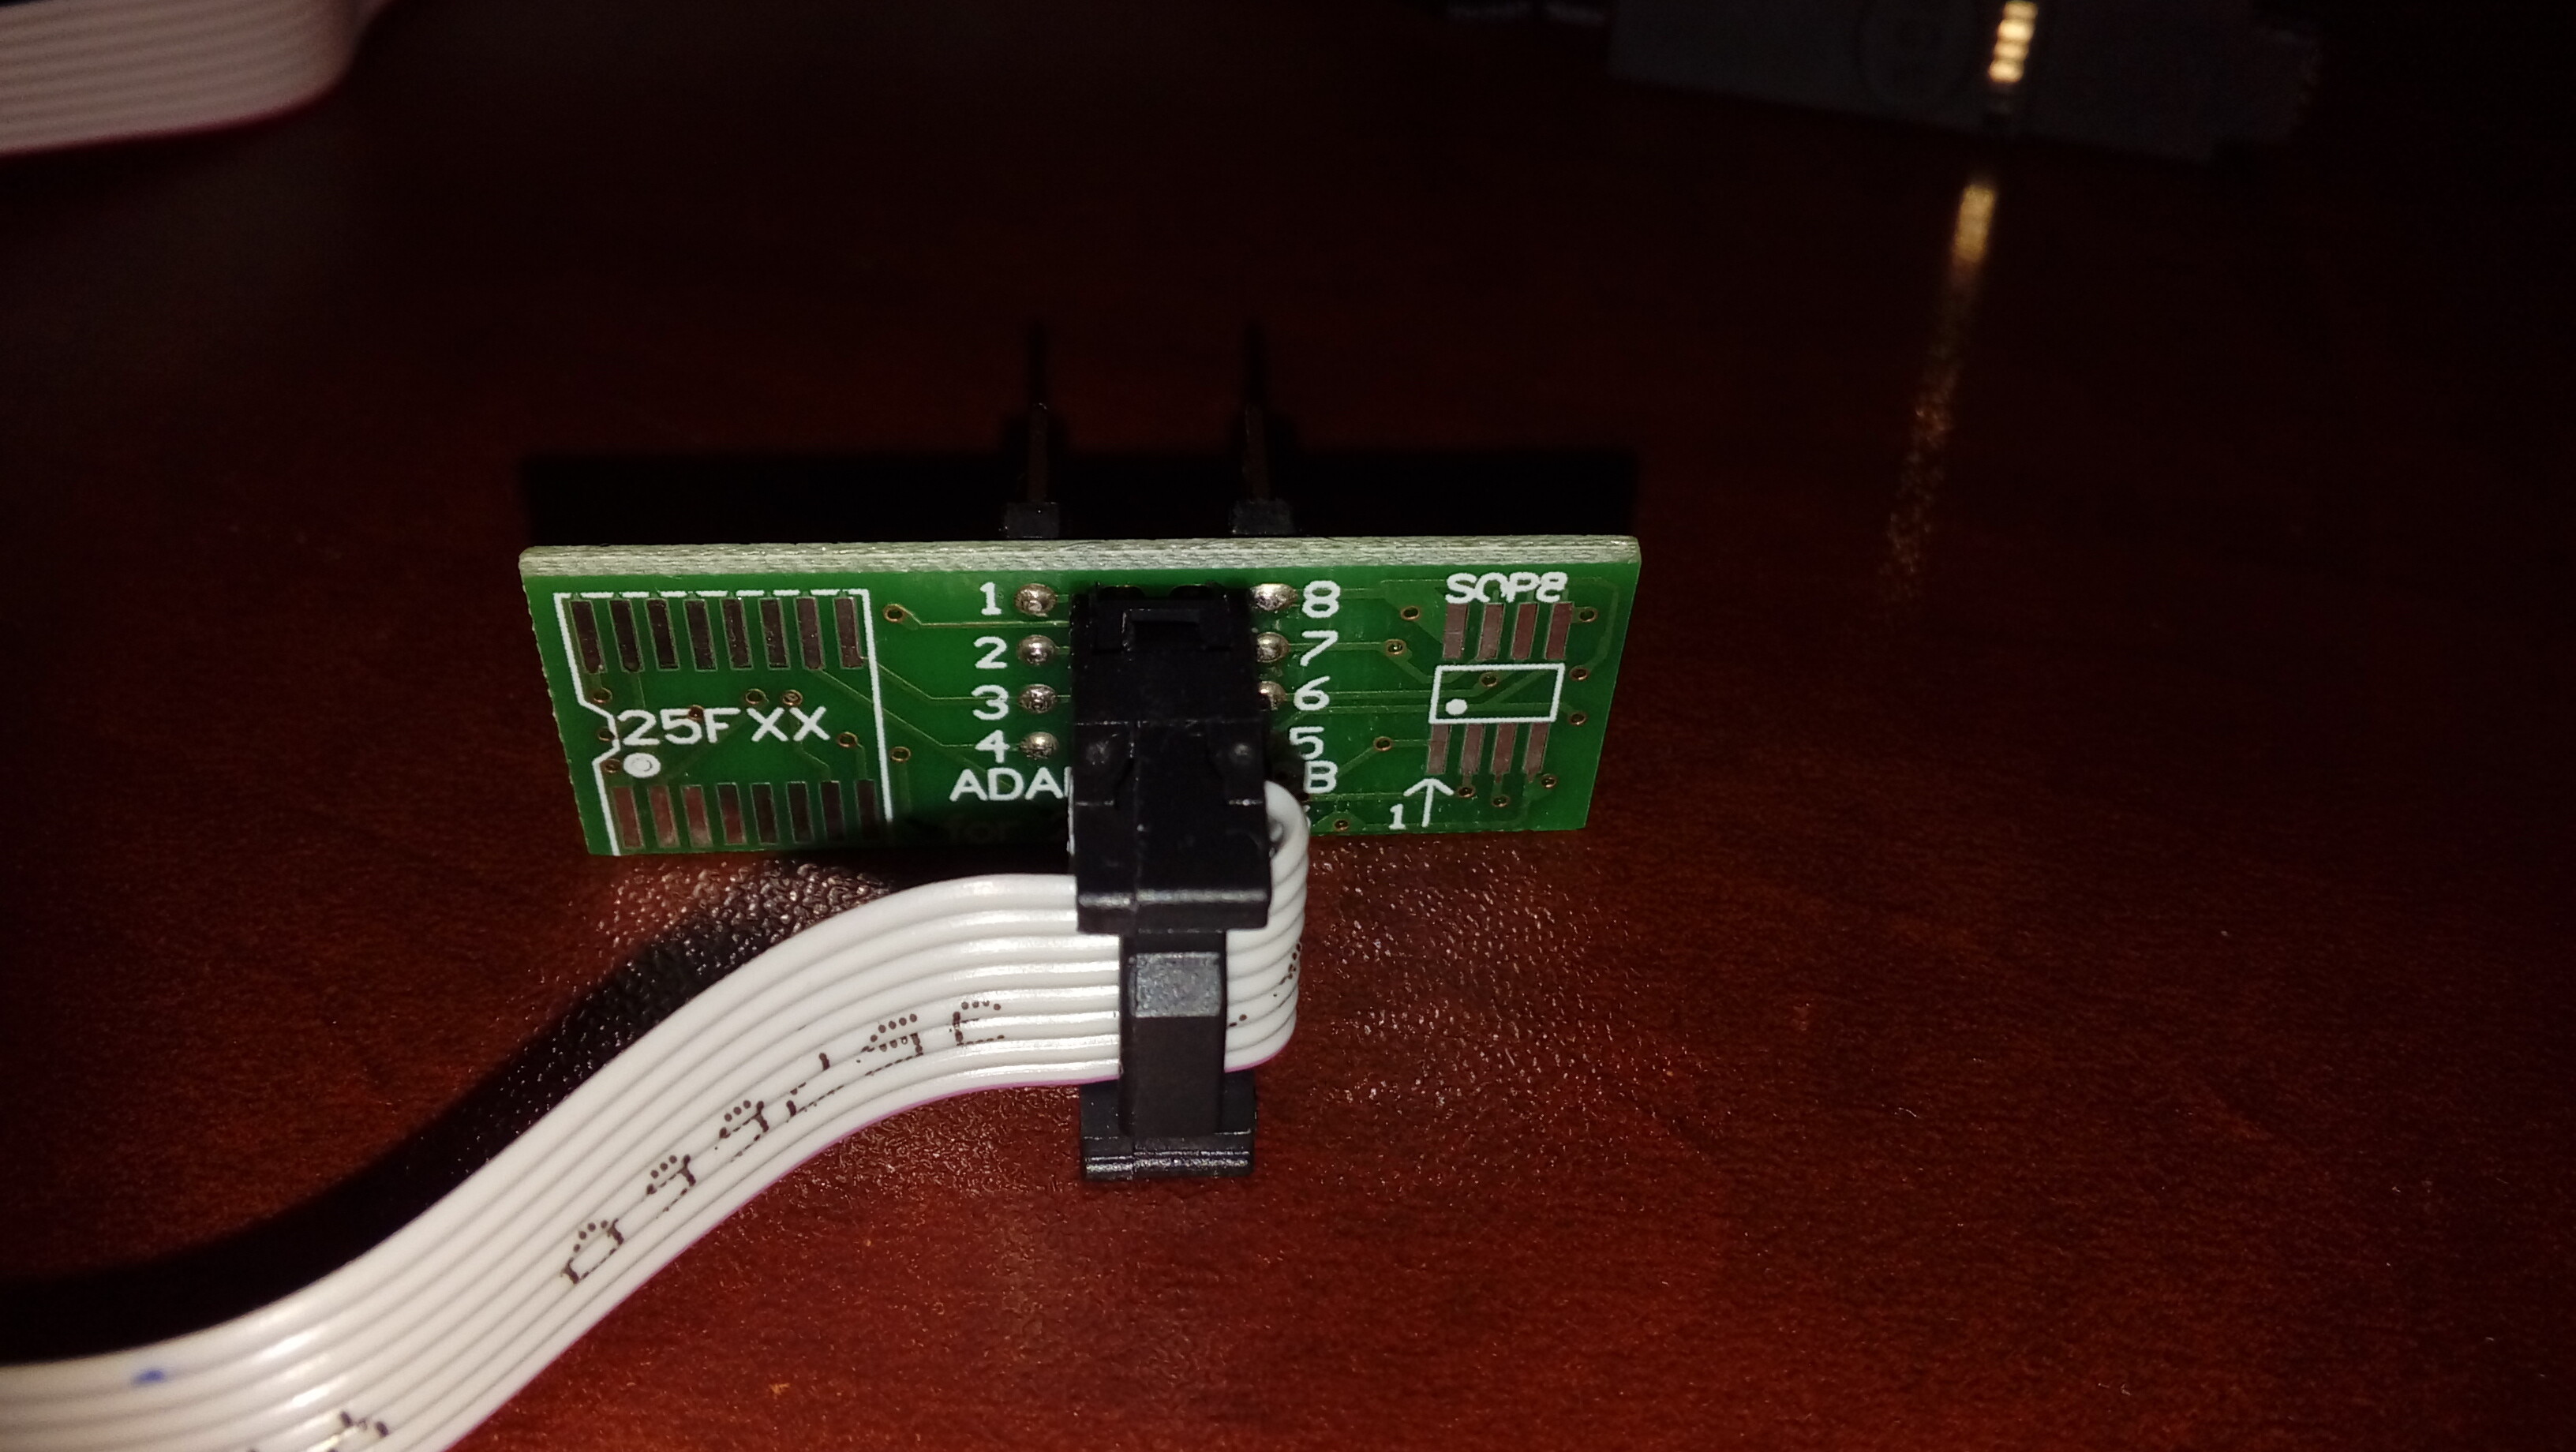
it came also with some adapters and a notice
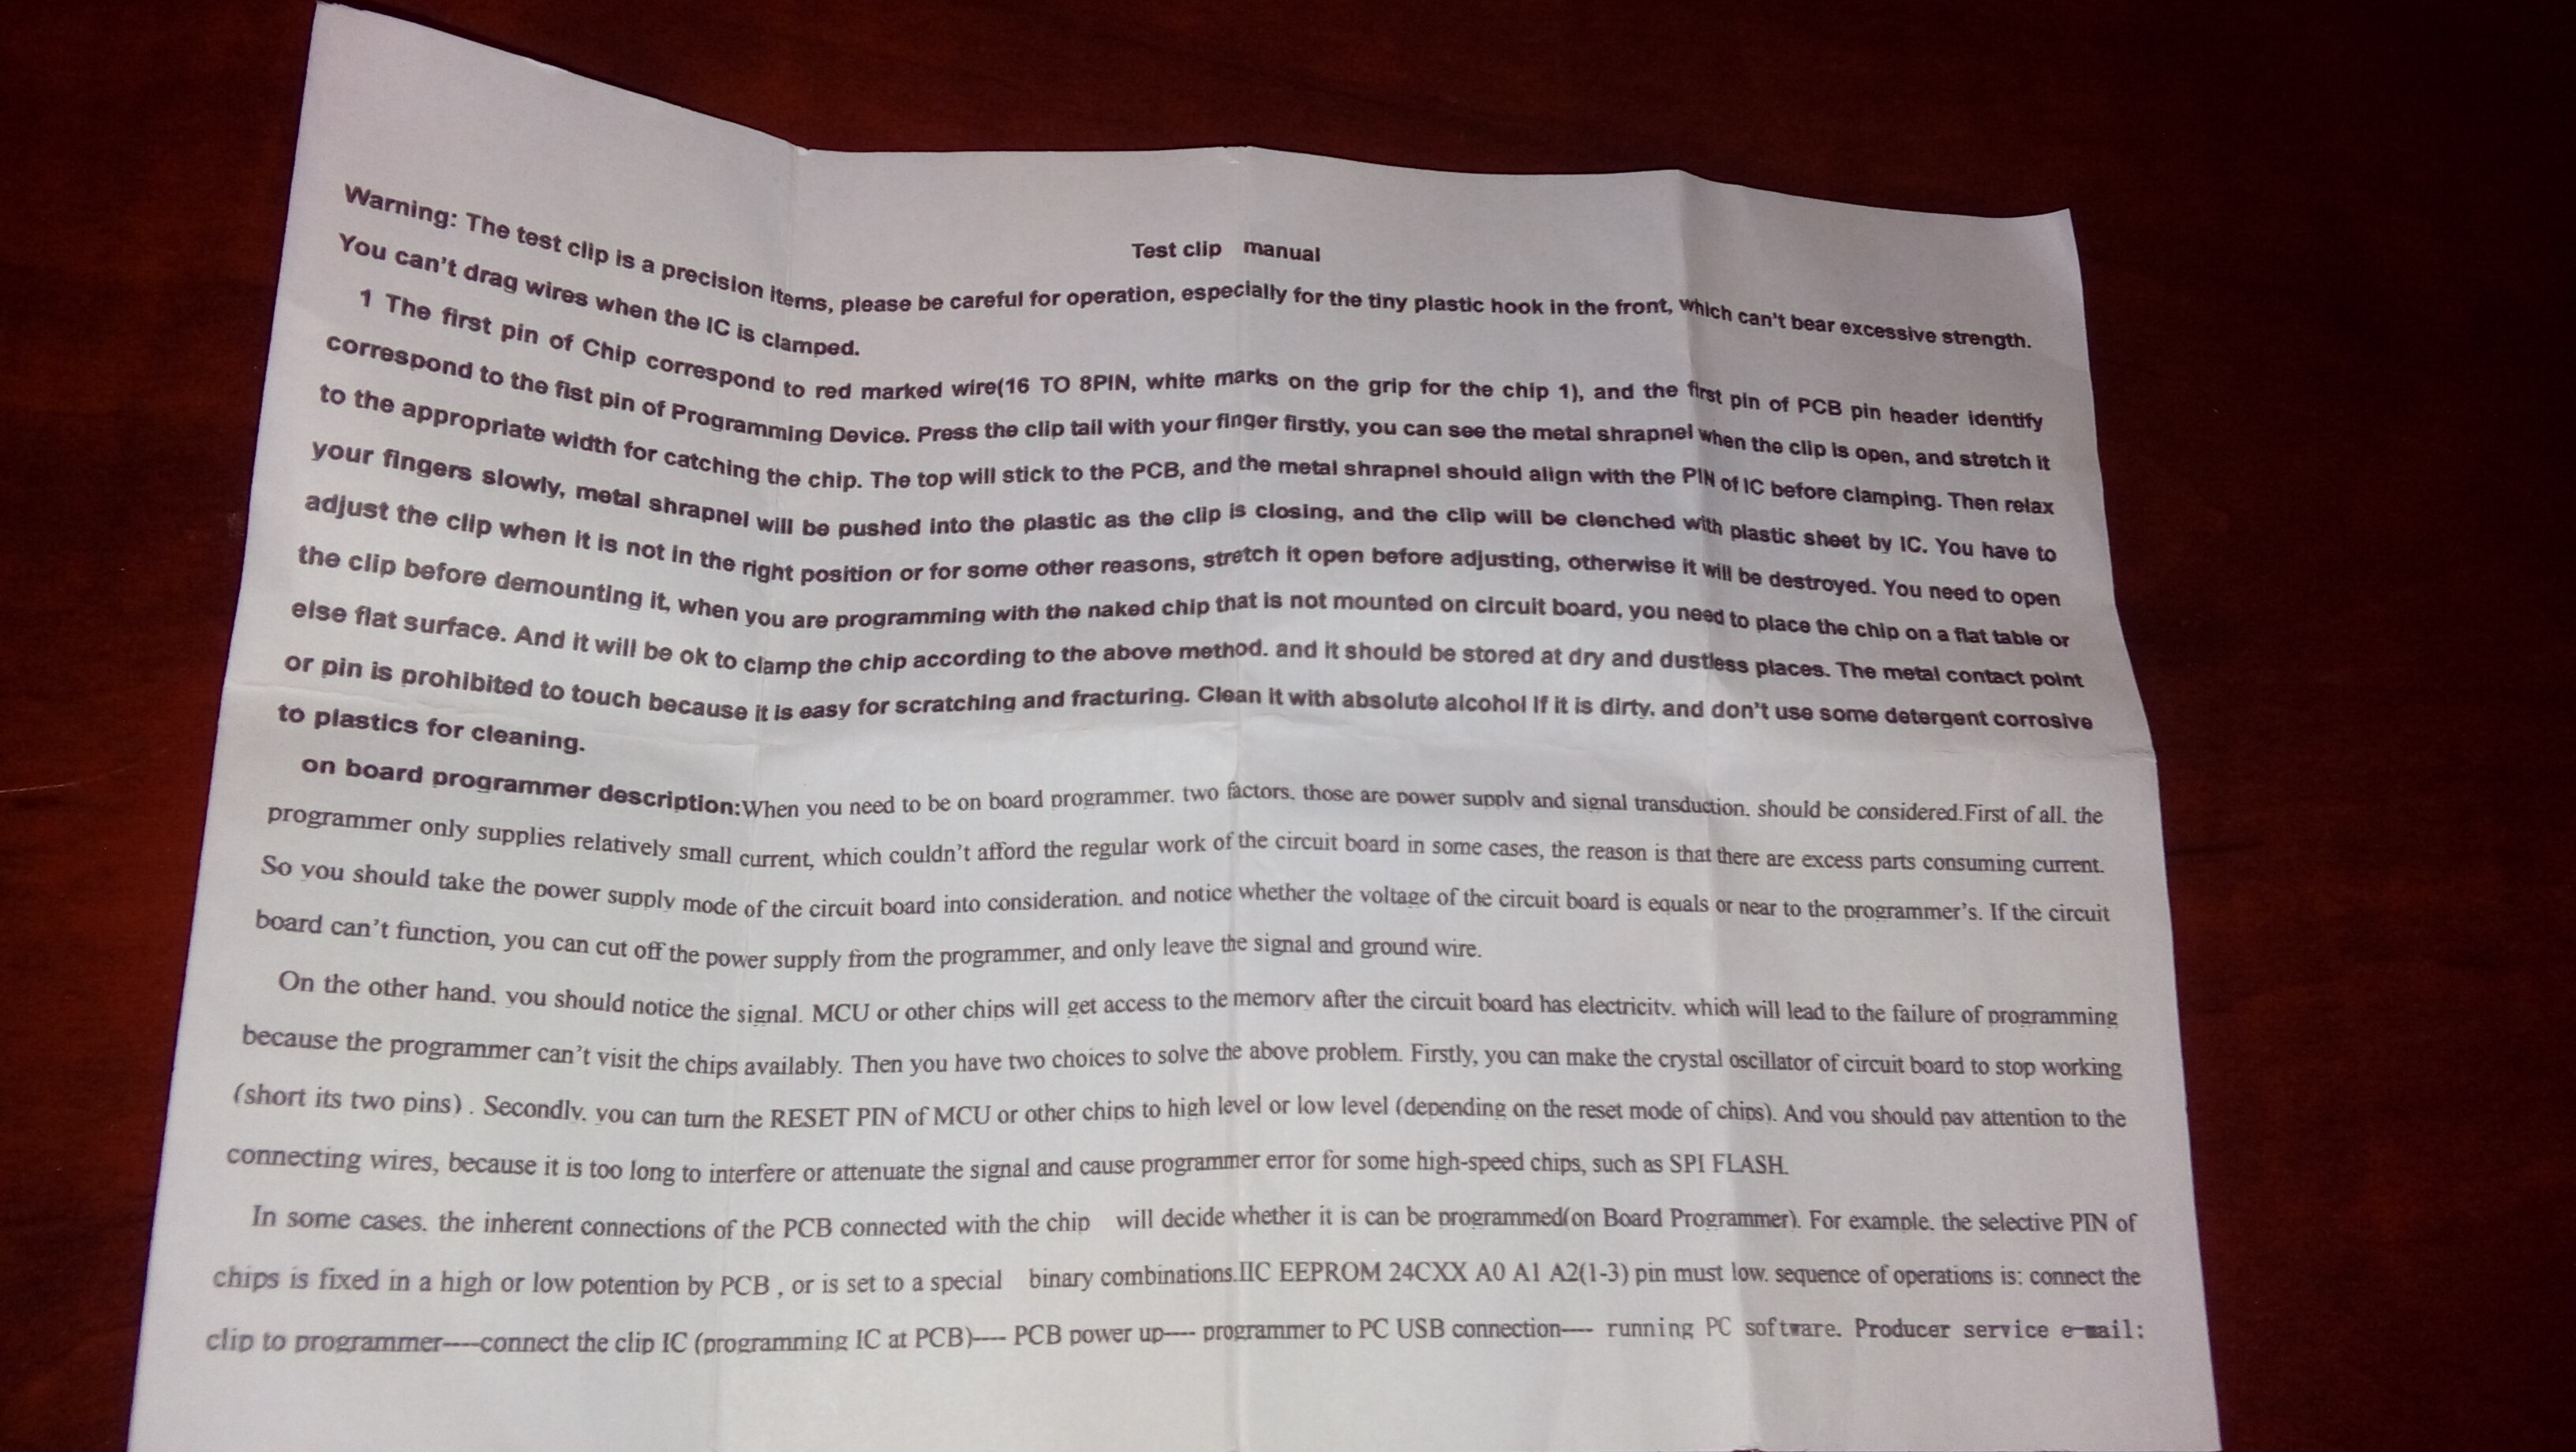
I only understand from the notice that the red wire must be connected with the the first pin of the chip which is marked with a dot.
I need to know how insert the test cilp on the prgrammer becuase there 16 slots and the it has only 8 pins.
I also need all the drivers and the program to use and how to use it.
After we checked the right bios then we’ll flash it.
@BrahimS - Here is guides on using CH341A
[GUIDE] Flash BIOS with CH341A programmer << Lots of images here on setting it up, will answer your main question with images so you can see exactly how to connect everything.
[Guide] Using CH341A-based programmer to flash SPI EEPROM
[GUIDE] The Beginners Guide to Using a CH341A SPI Programmer/Flasher (With Pictures!)
Package with main driver, and all versions of the software
http://s000.tinyupload.com/index.php?fil…257455007472602
@Lost_N_BIOS after installing the driver
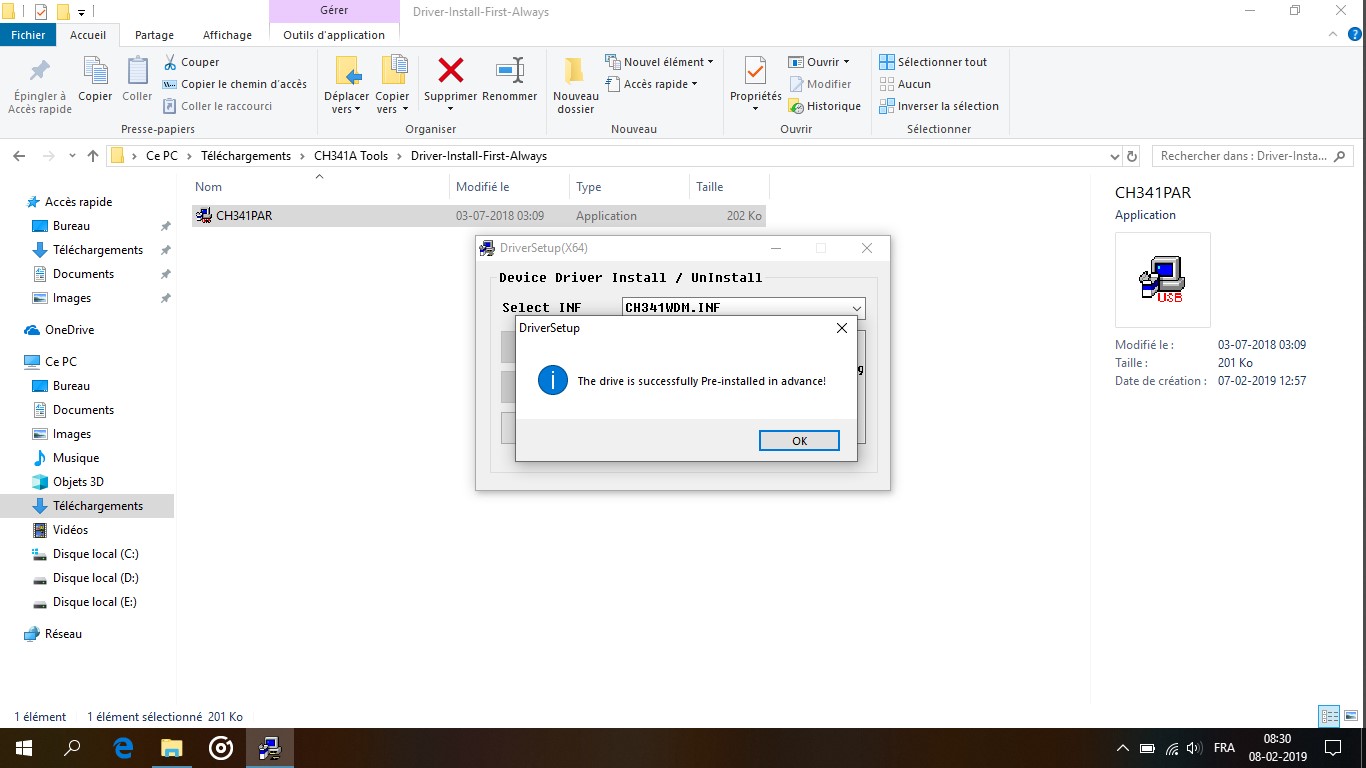
when lunching the program a error apreas that driver not detected
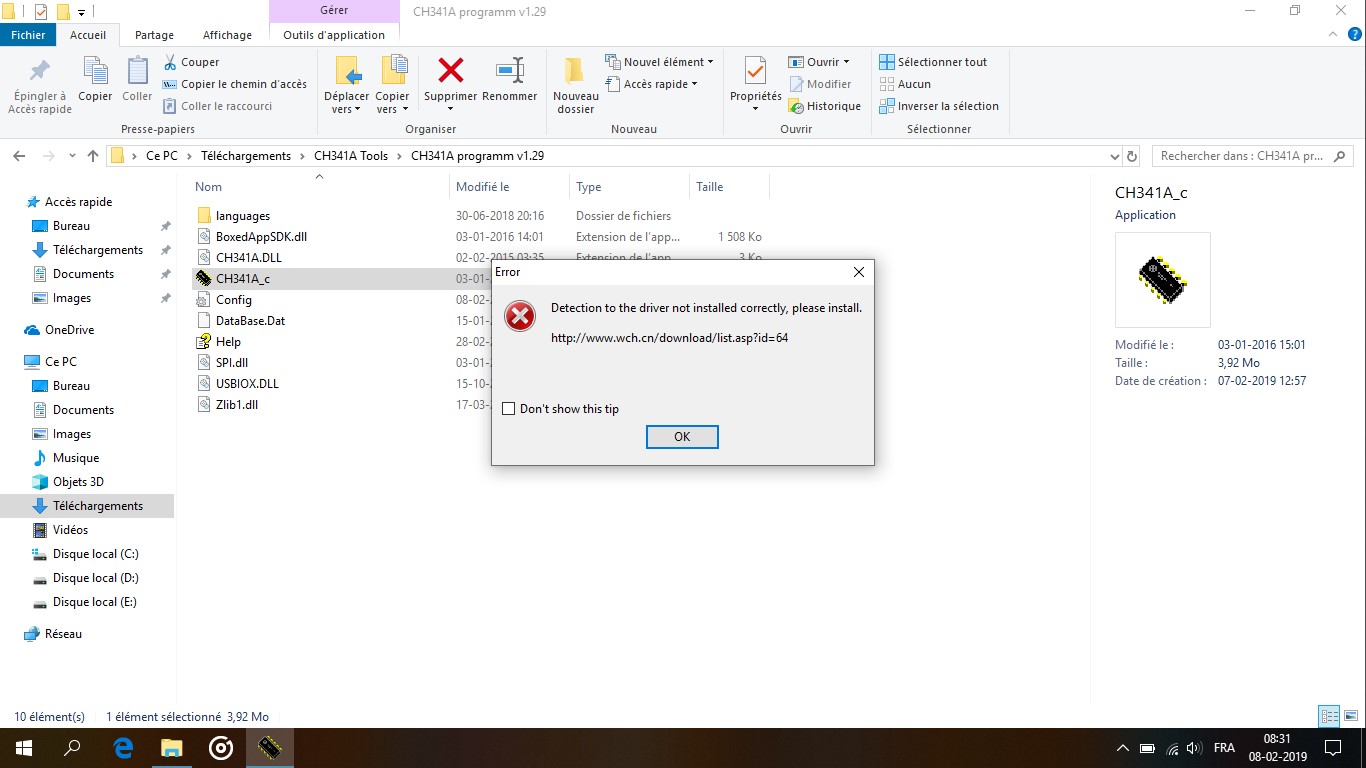
after clicking on OK the program show device not detected
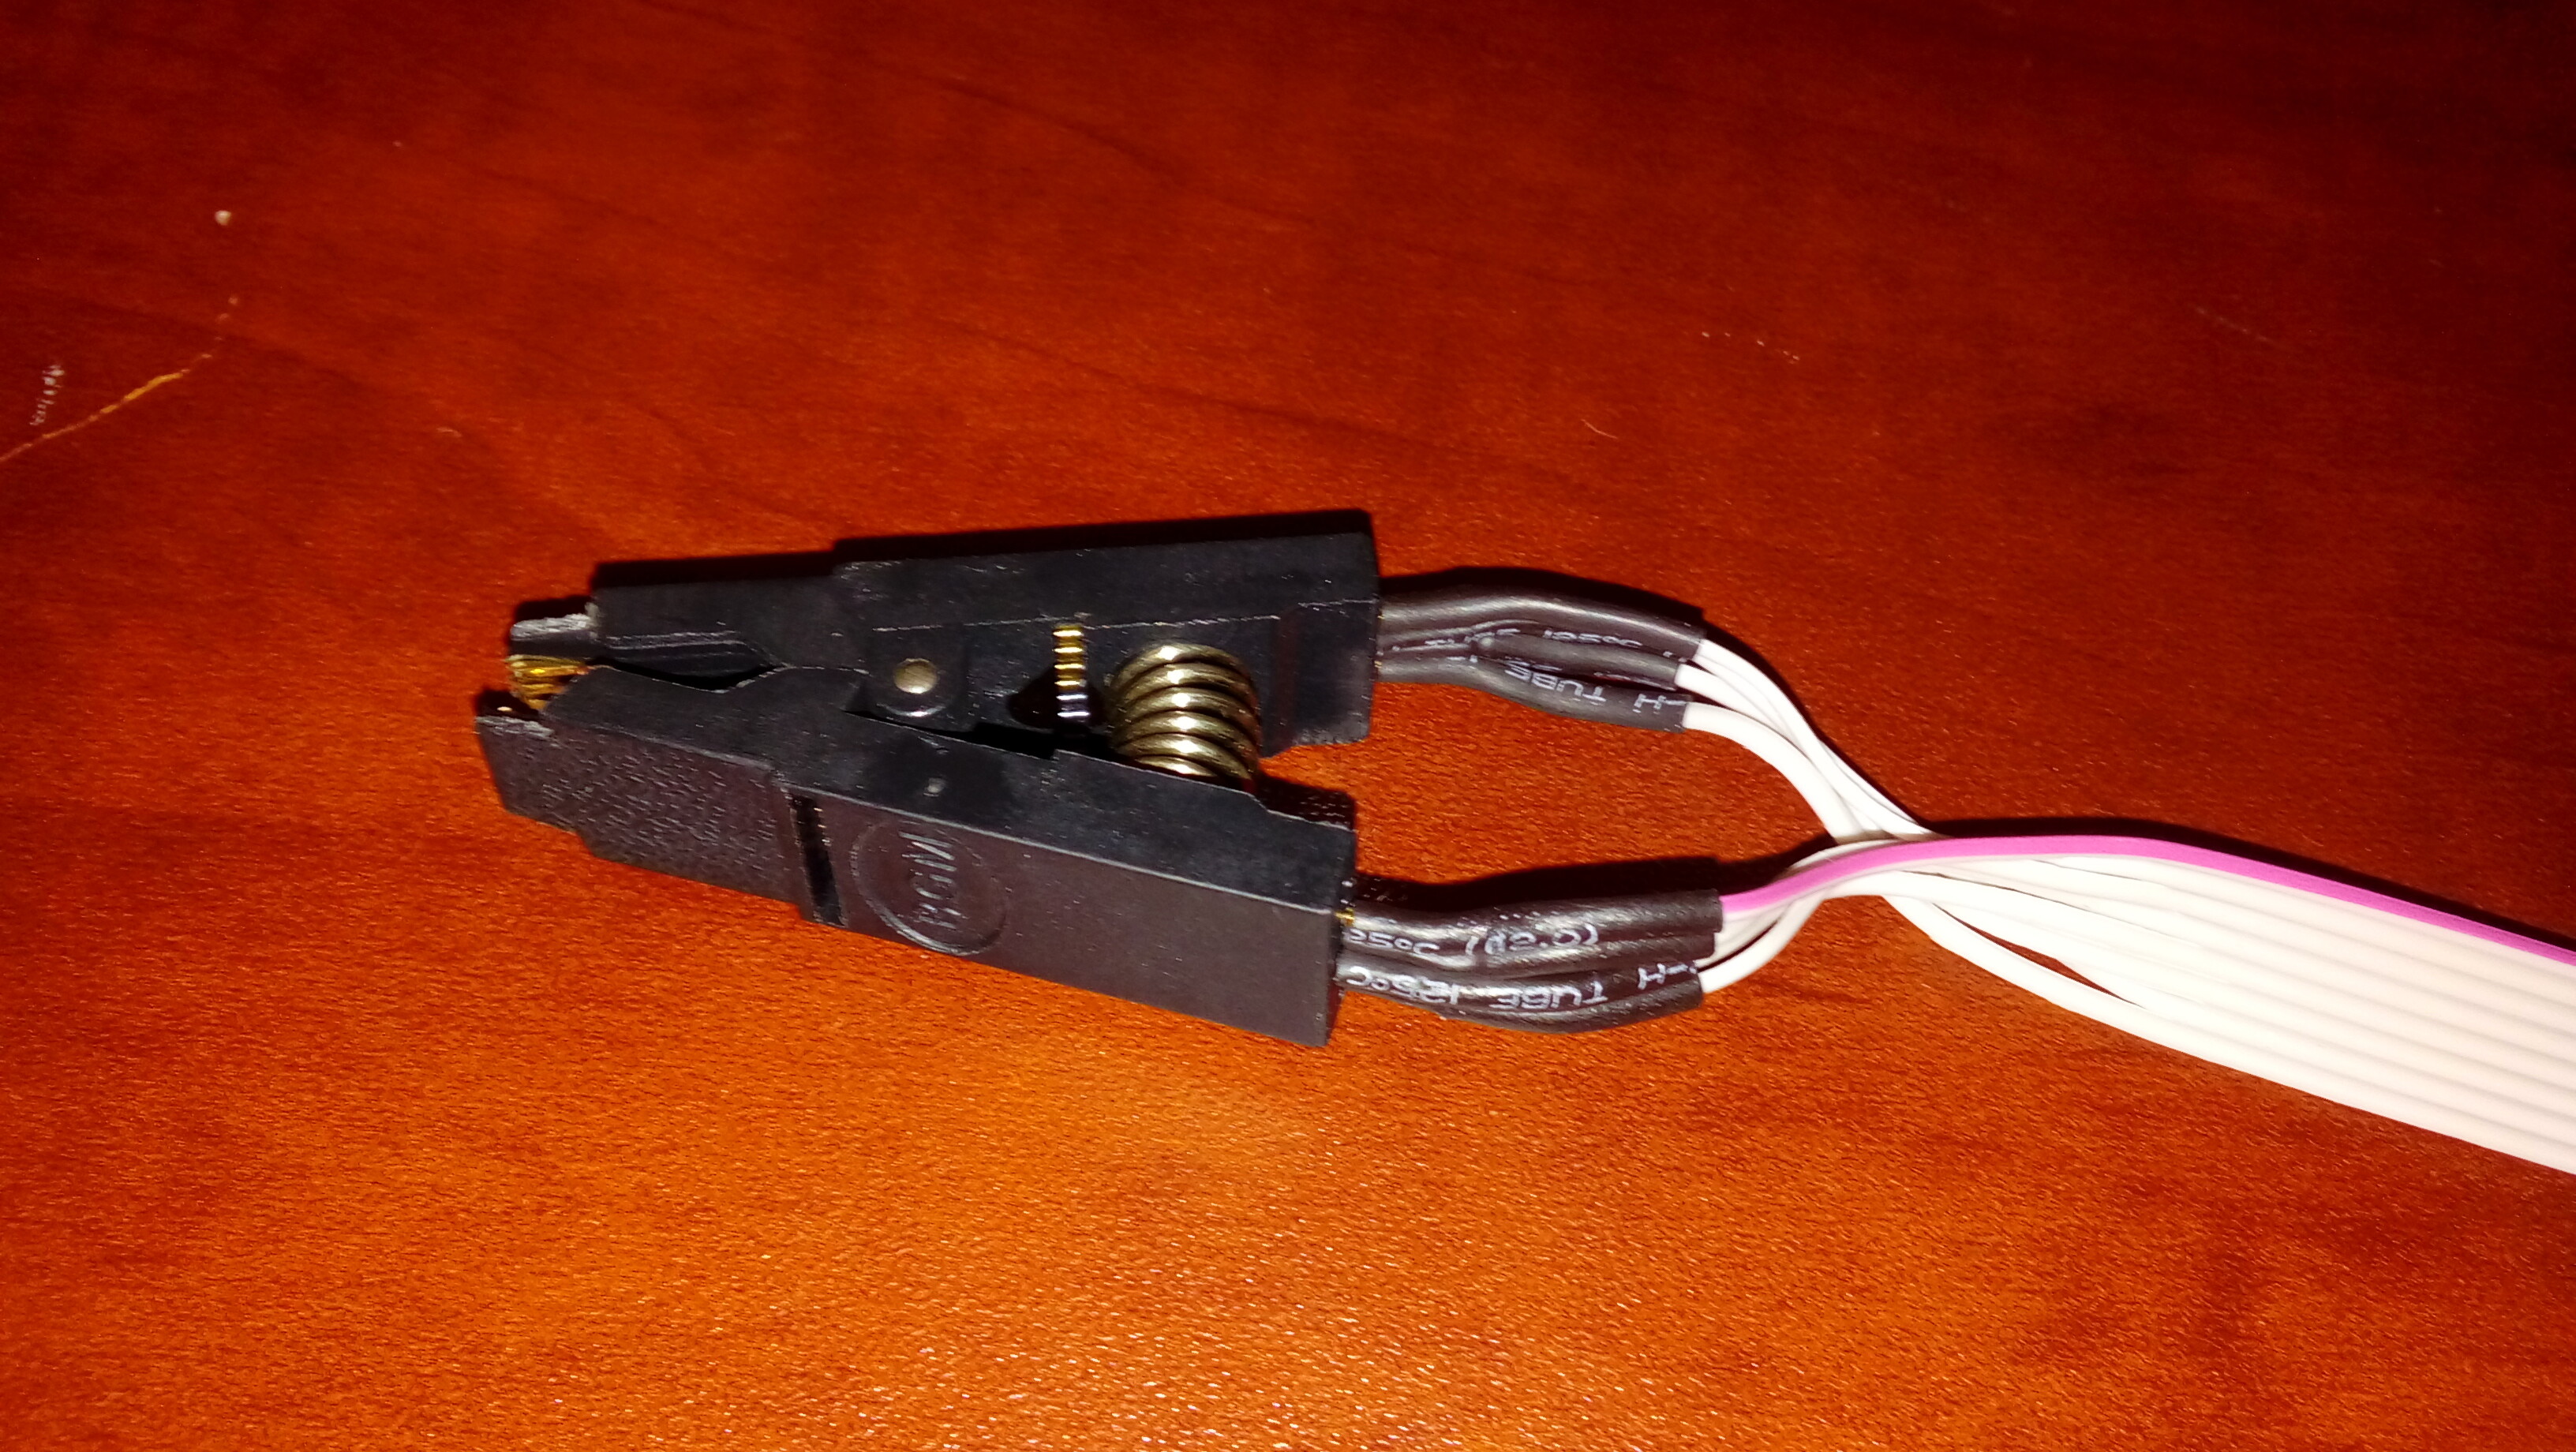
I solved the problem of the driver by runing the program with administrator right, but there is the same problem "Device not detected". this how the clip is connected
by the way I removed the CMOS battery, battery, and power cbale.
Whan I plug in the programmer the red light (power light) goes bright then dim a little bit.
@BrahimS - You have it connected wrong, you have red wire going into pin 8. See this guide, especially second spoiler, to see proper way to connect - [GUIDE] Flash BIOS with CH341A programmer
pin1 on the programmer is other side/middle (on the lever side, red wire goes there)
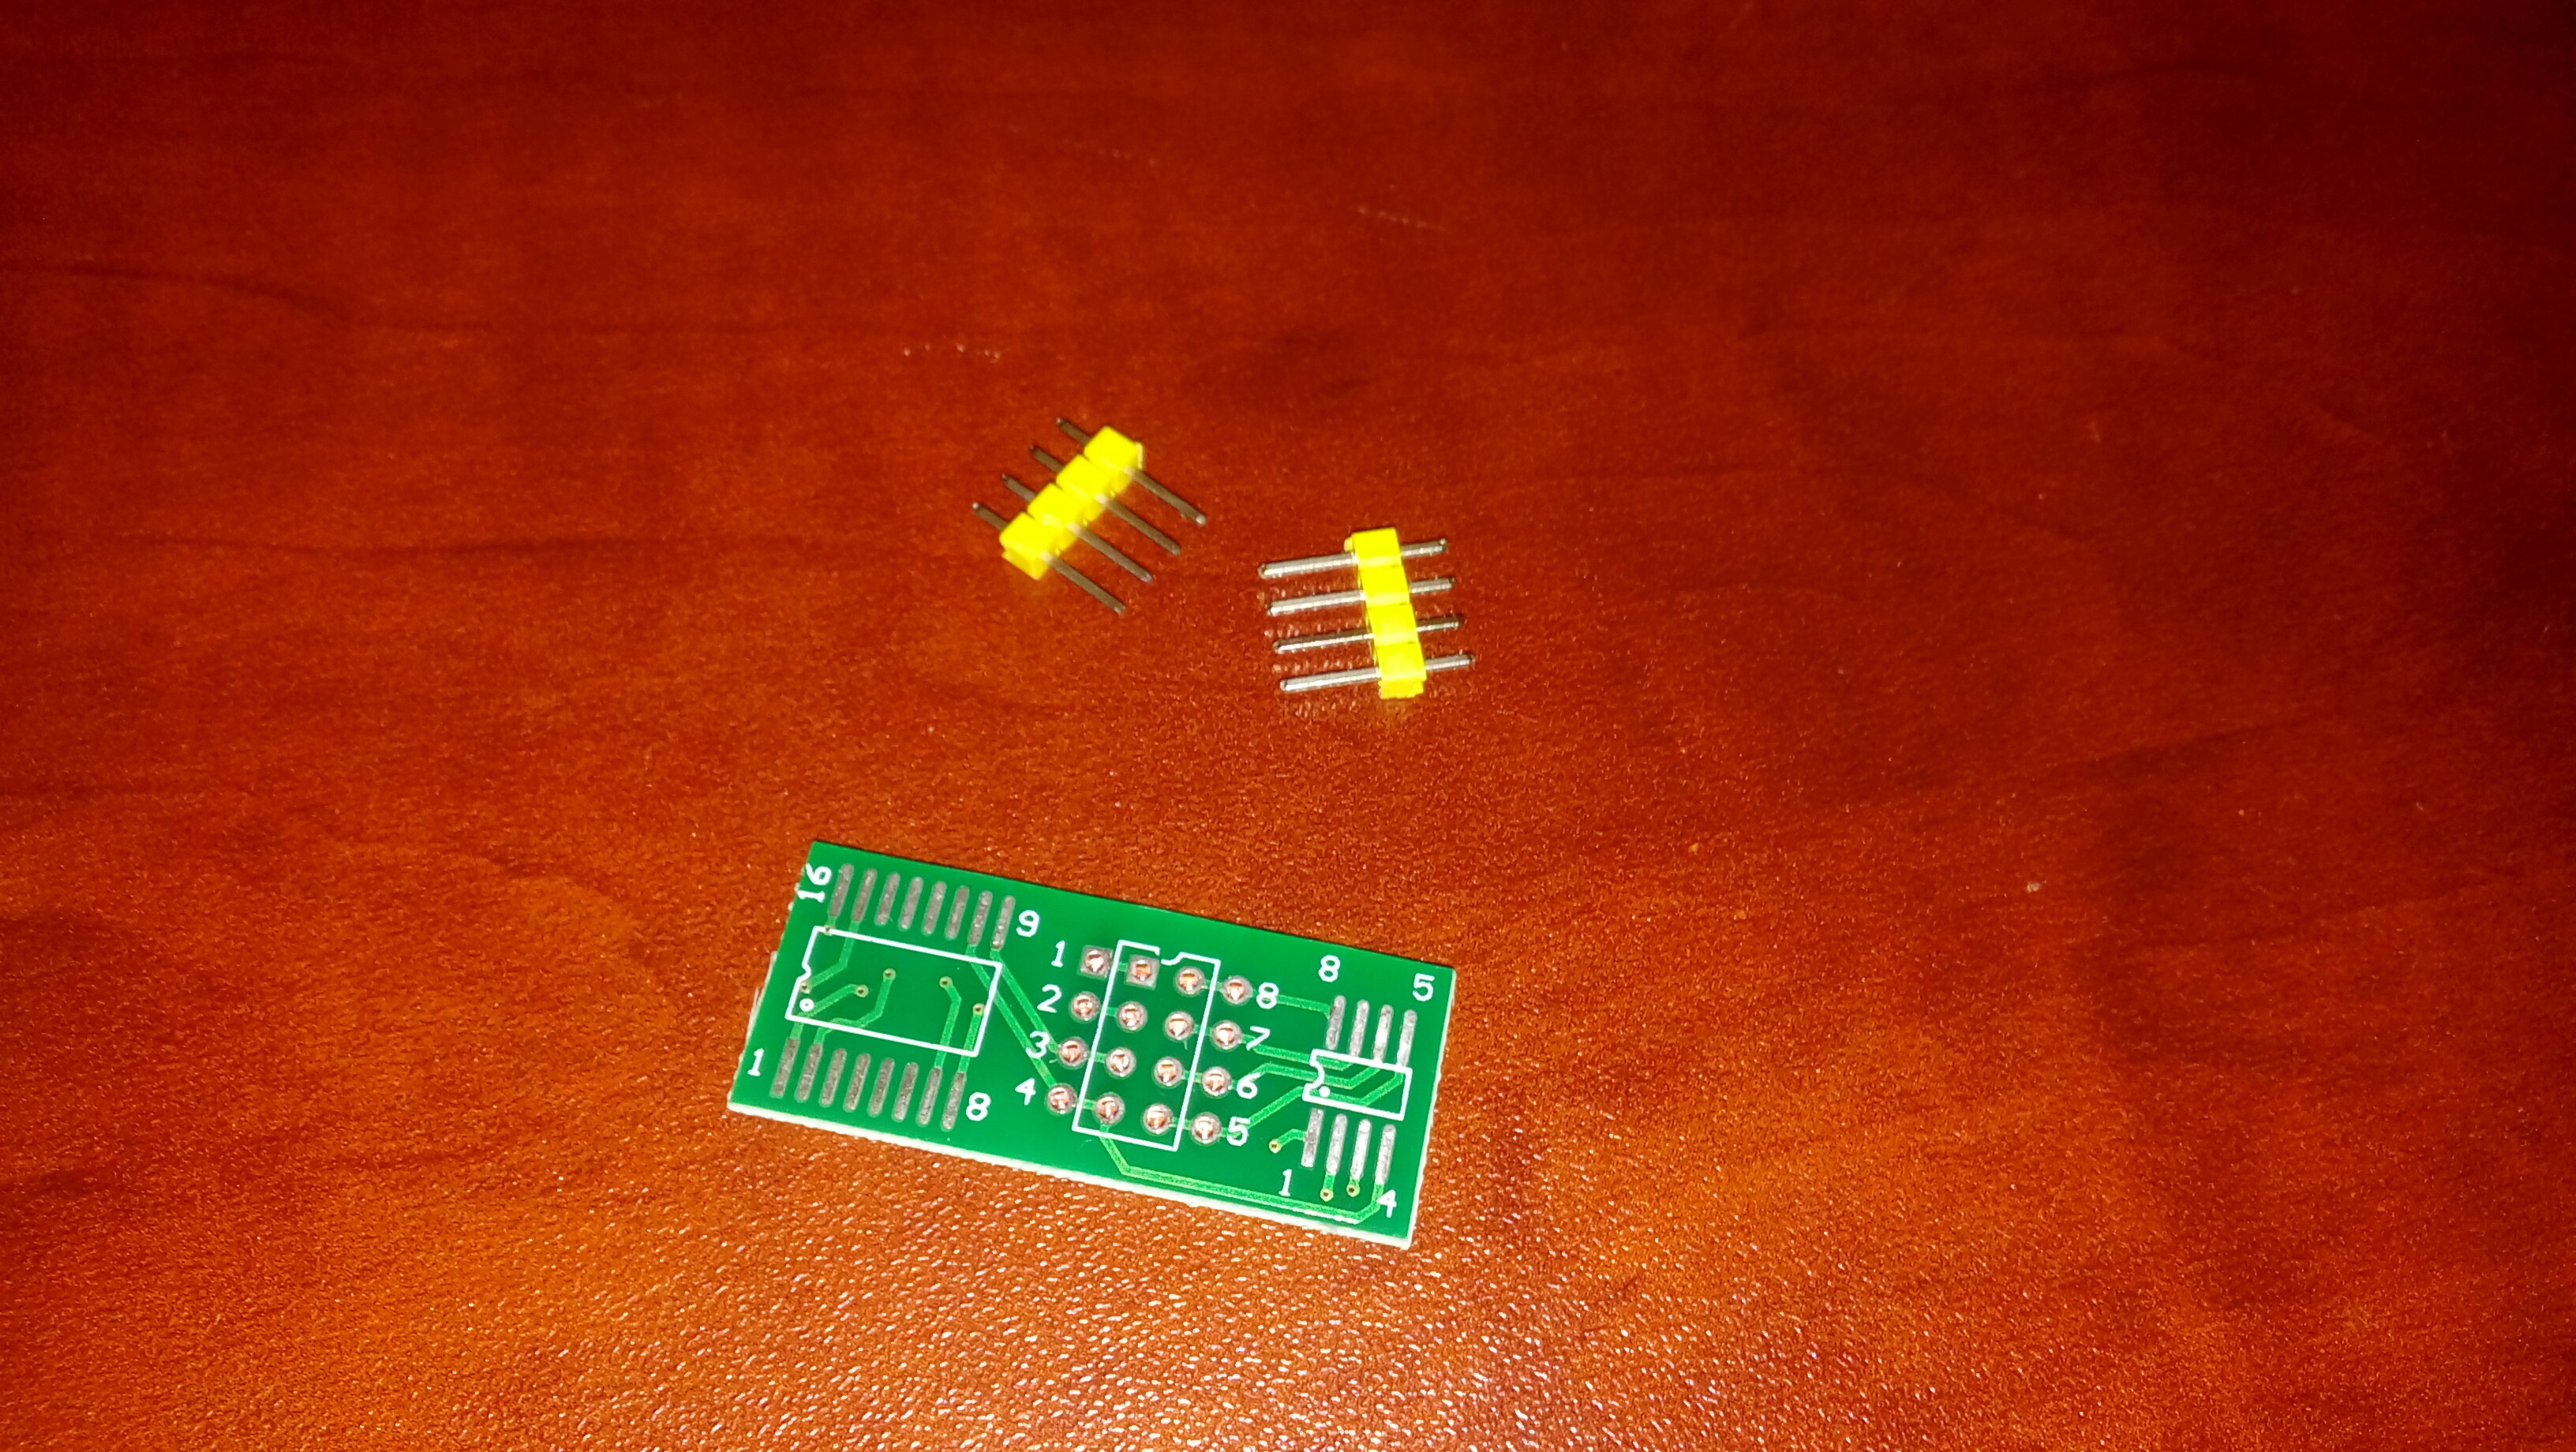
Leave CMOS Battery in, rest should be OK once you set it up correctly. You can remove the green PCB if you want, it’s only necessary if you want to solder pins into it, or use it for pin # identification /orientation (it’s also backwards, but that doesn’t matter, it’s not connected to anything but itself  )
)
@Lost_N_BIOS
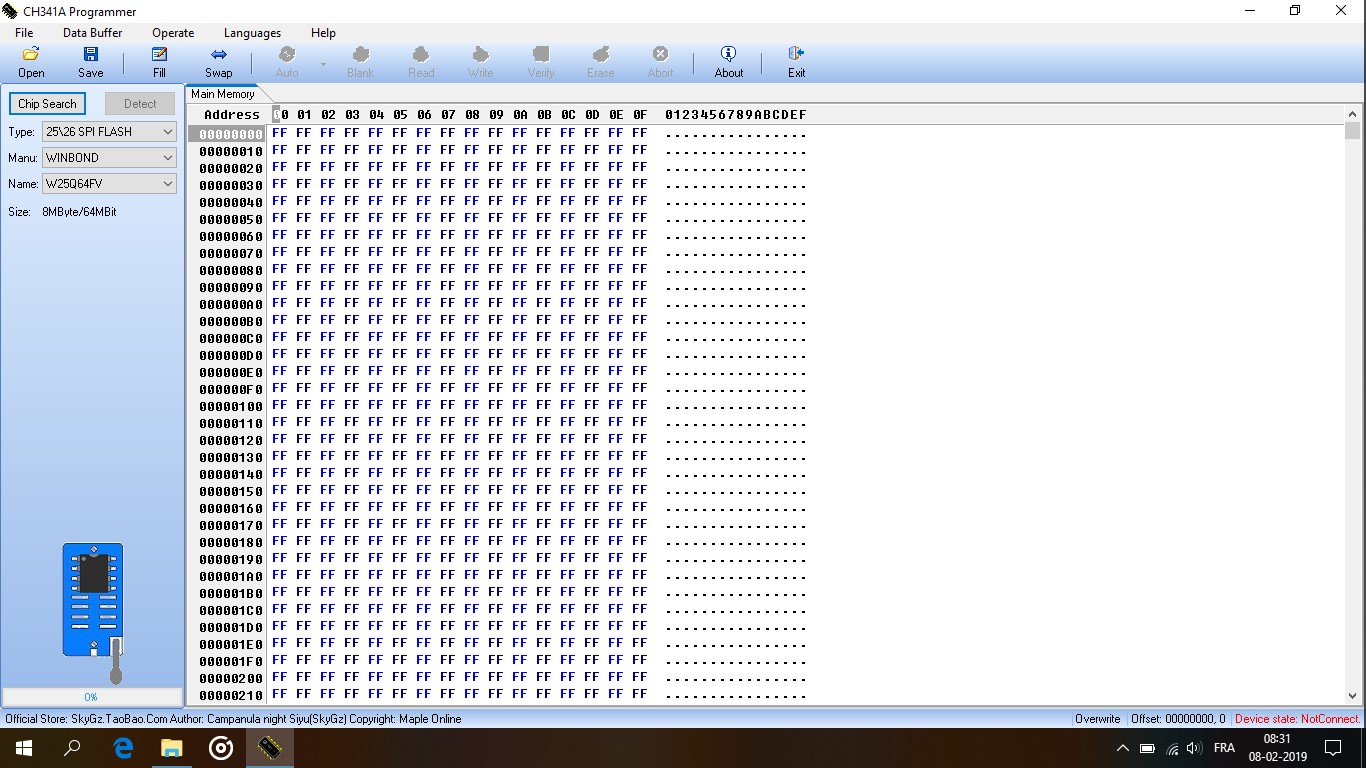
Yes it worked, actually I noticed that the red wire is not aligned with the 1st pin but I didn’t know I can remove the PCB it came like that from the shop. Anyway I forgot to put back the CMOS battery back but it’s okay everything went perfect.
I detected the chip, read it, and verfied it. There is the backup file, I also put a BIOS dump which I got it from a facebook group, it’s from someone from Brazil (the origin of the laptop) start comparing with it, if it match so I have only to flash it.
or you ou can dowload it from the link.
Corrupted BIOS for SVP132.zip (4 MB)
SONY SVP1321 V270-MBX REV 1.1 BIOS.rar (3.76 MB)
PCB is usually not soldered on, so user can do that themselves or not use it etc. Brazil site, that is where I got the list of close but none exact BIOS dumps I mentioned in post #4 , probably same site I bet.
Yes, your name of that file is exact as third one I quoted in post #4, it’s not exact match to your model though, or I needed more info from you first to be sure, see what I mentioned back then
That BIOS has broken FIT Table (The one from Brazil site), this is sometimes normal from manufacturer if they are lazy, but your bricked dump it’s not broken so at least we know it’s not Sony’s M.O.
That is your BIOS version, same FID (Flash ID), only yours is BIOS version 28 from 2014 and that one is 23 from 2013
Give me a day or so, and I’ll get your NVRAM, serial, UUID and LAN MAC ID out of your bricked BIOS and grab the latest stock one and get you a rebuild BIOS to program back in.
Are you sure you only changed “Boot Mode” to legacy? I ask for a few reasons, there’s not an exact setting called “Boot Mode” so there’s that, and the way you describe how it runs now (like it’s running, but no LCD)
I see this setting >> Launch Video OpROM policy
One Of Option: Do not launch, Value (8 bit): 0x0 {09 0E A2 09 00 00 00 00 00 00 00 00 00 00}
One Of Option: UEFI only, Value (8 bit): 0x1 (default MFG) {09 0E A3 09 20 00 01 00 00 00 00 00 00 00}
One Of Option: Legacy only, Value (8 bit): 0x2 {09 0E A4 09 00 00 02 00 00 00 00 00 00 00}
And if you changed that to legacy only and your video card does not have legacy vBIOS (or BIOS doesn’t have legacy vBIOS for the onboard GPU in CPU etc) then you would boot but nothing would be on screen. So that’s why I asked if you’re sure you only changed “Boot Mode” which I don’t see
There’s also this one, that could mess things up, depending on hardware and BIOS contents. It’s set to UEFI only, so if everything else set to legacy and this is not, that would cause boot failure too. Long clear CMOS would reset things like this and all the others to default though, you did that correct?
Boot option filter, VarStoreInfo (VarOffset/VarName): 0x3AE, VarStore: 0x1, QuestionId: 0x13, Size: 1, Min: 0x0, Max 0x0, Step: 0x0 {05 A6 97 09 98 09 13 00 01 00 AE 03 10 10 00 00 00 00 00 00 00 00 00 00 00 00 00 00 00 00 00 00 00 00 00 00 00 00}
Default: DefaultId: 0x0, Value (8 bit): 0x2 {5B 0D 00 00 00 02 00 00 00 00 00 00 00}
One Of Option: UEFI and Legacy, Value (8 bit): 0x0 {09 0E 99 09 00 00 00 00 00 00 00 00 00 00}
One Of Option: Legacy only, Value (8 bit): 0x1 {09 0E 9A 09 00 00 01 00 00 00 00 00 00 00}
One Of Option: UEFI only, Value (8 bit): 0x2 (default MFG) {09 0E 9B 09 20 00 02 00 00 00 00 00 00 00}
I searched all BIOS settings using “Legacy” as my search term, and only find option rom settings like you see above (Storage, video, PXE/Lan, PCI etc). Same for using UEFI as search term within the settings, and same for “Boot”.
I was trying to see what you actually changed and if it applied into the BIOS settings and was maybe why it wouldn’t boot, but since I can’t find setting like you mentioned I’ll wait for your clarification if you can remember.
I see launch CSM is enabled, did you change that too, or no?
Anyway, don’t worry, just wait a bit and I can fix this for you soon as I have time to dig into it all more.
@Lost_N_BIOS
I did the oposite I changed from Lagacy to UEFI, windows was installed in Legacy mode, since I was trying to do clean install of windows I checked the bios then I set the boot mode to UEFI (recommonded with new systems like Windows 10). it’s my friends laptop I think the main reason it’s installed in Legacy in first because he don’t know how to make a UEFI bootable USB drive.
And yes that’s all, I boot into BIOS, Set default settings (I usaully do this when the PCs is not mine and the best settings for average user is default settings), then I checked Boot options boot mode was in UEFI ( as default) I also enabled boot from USB (install Windows 10 from usb) that’s all, I saved the changes, insert USB drive and reboot. then I got screen off. I truned it off after a while (I was hoping it just taking time to apply BIOS settings) turned it on with assist button, then with power on button but nothing hapenned. connnect with HDMI out to a screen same thing. removing cmos battery, laptop battery let it for a while put back then turned it on again this didn’t solve anything.
@BrahimS - I found boot mode in another area of settings that I forgot to check last night when looking (UEFI is default setting for that option, so he must have changed to legacy initially)
I’ll get this sorted out for you with stock BIOS and hopefully this time when you make changes it wont mess anything up. Hopefully there is also a newer BIOS than 28, in case that one contains some bug that maybe caused all this.
Going to look now and work on this tonight - * Yes, found latest is from 2015 >> version 28 - This is same version as your current, but looks like they re-released and maybe fixed something, since it’s dated internally a year later 3/24/2014 for your original an 4/24/2015 for this newer one
* Edit @BrahimS - please try these in order, if #1 fails to boot, try #2 next, and so on. And please test all three, but this is only required if #1 fails. If #1-2 fail, but 3 works you may not have system details (Serial, UUID, LAN MAC, Windows activation etc)
I found location where some of the system details go, but without a known working user dump along with that systems details I cannot tell the format it’s entered into the file (Not always in straight-forward manner, or sometimes hex sometimes text etc)
I have a dump that contains details, but can’t decipher what’s what since I don’t have that boards details to look at. You’re module that contains this is all corrupted, so none of your details are there either, not even partial. So this module is left as stock with standard/reserved/Sony Corp fillers in place
#1-2 contains your original dumps NVRAM (#1 has both volumes, #2 only one + Stock empty/standard one), if these both fail but #3 works, then you know part of the problem is in your NVRAM area and we’ll have to do further builds without those if more work on this is required.
I was not able to find a LAN MAC location, due to not knowing the LAN MAC for the dump I have, to add to that I can’t locate in your dumped BIOS either due to not knowing it’s exact location because of the same.
So it may or may not work, if it does not work, please tell me the invalid MAC ID, that may help me locate it provided it’s not all FF’s
http://s000.tinyupload.com/index.php?fil…836092451391738
@Lost_N_BIOS
#1 and #2 didn’t work at all (same problem screen off)
#3 worked fine, it booted up, I got access to BIOS setting, I even changed the default setting of boot mode from UEFI to Legacy to boot with the SSD (the old system is installed in Legacy mode) and it worked windows booted up, all peripherals worked also the touch screen. I tried to connect with wifi and it worked I also browsed the web, windows activation key is still valid.
The only thing is left is system informations in the BIOS main menu, I’m ok with that if if doesn’t have other problems. My laptop doesn’t have LAN port only Wireless, if you are asking for MAC adresse that is on the wifi card there is it :
WF MAC : 5C514FCC58E9
BD MAC : 5C514FCC58ED
Do you think I can find other informations saved in system settings (in SSD storage) ?
@BrahimS - great at least one BIOS got you back up and running! 
Big shame on that initial tech you spoke with now, I used stock BIOS to rebuild those for you, and #3 only had one windows key/padding file copied over from your dumped BIOS into rebuilt volume module. I wasn’t sure if that alone would keep your activation, if not I planned to try further copied modules from your dump.
He probably wanted to do what I did with #1-2 and use some similar dump’s NVRAM instead of yours, which I would do too but then you still loose your system details and that’s just a really dirty/non-ideal way to do a BIOS rebuild due to all the details contained in a NVRAM volume.
I’m always concerned when putting back NVRAM from bricked system into a new BIOS for recovery, since the problem can often be in NVRAM, but sometimes you get lucky and it all works perfectly (meaning problem not in NVRAM)
the only bad thing about not using that, is often loss of some board details (Serial, UUID etc), and on this board I think those could be kept there and the other padding I mentioned I left too. So without board details you probably can’t RMA, unless you still have box and receipt, but at least windows activation still works.
Also good your wireless is still working too, and MAC does not look generic so that’s a plus!
You can look for your other system info for me to transfer back into another BIOS, but I believe I have it all from your stickers, just not way to know how to put it back into the files properly without a known working dump from some other same system and it’s exact system details given as well.
Hi bro it’s a pleasure to read your differents explanation, I love your capacity, I hope have it someday… I’ve the same problem but yours files are down, may you help me and get them up again please?? I’d be really thankful by your good heart bro…thanks a lot…