[Offer] Collection of LGA 1151 Xeon v5/v6 E3-12xx compat. MB BIOSes

Gigabyte
H270 Series:
Gigabyte GA-H270-Gaming 3 XEON BIOS MOD (TEST OK)

UserBenchmark:
Gigabyte GA-H270-Gaming 3 XEON BIOS MOD/Xeon E3-1230 v6, 3700 MHz
Geekbench Browser:
Gigabyte GA-H270-Gaming 3 XEON BIOS MOD//Xeon E3-1230 v6, 3700 MHz


Gigabyte GA-H270-Gaming 3 Xeon E3-12xx v5 BIOS MOD Other Details
CPU-Z Data Information:
Xeon E3-1230 v5, 3600 MHz

MSI H170A PC MATE XEON BIOS MOD (TEST OK)
MSI H170A PC MATE Xeon v6 BIOS MOD Other Details
Xeon E3-1230 v6, 3700 MHz
CPU-Z Data Information:


Geekbench Browser:
MSI H170A PC MATE XEON BIOS MOD/Xeon E3-1230 v6, 3700 MHz


MSI H170A PC MATE Xeon v5 BIOS MOD Other Details
Xeon E3-1230 v5, 3600 MHz
CPU-Z Data Information:


Geekbench Browser:
MSI H170A PC MATE XEON BIOS MOD/Xeon E3-1230 v5, 3600 MHz

Hi,

I’m planning to buy an ASUS H170M-E D3 motherboard and I’d like to use it with an Intel Xeon E3-1240 v6.

Would it be possible to get a Xeon-compatible BIOS for the ASUS H170M-E D3? I don’t have the motherboard in hand yet, so I’m not sure about the PCB revision. If a compatible BIOS already exists, I’d really appreciate it if you could share it or point me to it.

Thank you for your time and for maintaining this BIOS collection.

1 Like

Welcome to our community platform.

First, purchase the motherboard. Then, submit your request here again.
I can prepare a BIOS file for you that will allow the Xeon E3-1240 v6 processor to run smoothly.
This way, you can share your experiences with us and guide other users.

Thank you very much for your reply.

I’ll purchase the ASUS H170M-E D3 first and then come back here with the motherboard details and BIOS version. I really appreciate your willingness to prepare a Xeon-compatible BIOS for the E3-1240 v6.

Looking forward to testing it and sharing the results with the community.

I’m using USB Bios Flashback Support. There is no supported processor installed so I cannot boot.

I can successfully flash the latest official bios MAXIMUS-VIII-HERO-ASUS-3802.CAP. Multiple times without issue.

I cannot flash either of the bios files that you linked - 3801a official bios or xeon bios mod. They both fail to flash through USB flashback support.

The official asus repository only has version 3802, they don’t have 3801 alpha.

USB flashback support claims you can downgrade, but neither of the bios files you provided are functional through USB flashback.

Correction:
Then, instead of using the CAP file, try using the ROM file through the application I prepared for ASUS motherboards in the first post.
I will prepare a file for you immediately.
But all responsibility lies with the user.
This may also erase unique identifiers such as MAC address and UUID on the current motherboard. To avoid this, you need to provide me with a dump file. You can do this via private message, not in a public forum. The choice is yours.

ASUS EX-B365M-V XEON BIOS MOD (TEST OK)
ASUS EX-B365M-V Xeon v6 BIOS MOD Other Details
Xeon E3-1230 v6, 3700 MHz
CPU-Z Data Information:


Geekbench Browser:
ASUS EX-B365M-V XEON BIOS MOD/Xeon E3-1230 v6, 3700 MHz


ASUS EX-B365M-V Xeon v5 BIOS MOD Other Details
Xeon E3-1225 v5, 3400 MHz
CPU-Z Data Information:


Geekbench Browser:
ASUS EX-B365M-V XEON BIOS MOD/Xeon E3-1225 v5, 3400 MHz
UserBenchmark:
ASUS EX-B365M-V XEON BIOS MOD/Xeon E3-1225 v5, 3400 MHzz

ASUS ROG STRIX B250G GAMING XEON BIOS MOD (TEST OK)
ASUS ROG STRIX B250G GAMING Xeon v6 BIOS MOD Other Details
Xeon E3-1230 v6, 3700 MHz
CPU-Z Data Information:


Geekbench Browser:
ASUS ROG STRIX B250G GAMING XEON BIOS MOD/Xeon E3-1230 v6, 3700 MHz


ASUS ROG STRIX B250G GAMING Xeon v5 BIOS MOD Other Details
Xeon E3-1230 v5, 3600 MHz
CPU-Z Data Information:


Geekbench Browser:
ASUS ROG STRIX B250G GAMING XEON BIOS MOD/Xeon E3-1230 v5, 3600 MHz

Gigabyte GA-B250-FinTech XEON BIOS MOD (TEST OK)
ASUS ROG STRIX B250G GAMING Xeon v6 BIOS MOD Other Details
Xeon E3-1230 v6, 3700 MHz
CPU-Z Data Information:


Geekbench Browser:
Gigabyte GA-B250-FinTech XEON BIOS MOD/Xeon E3-1230 v6, 3700 MHz


Gigabyte GA-B250-FinTech Xeon v5 BIOS MOD Other Details
Xeon E3-1230 v5, 3600 MHz
CPU-Z Data Information:


Geekbench Browser:
Gigabyte GA-B250-FinTech XEON BIOS MOD/Xeon E3-1230 v5, 3600 MHz

ASUS Z170-P D3 XEON BIOS MOD (TEST OK)
ASUS Z170-P D3 Xeon v6 BIOS MOD Other Details
Xeon E3-1230 v6, 3700 MHz
CPU-Z Data Information:


Geekbench Browser:
ASUS Z170-P D3 XEON BIOS MOD/Xeon E3-1230 v6, 3700 MHz
UserBenchmark:
ASUS Z170-P D3 XEON BIOS MOD/Xeon E3-1230 v6, 3700 MHz


ASUS Z170-P D3 Xeon v5 BIOS MOD Other Details
Xeon E3-1230 v5, 3600 MHz
CPU-Z Data Information:


Geekbench Browser:
ASUS Z170-P D3 XEON BIOS MOD/Xeon E3-1230 v5, 3600 MHz
UserBenchmark:
ASUS Z170-P D3 XEON BIOS MOD/Xeon E3-1230 v5, 3600 MHz

MSI H310M PRO-D PLUS XEON BIOS MOD (TEST OK)

Thanks to the Modded BIOS file I have released for this MSI LGA 1151 Socket H310 series motherboard:
Xeon E3-12xx v6 & v5 processors, as well as all 6th, 7th, 8th, and 9th generation processors, will work.
Sample images are provided below.

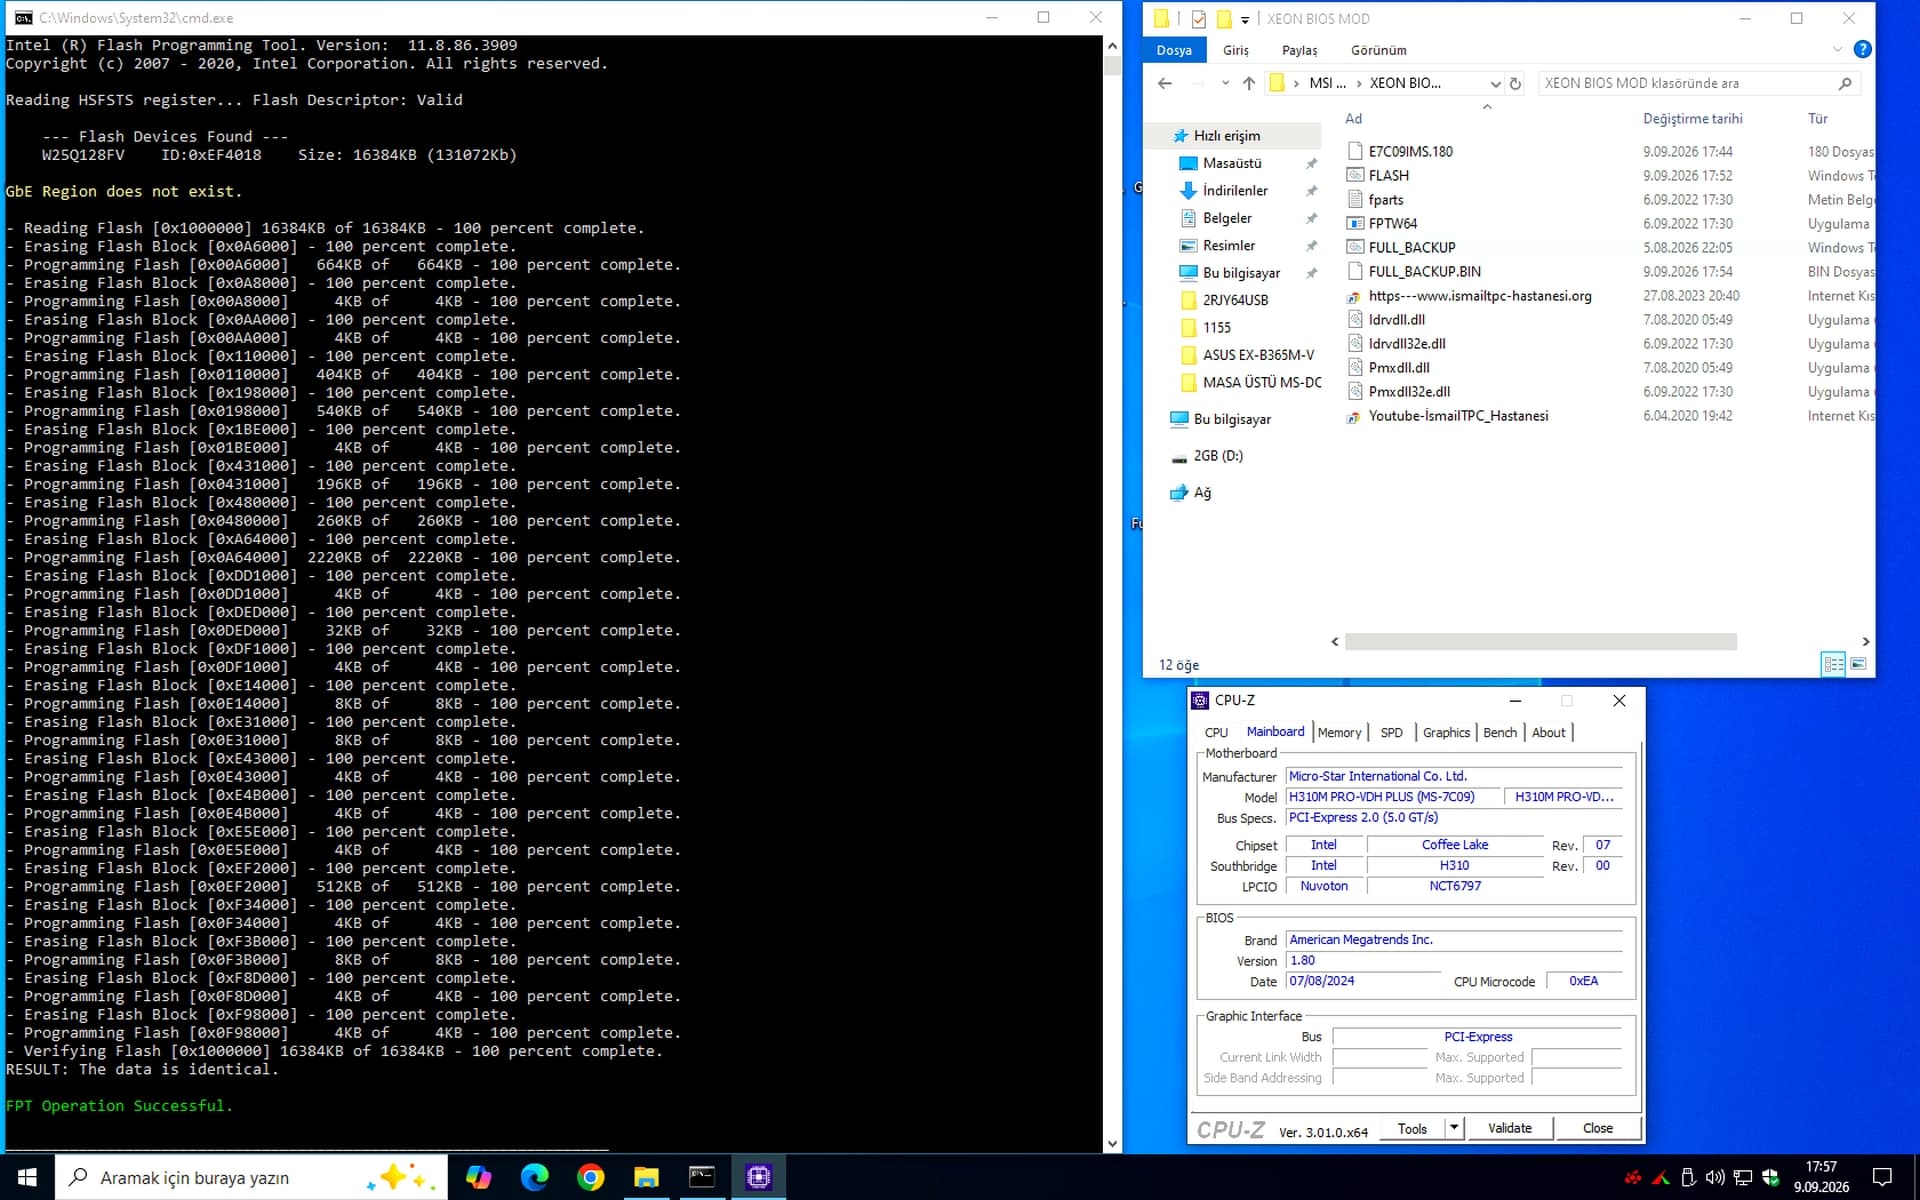
You can only flash the modified BIOS for the MSI H310M PRO-D PLUS from within Windows; simply run the “FLASH.BAT” script located in the folder of files I provided.

Important Note: You cannot flash it using M-Flash via the motherboard BIOS itself; the system will not allow it.


If you wish to revert from the modified BIOS to the original factory setup, run the “FULL_BACKUP.BAT” script from the files I provided and wait for the processes on the black screen to complete.

Immediately afterwards, you will have obtained the motherboard’s original BIOS file, named “FULL_BACKUP.BIN,” in the same directory. This is also a complete DUMP file for the motherboard.

This full DUMP BIOS file contains your motherboard’s specific Serial Number, MAC Address, and UUID information.
Keep this file safe.

As mentioned earlier, if you want to revert from the modified BIOS to the original BIOS and factory settings, rename the “FULL_BACKUP.BIN” full-dump file to match the official BIOS filename for your motherboard.
For example:
Rename “FULL_BACKUP.BIN” to “E7C10IMS.170” and run the “FLASH.BAT” script located in the same directory. Wait for the processes on the black screen to finish.
This will restore your motherboard to its original BIOS and factory settings.

MSI H310M PRO-D PLUS Xeon v6 BIOS MOD Other Details
Xeon E3-1230 v6, 3700 MHz
CPU-Z Data Information:


Geekbench Browser:
MSI H310M PRO-D PLUS XEON BIOS MOD/Xeon E3-1230 v6, 3700 MHz


MSI H310M PRO-D PLUS Xeon v5 BIOS MOD Other Details
Xeon E3-1225 v5, 3400 MHz
CPU-Z Data Information:


Geekbench Browser:
MSI H310M PRO-D PLUS XEON BIOS MOD/Xeon E3-1225 v5, 3400 MHz


MSI H310M PRO-D PLUS Intel® Core™ i3-6098P CPU @ 3.60GHz BIOS MOD Other Details
CPU-Z Data Information:
Intel® Core™ i3-6098P CPU @ 3.60GHz


Geekbench Browser:
MSI H310M PRO-D PLUS XEON BIOS MOD/Intel® Core™ i3-6098P CPU @ 3.60GHz/
(6th generation processor)

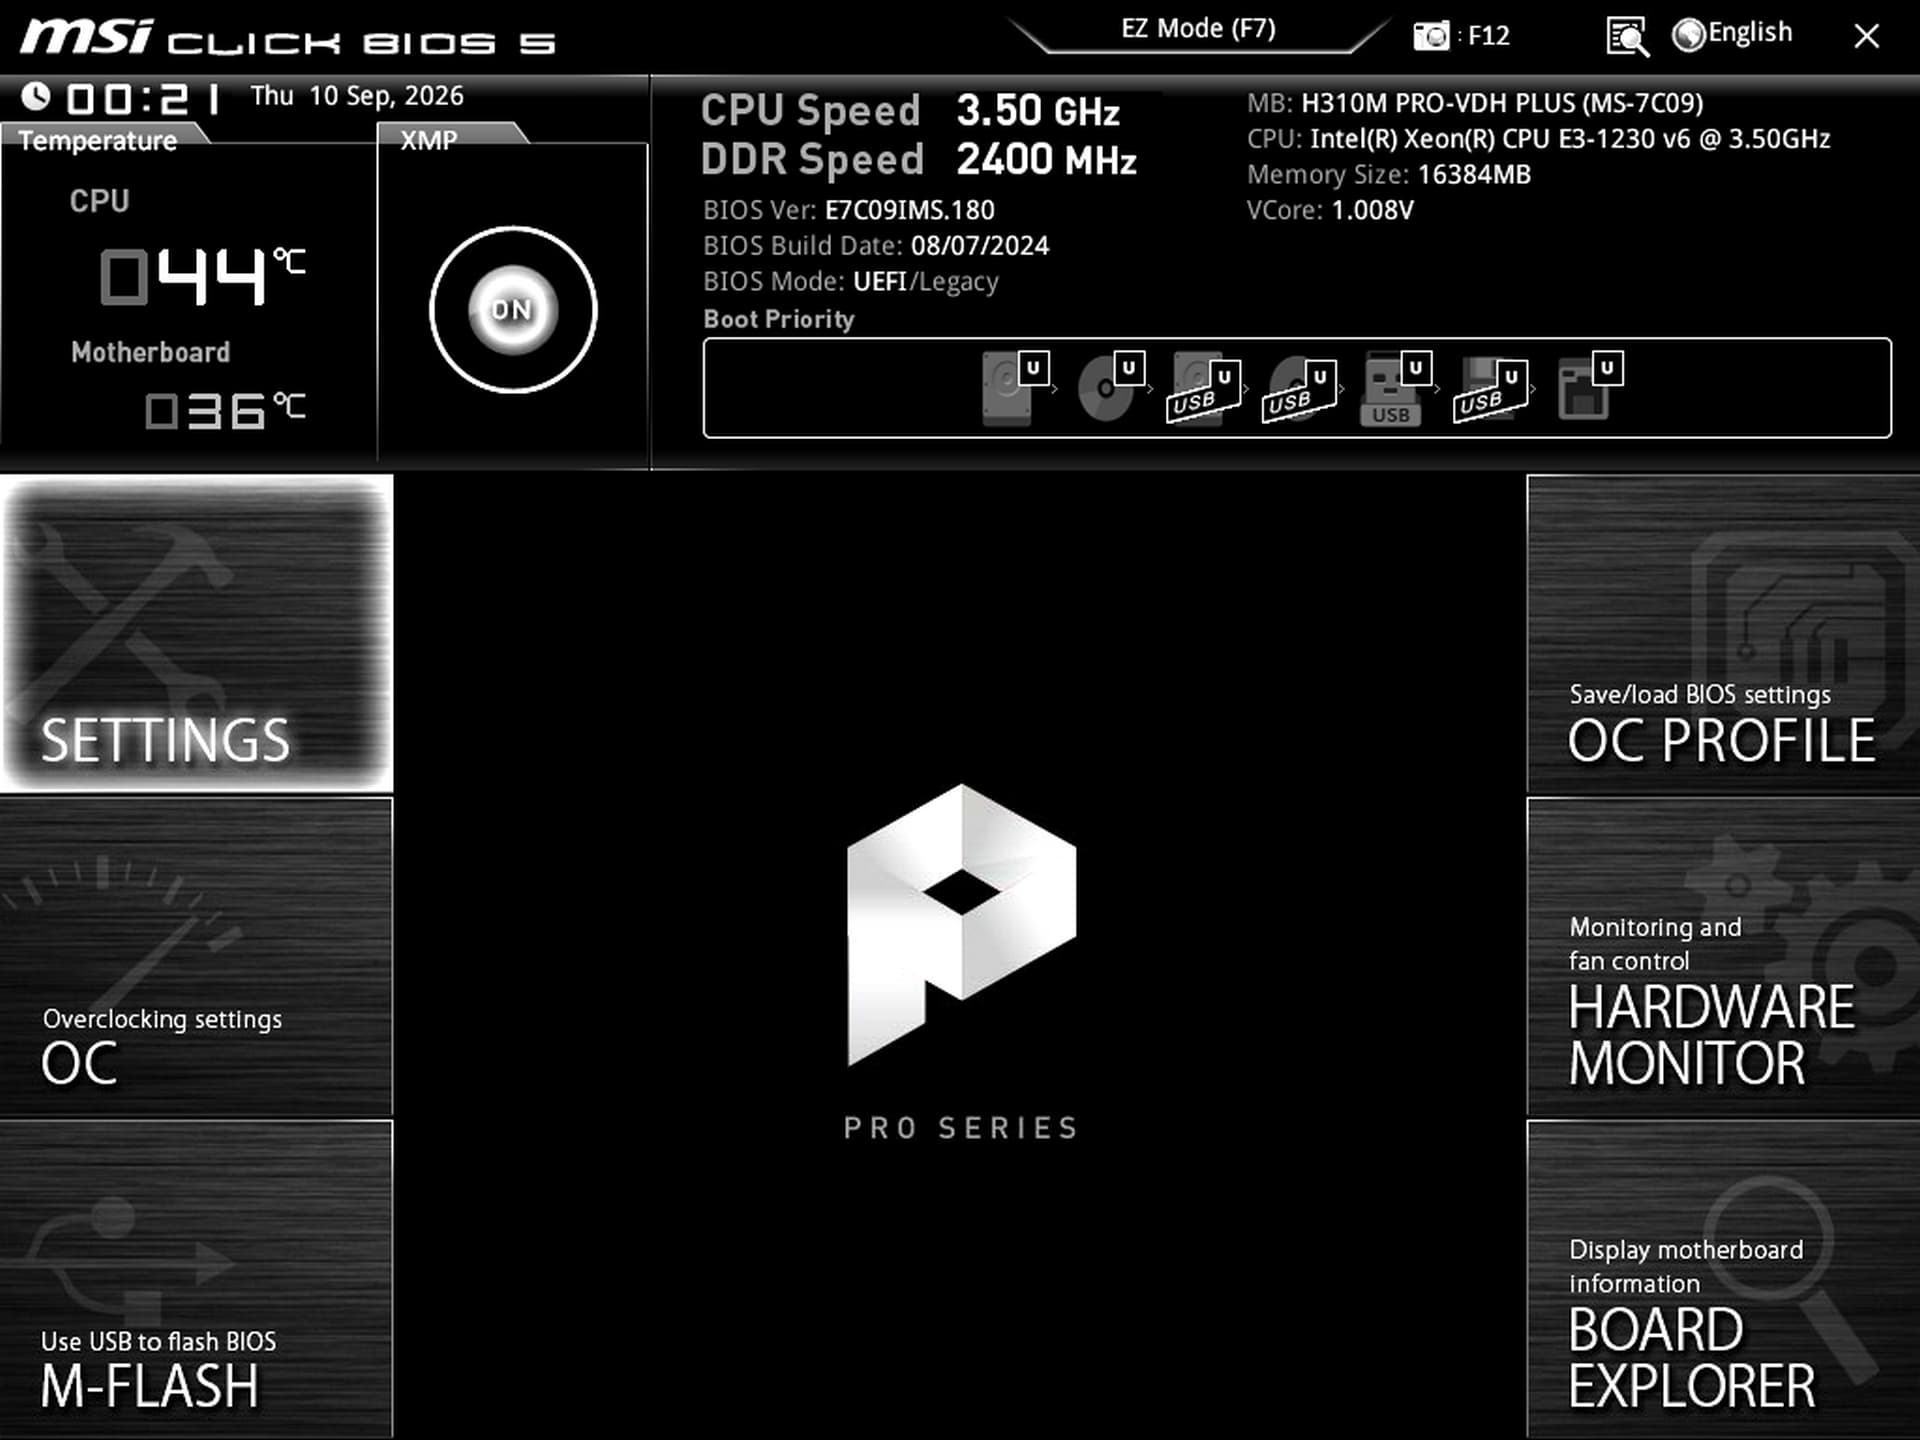
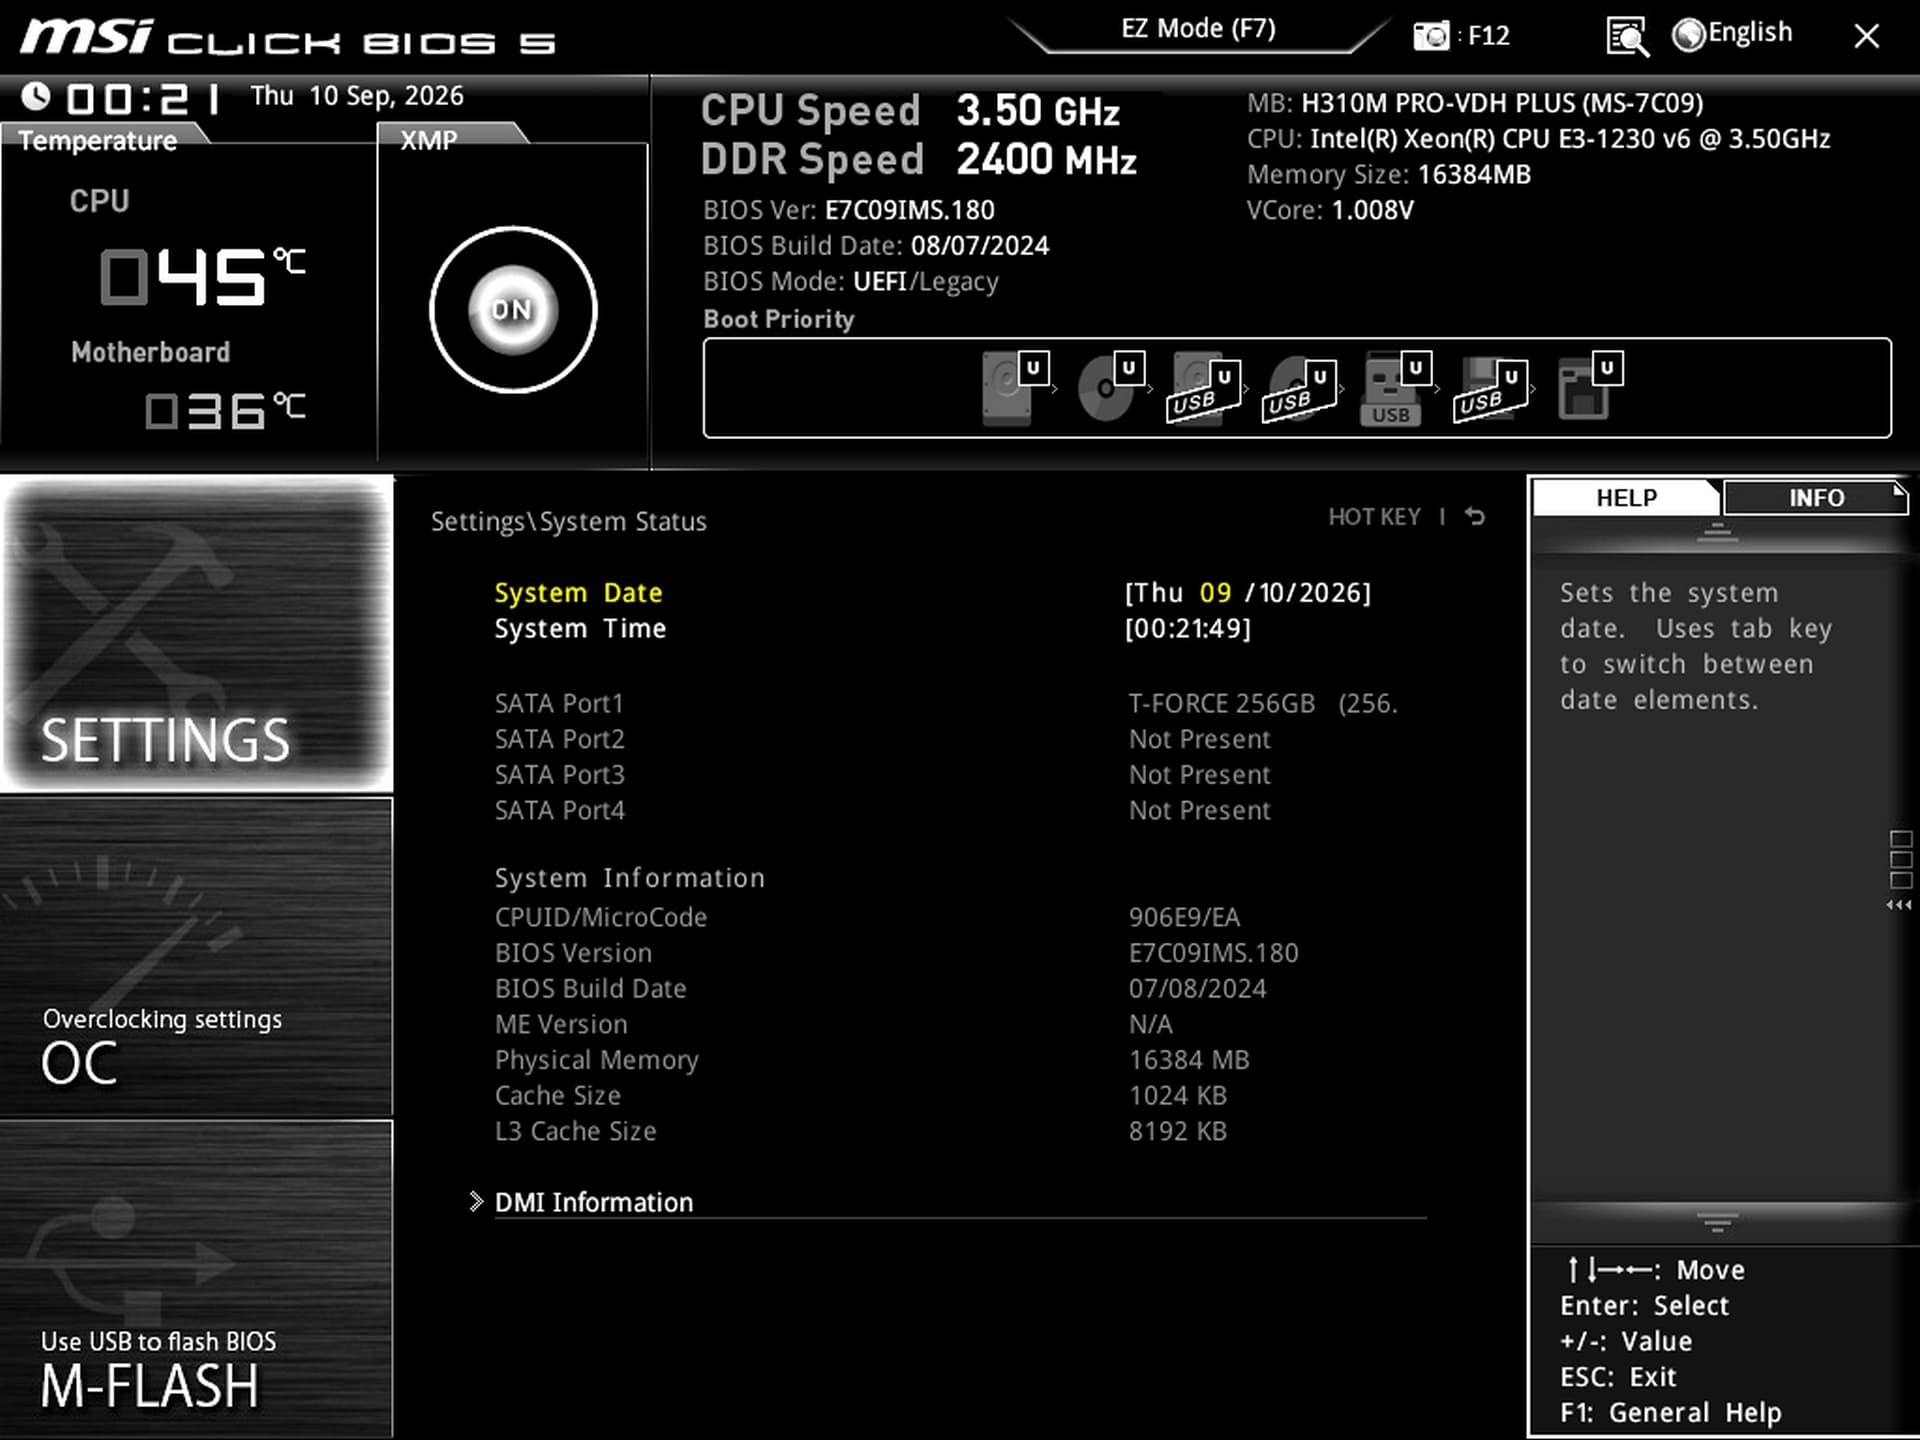
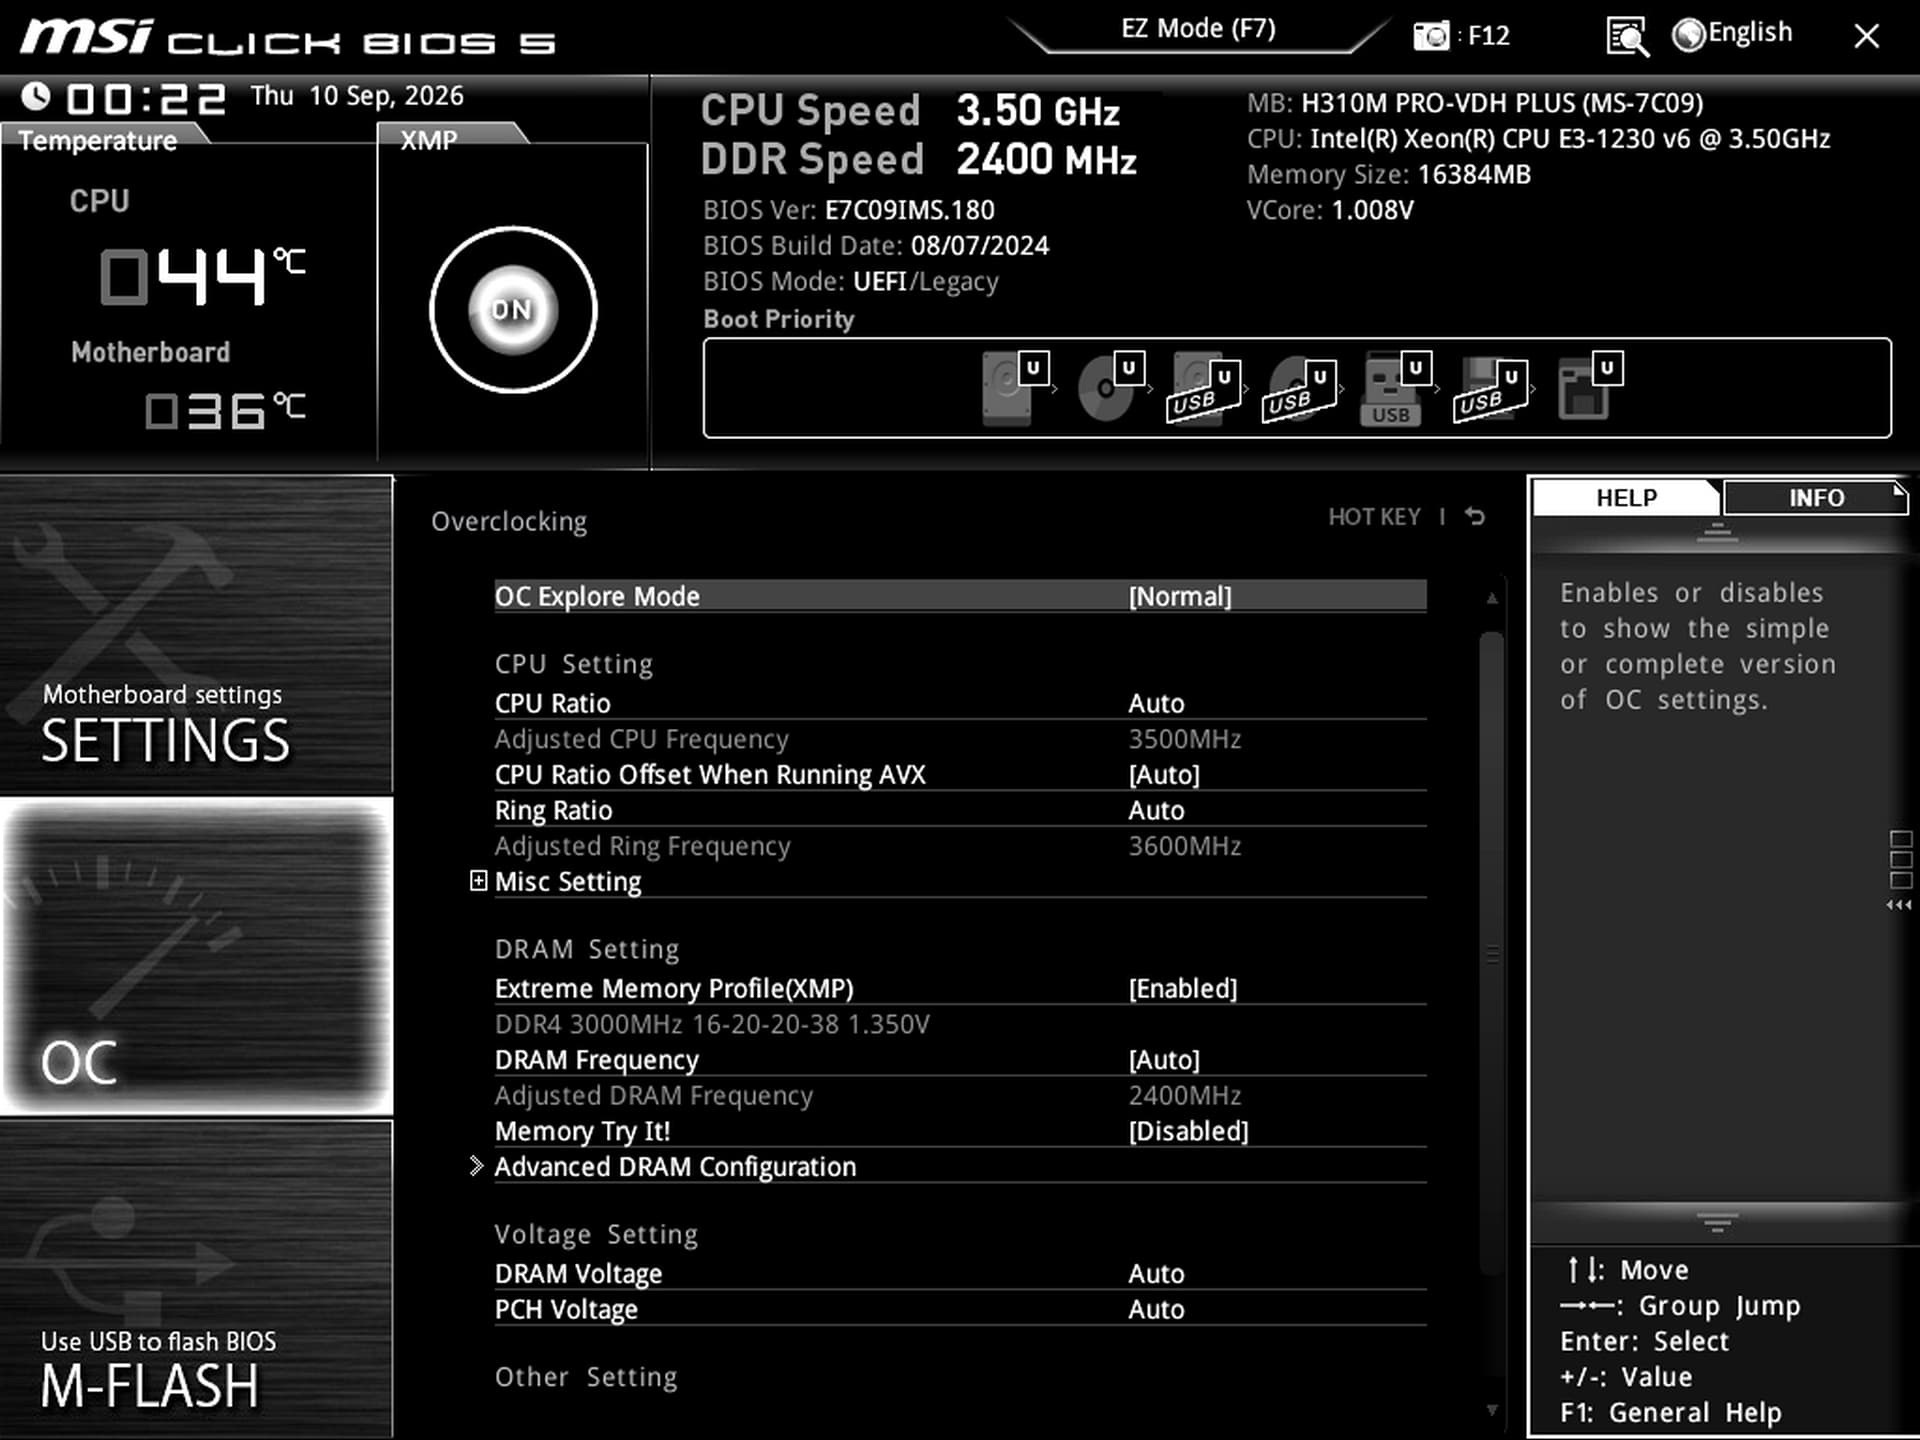
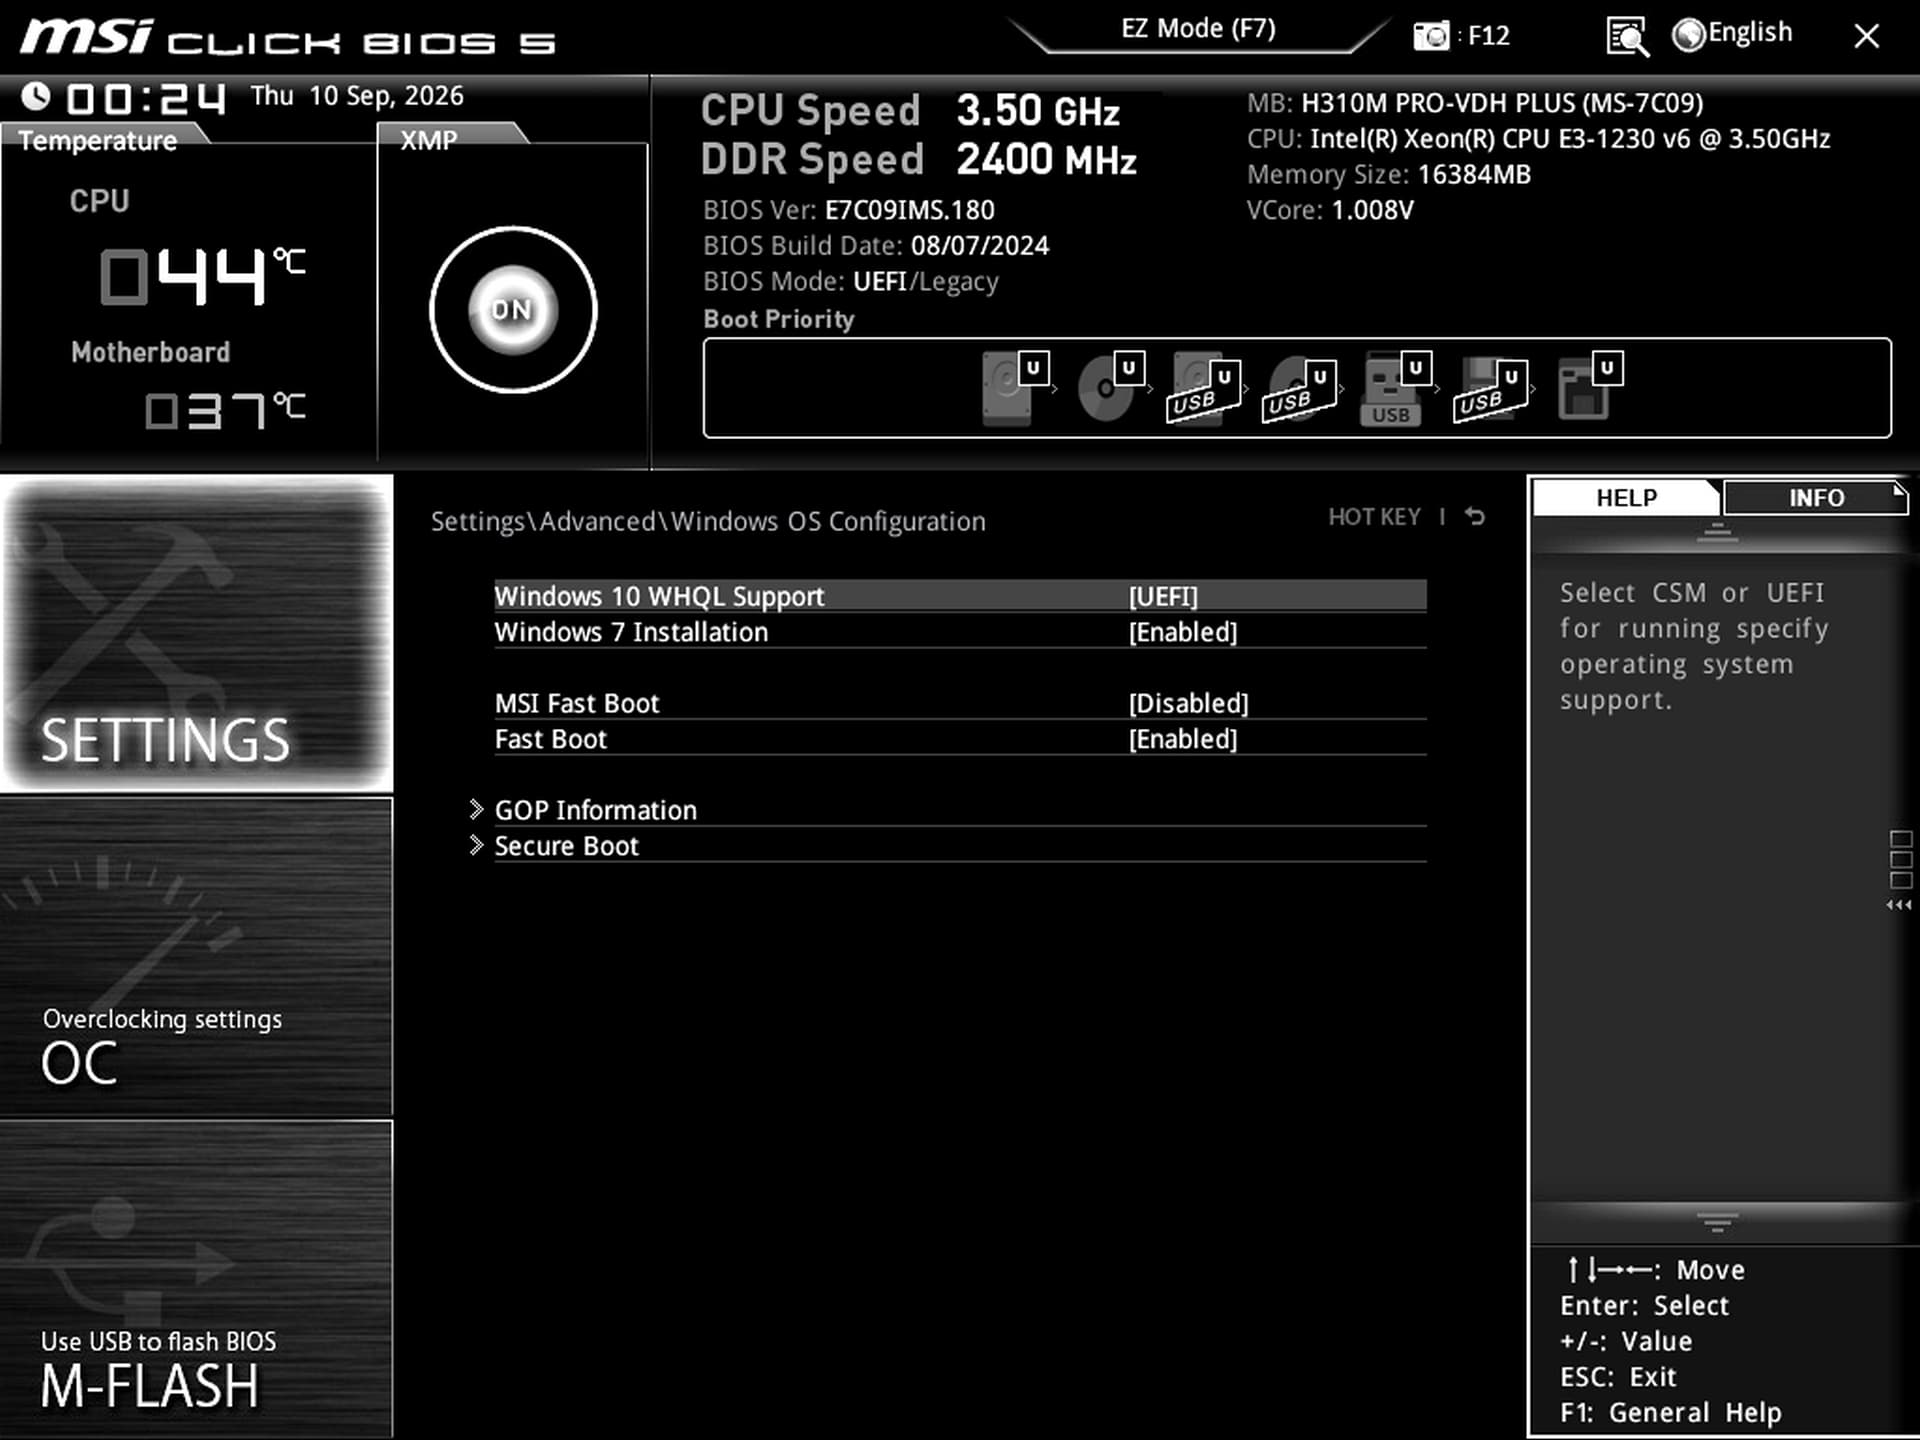
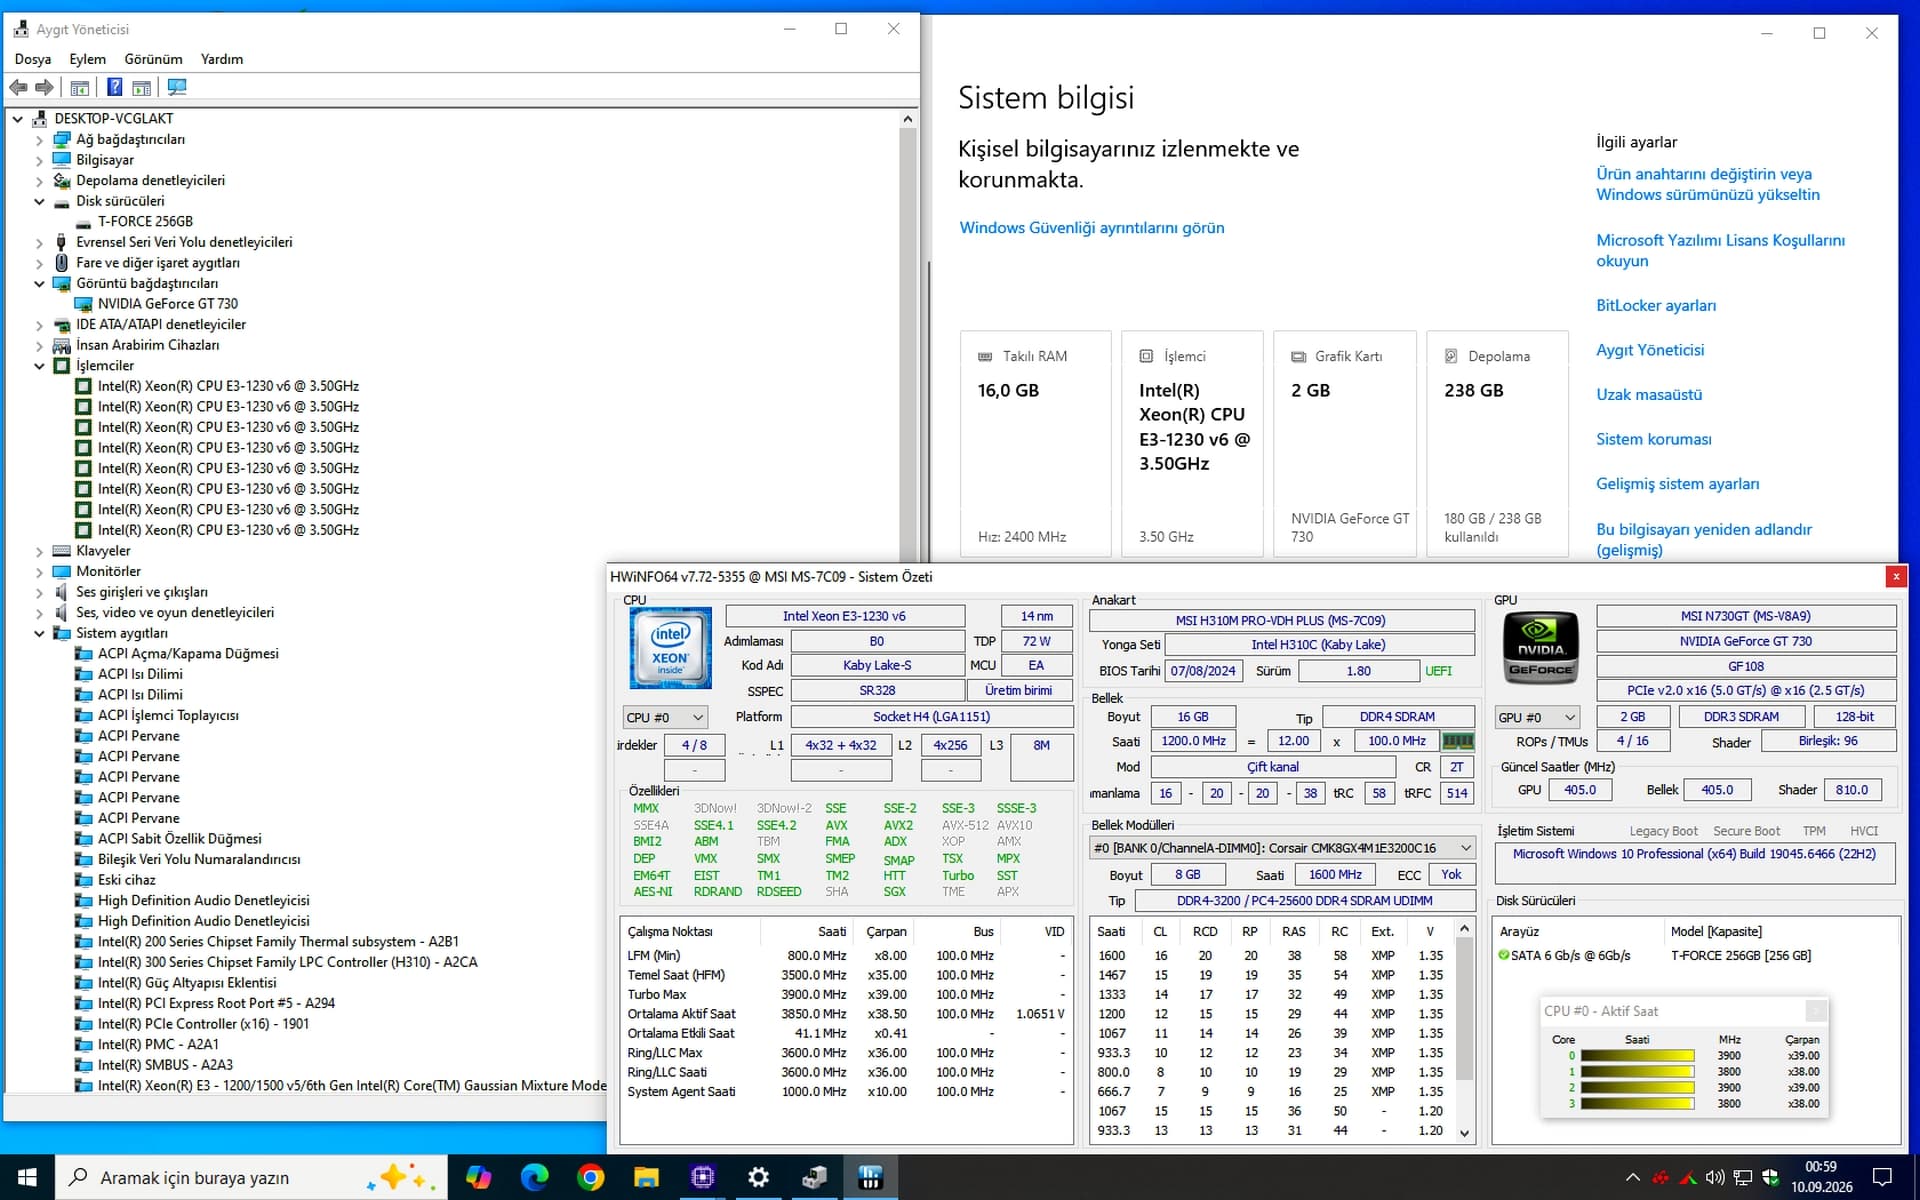
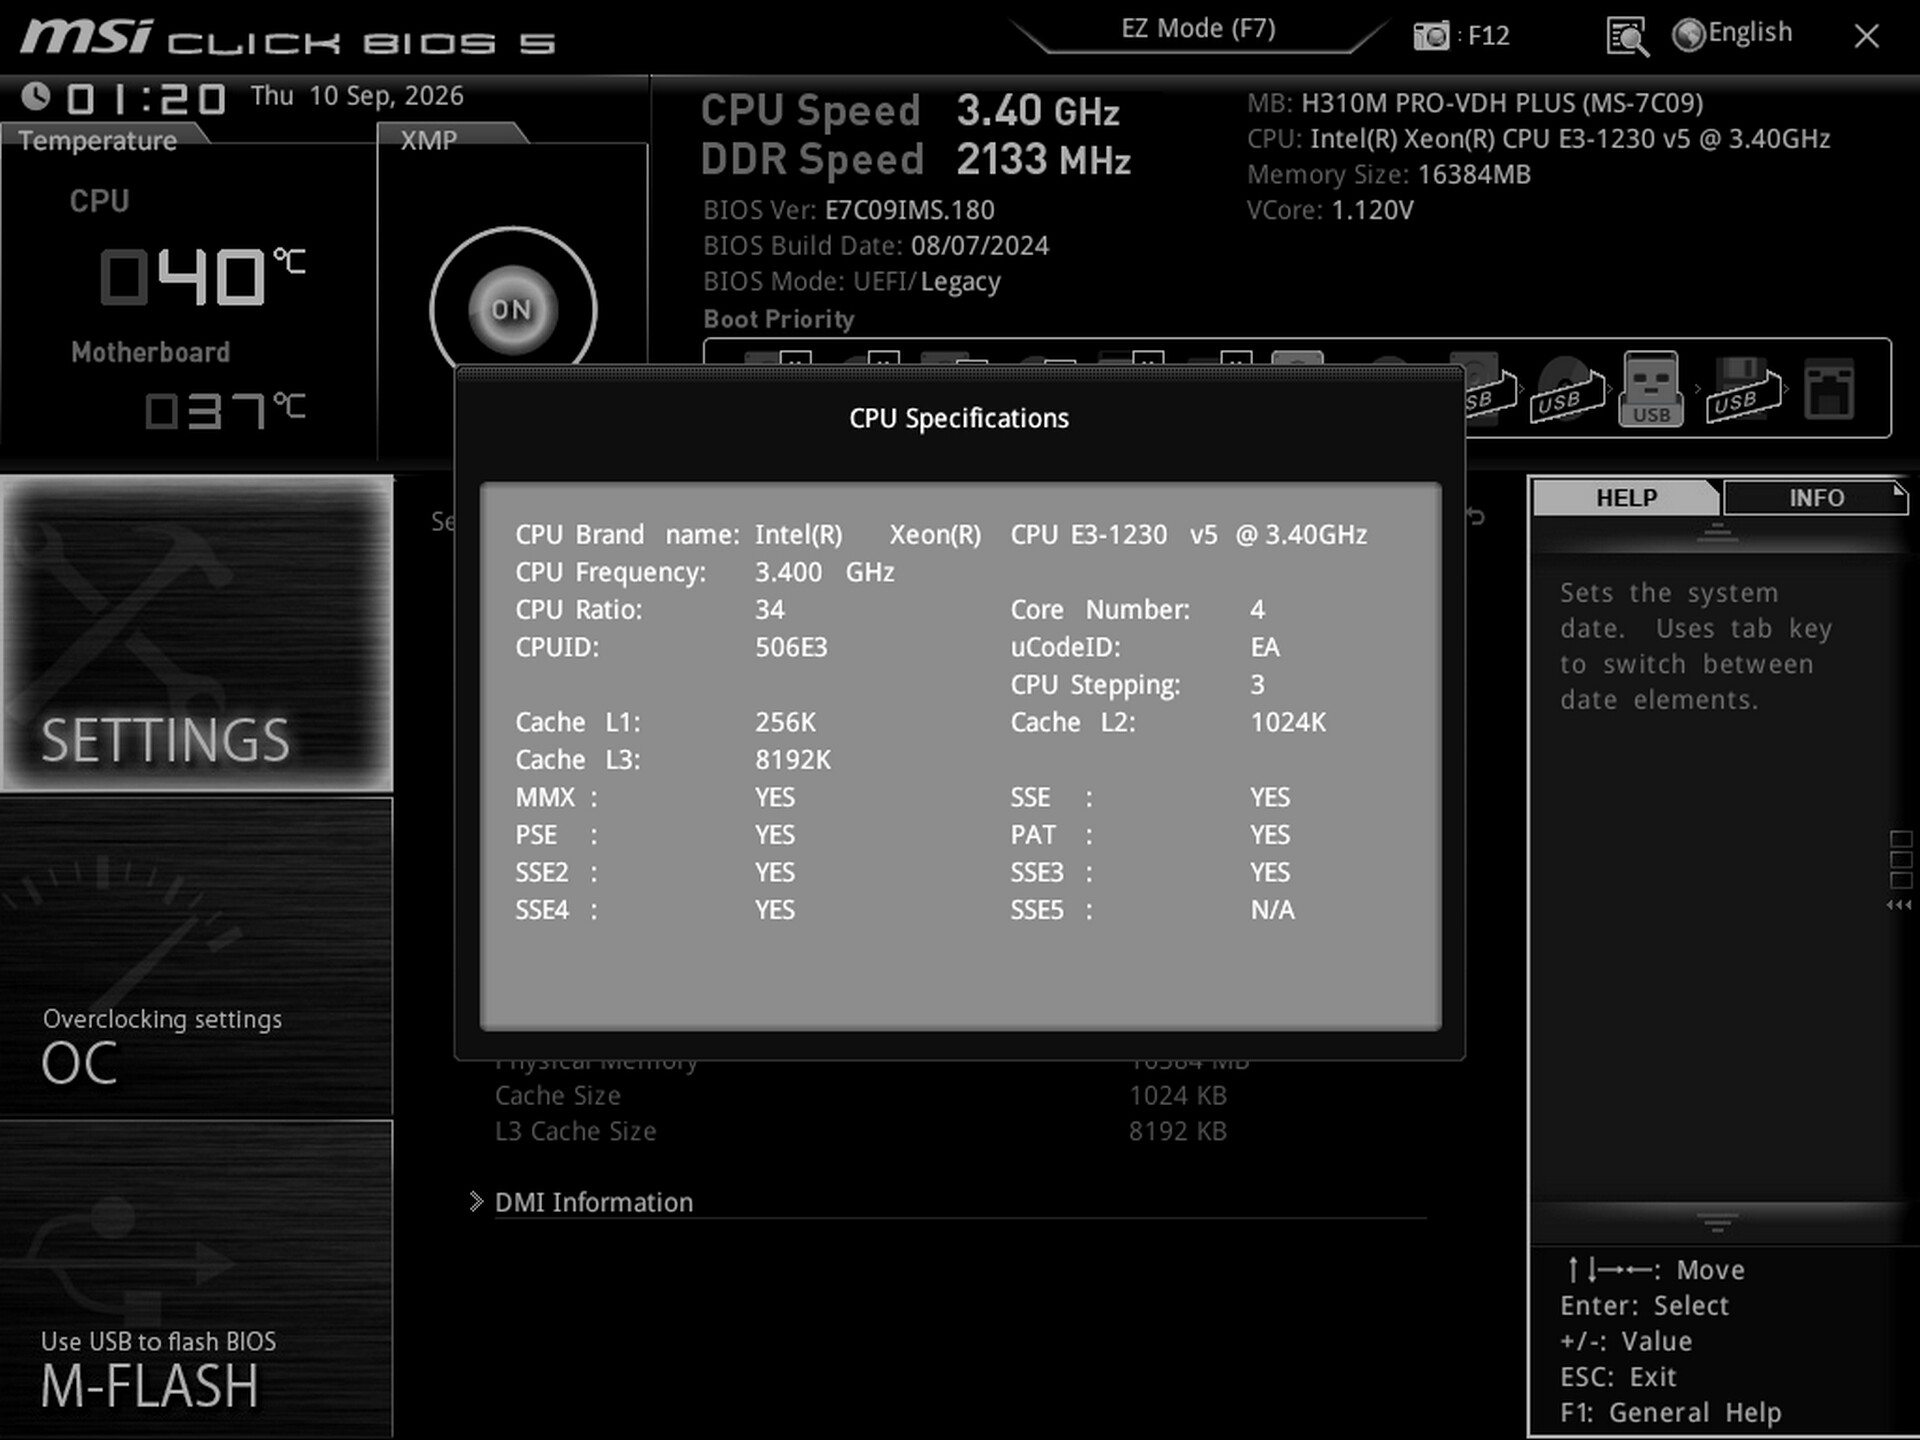
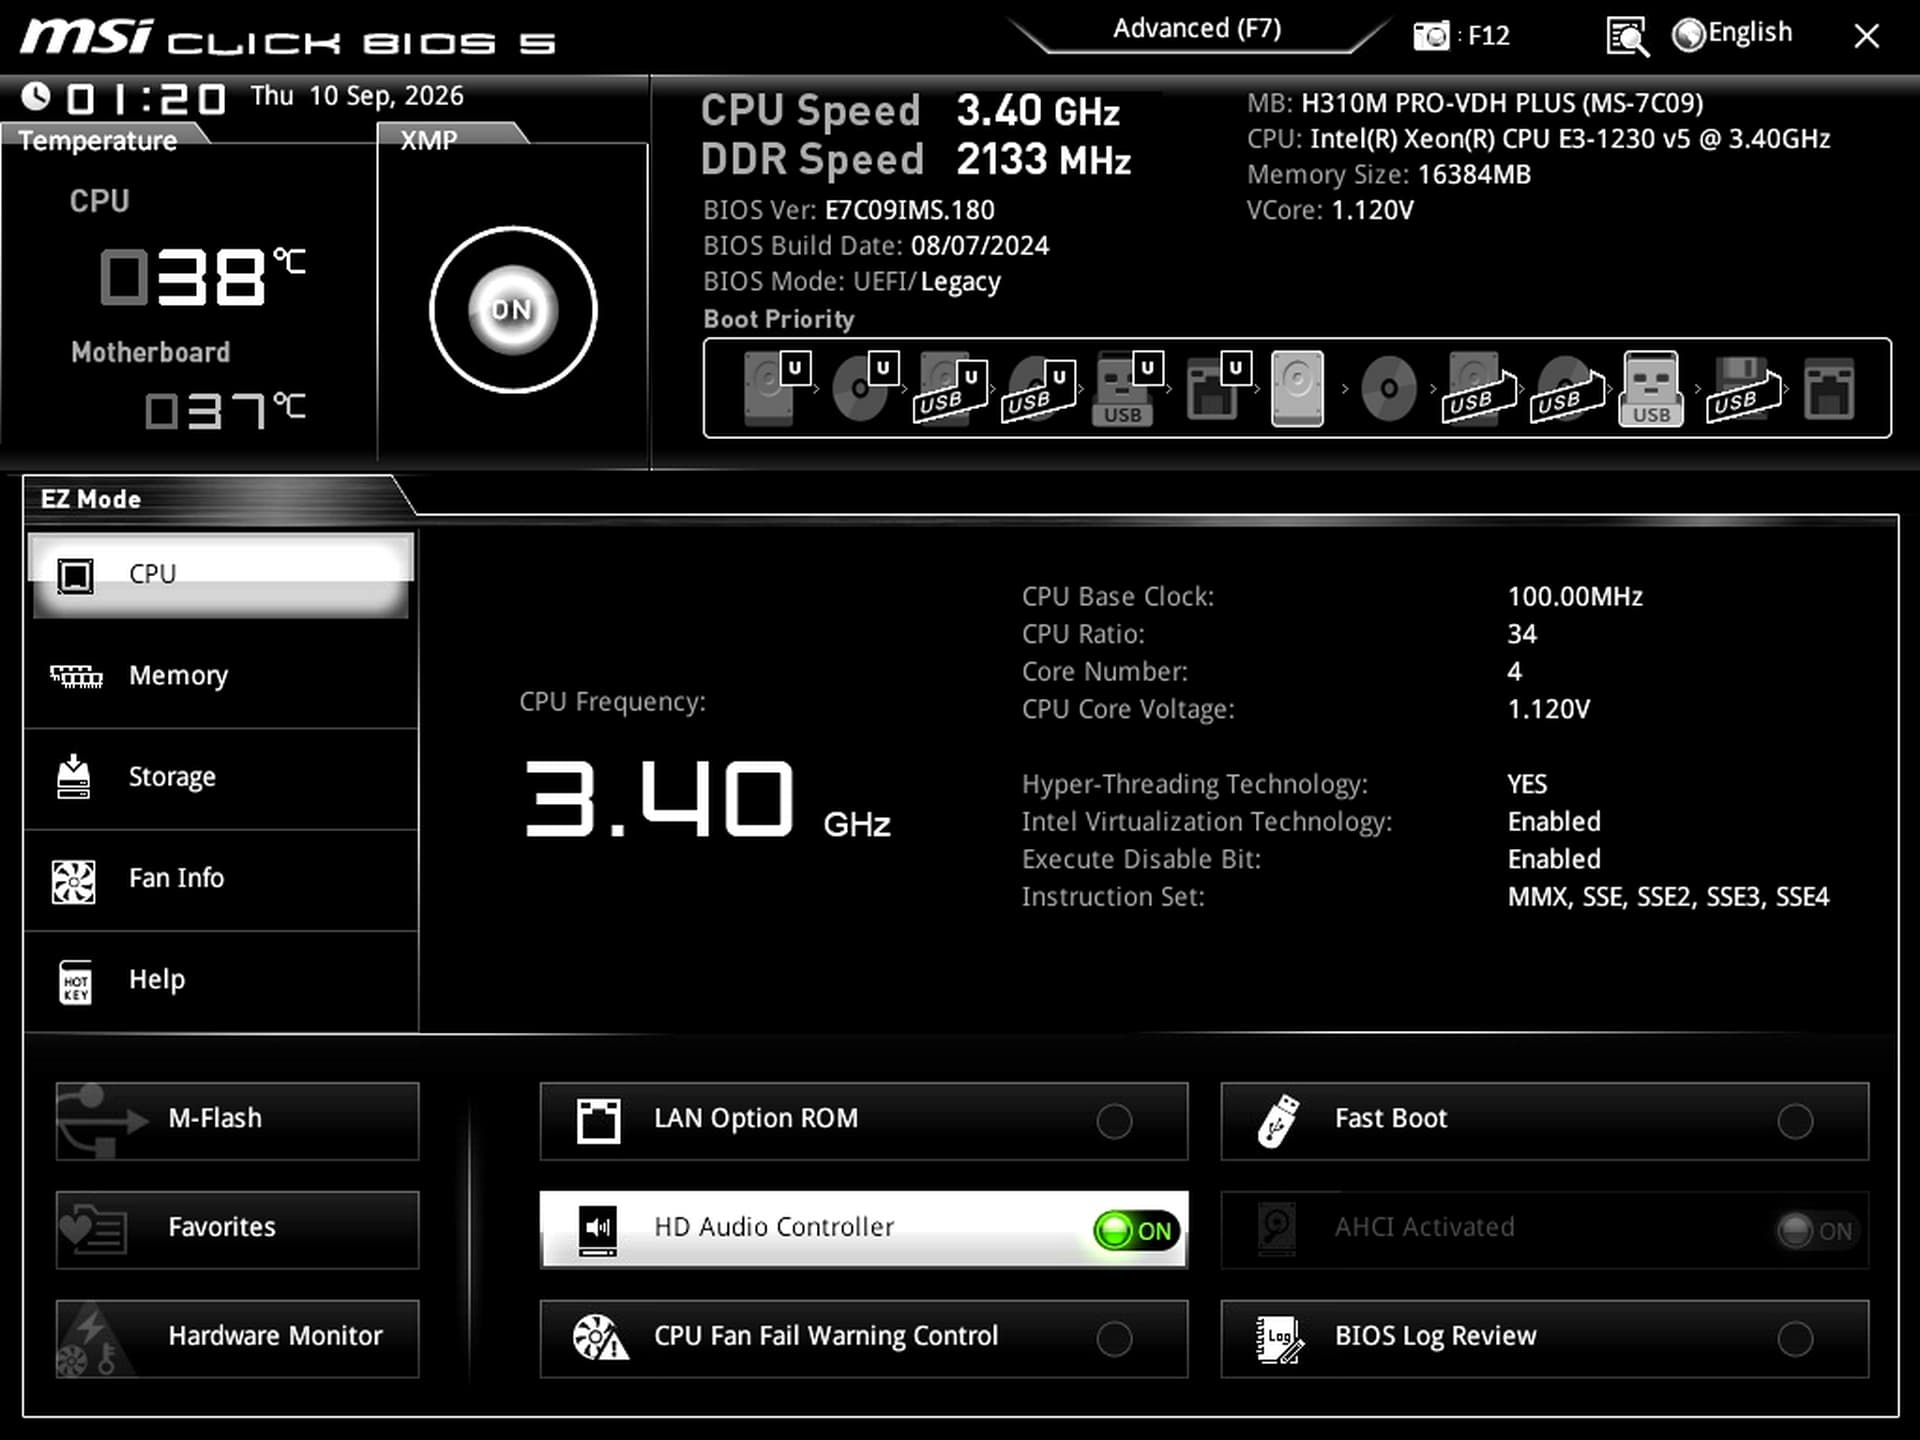
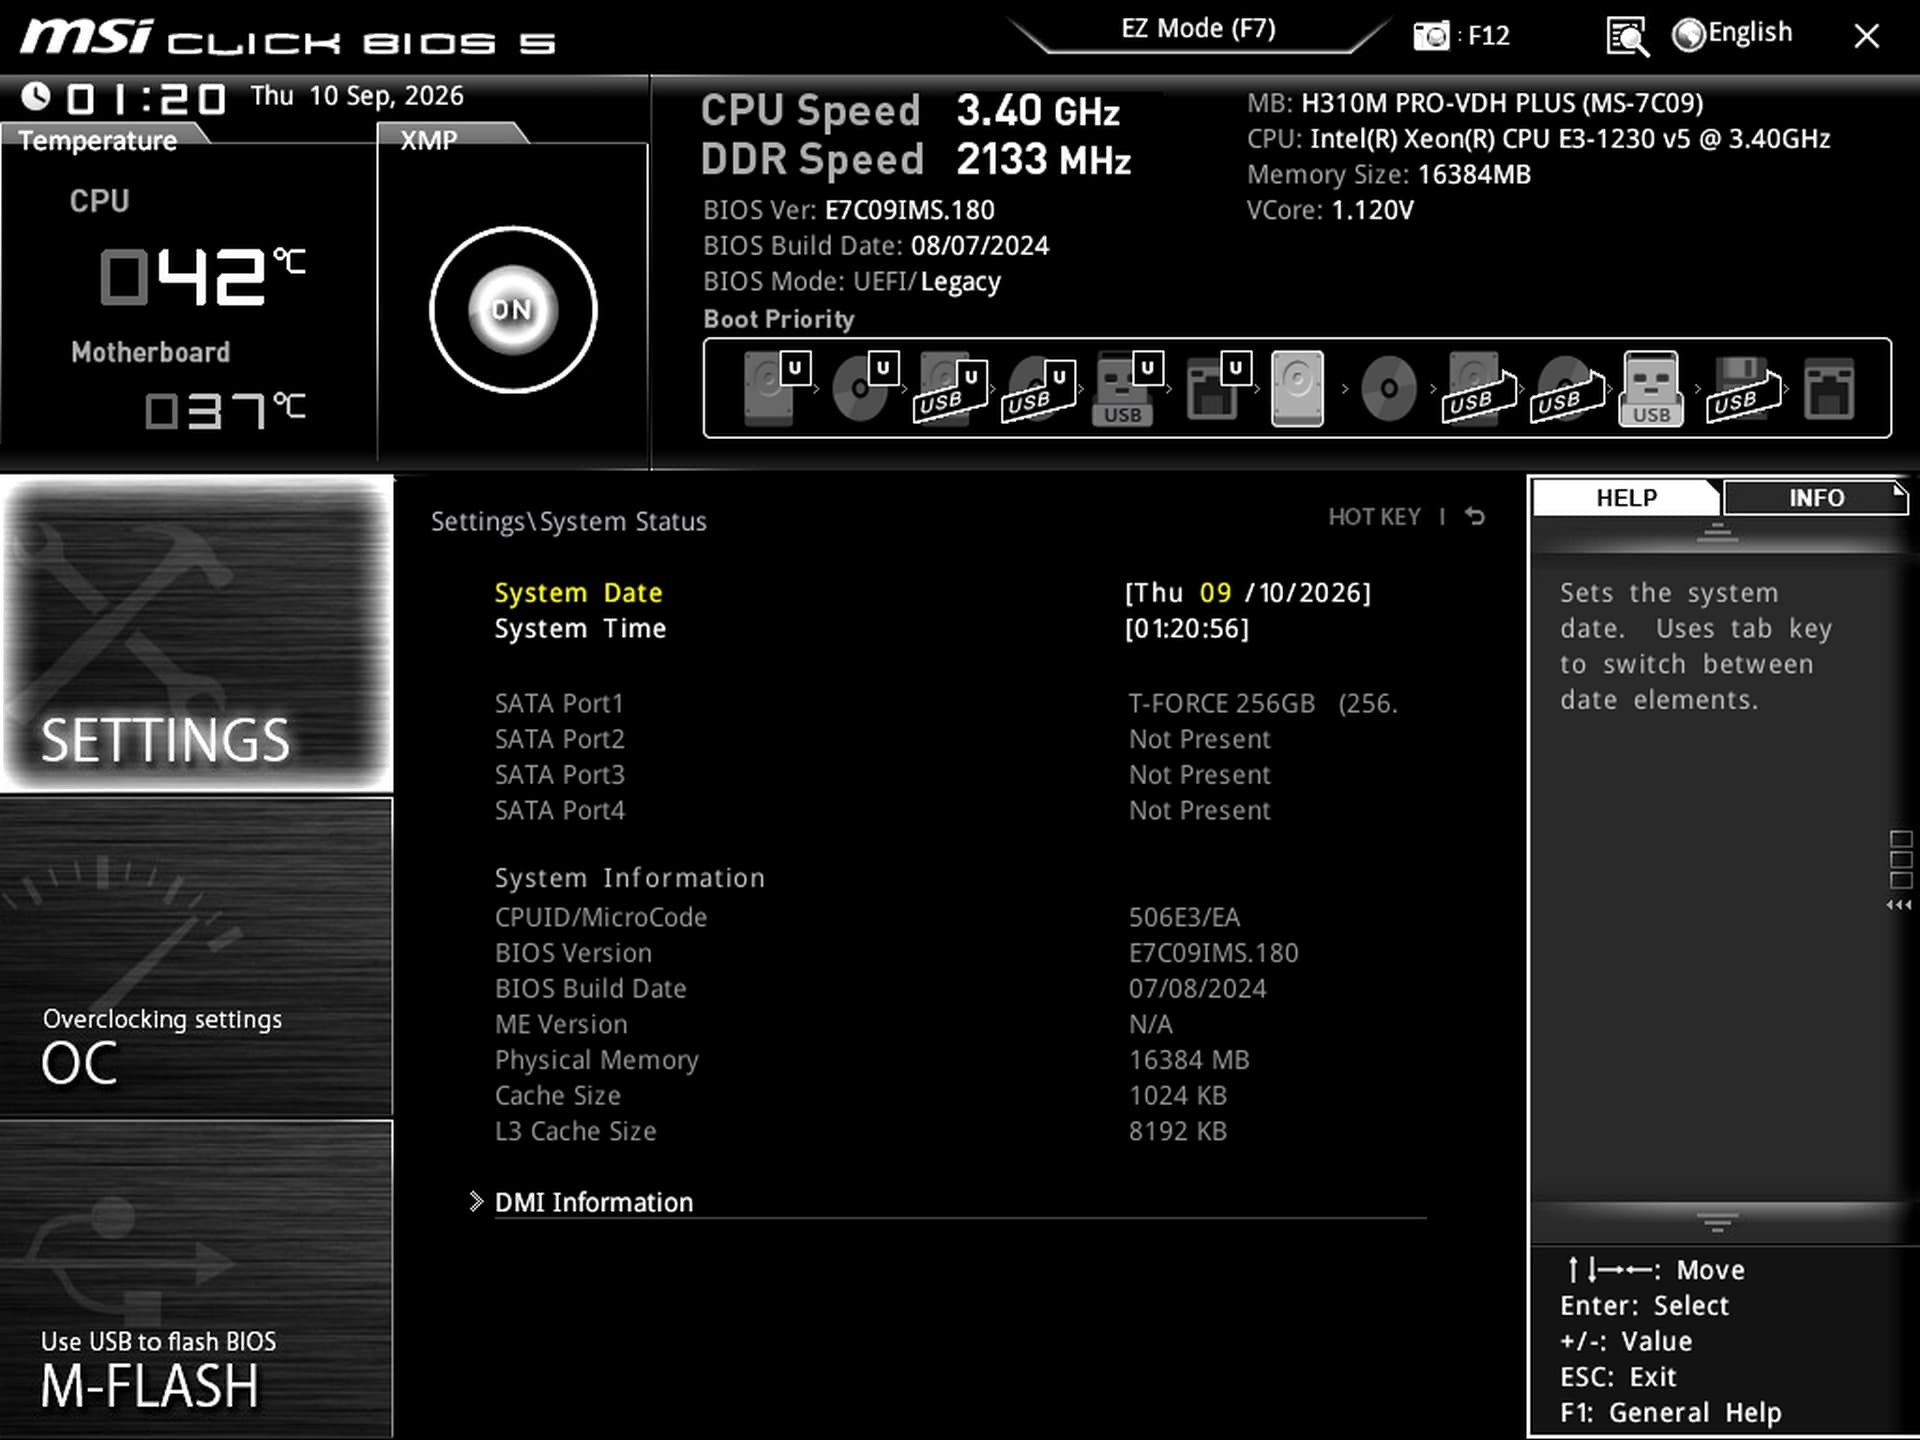
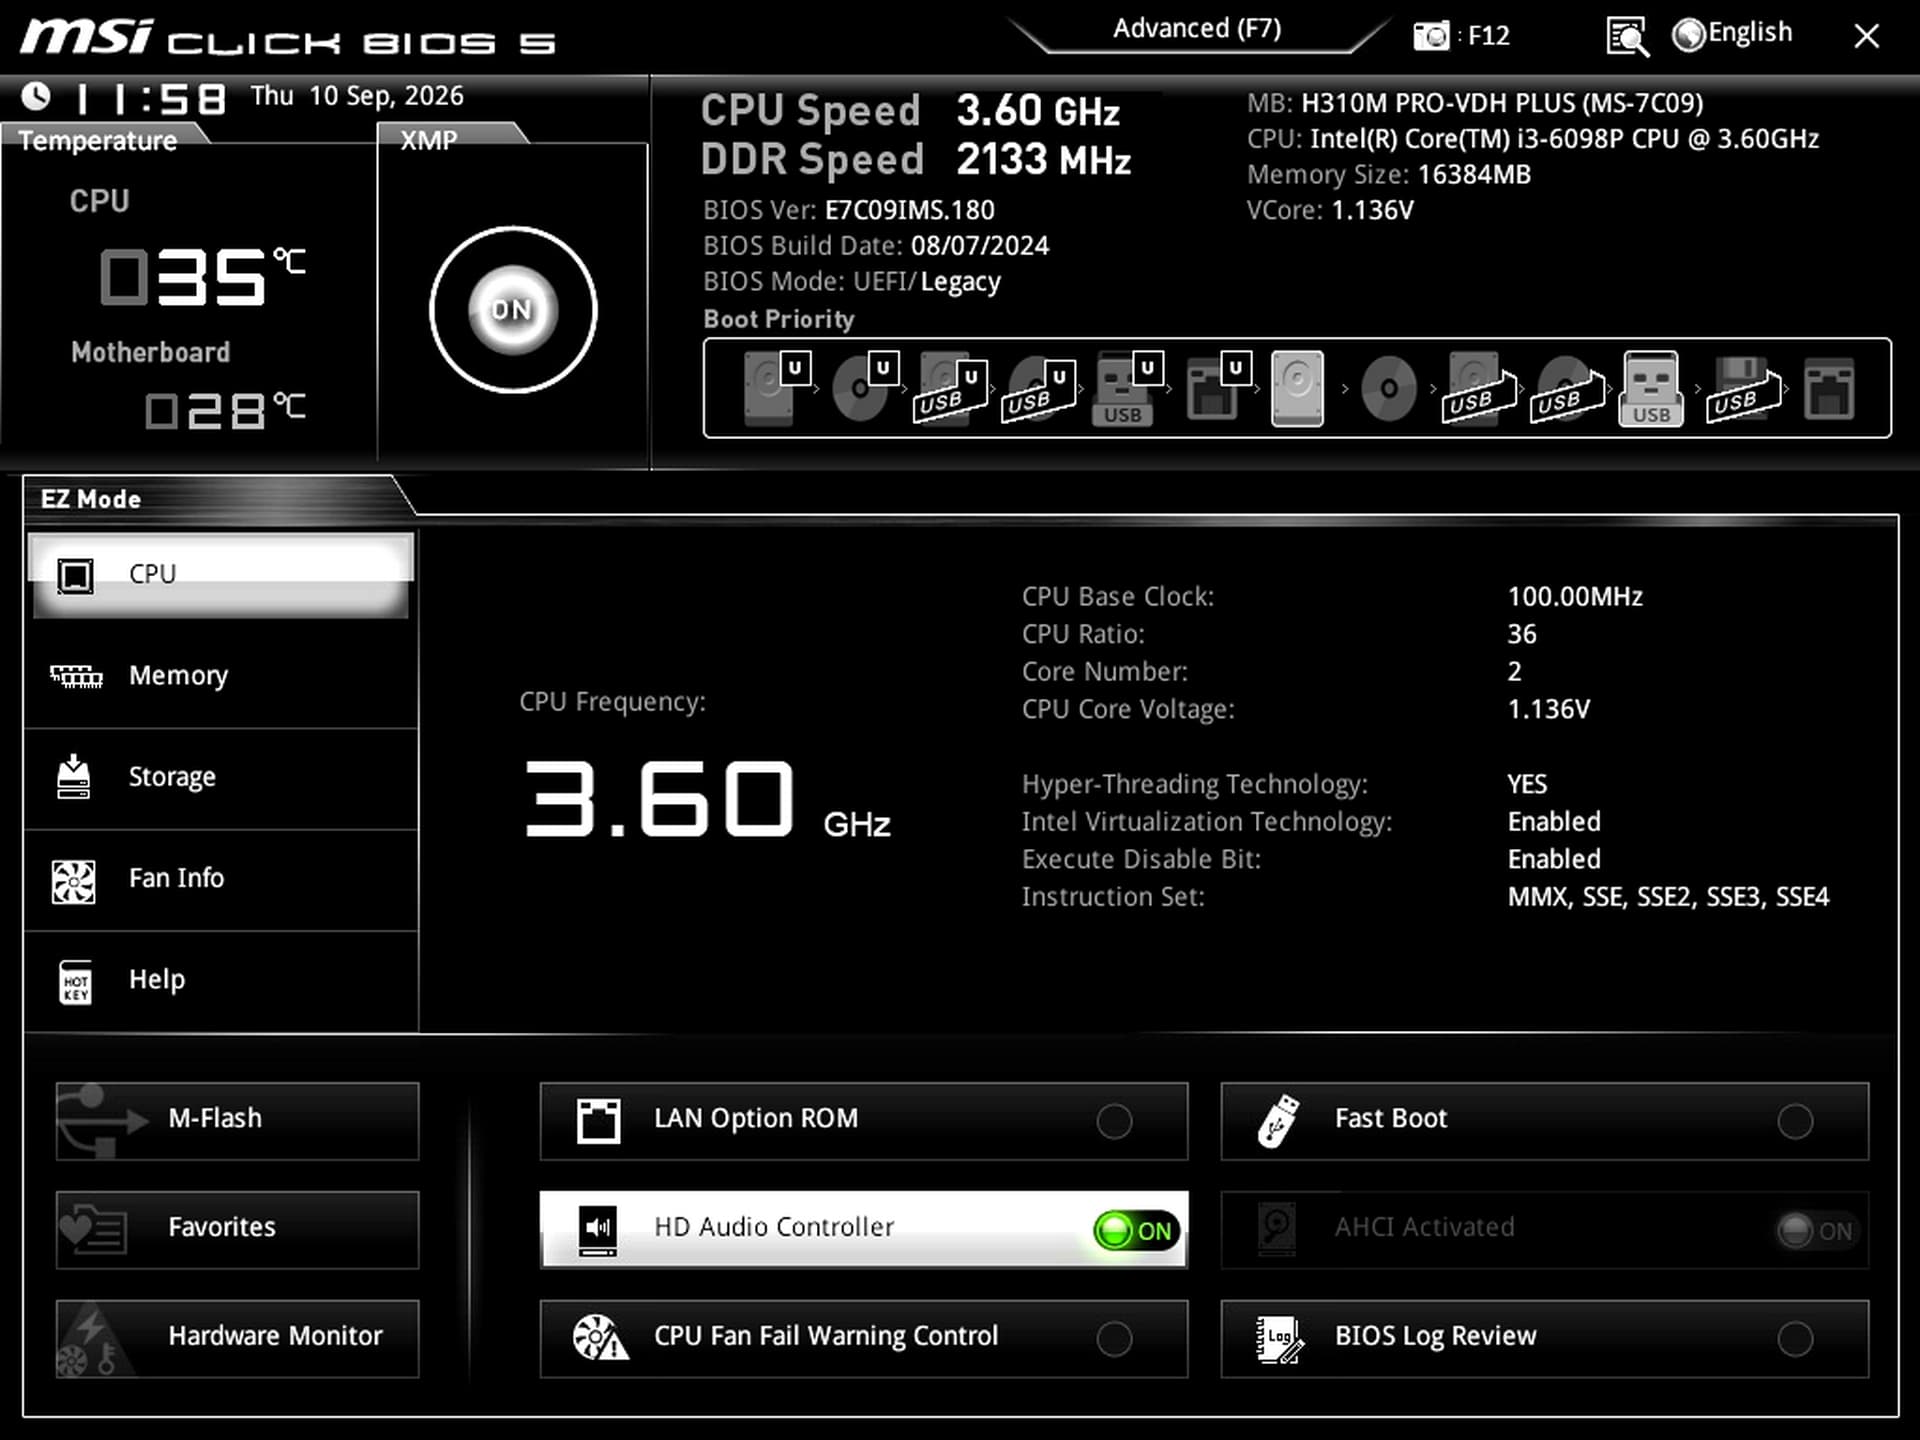
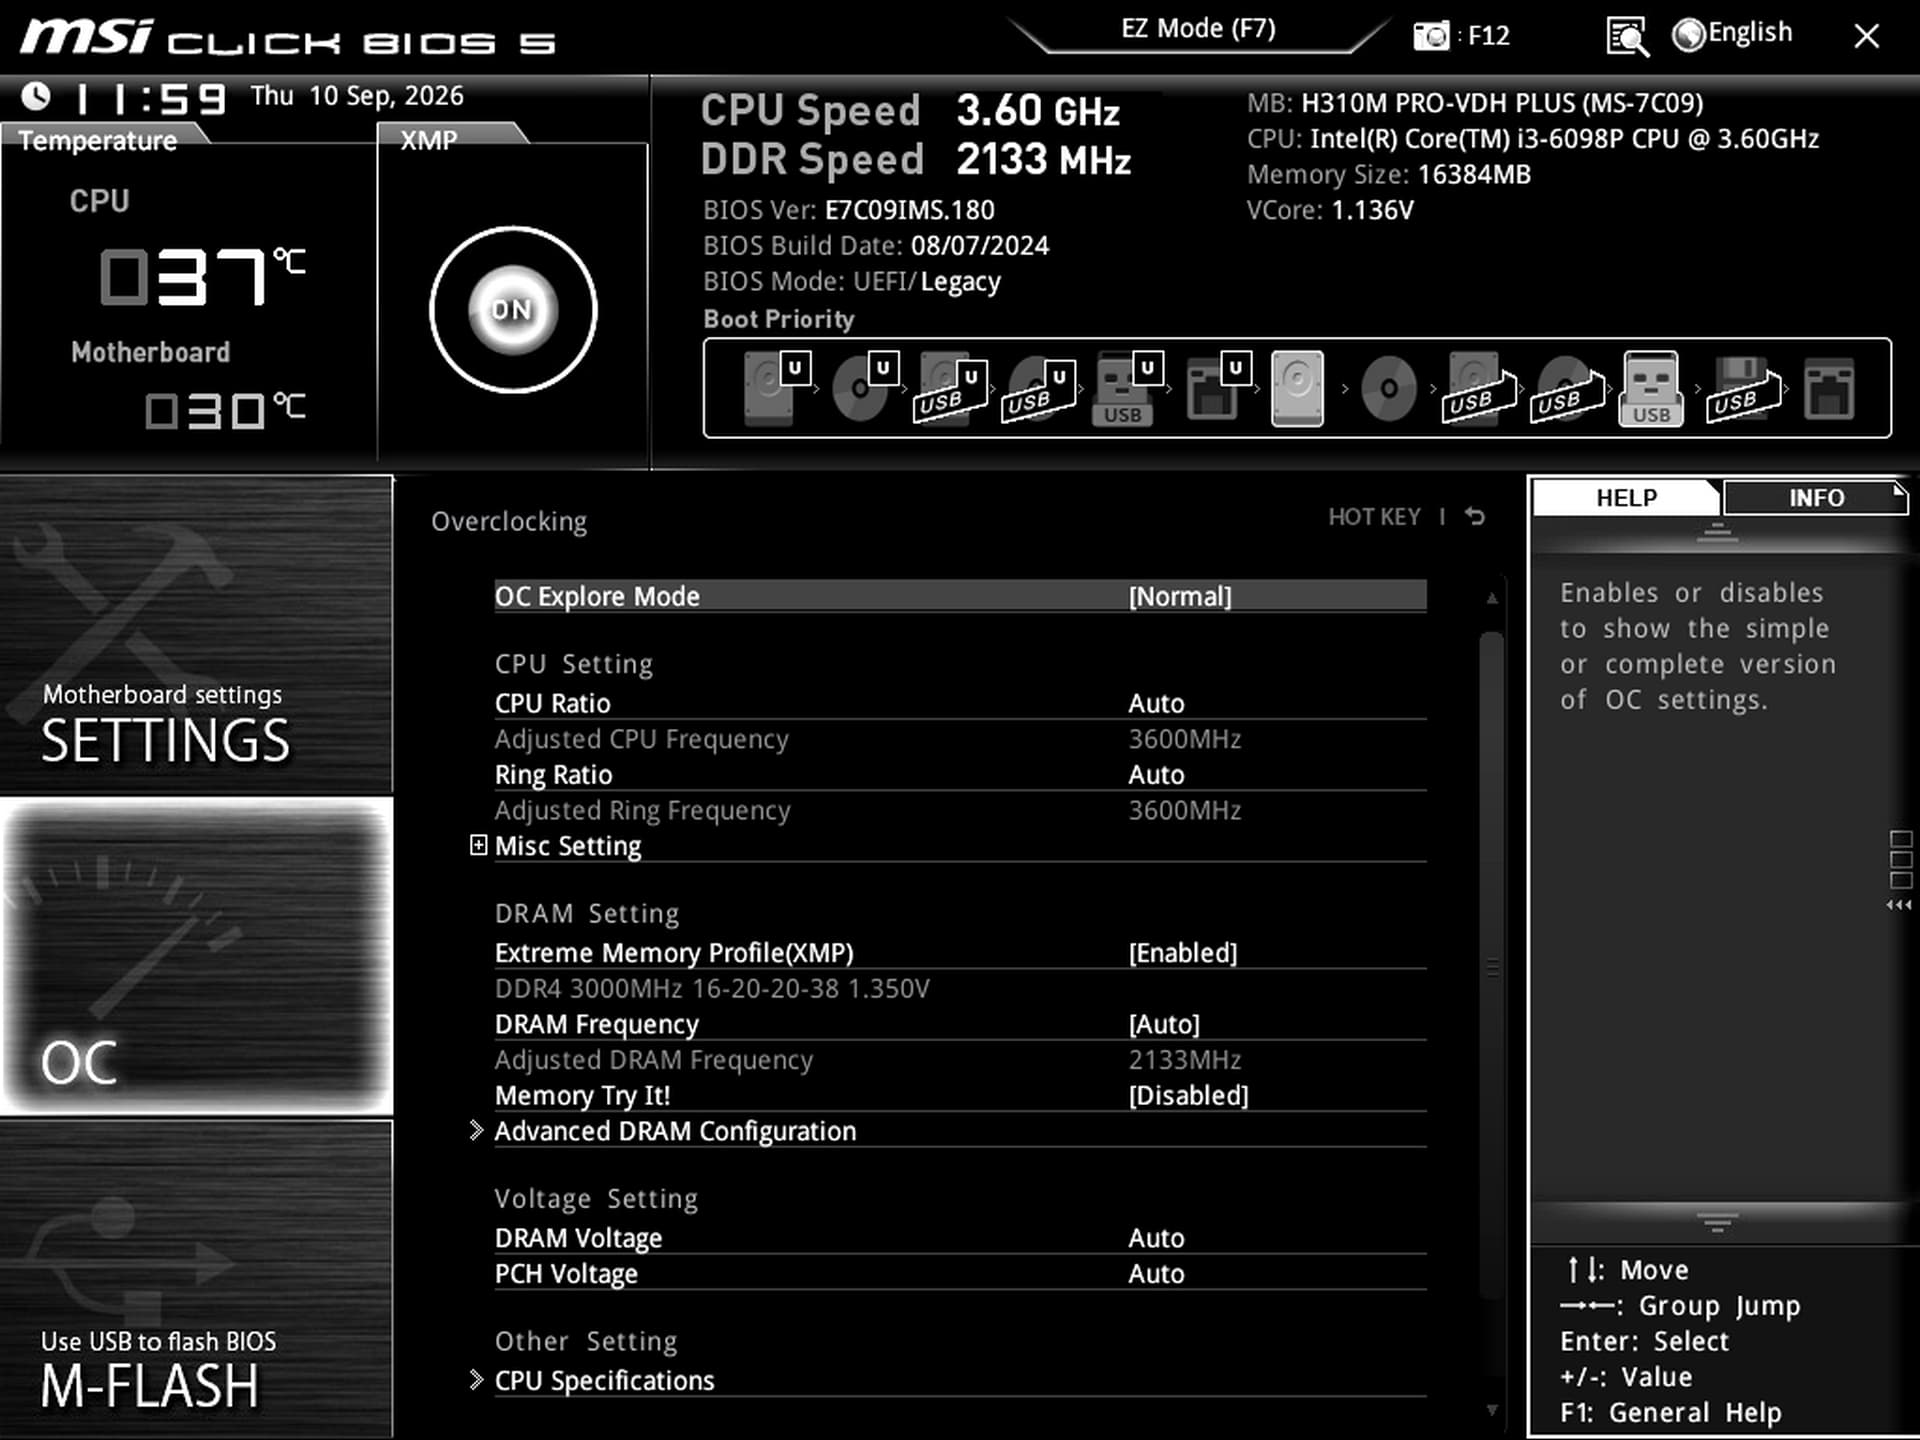
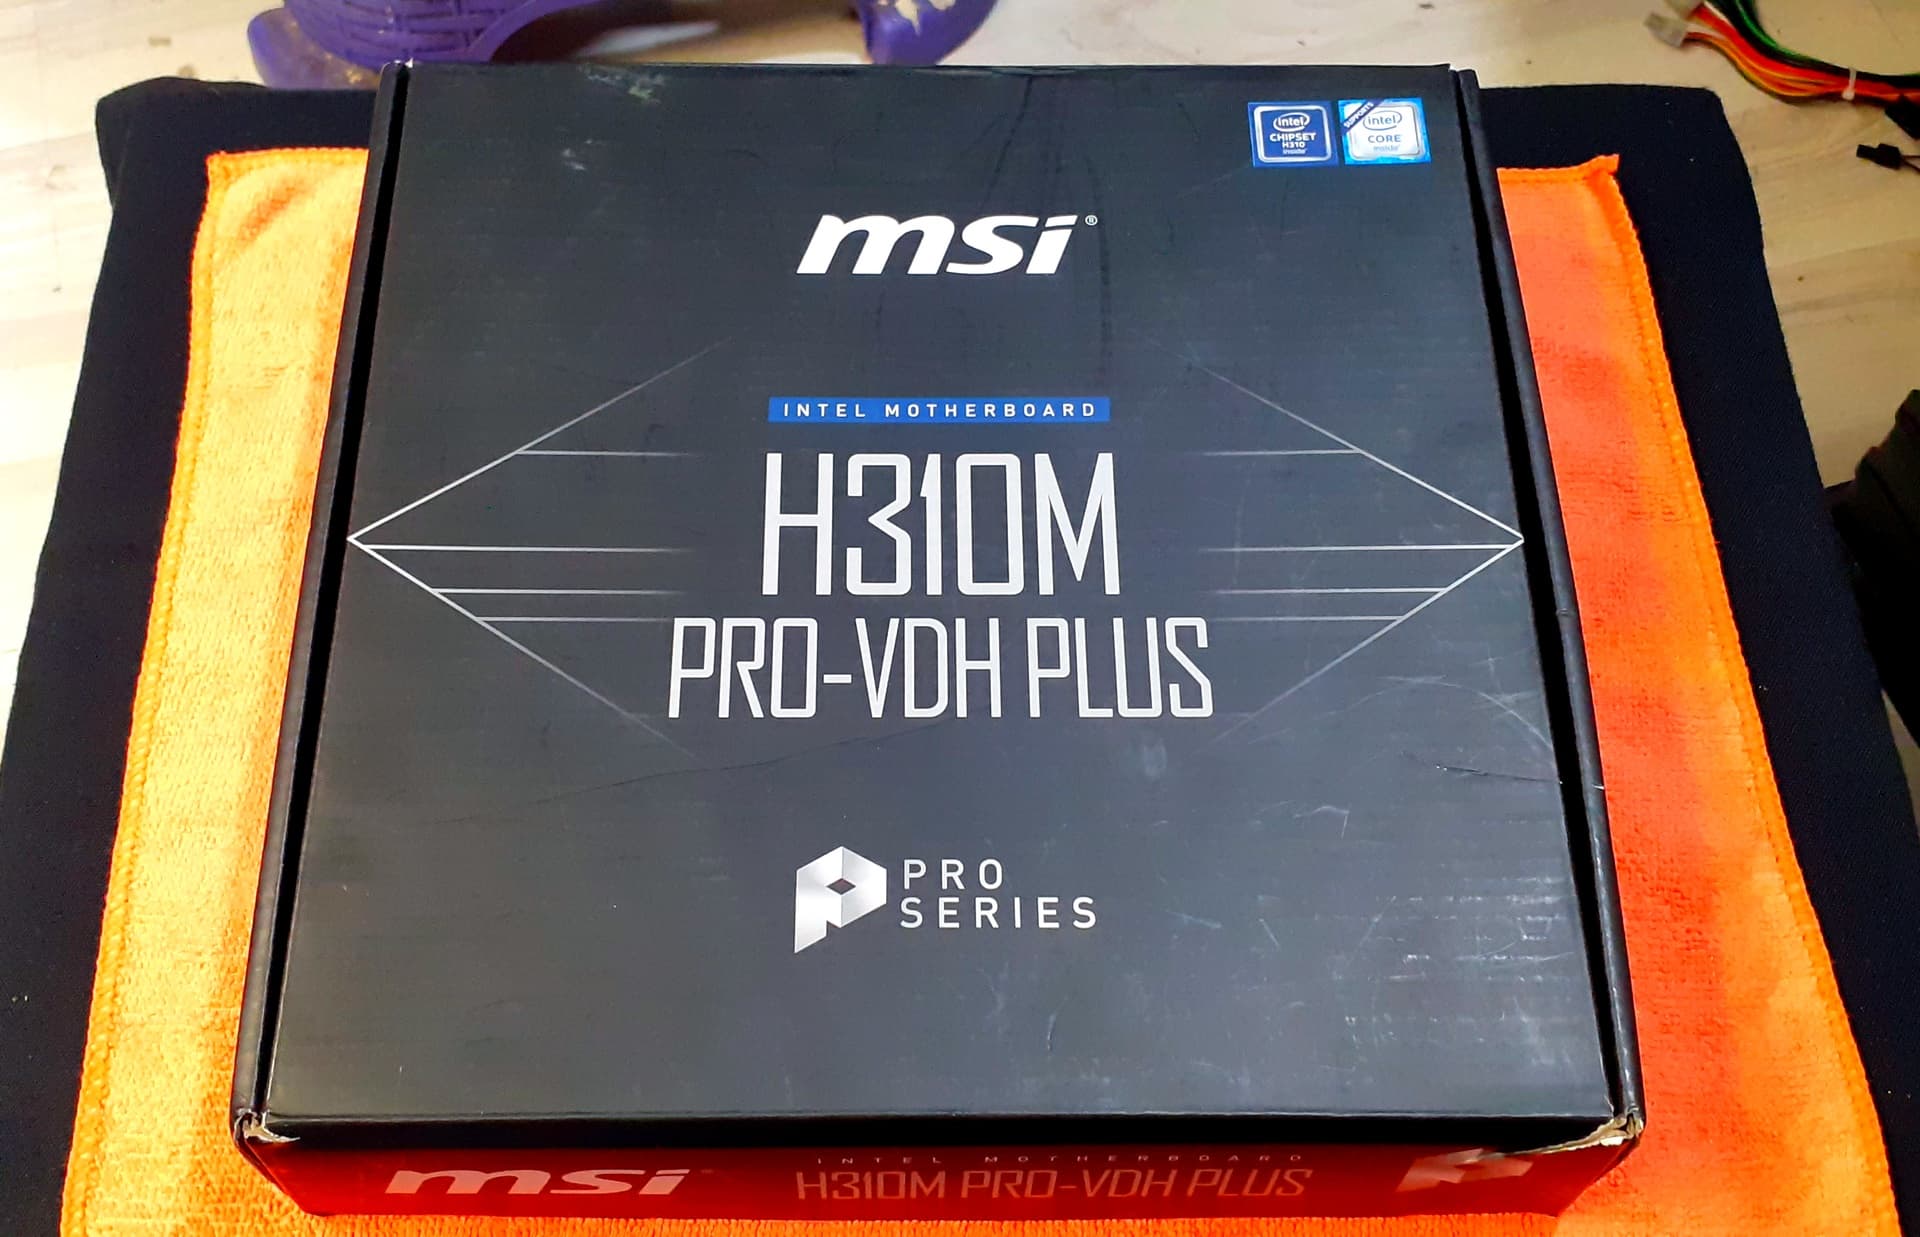
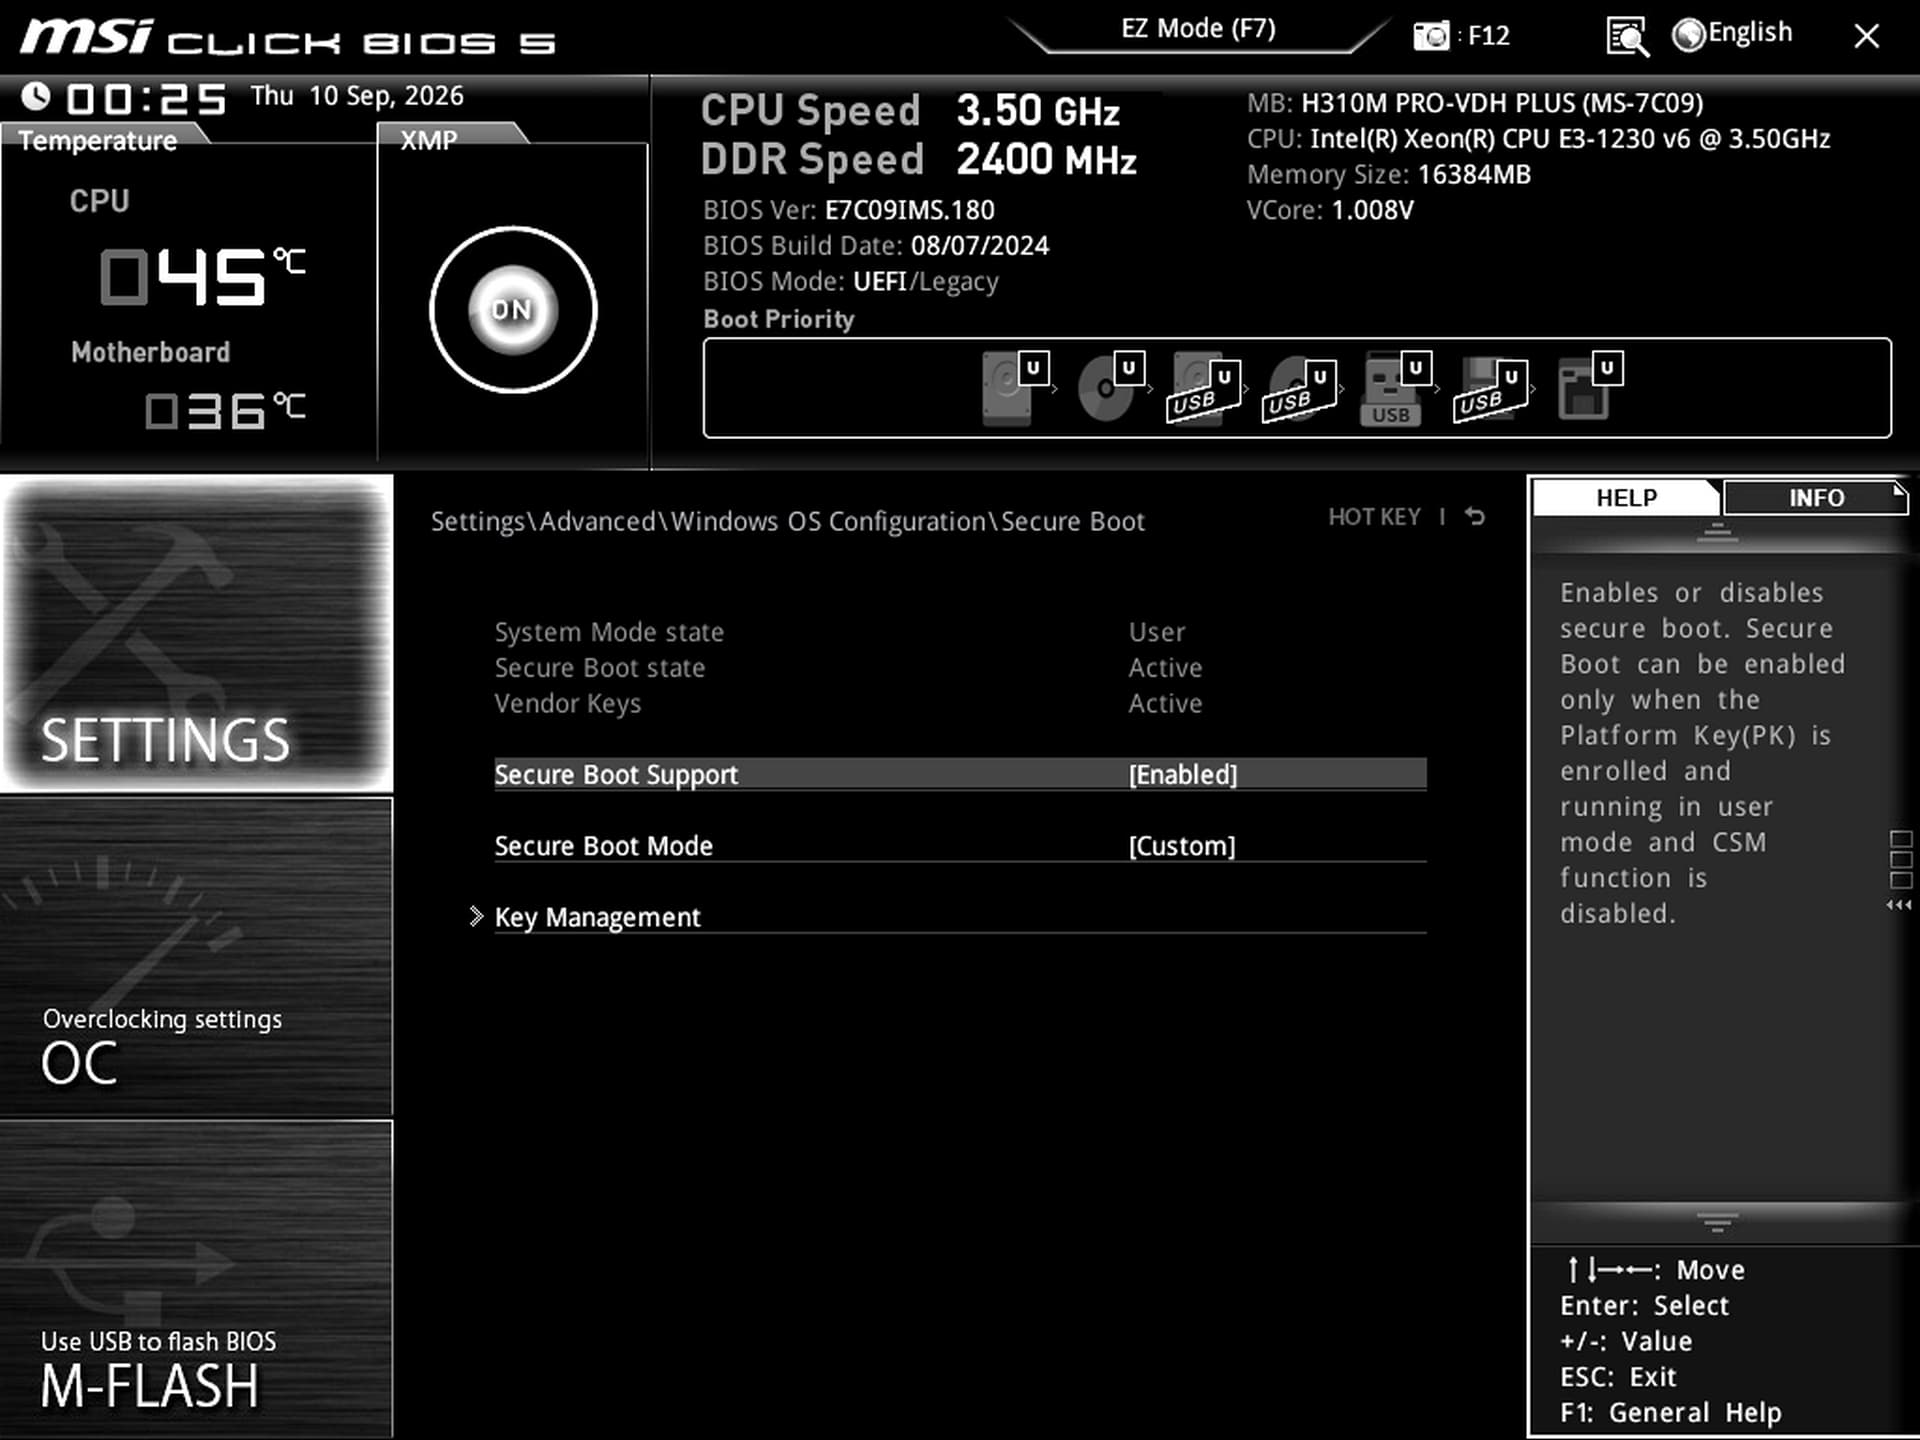
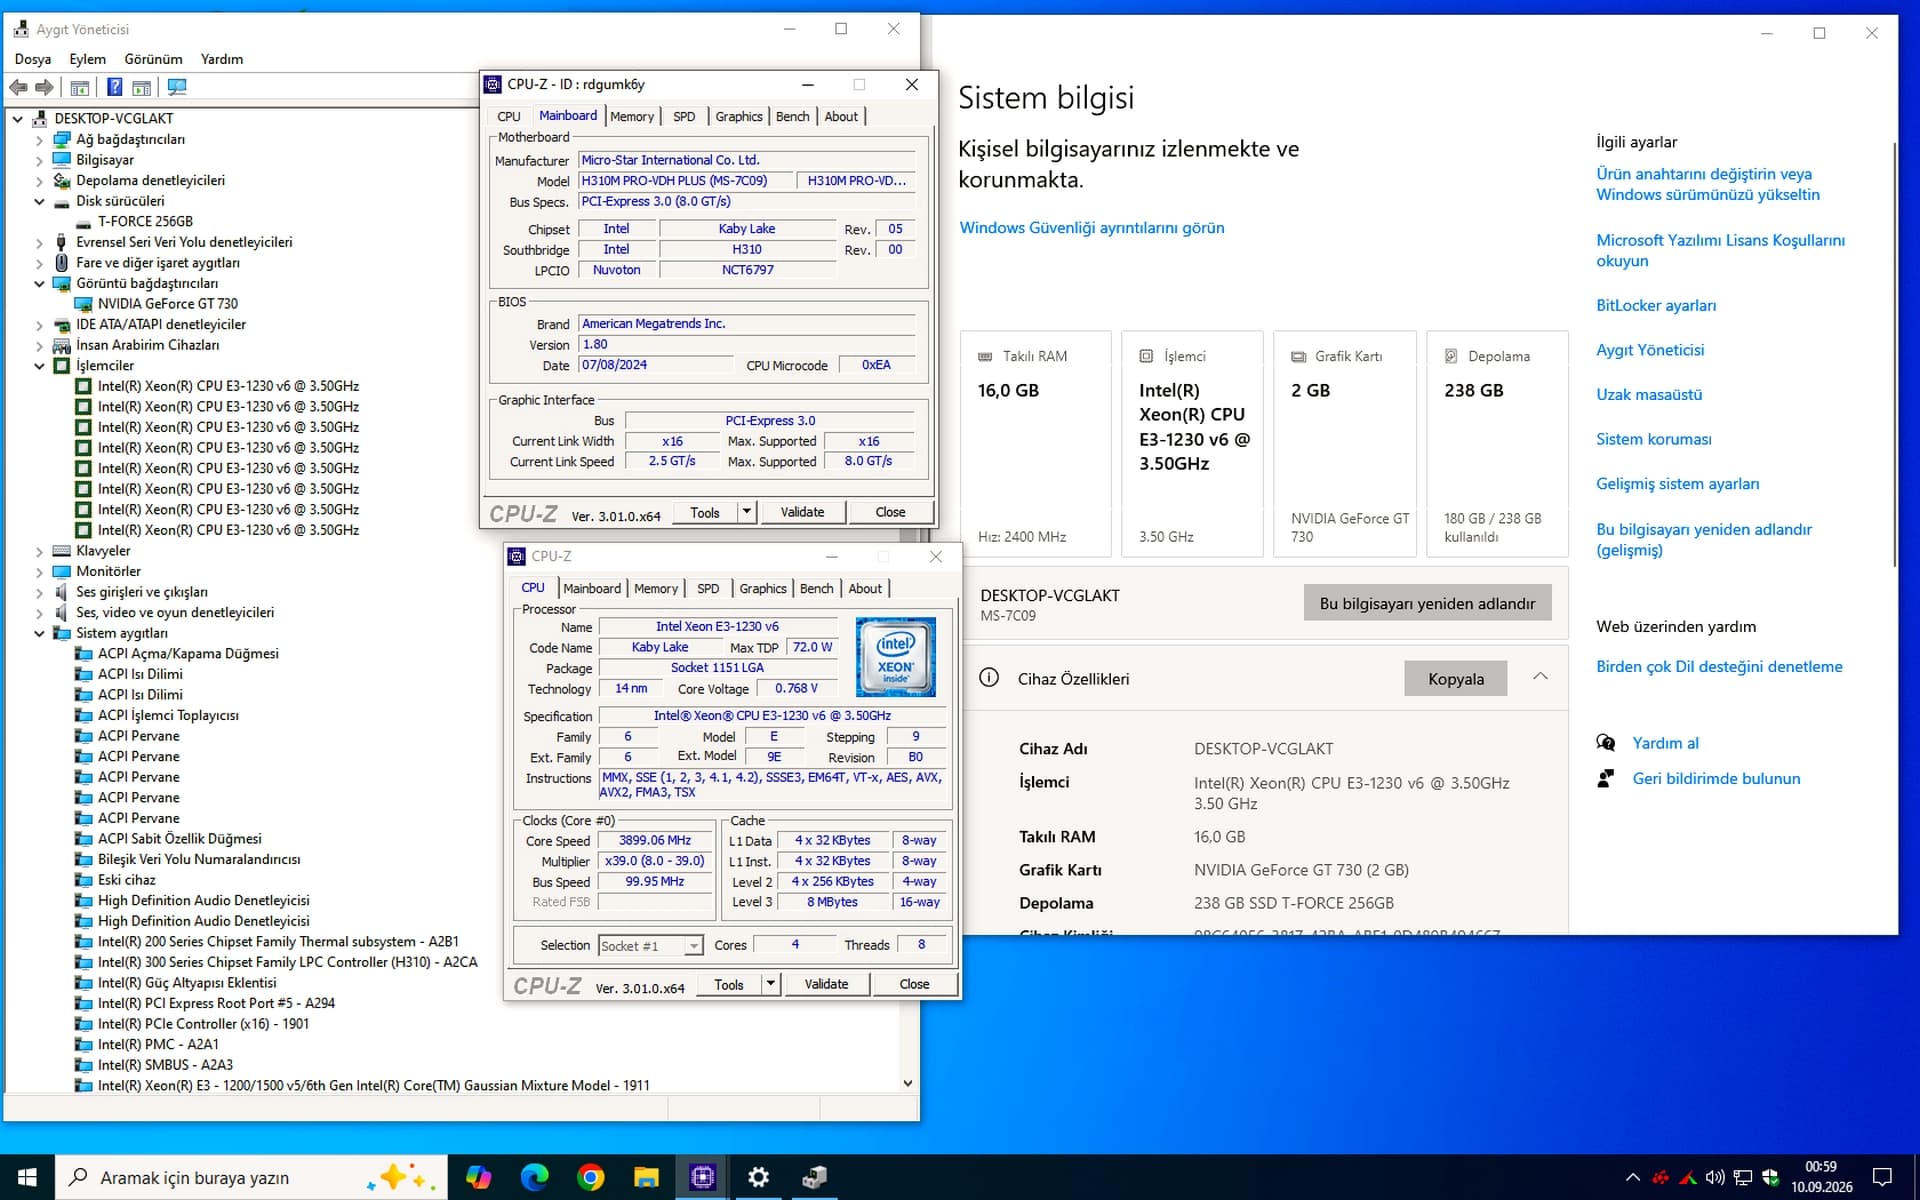
MSI H310M PRO-VDH PLUS XEON BIOS MOD (TEST OK)
Thanks to the Modded BIOS file I have released for this MSI LGA 1151 Socket H310 series motherboard:
Xeon E3-12xx v6 & v5 processors, as well as all 6th, 7th, 8th, and 9th generation processors, will work.
Sample images are provided below.

You can only flash the modified BIOS for the MSI H310M PRO-VDH PLUS from within Windows; simply run the “FLASH.BAT” script located in the folder of files I provided.

Important Note: You cannot flash it using M-Flash via the motherboard BIOS itself; the system will not allow it.


If you wish to revert from the modified BIOS to the original factory setup, run the “FULL_BACKUP.BAT” script from the files I provided and wait for the processes on the black screen to complete.

Immediately afterwards, you will have obtained the motherboard’s original BIOS file, named “FULL_BACKUP.BIN,” in the same directory. This is also a complete DUMP file for the motherboard.

This full DUMP BIOS file contains your motherboard’s specific Serial Number, MAC Address, and UUID information.
Keep this file safe.

As mentioned earlier, if you want to revert from the modified BIOS to the original BIOS and factory settings, rename the “FULL_BACKUP.BIN” full-dump file to match the official BIOS filename for your motherboard.
For example:
Rename “FULL_BACKUP.BIN” to “E7C09IMS.180” and run the “FLASH.BAT” script located in the same directory. Wait for the processes on the black screen to finish.
This will restore your motherboard to its original BIOS and factory settings.

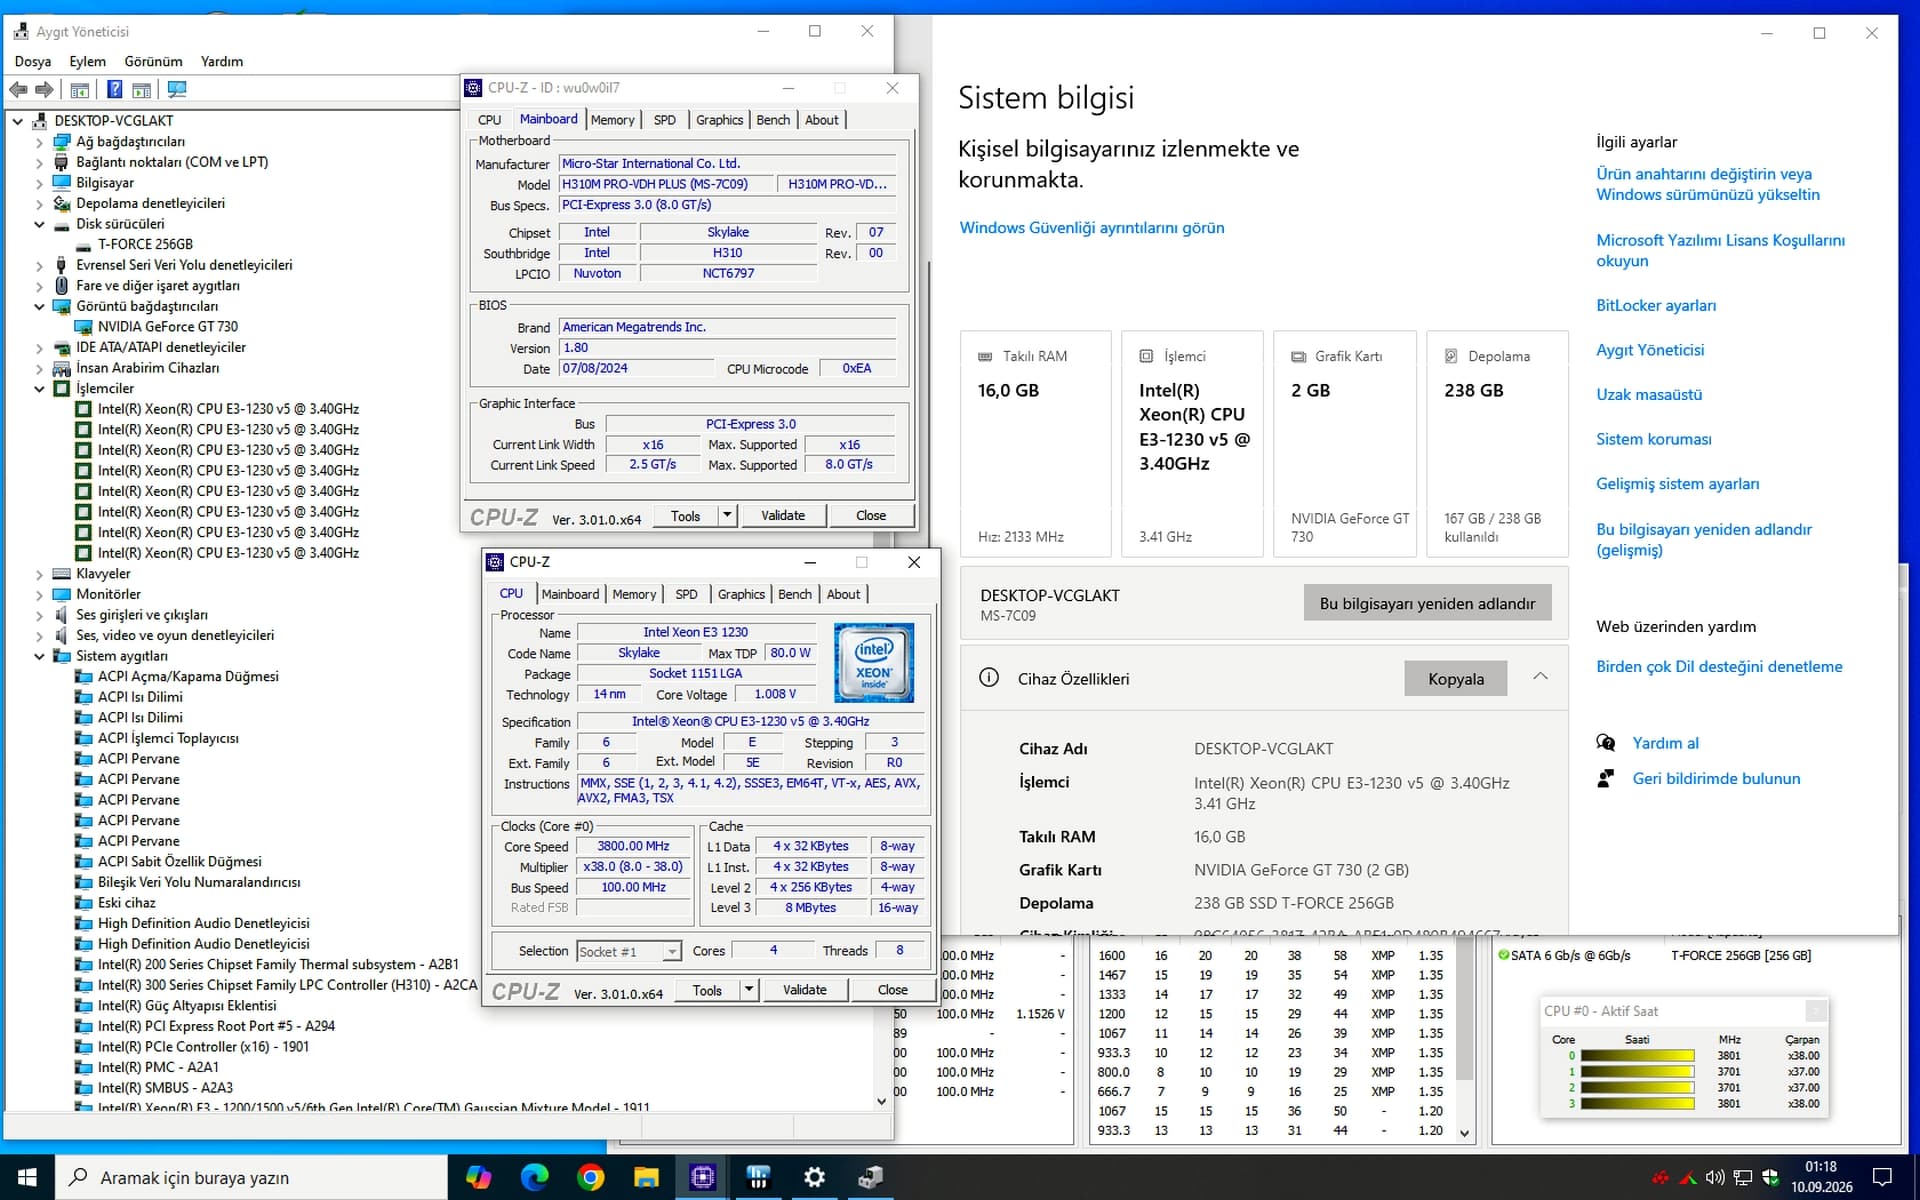
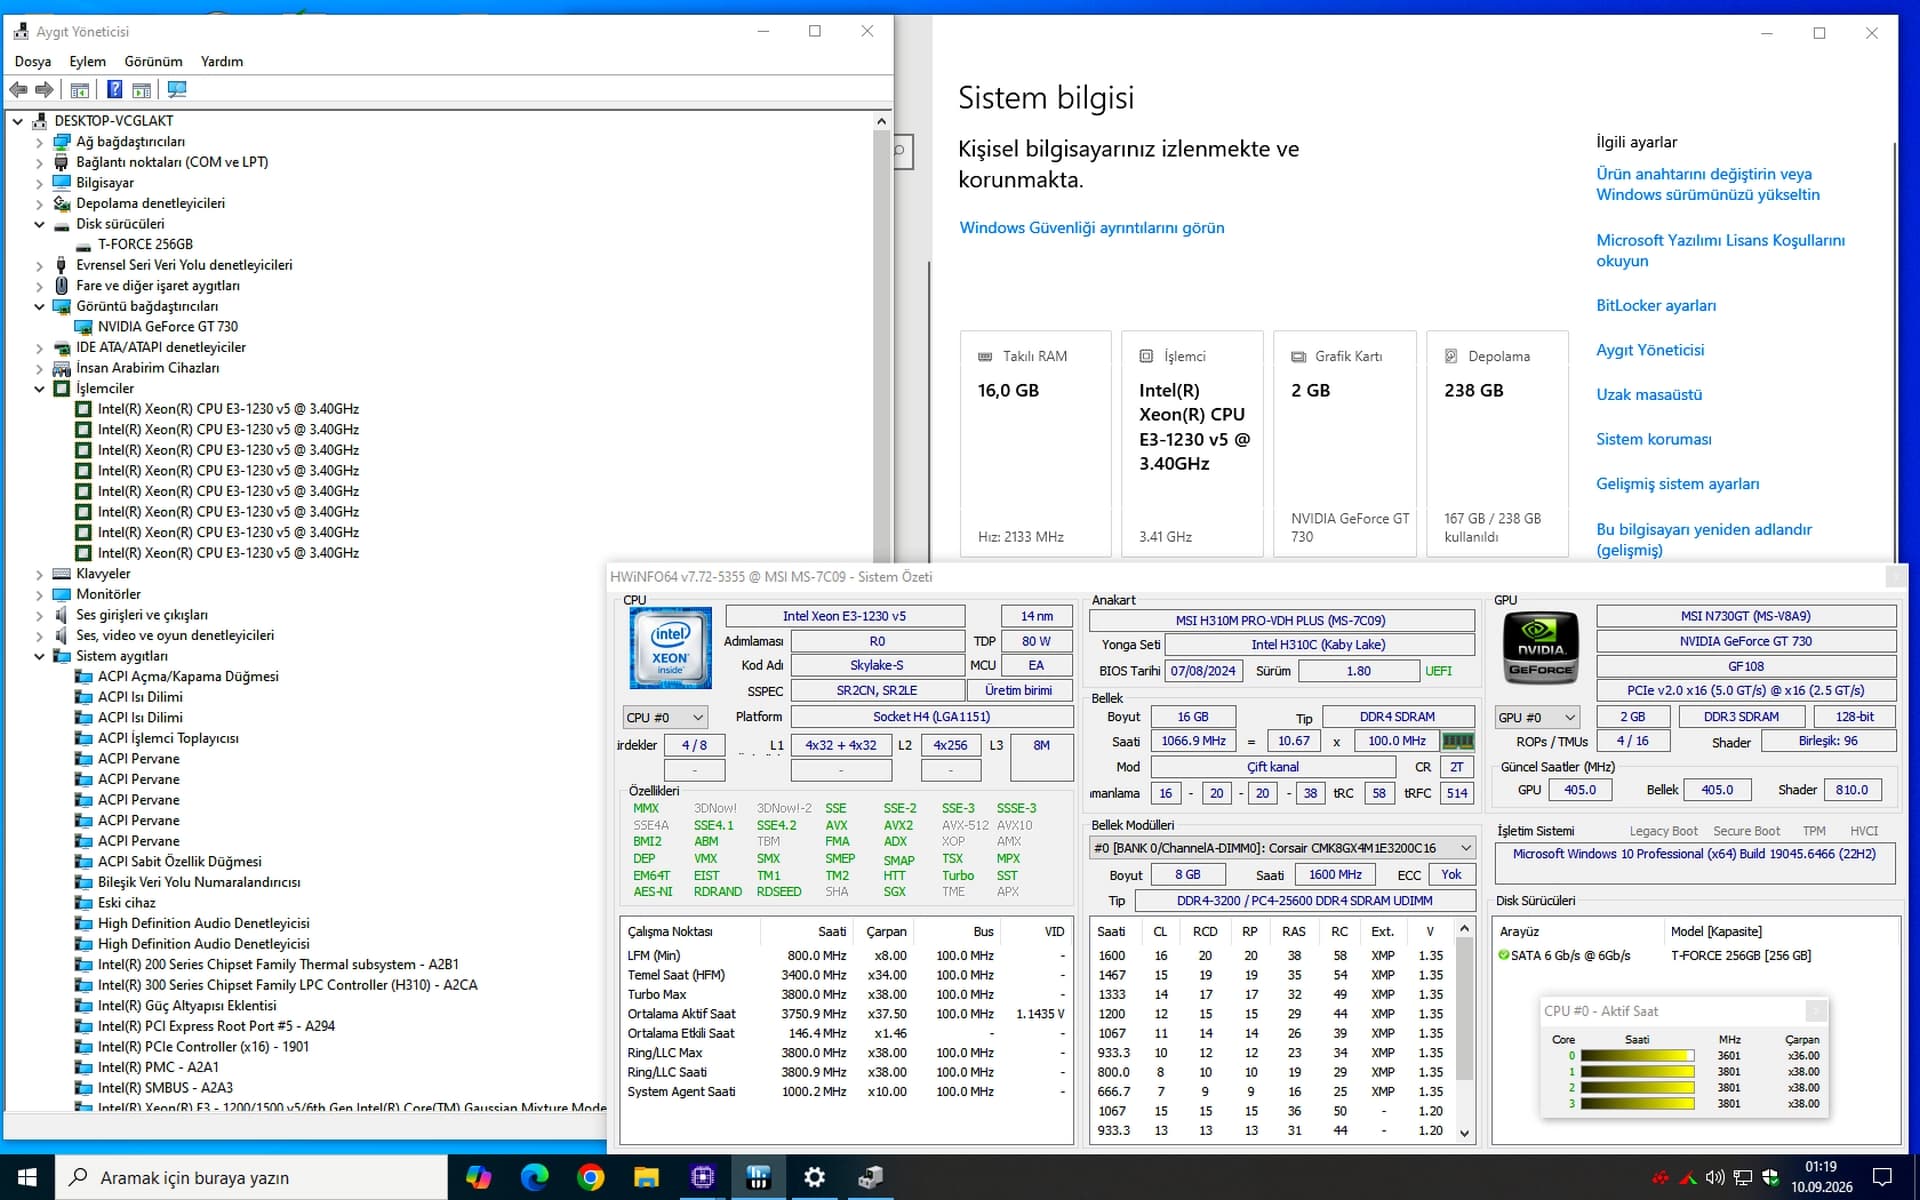
MSI H310M PRO-VDH PLUS Xeon v6 BIOS MOD Other Details
Xeon E3-1230 v6, 3700 MHz
CPU-Z Data Information:


Geekbench Browser:
MSI H310M PRO-VDH PLUS XEON BIOS MOD/Xeon E3-1230 v6, 3700 MHz


MSI H310M PRO-VDH PLUS Xeon v5 BIOS MOD Other Details
Xeon E3-1230 v5, 3600 MHz
CPU-Z Data Information:


Geekbench Browser:
MSI H310M PRO-VDH PLUS BIOS MOD/Xeon E3-1230 v5, 3600 MHz


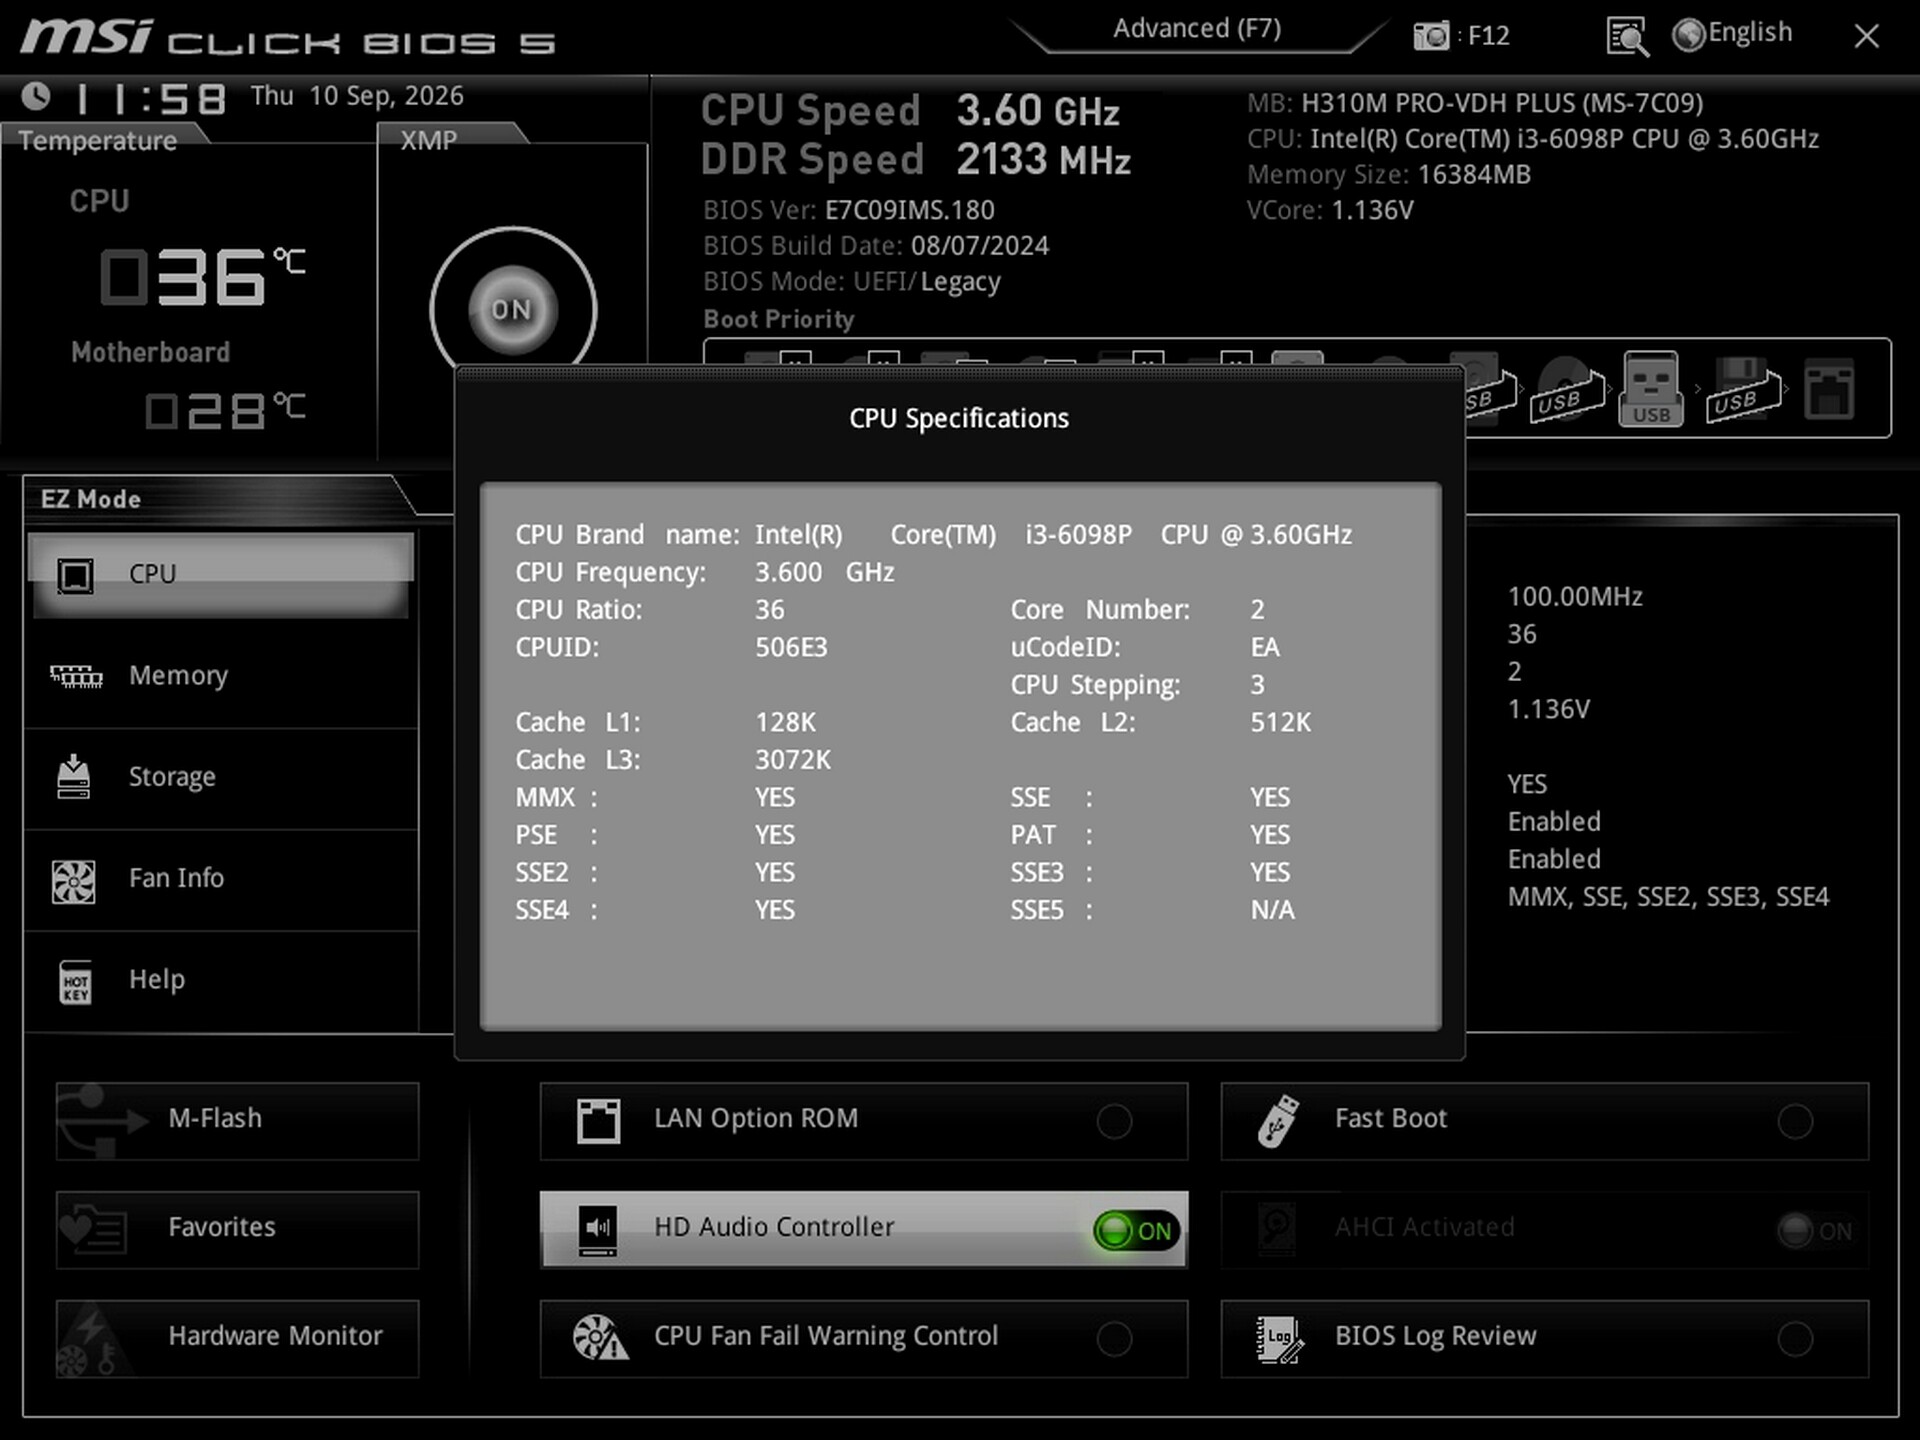
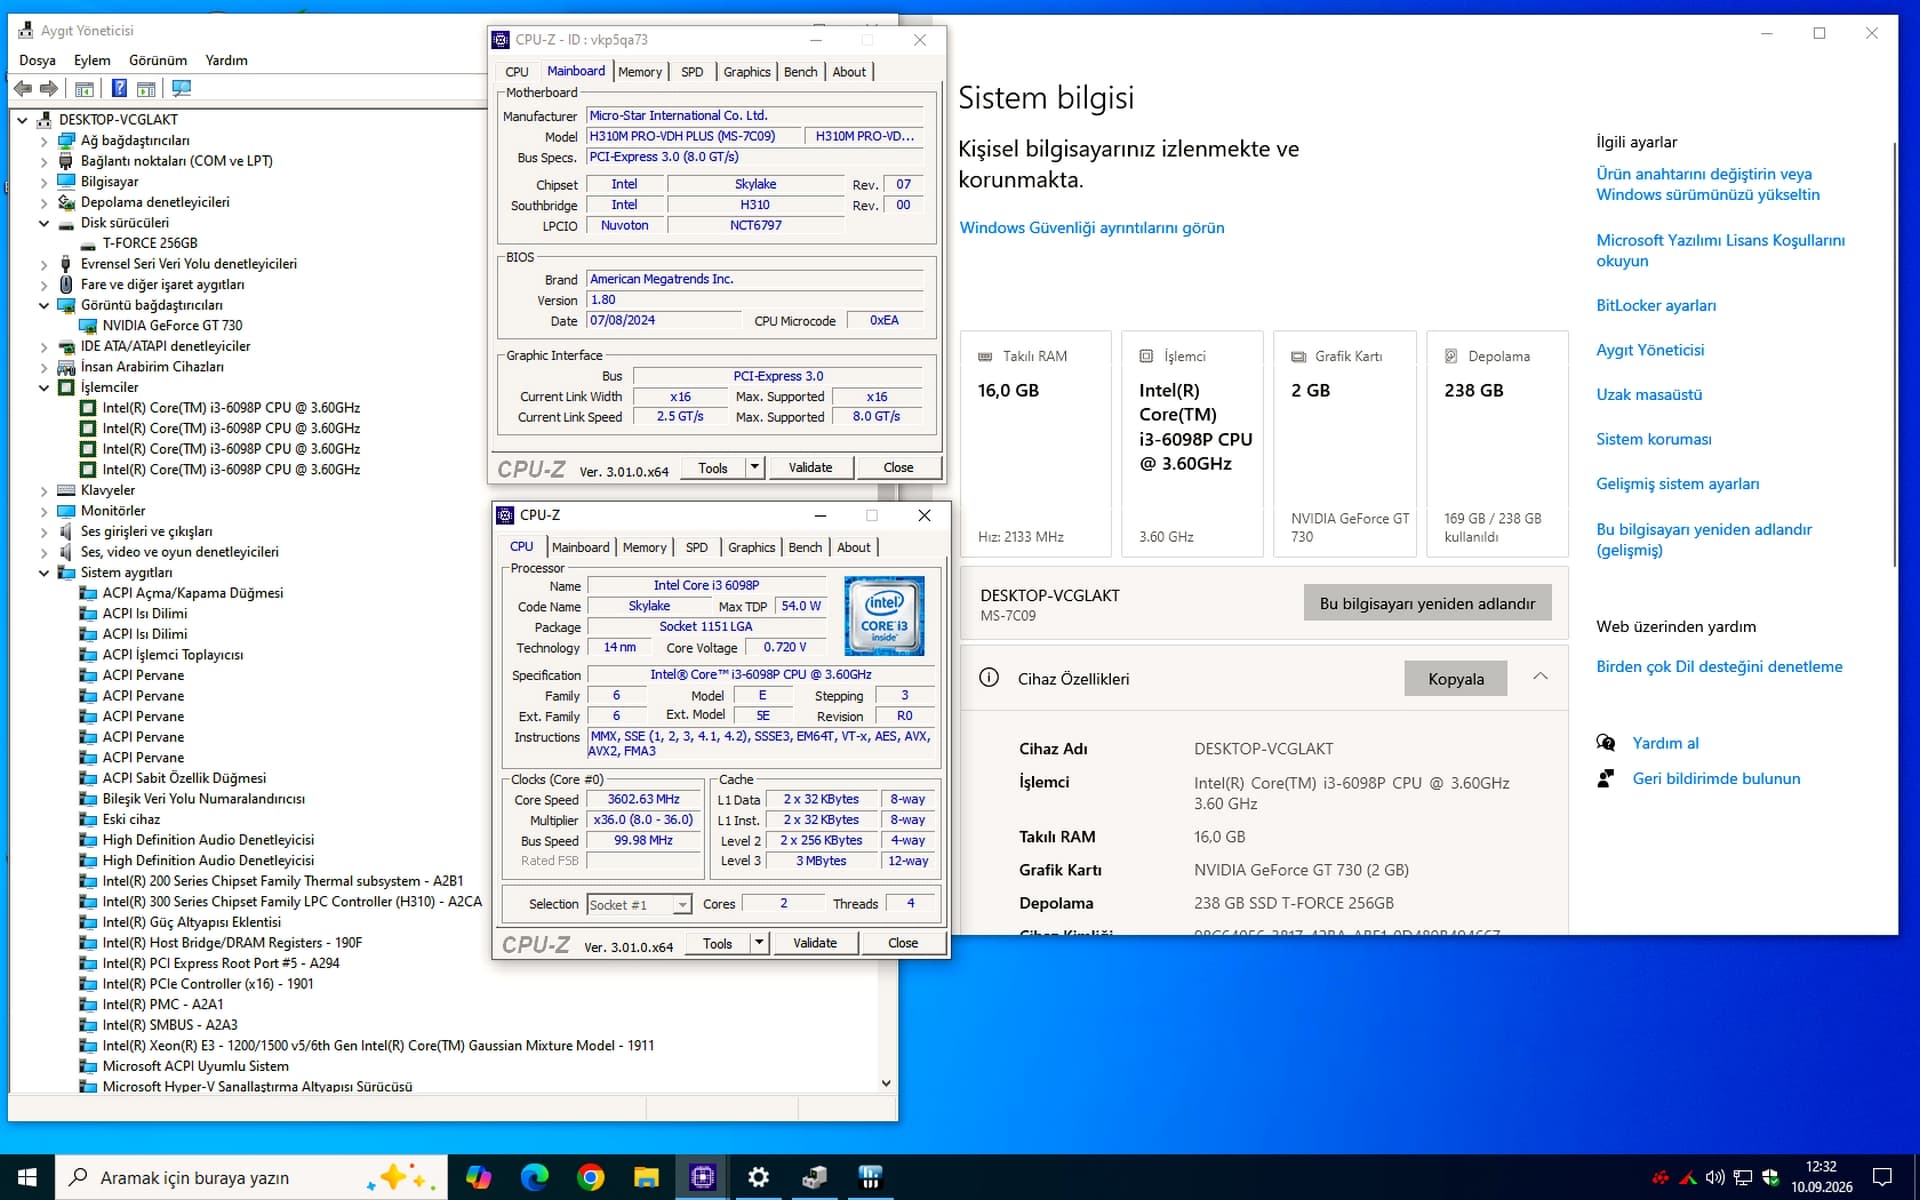
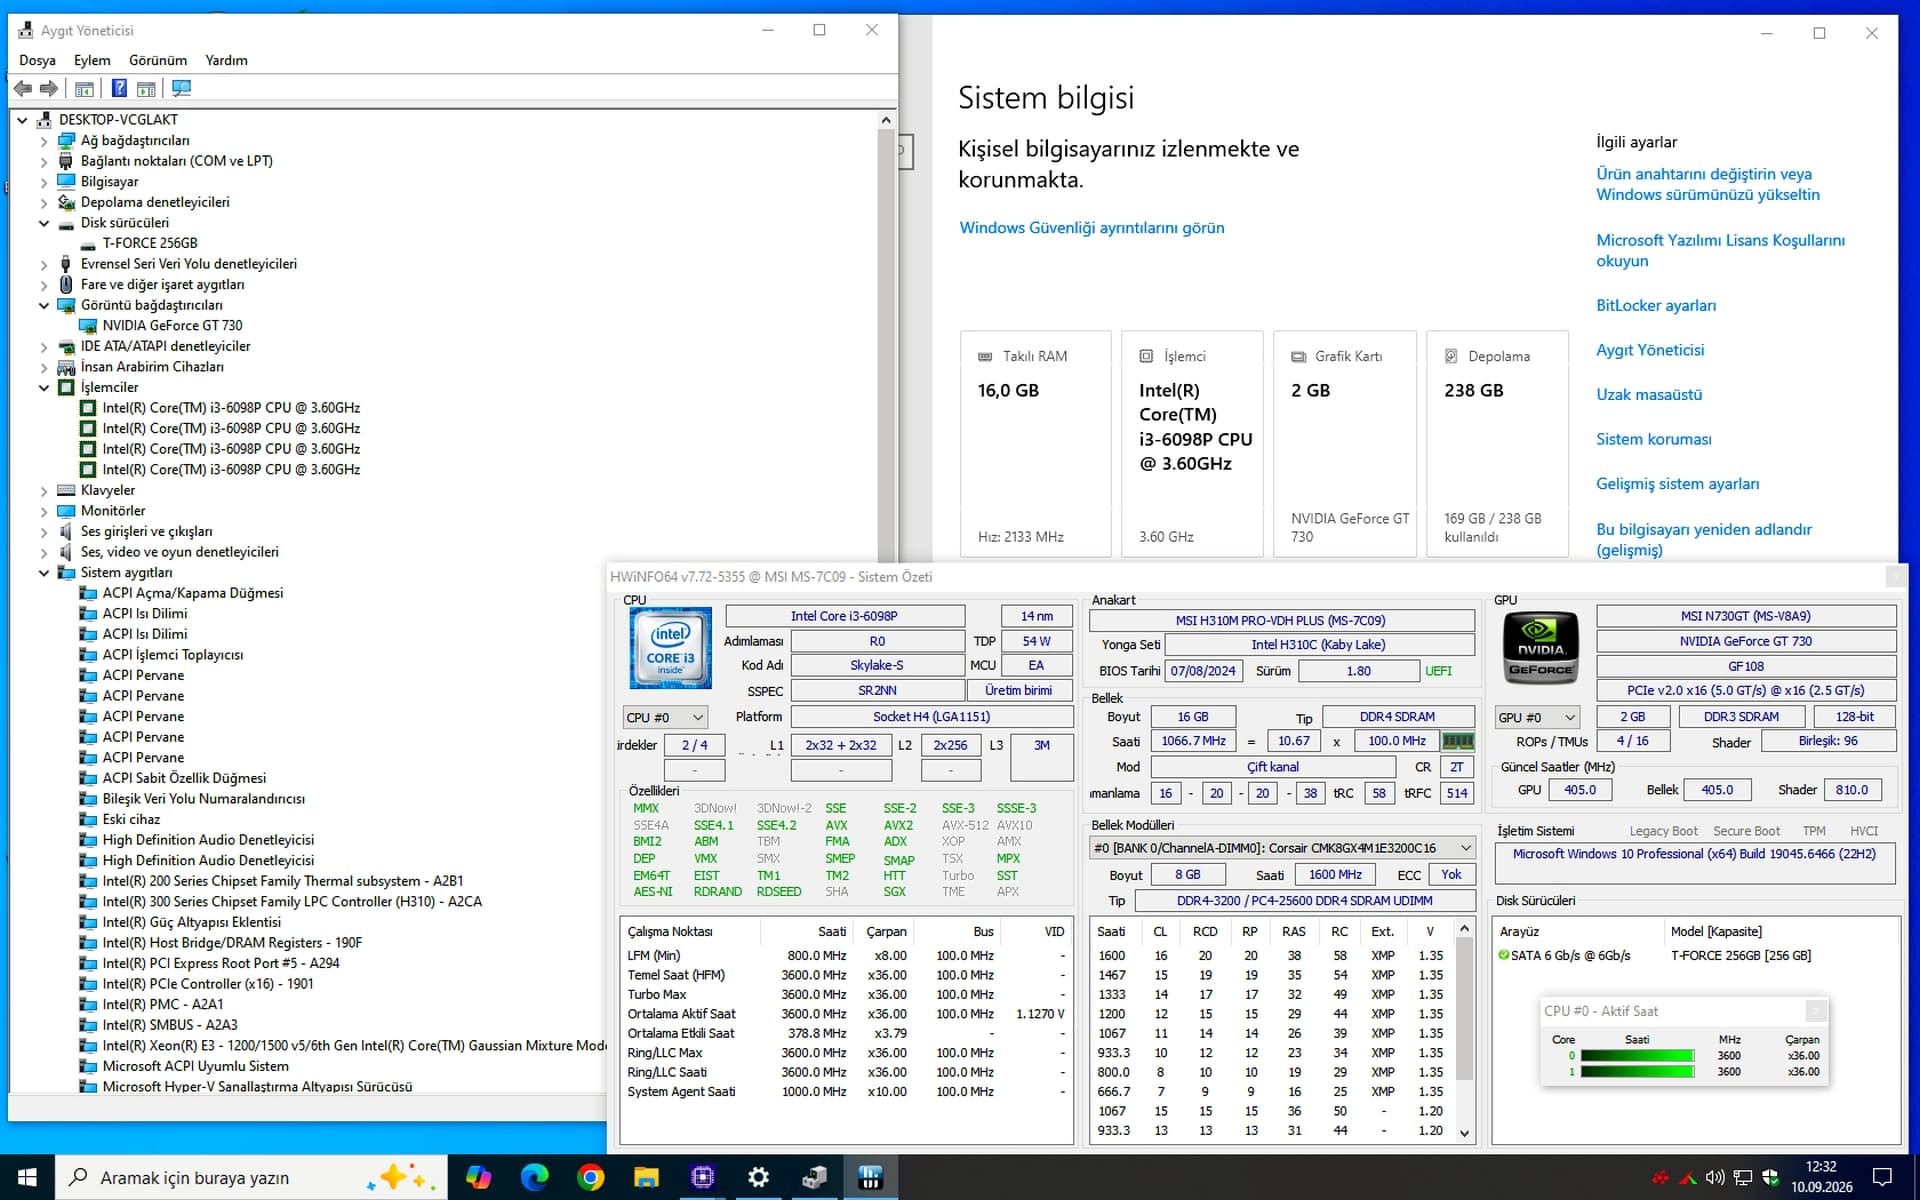
MSI H310M PRO-VDH PLUS Intel® Core™ i3-6098P CPU @ 3.60GHz BIOS MOD Other Details
CPU-Z Data Information:
Intel® Core™ i3-6098P CPU @ 3.60GHz


Geekbench Browser:
MSI H310M PRO-VDH PLUS XEON BIOS MOD/Intel® Core™ i3-6098P CPU @ 3.60GHz/
(6th generation processor)


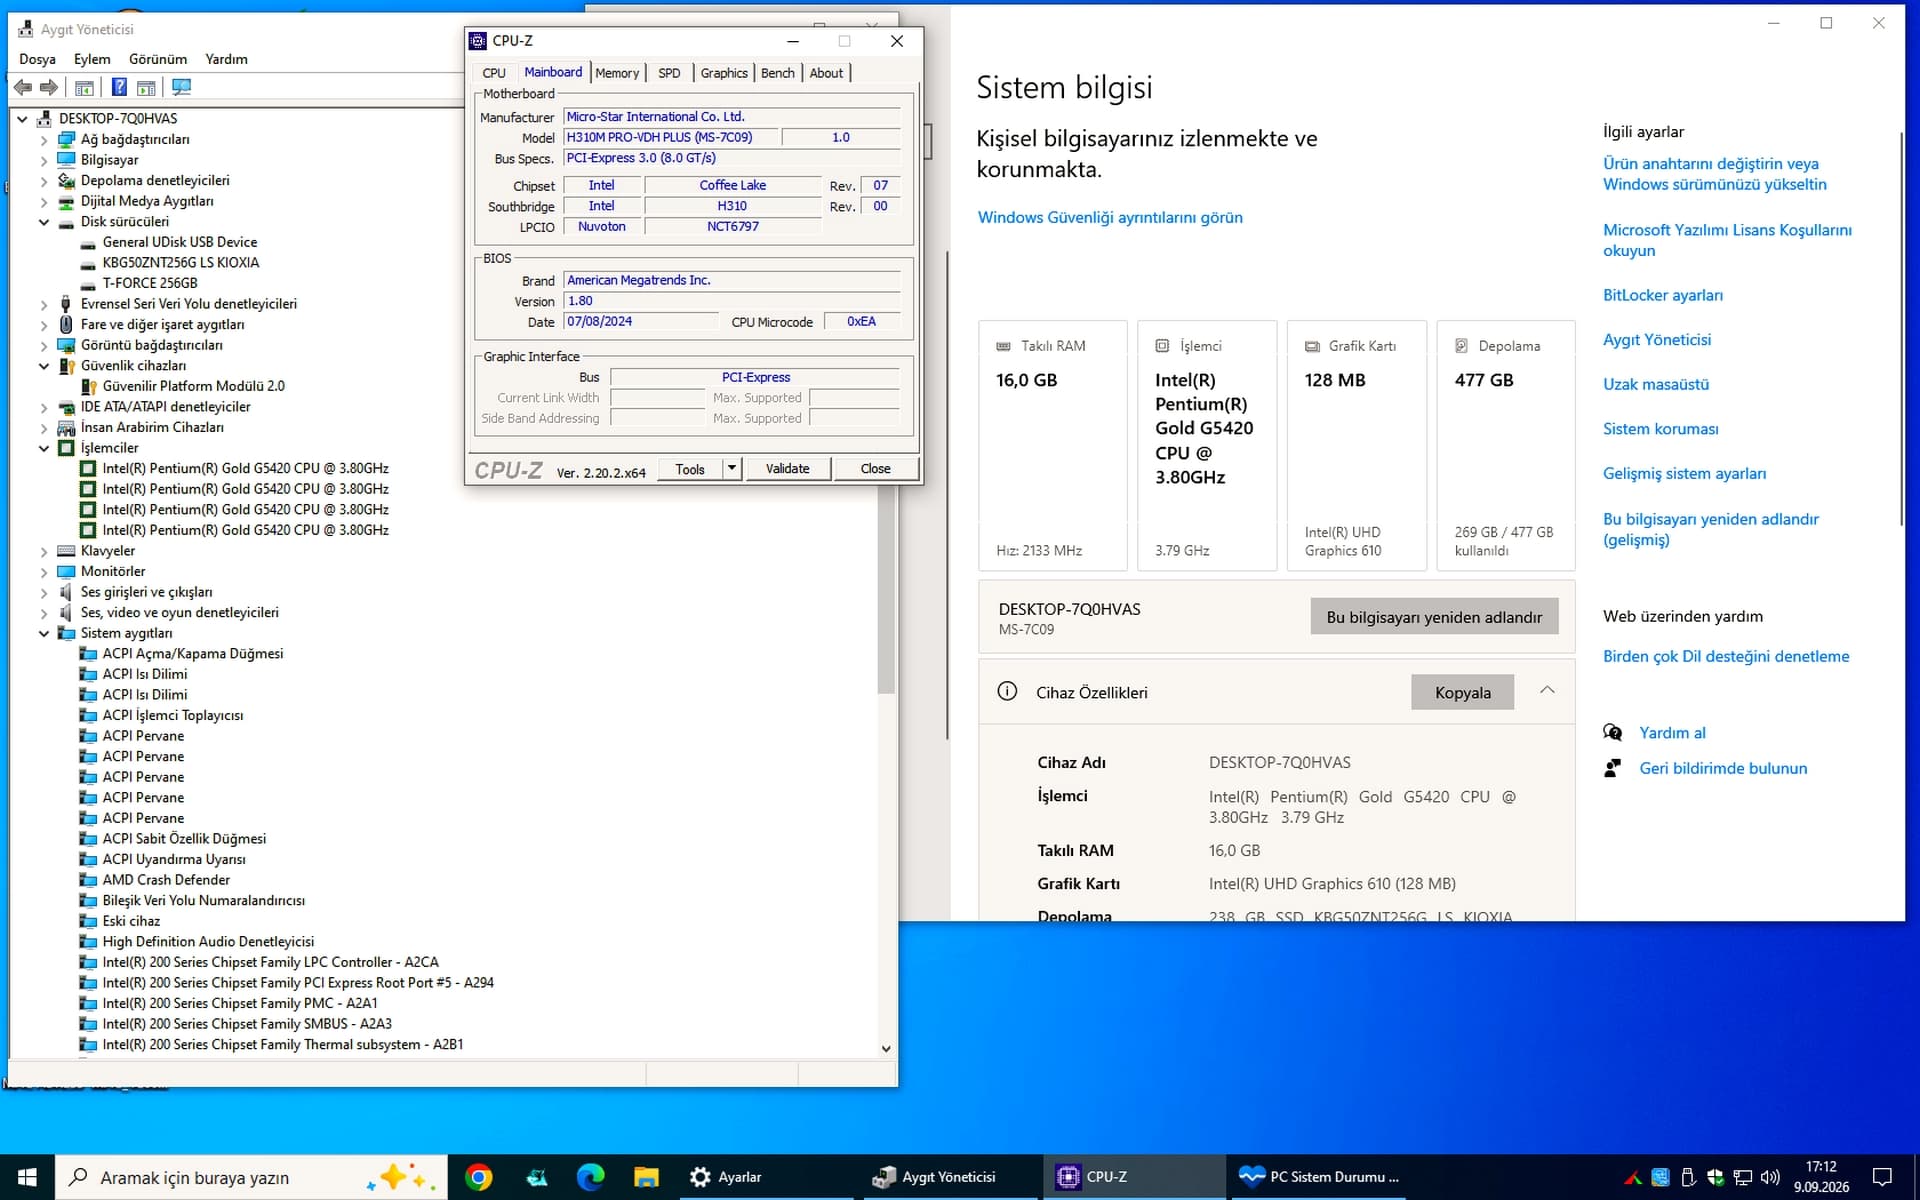
MSI H310M PRO-VDH PLUS Intel(R) Pentium(R) Gold G5420 CPU @ 3.80GHz BIOS MOD Other Details
CPU-Z Data Information:

Intel(R) Pentium(R) Gold G5420 CPU @ 3.80GHz
Once the modified BIOS is installed, the motherboard will continue to operate normally with other officially supported processors.
In short, the modified BIOS has no impact on—and causes no issues with—other processors supported by the motherboard.

MSI B150 Series:
MSI B150 GAMING M3 XEON BIOS MOD
MSI B150 PC MATE XEON BIOS MOD
MSI B150M MORTAR XEON BIOS MOD

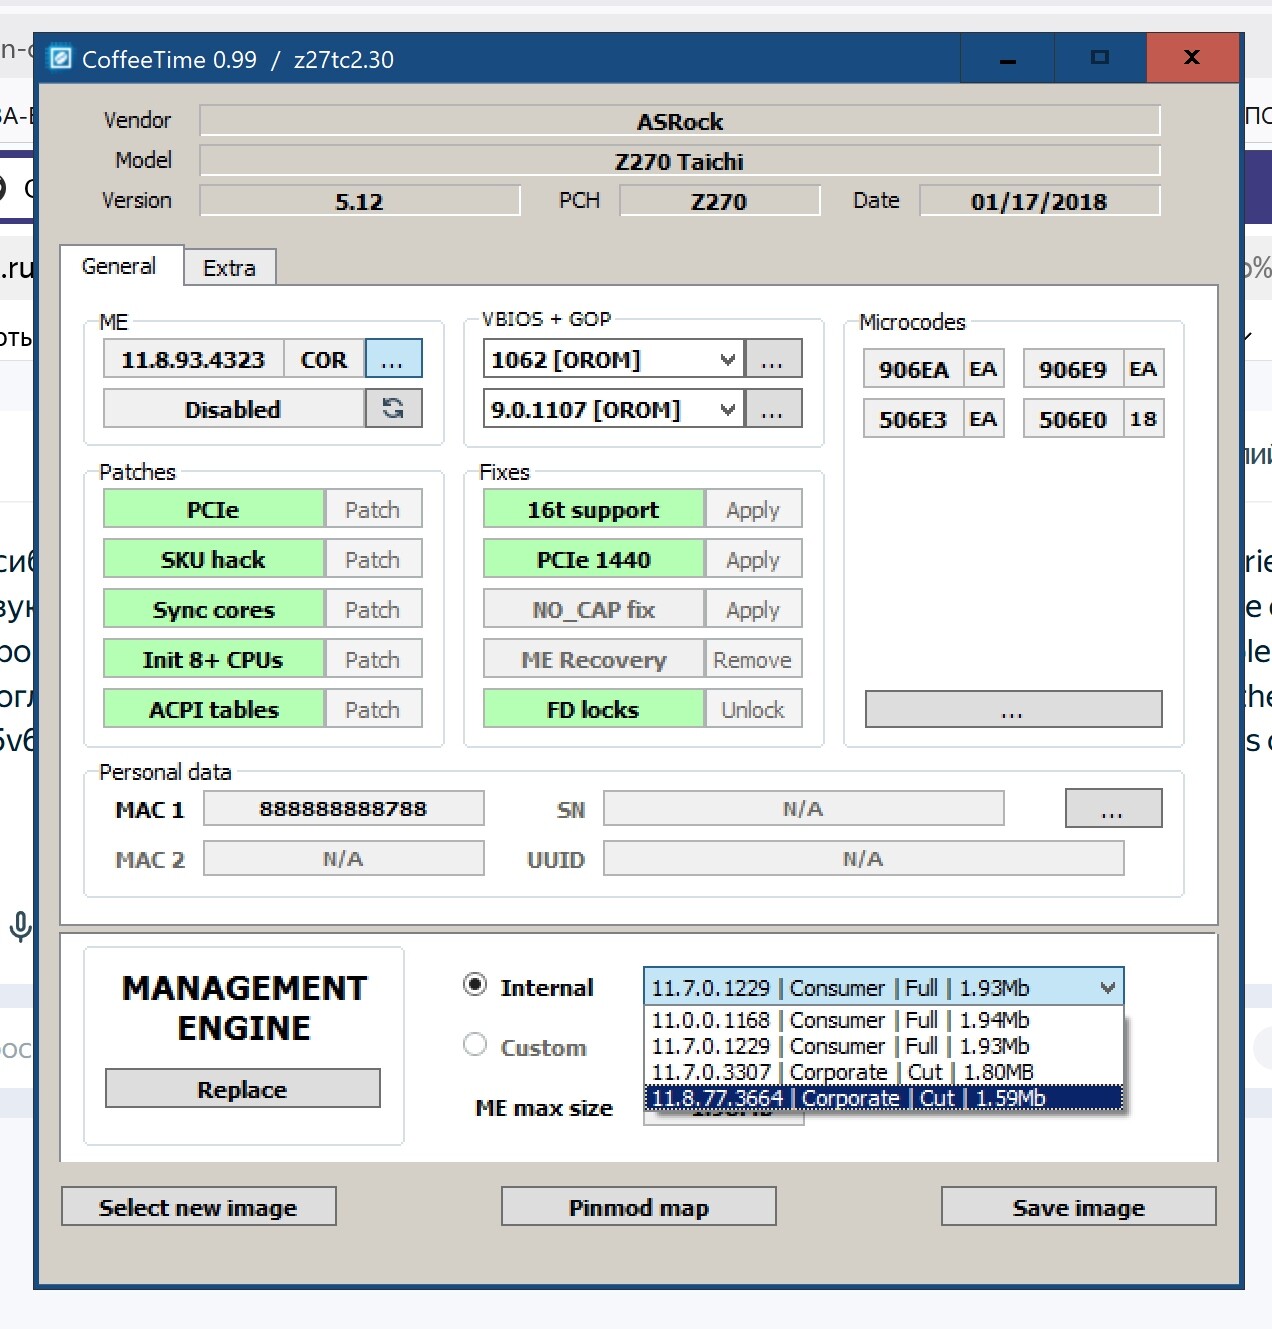
Hello, esteemed sir! Please help me understand the situation. I am currently working on the ASRock Z270 Taichi and its modified BIOS for use with the Xeon E3‑1245v.6. I have experience working with the CoffeeTime_0.99 program, and I successfully used it on Asus Z270 and H110 motherboards with the Ch341A_Ver_134 programmer. But! With the ASRock Z270 Taichi motherboard, it’s a complete failure. After flashing both BIOS chips (A and B), the motherboard does not start with the Xeon processor. Power is supplied to the board for 1 second and then it is turned off. It doesn’t even try to select the frequency, as is usually the case during the first startup. At the same time, the i5‑6500 processor starts and works with this modified BIOS. I started to doubt whether I had done the right thing by creating the mod, so I took your ready‑made BIOS from this forum (ASRock Z270 Taichi XEON BIOS MOD), but I got the same negative result with the same symptoms. However, there’s also a note saying “not tested.” The testing was carried out on a Xeon E3‑1245v6 processor and memory taken from a working Asus Z270‑P motherboard — thus, a malfunction of the components is ruled out. Do you or your friends have the opportunity to check your BIOS mod, or to copy a verified mod for my board check? I would be very grateful for your help!

1 Like

Hi!

If the board starts up for a second and then shuts down, try experimenting with the ME-region.

Thanks.

Thank you for the answer, friend! This has been verified. first of all. There are only three ME “corporate” options available — I checked all three. It didn’t help. I also changed the microcodes — but for the Xeon E3‑1245v6, there’s only one choice — and that didn’t help either.

I think the problem lies in the procedure for flashing the BIOS chips. I used a Ch341A_Ver_134 programmer with a “clamp” for flashing; I didn’t unsolder the chips from the board (all power supplies were disconnected, the battery was removed, and the processor and memory were removed. However, the official BIOS (P2.20) flashed without any problems, and I “revived” the board after the unsuccessful flash using the same method. Now I’ve flashed both chips separately (without the board) and sent the board to the workshop to replace the original chips with new ones, with a modified BIOS. The result is still unknown; I’m waiting for a call from the workshop.
Yes, it is also possible that the BIOS chips themselves are defective, or that they need to be flashed separately after being desoldered.

Yes, it is possible. During the A_1 chip firmware procedure, the program displayed the message “unknown chip” a couple of times. Perhaps the problem lies with it. Or perhaps it’s due to poor contact of the clip (which is also very likely). . Let’s not speculate now — we’re waiting for a message from the workshop.