COMMUNITY ACKNOWLEDGEMENTS
===================================================================
I would like to express my deepest gratitude to everyone who made this incredible hardware modding project possible.
Special thanks to:
-
Dsanke, first and foremost, for developing the custom BIOS that breathed new life into the Z270 platform. (All specific Intel ME and deep configuration details follow his excellent documentation).
-
The innovative engineers and manufacturers behind the mutant CPU interposers, making mobile silicon viable on desktop sockets.
-
The dedicated community members who spent hours translating complex guides and documentation into English.
-
Every developer who contributed open-source tools and shared their valuable research for free on GitHub.
A personal note for beginners: Before starting this journey, I had absolutely zero prior knowledge in hardware modding or soldering. If I could pull this off, you can too! To bypass the tedious process of completely tearing down the laptop every time, I learned how to solder on the spot and wired an extension connector directly to the 8 pins of the motherboard’s BIOS chip. This allowed me to easily hook up the CH341A programmer externally whenever a re-flash was needed.
I also relied on AI to cross-reference data and format this guide. However, a crucial piece of advice for anyone attempting this: never follow AI blindly. You must take its advice with a grain of salt, question everything, and above all, trust your own instincts and capabilities. The tool helps, but you are the one holding the iron.
Without the collective knowledge shared across the internet, this unique and fully stable Frankenstein build would not exist. Thank you all for keeping the hardware modding scene alive!
[CLEVO P870KM1-G] QUICK HARDWARE OVERVIEW & STABILITY FEEDBACK
===================================================================
-
Motherboard / Chipset : Clevo P870KM1-G - Intel Z270 (Dsanke Mod BIOS)
-
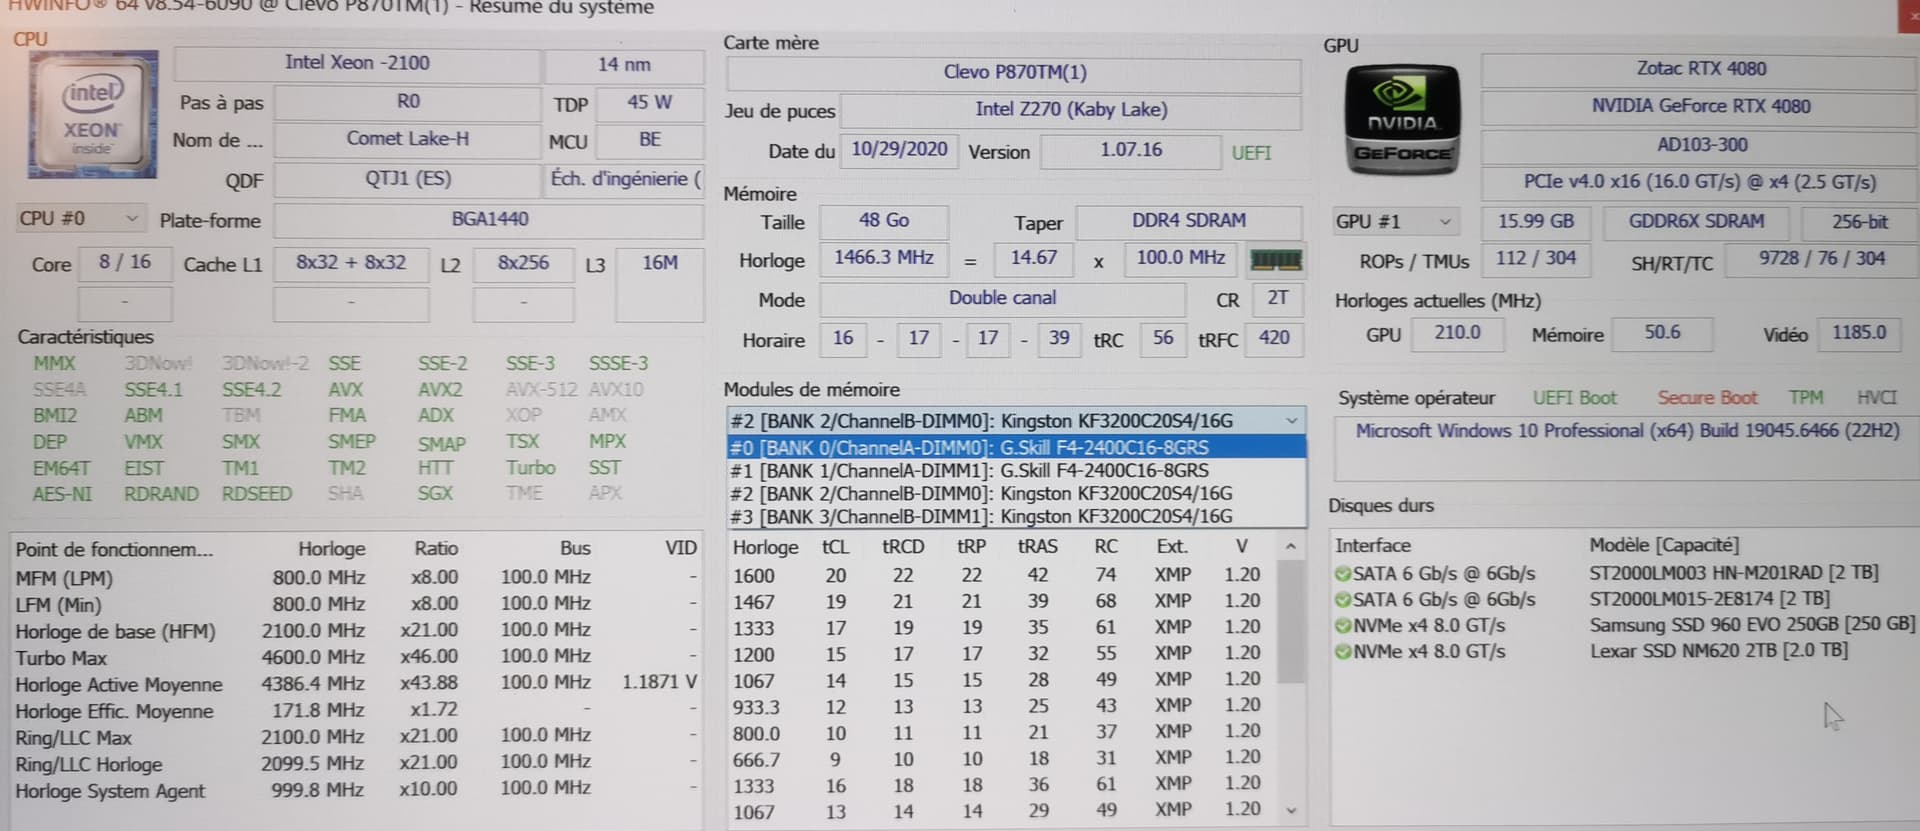
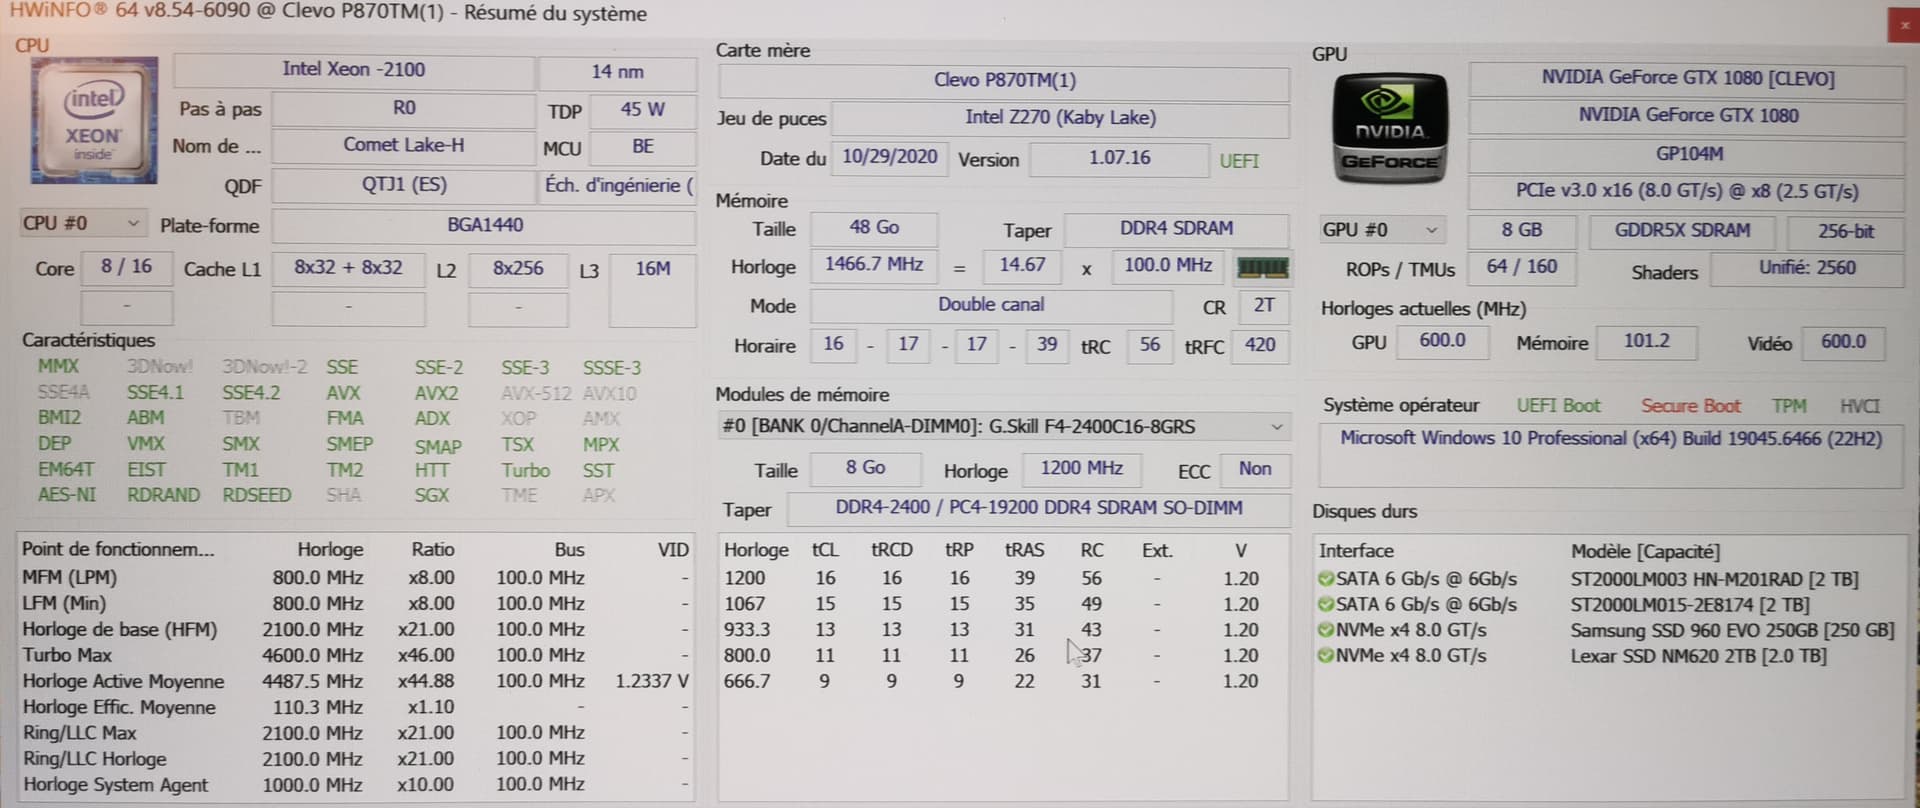
CPU : Intel Mutant QTJ1 (8C/16T - Coffee Lake Refresh ES)
-
Injected CPU Microcodes :
-
906ED (For Mutant QTJ1 / 8-Core support)
-
906E9 (For Kaby Lake / i7-7700K support, fully operational fallback)
-
-
Injected Intel VBIOS / GOP Driver : 0x3009 (9.0.1033)
-
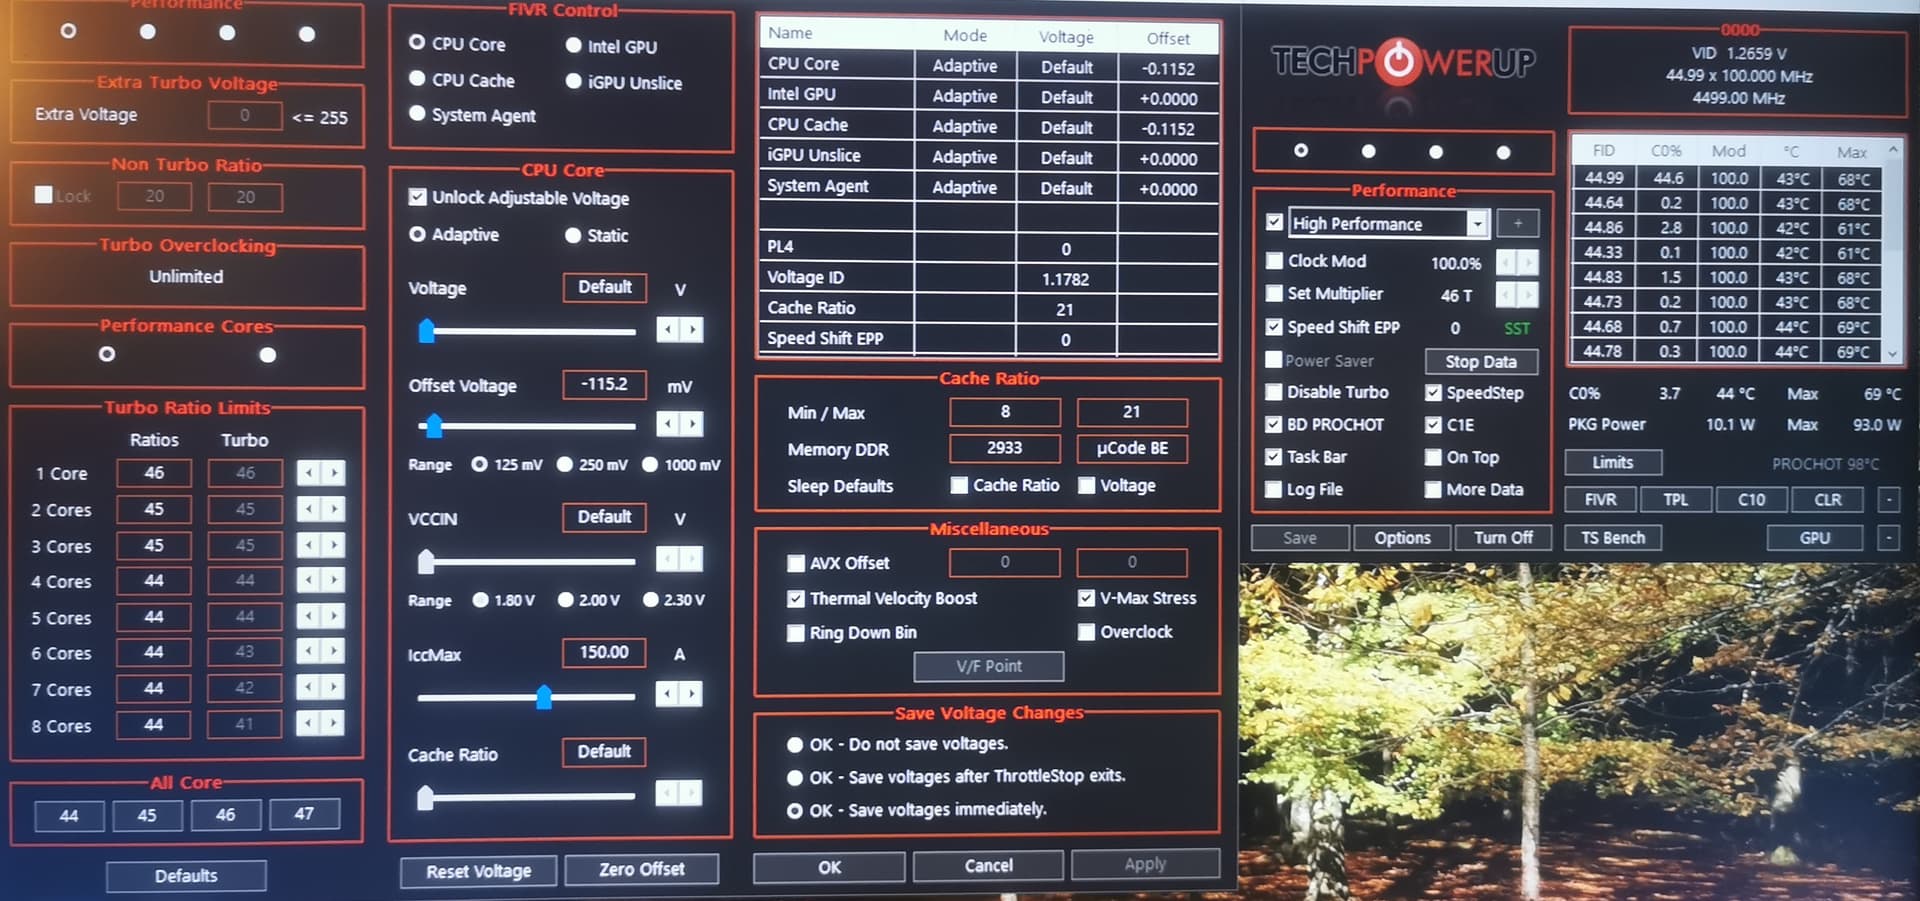
Core/Cache Offset : -115.2 mV (Stable via ThrottleStop)
-
Power Draw : ~100.5 W max under full load (CPU package max spikes around 42.8W in mixed loads)
Memory Configuration (4 Slots / Mixed RAM / Total 48 GB)
-
Slot 1 & 3 : Kingston Fury DDR4 (3200 MHz)
-
Slot 2 & 4 : G.Skill DDR4 (2400 MHz)
-
DRAM Voltage : 1.30V (Manually set in BIOS to achieve stability)
-
Current Stable Frequency : 2933 MHz (Timings: CL16-17-17-39 2T)
Graphics Configuration (Dual GPU / eGPU Setup)
-
Internal GPU : 1x NVIDIA GTX 1080 MXM (Running solo in SLI laptop chassis, peak 195.4W / 79°C)
-
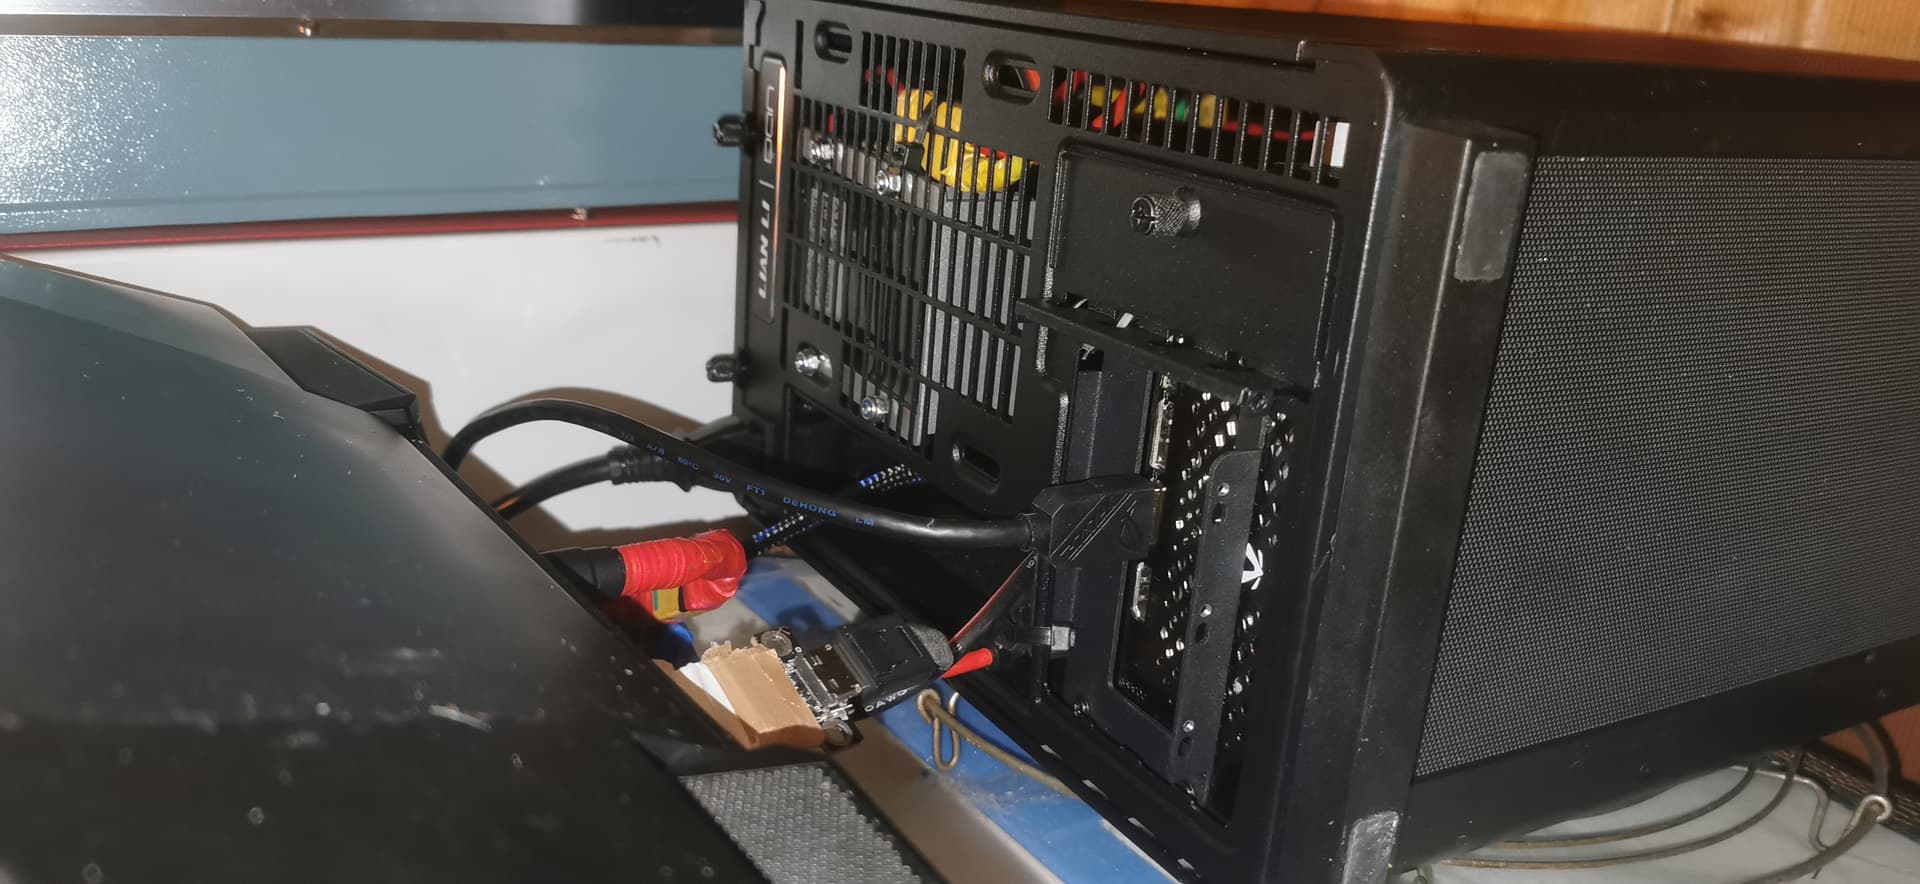
External GPU : NVIDIA RTX 4080 (Zotac Edition) connected via Oculink PCIe link (running at Gen3 PCIe speeds, stable 8.0 GT/s link).
-
eGPU Functionality Note : While the BIOS required modifications and manual voltage tuning for the Mutant CPU and Mixed RAM stabilization, absolutely NO BIOS modifications, custom firmwares, or software patches were required to get the RTX 4080 up and running. The eGPU functioned 100% natively via Plug & Play out of the box with official NVIDIA 581.80 drivers.
-
eGPU Thermal & Power Metrics : Maximum power draw reached 321.2W (101.4% TDP). Temperatures peaked at an impressive 62.1°C GPU / 75.9°C Hot Spot, idling back down to 26°C at 0 RPM (fans stopped). Max GPU clock hit 2805 MHz.
Monitor & Display Output
-
External Display : ASUS ROG 4K Monitor running fully stable at 160 Hz with G-Sync Enabled.
-
Verified via PresentMon/RTSS : Desktop environment and games successfully push up to 160.0 FPS / 182.0 FPS frame presentation, confirming no bandwidth choking on display return.
-
Internal G-Sync Broken : As a well-known consequence of this deep platform modding (Dsanke BIOS + Mutant CPU combo), G-Sync is NO LONGER compatible / functional on the laptop’s internal panel. The hardware certification link is broken. This is a trade-off to be aware of before jumping into this project. However, G-Sync still works perfectly fine on the external monitor via the eGPU.
-
Fan Control Management Issues : Another known limitation is the broken or erratic automatic fan control behavior caused by the custom EC/BIOS interaction with the mutant CPU. However, this is currently on the verge of being resolved thanks to community development/workarounds. Fix update pending.
Hardware Troubleshooting & Boot Behavior
-
Flashing Method : Flashed using an external CH341A programmer connected via a custom 8-pin extension soldered directly to the motherboard’s BIOS chip (avoiding complete laptop teardowns).
-
Display Fix : Resolved a “snowflake / static noise” display issue. Root cause was purely mechanical: an eDP display cable issue during teardown/reassembly, NOT a BIOS or microcode bug.
-
POST / Boot Behavior : Hardware Clear CMOS triggered by holding [F2] + [Power Button]. Memory training successfully initiates automatically post-CMOS. Mixed RAM configuration calibrates and trains perfectly at 2933 MHz.
===================================================================
STABILITY STATUS
===================================================================
-
TS Bench (7680M) : SUCCESSFUL (0 errors)
-
TestMem5 (Absolute Profile) : SUCCESSFUL (0 errors / stable run)
-
3DMark Steel Nomad (Heavy 4K Load) : SUCCESSFUL (Peak Score: 6403 pts / 64.03 FPS average)
-
Windows Hardware Errors (WHEA) : PERFECT (0 errors recorded over extensive benchmarking sessions)