I’m going to make you do the first step yourself ![]() , I want to document things so people know how to proceed and all, but since I haven’t done it yet (there may be guides already though) this basic walkthrough will have to do.
, I want to document things so people know how to proceed and all, but since I haven’t done it yet (there may be guides already though) this basic walkthrough will have to do.
The first part is to remove some locks in place that prevents us from flashing modified firmware through FPT, don’t worry, it isn’t hard and I took screenshots of what you need to do and some basic scripts to simplify things. Needed stuff is already in the file you uploaded, but just in case the content of some UEFI vars changed since we’ll do it this way.
Anyway, let’s begin:
- Sanity check, make sure you don’t have any password set up in the BIOS or something. Download the file from here, its password is “Win-Raid”.
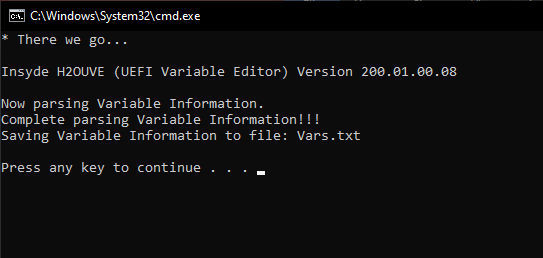
- Extract the file I uploaded for you somewhere in your machine and enter the “1. Vars” folder and right click the script named “1. Dump UEFI variables”, run it as administrator. A successful run should look similar to this:
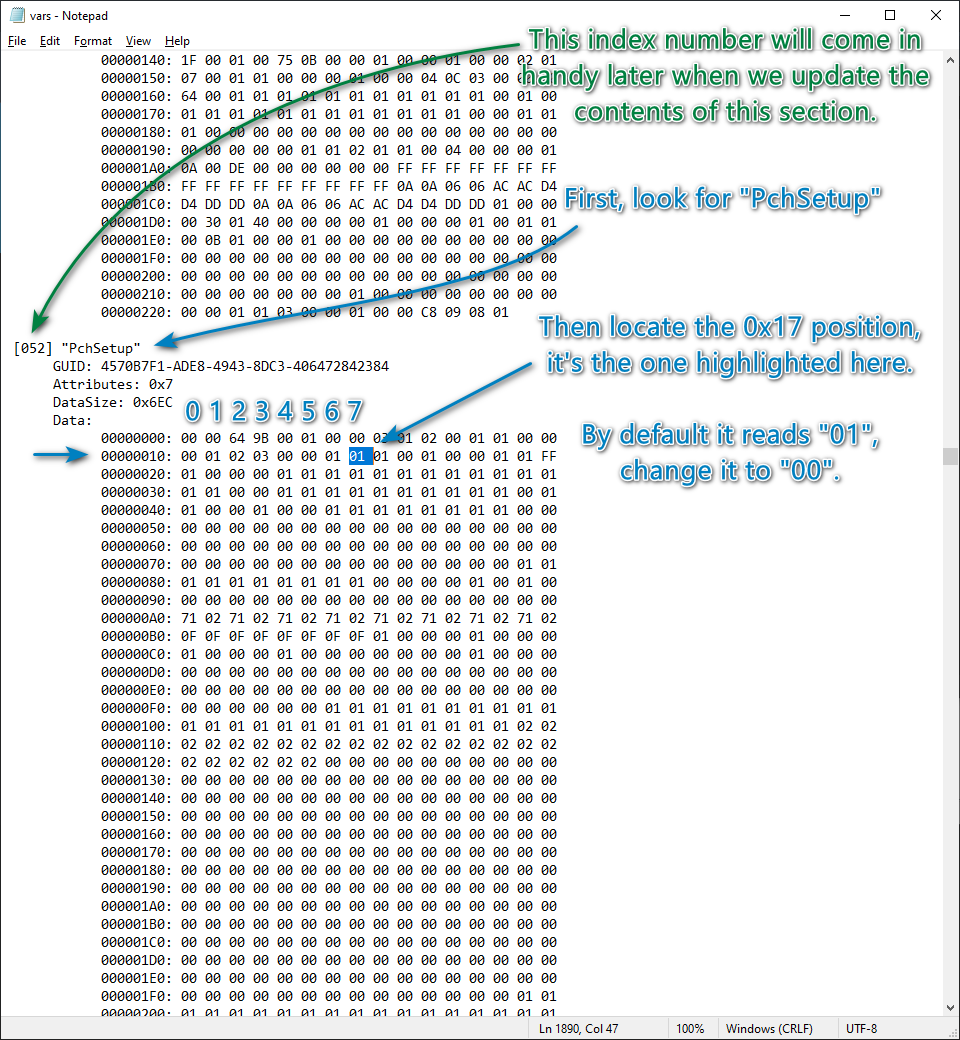
- Next is editing time, notice a file in that same folder called Vars.txt, double click it to open it (the basic Notepad that comes with Windows is enough), and modify it as per the following pictures (don’t worry if numbers other than the highlighted ones are different):

- Save the file and close it, we’re done here. Next right click the second script, “2. Write UEFI variables”, and run it as administrator too. It will be updating the variables we just changed (to be fair, it’ll be trying to update all UEFI variables, but we just care of our edit).
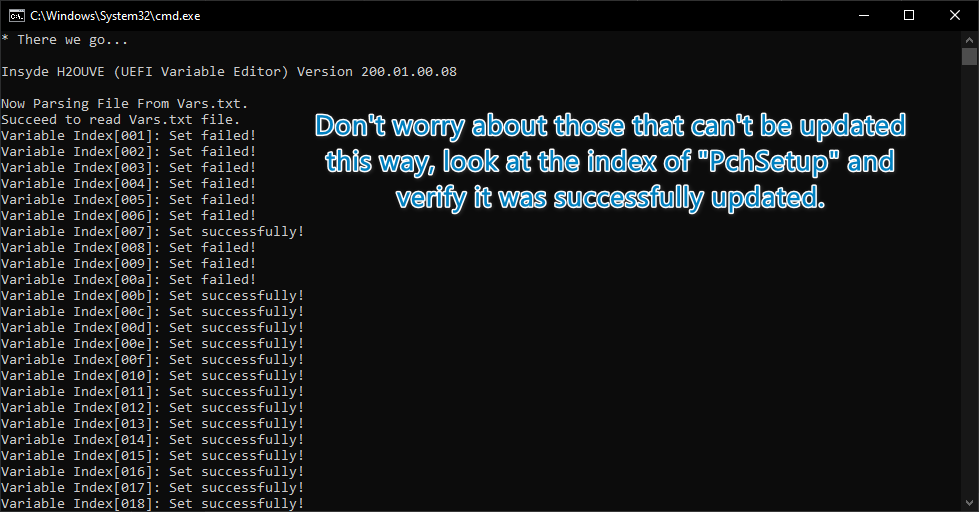
- That checking for the index being successfully set is more of a formality, but still.
- Now whether a reboot or not is in order… I’m not quite sure, so do it just in case
 . The thing is, the next step which is getting a hold of the contents of the BIOS section in the flash chip also brings with it the variables we just changed, so I’d rather they be set as expected for when we update it.
 - Next go to the folder labeled “2. Dumping” and you’ll find 2 scripts there as well, begin with the one that ends in 14.1, if that one works there’s no need for the other, but I included both anyway.
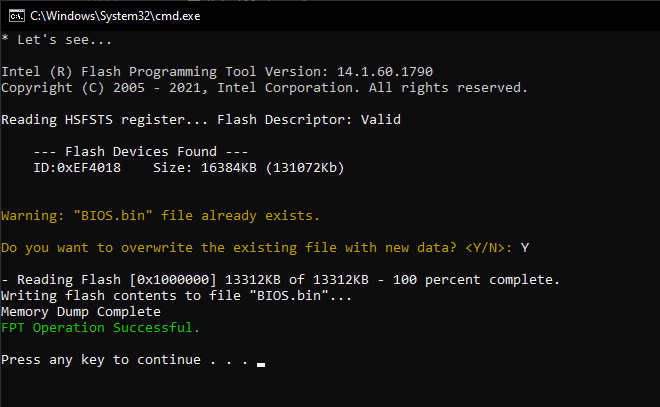
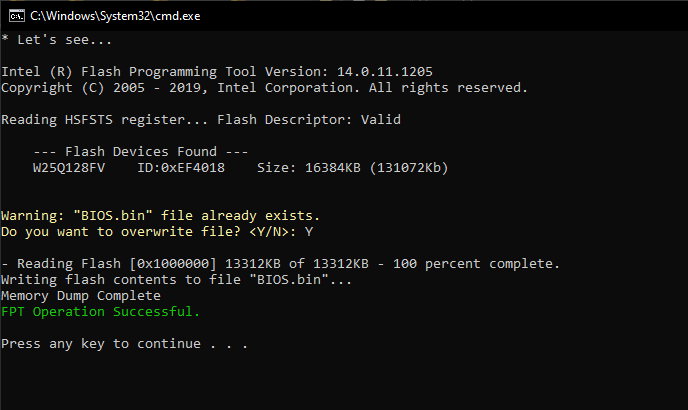
- A successful run of the 14.1 would look like this (disregard the file existing already, that part won’t show for you):
- Likewise, but for 14.0, it’s just the same:
- End of the road! You’ll see a file named BIOS.bin in that folder now, I want that, upload it somewhere and share a link to it, the next part is for me to do.
You’ll notice there are 2 other script in that last folder, it’s for later on and they have nothing to do with dumping anything so the folder name doesn’t represent what they do, but they are basically the opposite. When I do the modification to that file, you’ll put it there in that same folder and right click run as admin a flashing one to write the modified BIOS to your system.