[Solved] Modifying Write-Protected UEFI Variables on HP Victus 16 with CH341a

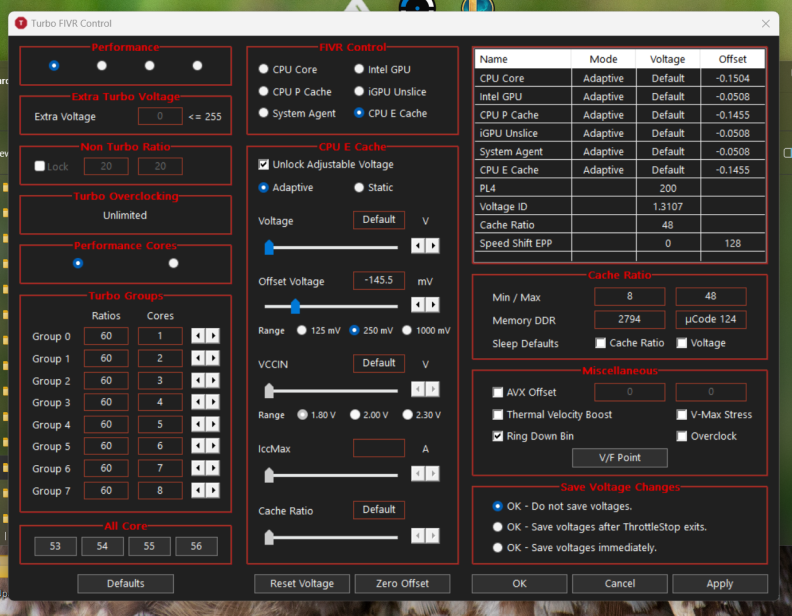
Hello everyone, my goals with the BIOS mod is very simple. I just want to switch some UEFI variables to enable undervolting using Throttlestop on my i7-14700HX CPU. HP locks it even though it’s an HX CPU.

The only modifications I made were switching the default value bits of 7 variables. CFG Lock, Overclocking Lock, Undervolt Protection, Overclocking Feature, BIOS Lock, RTC Memory Lock, FPRR, and FLL Overclock Mode Enable. I am not THAT interested in fancy things like showing hidden menus in the BIOS setup menu.

I did these modifications in the following way:
-First of all I extracted my full BIOS using a CH341a programmer and made sure that I got a good read and obtained backup.bin.

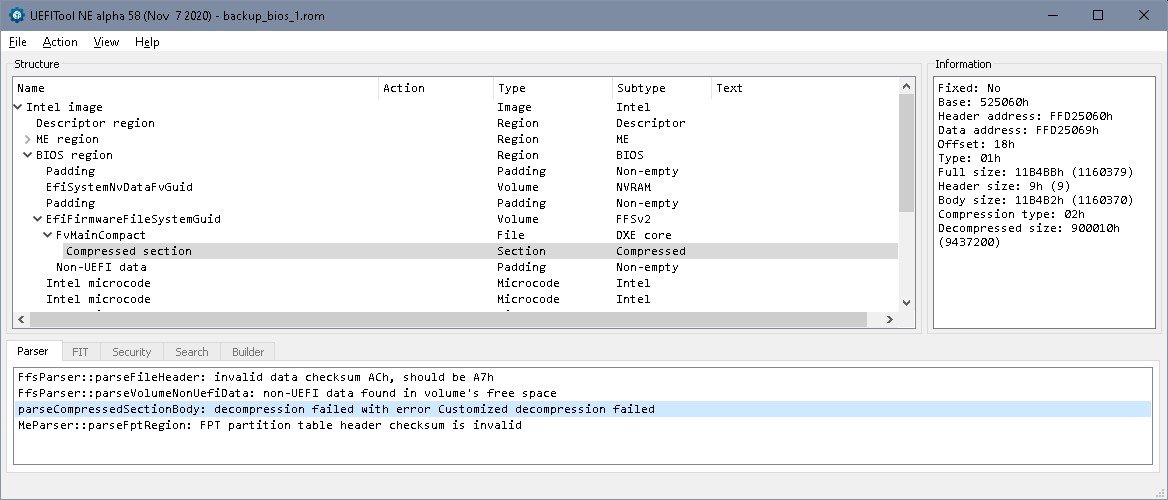
-Extracted SetupUtility.bin from backup.bin (16MB) using UEFITool.

-Extracted SetupUtility.txt from SetupUtility.bin using IFRExtractor.

-Modified the variables in the following way:
Consider CFG Lock as an example, from SetupUtility.txt its located on 0x186370 with {05 91 8F 03 90 03 87 01 03 00 43 00 10 10 00 01 00}
After this string of hex bits comes the Disabled and Enable strings which are {09 07 0D 00 00 00 00} and {09 07 0C 00 30 00 01} respectively.
The only modification I did was the following:

09 07 0D 00 00 00 00 → 09 07 0D 00 30 00 00
09 07 0C 00 30 00 01 → 09 07 0C 00 00 00 01

Which I think sets Disabled to be the default value of CFG Lock. Am I doing it correctly?
When I extract the SetupUtility.txt from the modified SetupUtility.bin it shows that “(default)”
is moved from the Enabled line to the Disabled line. Same thing was done for the other variables mentioned above.

Sadly after I flashed the modified BIOS, on boot, the laptop gave an error saying “BIOS is corrupted, recovery process is starting soon” and it recovered the original BIOS.

Do you think a checksum validation bypass is necessary, is it something other than a checksum?

Also I have tried flashing the original BIOS which I extracted and it did not give a “BIOS is corrupted, recovery process is starting soon” error. So I am not so worried about bricking the laptop I think.

I linked the unmodified BIOS and the modified BIOS as well.
original BIOS: https://www.mediafire.com/file/l2gtkqoswhicv56/backup.bin/file
modified BIOS: https://www.mediafire.com/file/j87xzibbk26scxk/backup-edited.bin/file

Please let me know what Im doing wrong or if there is a way to do this correctly at all. Thank you for this amazing forum, literally 1 month ago I knew almost nothing about BIOS modding and thought that UEFI variable editing was the craziest thing xD

Also side note: The reason I went for a BIOS mod to make these simple changes is because all of the relevant UEFI variables are write-protected and I was not able to edit them with setup_var, RU.efi, or H2OUVE -sv vars.txt. So this was my last resort I think.

@Sweet_Kitten Do you remember our discussion from around two days ago? This is the current situation, I am mentioning you since I mentioned that I will update you. Your expertise would be much appreciated

I think this “problem” belongs to another thread you created.

This byte serve as indication and not meant to control the lock. After the modification, if there was no protection and you could access setup screen, the lock would have displayed as enabled.

In order to get to variables, you need to open default nvram section and not bios driver. See the linked post.
When edited, this should not trigger the recovery feature.

1 Like

You are right they are related but back then I knew almost nothing xD and I gave up on those approaches mentioned in the old post.

How can I locate my AmiNvramMainRomAreaGuid.vol ? I am unable to find it with UEFITool after opening the full BIOS dump. What other possible alternative names might it have or how can I properly locate it?

Since you have the insyde dump rather than AMI, the nvram is not named as AmiNvramMainRomArea. But everything besides this should be more or less the same.

nvram is usually found at the beggining of bios region, its root, in the picture it is named EfiSystemNvData

1 Like

Found it and now im changing the 7 variables I mentioned in the post. I will be able to flash it tonight and update the post if it works.

Are there some other variables which you would suggest me to change as well? Beyond the 7 ones I mentioned?

Only-NVRAM-modified BIOS: https://www.mediafire.com/file/mlv1y5sznim5ksq/backup-editedNVRAM.bin/file

From what I know, none of the 7 vars allow you to undervolt.
If that really is going to be a thing for your laptop, try adjusting AC loadline.

1 Like

CFG Lock and Overclocking Lock prevent throttlestop from working. I am very sure about this, so Im mostly interested in changing those.

By the way my Only-NVRAM-modified BIOS flashed properly but none of the values changed. Could you check my file if I did it properly? or if you have some time could you prepare me a different file from the original backup.bin?

The steps I took to prepare the Only-NVRAM-modified BIOS are the following:
-“Extract as is” the EfiSystemNvData.vol using UEFITool 68 NE
-Open EfiSystemNvData.vol using UEFITool 68 NE and find the CpuSetup variable and note down the base address (0x22B73) and header size (0x4E). CFG Lock is at 0x43 inside CpuSetup, thus within the .vol file CFG Lock is on 0x22B73 + 0x4E + 0x43 = 0x22C04
-Go to address 0x22C04 and change 01 to 00 (also im able to identify the structure of CpuSetup since I know the pattern of its variables)
-Repeat the same for the other variables
-Save modified.vol file
-Replace the EfiSystemNvData.vol with the modified.vol file inside the backup.bin using UEFITool 28

Is this correct?

Also there is another potential issue, when I “read ic” using the external programmer, I do it multiple times and save the file each time and compare them, I also compare the CR32 signature the programmer app gives. They are consistent like 4 times in a row. I extracted backup1.bin, backup2.bin, backup3.bin, and backup4.bin for example.

Now If I flash backup4.bin without applying any modification or anything, just the file that I read from IC 2 minutes ago and I read IC again (to extract backup5.bin) after flashing, without even booting, I get a different CR32 signature and the files become not identical. backup4.bin and backup5.bin are different but why?

Since I havent booted after flashing backup4.bin why would it change on the chip when I read it back? Although the reading before flashing was consistent and ensures proper pin contact

I think this was true until Intel 12th gen.

How do you check if the values changed? Via HP Client Management tools or other efi tools?

From my perspective you did everything correctly, but I’ll take a look at the mod.

Don’t know why. What’s non identical in them?

1 Like

I am checking them using RU.efi.

I just realized that they are 2 VSS stores inside EfiSystemNvData.vol which contain the UEFI variables. I changed one of them only. Both contain the UEFI variables, but the first VSS Store does not contain the custom variables that I created using HP Client Managment Tools, but the second one does.
So now im gonna change both instances of CpuSetup variable inside of EfiSystemNvData.vol and flash that. Let’s see :slight_smile:

Oh man I will be very sad if I change these variables and my throttlestop is still locked :((( What else could be locking it, given the fact that its an HX CPU

I am not sure, but I’ll try it again today.

RU.efi shows the VSS store with custom variables, the store which populated with invalid entrys.

I call the other VSS store as default one. If you do load defaults in bios, the 1st store should overwrite the second.

Intel management engine or mcodes. You can’t remove them… and there’s no alternative “old” versions which would allow UV.

1 Like

The UEFI variable changes are not staying upon boot. Even things which I can control from the basic BIOS setup menu (F10 menu).

I changed all the instances of the CpuSetup and in both VSS stores but they are going back to the original defaults. I checked using HP management tools and RU.efi.

I believe there is some kind of checking happening on first boot after flashing.

On first boot after flashing is successful, the laptop starts boot with light only on the power button, then turns off, boots up again automatically with fans and caps lock light, then turns off again, and then boots normally automatically. This sequence is the same one that happens when I do CMOS reset and reset BIOS to defaults.

So maybe after every flash, my BIOS is getting recovered from some other chip? Could there be another BIOS chip under the heatsink which keeps recovering the original BIOS?

Are checksum bypasses possible?

Likely there’s a recovery chip as I could not find the “BIOS is corrupted” in the entire bios image.

Can’t know as I don’t understand how newer implementations work. At first the check was just one function, but then the vulnerability was fixed and I stopped monitoring updates on this.

1 Like

I understand.

What do you suggest I do next? What could be a possible next approach?

Maybe there is some simple mistake that I am making with this NVRAM editing thing.
Maybe my flashes are not being done successfully (although I am doing them after 3 consecutive identical reads). Could choosing a different chip in NeoProgrammer be causing this issue? Since my exact BIOS chip is not present in the NeoProgrammer application.
Maybe if I locate the second BIOS chip, I can read its contents and edit the NVRAM data there?

This is the best option IMO.

1 Like

I have found another chip between the CPU and the GPU.
This second BIOS chip has W25Q16JWSIQ 2328 written on it.

Sadly it is a 1.8v chip as far as I can tell, so I ordered the 3.3v to 1.8v converter for the CH341a and Im waiting for it to arrive

Hello, it finally worked :DD
The second BIOS chip which I located under the heatsink was just a vBIOS chip, it contained only 2MB of data which was all describing the Nvidia GPU. So I went back to the first BIOS chip and kept modifiying the original file.

Previously, I was editing the CpuSetup instances found only inside of EfiSystemNvData, but turns out there are 3 instances of CpuSetup inside the padding area above EfiSystemNvData and 1 instance of CpuSetup inside the padding area below EfiSystemNvData

After modifying the padding areas’ CpuSetup along with the EfiSystemNvData’s I flashed the “modded” BIOS again and upon reboot the variables were finally changed.

I changed CFG Lock, Overclocking Lock, Undervolt Protection, Overclocking Feature, and FLL Overclocking Mode Enable. I confirmed that the changes were applied and active using RU.efi.

So I was finally able to use Throttlestop and XTU both of them became unlocked and fully functional.

Seriously much much thanks to you @Sweet_Kitten!!! Especially for informing me about that Github issue of UEFI-Editor and directly editing the NVRAM variables.

1 Like

I can confirm that unlocking CFG Lock, Overclocking Lock, Undervolt Protection, and Overclocking Feature does unlock Throttlestop on intel 14th gen.