I’ve had some success getting rid of mcodes that Windows provides during boot, still can’t edit DLLs though. See spoiler.
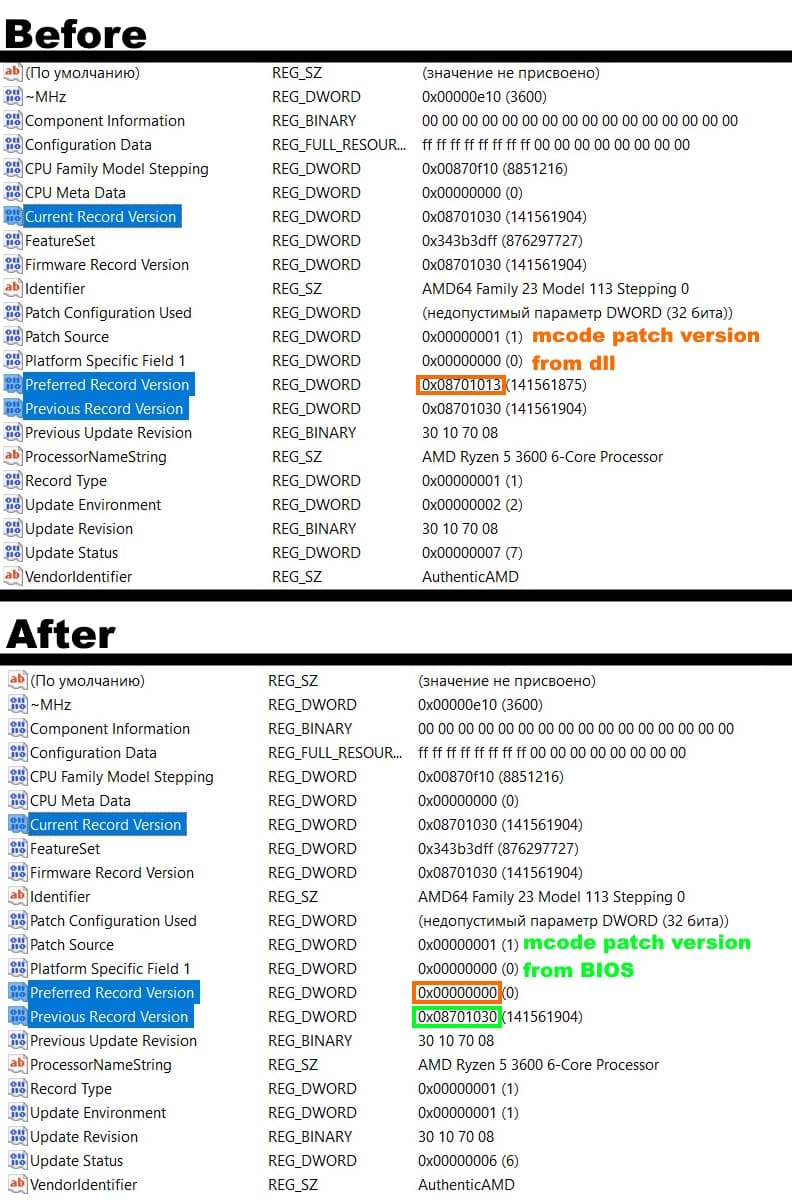
All I did was rename the dll for Intel to AMD and vice versa. Windows doesnt enter automatic repair mode and boots fine. AMD mcode can’t be found inside the Intel dll, so it doesnt load any.
At first, I really tried to replace or delete mcodes. And even figured out the dll files structure. Upon replacement a desired mcode, even if I correct version numbers (eg. 08701013 > 08701033), Windows would not boot. The same behaviour as if I changed any single byte or deleted the dll file.
Since I have AMD CPU, deletion of Intel dll has no effect.
Then I tried dlls, from other Windows builds. Resulted in automatic repair.
Later, got an idea to find how and by what means the system loads the dll files. SMCM signature (don’t know what SMCM means, but it’s in the header of mcodes section) was found in multiple executables and libraries, but had no courage to start disassembly and analyze them all.
Finally, exact dll names, mcupdate_AuthenticAMD.dll and mcupdate_GenuineIntel.dll, were found in the only one file, hvloader.dll. It contains a function that calls either dll for Intel or AMD. Nothing changed after switching the calls. Purpose of the function left unknown.
I got to switching the dll files itself afterwards.
To sum everything up, Windows loads one dll that meets vendor of your CPU, mcupdate files are build specific and are subject to integrity check.