@ all users, who want to install Win7, Win8.1 or Win10/11:
Introduction:
When you are going to do a fresh OS install, it is a good idea to customize the original OS image by integrating the things you need or like to use (special drivers, additional hotfixes, features etc). This way you will save time and may avoid some troubles (see below) while doing all this later, that means once the OS is already up and running.
The easiest and safest way to customize an OS image from Win7 up is to use a special tool. My favorite one is NTLite (>LINK<), which has been developed by our Forum member and nLite maker nuhi. The free version of NTLite is able to do all the needed operations for this guide, including the removal and addition of special mass storage drivers like the Intel RST ones.
Here is a guide about how to to do it:
Integration of Drivers
(incl. AHCI/RAID/NVMe/USB)
into a Windows Image
by using NTLite
Guide for Win7, Win8/8.1 and Win10 (32/64bit)
Last updated: 09/05/2017
Changelog:
- Updated:
- Parts of the Guide (due to NTLite v1.4)
- All inserted pictures
General notes regarding this guide:
- The current guide version and its inserted pictures are based on NTLite v1.4 Build 5537. Although I am trying to keep my guide up-to-date promptly after major NTLite updates, I cannot exclude, that there are some differences between the pictures of this guide and the GUI of your used NTLite version/Build.
- To demonstrate the procedure how to remove an in-box driver from a Windows Image and how to insert another driver into it, I have chosen a practical example, which may be helpful for Intel RAID users with an older Intel RAID system (up to 7-Series Chipsets), who want to use the best performing "classical" Intel RST driver v11.2.0.1006 named iaStor.sys from scratch instead of the in-box Intel RST(e) driver 12.0.1.1019 named iaStorAV.sys (Win8) resp. v15.44.0.1015 named iaStorAVC.sys (latest Win10 Build).
- If you are missing anything within the guide or should somewhere find a mistake or a lack of clarity, please send me a PM. Thanks in advance!
I. Preparations
This is what you need:
- the latest available Build of the newest stable NTLite version (you can get it >here<)
It is recommended to choose the tool architecture (32/64bit) to be the one of your host Windows OS (which you are currently running). - the OS image you want to customize (either as ISO file or as content of a bootable OS DVD/USB Flash drive, the "Sources" folder should contain a boot.wim and an install.wim file) and
- the desired AHCI/RAID/NVMe drivers and other device drivers you want to integrate into the OS image (usually available >here< or >here<).
Further preparations:
- Create a new folder outside the OS partition and give it any name (e.g. D:\NTLite-Works).
- Copy the content of the Windows installation DVD/USB or - if using an ISO file - extract it (by using a tool like 7-Zip or WinRAR) into the just created folder.
- Install NTLite onto your computer.
II. Working with NTLite
This is what you should do:
-
First steps:
- Run NTLite.
Now you will see the NTLite GUI Interface similar to this picture (Note: you can enlarge all screenshots by clicking onto them):
- Run NTLite.
- If you want to change the language of the NTLite GUI (English is DEFAULT), you can do it this way:
Click onto the NTLite Menu point "File", choose "Settings", click onto the drop-down menu, which is underneath the word "Language", choose your favorite one and click "OK".
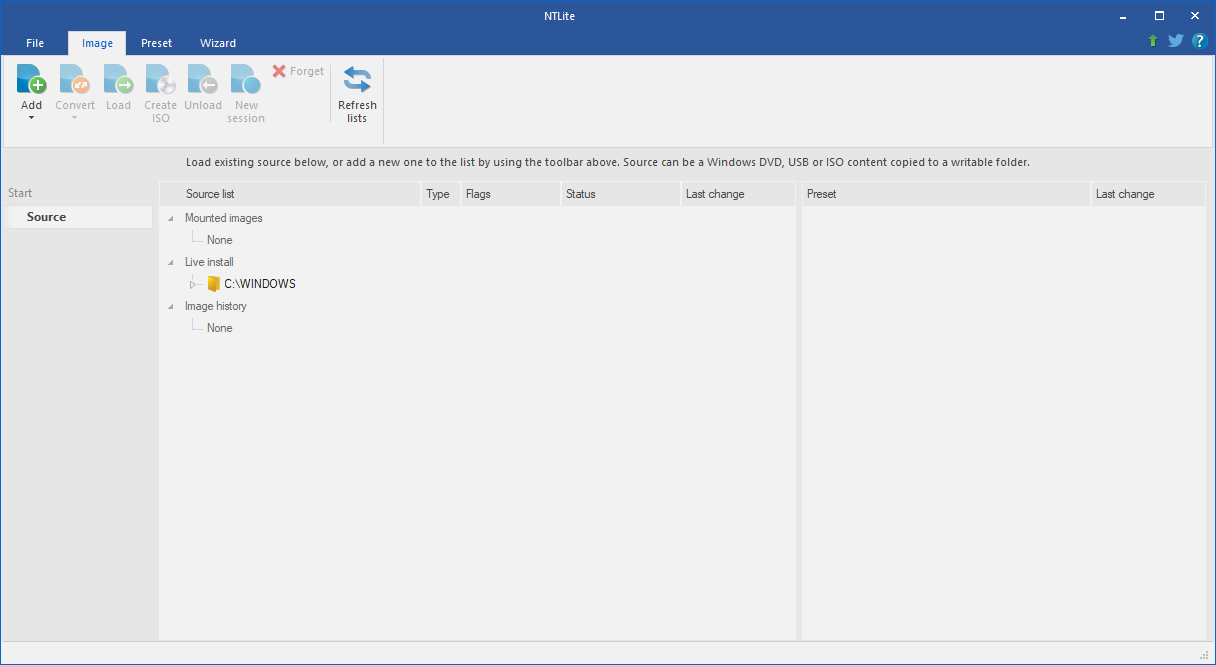
- Click onto the "Add" field from the Toolbar, navigate to the folder, where you copied/extracted the original OS image files, and click "Select Folder".
- After having expanded the "Boot/Setup" string (leads to the BOOT.WIM) on the right hand side, you will see a picture like this:

Important infos regarding INSTALL.WIM and BOOT.WIM:
- The file named INSTALL.WIM (or INSTALL.ESD, if even more compressed and encrypted) is very voluminous, because it contains the complete OS data in compressed form. That is why this file has to be customized, if the user wants to use a special third party driver from scratch or want to avoid the usage of a special in-box driver. Since the INSTALL.WIM may contain more than 1 OS Image Edition (example: Win10 Home and Win10 Pro), you have to pay attention which of them you want to customize. If you want to customize more than 1 image, you have to repeat the procedure with the other one(s) later on (see below).
-
Loading of the desired Windows Image Edition
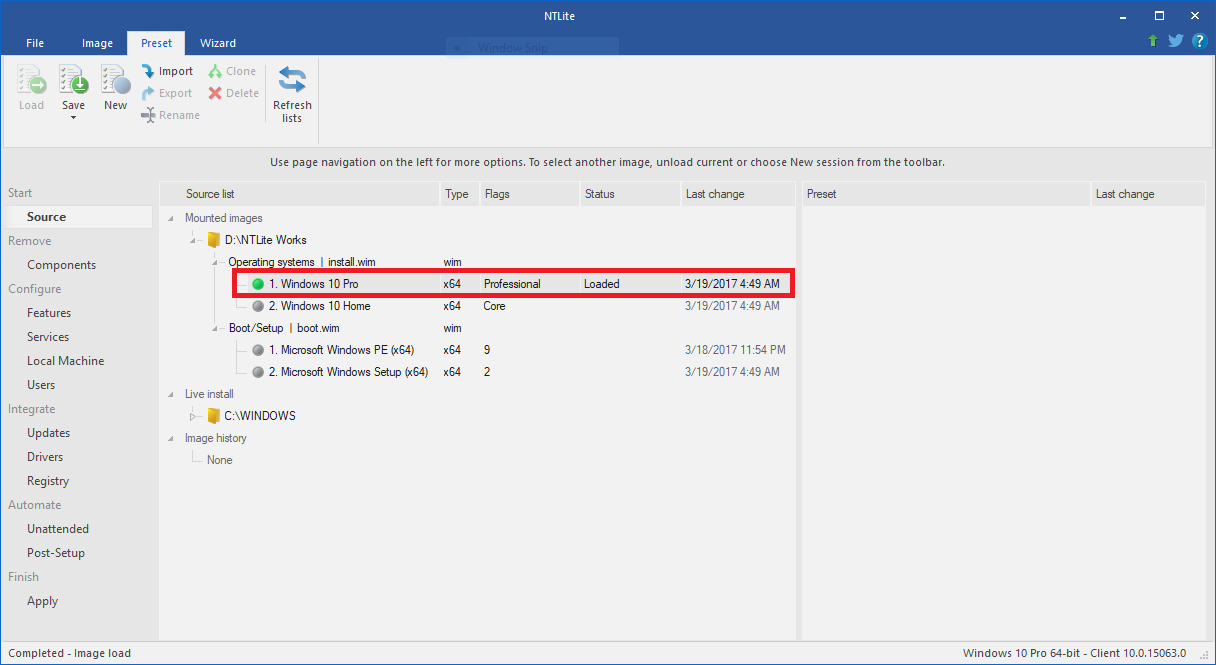
- If not already done, expand the NTLite processing folder part "Operating Systems | install.wim".
- Right-click onto the Windows Image Edition you want to customize (here: Windows 10 Pro x64 "Creator's Update") and click onto the "Load" option.
- After having finished the loading process, the line with the chosen Operating System Image Edition will look like this:
-
Integration of the desired drivers into the chosen Windows Image
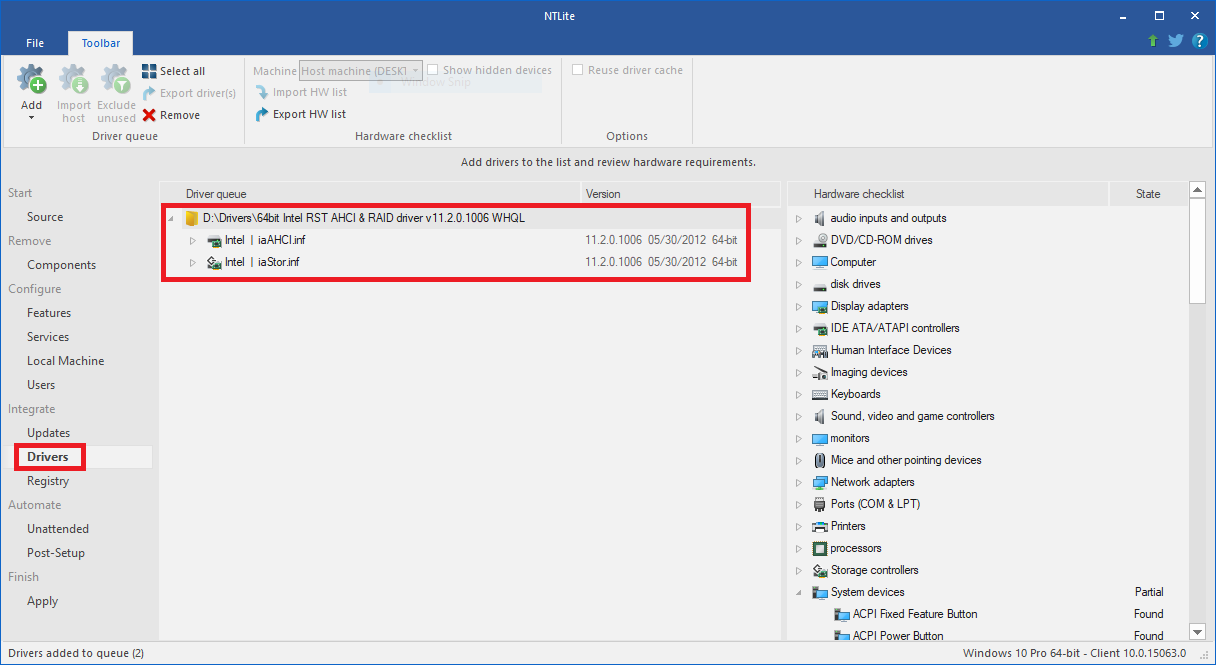
(here:Intel RST RAID driver v11.2.0.1006)- Click within the leftmost side of the NTLite GUI onto "Drivers" (to find among the "Integrate" options) and then onto the "Add" field from the Toolbar.
Note: If you click onto the "+" sign of the "Add" field, NTLite will open the Explorer straight ahead. If you click onto the downwards arrow at the bottom of the "Add" field, you can choose between the options "Drivers (INF selection)" and "Folder with multiple drivers". The first option should be taken, if you want to integrate just a specific INF file, which is inside the related driver folder. This way you can skip the later on delition of unwanted INF files (see next steps). - Navigate to the folder, which contains your desired driver (e.g. an Intel RAID one), and click "Select Folder".
- Now you will see the related driver and, after having expanded it, the associated INF files within the middle NTLite GUI window:
- Click within the leftmost side of the NTLite GUI onto "Drivers" (to find among the "Integrate" options) and then onto the "Add" field from the Toolbar.
- If you don't want to integrate all offered INF files (e.g. the iaAHCI.inf for the AHCI driver and the iaStor.inf for the RAID driver), you can remove the unwanted INF file by right clicking onto it and choosing "Remove".
- This procedure can be repeated for other device drivers you want to get integrated into the Windows Image.
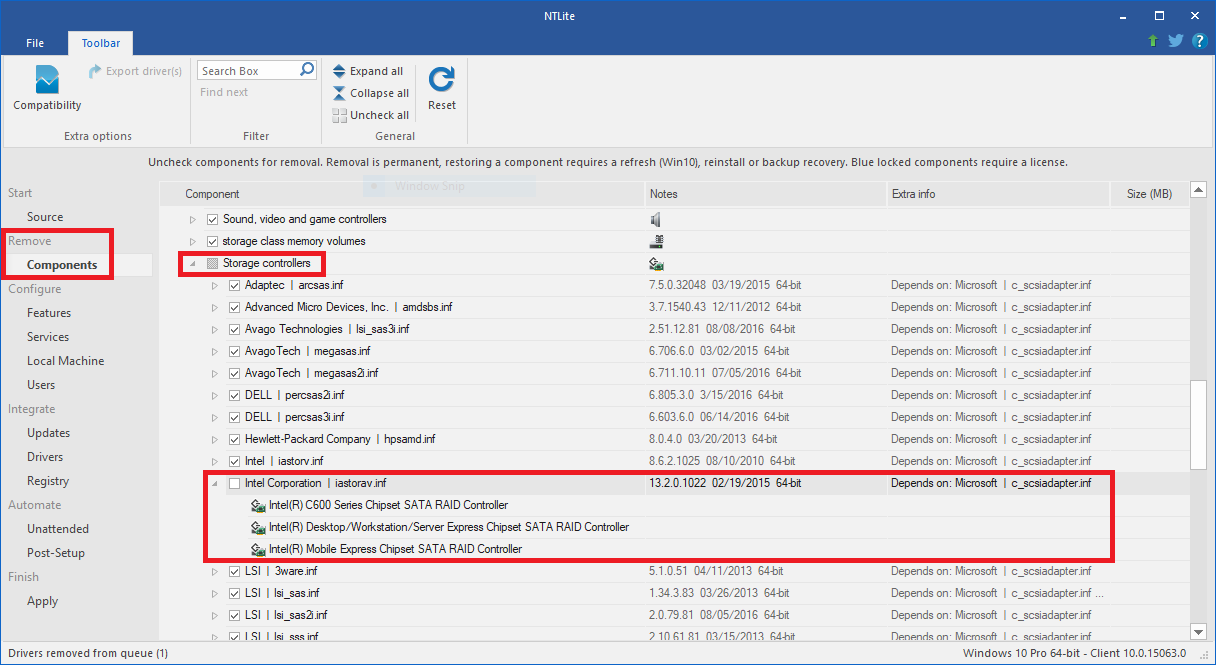
(here: Win10 in-box Intel RST(e) RAID driver v13.2.0.1022)
Info: This step makes sure that your integrated and potentially older driver will replace Microsoft's default in-box driver.
Warning: Be careful with component removals and read the page warning. By the way: Driver removals are a bit safer than other removals.
Note: If the desired removal should fail due to a "LOCKED by the HOST machine" message (this is an NTLite feature to prevent the creation of an unbootable Windows LIVE medium), you should click onto the "Compatibility" button, which is shown within the Toolbar while working on the removal of "Components". Then uncheck the "Host Machine", which is listed within the section "Machine support (Hardware lists)" and click onto "OK".
- At this point you have the possibility to add Windows hotfixes and Windows features (like .NET 3.5) into the loaded Windows Image Edition.
- Click onto "Apply" on the leftmost side of the NTLite GUI.
- After having done that, you will get a totally changed picture. In my case it looked like this:
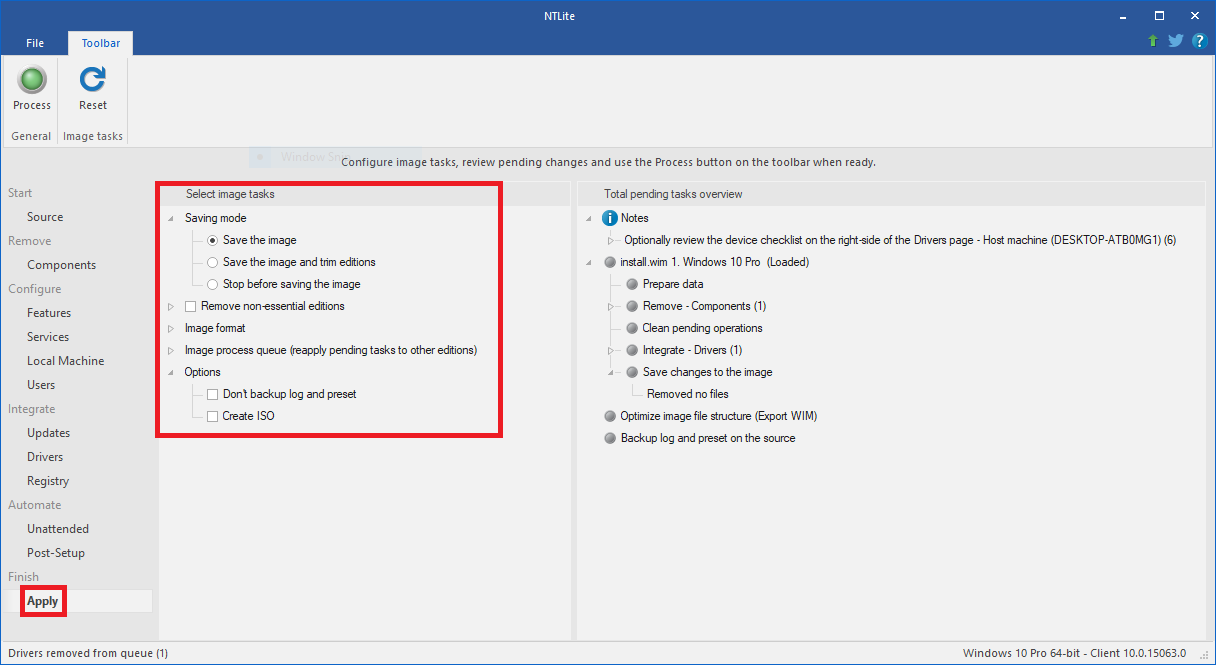
- Expand the "Image Process queue" in the middle of the NTLite GUI. Now you will see a list with different tasks.
- Expand all sub-sections of the listed tasks, which you want to be executed by NTLite.
This is the related screenshot I got:
As you can see, some tasks are already checked and greyed out. In my example it are the tasks "Remove - Components" and "Integrate - Drivers" for the already loaded INSTALL.WIM Image Edition 1 (here: Windows 10 Pro). -
Now you can select the desired Windows Image Editions, which should be additionally processed and can choose the related tasks by checking the blank box in front of them.
Important: Don’t forget to check the related tasks for the BOOT.WIM Image named "Windows Setup", if you want to insert or remove any AHCI, RAID, NVMe or USB driver.
Optional: If you want to get the same tasks executed with another INSTALL.WIM Image Edition (here: Win10 Home), just check the related tasks.
This is how the related NTLite GUI should look, if you want to get the same tasks done with the "Windows Setup" Image as with the INSTALL.WIM Image Edition(s):
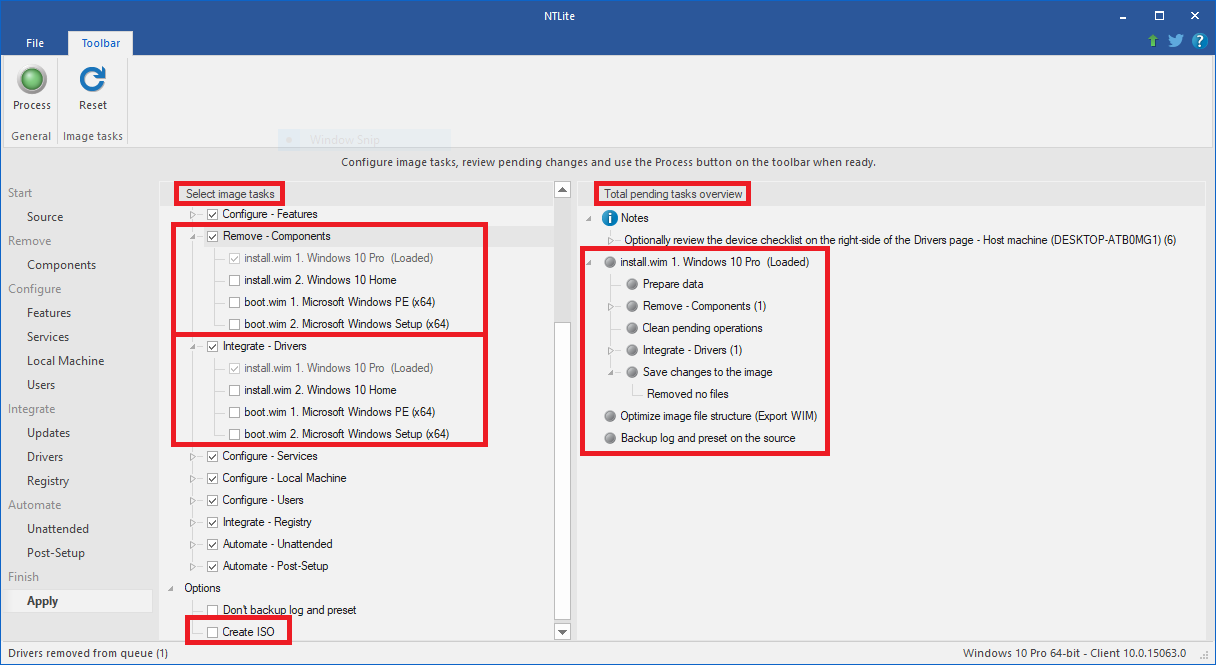
Tip: Before starting this task you should temporarily disable your currently running Antivirus Software to speed up NTLite's work.
-
This is what you have to do:
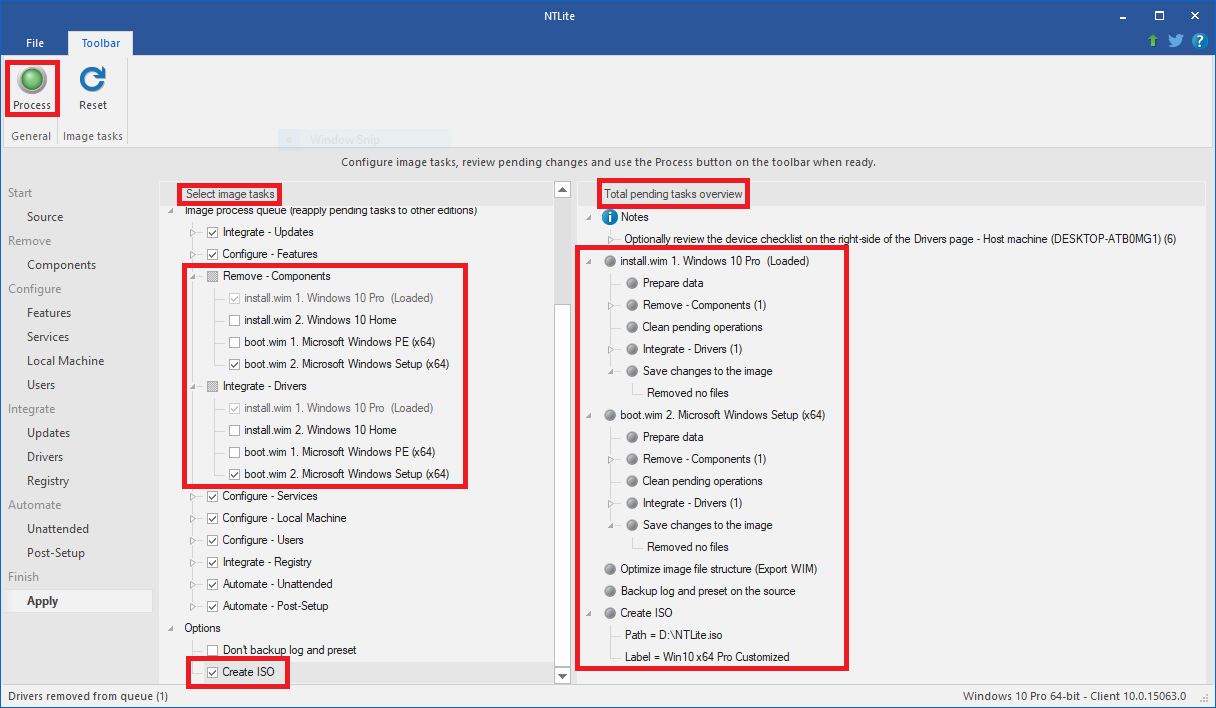
- To execute and finalize all previously checked tasks, you just have to press the round "Process" button from the Toolbar and confirm it by hitting onto the "Yes" button.
- Now NTLite will execute automaticly one after the other all the requested customization tasks (and additionally the creation of the ISO file, if you had checked the option).
You can see the progress within the right NTLite GUI window. If you are using the Free version of NTLite, you may have to hit "OK" after NTLite has completed all tasks regarding a certain Image. - If everything worked fine, you will get this final success picture:
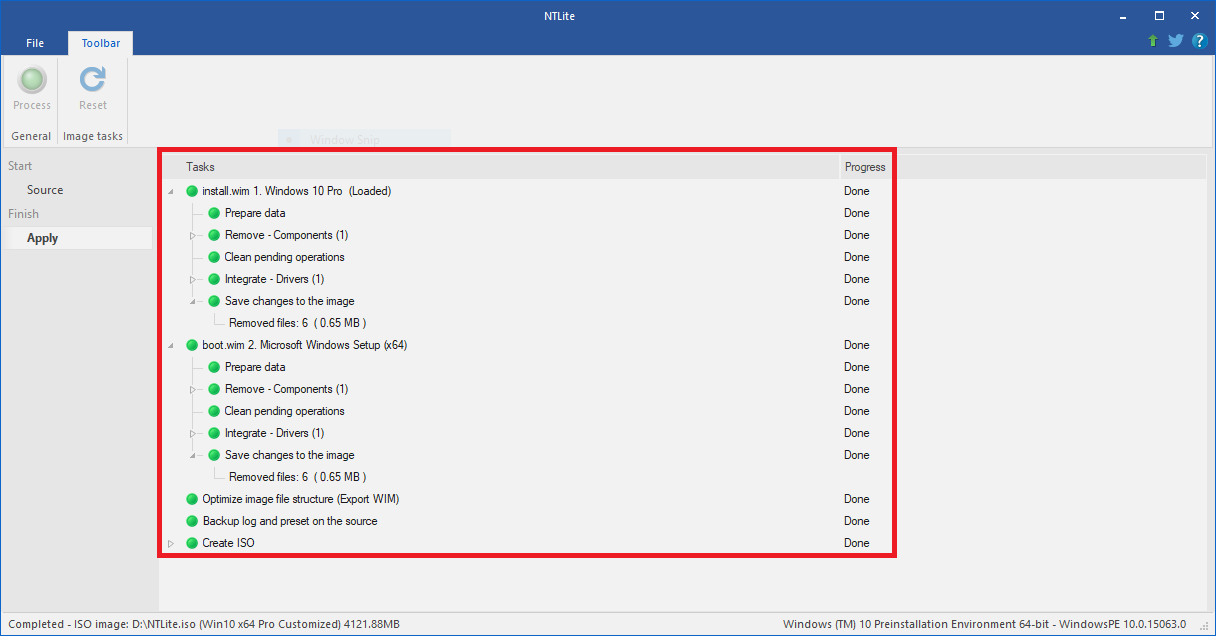
- Provided, that you don't need an ISO file or got it already, you can now close the NTLite GUI.
- You will find the unmounted customized OS image within the previously chosen NTLite processing folder (e.g. D:\NTLite-Works).
- If you should need an ISO file with the customized OS image, look into chapter D.
- If you have checked the "Create ISO image" option according Chapter B, that means before clicking onto the "Process" button, you will immediately get a popup window, where you can choose the storage destination, the name of the ISO file and its label.
The ISO file generation itself will be automaticly done by NTLite as last step, that means after having finished all other tasks. - If everything worked fine, you will get the above shown final success picture.
- If you should have forgotten to check the "Create ISO Image" option before having clicked onto the "Process" button, you can get the ISO file nevertheless.
- This is what you have to do:
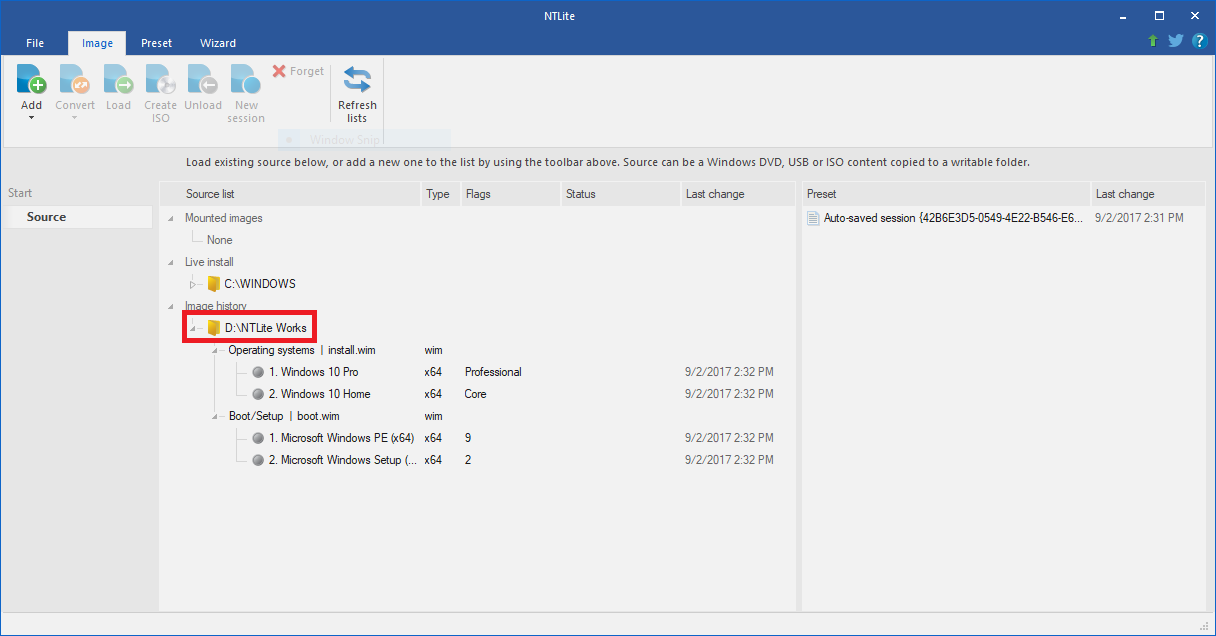
- If you have already closed NTLite, re-run it.
This is what you will see:
- If you have already closed NTLite, re-run it.
- Right-click onto the shown NTLite-Work folder and choose the option "Create ISO image".
- Choose the name and the storage location of the ISO file and click onto the "OK" button.
Managing the ISO file containing the customized OS Image
- You will find the customized ISO file within the storage folder you had chosen.
- Now you can either burn a bootable DVD or create a bootable USB Flash Drive with a tool like Rufus.
- Install the OS and enjoy the performance and stability of your system by having integrated the "best" drivers for your special system.
Good luck!
Fernando
