Hi everybody.
I’m having a problem with my Dell Latitude 3510. I just read the Bios chips today, but after dumping and verifying the files (battery and CMOS battery were disconnected during dumping), the computer won’t start anymore. The battery LED quickly blinks twice, no beeps, no nothing. Anybody had the same situation happening?
Thanks
Did you read eeprom in circuit or desoldered?
Find your code?
https://www.dell.com/support/manuals/en-…f5dd&lang=en-us
Chip type (voltage), used 1.8V adapter if needed?
Error in assembling (check code)
If you just read the chips and no write or erase, then there should be no issues unless you shorted something, or have not re-connected something properly etc 
Recheck all connected, and reinstall main battery again in case it’s in there funky (or remove it, to rule it out)
fixitprohr, I read everything from the mainboard using a clip connected to CH341A.
lfb6, Thanks for the link. I uploaded two videos showing what happens, One with, one without the charger connected. The LED never becomes amber as the service manual suggests, can you give me a hand diagnosing this?
youtu.be/P5m4BXWKC_Q
youtu.be/m1tFvfWHdBE
The bios chips are rated at 3.3 V, so I didn’t use any adapters. Could I have fried my ICs? VCC to GND was 3.2 V.
Lost_N_Bios, there was no write, however, when I was reading and verifying, during the verifying step, it kept failing verification if that’s an indication of something.
@jacoghi Whats ‘everything’? Which chips did you read? Can you attach the images?
And which program did you use? Verify is normally done after writing to be sure that chip and loaded image are identical. How did you do that?
And regarding the LED- that doesn’t say anything, it doesn’t look like signal- blinking to me.
Seems to be a quite new model- what about warranty?
There’s a lot of options what could have gone wrong and of course you could have fried a chip, but normally that isn’t so easy either. I’m a little suspicious if you didn’t accidentally write to a chip?
@lfb6 , these are the two chips, both are rated for 3.3 V. I used ASProgrammer just to read and verify the buffer (the green = button), was getting DONE message after both steps. At first I was using That chinese CH341 application but when verifying the buffer, it always failed. With ASProgrammer, it apparently passed without moving the clip or anything like that.
drive.google.com/file/d/1Mer0zd99Nja4v3yNdEPqOiKy7otpRcLU/view?usp=sharing
I got it through my university’s IT department and I cannot get warranty since it was purchased through the University’s discount.
I read somewhere CH341A might read data at 5 V instead of 3.3 V even if VDD GND reads 3.2 V before reading. Have you seen that happening before? IF the chips are fried, is there any way I can recover the laptop or only through DELL?
@jacoghi Please post the content/ dump of the two chips.
Your use of ASprogrammer seems to be OK. I had never thought og verifying a freshly read dump since I don’t have any original content, but anyway- you read, fill programs buffer with first read and compare to another read. Since it’s not very probable to have identical read errors…
The 5V/3V CH341 thing is a long story with some modifications proposed, but I haven’t seen/heard something happening to a 3V chip because of that. There might me other dangers like static electricity, shorting pins, connecting wrong direction, choosing wrong chips…
- Try a CMOS reset if you haven’t already
https://www.dell.com/support/article/en-…systems?lang=en
- Verify the two chips- read them again and compare the content with the dumps made before. If you can read them and the content is identical you didn’t harm them. If the content isn’t identical- post it in addition to the two original dumps.
(Warranty is normally between Manufacturer and you, you might check with Dell itself?)
I tried resetting the CMOS to no avail.
These are the dumps:
https://drive.google.com/file/d/1rELqcMc…iew?usp=sharing
https://drive.google.com/file/d/10MEANnh…iew?usp=sharing
The only thing is that neither chip is part of the ASProgrammer list. My chip is a MX25L12872F and ASProgrammer only has MX25L12873F, so I went with that one. XMC is XMC QH64AHIG but according to flashrom it’s the same chip ID as MX25L6406EN so I went with MX25L6406E.
I got in touch with DELL customer center and they are checking it the warranty is applicable to me, hopefully they’ll get back to me soon enough.
1 Like
@jacoghi Both files put together are a complete bios, and seem to be OK.
There is some information that doesn’t fit together, ME region seems to have a possible error/ is recognized as unconfigured in ME- analyzer, but opens fine and is configured in an older FIT. Had to ask for some help.
( Intel Management Engine: Drivers, Firmware & System Tools (347) )
Chosing the wrong SPI type would make reading impossible, otherwise there shouldn’t happen too much.
I assume there is no error in the dumped bios. So only thing left is dumping the two chips again, content should be identical- then you know it’s not the bios SPIs itself that make trouble…
@lfb6 , no words to describe how much I appreciate your help, man. So from reading your post I understand you suspect this “unconfigured” file system might be the issue? Have you ever seen that being caused by a programmer? I’ll re-read the chips tonight, I’ve been trying to stay away from this freaking programmer cause I thought the whole 5V thing fried completely these chips. Once again, thanks man, appreciate it!
@jacoghi The ME region you have dumped has a corrupted sub- partition, unfortunately this isn’t the firmware region, but the region, where settings are stored.
You wrote about ‘verify’- errors, might be a read error while dumping. We have to check if re- dumped images will be identical to first dumps.
- If images are identical: That’s possibly the reason for the brick.
- If images aren’t identical, we’ll have to check ME region (and in other regions) again.
@ jacoghi - Failing during read/verify simply means you are using wrong software/version for the chip, or the connection was lost mid-read or mid-verify
Don’t stretch the cable. What is the chip ID, and what software/version were you using? Not all work for all chips, sometimes even read/verify can fail or falsely verify if it’s incompatible software version for the chip ID.
So it could have read wrong and that’s failing to match up now due to new wrong read during verify, or simply bad read during verify so contents aren’t matching.
Either way, saved/read buffer contents and live read/compare would diffir each time, when incompatible software is used, so it would never be able to verify.
During read or verify, nothing is erased or written, so unless you forgot/missed hooking something up, all should be fine
Provided nothing hard shorted out (or there is no current hard short via loose cable, loose screw etc
Chip will be fine even if it’s hit with 5V, and will still be fine even if it’s hit with 5V and clip is backwards, it will get VERY HOT, very quick though, so not sure how long it can be left in that state 
It will burn your fingers off in seconds though, so probably not too much longer than that 
For MX25U12873F use one in folder of package below named >> CH341A v1.31(1.4) (CH341AFree) Choose correct size and type first
http://s000.tinyupload.com/index.php?fil…213094641136166
And, see also, this post about version/method, see end of post #126, (DO do the erase, he already did is why he skipped) - https://www.badcaps.net/forum/showpost.p…5&postcount=126
Same may work for 72F too - But, all other software fails on 73F, so probably same true to 72F too
This only means it fails to read or write properly, or both, no software would/should change contents unless you hit Auto, erase, or write, so system should always remain in working state if it’s working before you tried to read.
Now, once you find/make proper BIOS to program in, use the info above, this is all I know for 72F/73F chip
I would take it all apart again, then put all back together, to be sure nothing was connected loosely, off/missing etc.
Because if you did not Auto, write, or erase, then system should work same as before you connected the programmer.
@lfb6 - DO Assume the dumped contents are invalid, they are and should not be used here, other than to gather system specific details to put into a new fresh BIOS
ASProgrammer cannot read this chip properly, thus invalid read/save and verify etc. I have not tested on 72F, but have personally on 73F (all fail except what I mentioned above)
As I wrote, I’m aware of this option. On the other hand these dumps have a quite well contained structure…
And I would strongly recommend to jacoghi not to change anything/ no try to write to the chips until it’s clear that this system is no longer under warranty from Dell!
@Lost_N_BIOS Do you happen to have an image of a rather new Latitude 3510 with ME14, just in case?
@lfb6 - What I mentioned It’s not an “option”, it’s for sure. 
Well defined structure meant nothing, incompatible software could read wrong data every 100 bytes, or every 1000 bytes, or every other byte, and structure may look “OK”
Only a few certain bytes of the start any module need to be bad before it will look messed up, other than that it could be all garbage (99.9%) and still "Look OK"
You should only use this bad unverified BIOS dump to collect system details (serial, Asset Tag, MAC ID etc, and confirm those are correct) then make new BIOS from other source (nothing from this BIOS other than those details)
Otherwise you are wasting your time and efforts
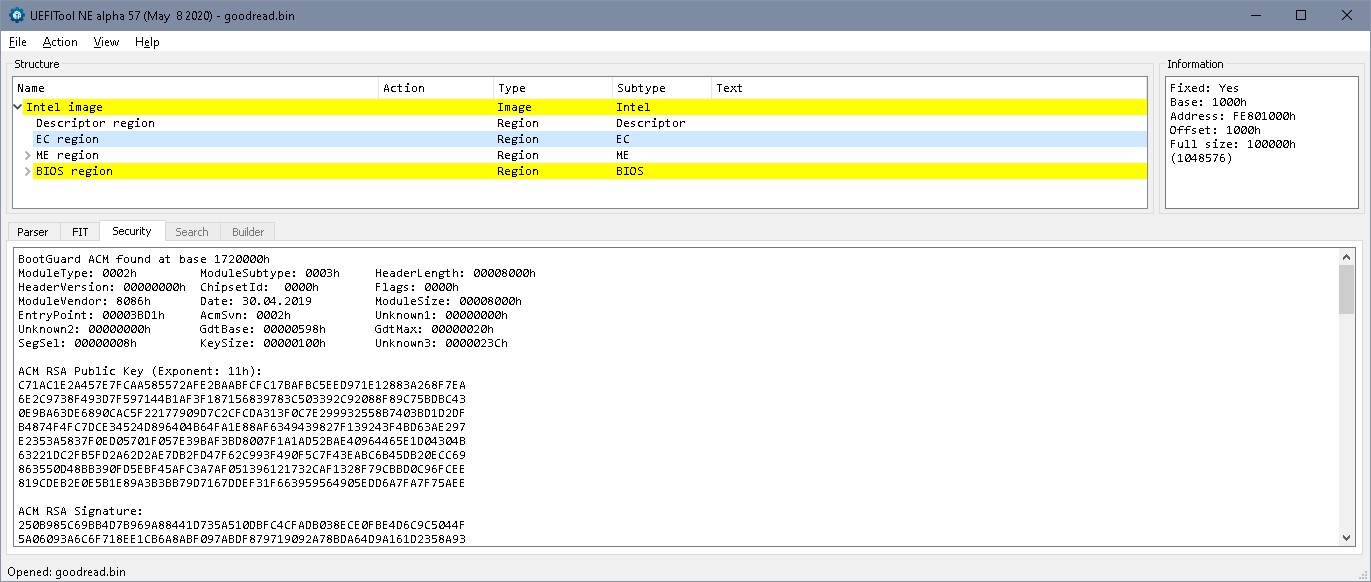
This system has active boot guard too, so be careful what you edit and how
You can get clean 16MB BIOS image from the exe, but ME FW in there is only "Update"
Sorry, I do not have any dumps from anyone with 3410/3510 
http://www.xn----8sbafotoqlagnhme.xn–p1…la-c631p.16047/ << have to join, after that?
https://vinafix.com/threads/dell-latitud…tem-bios.23310/ << have to pay, minimum $3 for 1-2 day access I think
https://badcaps.net/forum/showpost.php?p=815804&postcount=21 << Join, ask user for password in PM, I sent a PM but I only have three posts there, will let you know if he sends me password
See also
https://www.badcaps.net/forum/showpost.p…515&postcount=2 << Free share, but didn’t work for user there (I think user error, this same BIOS posted many places, and you only need ME FW, which is “Cleaned” there)
https://dr-bios.com/threads/dell-latitud…642p-bios.9617/ << Paid site
Would be more helpful if he can tell you the motherboard model, it’s printed on the PCB, then I can better find proper BIOS dump possibly
But, personally I would make from stock, aside from the ME FW, which will have to be sourced
@lfb6 , @Lost_N_BIOS , I only disconnected the CMOS battery and the main battery, didn’t disconnect anything else before the first read. I don’t touch the whole setup while reading. Before reading, system was booting, all was good. After reconnecting the battery and CMOS, I got the brick. DELL is supposedly sending me a final response tomorrow whether the warranty will be valid, so fingers crossed.
using the software suggested by Lost, 25 SPI FLASH. Using this version, the verification step doesn’t fail indeed, says chip and dump are the same. I checked the MD5 hash of the new files and they are different from the first reads I got with ASProgrammer, so I’m attaching the new dumps here
72F chip ID is detected as C2201817, used 16 MByte dump
https://drive.google.com/file/d/1SCyRLJM…iew?usp=sharing
XMC chip ID is 20701716, used 8 MByte dump
https://drive.google.com/file/d/1V8QREHa…iew?usp=sharing
I disconnected the CH341 from my computer while swapping the clip from one chip to the other, so I don’t think it could have shorted anything on the board except if the 5V indeed fried the chips cause I didn’t check if they were hot during the read. This is what concerns me the most right now since this programmer came from China for 6 dollars, so… I’m afraid what was supposed to be cheap became a very expensive problem.
Regarding Lost’s links, that’s not same computer, there’s something called DELL Latitude Precision 3510 which was a workstation using 7th generation processors, mine is called the NEW Latitude 3510, which uses a U processor, it’s an i5 10210U.
Now I don’t know anything about this ME firmware, but I checked another identical computer for that using hwinfo (my whole team got the same computer), shows as
ME Version: build 1165, hotfix 37
Recovery Version: build 1165, hotfix 37
FITC Version: build 1205, hotfix 11
I just cannot guarantee the bios version is the same, unfortunately.
@lfb6 so this ME firmware not being configured could stop the computer from booting? Considering the 5V ordeal didn’t fry the chips, is there any way of reconfiguring this if needed?
Thank you both for your help
@jacoghi - What is second chip full ID, so I can tell you what software/version is best to use for this, it may not be the v1.31(1.4) (CH341AFree) one I mentioned for the 72F chip.
5V would not fry the chip, I’ve used $3 programmer like that all the time on 100’s of boards. The chips do not get hot under normal usages here, when I mentioned that it was in regards to/only happens if something is backwards (ie hard short)
Indeed, the files I linked may all be incorrect, I was only looking with Latitude 3510 as model, it would be best if you gave me the motherboard name/ID printed on the PCB
If you have another identical computer, dump it’s ME FW and then lfb6 can use it here to make you a fixed BIOS to program back to both chips on the messed up board.
This can be done with software, so no programmer concerns, if this system has a ME/FDo/Management/Service jumper, look over the entire PCB for 2-3 pin jumper with label like that near it.
If you find one, then put jumper on, reboot to windows three times, then download ME System tools 14.0.20+ from section C.2 in this thread - Intel Management Engine: Drivers, Firmware & System Tools
Then from ADMIN CMD Prompt, run the following and send lfb6 that file >> FPTw.exe -me -d me.bin (Fixed!)
If you do not know how to run Admin CMD Prompt, here, merge this to registry, reboot, and then you can right click anywhere in the folder that contains the FPTw.exe and choose "Open CMD Prompt here as Admin"
http://s000.tinyupload.com/index.php?fil…134606820377175
Also, for lfb6, run these commands with FPT on the other system as well, and send him above + these files
FPTw.exe -ec -d ec.bin
FPTw.exe -desc -d fd.bin
FPTw.exe -bios -d biosreg.bin
ME FW drivers must be installed first as well, or you can do all this from UEFI Shell if you know how, using the EFI Shell version (no driver needed there, nor Admin CMD prompt
Once those two dumps you linked are appended, except for “Unconfigured” the only ME FW error MEA gives is >>
Skipped MFS partition at 0x107000, unrecognizable format!
Usually ME FW can be 100% corrupt, or missing, and system will still boot, but not always, so it’s hard to say if this is the cause of the issue here, or if BIOS is messed up some too.
Is this the BIOS exe name from Dell you would use for this model >> Latitude_3410_3510_1.3.0.exe >> If not, please link me to your BIOS download page
You’re welcome, hopefully lfb6 can help you get this sorted out!!
@jacoghi Dont run this command on any other computer
fptw -f would flash a file, not read it. Since there’s probably no file me.bin in same directory you’d probably get an error message, but anyway…
@lfb6 - Fixing, thanks for the catch! No file there as source for me.bin, so no mistake could be made, only file not found error would appear as you mentioned.
But yes, lucky catch just in case write would be allowed - locked FD for ME anyway though so nothing could happen
@jacoghi - What is model name printed on the motherboard PCB, thanks!
@jacoghi Regarding your new dump:
There’s just one chunk in the region of the EC firmware that’s not read:
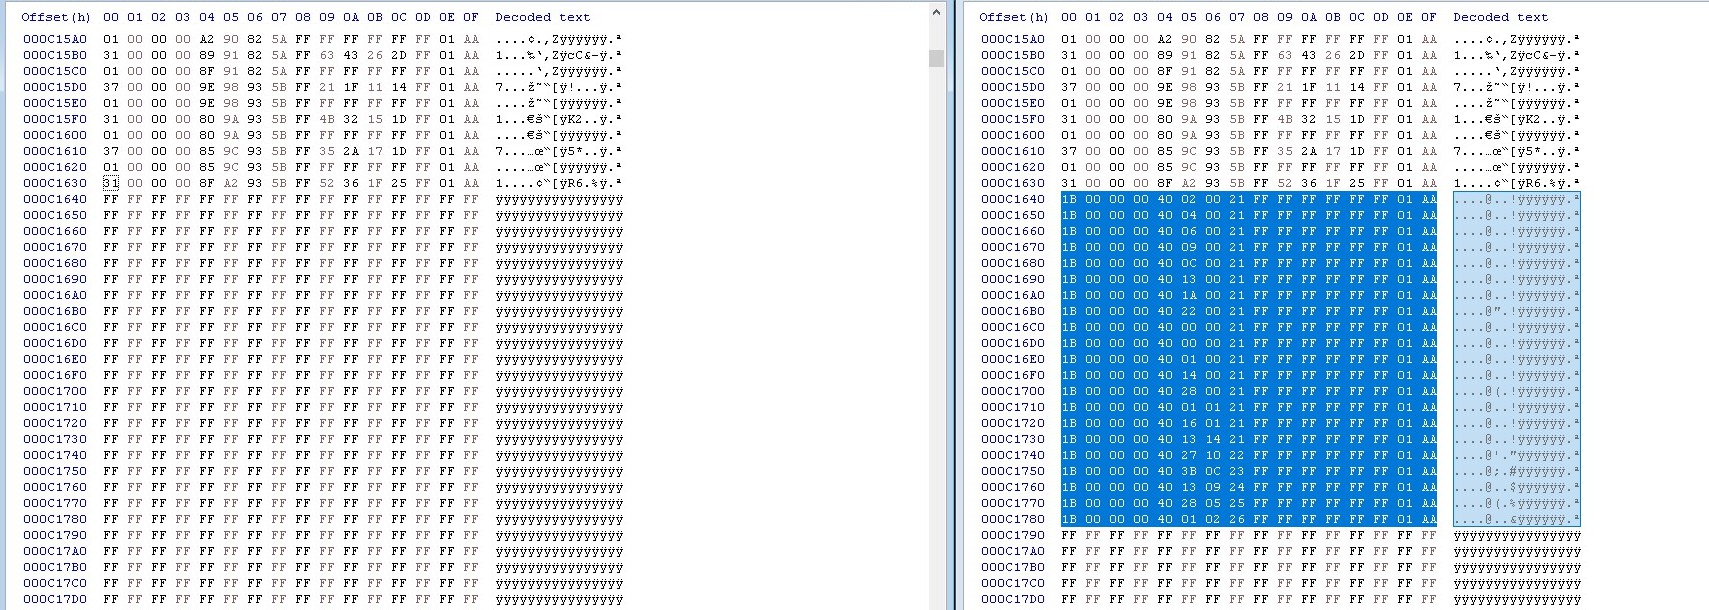
But it’s not EC firmware itself, that’s identical with the EC firmware of the Dell update package.
EC fw block fro 1000- 101000
EC fw 1.03 at 1000
EC fw 1.01 at 41000
EC fw 1.03 at 81000
C1000: Something I can’t identify, see ubo zip, the part not read is the last block of this area.
The dump of the ME region is identical and the bios region is identical, too.
That leaves us at:
- There’s an uncertainity regarding your EC firmware, but I assume that a missing block when reading first time and it’s OK
- Your ME is corrupted and that needs to be fixed anyway. That could be the reason for system not starting, especially if BootGuard is configured.
So I’d like you to read the bios of an identical machine as written by Lost_N_BIOS. I don’t repeat the complete description here, just the commands:
Dump the complete firmware
fptw??.exe -d bios.bin
This will give an error if you didn’t find a jumper as described by Lost_N_Bios, so if you don’t success continue with the single regions:
FPTw.exe -desc -d fd.bin
FPTw.exe -ec -d ec.bin
FPTw.exe -bios -d biosreg.bin
and let’s see what we get.
ubo.zip (939 Bytes)