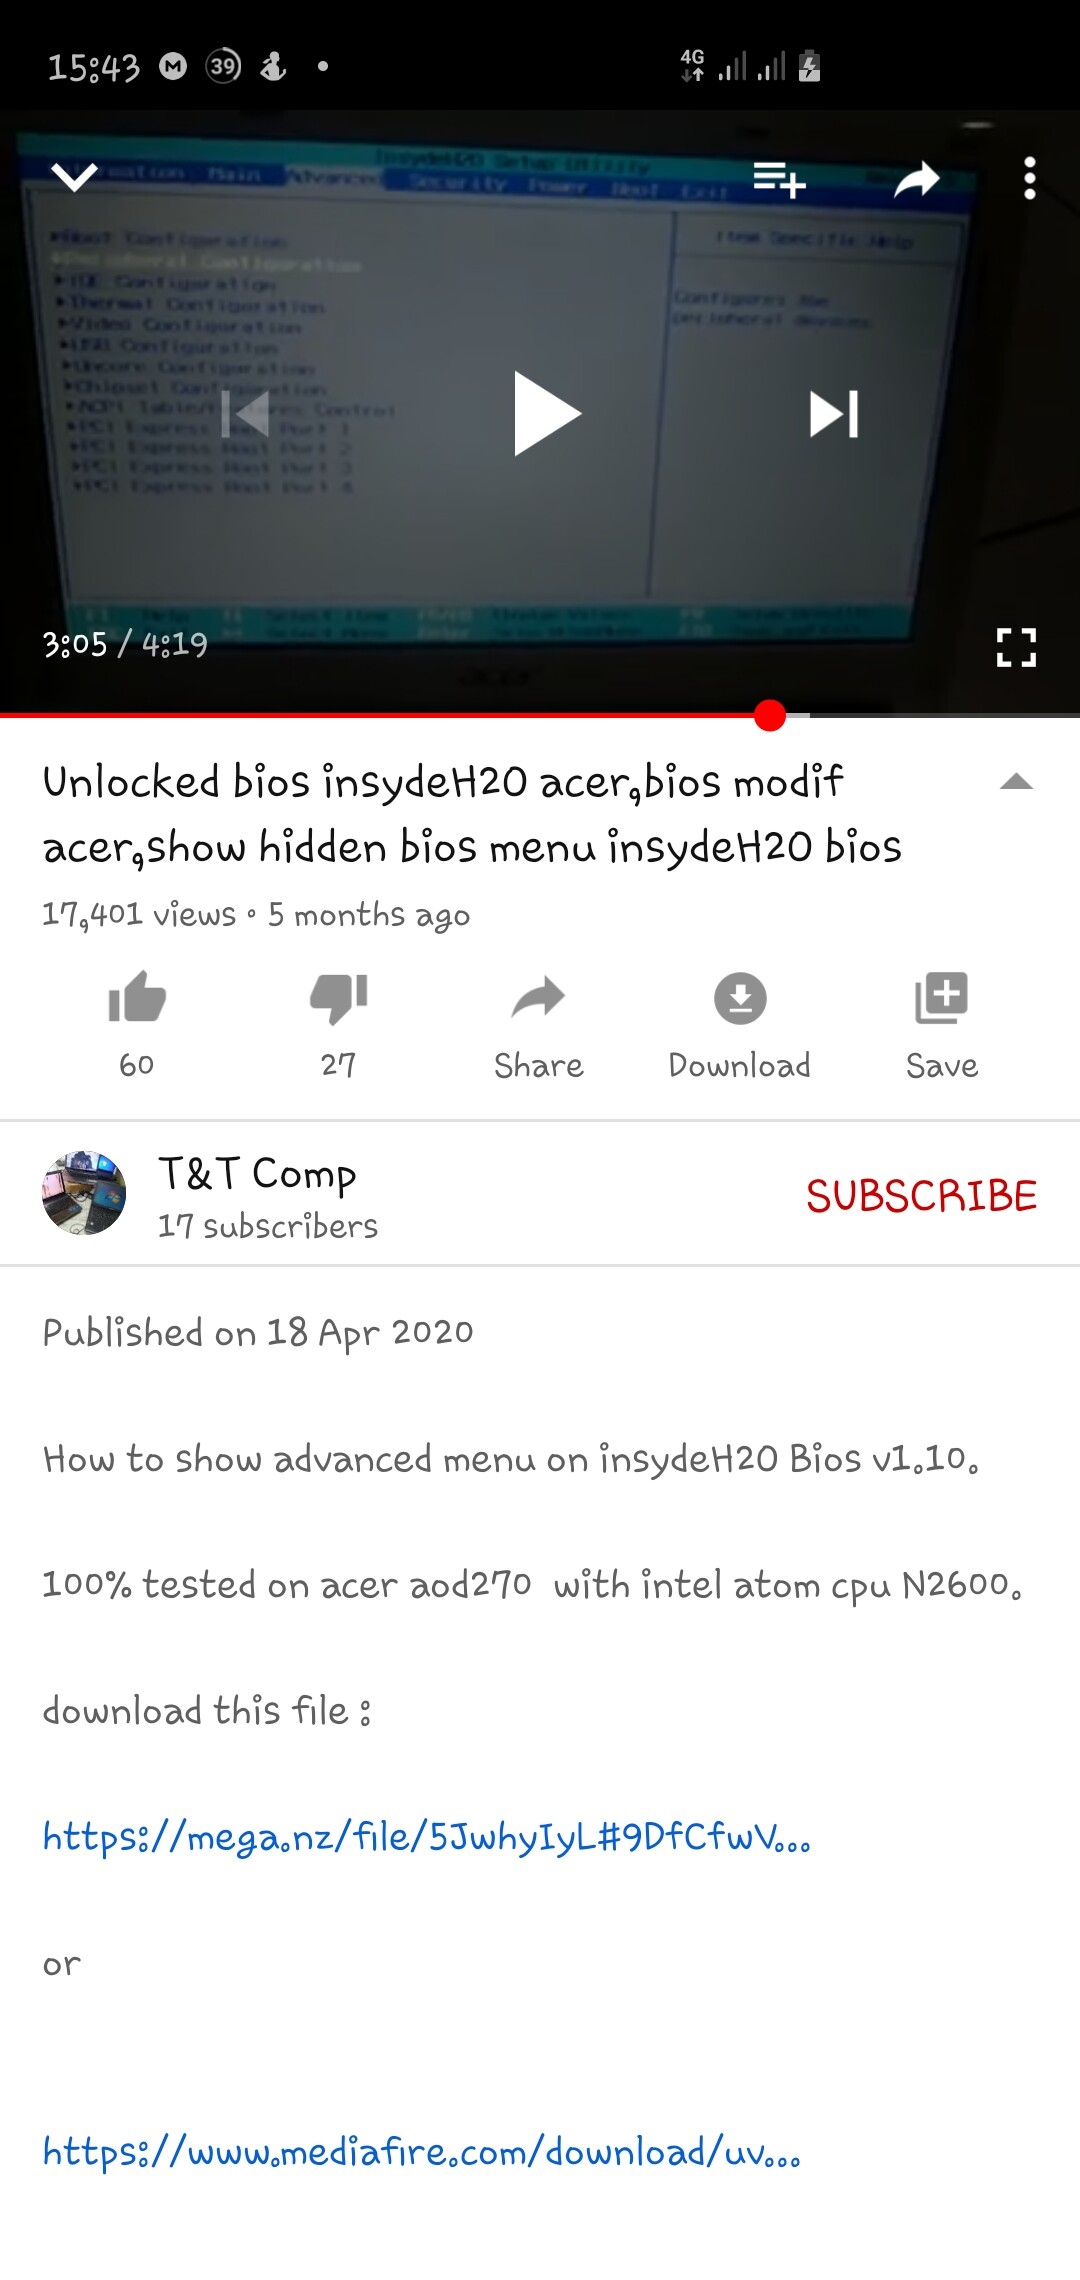
Hi! I need to increase vram allocation in bios after trying the windows registry method - HKEY_LOCAL_MACHINE\SOFTWARE\Intel\GMM and it does not working anymore. (It worked before but somthing has canged) So, I have only one solution to do it. Unlock the ADVANCE MENU.
# My laptop model : ACER Aspire E 15 (E5-575-58KK) # BIOS Version : 1.45 (Insydeh20 v5)
So, I tried some tricks to unlock it Fn+Tab x 3 / A key and it wasn’t help.
But i watched a video on youtube and seems like he use a bootable drive to reinstall modded insydeh20 bios that has given by you. That’s just what i need. But the bios version of his laptop is so old and inappropriate for my version.
Could you give the a solution like that please. If you want further more details i will provide.
I cannot put either external links or heavy files. (BIOS_Acer_1.32_A_A.zip - 34.91MB) so i attached all links in a text file.
@DukeX9 - I can mod and unlock BIOS menu for you, but not in a way that’s described in the info you supplied. I mean I can’t give you bios files and stock package to use in that manner, unless maybe you link me to the thread (here) that is linked there on bottom image
The normal way I help members to do this is via FPT BIOS region dump, VSS/NVRAM var dump, bypass locks, make a new dump after locks disabled, then edit this, then flash it back via FPT
If you want to get started my way, please do the following below, but do not send me BIOS from step #1 yet. Also, if step #2 fails, which is expected, put system to S3 sleep, not hibernate, then wait one minute, wake it up and try #2 again If still fails, then your BIOS does not have this bug and we carry on. If #2 passes after wake from sleep wait cycle, then you do not need to do the vars stuff below and go ahead and upload file from step #1
If you have already modified the BIOS in ANY way, you will need to re-flash it back to factory defaults using factory method (NOT FPT)!!! Additionally, please remove all BIOS passwords, disable secure boot, and disable TPM or Encryption if you have enabled. Do this before moving on to below
If you do not have Intel ME drivers installed, install them now from your system driver download page, then start over here after reboot. Check your BIOS’ main page and see if ME FW version is shown. If not then > DOWNLOAD HWINFO64 HERE <
Once HWINFO is open, look at the large window on the left side, expand motherboard, and find the ME area. Inside that section is the ME Firmware version. Take note of the version. (ie. write it down or get a screenshot)
Once you have that, go to the thread linked below, and in the section “C.2” find and download the matching ME System Tools Package for your system. (ie if ME FW version = 10.x get V10 package, if 9.0-9.1 get V9.1 package, if 9.5 or above get V9.5 package etc) > DOWNLOAD " ME System Tools " packages HERE <
Once downloaded, inside you will find Flash Programming Tool folder, and then inside that a Windows or Win/Win32 folder (NOT x64). Highlight that Win/Win32 folder, then hold shift and press right click. Choose “open command window here” (Not power shell! >> * See Registry file below *).
If you get an error, reply to this post with a screenshot of it, OR write down the EXACT command entered and the EXACT error given.
((If “open command window here” does not appear, look for the “Simple Registry Edit” below…))
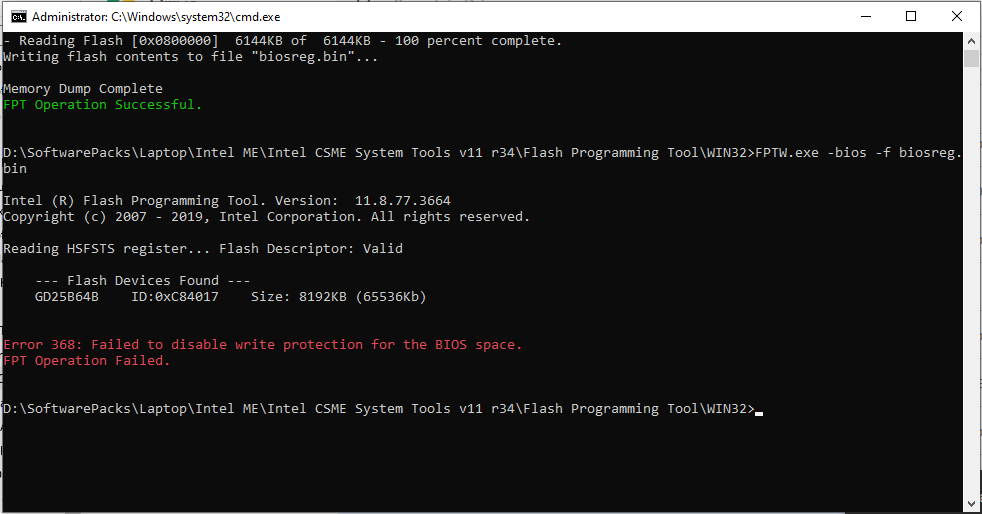
Step #1 Now you should be at the command prompt. You are going to BACKUP the factory un-modified firmware, so type the following command: Command: " FPTw.exe -bios -d biosreg.bin "
>> Attach the saved "biosreg.bin ", placed into a compressed ZIP/RAR file, to your next post!!! <<
Step #2 Right after you do that, try to write back the BIOS Region dump and see if you get any error(s). Command: " FPTw.exe -bios -f biosreg.bin " ^^ This step is important! Don’t forget! ^^
If you get an error, reply to this post with a screenshot of it, OR write down the EXACT command entered and the EXACT error given.
Here is a SIMPLE REGISTRY EDIT that adds “Open command window here as Administrator” to the right click menu, instead of Power Shell Double-click downloaded file to install. Reboot after install may be required > CLICK HERE TO DOWNLOAD CMD PROMPT REGISTRY ENTRY <
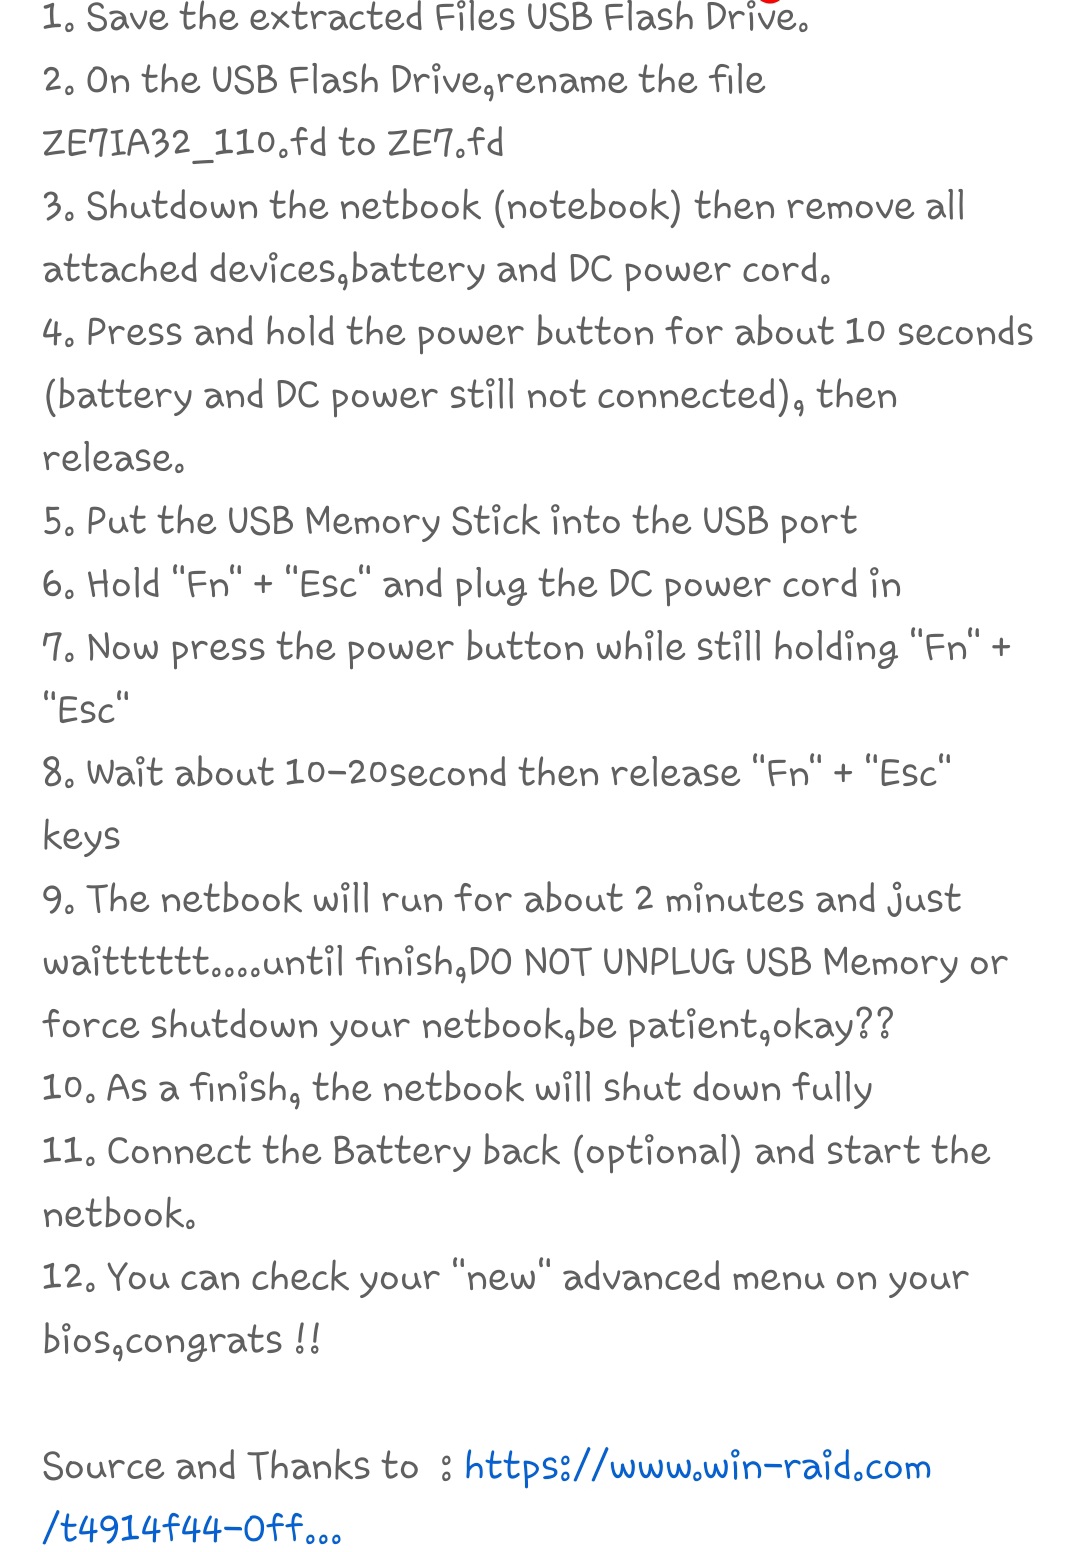
If the windows method above does NOT work for you… Then you may have to copy all contents from the Flash Programming Tool \ DOS folder to the root of a Bootable USB disk and do the dump from DOS ( DOS command: " FPT.exe -bios -d biosreg.bin " )
Additionally, Please download the following package, and run the command below from each versions folder that directly contains it’s exe. Before doing this, make sure you have secure boot disabled in BIOS, any BIOS password removed, and TPM/Encryption disabled. Once done, copy the entire folder somewhere, delete everything but any created vars.txt and then repackage this and send to me, this way all created vars.txt remain in place in the folders of the version that created them. http://s000.tinyupload.com/index.php?fil…212104496994806 << If tinyupload still down >> https://www.sendspace.com/file/5f1anw
Thank you very much for fast reply. So, As you said. I’ve downloaded all drivers and tools. My Intel version is 11.5, build 1058. So, I decided to use this tool and go further.
In the Step #1, I could able to create the bios dump file. Step #2
I think I’ve done everything as you have assigned me. And I created an archive with include H2OUVE var files. (biosreg.rar and H20UVE.rar attached with this post)