@Lost_N_BIOS I did the homework but I forgot to upload it!
https://gofile.io/?c=6QjA6N
That is all I was able to get with the provided tools
I have flashed it and it is the same, nothing unlocked, thank you.
@Lost_N_BIOS I did the homework but I forgot to upload it!
https://gofile.io/?c=6QjA6N
That is all I was able to get with the provided tools
I have flashed it and it is the same, nothing unlocked, thank you.
Please edit your post to add more info, no need to make multiple posts in a row - merged, again 
If you two don’t get it by tonight I will fix for you 
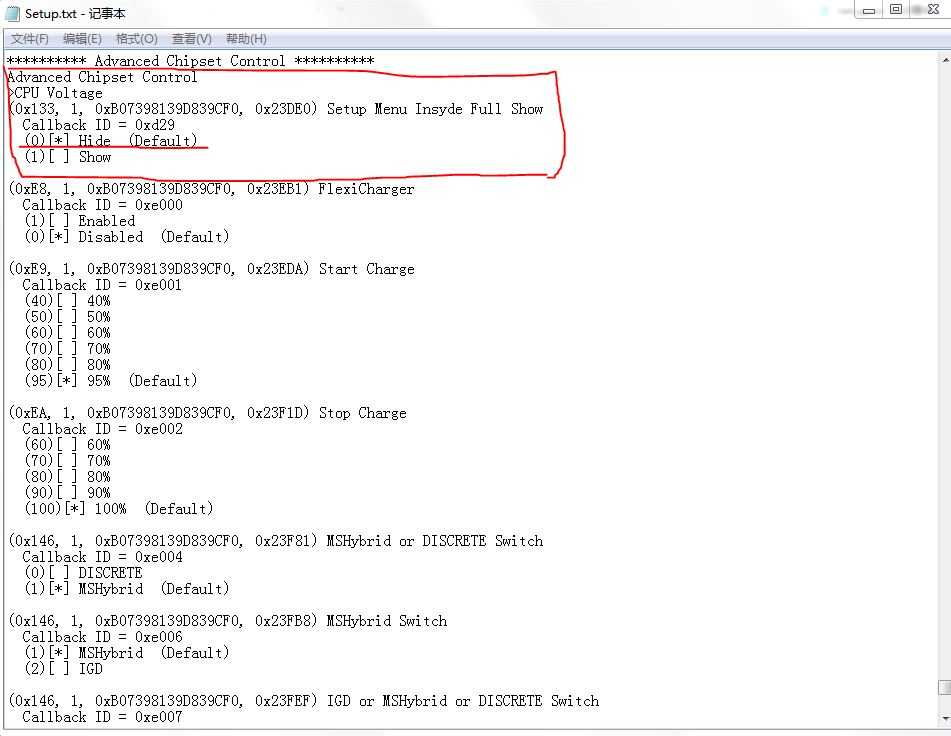
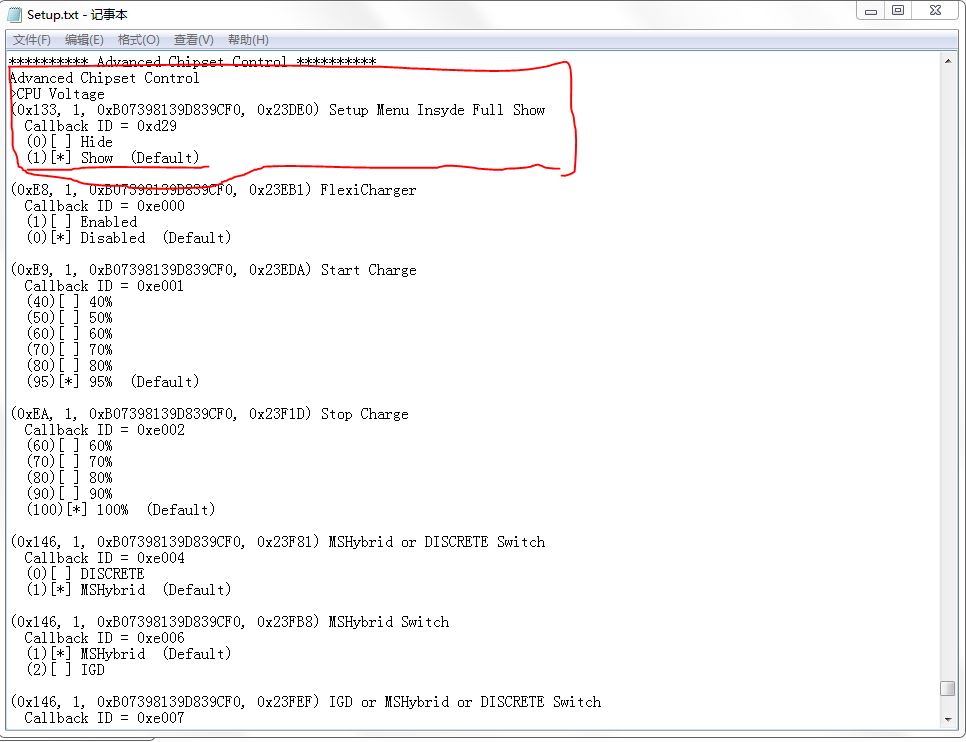
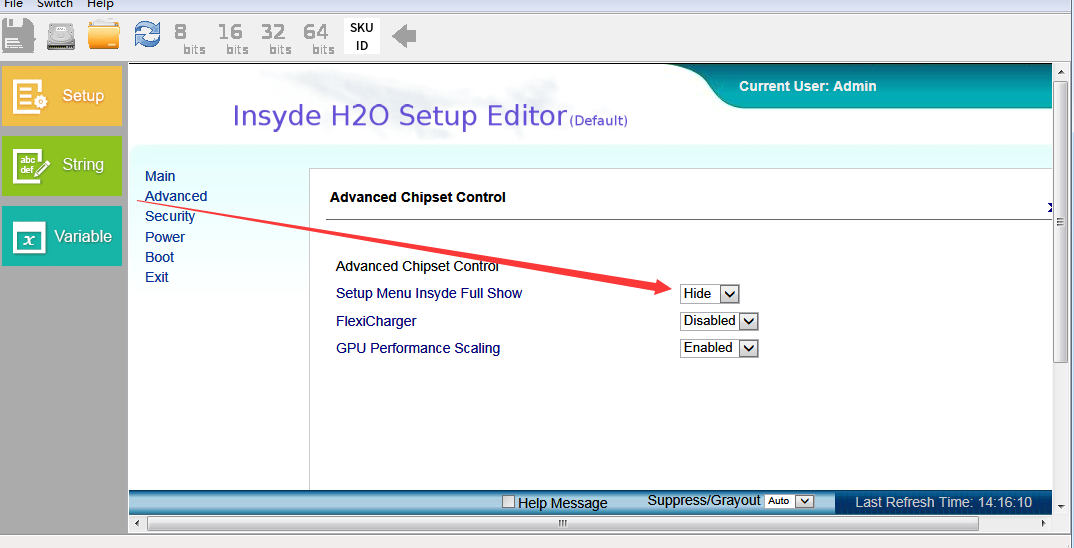
@zr1971jp - not sure what you meant to do there, I see in setup you changed the default “hide” to Default Manufacture, but still left it on hide
Those need switched, Default can be left as it was value-wise (30), 20 is not required, but you do have to make the “visible” default or default MFG (pick one of those, on other/“Hide” use nothing/00).
As it is now you have Default MFG for “Hide” and Default “Visible”, that may work in some instances, in some BIOS, but that is two defaults there, so confusing to a BIOS I’m sure and I would imagine that would invoke setting to be pulled from NVRAM instead 
Normal thing to do would be leave the control variables as is and switch where “Default” is located (ie swap 00 on Show and 30 on Hide, to be reverse of that, hope you get what I mean.)
This may not be the only edit required too, not sure if you did other edit at NVRAM, I didn’t have time to check fully, but that is often required as well, but not always (This is what UVE changes).
Anyway, just wanted to give you heads up on why your edit possibly didn’t help. Make “Show” default (30) (or 20 if you want to try, maybe make two BIOS, one with each), make “Hide” 00 only = nothing there
So ideal goal
One Of Option: Hide, Value (8 bit): 0x0 {09 07 68 16 00 00 00}
One Of Option: Show, Value (8 bit): 0x1 (default) {09 07 69 16 30 00 01}
or
One Of Option: Hide, Value (8 bit): 0x0 {09 07 68 16 00 00 00}
One Of Option: Show, Value (8 bit): 0x1 (default MFG) {09 07 69 16 20 00 01}
If this is on a menu section he can already see, then you can also do the following directly above this setting, and make the setting itself visible
Suppress If {0A 82}
64 Bit Unsigned Int: 0x1 {45 0A 01 00 00 00 00 00 00 00} << target
Change to
64 Bit Unsigned Int: 0x1 {45 0A FF 00 00 00 00 00 00 00} << FF’d = now setting will be visible to user, if this in an already visible menu (I’ve not seen BIOS images yet, so do not know if “Advanced Chipset Control” is visible to him, if not this wont help until it is)
Lock:[[File:??.JPG]] [[File:??2.JPG]]
unlock:[[File:??1.JPG]] [[File:??3.JPG]]
Setup-Lock.txt (534 KB)
Setup-unlock.txt (534 KB)
@zr1971jp what to do with this txt files? Thank you.
---------------
@ Lost_N_BIOS STATUS: UNRESOLVED.
------------------
I cant follow, any help? Thank you.
@zr1971jp - yes, just as I said, move the default, that is all that is needed here, unless other NVRAM edit is also needed, but that we can only know after the proper setup edit is tested.
I do see what you mean, your edit changes it as shown in your images, but this is not how it works in BIOS sometimes, as you can see from his report of no changes.
It’s best done the way I mentioned + NVRAM edit usually needed (Or only NVRAM edit (x9 instances in this case), either way OK, but I always test setup edit alone first) - May need a combo of your edit and mine? Hard to say, I hate Insyde BIOS 
@Brask - yes, sorry, I assumed you wouldn’t be able to follow that, it was meant for zr1971jp, this is manual editing info I was discussing with him. Sorry, I assumed he take that, and send you new BIOS right away, unsure why he didn’t?
Here is mod BIOS, setup edit only first. If this still fails, then we edit vars/NVRAM via the H20UVE stuff I had you do earlier, or via BIOS mod to same area (NVRAM)
Please zip up images for me of your stock BIOS (All pages) before you test this, and then if this changes things, make a new set of all BIOS images too, this way I can further unlock once this is done.
I assume this edit is not all that’s required, normally for Insyde BIOS it goes by what’s in the NVRAM in default or custom profiles. Once this setting change works it will unlock some settings, but I bet there will still be some hidden settings (many), so I need to see these images or we can’t continue properly.
Please put them all in a zip or 7zip preferably. Also, if you can, set your camera to small images, I don’t need 3-5MB images of each BIOS page, I only need quick glance, no need for high rez images.
Flash via >> FPTw.exe -bios -f biosregM1.bin
If that fails to show menu items, then test this one (has NVRAM edited) >> FPTw.exe -bios -f biosregM2.bin
http://s000.tinyupload.com/index.php?fil…189796983214047
There is no problem with this modification, and it has been successfully implemented on many similar machines. He didn’t succeed. Maybe he didn’t brush my modified BIOS at all (maybe he brushed the original BIOS file).
Your modification will not succeed.
You modified the BIOS screen:
[[File:QQ??20190829141644.png]]
There is no change; once the modification is successful, the choice will change.
-------------
Do not make a mistake when you rewrite my modified BIOS file. The name of this BIOS file is the same as the name of the BIOS file you backed up. It is recommended that you modify the name of this BIOS file and rewrite it.
After the brush is complete, restart loading the BIOS default settings
@zr1971jp - OK, thanks! I’ve done before, and it didn’t show in UVE. Sometimes success that way, sometimes not. I did check and see what you mean in UVE, but it’s changed, maybe success this time like others in past too.
It’s good to know your mod BIOS is tested, you did mean this exact model you have already unlocked and tested correct? Or did you just mean this method is tested?
Yes, it is possible he didn’t flash the correct BIOS you sent him, mistakes happen He should try again to be sure, before testing my BIOS!
@Brask - be sure you test flash the BIOS at post #17, and do not mix it up with your original biosreg.bin file (rename it to whatever you want, so you know it’s mod from zr1971jp) then flash it via FPTw.exe -bios -f filename.bin
@Lost_N_BIOS what to do if it goes wrong?
@Lost_N_BIOS biosregM1.bin or biosregM2.bin or both?!
I flashed and for some reason @zr1971jp didnt work, requires nvram reset? What is a "brush"?
@Brask - first, please start editing your posts when you want to reply more!
Second, read post #26-27 and do that first, it sounds like the BIOS zr1971jp sent you is already tested and confirmed working, and you possibly reflashed your original FPT dump instead of the mod one he sent you.
"Brush" means flash BIOS. I think you maybe mixed up the files, since it has same name. Download it again from his post, save to new folder, and rename it, so you know which is his mod, then flash it again
Yes, it may require NVRAM reset, this can be normal, you want to enter BIOS and load optimal defaults again anyway (restore defaults, load optimized, whatever your BIOS calls this)
@Lost_N_BIOS flashed again, confirmed working when loading defaults. Thank you.
Nice! So all is unlocked now and visible to you? If yes, thanks for confirmation and thanks again to @zr1971jp
Last question, memories I have are 2667mhz, they are shown in bios and windows as 2400, how to change the multiplier to 2667? Thank you.
If I select XMP profile, they are blank and PC wont boot.
I can’t see your BIOS, you’ll have to show me what all memory options you have visible. Can you see the memory multiplier option?
Are you certain your memory has XMP Profiles? “They are blank” sounds like no XMP profiles. XMP may not be ideal, especially with everything else on auto, that may be why it’s not booting, or your CPU cannot handle the XMP speed and timings, with stock voltage, hard to guess
What is your memory model? Is it 2x4GB or 2x8GB etc? Please show me image of CPU-z SPD tab, and one image of HWINFO64 main little window that looks similar to CPU-z, this way we can see what XMP profiles are there, if any
To get 2666 manually, you have to set one of the following (either way can work, but it’s possible only one way will work)
Memory Profile = Custom (For both below)
Memory Reference Clock >> Set 100 >> Set Memory Multiplier >> 26 = 2600
Memory Reference Clock >> Set 133 >> Set Memory Multiplier >> 20 = 2660
For both, set your memory standard voltage, and main timings + nMode = 1 (2 at first if you want, this is command rate 1T/2T)
https://imgur.com/a/PKa3UKI
-------------
Slot 1 1x16 2666 CL16
Slot 2 1x8 2666 CL14
--------------------------------------
It seems that the conflicting one is thee 1x8 module:
https://imgur.com/a/4RioBwJ
--------------------------
Solution found: I have set all the memory settings to 0 auto, the frequency 133 MHz and the multiplier to 10 and the voltage 1.35, works now at 2667 MHz. Any way to optimise the memory values instead of leaving them auto?
--------------------------------
@Lost_N_BIOS memories are running at 3000MHz now without any problem 133x11. How much higher can I achieve on the RAM? Going to start benchmarking at 3000MHz to see if there is any difference.
-------------------------------
@Lost_N_BIOS memory voltage is 1.35V
------------------------------
New image of the memories working at 3000MHz
https://imgur.com/a/sAt9bR4
What would be the optimal settings for 2666mhz or 3000 mhz.
at the moment it is 21-21-21-47 and I think this lasst value is too high
-----------------------------
https://imgur.com/a/O5FODv0
15-17-17-34-450 2666
Do I get any benefit from putting the memory to 3000MHz or the 8750H is limited to 2666 because Windows sees 3000MHz
@Brask - WOW, please edit your posts if you need to add more info and no one has replied yet, thanks! Look at all those posts I had to merge
CPU-z images are not helpful, and only show JEDEC profiles, please send CPU-z dump.txt or look in HWINFO64 at each module directly at Motherboard >> Memory >> Choose memory stick, then scroll down, there you will find if they have XMP or not.
Mixing memory is never suggested or ideal, and often will not work together smoothly, especially at high speeds, and even more-so at stock speed when memory are not even same size or type (different IC’s probably used for these, especially since two different brands, speeds, timings, and size) = terrible mix-match here
From your second linked image gallery, unsure what that is from, maybe some strange area in HWINFO64 that I’ve not seen/used before But, anyway, it looks like neither have XMP if that is some HWINFO window, it shows XMP if present in the “Ext” column
This is all 1.20V memory, I would not use 1.35 as it may damage them. Setting memory timings, you can use what you see in the JEDEC tables.
I don’t know what would be optimal settings for the memory timings, or speed, I personally would not use those sticks together as it will never be stable, except maybe under stock speed (ie 2400 or so, there you may get lucky)
If you can run 3000Mhz and be stable, then no problem to use that, there is no limitation. Benefit can only be measured via benchmarks and stability tests, find what you can use best timings and lowest voltages that are stable at 3000 then benchmark best timings/voltages you can find that are stable at 2400/2666
Stable means passing benchmarks and memory stability tests, not “can it run windows for a day or more OK”
Memtest86+ 12 hours or longer is good way to test, but I would also do multiple instances of HCI memtest with free memory divided between as many instances of this test per how many CPU cores you have (including HT, so if 4C/8T then use 8x instances with free memory divided beteeen then - minus a little to spare)
I am happy running at 2666MHz 14-16-16-32-420
What do you think about it? Thank you @Lost_N_BIOS
I like the tRFC value 

@Lost_N_BIOS is there any way to increse voltage or TDP of the RTX 2070 MaxQ and convert it to MaxP?
Increase voltages or TDP may be possible, send me a dump of the vBIOS using GPU-z
Attached dump , thank you and sorry for my late response.
TU106.zip (677 KB)