Hi Fernando,
Some progress on Graphic card.
I got from eVGA Technical Support a special “UEFI BIOS” for the EVGA 670 GTX FTW, they provided me a utility to flash this new BIOS. This “UEFI BIOS” is compatible with “legacy” and “uefi” mode. At any time we can come back to the original BIOS version with NVIDIA flash tool such as NVFLASH.exe.
So, currently in “legacy mode” the card is working as well as with original bios.
On other side i am stopped on this issue:
As you know CD/DVD are no longer detected in boot sequence when using 12.7 OROM RAID. So, i can"t select a ACRONIS CD/DVD boot to do backup.
Please, can you confirm me you get the same issue with UEFI mode and 12.7 sata driver ?
Do you think this is only a ‘temporary’ bug to be fixed soon or is it a “feature” of this technology ?
The workaround i thought was to replace the CD boot with a USB boot.
So, using RUFUS application i tried to convert the .iso file used to create the CD boot to a USB boot file. No success, RUFUS does not recognize the .iso file structure !
So, what do you suggest ?
Yes, I am not able to boot off any non-UEFI CD/DVD unless I have set the SATAController to AHCI mode and switched from UEFI to LEGACY mode. But your experience, that you are not able to boot off any CD/DVD, is caused by a bug either of the Intel RAID ROM v12.7.0.1936 or of the Intel RST(e) Drivers v12.x.x.xxxx.
Your current problem hopefully will be solved by the next Intel RST Drivers/OROM module, but the boot limitations regarding non-UEFI media after having set the BIOS to a clean UEFI Mode, is a disadvantage of the UEFI mode settings.
Acronis TrueImage (not even the newest version) doesn’t support the GPT partition table. So you have to decide anyway either to stick with your LEGACY mode Win7 installation or to use another sort of backup software. Why don’t you use the Win7 backup option? You can let Win7 save complete partitions and store it on any separate (extern) HDD. This was the way I have done it as long as I used Win7.
Another thought: What about an upgrade to Windows 8.1? This is the actual Windows OS and a much better basis for a switch from the LEGACY to the UEFI Installation mode.
Fernando:
What do you call exactly "UEFI CD/DVD" ?
Is it the firmware device (hardware) to be UEFI compliant ?
or is it the media format structure to be "UEFI compliant" ?
or is it the content of the media to be written in respect of UEFI specifications ?
or is it a mix of all these items ?
What do you call a "clean" UEFI mode ? Are you speaking of OS only or OS plus hardware ? Is a PC may be more or less "UEFI" ? Or is "UEFI" only a way of the OS is intalled ?
I see sometimes you refer to "UEFI ANNEX" in bios , is it the same thing as "Launch EFI shell from system device" in EXIT menu ? or "UEFI/Legacy Boot" option in BOOT menu ?
This is an optical drive, which is shown in the boot order with the Suffix "(UEFI)". It contains a media like a Win7 or Win8 installation image, which does fully support the UEFI mode (e.g. has a special folder named "efi" etc.).
An installation of an OS like Windows 8 without using the "Compatibility System Module" (CSM) of the BIOS at all, that means the CSM option within the BOOT section has to be set to DISABLED, before starting with the OS installation. The OS Installation in "clean UEFI mode" will only succeed, if the hardware of the system (inclusive the discrete graphics Card) is completely UEFI compatible.
No, I mean the "(UEFI)" suffix behind the listed bootable devices. If you want to install an OS like Win7 or Win8 in UEFI mode, you have to choose the bootable device with such suffix. Otherwise you will not get the OS installed in UEFI mode.
Example:
If you prepare 2 USB Flash drives for the installation of Windows 8.1 Preview, one of them by using the "Microsoft Win7 USB-DVD Tool" (which will do an NTFS formatting of the drive) and the other by using the "Rufus Tool" (choosing the FAT32 formatting option), and you hit F8 showing the "Boot Options" while starting the computer, you will realize, that only the second USB Flash Drive, which has been FAT32 formatted, will be shown with the Suffix "(UEFI)" and the other one not, although both of them do contain absolutely the same data. The simple reason is, that an NTFS formatted drive cannot be used for an UEFI mode OS Installation.
Fernando,
Do you agree with this detailed procedure on "How to migrate from a W7 64 bits system RAID 0 legacy mode to UEFI mode (on a P8Z77-V Deluxe motherboard as example) ?
1) Document current BIOS settings
2) Have the “Parted Magic Boot CD” (V 2013-06-15) , and Prepare 3 separate USB keys (FAT32):
Key 1: with BIOS 2003 modded (MMtool) with “satadriver” module 12.7.0.1036, ready for FlashBios backup (“BRenamerl”)
Key 2: with 64 bits V12.7.0.1036 WHQL driver folder
Key 3: with W7 64 UEFI bootable (Rufus tool)
3)Update external Graphic Card BIOS to “UEFI BIOS” version
4)Backup the RAID 0 system
5)Shutdown
6)Boot "Parted Magic Boot CD"
7)Break “LEGACY” current RAID 0 + Secure Erase the 2 x SSDs
8)Clear CMOS
9)Flashback new BIOS with Key 1
10)Power OFF totally (>1 mn)
11)Unplug (power cable AND SATA connection) of unneeded HDD (except the 2 x SSD)
12)Bios settings modification (CSM=disabled, , Build the UEFI RAID 0 Array)
13)Boot off UEFI W7 64 from key 3
14)Start W7 UEFI install
15)Inject Sata UEFI driver from key 2
16)Finalise W7 install, shutdown
17)re plug all nedeed drives
18)Reboot
19)Install all updated drivers, applications, etc…
20)Valid installation, tests
EDIT by Fernando: Completely quoted text deleted
@ 100PIER:
Your schedule seems to be ok.
Some side notes:
1. You should break the RAID array before you will boot off the "Parted Magic" CD.
2. Maybe you have to enter the BIOS and to load the default settings (F5), before you are able to boot off the "Parted Magic" CD.
About "Parted Magic" CD:
I thought the "Parted Magic" was the tool to "break" the RAID.
So, did you say to "break" first the RAID under BIOS (CTRL-I, Delete Array,…) and then (F5) to come back to default settings and then boot off the "Parted Magic" CD to do a secure erase ?
Question: is a SSD secure erase the same thing as a HDD secure erase ?
If not, do we have to use instead "Parted Magic" CD the Samsung tool Magician Software 4.1 with "secure erase" option (on an auxiliary PC) ?
Yes, that is what I meant.
It is quite similar. Do not use the "enhanced" serure erase option. The "normal" secure erase operation is better.
You can use the Samsung tool as well, if you have Samsung SSDs. I personally always let "Parted Magic" do the Job (only exception: Intel "Postville" SSDs).
Fernando,
Here the final version of the detailed procedure on:
“How to migrate from a W7 64 bits system RAID 0 legacy mode to UEFI mode” (example based on ASUS P8Z77-V Deluxe motherboard)
1) Document current BIOS settings
2) Have the “Parted Magic Boot CD” (V 2013-06-15) or the “Acronis True Image Home 2013 Rescue CD” if you have bought Acronis product , and Prepare 3 separate USB keys (all FAT32 formatted):
USB Key 1: with BIOS 2003 modded (MMtool) with Intel “satadriver” module V12.7.0.1036, make it ready for ASUS FlashBios backup (“BRenamerl”)
USB Key 2: with 64 bits iRST V12.7.0.1036 WHQL driver folder
USB Key 3: with W7 64 UEFI bootable (made with Rufus tool)
3)Update external Graphic Card BIOS to “UEFI BIOS” version (ask to manufacturer eVGA, etc…)
4)Full Backup the RAID 0 system on external device (W7 backup, Acronis, etc…)
5)Shutdown
6)Boot BIOS sequence , CTRL-I OROM Menu to Break “LEGACY” current RAID 0 (all datas be lost). Exit with modified settings.
7)Boot “Parted Magic Boot CD” or “Acronis TIH rescue CD” to Secure Erase (select ‘normal’ algorithm) each one of SSDs used in the old RAID 0 array, shutdown
8)Boot BIOS , select Default Parameters setting [F5]
9)Clear CMOS
10)Flashback new BIOS with USB Key 1
11)Power OFF totally (>1 mn)
12)Unplug (power cables AND SATA connections) of unneeded HDDs/SSDs (except the 2 x SSDs for RAID 0 array)
13)Boot BIOS sequence , settings modification (CSM=disabled, Build the UEFI RAID 0 Array, etc…), save settings when exit.
14)Boot off UEFI W7 64 from USB key 3
15)Start W7 UEFI install
16)Inject Sata UEFI driver from USB key 2 when prompted
17)Finalise W7 install, shutdown
18)re plug all needed drives
19)Reboot
20)Install all updated drivers, applications, etc… Validation, tests
EDIT by Fernando: Completely quoted text deleted
Fernando,
I am currently stopped at Step 13 , CSM=disabled.
But how exactly do you Build the UEFI RAID 0 ?
I can’t get the specific menu to Build it.
I use a French azerty keyboard.
What exact keyboard keys to invoke to get the UEFI RAID 0 menu (replacement of CTRL-I action) ?
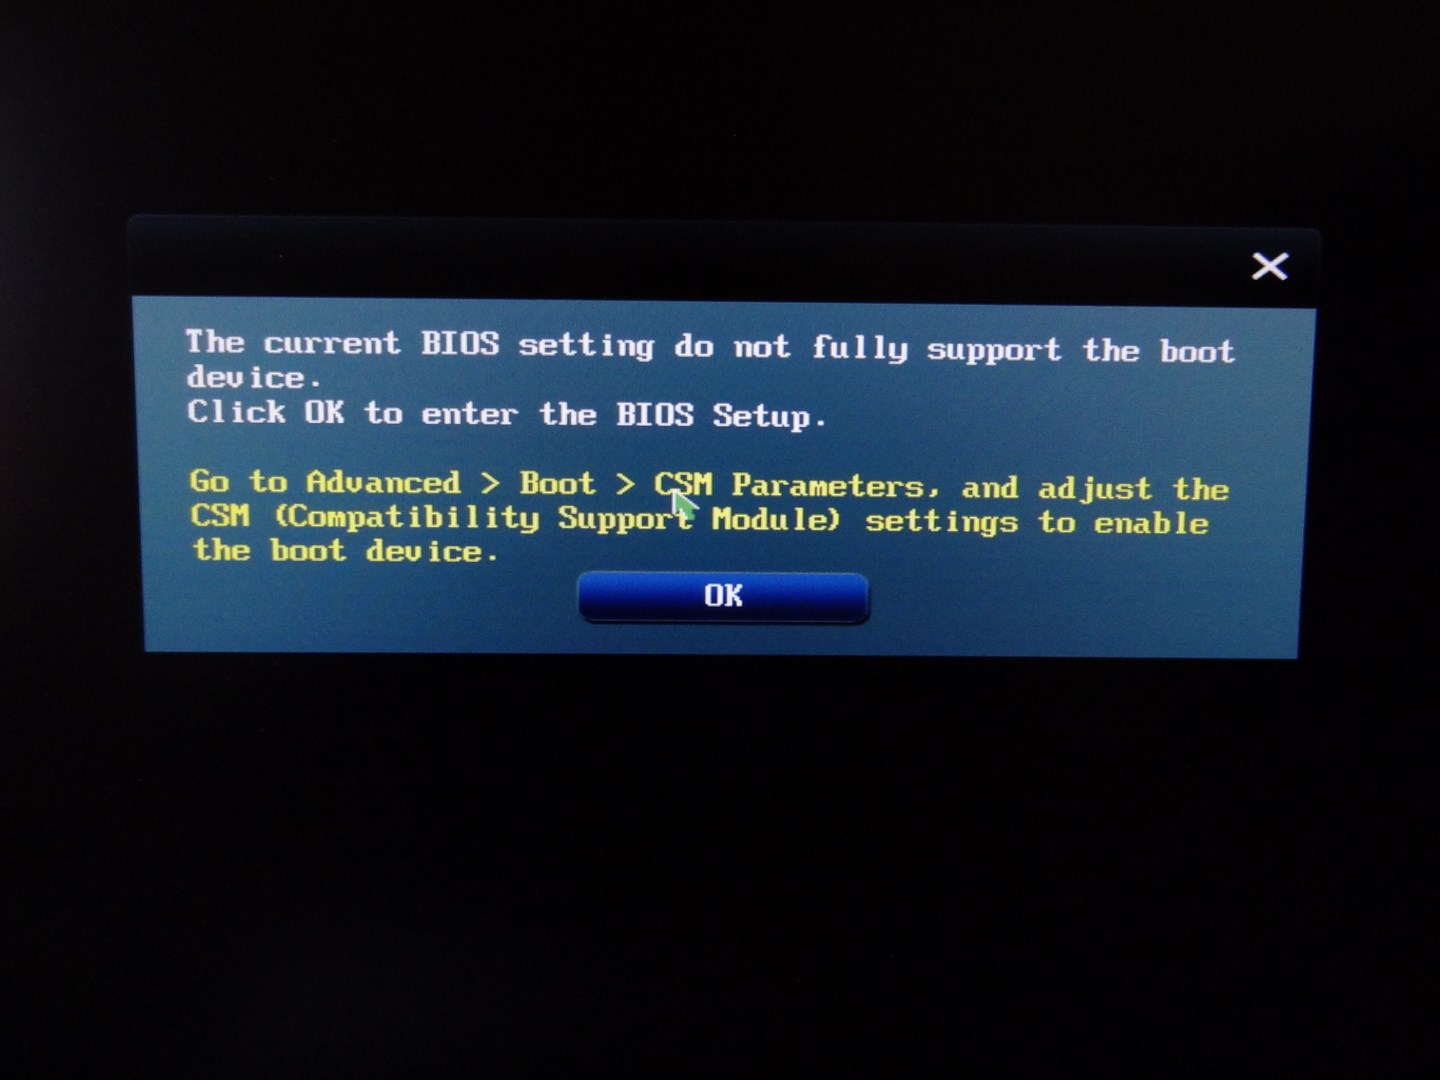
At the moment i have the warning menu :“The current BIOS setting do not fully support the boot device. Click OK to enter the BIOS setup…”
Enter the BIOS, go forward into the "Advanced Option" part and hit the right arrow key sometimes. Then you should see the tab named "Intel(R) Rapid Storage".
After having hit the tab, you should be able to create your UEFI mode RAID0 array.
Sorry, I have done this procedure but nothing happen !!
No tab named "Intel Rapid Storage" !
What is wrong ?
Moreover i observe that "quit without registering settings" is ignored and come back again to the same menu.
is it normal to quit i have to power off ?
@ 100PIER:
When you have done the needed BIOS settings like switching "CSM" to "DISABLED", you should save it and completely power off the computer for a while.
Then you should be able to join the "Intel(R) Rapid Storage" tab from within the BIOS.
Tip: You should set the BIOS option "Option ROM Messages" to "Keep Current". You find this option within the "BOOT" section of the BIOS.
Fernando,
I have completely power off th PC.
Sorry, not able to join IRS tab !!!
i have set Option ROM messages to Keep Current (it was not the default value)
About Setting Interrupt 19 ??
Any suggestion ?
Look >here<, where I have posted all my BIOS Settings within the BOOT section.
If you are within the "Advanced" BIOS section, don’t you see anything on the right side of the tab "Applications". There should be the LAN tab and then the IRST tab. Did you really try to hit the right arrow key very often?
Which SataDriver Version is within your actual Mainboard BIOS?
Fernando,
i used the Intel RST(e) EFI RAID "Satadriver" FFS module V 12.7.0.1936 (31/05/2013) (.ffs found on your site).
i have used your guideline to insert the new module in official asus bios 2003 with orom 11.0.0.1339
i have checked the extracted module of the bios modded , version near "SATA" pattern is well 12 7 0 1936
To be sure what you call the "right Arrow key" is it the "Upper Arrow" key located on the right side of the keyboard , just Under the "enter" key ? or is it in the additional pad, on the right, with a group of 4 keys (left, up, down, right) ?
In Advanced BIOS section i see absolutely no tab "Applications" !!
It is the group of 4 keys and you should use the right one of them.
How is the Advanced BIOS tab named, which is on top on the absolute right side? Is it "Tools"?
Fernando,
YES, i understand the confusion about the key.
I used the wrong key, in the wrong menu !
The ‘good’ key is the ‘right arrow’ NAVIGATION key on the most right of the keyboard.
On other thing is I was confusing about what is exactly “Advanced MODE”…
In fact the concept of ASUS UEFI BIOS Utility - “Advanced MODE” covers at least 9 different tabs, (Main, Ai Tweaker, etc…), one of them has the confusing name “Advanced”. Go into ‘advanced’ bios is not limited to the “Advanced” tab menu.
So now, i have discovered that i can use the NAVIGATION keys ‘right’ and ‘left’ to select various tabs in the “UEFI BIOS Utility - Advanced MODE”.
Among the tabs the most right on the immediate screen is “TOOLS”, and then when navigate with ‘right key’ i well discovered 3 hidden tabs:
2 are associate to the 2 LAN components and one other to the ‘Intel Rapid Stor’ and so i can create the RAID configuration …
The ‘Intel (R) RST 12.7.0.1936 SATA Driver’ indication is well displayed.
Nota: Nowhere in the 2 ASUS User Guide (E7163, E7667) delivered with the mboard package these multiple ‘hidden’ tabs are documented …
Thanks again for your help to progress
Fernando,
Stopped again !
UEFI W7 boot USB key not detected…
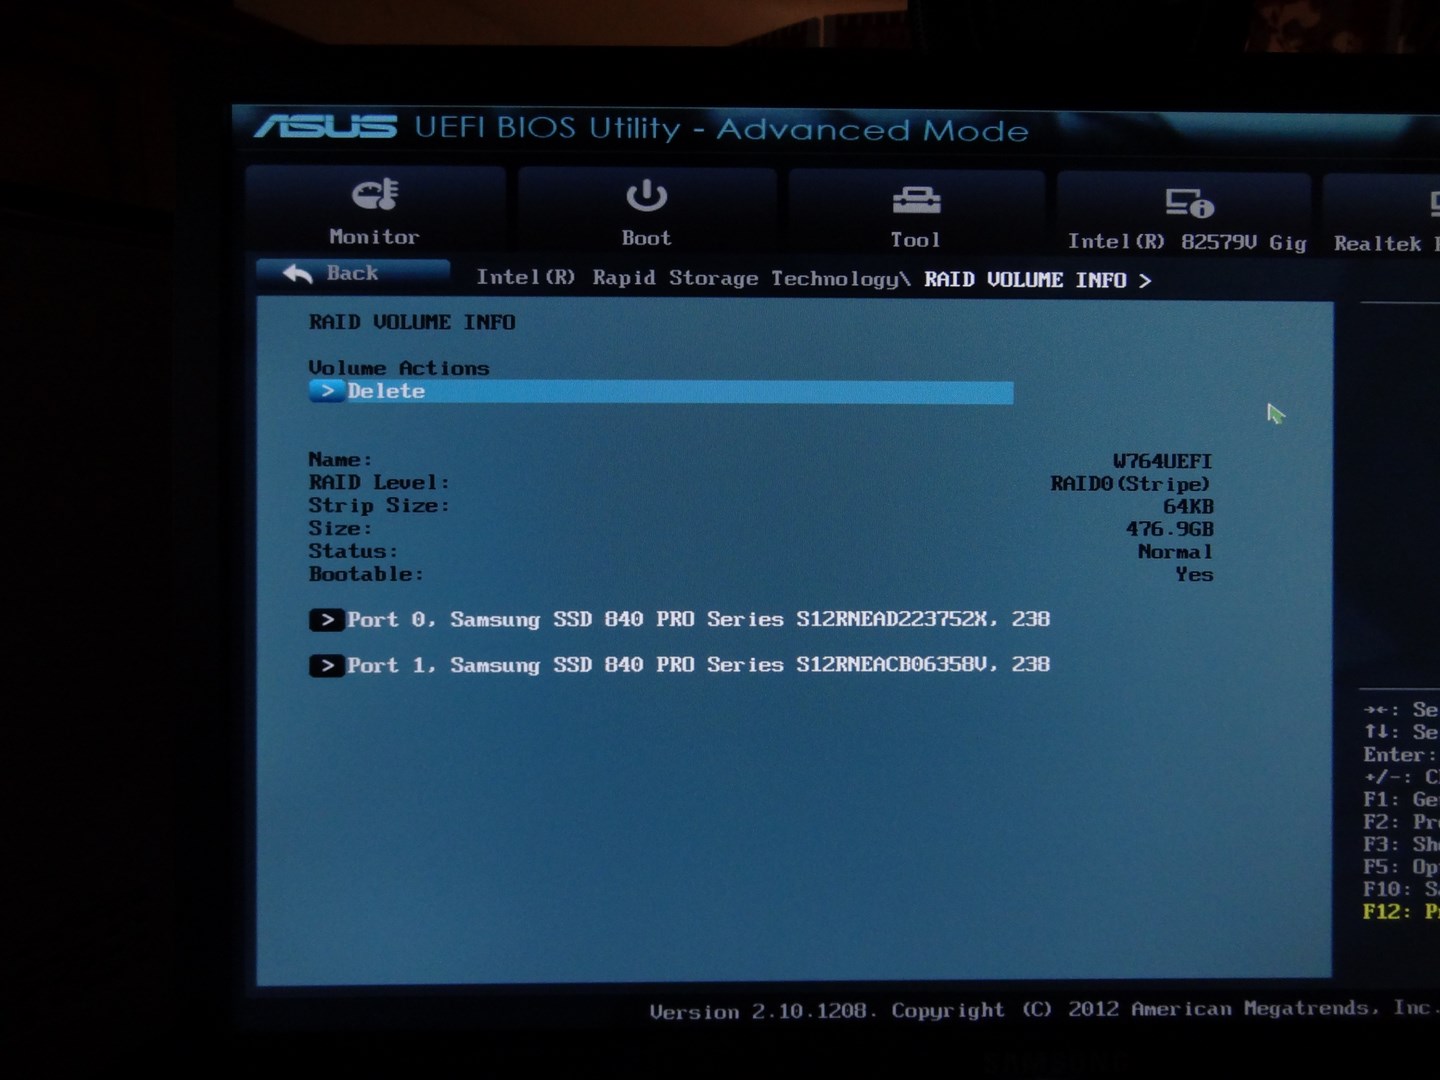
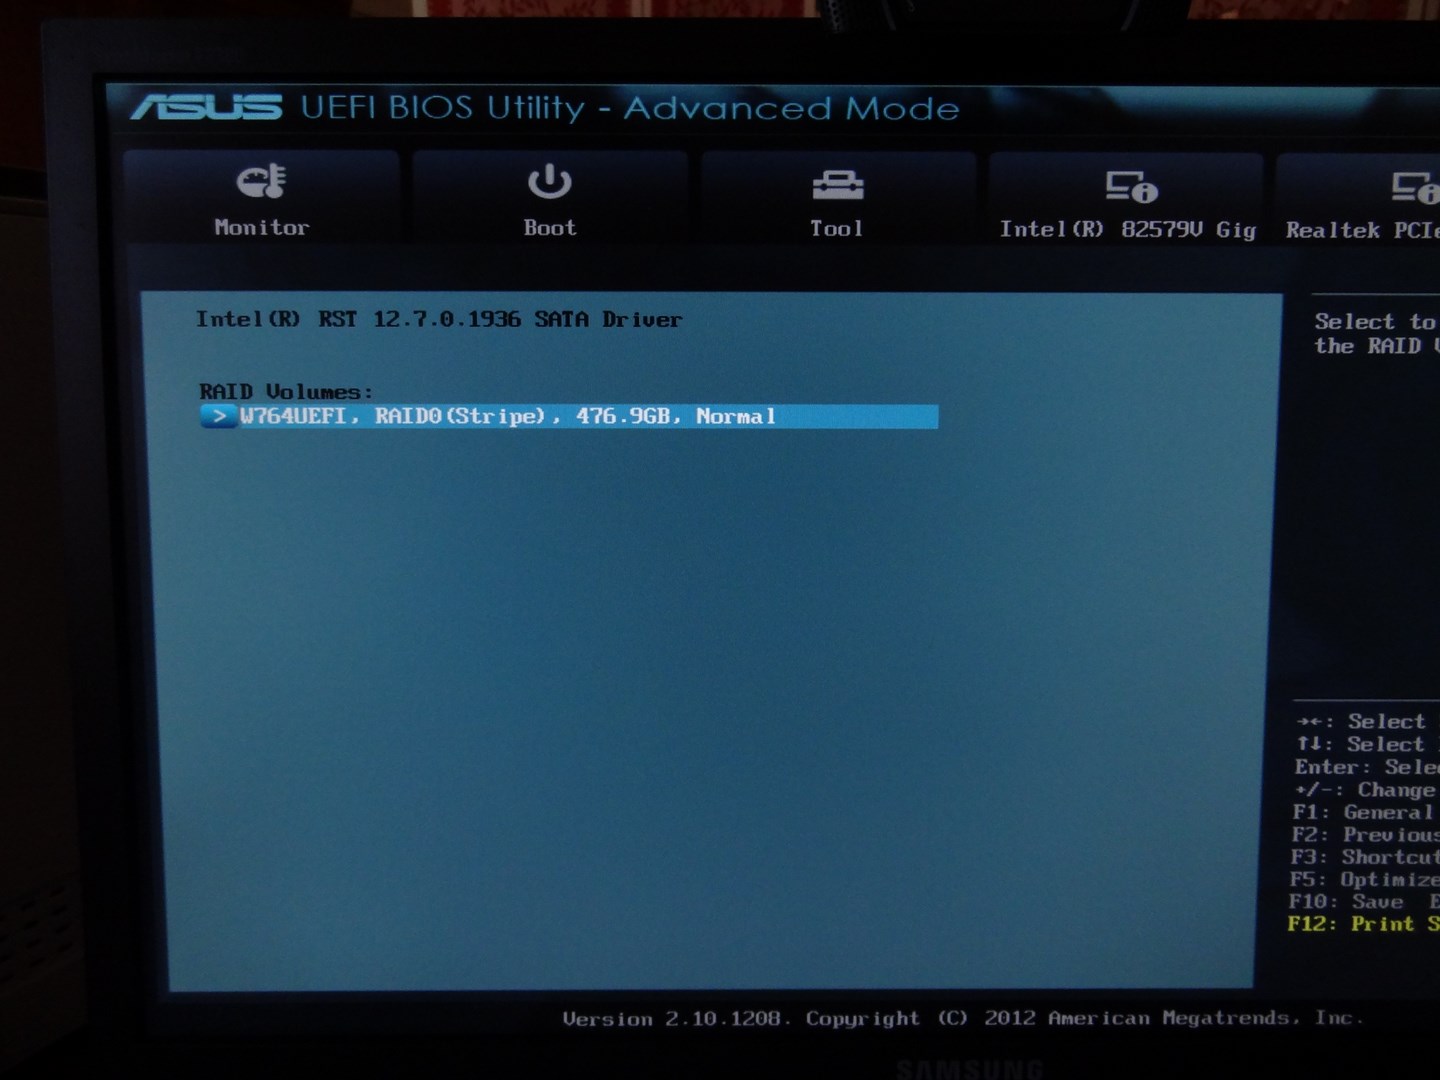
1)UEFI RAID 0 seems well built:
[[File:DSC03019 (Copier).JPG|none|auto]]
[[File:DSC03011 (Copier).JPG|none|auto]]
Is this OK to have Volume "NORMAL" ?
2)This is the USB 3.0 UEFI W764 bootable produced with RUFUS:
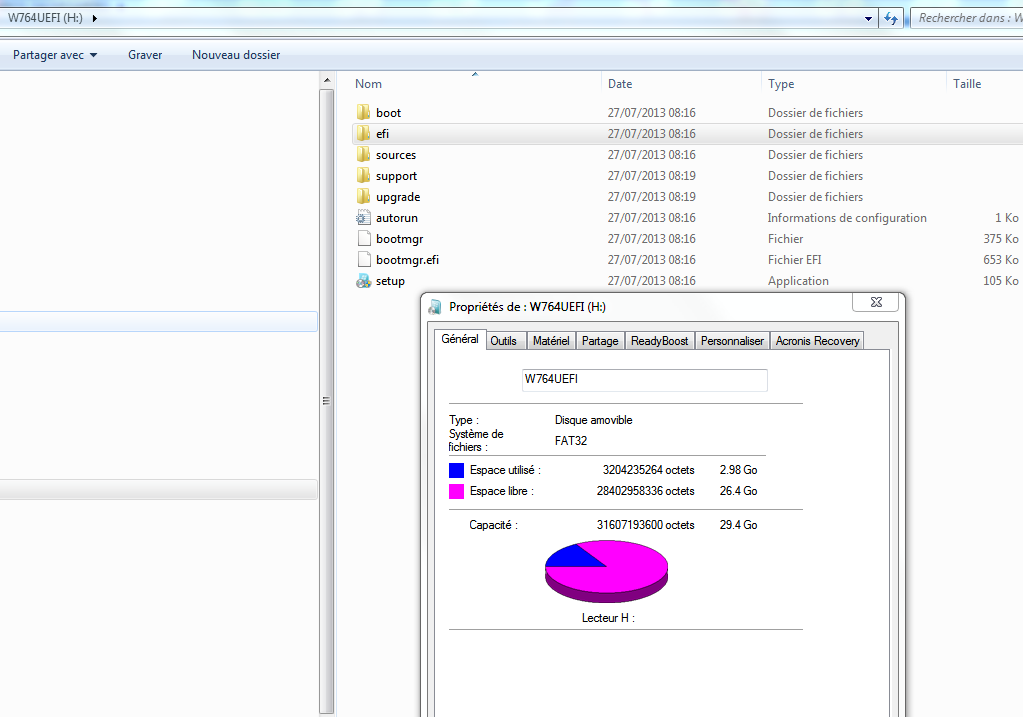
3)This UEFI W764 USB is not detected, why ?
[[File:DSC03013 (Copier).JPG|none|auto]]
4)This my current boot screen:
[[File:DSC03010 (Copier).JPG|none|auto]]
The 2 menus you have "Boot Option" and " Window Boot manager" are not on my screen … Why ? Any idea ?
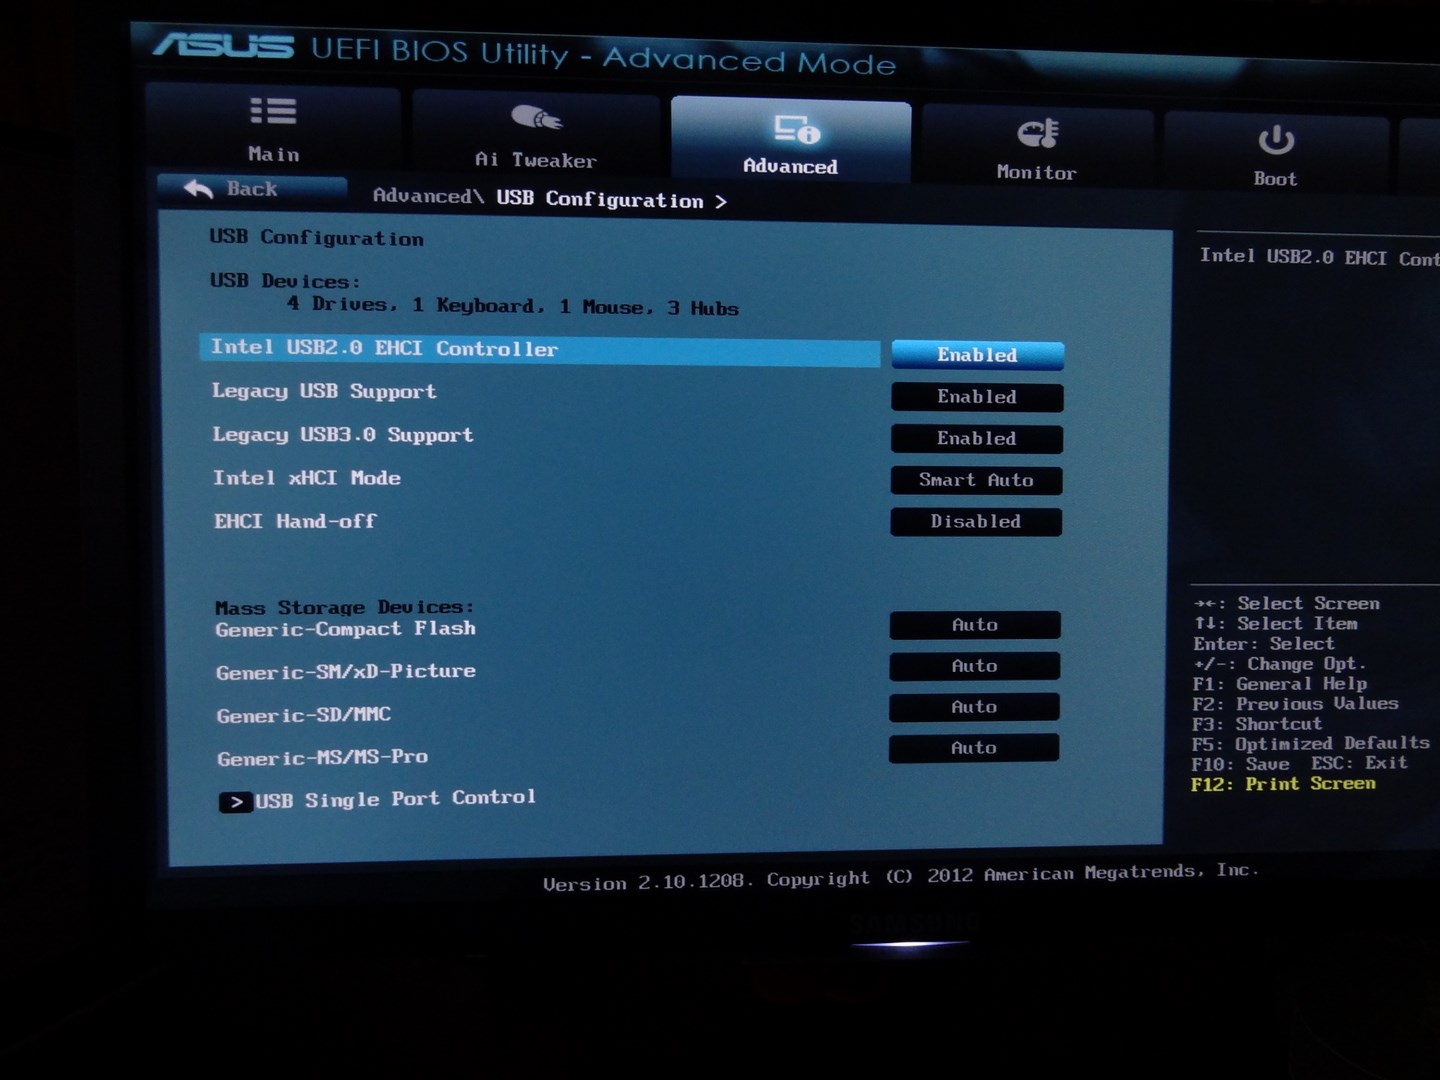
5)These are the current parameters i have:
[[File:DSC03018 (Copier).JPG|none|auto]]
[[File:DSC03017 (Copier).JPG|none|auto]]
[[File:DSC03016 (Copier).JPG|none|auto]]
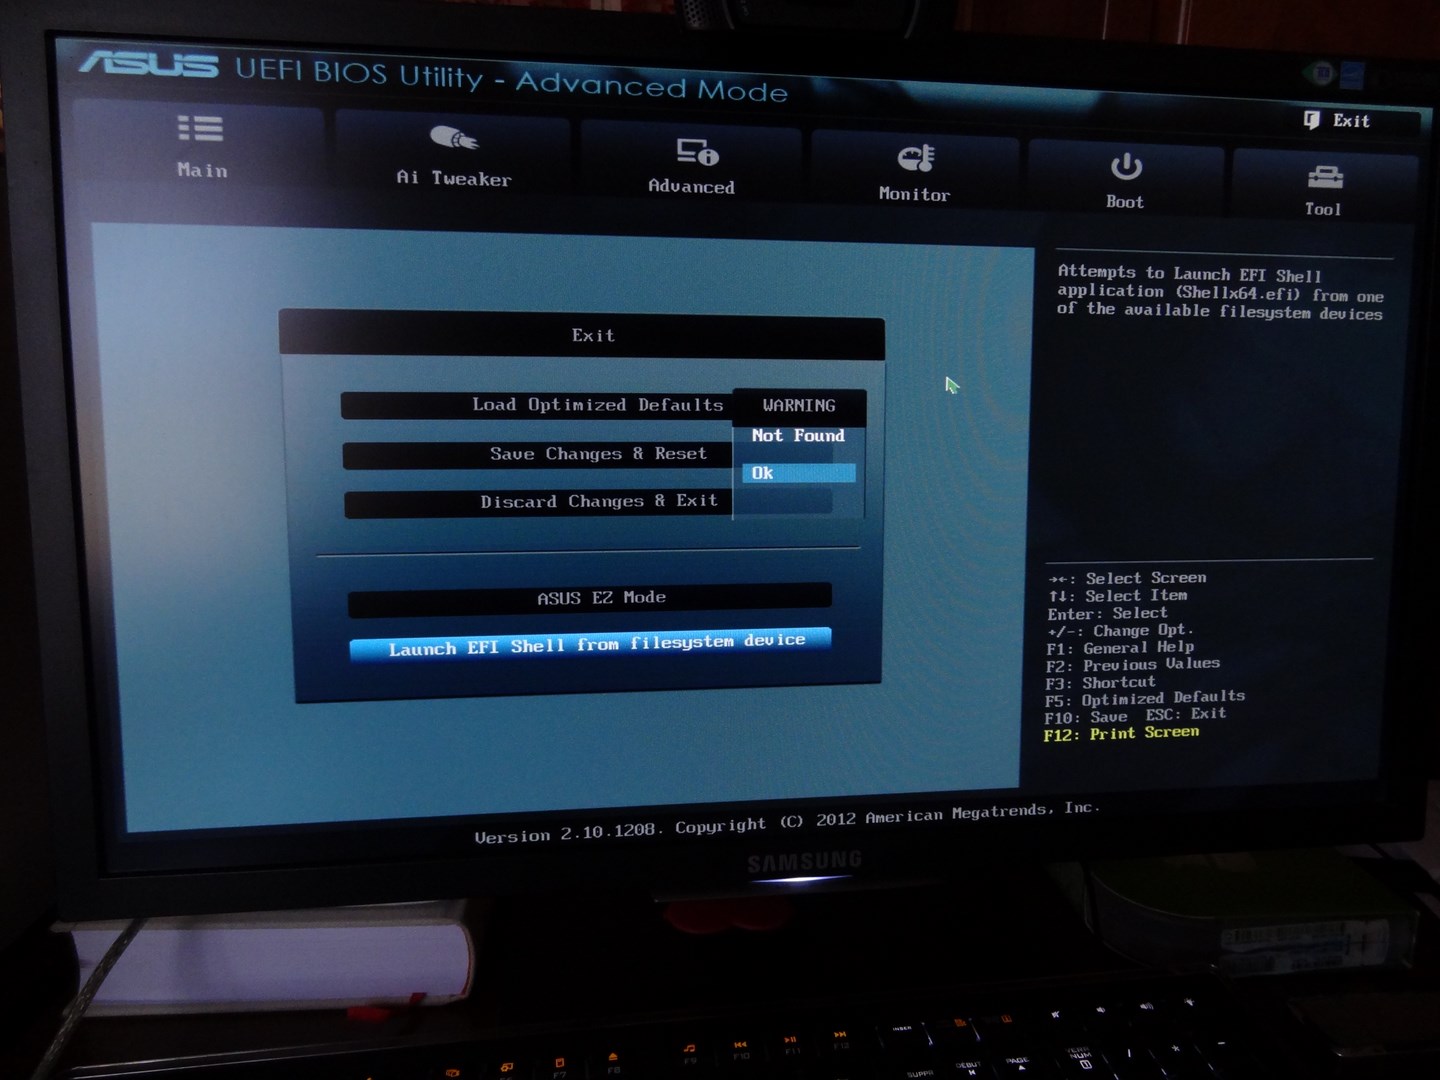
6)The error message is:
[[File:DSC03014 (Copier).JPG|none|auto]]
[[File:DSC03009 (Copier).JPG|none|auto]]
So, can you help me again ?
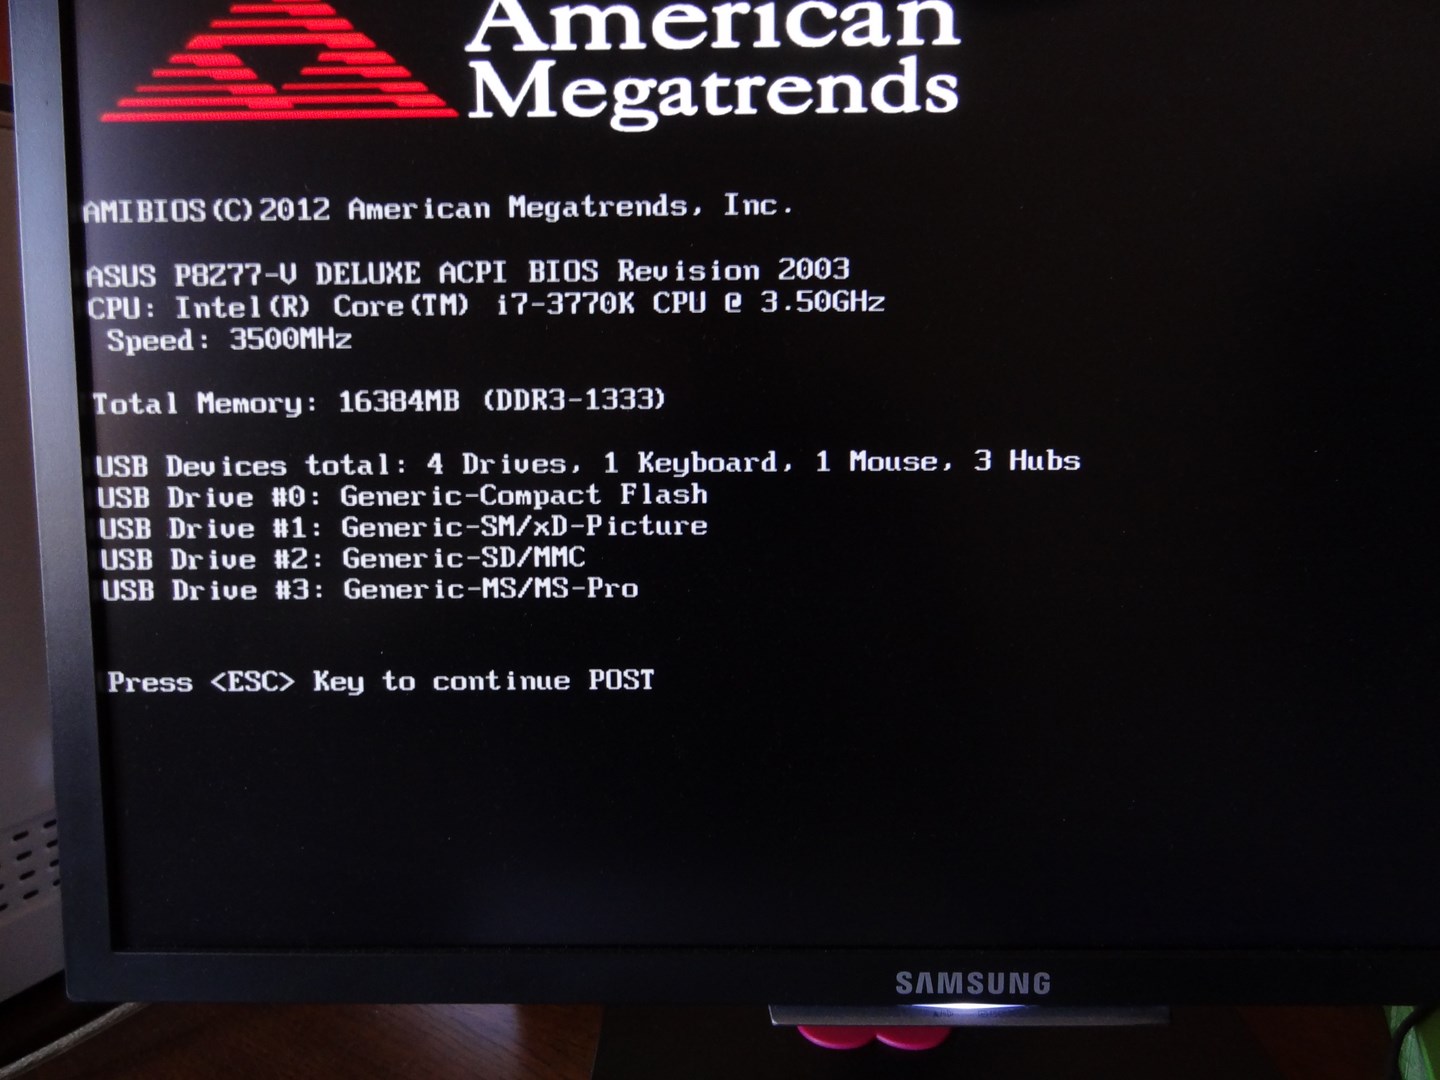
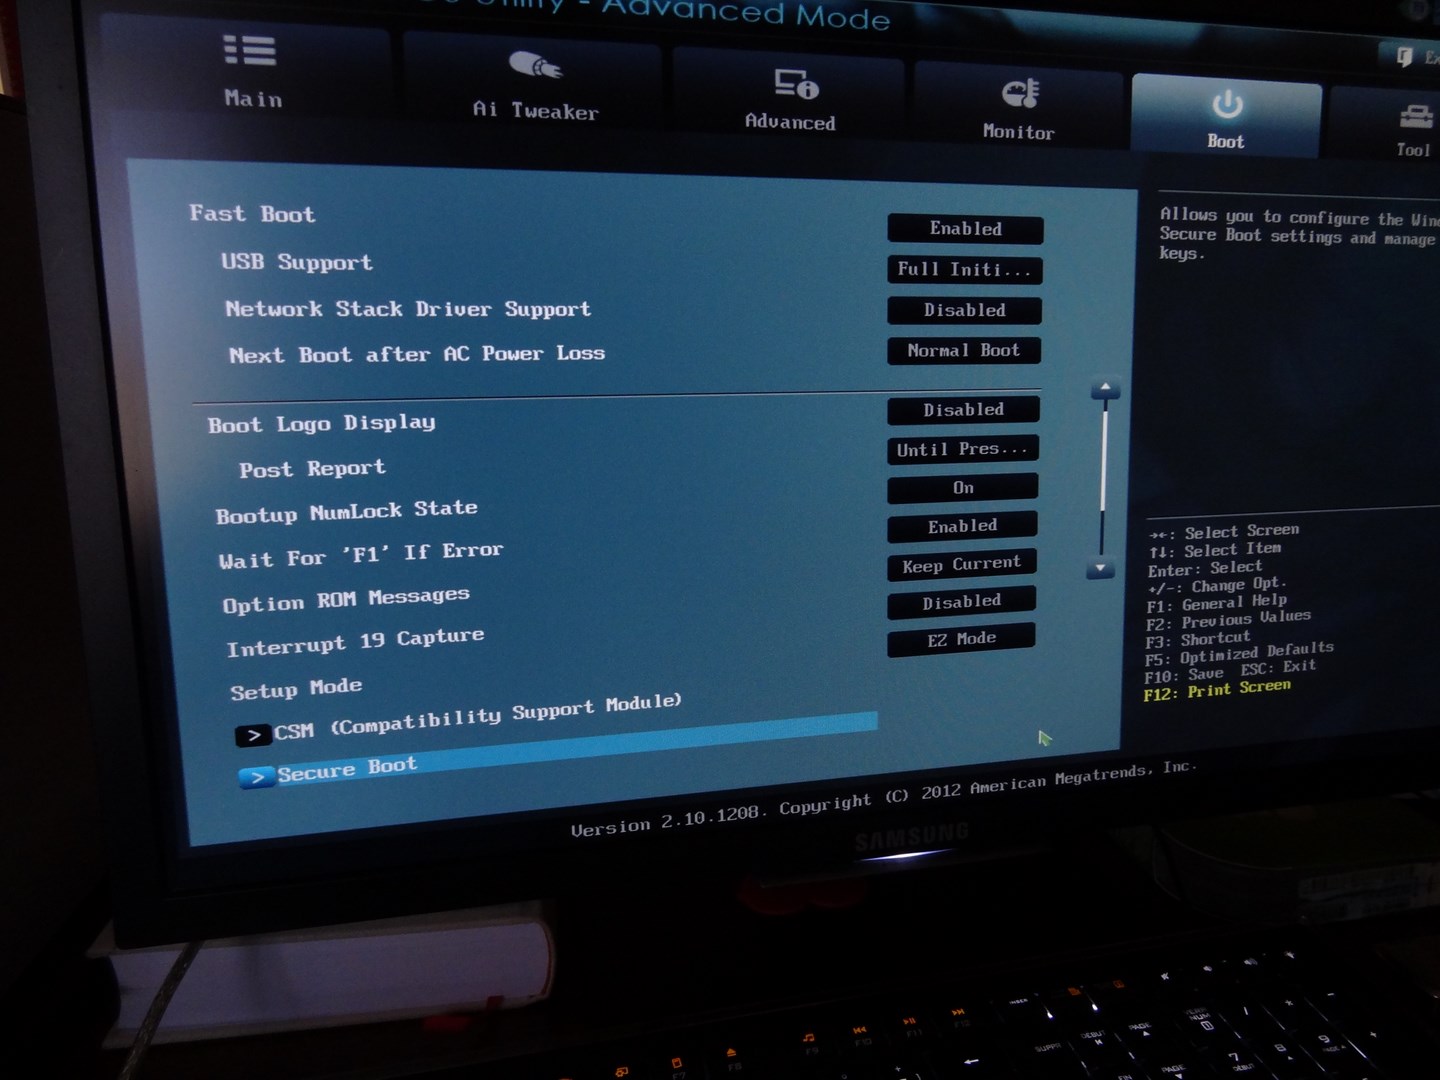
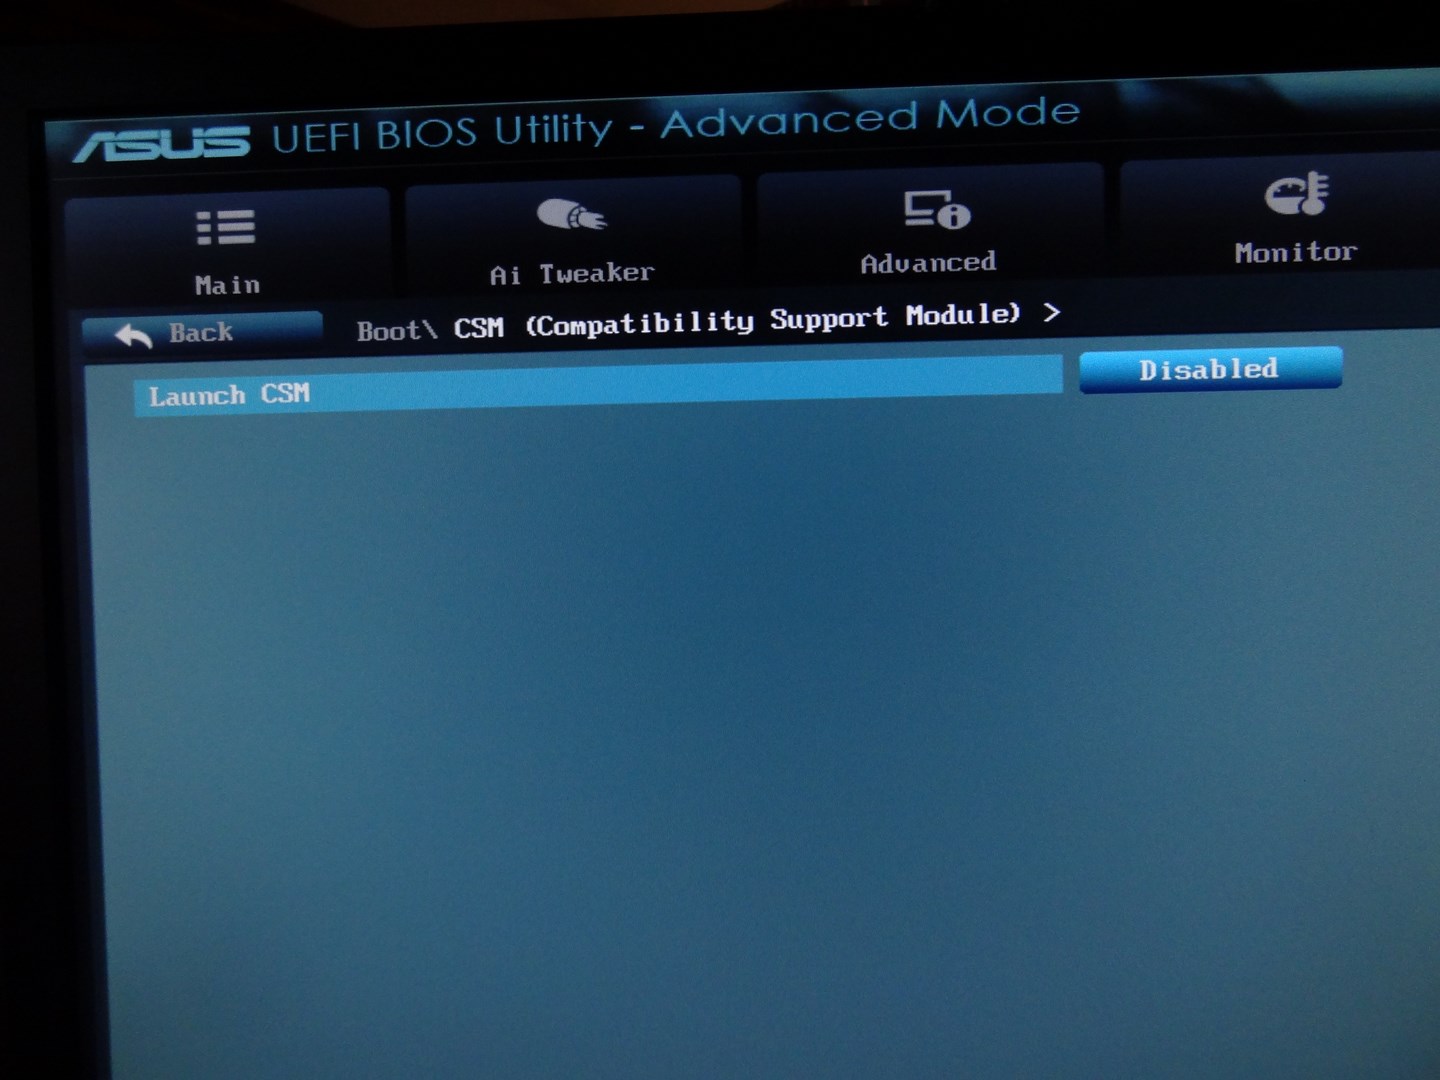
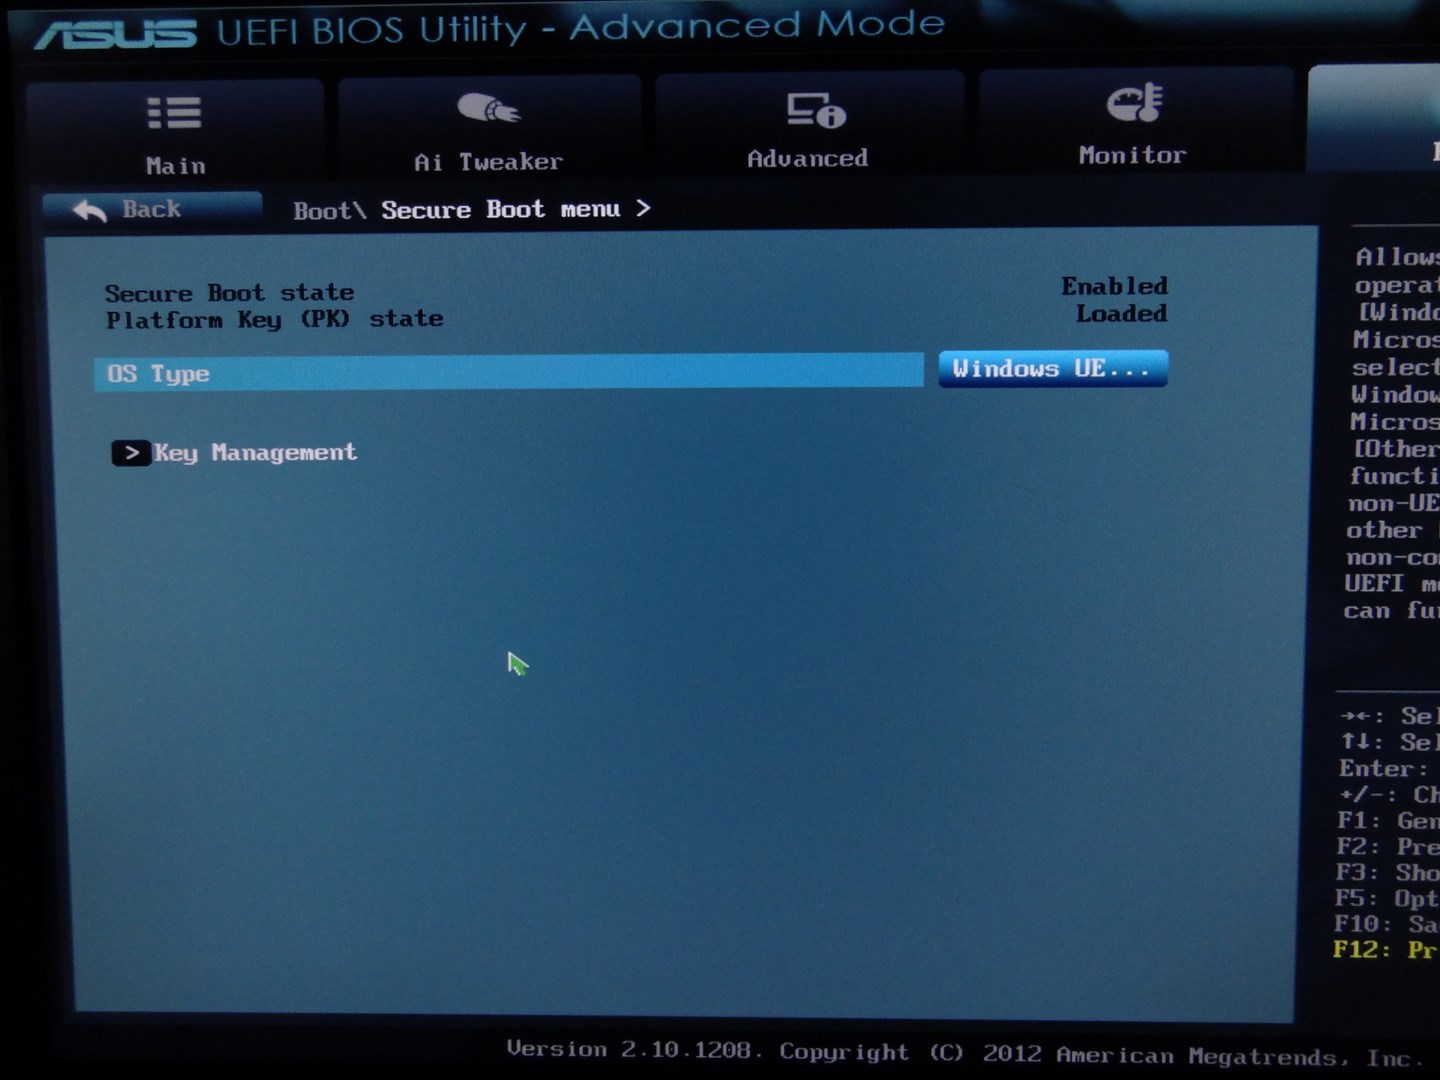
@ 100PIER:
It seems, that any of your devices (the NVIDIA graphics card?) does not fully support the "clean" UEFI mode with disabled CSM.
Nevertheless you will be able to get the OS installed in UEFI mode with a GPT partition table, if you change the "CSM" setting to "ENABLED" and choose the settings, which favours the UEFI before the LEGACY mode and if you boot of a flash drive, which is shown with the prefix or suffix "UEFI".
Another possibility (provided that the graphics card is the problem): Remove the graphics card and install the OS by using the iGPU.
By the way: There is no need to take photos of the UEFI screens. You can take a pic at each time by pressing F5. The picture will be saved within the picture folder.