After successfully modding Z170, Z270 BIOS for Coffee Lake, following the guide:
[GUIDE] Coffee Lake CPUs on Skylake and Kaby Lake motherboards
The Hyper-threading (HT) might not work with 6-cores CPUs (i7-8700K). The problem is that the the BIOS of the boards is configured to support maximum of 8 (logical) CPUs. This guide will show you how to change/increase the maximum value of supported CPUs in your BIOS from 8 to 16. We use BIOS of Asus Maximus VIII Impact (M8I) as an example but these steps should work for BIOSes of other Z170, Z270 boards as well. Basic knowledge of UEFITool, hex editor/disassembler is required.
Two steps are required to (fully) support 16 CPUs:
1. patching PEI module CpuMpPei
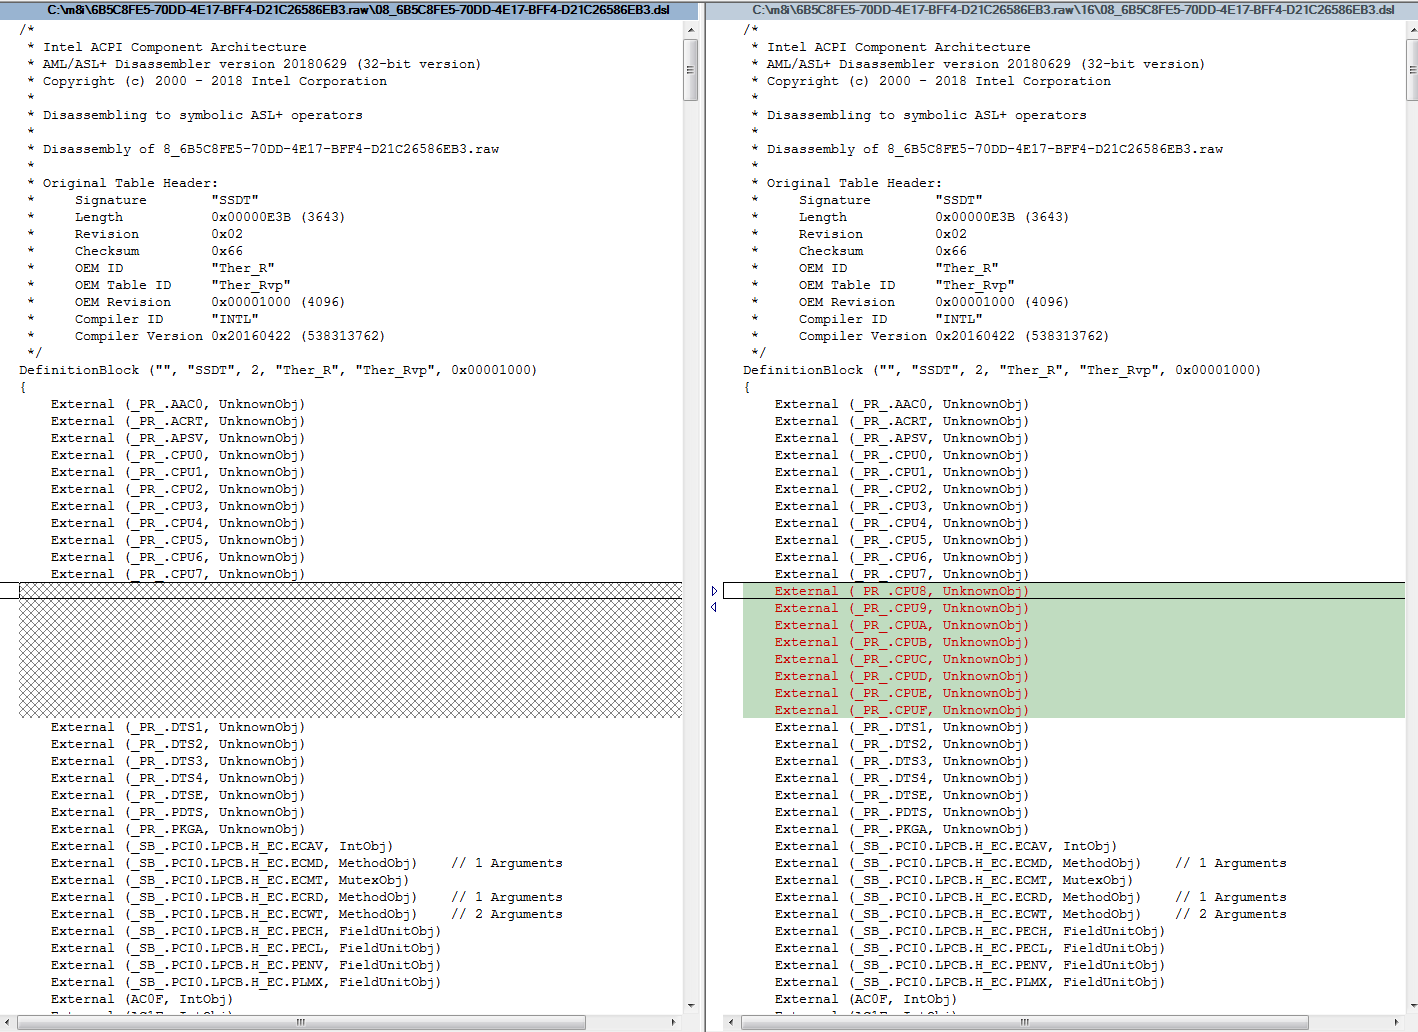
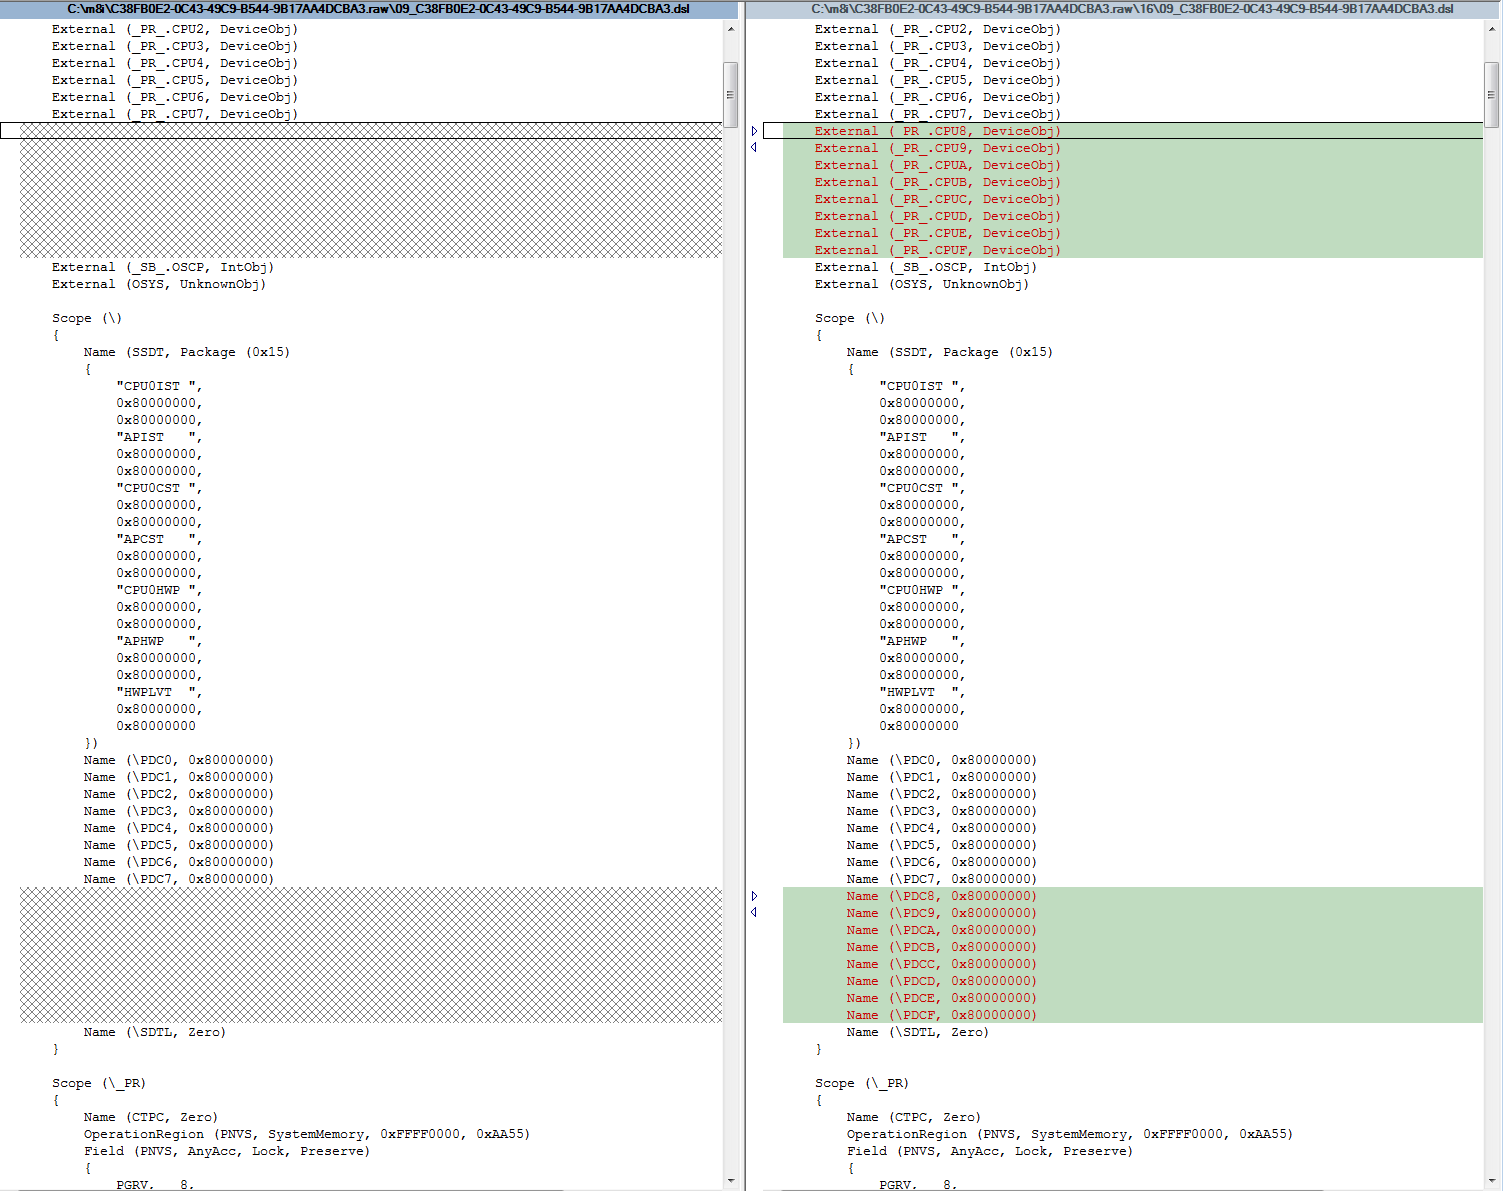
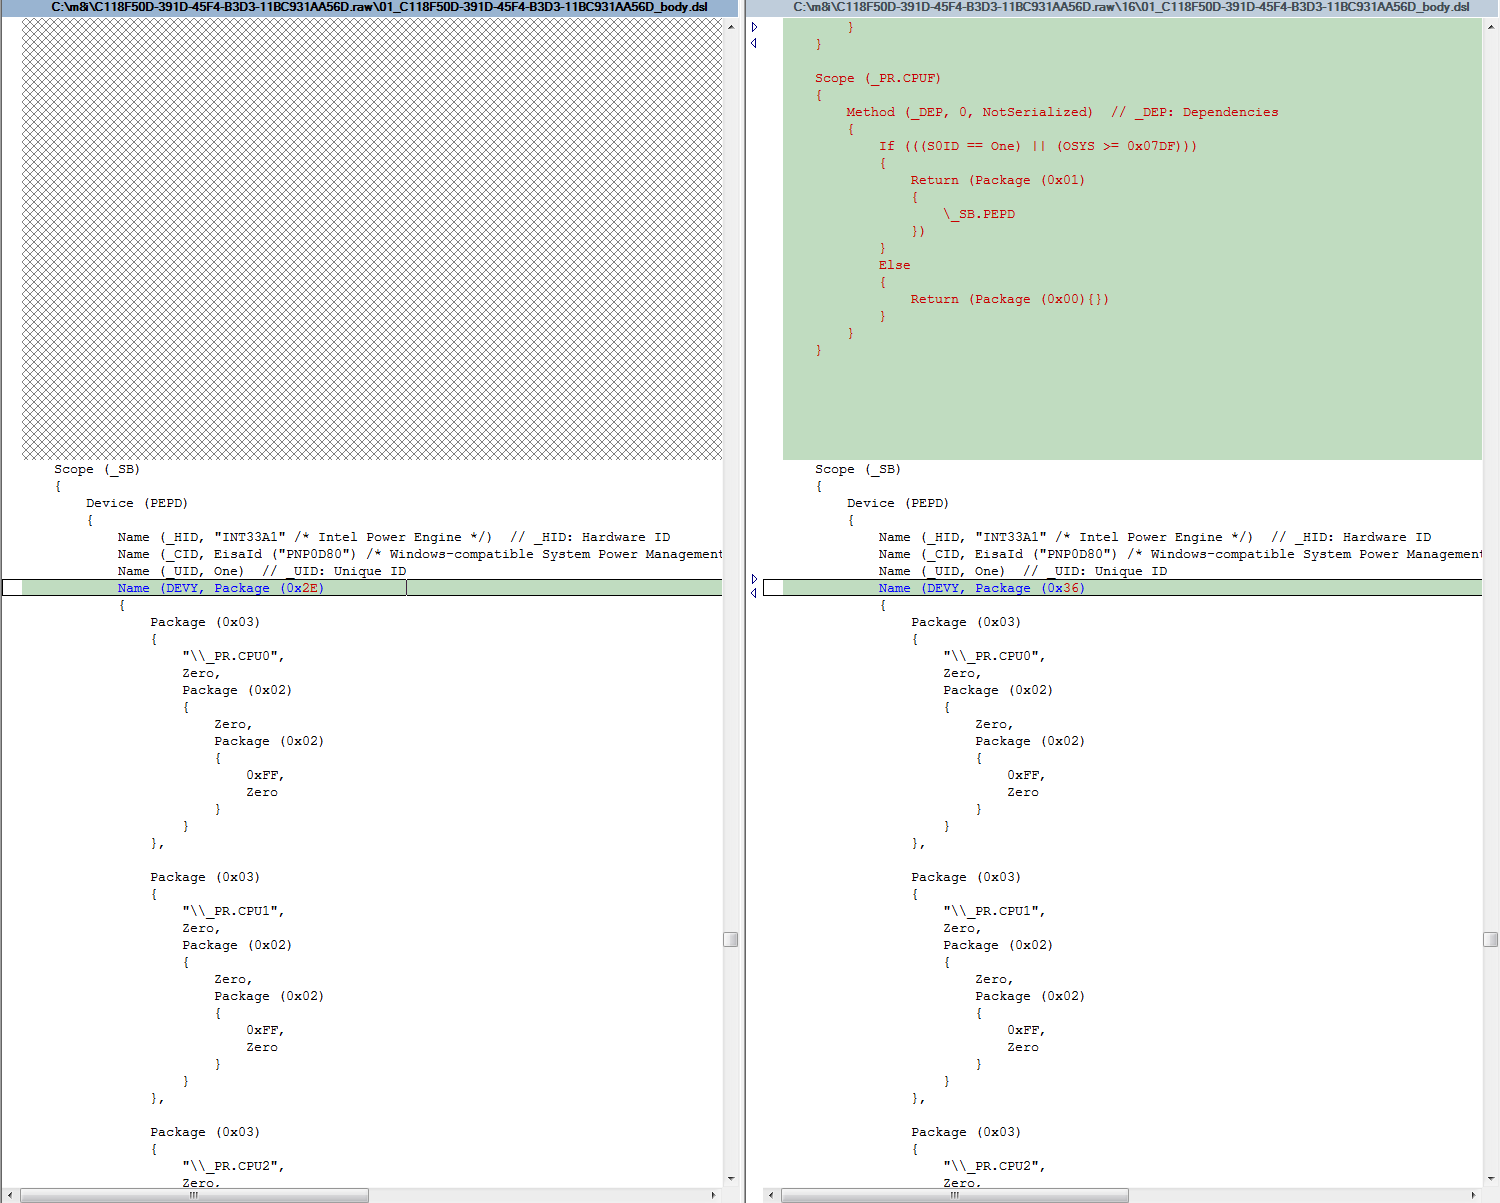
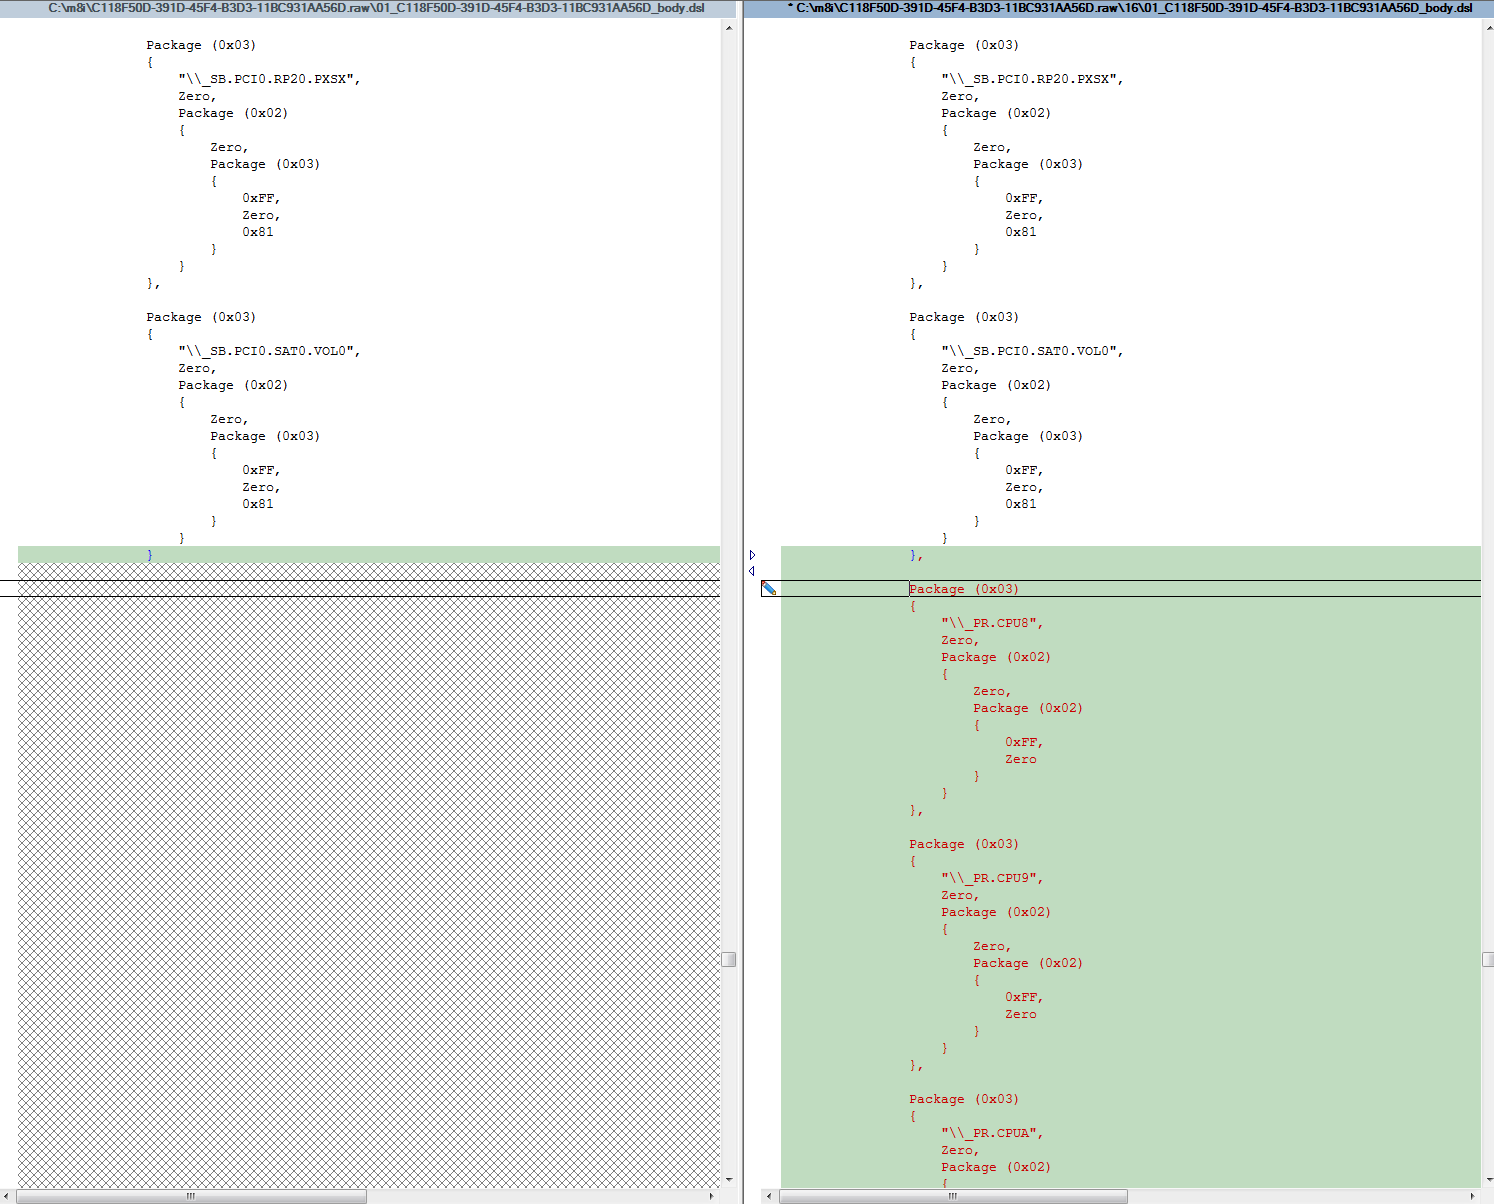
2. modifying ACPI tables
According to dsanke, it looks like on some boards/BIOS variants additional module(s) needs to be patched (we have no solution for this):
1. patching PEI module CpuMpPei
Download UEFIPatch. Place UEFIPatch, extracted patches.txt from the attachment and the BIOS file in the same folder. Run UEFIPatch on the BIOS file:
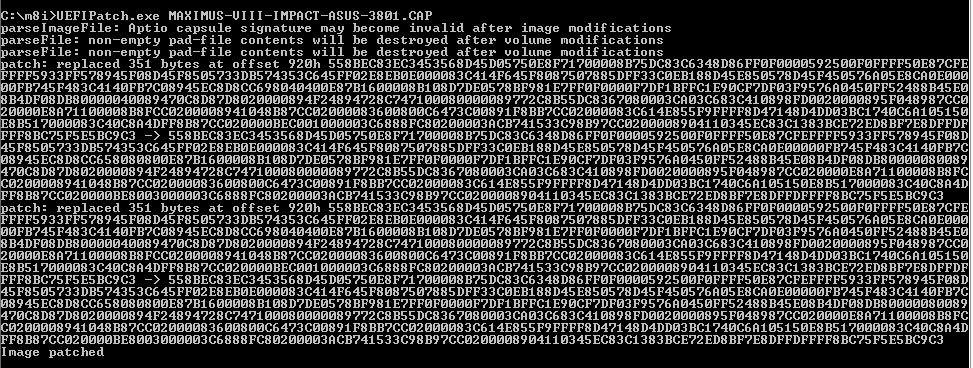
If the file was patched (at one or two locations) skip to step 2 - modifying ACPI tables. If nothing was patched, please write a post with a link to your BIOS file, we can update patches.txt file. Alternatively, follow the guide:
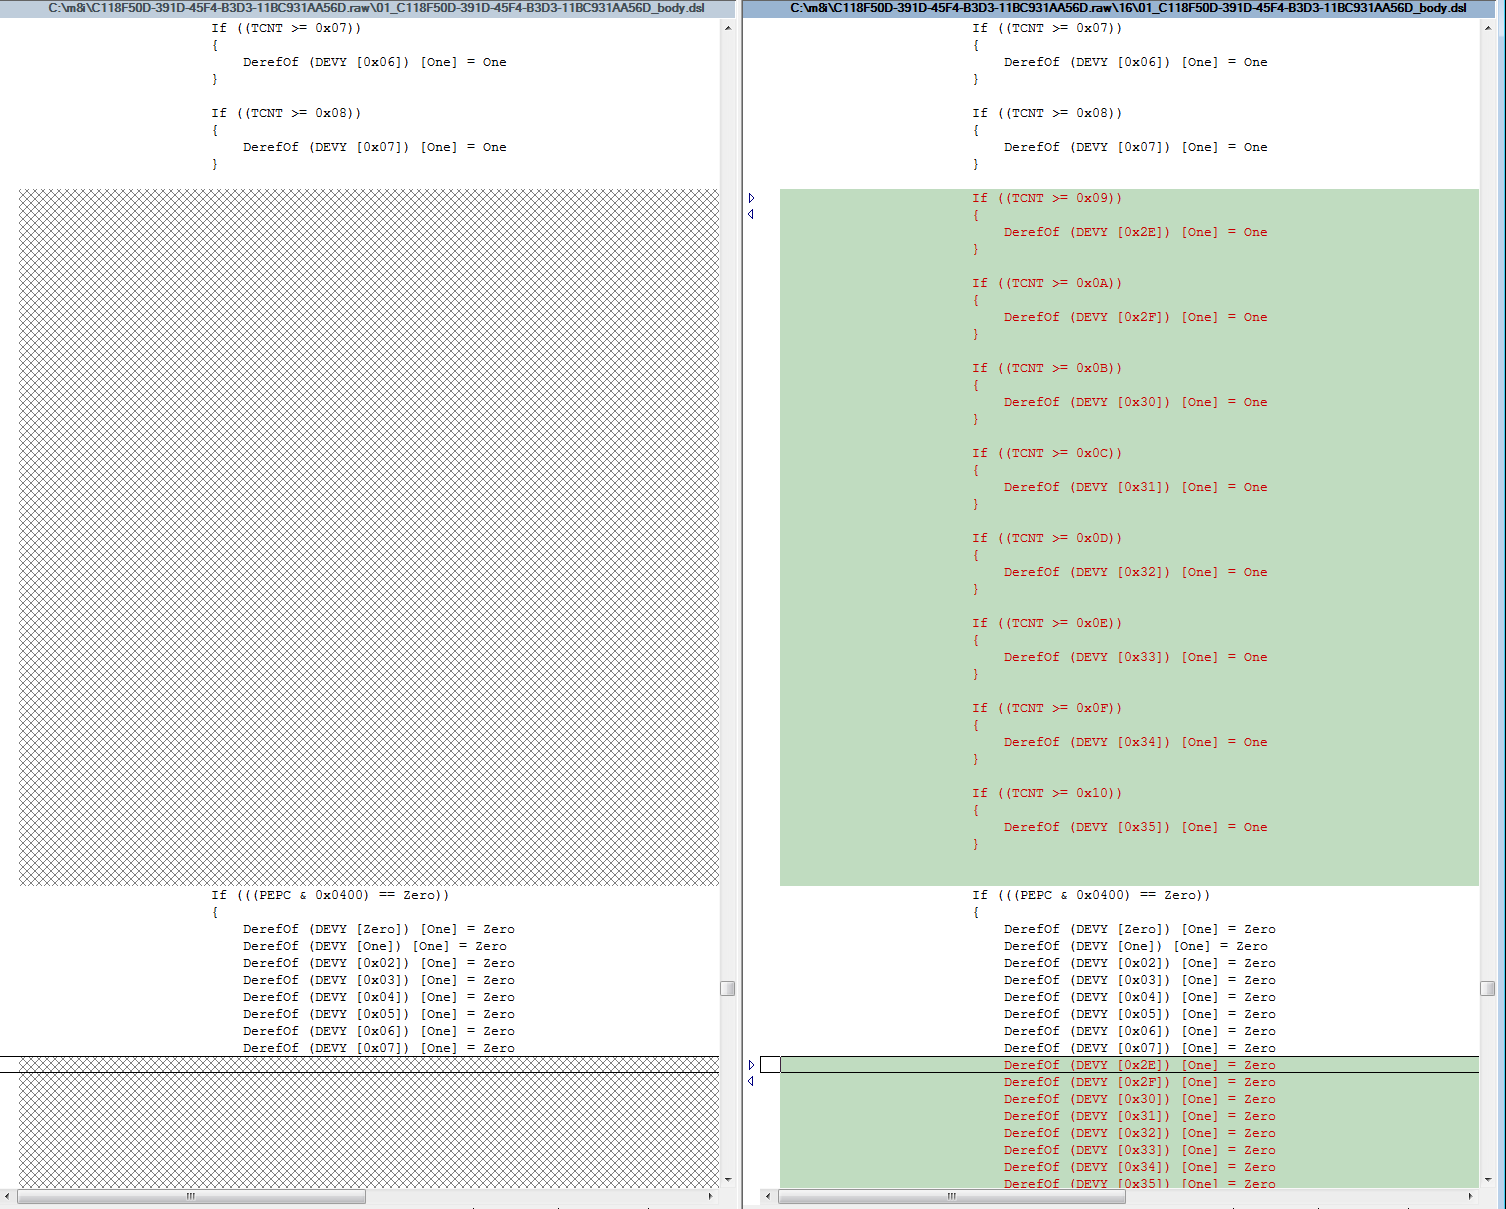
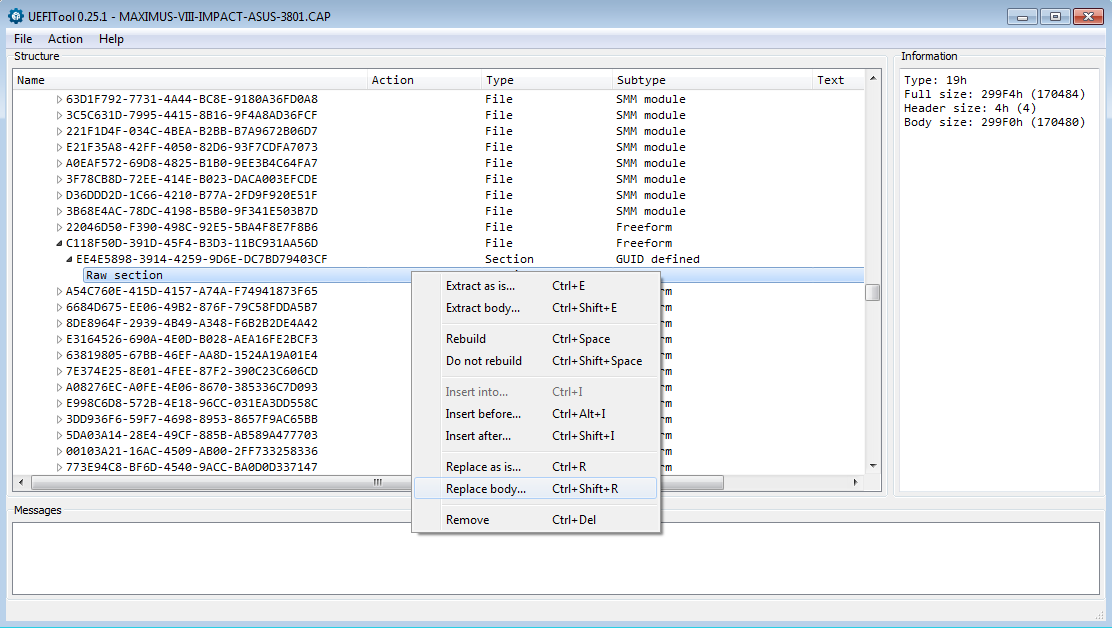
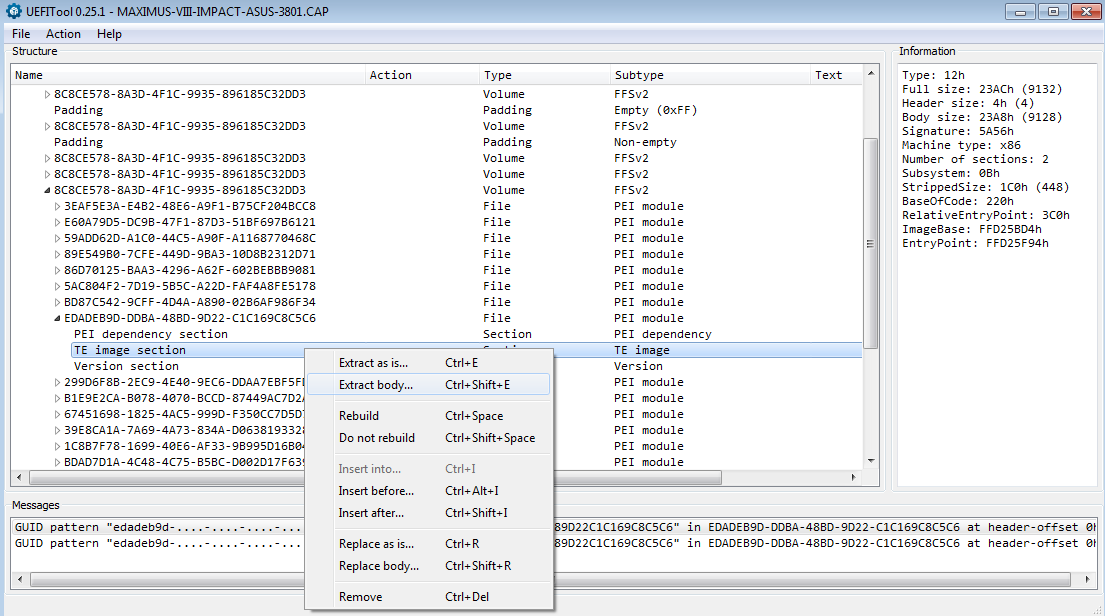
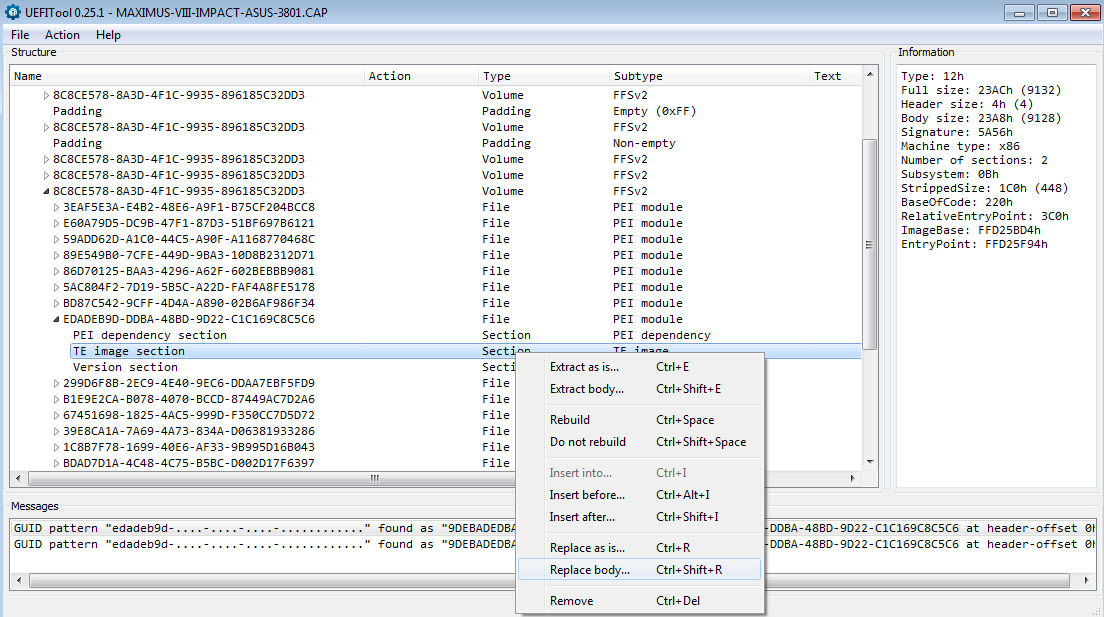
Locate and extract TE image section of PEI module CpuMpPei (GUID: EDADEB9D-DDBA-48BD-9D22-C1C169C8C5C6)
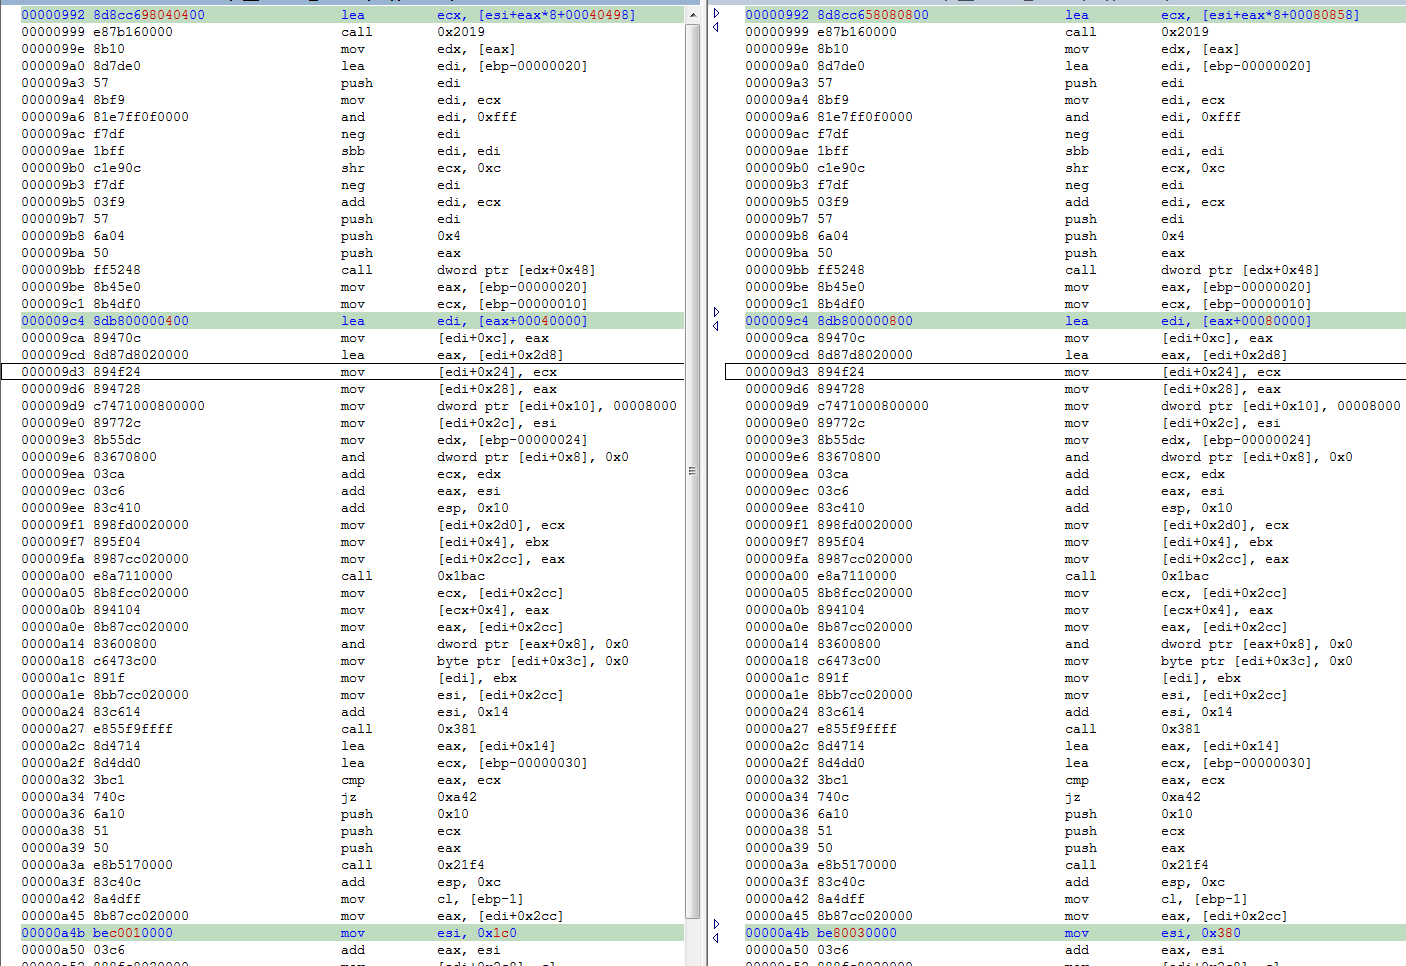
Open the extracted file in disassembler. The fix consist of patching 3 lines of code. The code, that is responsible for allocating and initializing some CPU structures. We need to replace:
2
3
4
5
6
file offset   hex                            asm
00000992      8d8cc698040400                 lea         ecx, [esi+eax*8+00040498]
...
000009c4      8db800000400                   lea         edi, [eax+00040000]
...
00000a4b      bec0010000                     mov         esi, 0x1c0
with:
2
3
4
5
6
file offset   hex                            asm
00000992      8d8cc658080800                 lea         ecx, [esi+eax*8+00080858]
...
000009c4      8db800000800                   lea         edi, [eax+00080000]
...
00000a4b      be80030000                     mov         esi, 0x380
At file offset 0x992 (this location may/will be different for different version of BIOS), there is a code responsible for allocating space/memory for some structures describing CPUs.
Some technical details/math here - assuming:
"n" is the count of maximum supported CPUs
"m" is largest monitor-line size in bytes, stored in eax
"k" is some constant stored in esi
The total memory that needs to be allocated is:
n * (0x8000 + 0x38 + m) + 0x2d8 + k
For n = 8, we get:
8 * (0x8000 + 0x38 + m) + 0x2d8 + k = k + m *8 + 40498
It is exactly what is at offset 0x992. Now for n = 16 or 0x10 hex:
10 * (0x8000 + 0x38 + m) + 0x2d8 + k = k + m * 10 + 80658
As we can't write instruction:
lea ecx, [esi+eax*10+00080658]
And we know that "m" (value stored in eax) is 64 or 0x40 hex for our CPU (we can get this value via cpuid instruction - cpuid(5):ebx[15:0]), we can replace it with:
lea ecx, [esi+eax*8+00080858]
Changes at offsets 9c4, a4b follow the same principle - we are doubling the amount of CPUs, thus we need to double the numbers:
    40000 -> 80000
      1c0 -> 380
In the end, we only need to patch/modify 6 bytes:
Save changes, replace body using UEFITool (note that this module is located at two locations in BIOS, we better replace both):
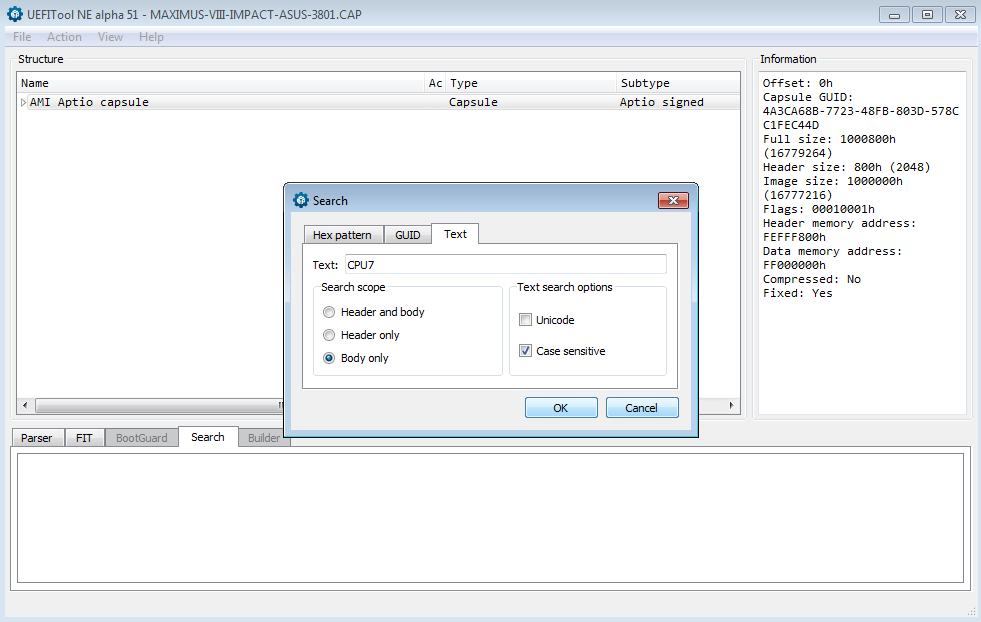
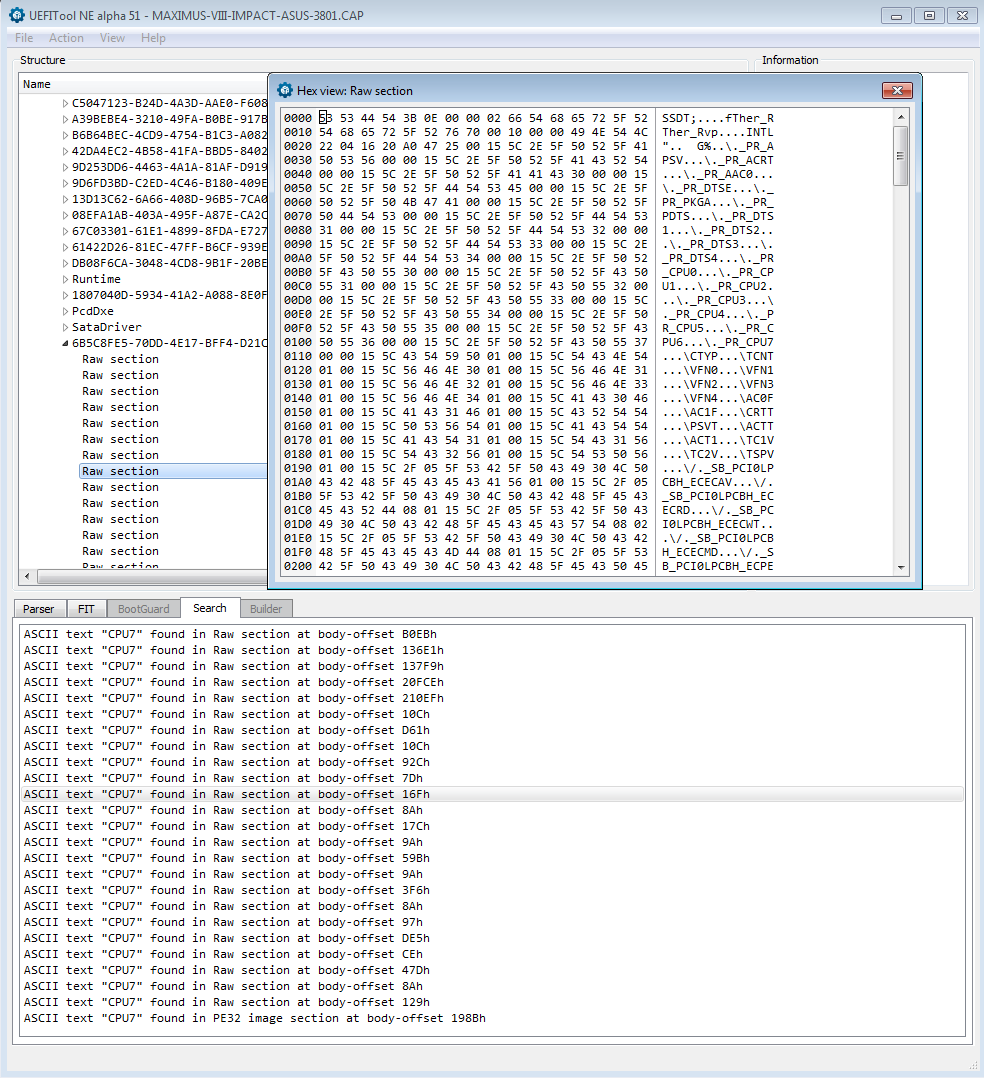
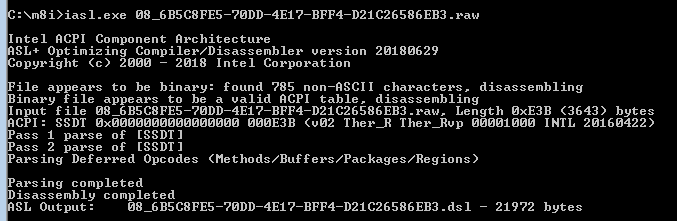
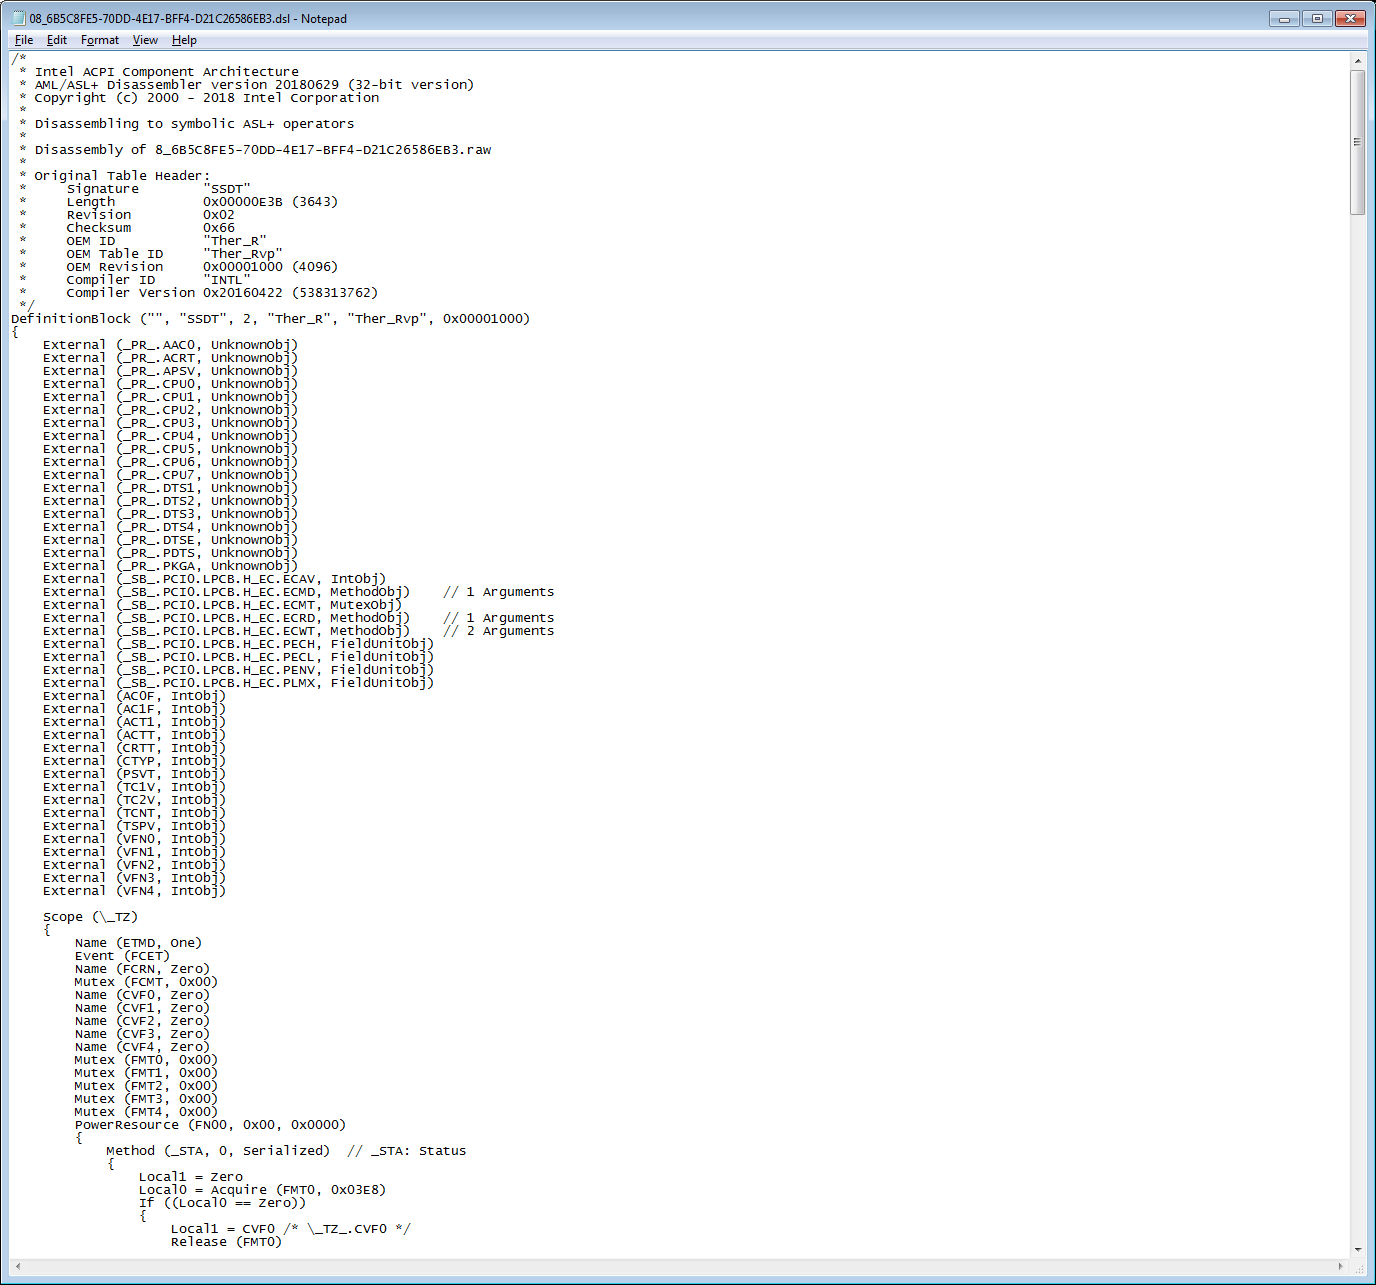
After this change (and flashing modified BIOS) we should be able to successfully boot with 6C/12T active (on 8700K). For proper operation (power management in operating system) we need to modify ACPI tables now.
patches.txt.zip (732 Bytes)
Edit by Fernando: Thread title shortened