Compatible Intel® Xeon® Processor v3
E5-1428L, E5-1603, E5-1607, E5-1620, E5-1630, E5-1650, E5-1660, E5-1680, E5-2408L, E5-2418L, E5-2428L, E5-2438L, E5-2603, E5-2608L, E5-2608L, E5-2609, E5-2618L, E5-2620, E5-2623, E5-2628L, E5-2630, E5-2630L, E5-2637, E5-2640, E5-2643, E5-2648L, E5-2650, E5-2650L, E5-2658, E5-2660, E5-2667, E5-2670, E5-2680, E5-2683, E5-2685, E5-2687W, E5-2690, E5-2695, E5-2697, E5-2698, E5-2699, E5-4610, E5-4620, E5-4627, E5-4640, E5-4648, E5-4650, E5-4655, E5-4660, E5-4667, E5-4669
In my example 18-core Xeon(R) E5-2696 v3 processor has set from the factory an all-core turbo of 2.8GHz and this guide help you set maximum all-core turbo for your processor. This is kind of “overclocking guide” with fixed negative Vcore offset for best performance. Main limitation of the performance is processor’s TPD and currency throttling limits so there is very small chance to harm your components. Still high performance VRM cooling is recomended. You are still operating at your own risk and your BIOS settings going to be reseted to factory defaults!
Requirements:
- CPU microcode revision patch must not be loaded during POST process ( this guide include removing of the microcodes )
- Knowledge where to download and how to use UBU Tool
It is recomended to load microcode for your CPU in operating system level:
- Be sure that you have installed intel-microcode package in Linux systems
[Canonical’s intel-microcode in Ubuntu]
- KB4100347, KB4090007, KB4091663 or KB4091664 Windows Update package depending of your Windows 10 version
[Summary of Intel microcode updates]
I use in my example of Asus Motherboard because I have it on my own. There may be the difference between the steps of the process depending of your manufacter of the mobo.
1) First download lastest version of your bios from Asus Download Center
2) Open the bios file with UEFITool_NE. You can download it > here <
With this tool you can easily find the microcode sections. There is two sections where the microcodes is stored in my example bios file.
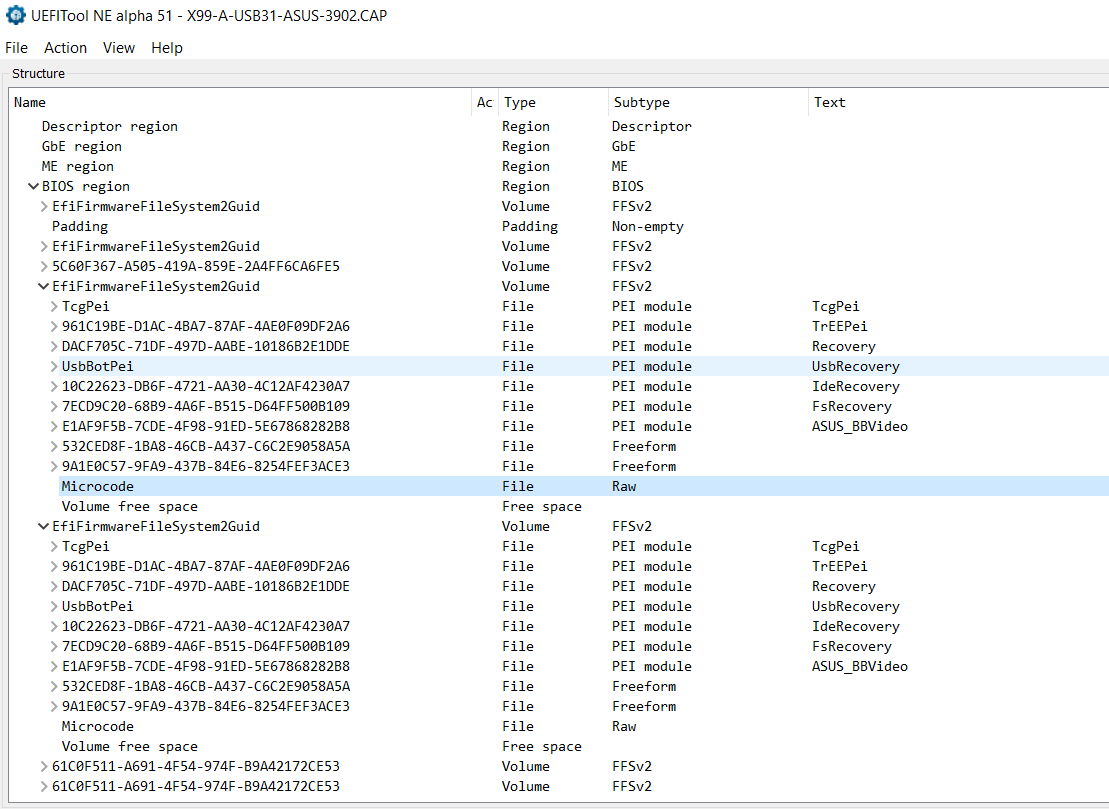
- Right click the microcode section and Extract body…
- Open extracted body with HxD or any hex editor and delete all lines except the last and save. After that it will be look like this.

The file that I am using is v3x4-0.10b-i306f2-rc9.efi from here: freecableguy’s v3x4
I have converted .efi driver to .fss driver that can be injected to bios file using pbatard’s efifs
You can also make that on your own if you are feeling distrust.
- Open the bios file with UEFITool. It can be downloaded same site that UEFITool_NE before.
Find the same microcode sections from the bios file that before. Right click the section and select Replace body… and find the file that we edited before. Be sure that you replace both sections with the same edited file without microcodes.
- Find section with lots of DXE drivers.
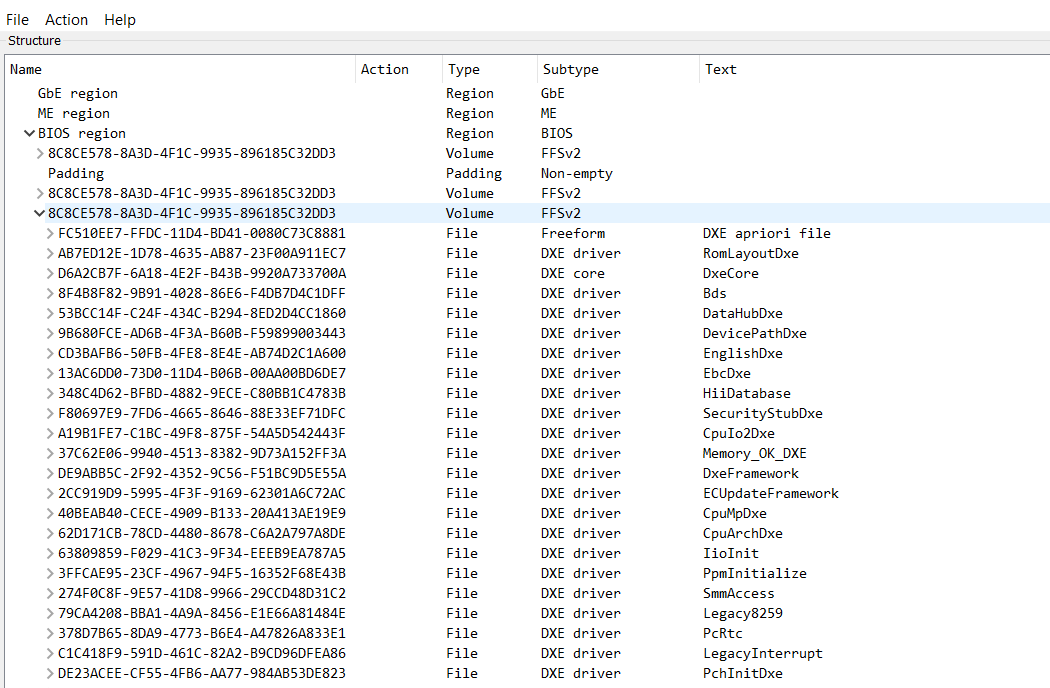
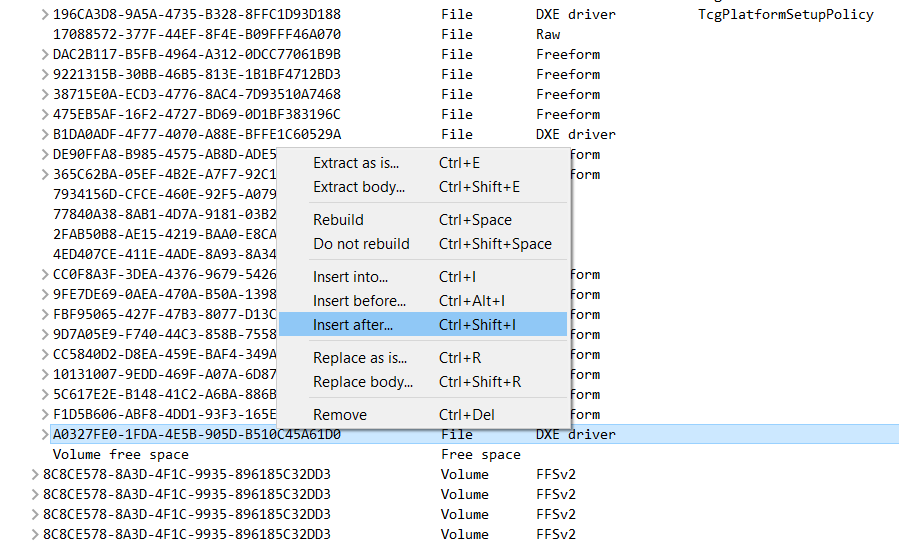
- Go to the bottom of the section and select very last DXE driver and right click, then select Insert after…
Select v3x4rc9.ffs - file and click OK.
- Save the bios file as bios.bin
The file set these settings
2
3
4
5
6
7
MAX_PACKAGE_COUNT = 4
CPU_SET_MAX_TURBO_RATIO = 0
CPU_SET_MAX_UNCORE_RATIO = 0
CPU_SET_OC_LOCK = FALSE
UNCORE_PERF_PLIMIT_OVRD_EN = FALSE
FIVR_FAULTS_OVRD_EN = TRUE
FIVR_EFF_MODE_OVRD_EN = TRUE
3) Move the saved bios file to UBU Tool folder
- Run UBU.bat with administration rights.
- Update the UEFI drivers if needed. More info about that is under [Tool Guide+News] "UEFI BIOS Updater" (UBU) thread.
- When you are ready select 0 - Exit and select 1 - Rename to ASUS USB BIOS Flashback
3) Move the created bios file to USB stick and use Asus USB BIOS Flashback.
More info about the flashback is in your mobo manual. There is spesific USB port to flashback.
Its take some time so do not rush. Turn on your PC and set your BIOS settings because all your settings has to set factory defaults that may cause also longer boot time and multiple restart in the boot prosess so do not panic and wait when you see the request to enter the bios.
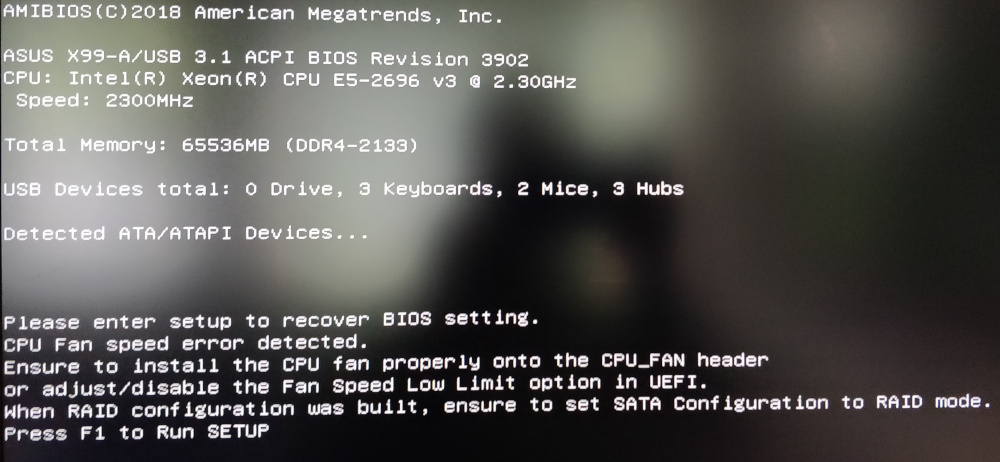
3) BIOS Settings to improve performance
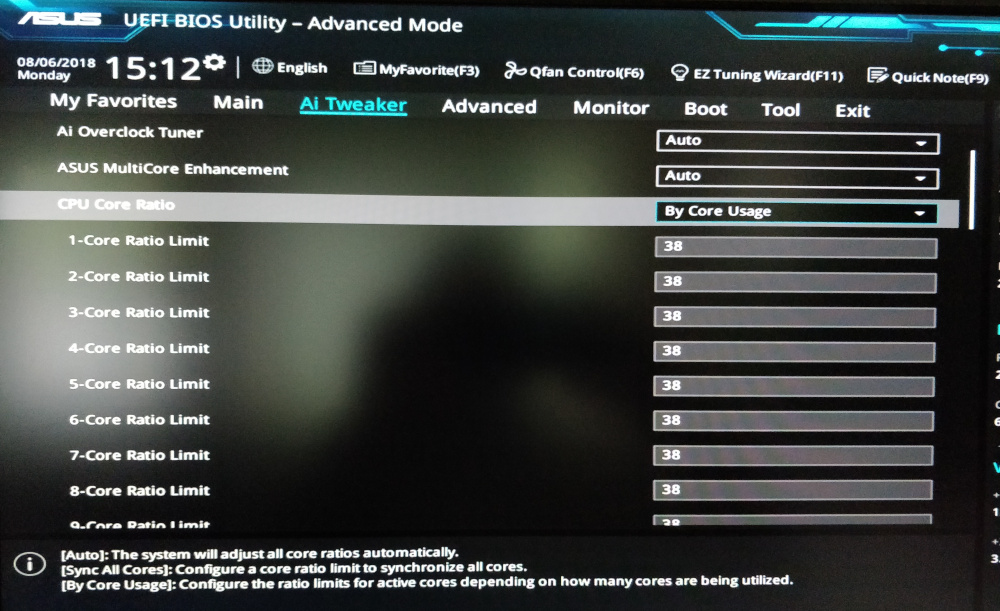
- CPU Core Ratio > By Core Usage
- Set individually every Core Ratio Limit to max value, example 38
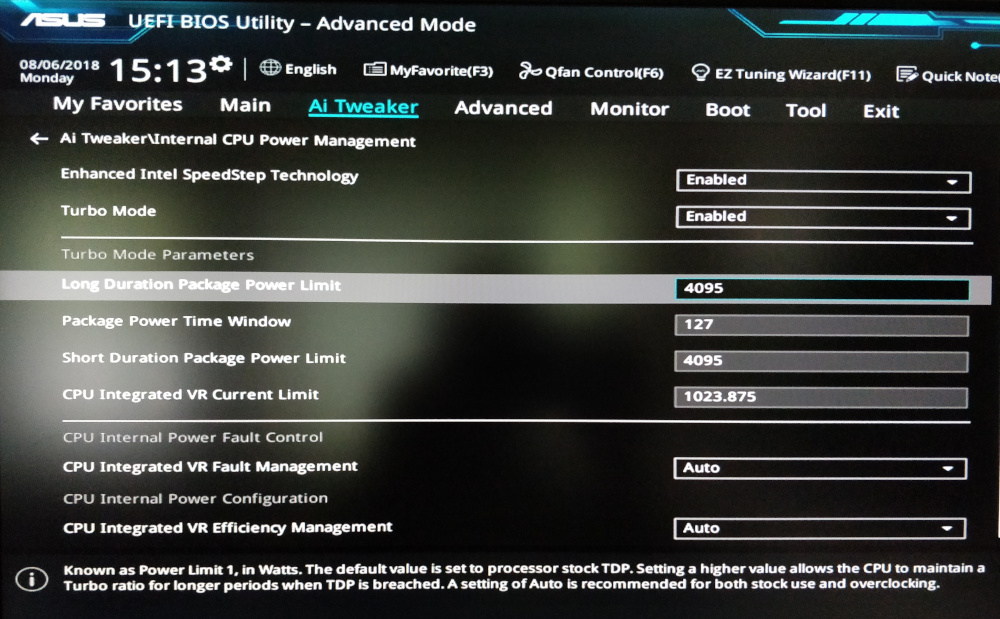
- Long Duration Package Power Limit to max value, example 4095
- Package Power Time Window to max value, example 127
- Short Duration Package Power Limit to max value, example 4095
- CPU Integrated VR Current Limit to max value, example 1023.875
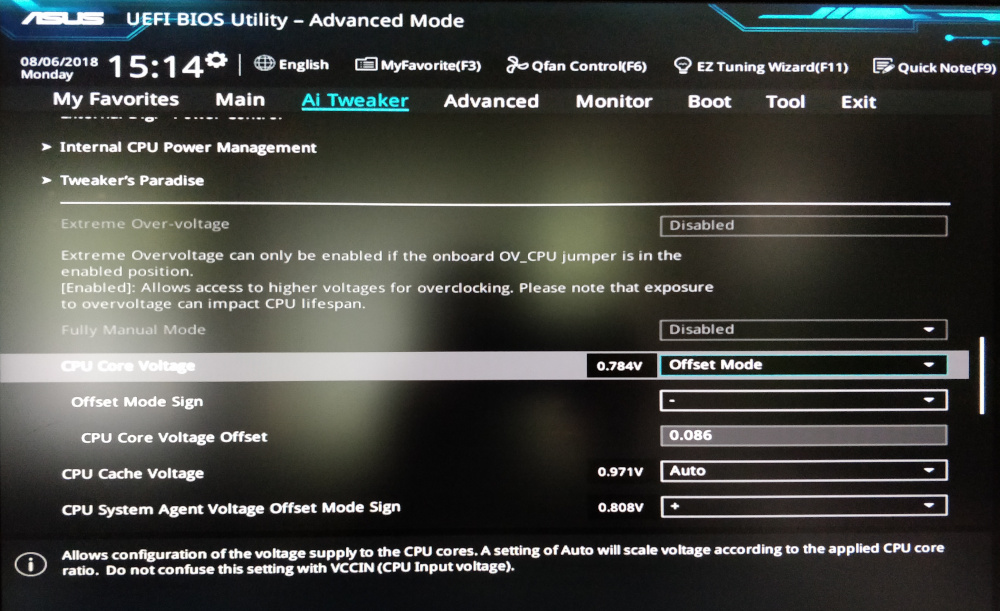
- CPU Core Voltage > Offset Mode
- Offset Mode Sign > -
- CPU Core Voltage Offset find the lowest value that keep the system stable, example 0.086
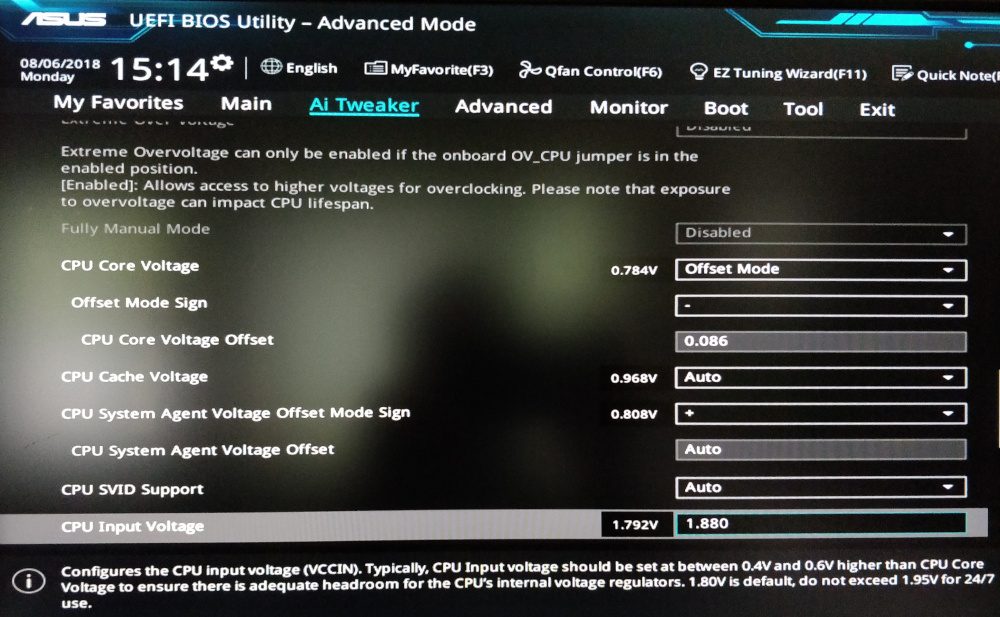
[OPTIONAL - if you know what you are doing]
- CPU Input Voltage increase default value, example 1.880
[/OPTIONAL]
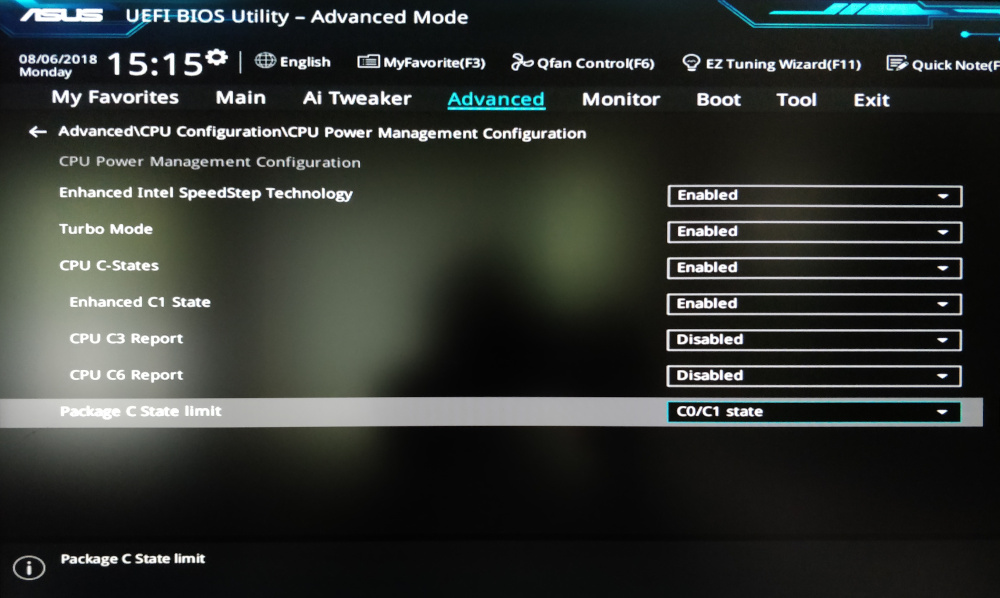
- CPU C-States > Enabled
- Enhanced C1 State > Enabled
- CPU C3 Report > Disable - if enabled causing system lockups
- CPU C6 Report > Disable - if enabled causing system lockups
- Package C State limit > C0/C1 state
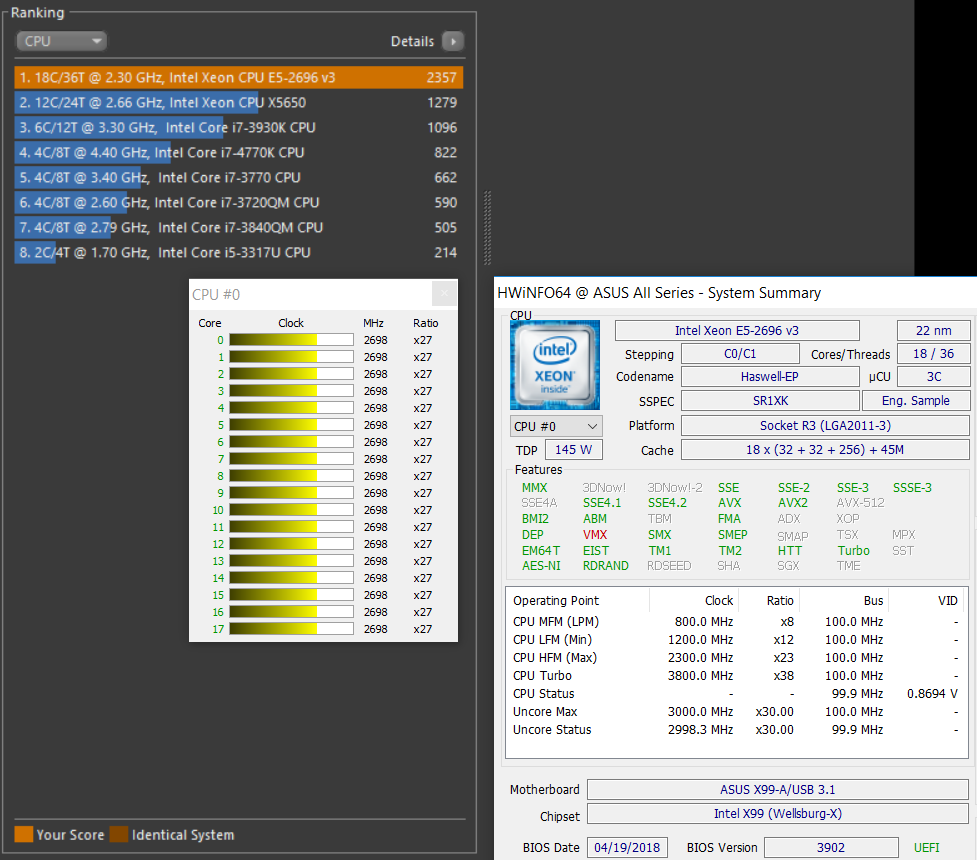
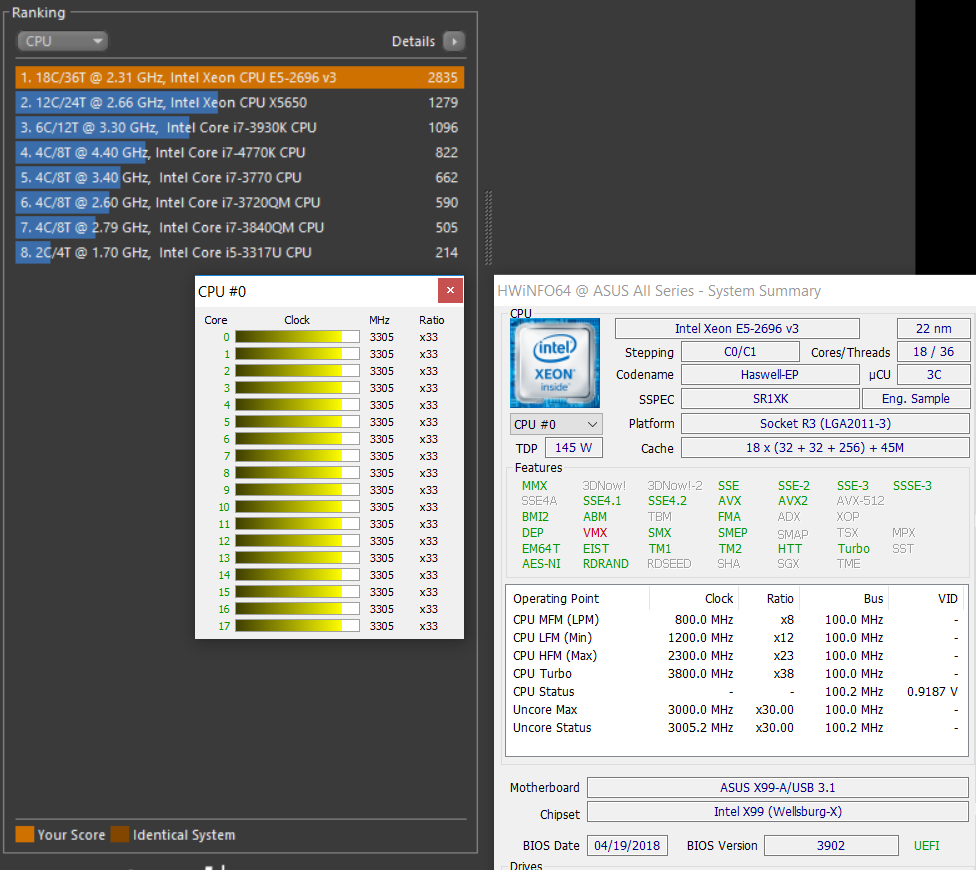
RESULTS
Before
After
v3x4rc9.zip (6.02 KB)
sandsifter_instructions.zip (2.18 MB)
