Disclaimer: This method has not been tested yet. I discovered it while messing around “Non-UEFI Data” (which should be “Volume Free Space” when the Full-Size Raw Header is correct). Additionally, I do not have the device for testing.
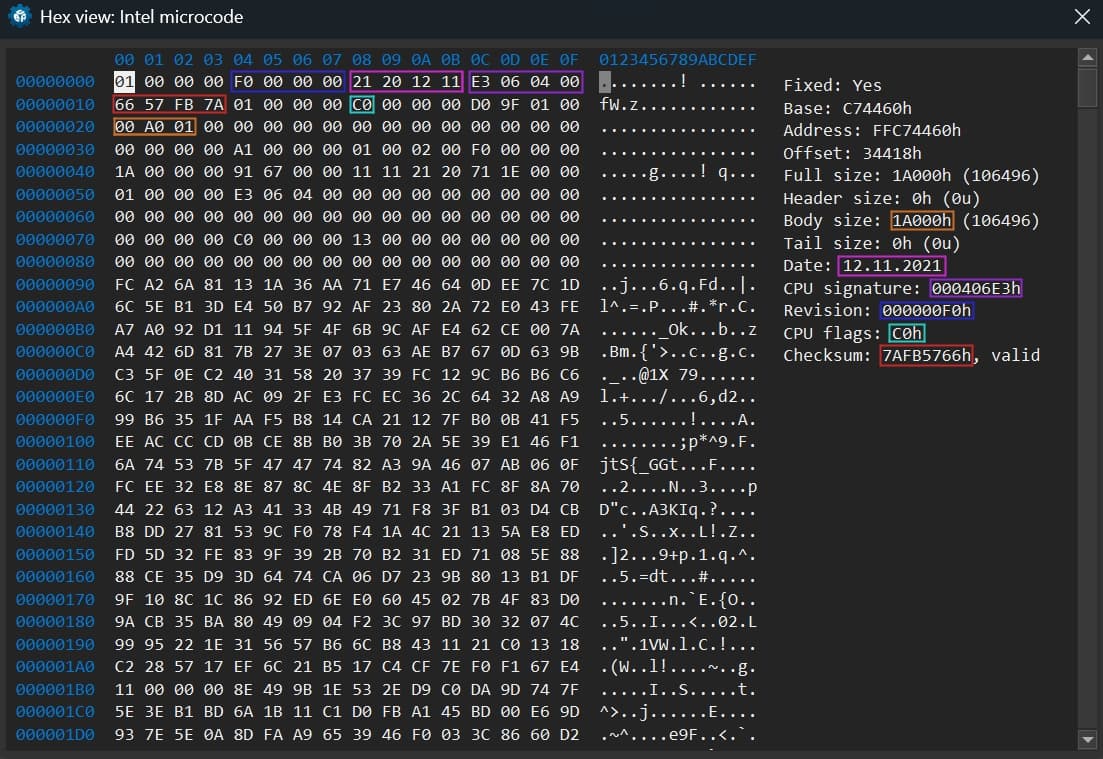
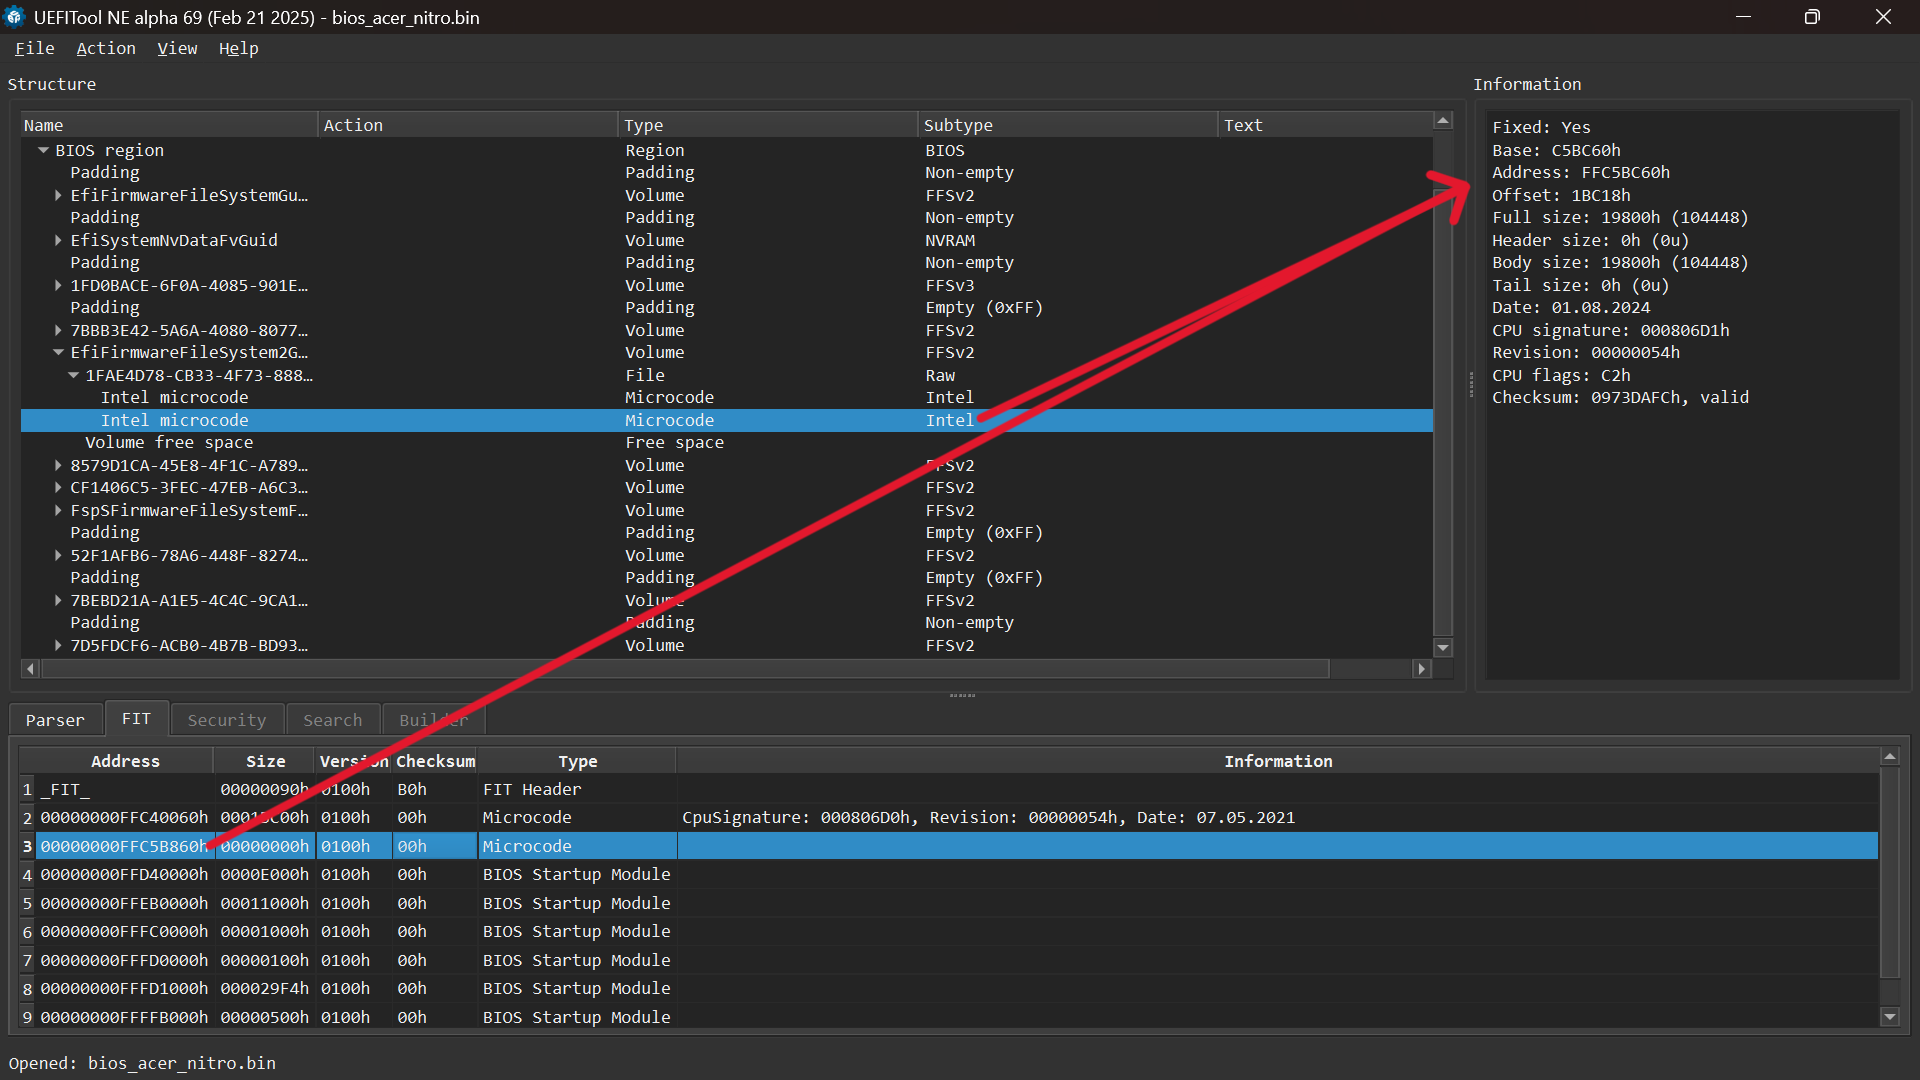
NOTE : This Guide only covers the structure microcode like this picture below. For padding area, refer to this thread.


What we are going to do here is adjust the Volume Free Space by editing the full-size Raw Header. When adding, deleting, or updating microcode of a different size, we need to increase or decrease the Body Size area accordingly. This method has additional advantages for newer Insyde devices and Intel Boot Guard-enabled systems (as Microcode and FIT are outside Boot Guard coverage), especially since UEFITool sometimes breaks the FIT Table.
what we need:
STEP1
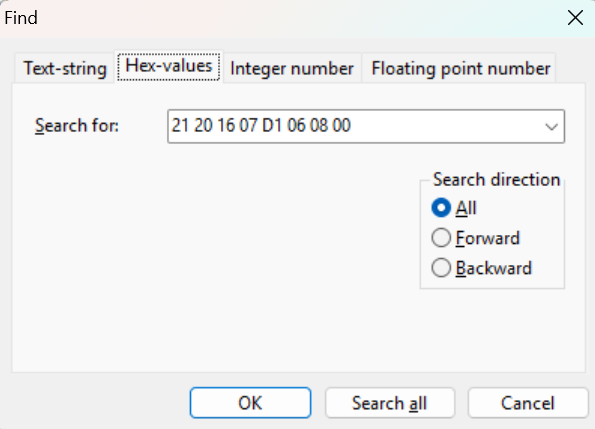
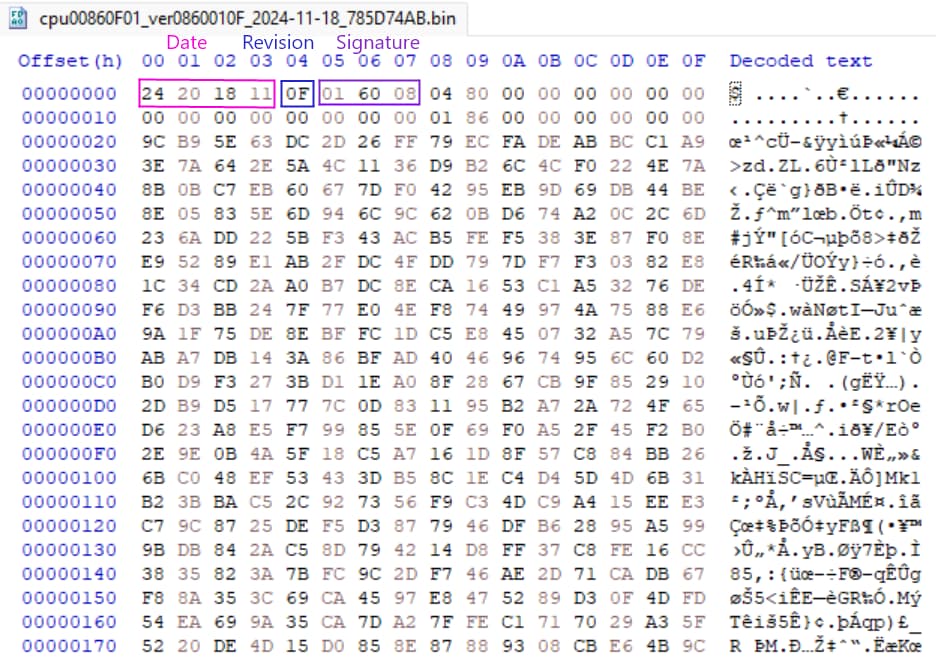
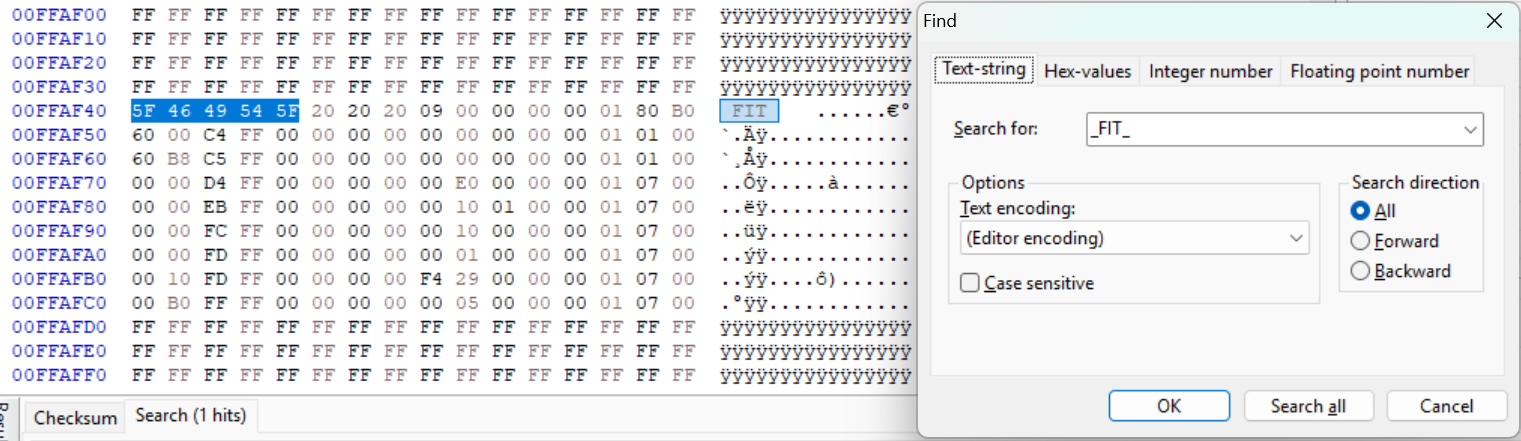
Load the full BIOS in a hex editor, then press “CTRL + F” to search for the first row of microcode (signature and date) in the FIT Table using the Hex view in UEFITool NE. You should now see the Raw Header, as shown in the “Raw Header and Volume Free Space” image.
STEP2
After adding, deleting, or updating the microcode in the Body Size area, don’t forget to add or delete FF in the Volume Free Space area to ensure the full BIOS size remains unchanged. Then, go back to the Raw Header, where we need to adjust the “Full Size” by recalculating it as the sum of the “Body Size (microcode area)” + “Header Size (always 18(?))”. Use the Programmer Calculator in Hex mode for this step. Afterward, save the file and reopen it in UEFITool NE.
here are bad example editing.

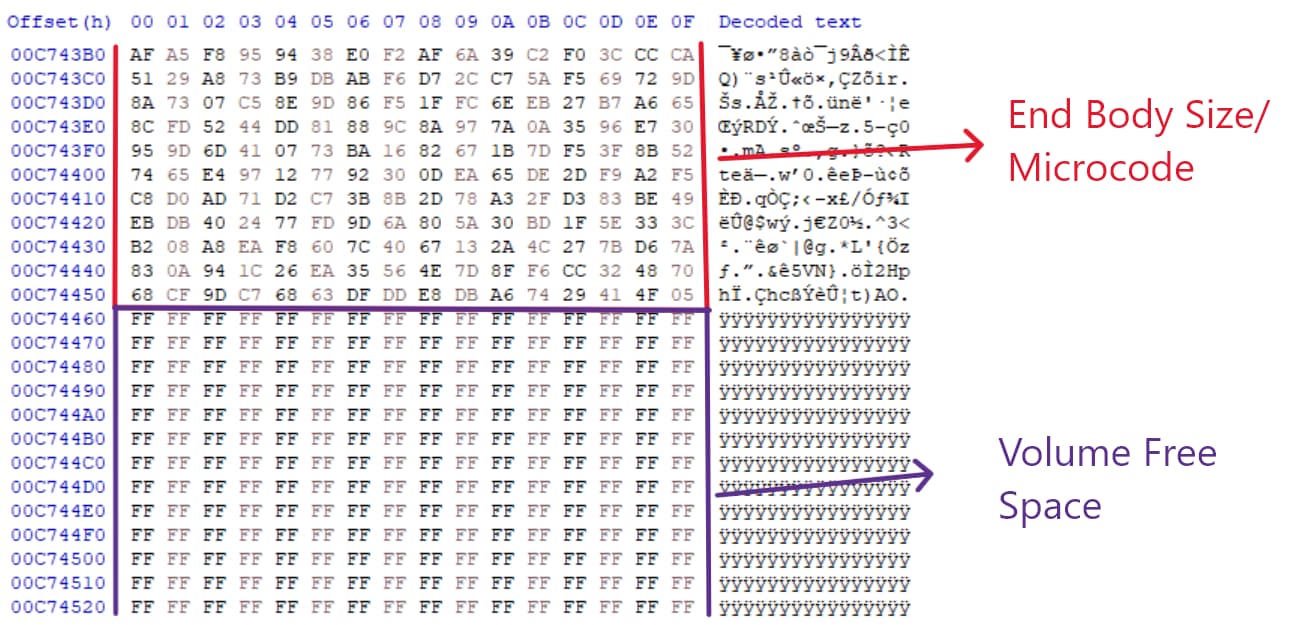
The full size Raw header has more space
FF at the end microcode that should’nt be. (incorrectly full size on the Raw header)

STEP3
Now we need to fix the FIT Table by clicking on the Intel microcode with the broken FIT. More information about the FIT Table can be found here.
STEP4
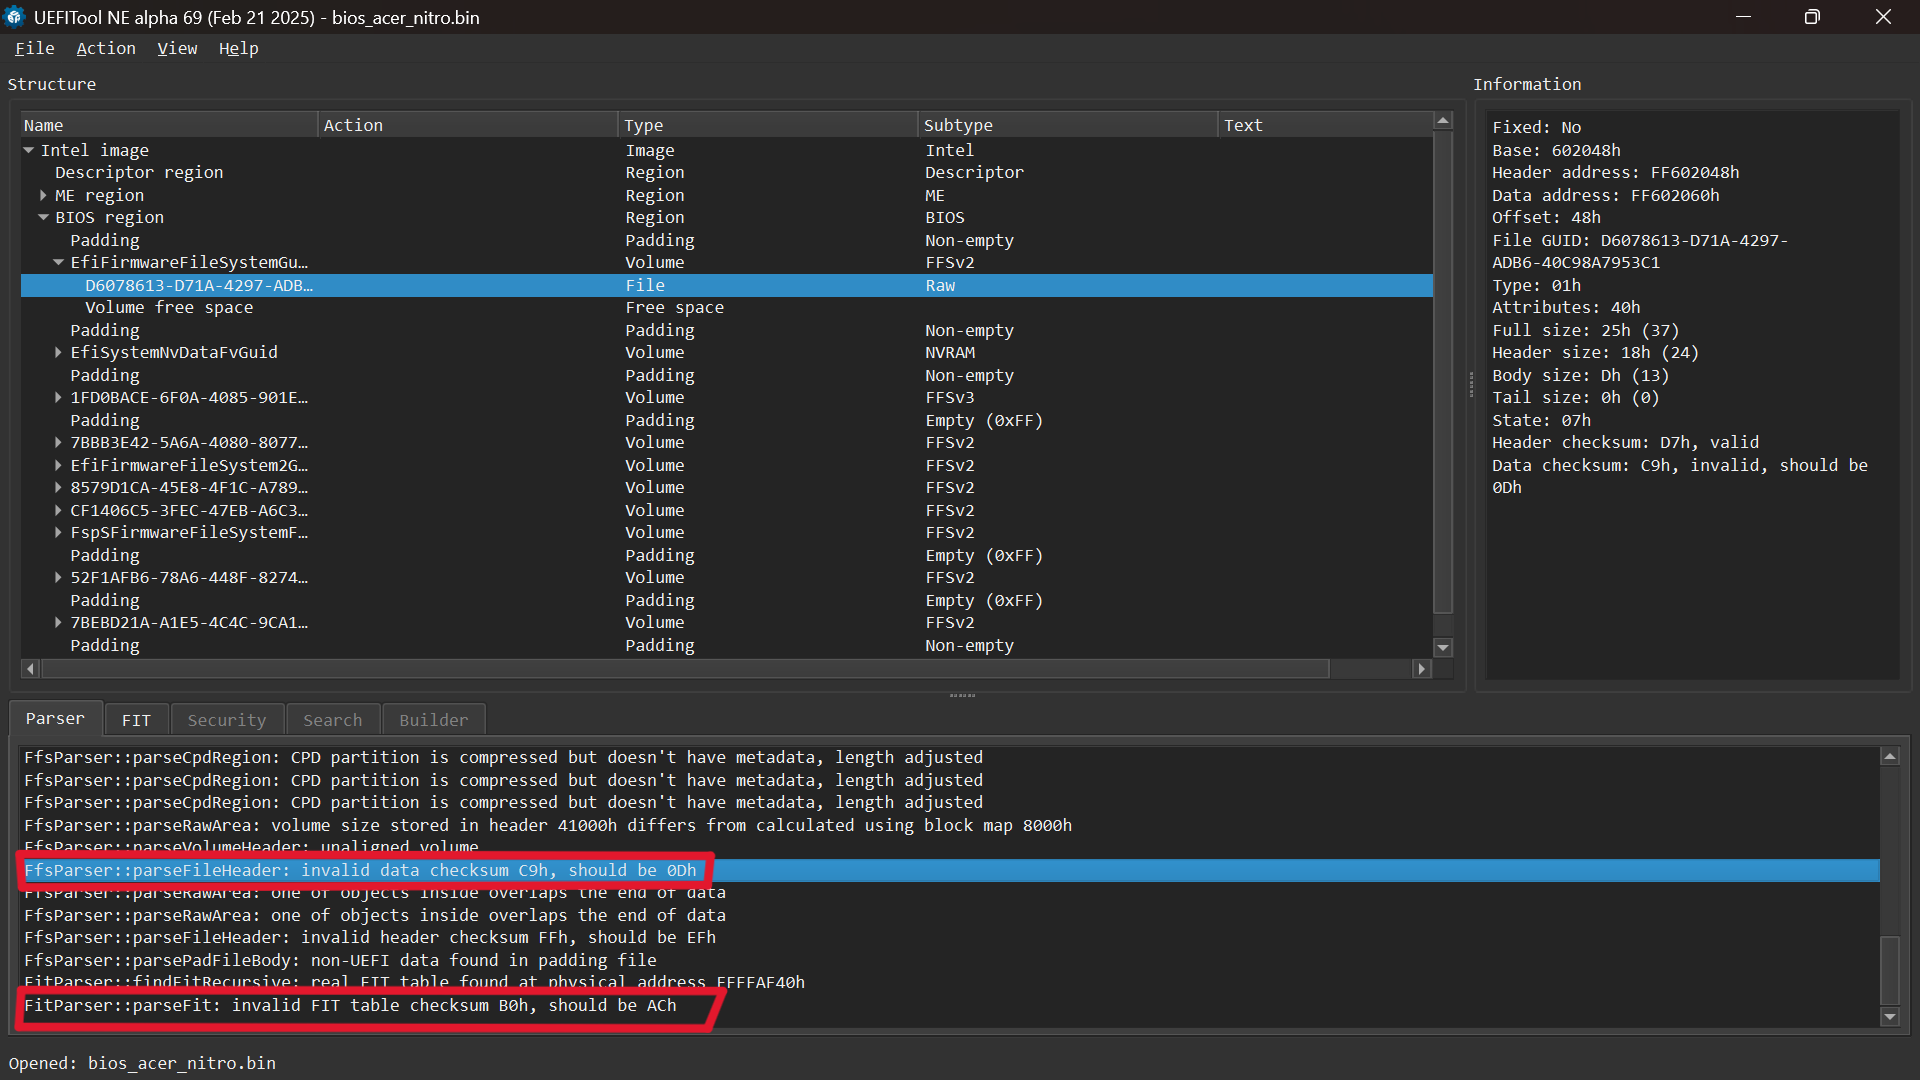
After completing all the processes correctly, the final step is to fix the checksum in the Raw Header and FIT Table. Simply toggle it to “Parser” in UEFITool NE.