@HisretDemir :
The MSI Trident 3 Arctic has a “pure” SATA M.2 port as your “Squad” model, but MSI is offering a Trident 3 model, which has an M.2 port with a SATA/PCIe autoswitch connection (look >here<).
Thanks, how are amazon seller able to sell MSI Trident 3 with NVMe?
https://www.amazon.com/Trident-VR7RD-202…rident%2B3&th=1
Is that the model you bought? If so I would open up a claim with Amazon. I think you have not told us the whole story here.
You probably bought a lesser model.
This Trident 3 model seems to be the one with the SATA/PCIe autoswitch M.2 port.
Just to let you know I managed to get the drive running win 10.
I couldn’t get it to boot with a cloned image of my drive, but it would install windows.
The drive is very rapid 3x my old sata evo’s.
Thanks for help. ![]()

Thanks for the answer! But, unfortunately, this does not help me.
I tried to use AFU modified.rom / P / B / K and got the following response:
Flash reading … done
- Checksums FFS … ok
Erasing the boot block … done
Updating the boot block … done
Checking the boot block … done
Erasing the main unit … done
Updating the main unit … done
Checking the main unit … done
Deleting an NCB block …
Updating the NCB block … done
Checking the NCB block … done
I also tried the GAN command, but it does not seem to work in afudos v5 (afudos v3 does not work with my aptio 5, it shows the "use afudos v5" error)
As I said in my first message, I used BCP to unlock bios, and after applying the modified file I see some new parameters in the BIOS, but this does not help to solve the main problem with ssd = (
Tell me, please, what else should I try?
I already want to sell this stupid asus and buy HP or MSI, maybe with normal NVME support …
EDIT by Fernando: Unneeded parts of the fully quoted post removed (to save space)
@Mark_rus :
Your problem has much more to do with the topic of >this< thread than with the procedure how to integrate an NVMe EFI module into an UEFI BIOS.
Please read the guide written by CodeRush and additionally have a look into >this< and >this< post. If you should have questions regarding the BIOS flashing procedure by using an AFU tool, you should better ask them within the linked thread.
Can anyone verify that I’ve done the module insertion correctly for the bios file for an ASUS Z87 Pro Mobo? I’ve attached the modified file and everything appears to be correct but I’m concerned about the random chinese characters that are showing up in the text fields. Do they indicate some kind of issue or is everything alright?

Thank you.
Mod Bios.zip (5.21 MB)
@twentyafterfour :
Welcome to the Win-RAID Forum!
I have done a look into the attached BIOS and for me everything seems to be alright.
Good luck!
Regards
Dieter (alias Fernando)
Hi All! Thank you Fernando for this helpful guide! Has this been proven to work on the Rampage IV Gene X79 motherboard?
Thank you so much for all your work on this. Everything worked perfectly and my new SSD is blazing fast.
Specs for the record:
4770k
Asus Z87-Pro
Samsung 960 Evo 500 GB
GTX-770
@Edward74 :
Welcome to the Win-RAID Forum!
Obviously yes, because the related NVMe modded BIOS has been already offered >here<.
Good luck!
Dieter (alias Fernando)
@twentyafterfour :
Thanks for your feedback. It is fine, that you succeeded and now can enjoy the performance of your NVMe SSD.
Greetings again, I had configured my Bios of my Asus P8Z77-V LE PLUS to place an adapter with SSD M.2 Nvme SAMSUNG MZHPV128HDGM-00000 and it worked very well. I just do not see the features, I just get S.M.A.R.T. It is normal? The program that I used is CrystalDiskInfo.
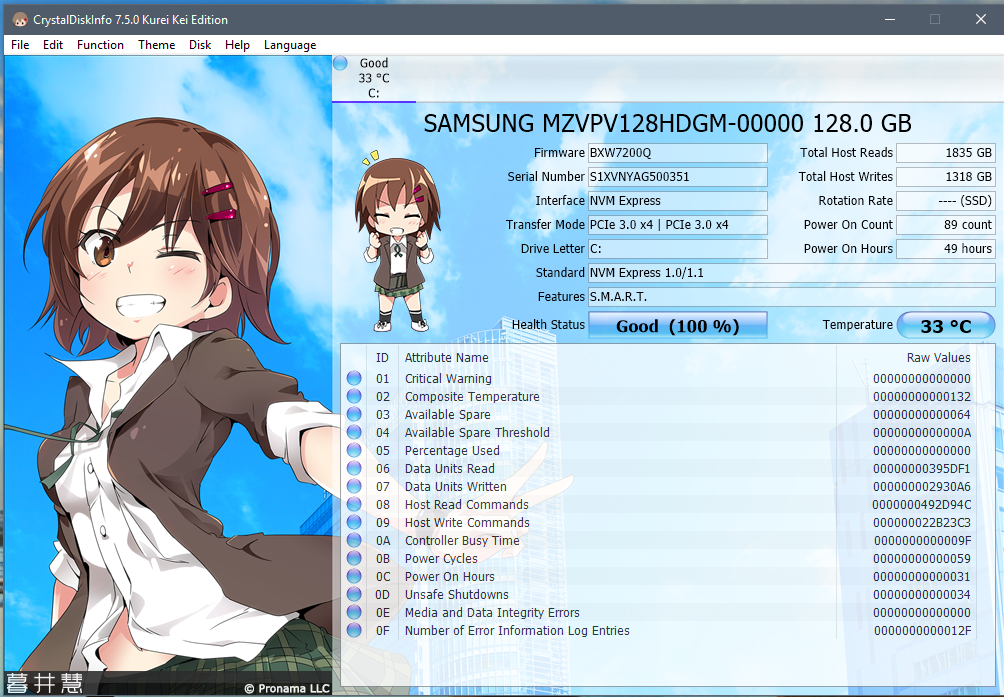
Which "features" did you expect to see by running the CrystalDiskInfo tool?
Maybe you should use a more specific tool like Samsung’s Magician.
Hi Fernando,
I think I need your help…
I have a Z68MA-D2H-B3 motherboard and I’ve just bought one Samsung EVO 960 SSD Nvme 250Gb + Asus Hyper M.2 X4 Mini in order to connect it into the PCI Express x8 space.
Well, I did that, Windows and Samsung Magician see the SSD, all OK and I did a copy into the SSD-NVME disk but I can’t start from the BIOS…
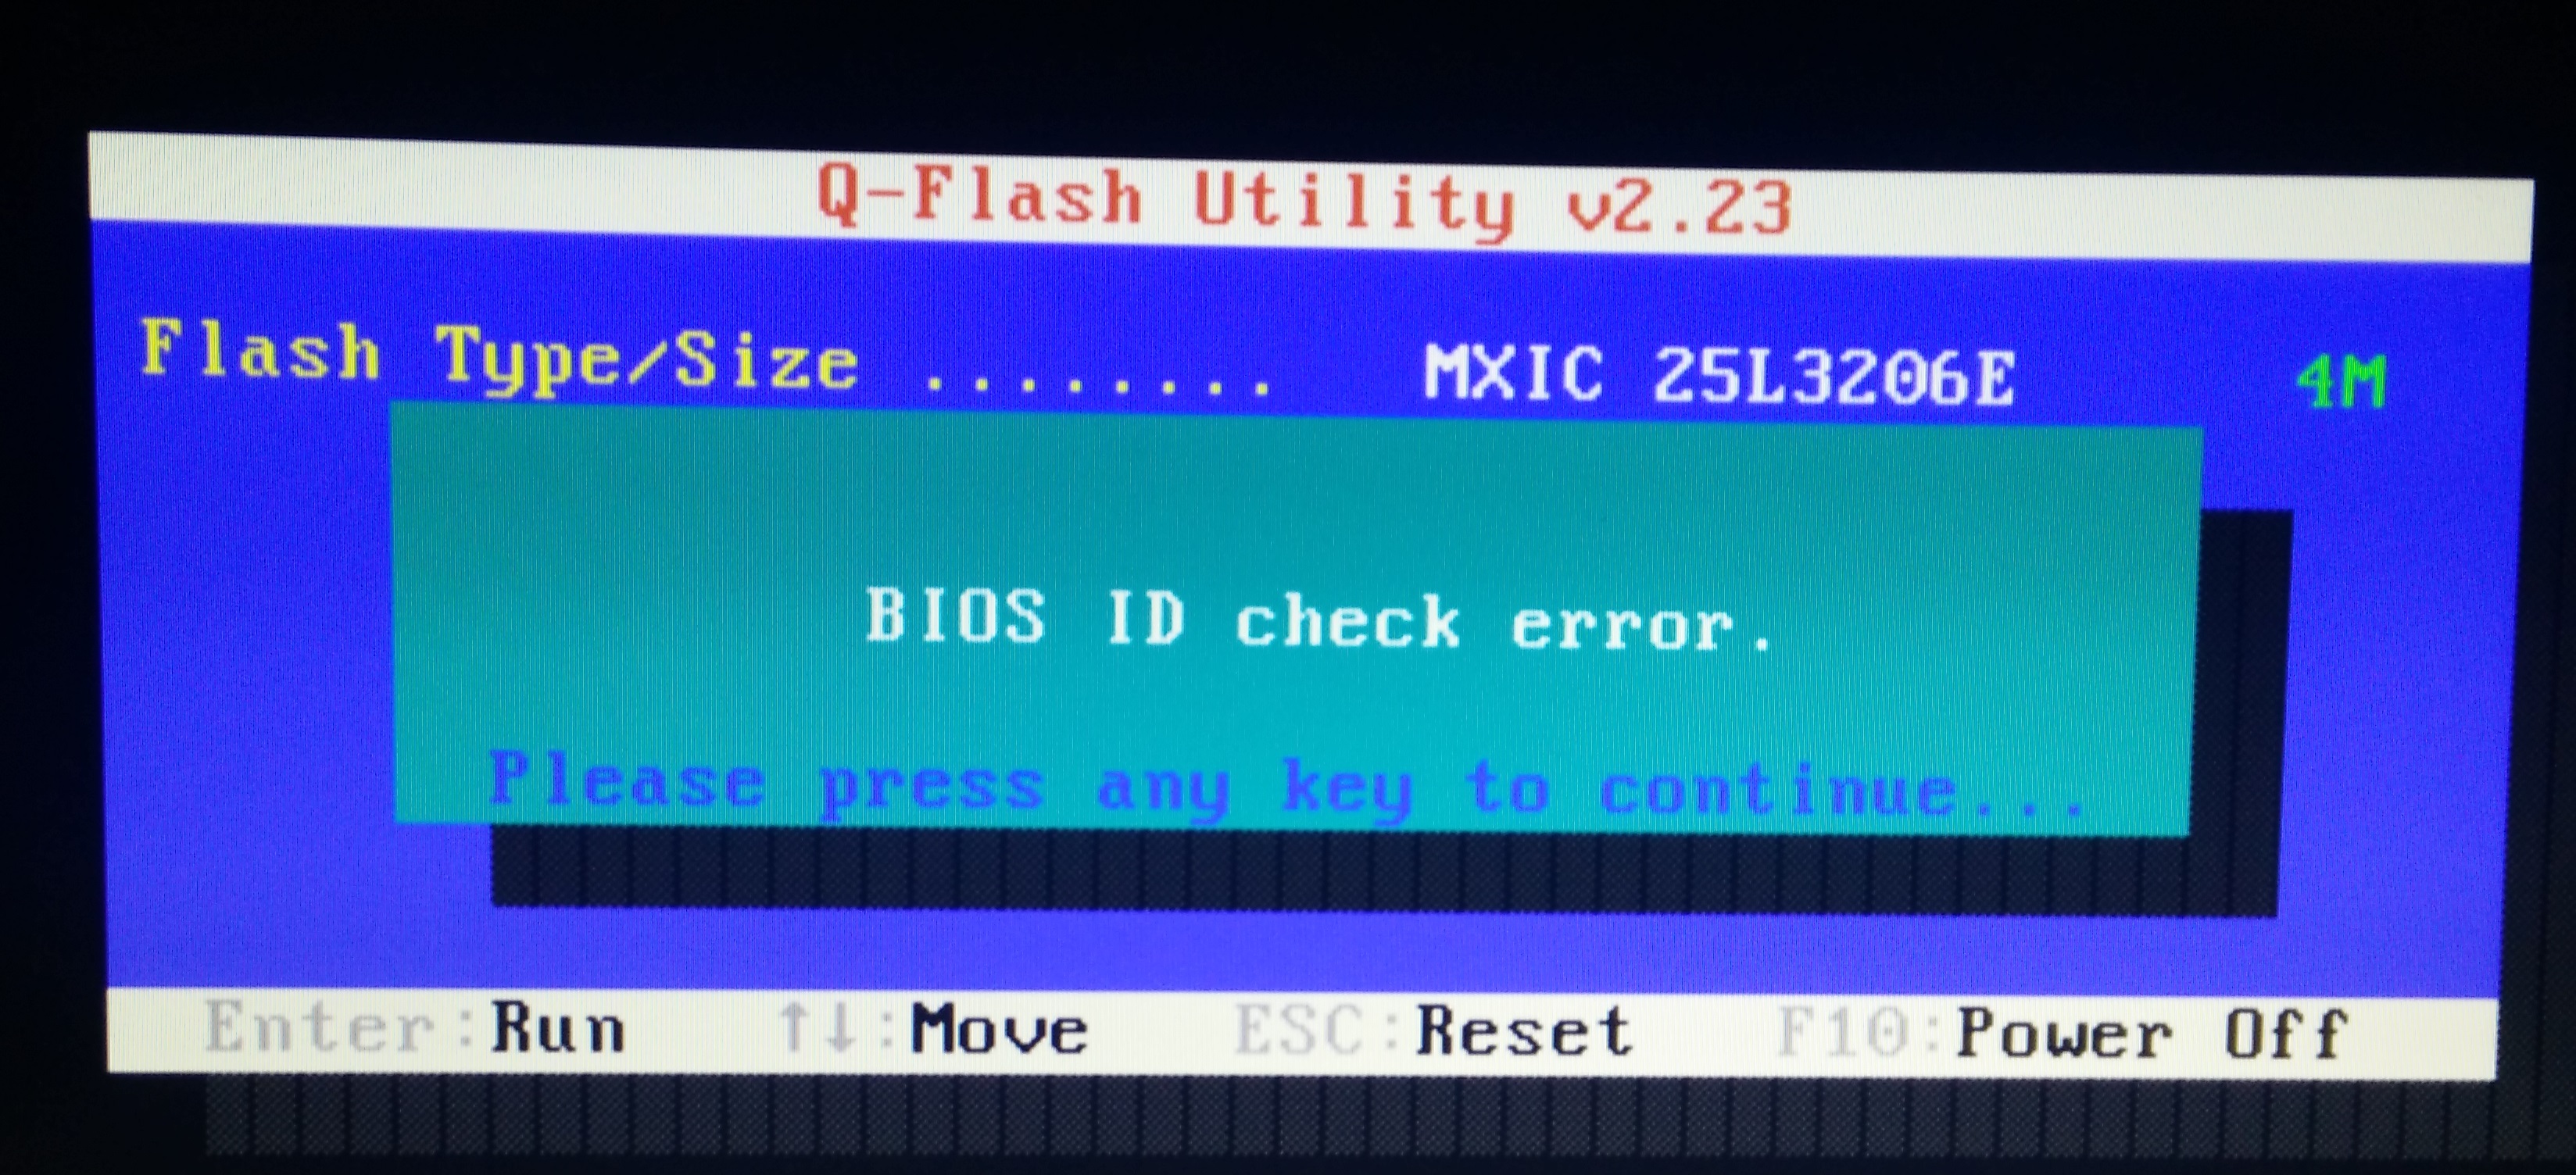
I upgraded the BIOS untill F10 but when I try to upgrade to UEFI with this link http://es.gigabyte.com/products/page/mb/…_10/#support-dl the Q-Flash utility reports an error… How can I upgrade to UEFI? I was following this tutorial but the .exe reports an obvious error “UEFI volumes not found”.
Please I need some help, thank you!
@Mrcarl0s8 :
Welcome to the Win-RAID Forum!
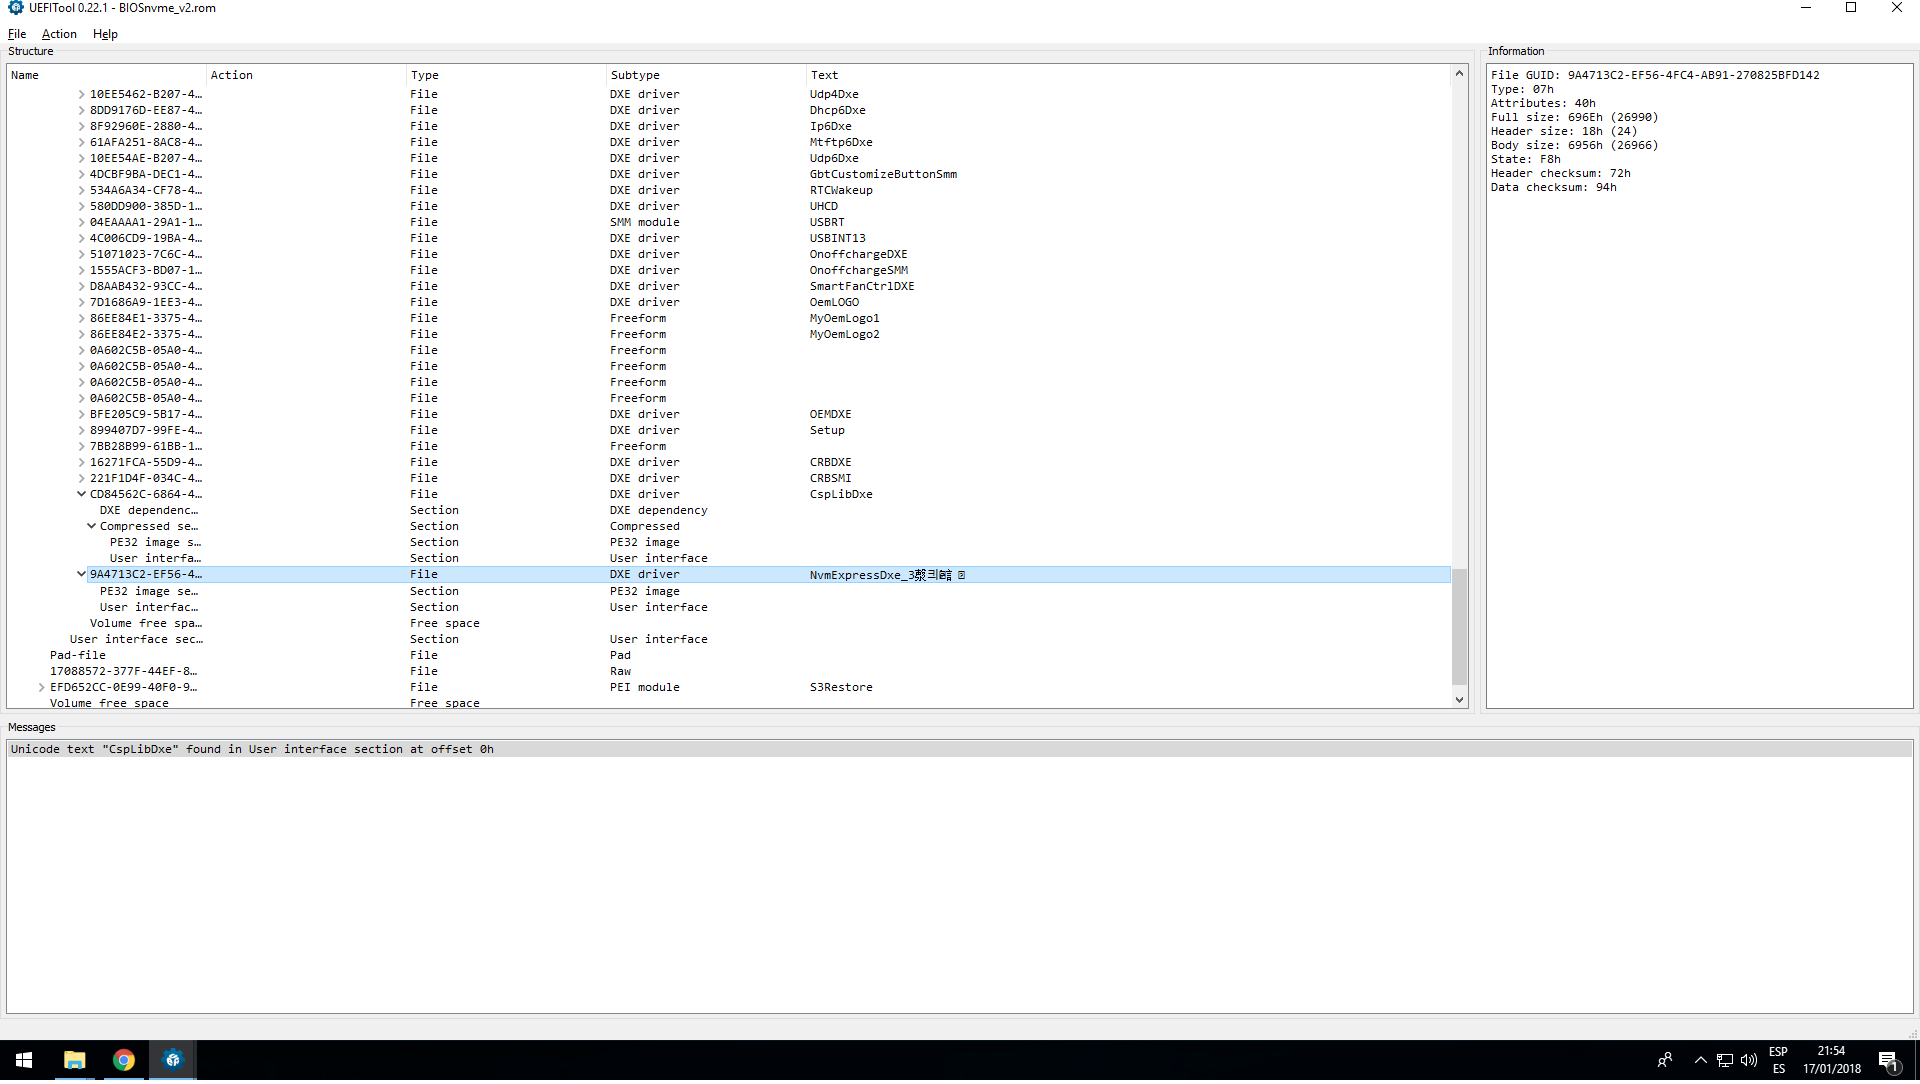
You have to extract the BIOS file named Z8MAD2H3.U1C from the EXE archive. It is very easy by using a tool like 7-zip.
After having done that you can insert the missing NVMe module.
By the way: I just have done a deeper look into the BIOS file. Its undermost listed DXE driver is named CspLibDxe.
Good luck!
Dieter (alias Fernando)
Hi Fernando,
First of all, thank you for your welcome and fast support!
I’ve created a modded BIOS file following the steps listed at the start of the topic and going to the last DXE file: CspLibDxe as you said.
I attach the an image so you can see what is wrong… Because the Q-flash utility show the same error ![]()
What I have to do?
@Mrcarl0s8 :
Please read the first and the 5th post of >this< thread.
Hopefully this will help you to get the modded BIOS flashed.
@Fernando
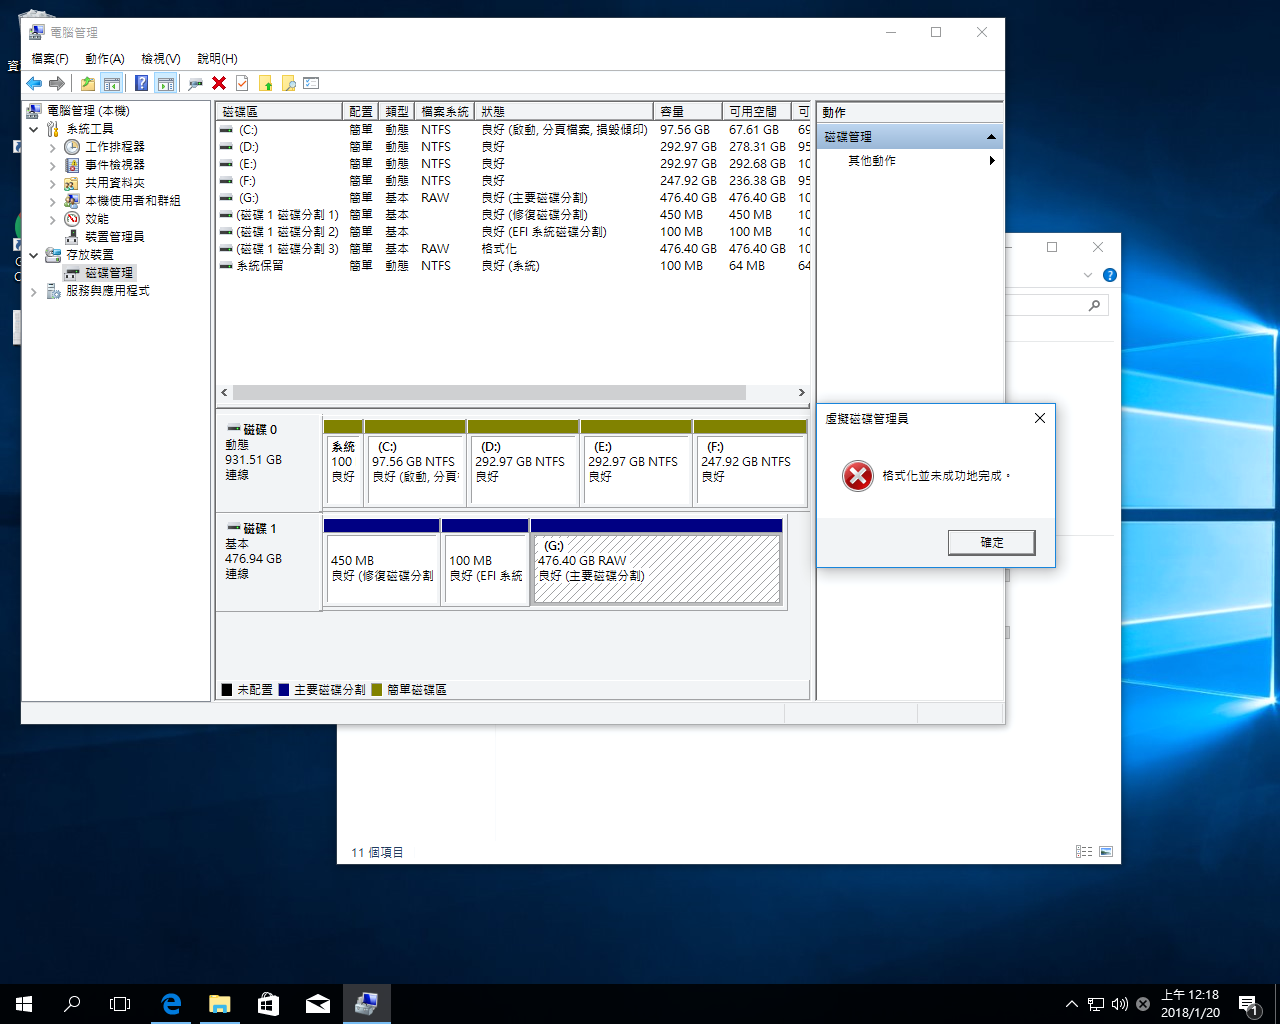
I had boot my USB Flash Drive in UEFI mode and disabled “Secure BOOT” and “Fast Boot”.
I follow your “Installation of the OS onto the NVMe SSD”, it created two parts, one is EFI system, but I still can’t format my ssd storage successfully.
So I can’t install OS into my SSD storage.
I really didn’t what happen @@
Could you help my check the symptom?
@bravowang :
If you want to use the NVMe SSD as bootable system drive with the OS Win10 on it, you should do the following:
1. Unplug your other HDD/SSD.
2. Boot off the USB Flash Drive with the OS image on it in UEFI mode.
3. Once your NVMe SSD has been detected by the Win10 Setup, delete all shown partitions and create a new one sized 420-450 GB. The OS Setup will automaticly create the other (usually hidden) partitions.
4. Choose the biggest sized partition as the target partition.
5. Wait until the OS installation has been completed.
6. Once the OS is running fine (all available Windows Updates loaded and installed, Device Manager without any yellow flagged device), you can reconnect your other storage devices.
7. To prevent, that your computer boots off the previously used OS, which is still on the other HDD/SSD, you should delete there the 100 MB sized EFI partition and the formerly used 97,56 GB sized system drive from within the Disk Management.
Good luck!