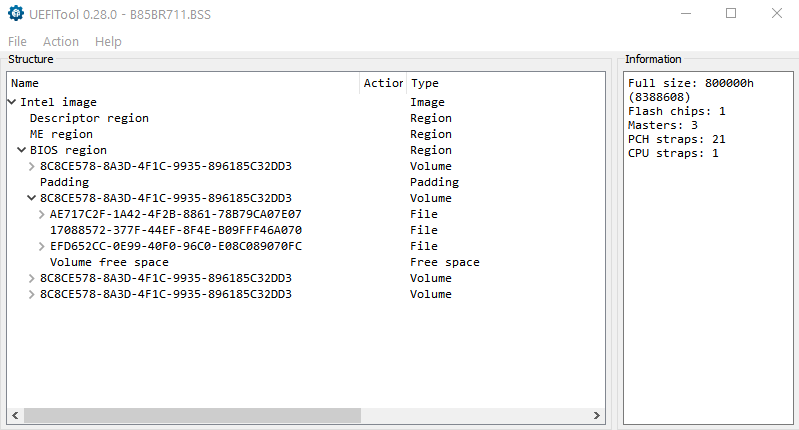
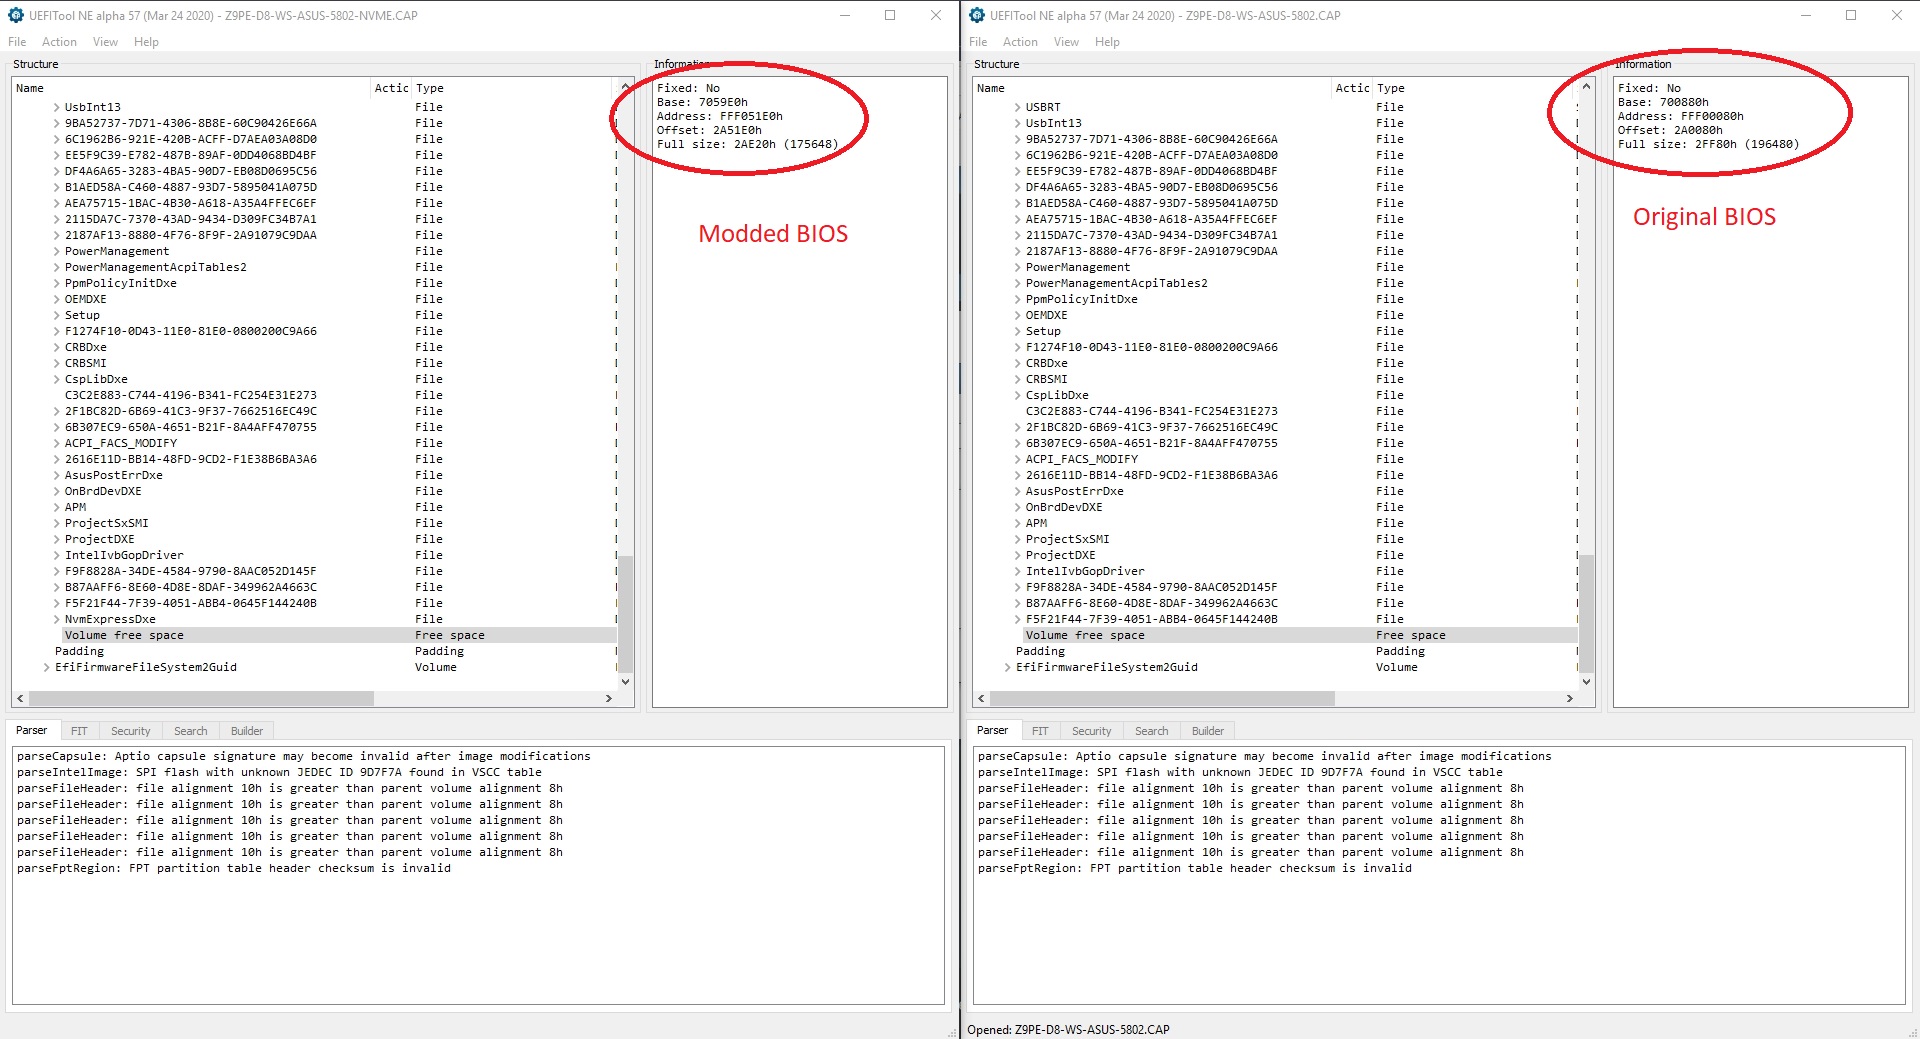
@alexel - You’re welcome! I meant, it looks like you do not have to worry about offset and rebuilding properly encapsulated BIOS because you bypassed needing that by using AI Suite flashing work around method, and have already flashed your incorrectly encapsulated BIOS This only needs done properly if you are using USB Flashback, AI Suite rips off the capsule anyway, so not sure it matters for that and many users this method fails anyway, so not much feedback there to know. Starting BIOS/Intel Image Offset is here shown in image below for your BIOS, I showed in image at link above (image in point #3), and told you what you need to use (UEFITool NE / Alpha), to see this
After my successful clean install, I tried restoring an image of my old Windows partition onto the new windows partition of my SSD, but it wouldn’t boot. The problem was I hadn’t converted my MBR HDD to GPT. Both @Fernando and @Shawn show methods starting with converting the MBR drive to GPT. But I wasn’t aware of this requirement, and it lead to my search for a direct way to clone my MBR HDD partition onto my GPT, NVME SSD. Thus I found the Macrium Reflect guide. Perhaps I could have done it with Macrium Reflect Free alone, but I used Rufus as well, per my original post.
Another satisfied customer. I added the module to an Asus P8Z68-V today, and it went very well.
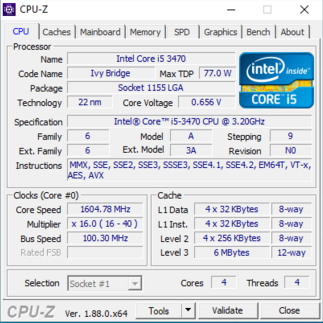
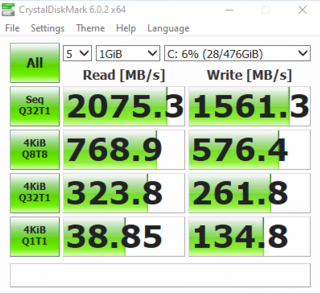
I thought I would add some more information that I have discovered through benchmarking. I had only tested this machine with the onboard video, but I recently began testing it with an Nvidia GTX 750 Ti. After adding the card to the uppermost PCIe slot, it took forever to boot up. I began to worry that, though it worked fine with the onboard video, it wasn’t going to work with a PCIE video card. I tried clearing the CMOS, and it began working normally; but when I tested the drive speed, it was now very slow (400 MB/s). This was with the NVME drive in the lowest PCIe slot. Looking in the manual, that slot is capable of 4x, but it defaults to 1x - so clearing the CMOS had dropped it from 4x to 1x. I set it to 4x, and I got nearly all of the speed back, and all else was still working properly. I decided to try something I hadn’t before - putting it in middle PCIe slot. This would split the bandwidth between it and the video card, making each slot 8x. This increased the speed from about 1600 MB/s to 1900+, and the 3D Mark 11 score was unaffected. So, maximum drive speed will only be achieved by using the onboard video rather than a PCIe video card, but the speed loss is negligible.
@Tanmay_Sarkar - Try doing the mod using UEFITool 25.0, then if same, try again using MMTool instead. If you still cannot get it, link me to the stock BIOS you are editing and I will do for you. Sometimes this is OK to add/remove padding, but only way to know is test flash BIOS, and if it’s a brick and you don’t have programmer, then no way to recover. So do not “go ahead and try it” unless you have a programmer, backup made, and are ready to recover. Don’t rush around, if you can’t get, wait and I or someone will help you
Can anyone help me, I’m looking to modify a bios for a MSI Z87-G41. I’ve done all the steps with UEFITools but the pad has disappeared, is there any way to remedy this. if someone could take a look at the 2 files for me that would be very much appreciated.
EDIT by Fernando: Inserted pictures resized to save space (can be enlarged by clicking onto them)
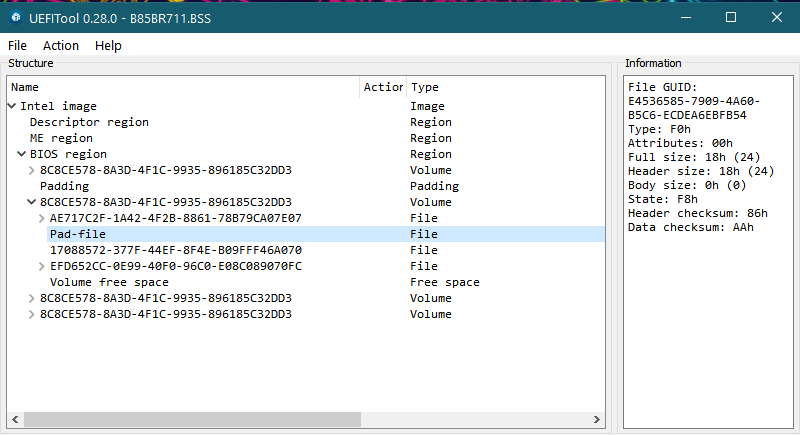
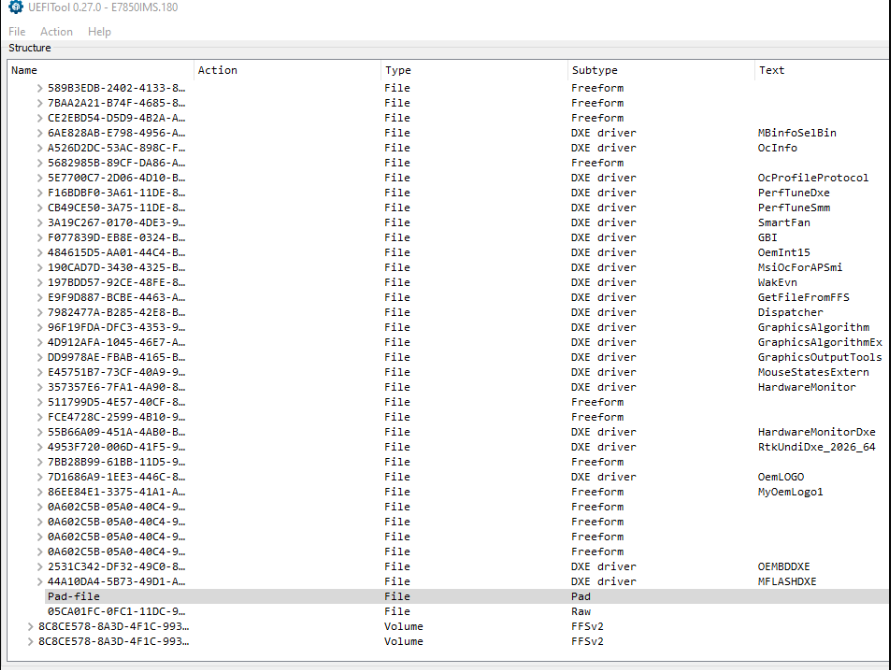
@LiquidCRA : Welcome to the Win-RAID Forum! Yes, according to my experience the UEFITool touches an originally present Pad-file more often than the MMTool. This is what I get after having inserted the NVMe module with the AMI MMTool v4.50:
As you can see, the Pad-file has not been removed by the MMTool. Good luck! Dieter (alias Fernando)
Is there a sure fire way to know if a modded bios will work or at least not brick a motherboard?, the board in question does not have flashback so if I was to do it I would need to know if it was going to be successful.
@LiquidCRA : There is no absolute secure way to get a modded BIOS successfully flashed. All you can do to minimize the risks of a bricked mainboard is to upload the original and the modded BIOS, so that a Forum member with more BIOS modding experience can check, whether the modification has been done correctly and no natiively present Pad-file has been touched. At the end it is up to you to decide, whether you flash the modded BIOS or not. In any case you will do it at own risk. By the way:
Each BIOS flash is risky. A sudden power breakdown during the flashing procedure will definitively brick your mainboard (even if you are flashing an original BIOS).
Many BIOSes are protected by the mainboard manufacturer to prevent the flash of a modded BIOS, but the mainboard will not brick, if you flash a correctly modded BIOS. The only thing what may happen is, that the flashing procedure will not be executed (with or without an error message).
The procedure described within my guide (= start post) is meanwhile well approved and until now I don’t know any case of a bricked mainboard after flashing a correctly modded BIOS. The most risky BIOS flash has been done by me myself in June 2015, when I tested as worldwide first user, whether it is possible to get NVMe support by flashing a modded BIOS, where BIOS modules from another mainboard model had been added (look >here<).
@LiquidCRA - Once mod BIOS is done correctly, you can flash via M-Flash if you rename the mod BIOS name.extension to match the original BIOS file As Fernando mentioned, if you use 4.50.0.23 the mod is done correctly, I did the mod too, so now you have two of us checking this edit for you. But in this case of mod BIOS you should not have any thing to worry about provided you did the mod with MMTool 4.50.0.23, and that you safely flash the BIOS (ie not during storm, do not interrupt etc) Flash can go bad at any time, for no reason, even flash of stock BIOS using stock method, so there is always "some" risk
I’m trying to insert the nvme inside the gigabyte z77x-ud3h F18. There was not enough space so I inserted NvmExpressDxe_Small using MMTool. I flashed the bios and everything seems to be working correctly (didn’t test the actual nvme ssd yet since it’s on its way).
BUT
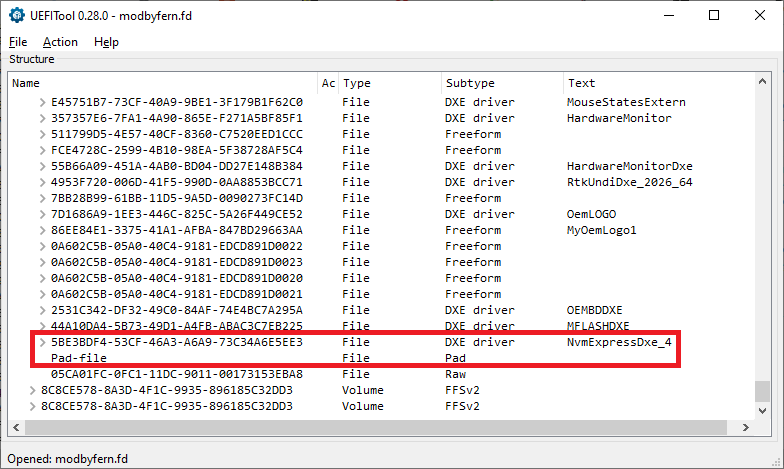
I didn’t know about the Pad-File issue. I realized it was something to be aware AFTER the facts. So I compared the bioses using UEFITool and I can see that it actually did removed a Pad-File. So to be safe, I flashed the stock BIOS back because I was afraid it might be a problem.
Also I did try to insert using UEFITool 0.25 and 0.28 and the same Pad-File is removed.
@bergelru : Welcome to the Win-RAID Forum! Please attach the original and your modded BIOS as *.ZIP archives. Then we will try to help you. Regards Dieter (alias Fernando)
@bergelru : Your BIOS is one of the very rare ones, which cannot be correctly modified by just using an AMI MMTool or or the UEFITool. Our expert for such more difficult BIOS modding operations is Lost_N_BIOS.
@Lost_N_BIOS : Since I was not able to get the NVMe module correctly inserted by using different BIOS modding tools without erasing the Pad-file, which is natively present directly behind (under) the DXE Driver Volume, I ask you to help bergelru. Thanks in advance!
First, I want to apologize for my level of English, it’s not my native language … Secondly, I would like to thank people who have done all this work to allow NVMe SSDs to be integrated into old Bios that are not supported by the manufacturers.
Having seen Chinese X79 motherboards with native NVMe support, I figured it was possible, so I tried looking for a BIOS with NVMe support for my ASUS Z9PE-D8-WS motherboard. No luck, No BIOS, I didn’t find it … And finaly after long time to check the possibily to find à BIOS, I found this forum last night, and I found all these posts and explanation steps allowing NVMe support in AMI Bios. THE DREAM … YEAHHH … Thank you boys…
Having already modified graphics card Bios to mine crypto, I said to myself, I must… I need try it. So I made the modification of my original BIOS (downloaded from the ASUS site) during the night. I also compared the two BIOS (original vs modding) and didn’t see any differences apart from the remaining size. It seems logical to me because I added datas from the NVMe support. Is it right ? http://gbb-technics.fr/Archives/Divers/Bios/File_size.jpg
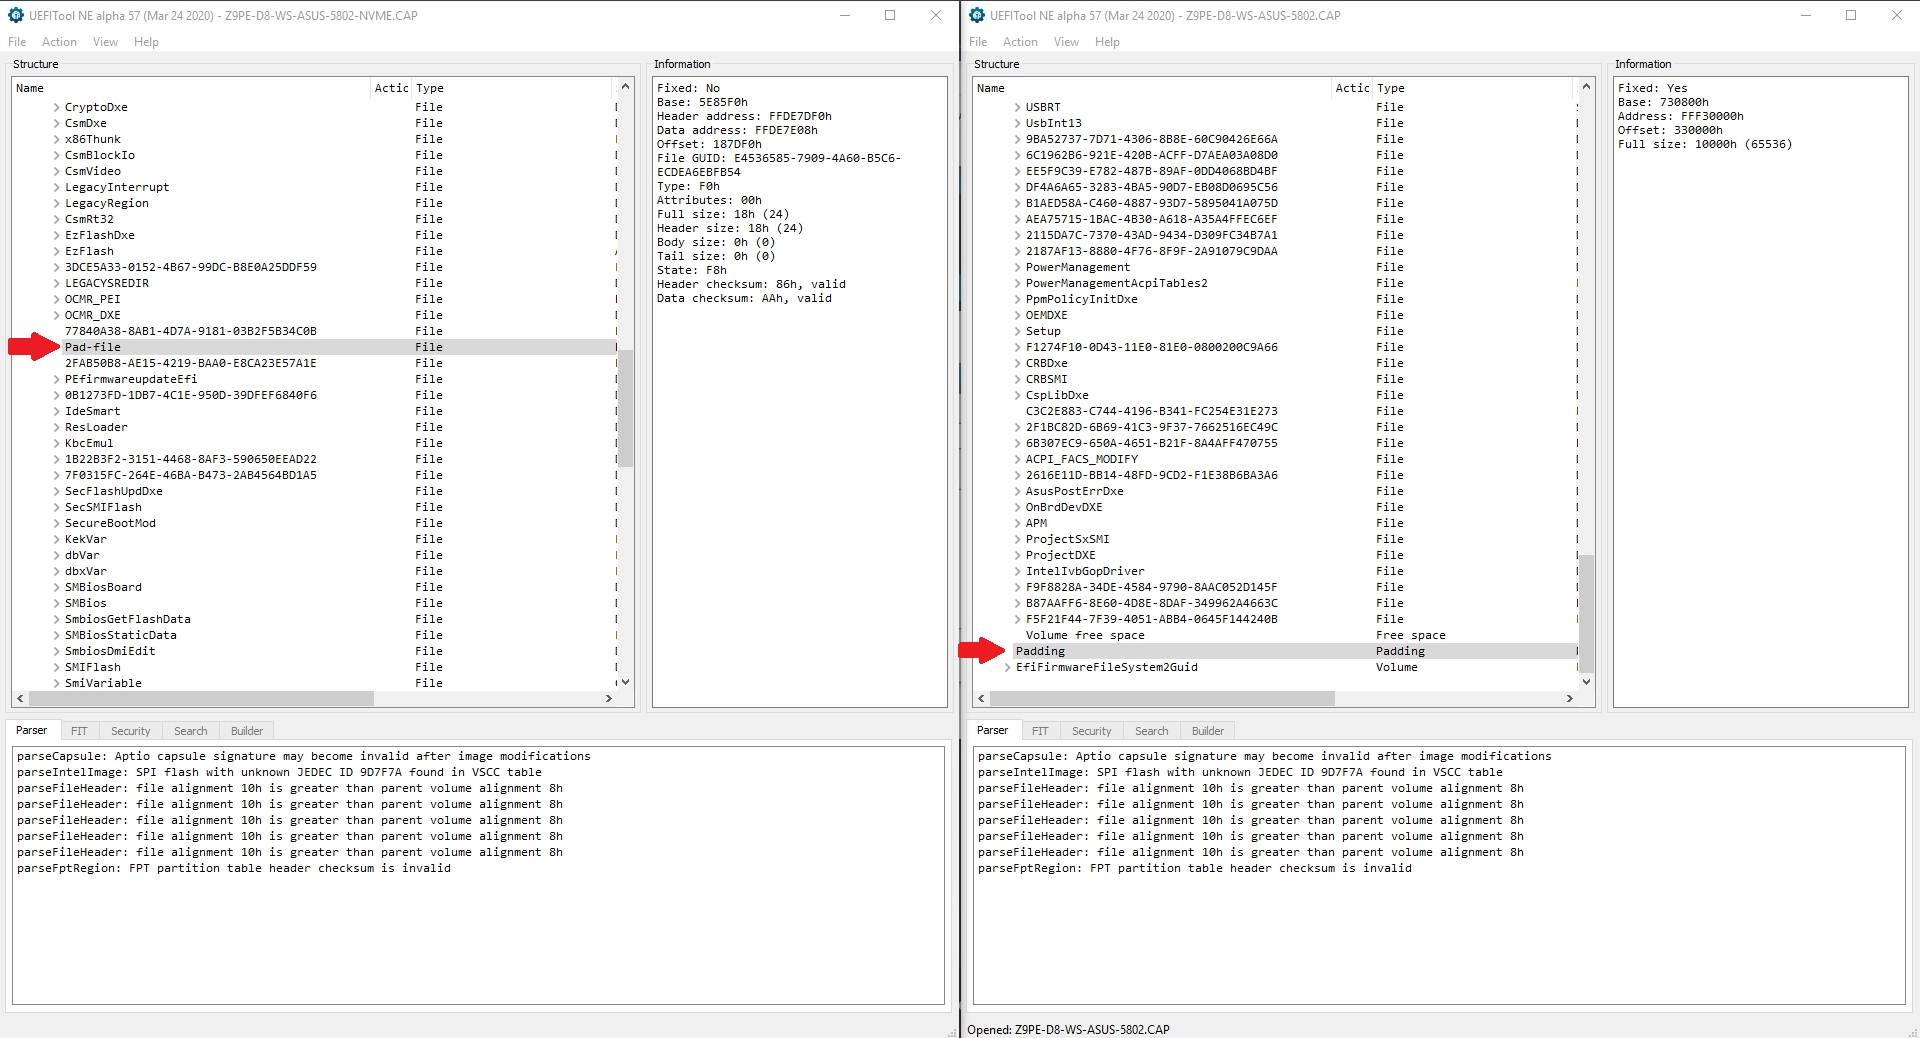
Now, I’ll try to explain my problem quickly and simply: I follow all steps to mod ASUS Bios, then I have extracted the *.ROM file from the CAP Bios, do the modifications, copy the result with HEX program in a new file and finaly save the new file as *.CAP But I saw that some members had problems after editing their BIOS, UEFITool can change or remove “PAD-FILES”. I don’t know what a “PAD-FILE” is, and I have actually seen this king of “file” in my BIOS called “PAD-FILE” and “PADDING”. I don’t know the difference between the 2. Is it the same? http://gbb-technics.fr/Archives/Divers/B…_vs_PADDING.jpg
Then, I compared the structure of the 2 BIOS, and I don’t think that this problem appeared in my modding, but I would like to have confirmation from a people who knows the subject very well. The ASUS Z9PE-D8-WS card is a dual XEON card, OK, it is old motherboard now, but it still costs quite a lot on occasion, and I don’t want to burn it because of checks that I did not do.
So what I would like to have is a confirmation that there is no modification on “PAD-FILE” and/or “PADDING” structures in my moddes Bios.
@Captain_Caverne : Welcome to the Win-RAID Forum! Since it doesn’t make sense to start a new thread for each mainboard model, I have moved your post into this already existing thread, which covers 100% your request. After having checked your modded BIOS and compared it with the original BIOS, here is the result: The insertion of the NVMe module has been done perfectly and none of the natively present Pad-files have been deleted or moved. Well done! Conclusion: Your modded BIOS is ready for being flashed via the ASUS USB Flashback feature of your mainboard. Good luck! Dieter (alias Fernando)
Not Lost_N_BIOS but looked into this gigabyte z77x-ud3h F18 bios just out of curiosity. Seems to me that theres too little space left in this volume to add the NVME module. Since the whole partition is compressed, it grows relatively more than module size would predict as the free FFs at the end take much less space when compressed. Next partition has changed location in modded bios, too. I’d think one would have to remove something ‘unused’ from the compressed partition to succeed. Will be interesting to hear @Lost_N_BIOS conclusion.


