@D-man :
If you don’t want to modify the BIOS yourself, you should better post your request into >this< Subforum by starting a new thread.
Don’t forget to attach the extracted original “pure” BIOS (not the *.exe file).
@isgraceenough
The Asus ROG IV EXTREME or any other based X79 chipset will enable and use by default PCIe 3.0 using any processor above SandyBridge-E
We will need a a 4820K IvyBridge-E, so leave NVidia away from this…this is Intel subject.
I joined up specifically to thank the OP for this thread. I was able to adjust the bios for my ASUS Z87-WS motherboard using the ROG usb bios flashback method. I also had to export the body.rom, modify that and reinject using a hex editor so that the .cap file would flash correctly. It is renamed correctly to allow flashing via the USB method and attached here for anyone else who needs it. I’m in Canada, so not sure if this work for EU folks or not. I am using a Samsung 1TB EVO 970 mounted to a PCIe adapter from amazon that included heat pads and a small external heat sink. This SSD does run 45C or so, and I found it runs best in the PCIe slot directly under an Nvidia 1060GTX card which pulls cooling air directly over the SSD drive on its way into the video card cooling slots.
Just a point that likely has been made many times, but I was able to copy over the image from an older 500GB sata SSD to the new PCIe 1TB, but I first had to convert the original hard drive to GPT (to allow UEFI booting). I did this booting with a current windows 10 boot USB image, and running the mbr2gpt tool to convert my old SSD to GPT. There were several issues preventing this tool working which I had to work through first (googled the error messages…fixed, tried again etc.). One way or another, if you’re starting with a non UEFI boot, you need to convert it before or after cloning using a windows 10 bootable USB before you can use it as a bootable drive.
If you have an existing OS that is not a GPT formatted HD, then you should mod the bios, then get it booting OK in UEFI mode first before you try to clone it to a new PCIe SSD.
What worked:
1. Bios was mod’d using the attached BIOS using the USB flashback method with the attached bios file unzipped and copied to the root of a FAT32 formatted USB. Don’t change the name or it won’t work.
2. The original Samsung Evo 500GB was converted to GPT and tested OK booting in UEFI mode using a windows 10 boot disk → command prompt and mbr2gpt tool (google it).
3. I download Macrium Reflect free and created a bootable USB from the program GUI.
4. Booting from the Macrium boot USB, you can clone the disk. (samsung data migration tool did not work at all)
5. Changed the boot order in BIOS to the new 1TB UEFI option.
6. Tested to see that I was getting the full rated read/write speeds from the Samsung 1TB EVO 970.
7. If you have boot issues, try the Macrium boot disk which has a tool to repair the boot process.
There are a lot of bios options to mess with to get a fast boot, but it does work great. You may need to disable all other options in the boot area of BIOS to get the workstation to boot off a given USB boot disk while doing the above. Thanks again for the great work in this post!!
Z87WS.zip (5.39 MB)
@denwood :
Welcome to the Win-RAID Forum and thanks for your feedback and additional tips.
By the way - it is not necessary to convert the partition table of a previously used NVMe SSD from MBR to GPT, if the user follows my advice to remove/unplug all other HDDs/SSDs before starting the OS installation and this part of the chapter "Installation of the OS onto the NVMe SSD":
Enjoy the performance of your new NVMe SSD!
Dieter (alias Fernando)
EDIT: If you want to offer your successfully modded BIOS for other users with an ASUS Z87-WS mainboard, you should better start a separate thread within >this< Sub-Forum. Within this voluminous thread it is not easy to find your offer.
Fernando, understood. I did actually do a fresh win10 install on the new PCIe to test it out. Then I wiped the drive and cloned it from my older win10 install with a MBR formatted SSD. I did not want to the go through the hours of restoring programs etc. onto a fresh win10 installation. Cloning an existing win10 install will work with fewer issues if you start with GPT formatting your existing drive that is UEFI booting.
Hope that makes sense?
@denwood :
Although I would always prefer to boot off an NVMe SSD with a clean installed OS, you can use a cloned old OS partition with a Guimode Partition Table as well, but it is not necessary to convert the partition scheme before you are going to do a fresh OS installation onto a previously used SSD. It is enough to wipe all existing partitions (inclusive the one with the boot sector) and to let the OS Setup create a new system drive for the OS.
Hello, I’m new here.
I really appreciate everyone here who post this guide how to make NVMe work on old computer.
But I have a problem during the installation.
I’m using ASRock Z77 fatal1ty as Motherboard and Intel i7-3770k as my Processor.
I have a Samsung SSD 970 Evo and using an NVMe to PCIe 3.0 adapter to install it on my motherboard.
So I following the instruction from this forum which is modding BIOS using AMI’s MMTool and then flash the bios.
Here is BIOS driver comparison:
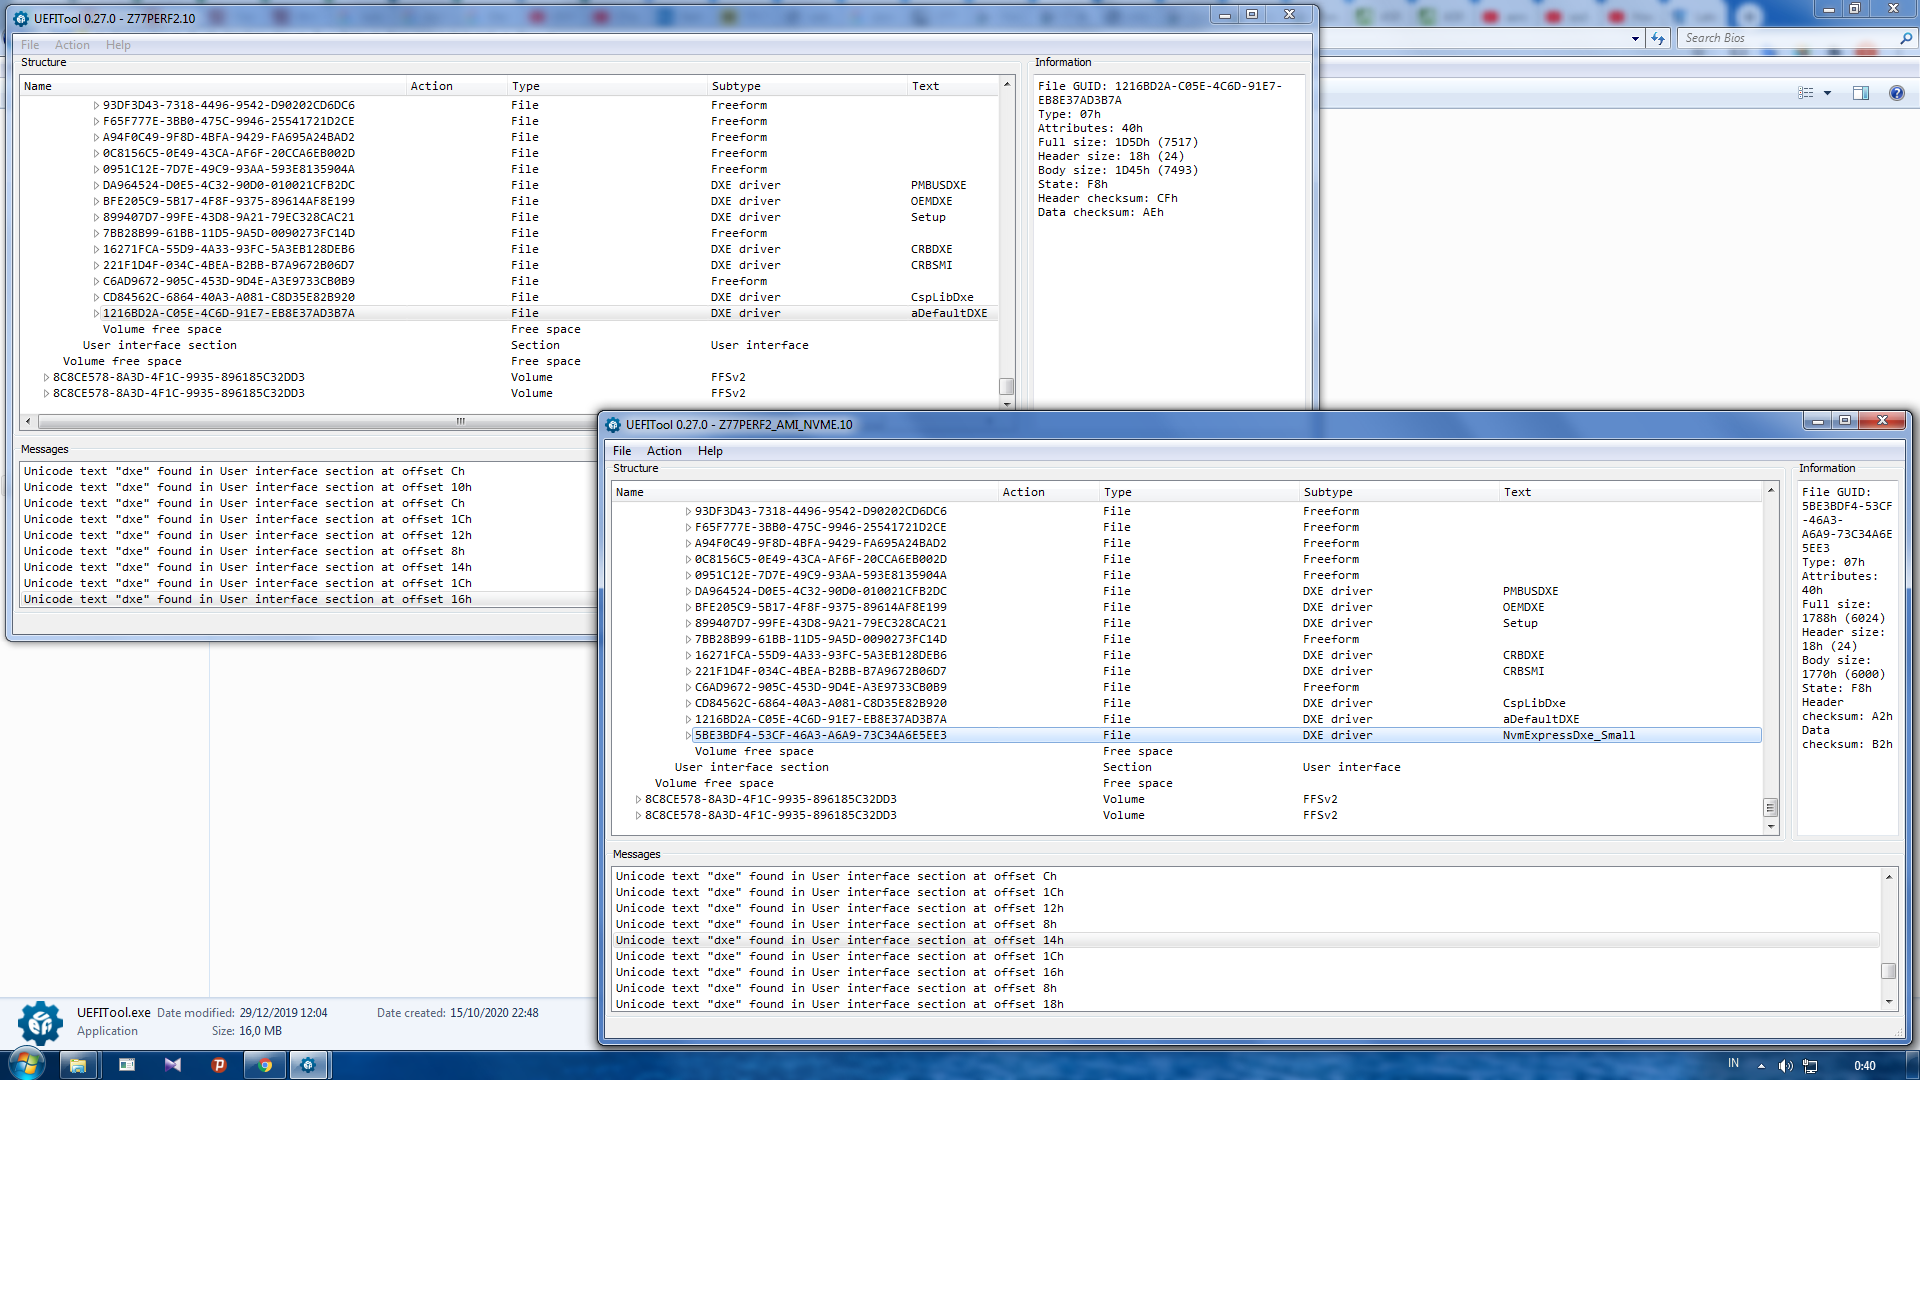
Left Windows is Original BIOS
Right Windows is Modded BIOS using AMI’s MMTool
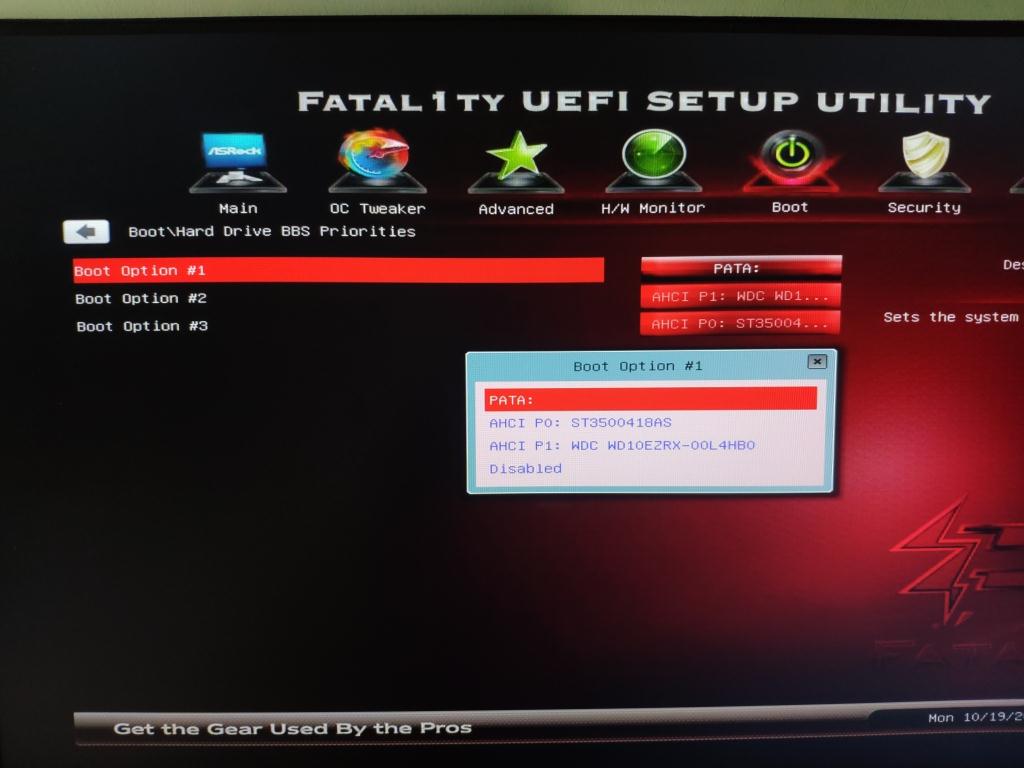
After flashing the BIOS, I’m able to choose a new hard drive as a bootable device beside my old hard drive.
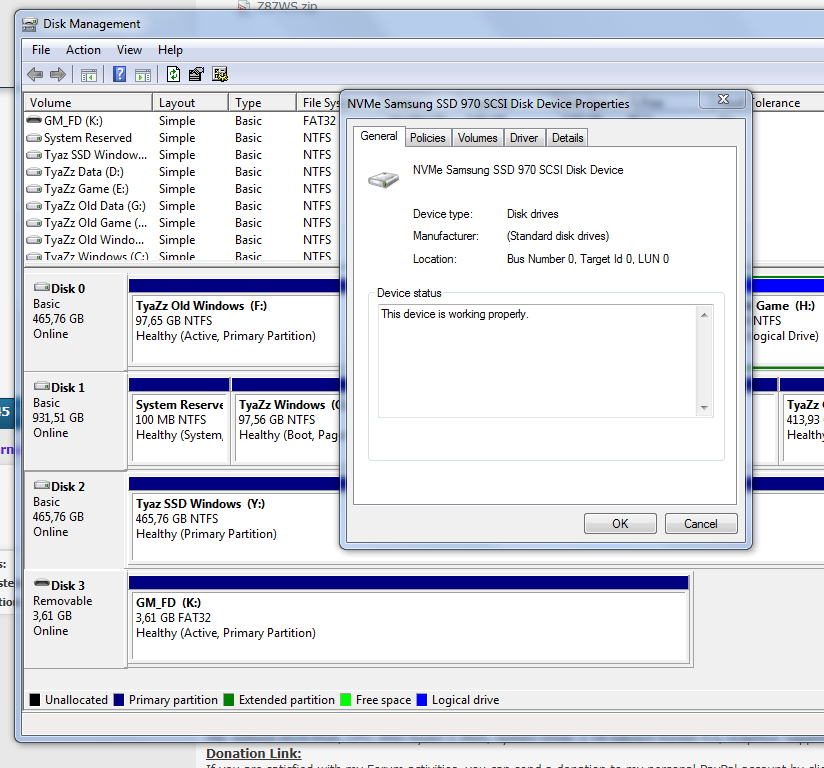
But first, I try to booting using my Old Drive and test my SSD as a storage, it’s work fine.
Here is the pict:

Next, I want to install a clean windows 10 on my SSD, I have win10 installation on my USB.
Before I do that, I remove all my old hard drive and only keep the SSD.
Then I change booting to the USB and begin the win10 installation, until I found this problem.
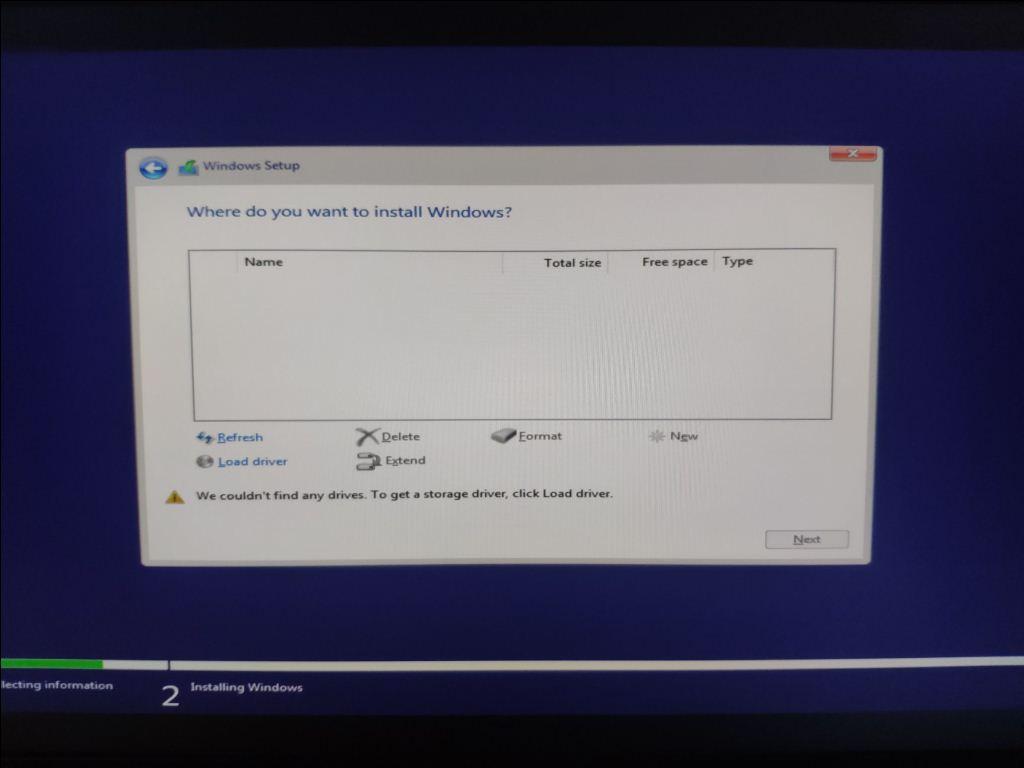
I can't choose any hard drive to install the windows
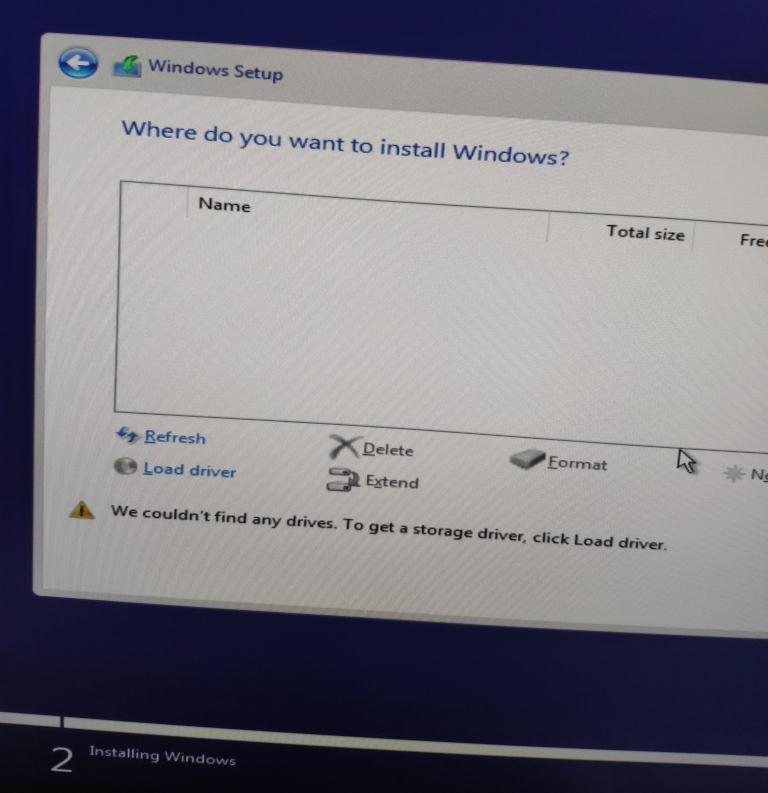
I've already trying to format the disk partition type both as MBR and GPT, but none of them works.
can someone help me please ? what did I do wrong.
@tyaz :
Welcome to the Win-RAID Forum!
Since the BIOS has detected the NVMe SSD (which name has it there?), the BIOS modification and the flashing procedure seems to have been successful.
I suspect, that you have either missed a required BIOS setting (the options “Fast Boot” and “Secure Boot” must be set to “Disabled” and loading of EFI modules must be allowed) or didn’t prepare the USB Flashdrive correctly according to my guide. Please look into the related Rufus picture and compare the settings with your Rufus GUI. You have to boot the USB Flashdrive in UEFI mode and the OS installation has to be done by using the Guimode Partition Table.
Good luck!
Dieter (alias Fernando)
@Fernando :
Thank you for you reply!
Name of the SSD is a bit weird, it was named “PATA”, it’s the new one that appeared after I flash the BIOS.
and it’s disappear when I remove the SSD.
Here is the list for the Fast Boot, Secure Boot and Loading EFI Modules:
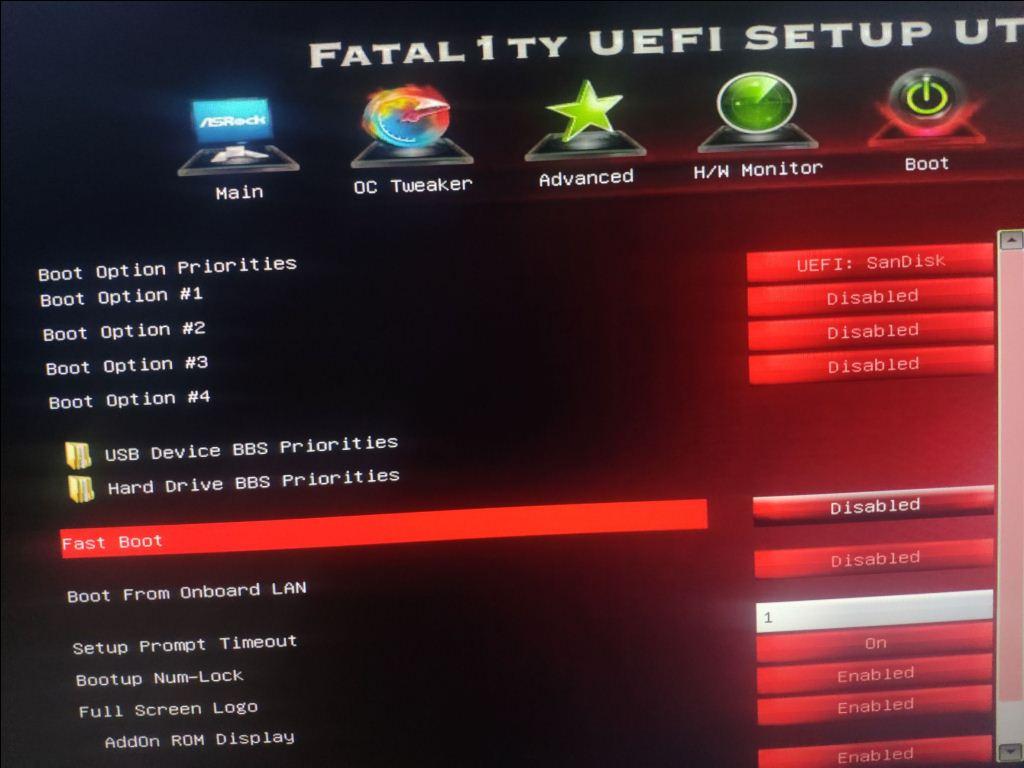
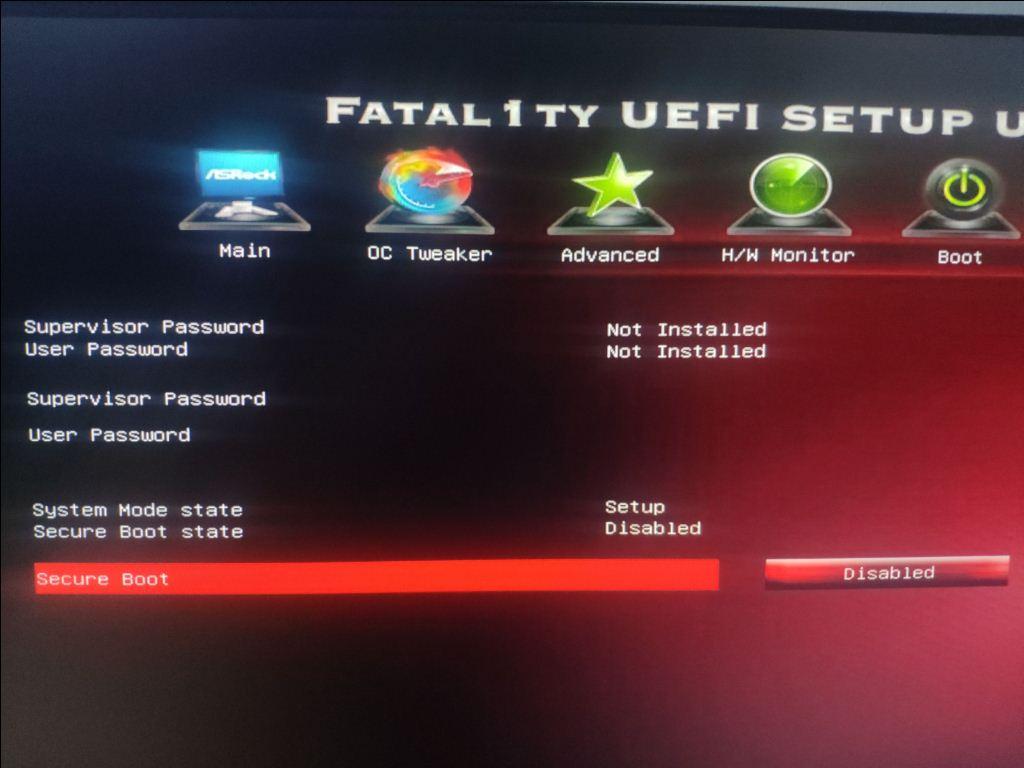
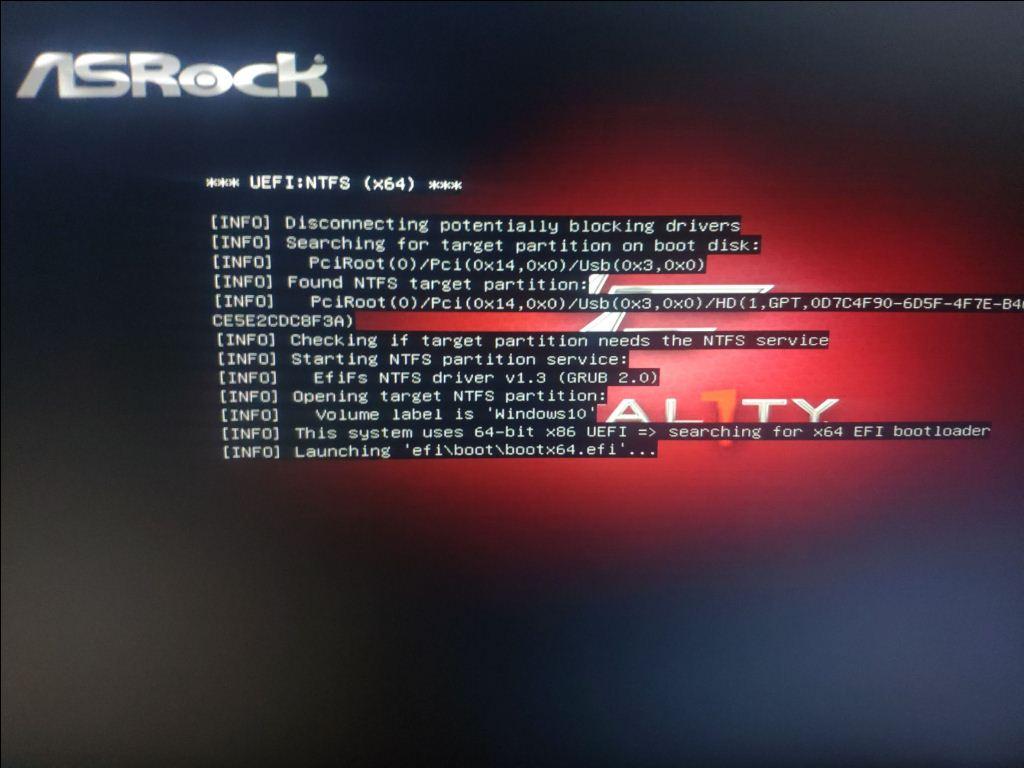
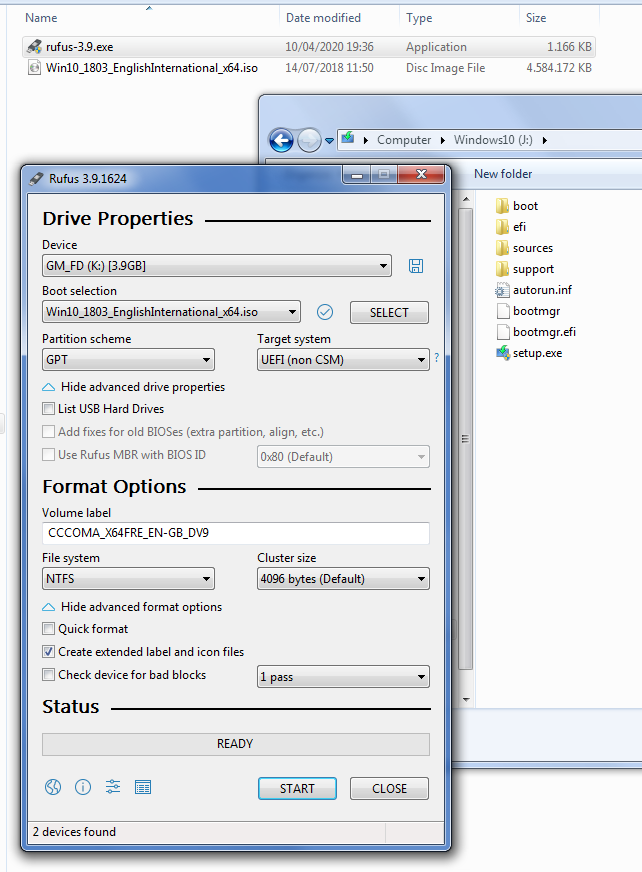
Here is my SSD Format Partition Type (GPT) and Rufus Win10 bootable device creation:
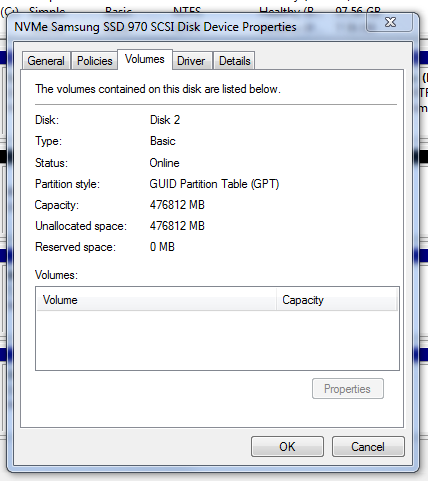
Just an empty list.
If anyone have been through the same problem, please help me ..
I really appreciate it, Thank You!
EDIT by Fernando: Unneeded fully quoted post replaced by directly addressing to its author and unneeded blank lines removed (to save space)
@tyaz :
Thanks for having posted the requested details and screenshots.
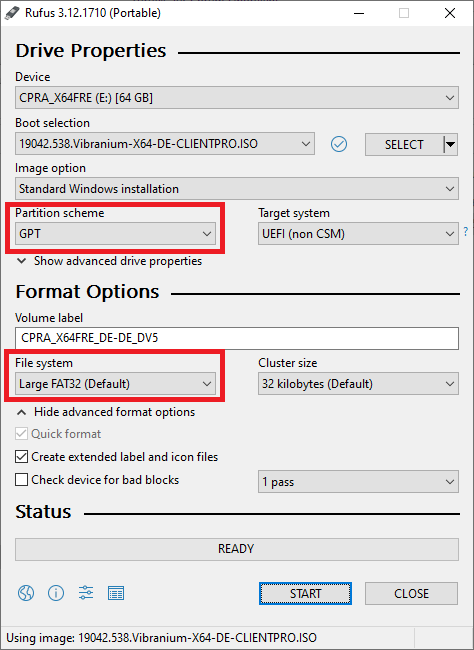
Please redo the creation of the bootable USB Flash drive by using
- a) the currently newest Rufus version v3.12 and´
- b) the currently newest Win10 v2004 (or v20H2, which will be available within the next days).
The Rufus USB Flash Drive should be FAT32 formatted as shown here:
@Fernando
Thank you for your advice!
But unfortunately it didn’t work …
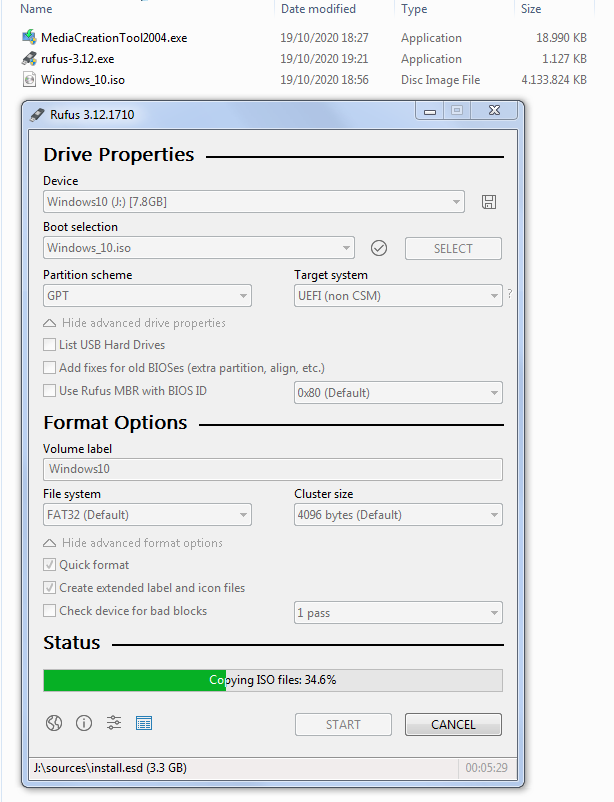
I’ve download the newest version of win10 v2004 from microsoft website and newest rufus v3.12.
Then create a bootable device with the exact same format as your suggestion.
Here’s the results :
I would try booting into your old OS, and do a diskpart clean on the PCIe SSD. I’d also try the install using a boot USB that the windows media creation tool creates for you.
Just google the diskpart method to clean a disk.
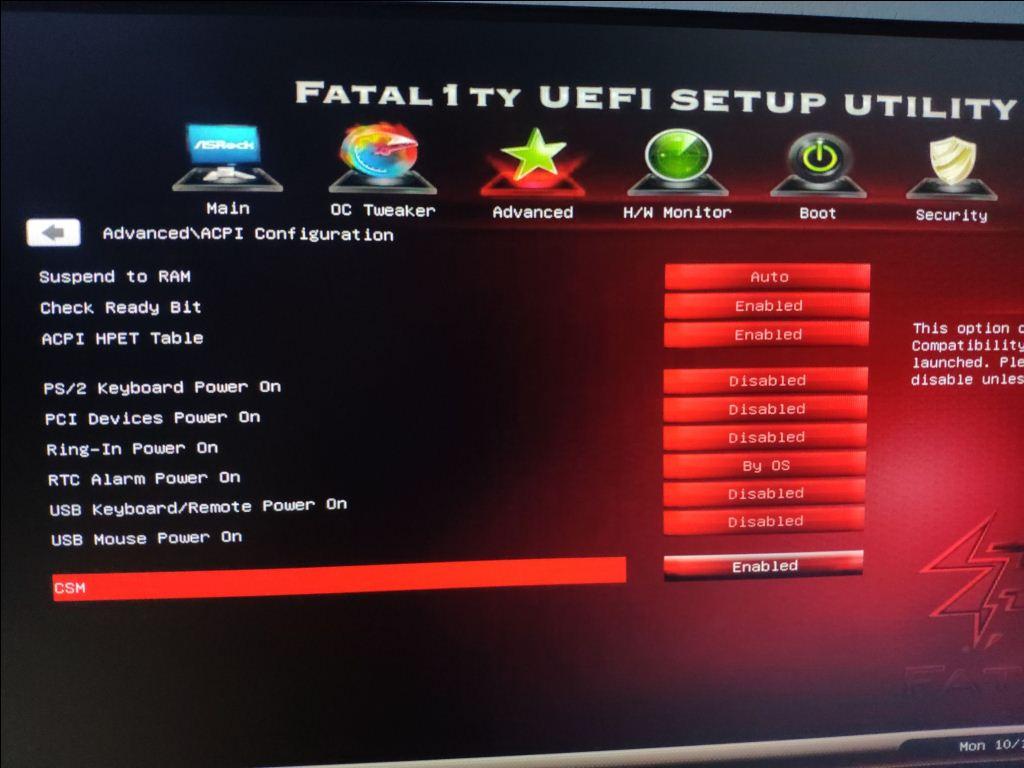
What do your BIOS CSM settings look like?
@denwood
Hi, thank you for the answer!
Yes I already try it before, diskpart clean using Administrator Command Prompt, the result is same.
About my BIOS CSM setting is looks like this :
@tyaz :
Did you or someone else previously use the NVMe SSD or is it a brand new "raw" one?
Yes, try to enable CSM, but don’t forget to allow the loading of EFI Option ROM modules.
@Fernando
It’s brand new, I just bought it yesterday.
I think the problem is on my BIOS maybe ?
Because it detects the SSD as “PATA” instead of the SSD name which is Samsung 970.
I downloaded the original bios from ASRock BIOS
@tyaz :
The BIOS of all mainboards, whose original BIOS doesn’t support NVMe, does not show the NVMe SSD with its correct name. So the fact, that your BIOS just shows a disk drive named “PATA”, is absolutely normal.
Please attach or give me the link to your modded BIOS. Then I will do a look into it.
@Fernando
I see, so the SSD name won’t shown correctly on modded BIOS.
Here is my modded BIOS.
Thank you for your help, I really appreciate it!
ModdedBios.zip (4.45 MB)
@tyaz :
Thanks for having attached your modded BIOS. As far as I can see, it seems to be fine.
So I suspect another reason for your problem to get the NVMe SSD detected by the Win10 Setup.
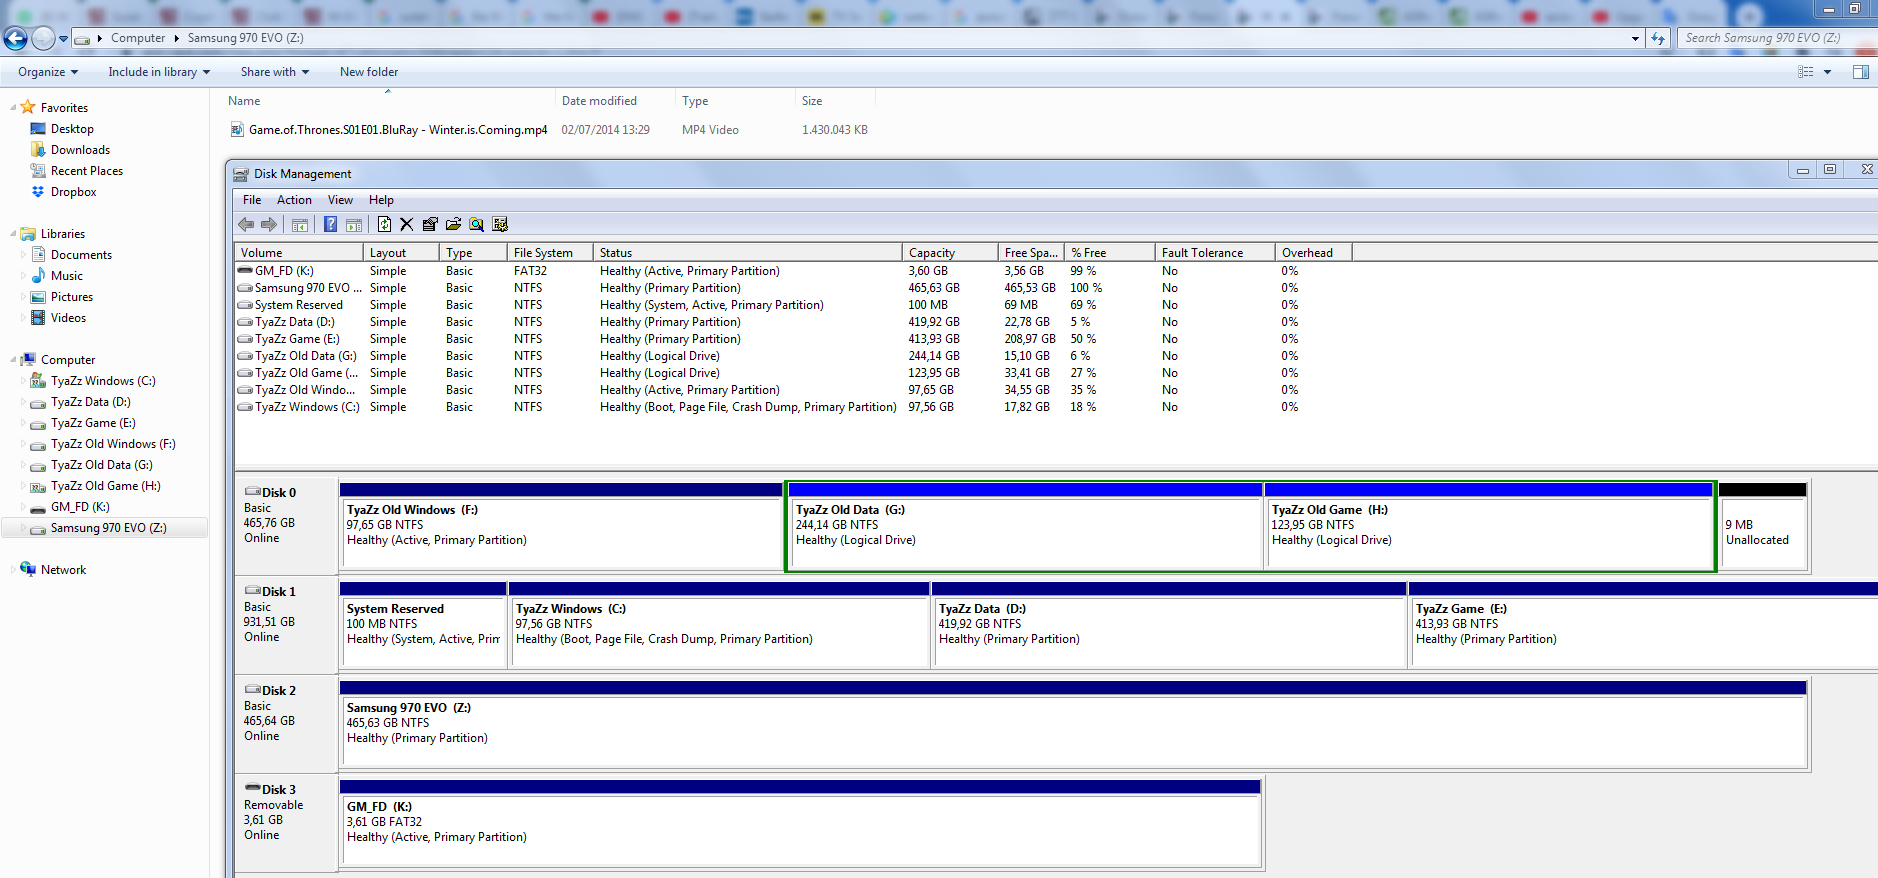
To find out, wether the NVMe SSD itself is ok, it may be a good idea to attach it as additional storage drive to any running Windows system and to look for the shown information within the "Disk Management".
@Fernando
Thank you for checking on my modded BIOS.
The NVMe SSD is okay, currently I use it as additional storage.
I run Windows 7 on my old Hard Disk, I also copy some files to my new SSD, and it’s fine.
Here is the picture of Disk Management on my Computer :
SuckSeeds,
I have a PC with Asrock Z77 Pro4 Mainboard too.
Will zou be so kind to send me ([email protected]) the modded Asrock BIOS which you used on your PC.