[Success] Problem flashing Asus P8Z77V-LX2 modded bios (no flashback button).
A big thanks for the great thread @Fernando !
Modding bios with MMTool or UEFITool was very easy. Unfortunately, flashing modded bios was not ![]()
Finally, I found the steps that woerked for me for Asus P8Z77V-LX2 old mo-bo (no flashback buton):
1. Download newest BIOS (v2501)
2. Download older BIOS (v2403)
3. Install Asus Update (part of the AI Suite II)
5. Mod newest BIOS (v2501) using method described in post #1 in this thread.
4. Downgrade BIOS (v2501–>v2403) using Asus Update (“Update BIOS from file” option).
5. Restart.
6. Upgrade BIOS to newest (modded) BIOS (v2501) using Asus Update (“Update BIOS from file” option).
7. Restart and voila: your NVME SSD should be visible in Bios’s boot section as PATA SS:. (You should be able to choose “Windows Boot Manager XXdisk_modelXX” if disk has (proper) installation of Windows on it already.
Now you can do fresh install or clone disk.
NOT working steps:
1. Bios upgrade v2501–>v2501 w/mod using Asus update - no error message, quick upgrade - approx 10sec. (It should take approx 2 minutes!).
2. Bios upgrade v2501–>v2501 w/mod using Asus update and swap bios files from original to modded after file checking - no error message, quick upgrade - approx 10sec. (It should take approx 2 minutes!).
3. Bios upgrade v2501–>v2501 w/mod using EZ Flash 2 utility from BIOS (.cap file on USB stick) - file check error.
4. Bios upgrade v2501–>v2501 w/mod using EZ Flash 2 utility from BIOS (both original ando modded .cap files on USB stick) and swap files from original to modded using other PC after file checking - no error message, quick upgrade - approx 10sec. (It should take approx 2 minutes!).
Enjoy your old Asus mo-bo running nvme SSD!
@UltimateTechHub
All NVMe disks in old system/current OS r seen as standard storage disks, now for booting it needs a PURE UEFI system environment and GPT x64 UEFI OS installation.
Its all well documented in the guide posted by Fernando…did u read it…seems not.
Cloning is not the optimal choice and if its a legacy dont even bother… clean performance against cloned/legacy old OS…forget it.
@UltimateTechHub @gorgu
Welcome to the Win-RAID Forum!
@UltimateTechHub : Please read the start post of this thread carefully. Your BIOS needs an NVMe module to be able to boot off an NVMe SSD.
@gorgu : Congratulations on your success. By the way - the AISuite method to get a modded ASUS BIOS properly flashed has already been described within the start post of >this< thread.
Merry Christmas and a Happy New Year!
Dieter (alias Fernando)
I knew AISuite method, of course (renaming .cap file after verification and before flashing), but, as I described in point 2. “NOT working steps” - it doesn’t work in my case. Maybe I missed something… ![]()
Merry Xmas!
gorgu
So I’m back with an update:
After several failed attempts of just trying to detect my NVMe SSD I decided to exchange it and request a new one. Lo and behold: my original NMVe was defective. The new SSD was detected in the bios (PATA) and in the disk manager, where I was able to create a partition and verify that it works. The “old” SSD was responsible for the frozen bios boot screen issue after all.
Making the NVMe bootable presented some obstacles though.
At first I tried to install windows 10 through a USB drive (FAT32) that was set up with the help of the Microsoft media creation tool. When selecting the SSD it warned me that I wouldn’t be able to boot through this drive. I was able to complete the installation though. After the completed installation I was greeted by the blue recovery mode (?) screen, where it told me that there has been a problem with the winload.exe file and thus booting wasn’t possible.
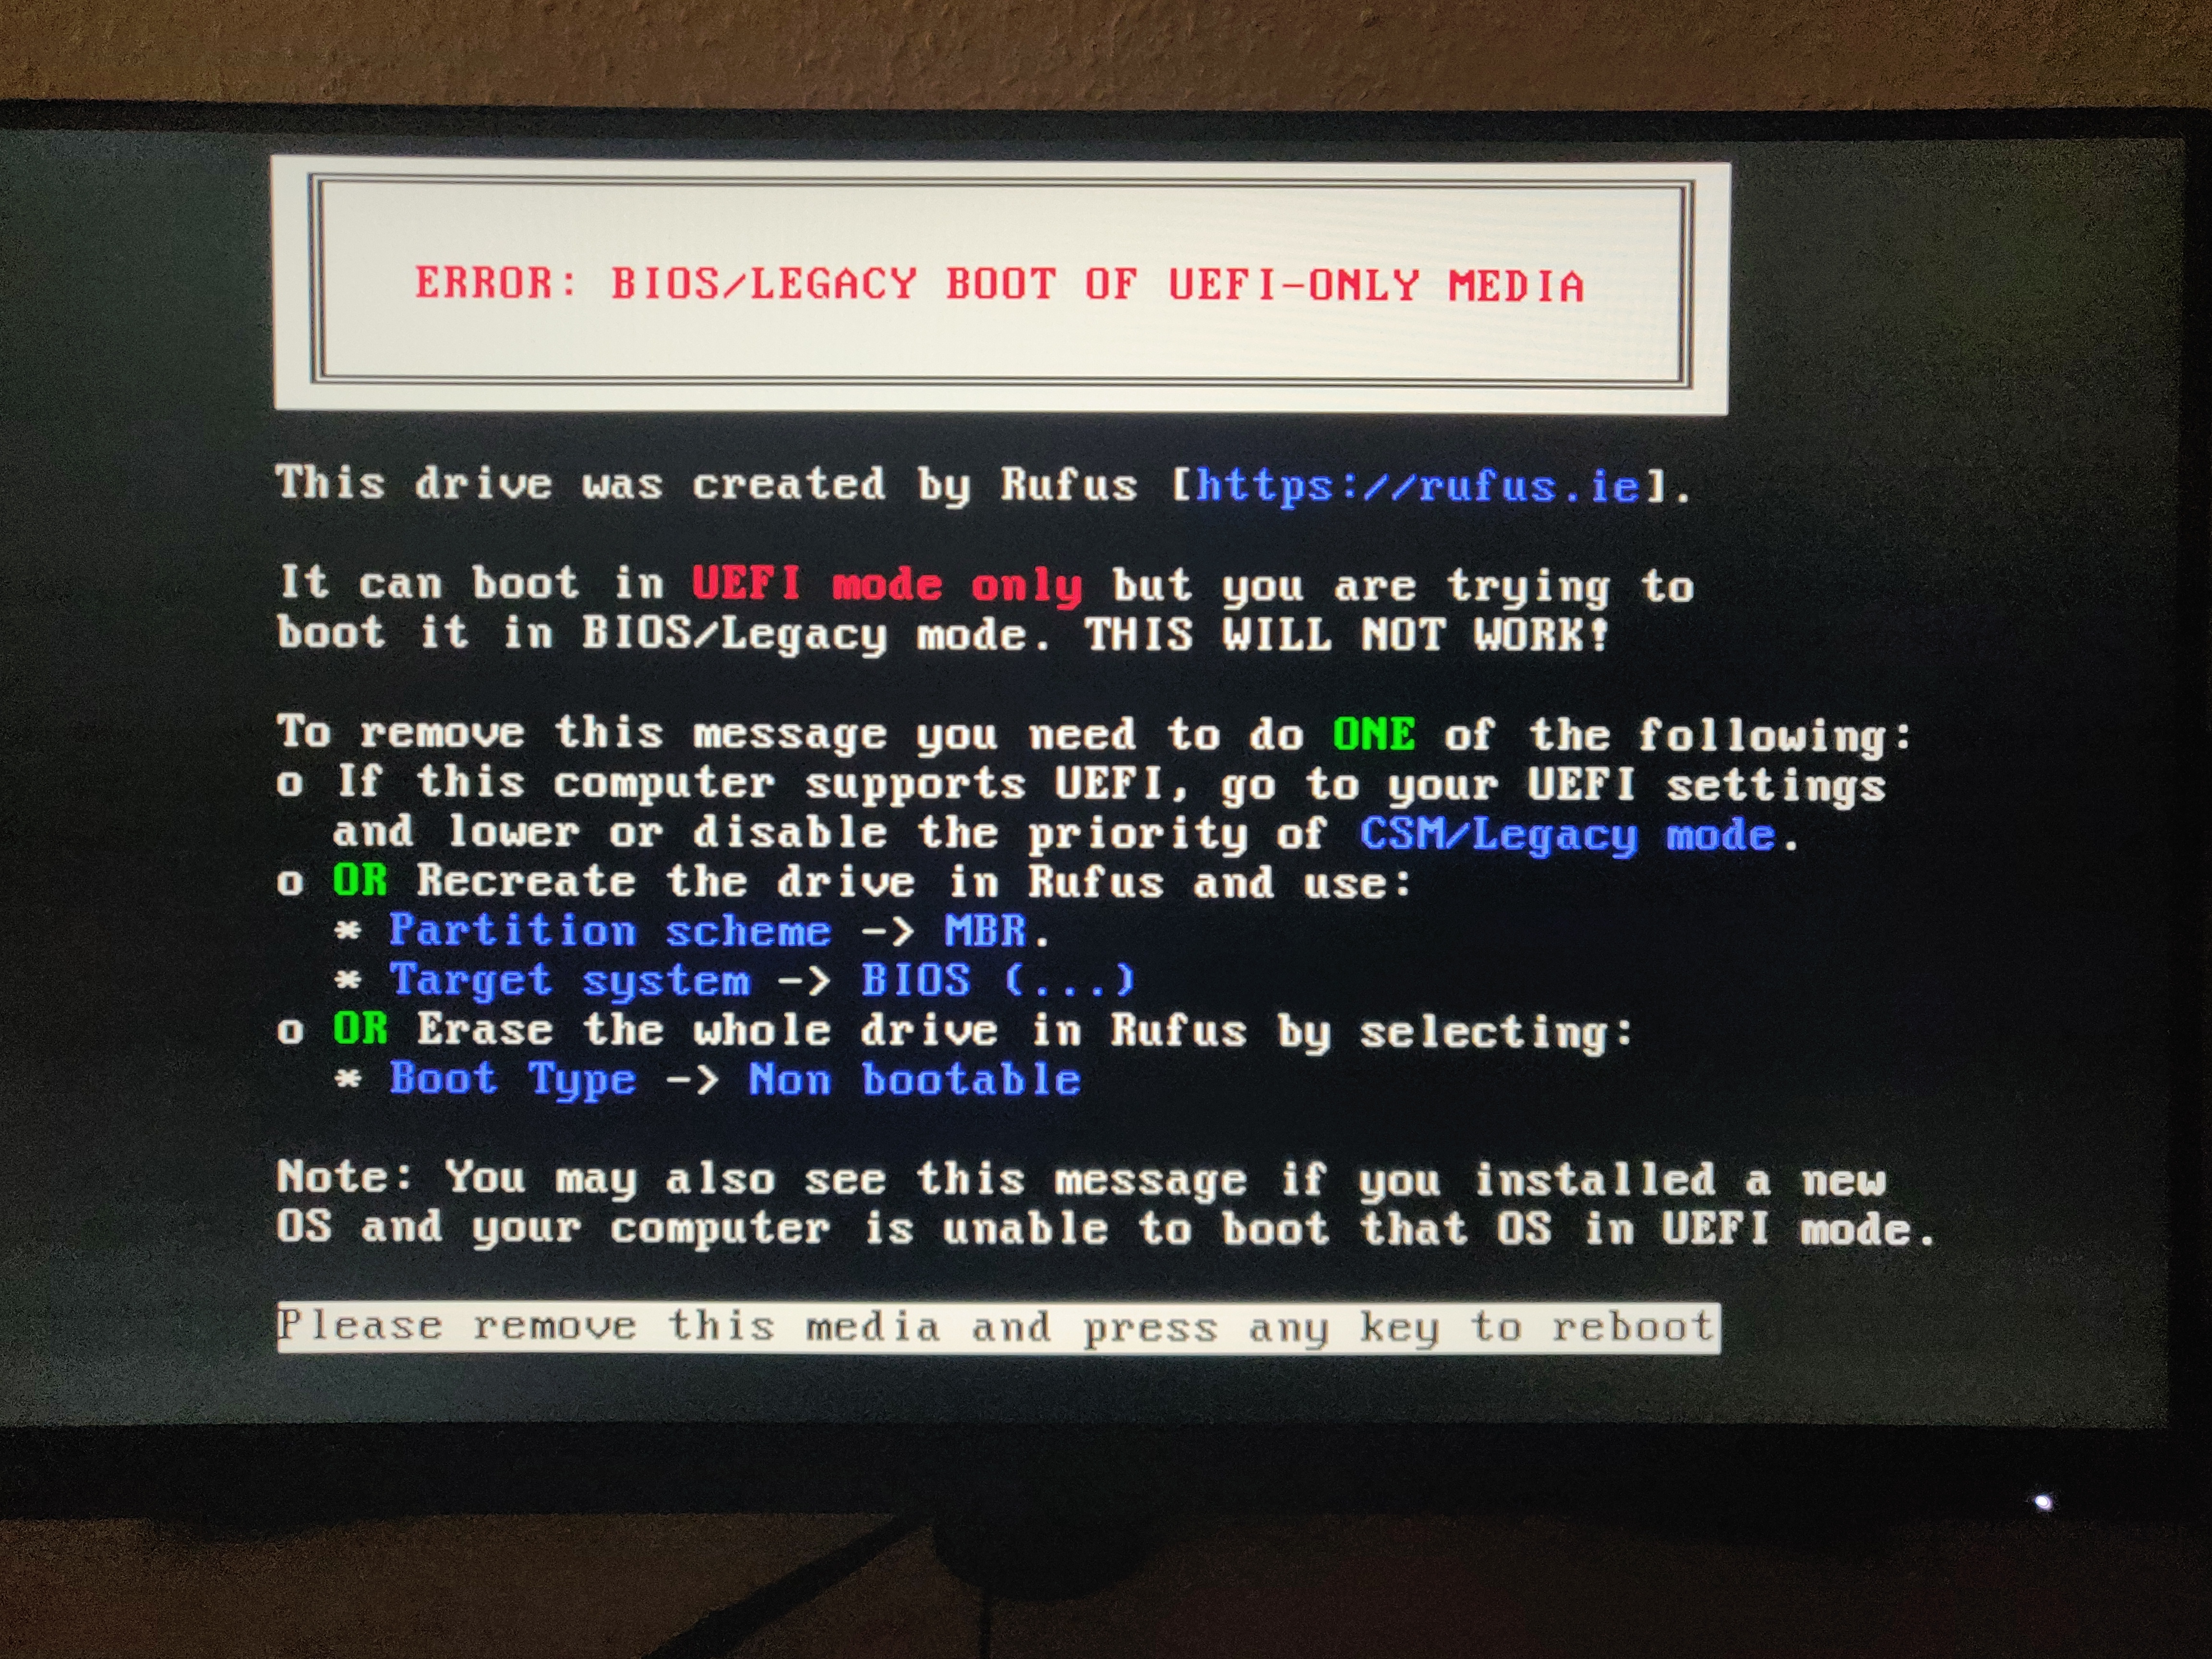
For my second attempt I tried following the advice in this thread to create a boot drive through Rufus. Unfortunately, I wasn’t able to select FAT32 like recommended (because the win10 iso is bigger than 4gb?) so I went with NTFS. This lead to the expected outcome: I wasn’t able to run the setup when booting. I received the Rufus warning (see attached picture).
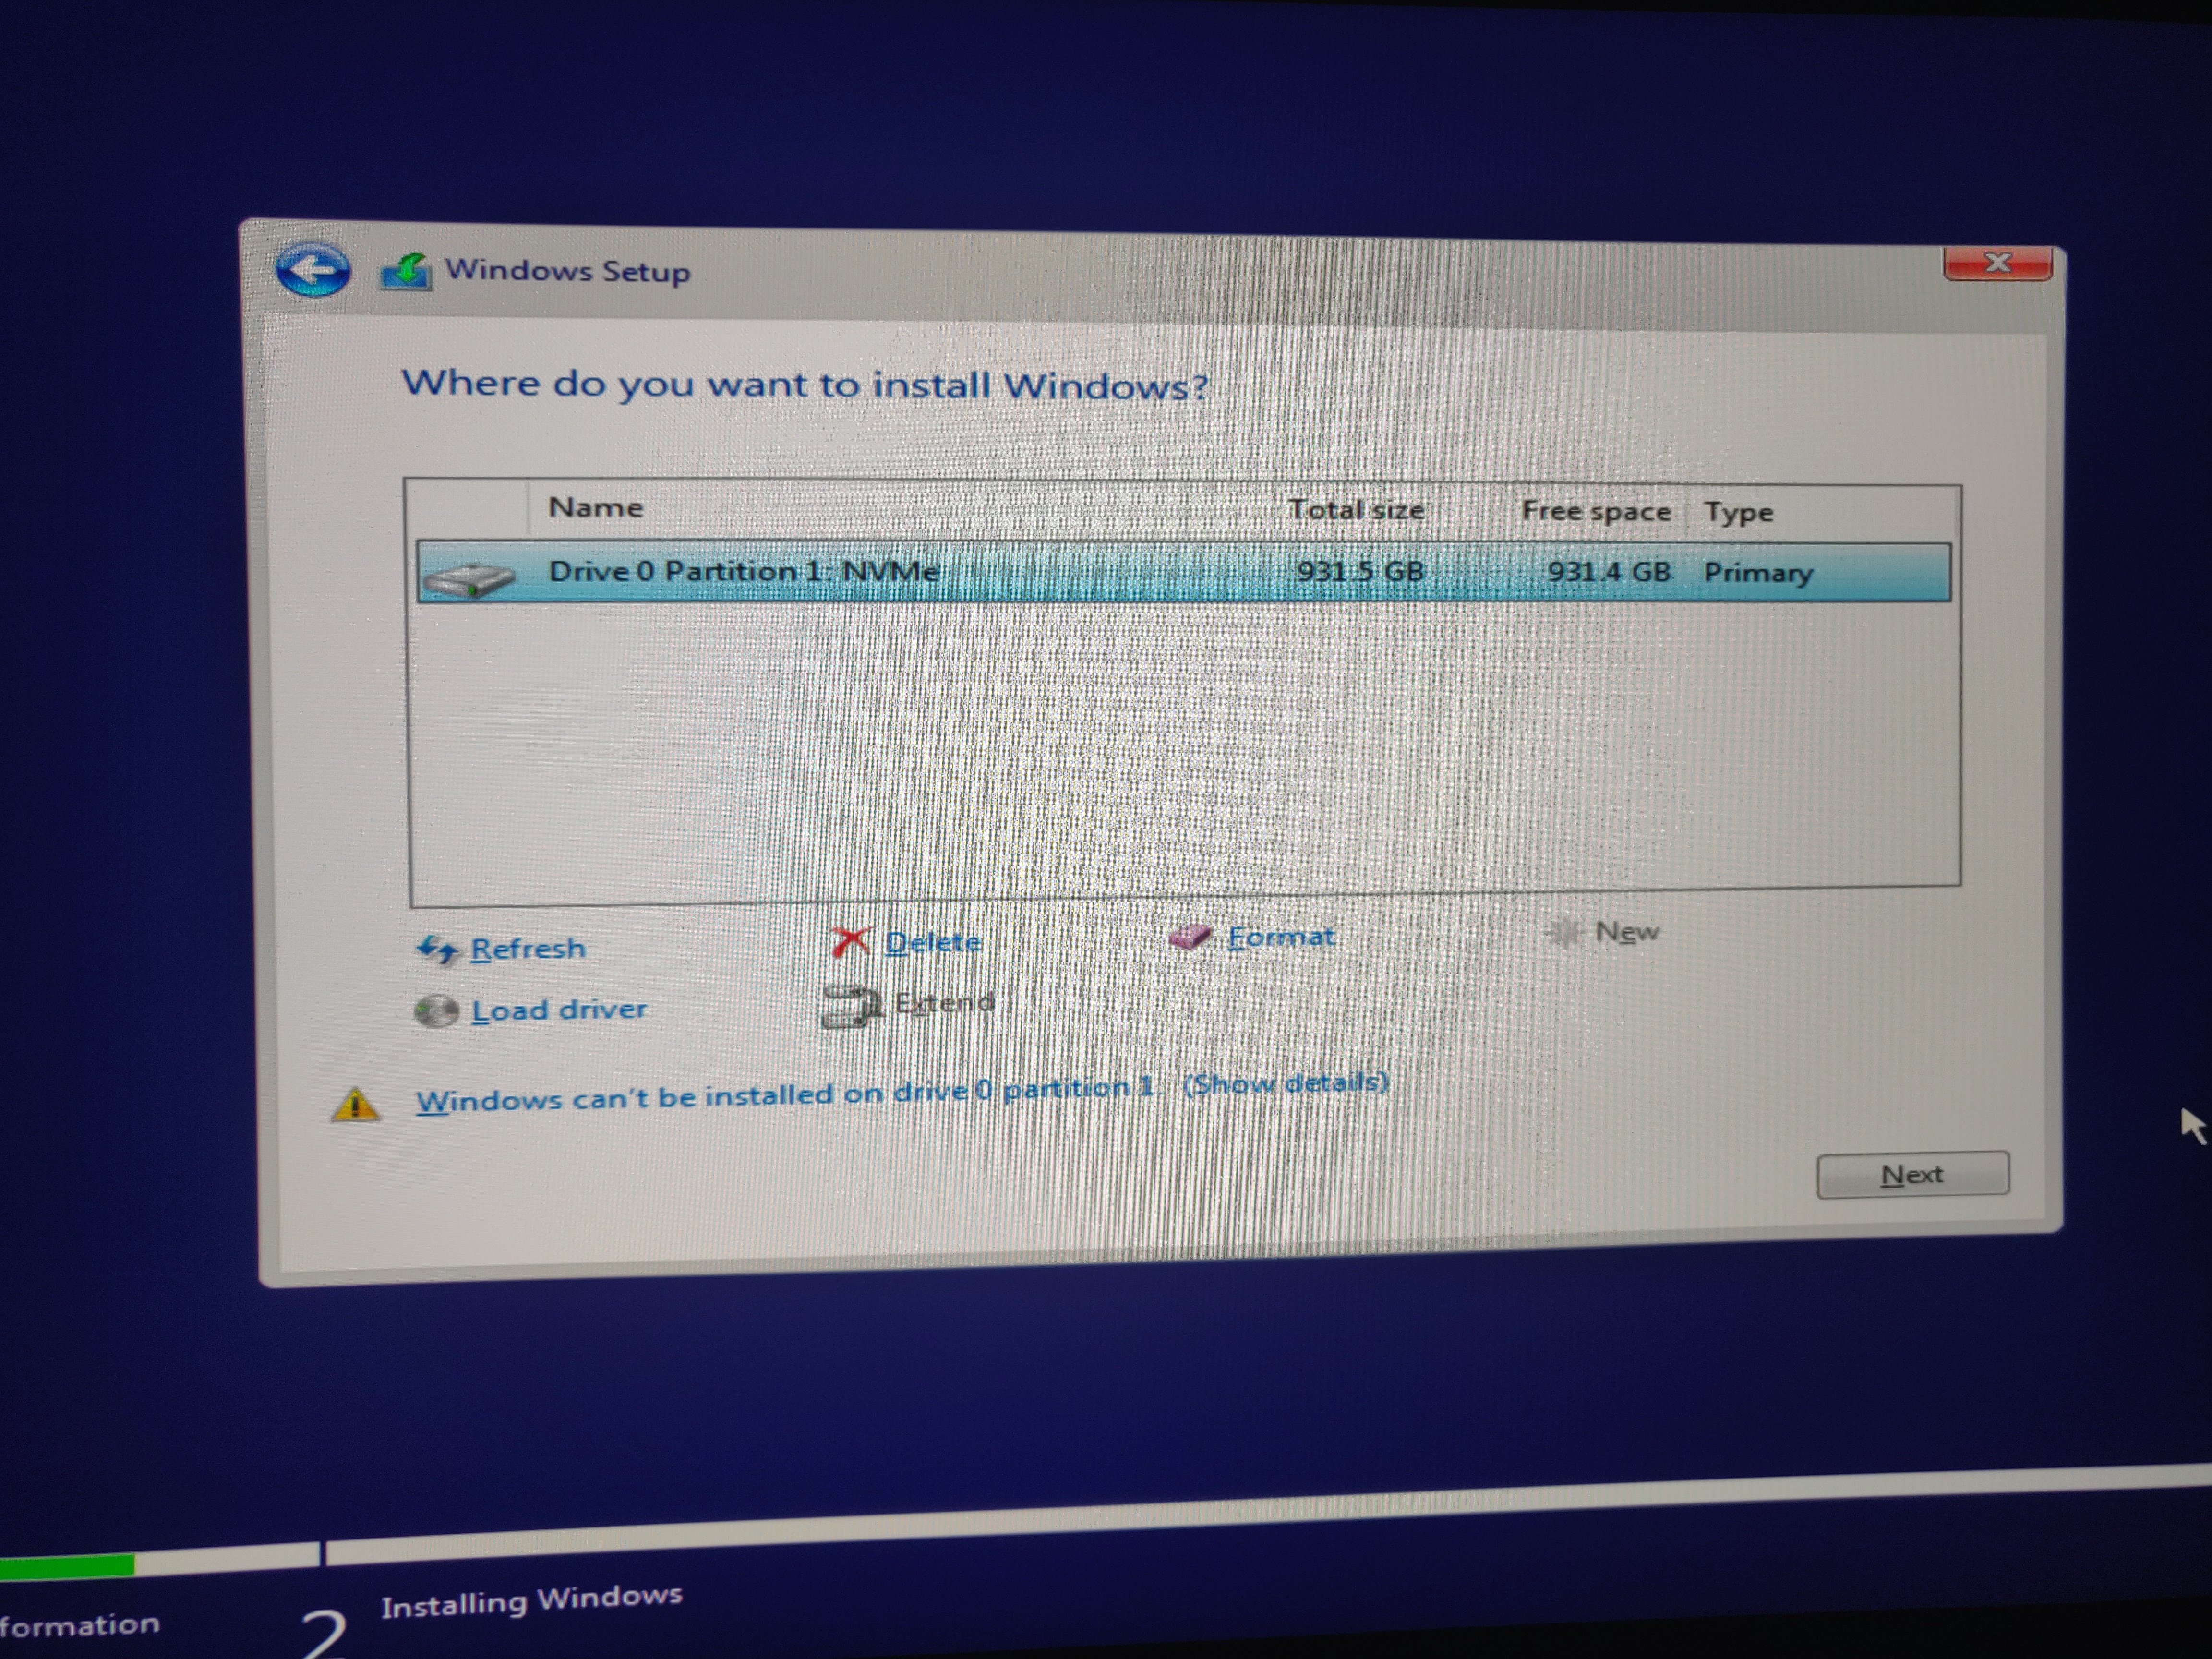
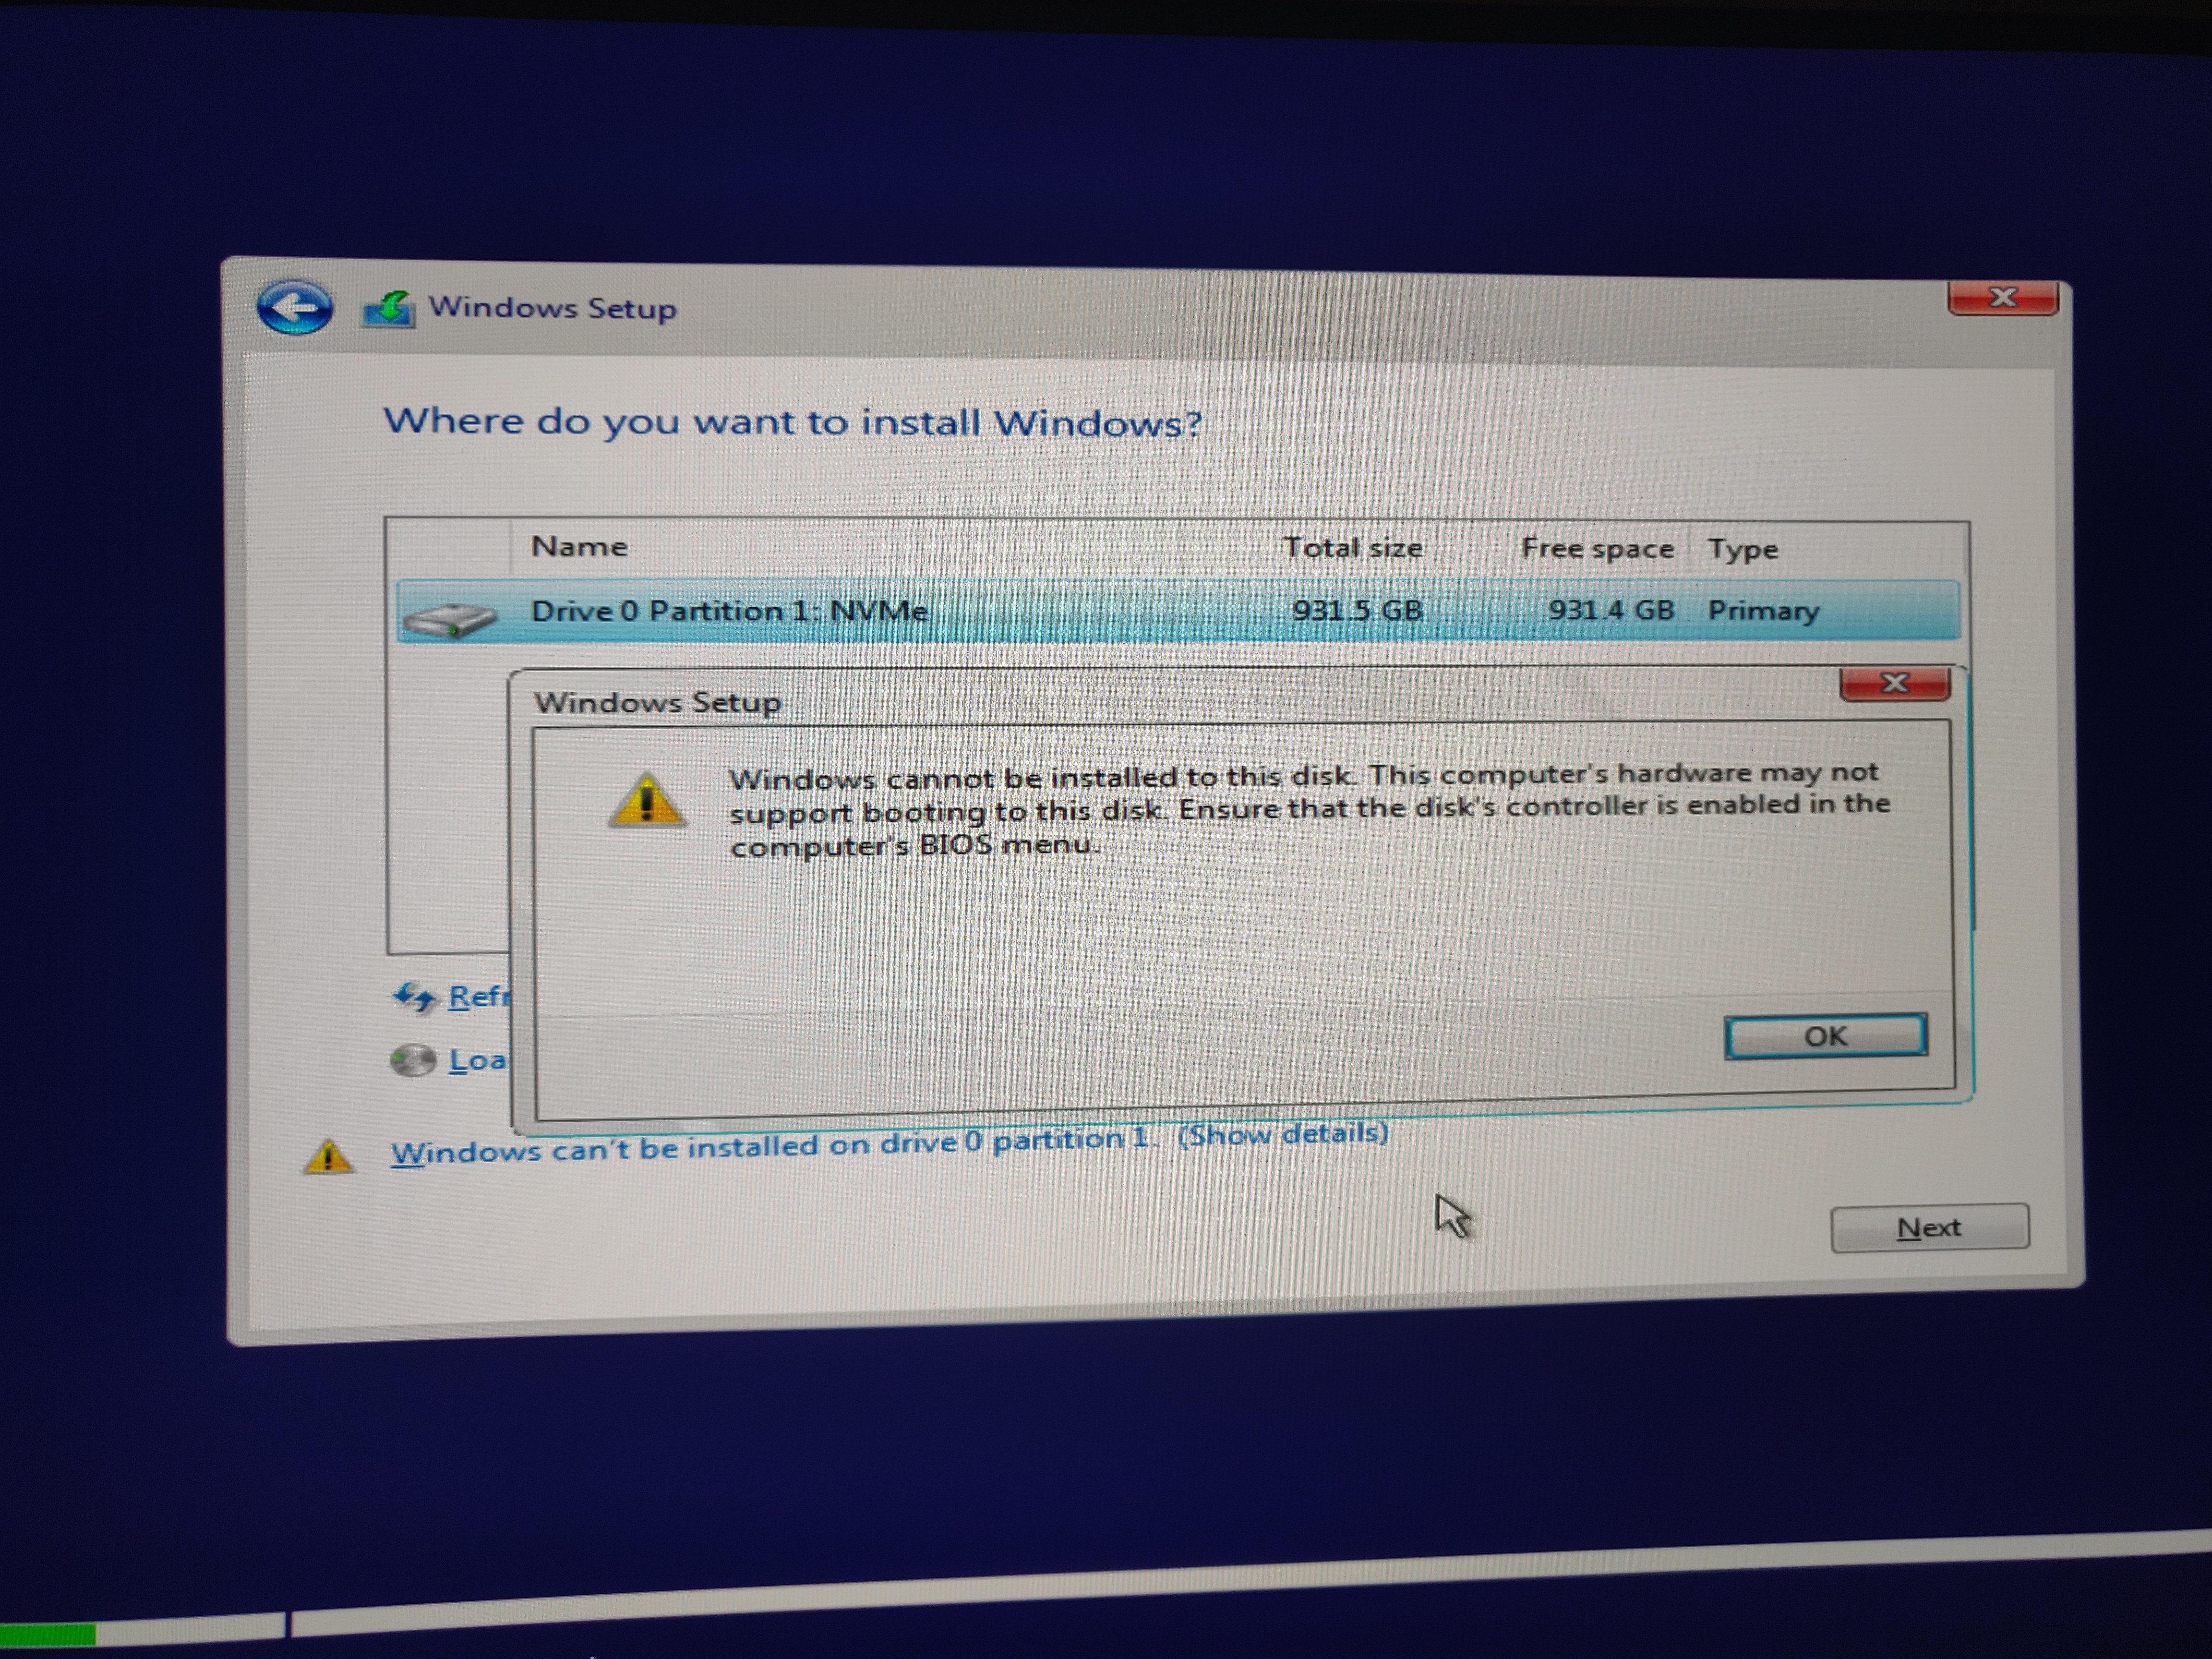
I followed the advice from the Rufus warning screen and created a bootable USB with the “MBR” Option. This made it possible to access the windows setup on boot, again. Unfortunately, I was again presented with the problem that it wouldn’t accept the NVMe as a boot drive (picture attached). Installation couldn’t be completed.
I checked my bios again. Fast boot and secure boot are booth deactivated. I wasn’t able to find an option for CSM in my bios. My other drives were disconnected for the two tests with the Rufus USB drive.
What would be the next steps for me? I am probably missing something really obvious here, but all these options and approaches seem kind of confusing to me right now.
Read point #4 of the guide, as people dont born with all the wisdom…
@Alexfailsatmodding : Thanks for your feedback. Now it became clear why your previous attempts to get your NVMe SSD working failed.
Regarding your problems to get the OS properly installed onto your new NVMe SSD I recommend - as MeatWar already did - to strictly follow the related section of my guide.
The tool Rufus (currently latest version: 3.17) is able to install Windows 10/11 in UEFI mode (creating a GUIMode Partition Table) even if the install.wim is bigger sized than 4 GB.
By the way: You can prevent any USB disk drive FAT32 formatting problem, if you choose an ISO file, which supports just your desired OS Edition (and not a customized or an All-In-One ISO file).
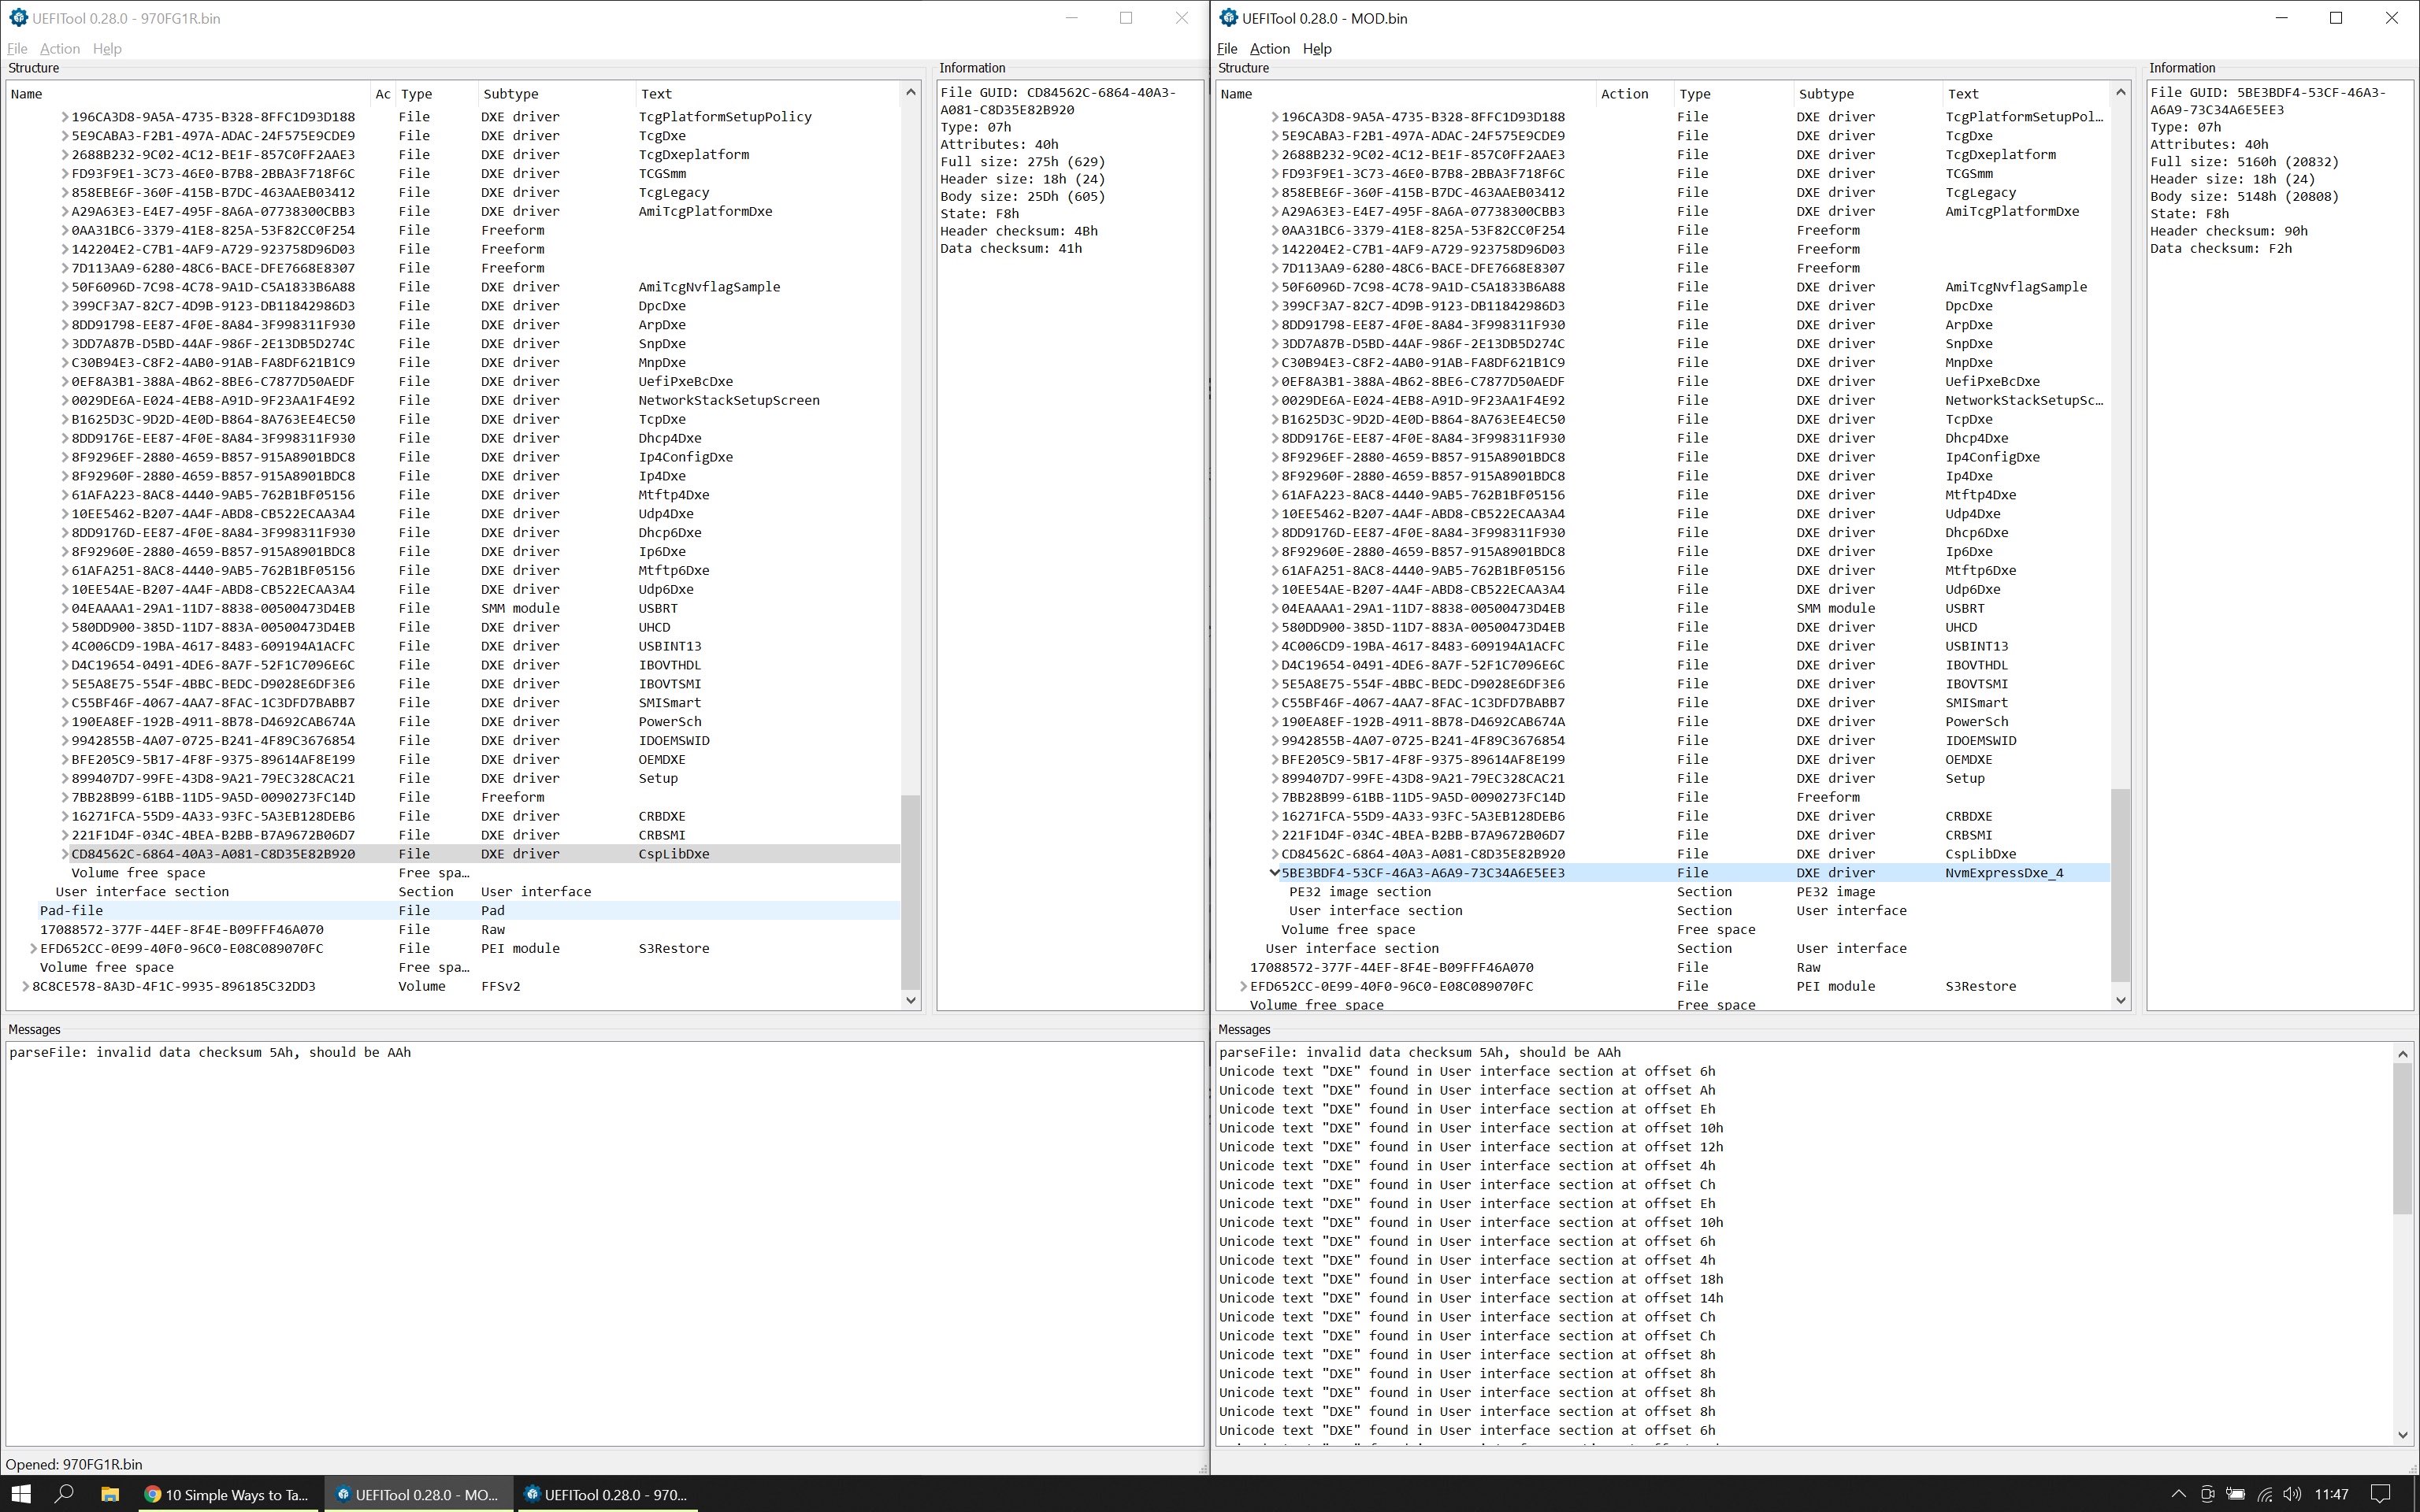
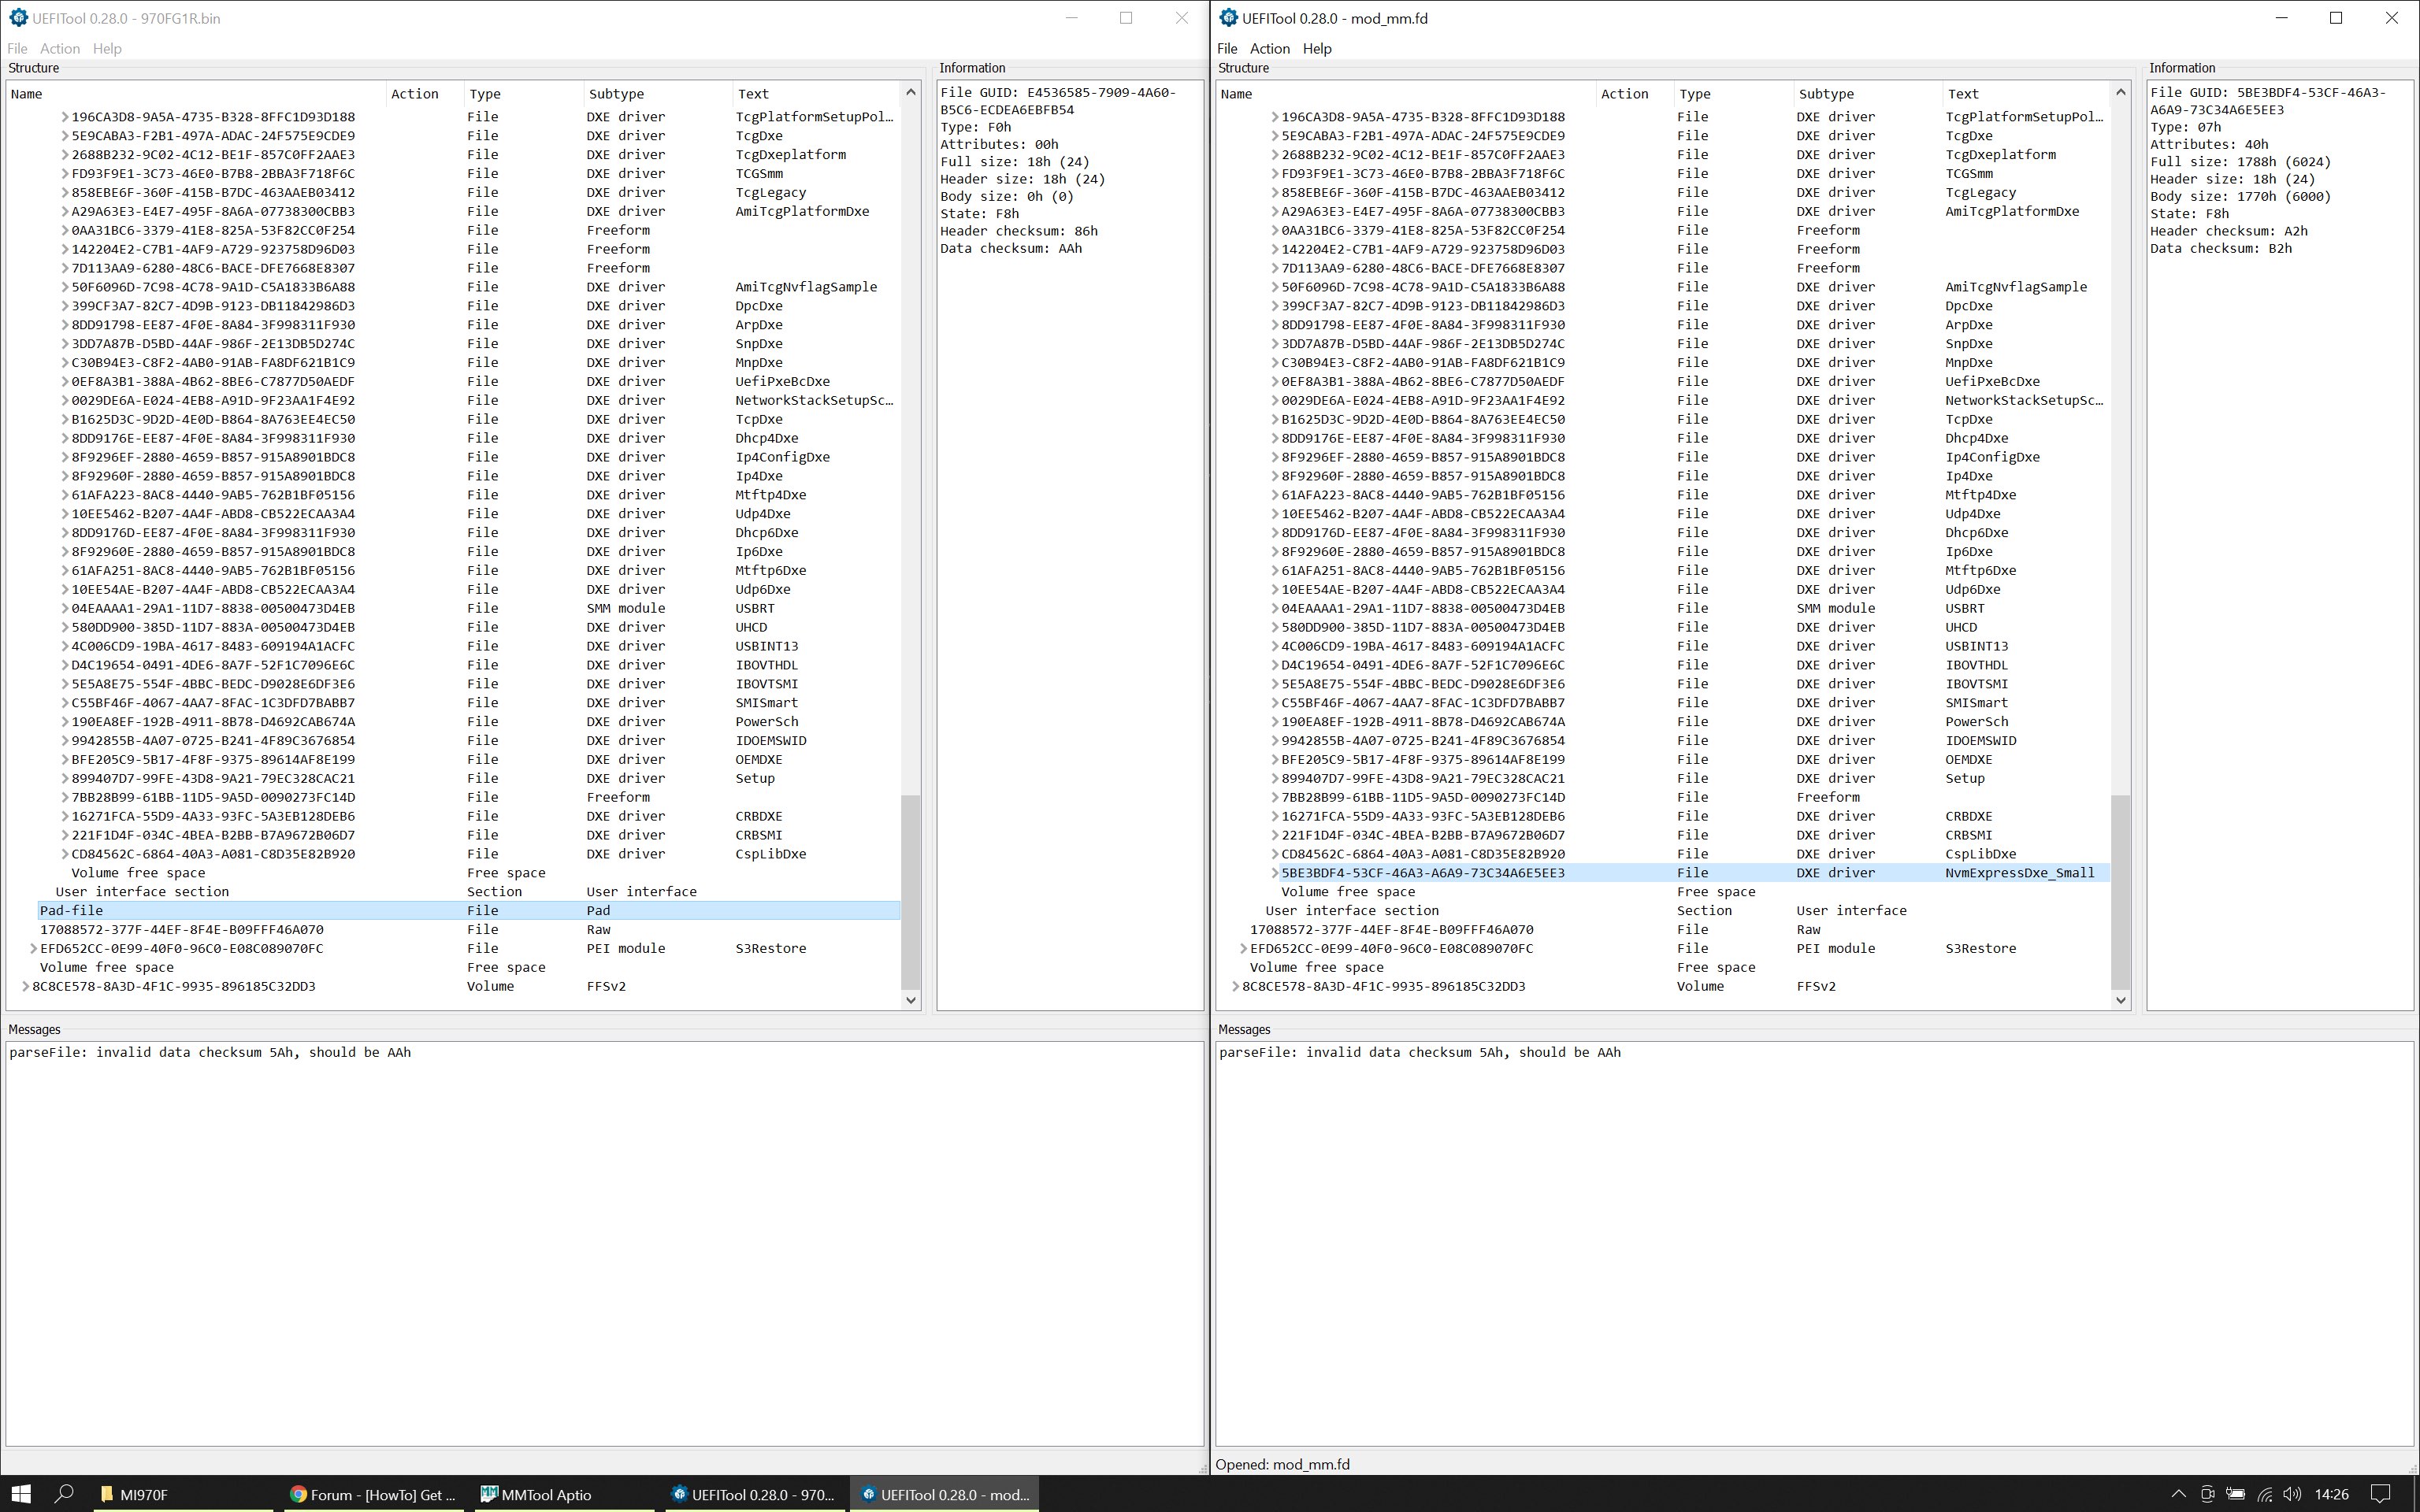
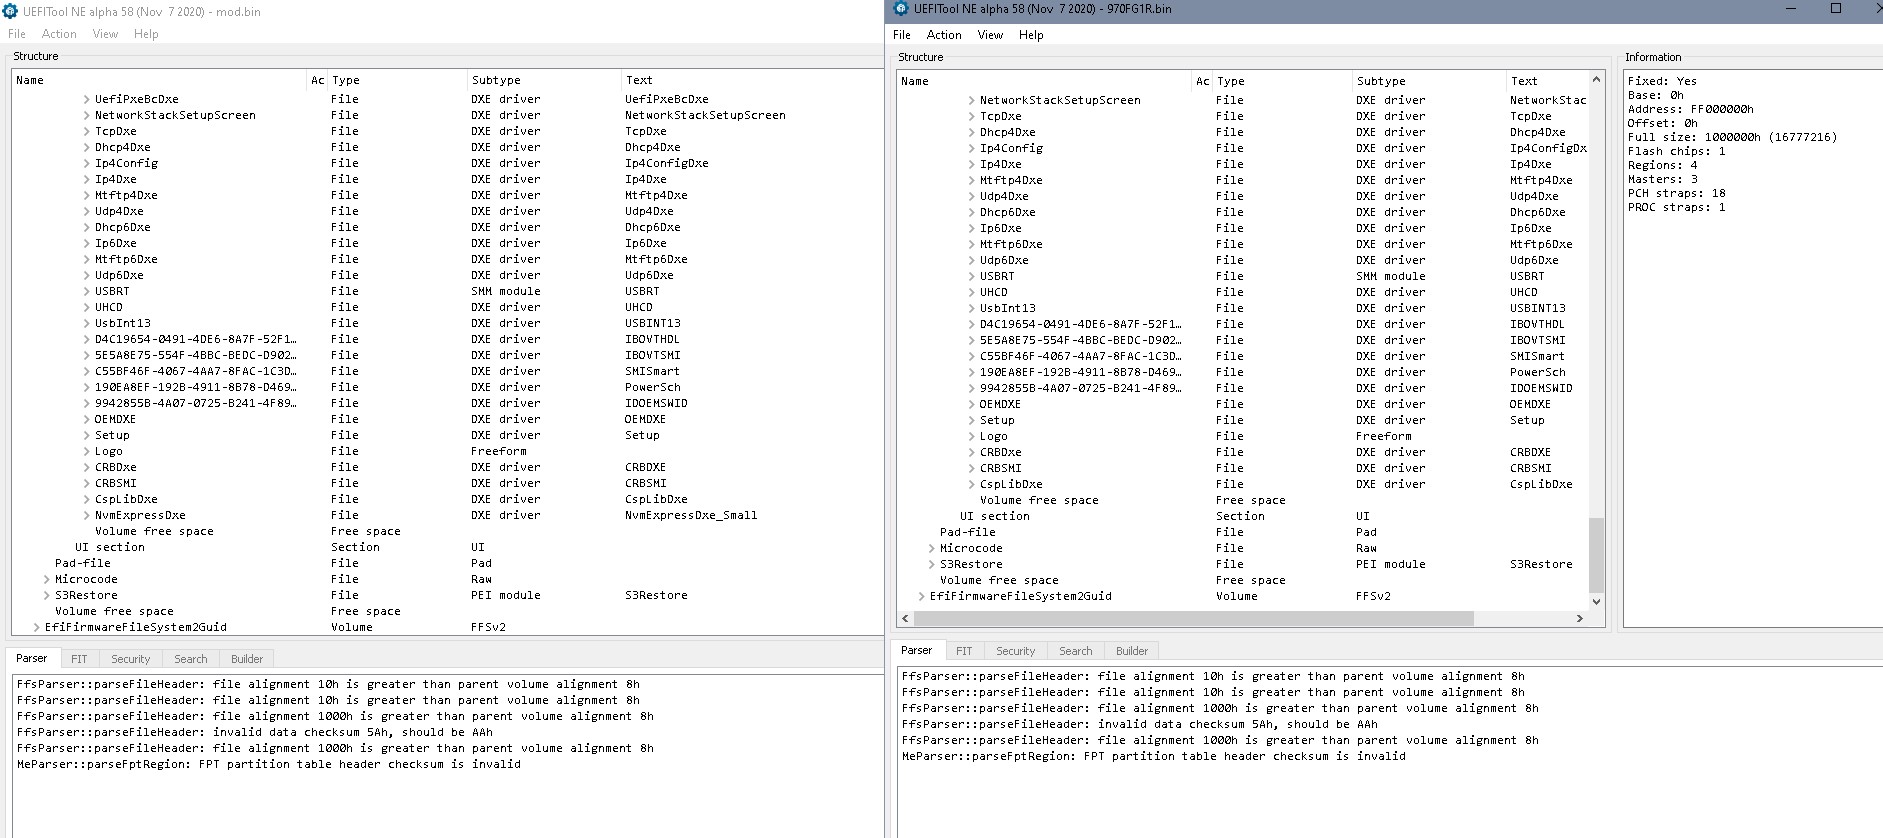
Hey guys, I’m trying to mod my MI970F with UEFITool 0.28.0. The insertion went ok, but it removed a “Pad-file”.
Is the exported .bin safe to flash? How should I get around missing “Pad-file”?
Thanks
@phedoreanu : Welcome to the Win-RAID Forum!
I do not recommend to flash a BIOS, where an originally present Pad-file has been altered by the BIOS tool.
Have you tried to use the AMI MMTool v4.50? The AMI tool is always my first choice for this kind of BIOS modding.
Good luck!
Dieter (alias Fernando)
Hi @Fernando , cheers!
Yes, I tried and sadly got the same result. No pad-file after insert ![]()
Any ideas?
Difficult to answer without seeing a bios file… You could try UEFItool025 or- if it is a compressed volume- extract the volume, insert into the extracted uncomplressed volume and reinsert the volume, or do it manually…
I have an old ASUS Rampage Extreme III Mainboard with PCIe Gen 2 x4. and x16 Slots with an old OCZ RevoDrive 160GB PCIe x4 card.
I want buy an newer Mainboard later.
So, Is there a way to update the bios of that board to bring M.2 SSD Cards with an M.2-/PCIe Adapter to fly?
For example…
- Western Digital Black SN850 M.2 1TB
- NVME Adapter PCIe x16, 6amLifestyle M.2 NVME oder AHCI SSD
I will be so thankful if anybody find a solution for this
Regards. Jens
Officially not supported by this MOD on this thread, as the motherboard doesnt have a UEFI bios interface. X58 uses legacy bios.
Exception is a pair of NVMe drives that came out with embedded controller on it, not depending on the motherboard side so no mod is needed (Samsung 950 Pro PCIe NVMe)
Other attempts were made, try search on the forum.
Doesn’t look like an UEFI bios, so no direct way, check [Guide] NVMe-boot for systems with legacy BIOS and UEFI board (DUET-REFIND)
But your OCZ RevoDrive 160GB PCIe x4 card has boot options, it’s anyway just PCIe 2 so you wouldn’t get much higher speed with any other solution on this board either. Bios mod is only required for booting support- you could simply plug in an adapter with an NVMe disk in a PCIe x4 slot for data (depending on OS/ driver) and use the 160G disk just for OS and programs. (My very old windows installation with all programs takes less than 130G including a rather large hibernation file)
Difficult to answer without seeing a bios file…
I have attached the original BIOS. I would greatly appreciated it if you could take a look at it
970FG1R.bin.zip (2.69 MB)
970FG1R.bin => try UEFItool025 (No warranty!)

@BigByte73 : Welcome to the Win-RAID Forum!
Due to the fact, that your currently used mainboard doesn’t have an UEFI compatible BIOS, you will not not be able to boot off an NVMe SSD.
Nevertheless you can use an NVMe SSD for storage purposes.
Merry Christmas!
Dieter (alias Fernando)
My PC won’t boot after cloning the ssd.
Here’s what i did step by step:
I have an Asrock B75 Pro3-M.
Modded the bios using UEFITool like you’ve shown in one of your comments and flashed it with no problems.
Installed SSD using m.2 nvme adapter and it shows up as PATA on BIOS.
Cloned my Sata SSD to my new Kioxia Exceria G2 using Macrium Reflect.
Rebooted my pc and it won’t go past the Bios screen. It won’t even open the boot menu or the Bios settings screen.
To be able to boot, i have to either remove my ssd from the pci-e slot or reflash the original BIOS and then i can boot normaly with the ssd back in the slot.
Having CSM enabled or disable won’t change anything. Fastboot and Secure Boot were both disabled.
I tried to format the drive and reflash the modded bios again. PC still won’t boot with the ssd installed. I think i’ll be using it as a secondary drive as the performance on windows shouldn’t be much different from my Samsung 860 Evo.
Clone is not the best/optimised performance in a brand new NVMe ssd… still only GPT/UEFI works… (SO wot did u cloned?) its in the guide if u read it.
EDIT: Bios issue has nothing to do Cloning or NVMe boot, still i leave the cloning for u… people prefer the easy way and get shoot in the back.
If no OS entry in boot volume entries in bios the NVMe wont boot, simple.