HP HDX9000 mods

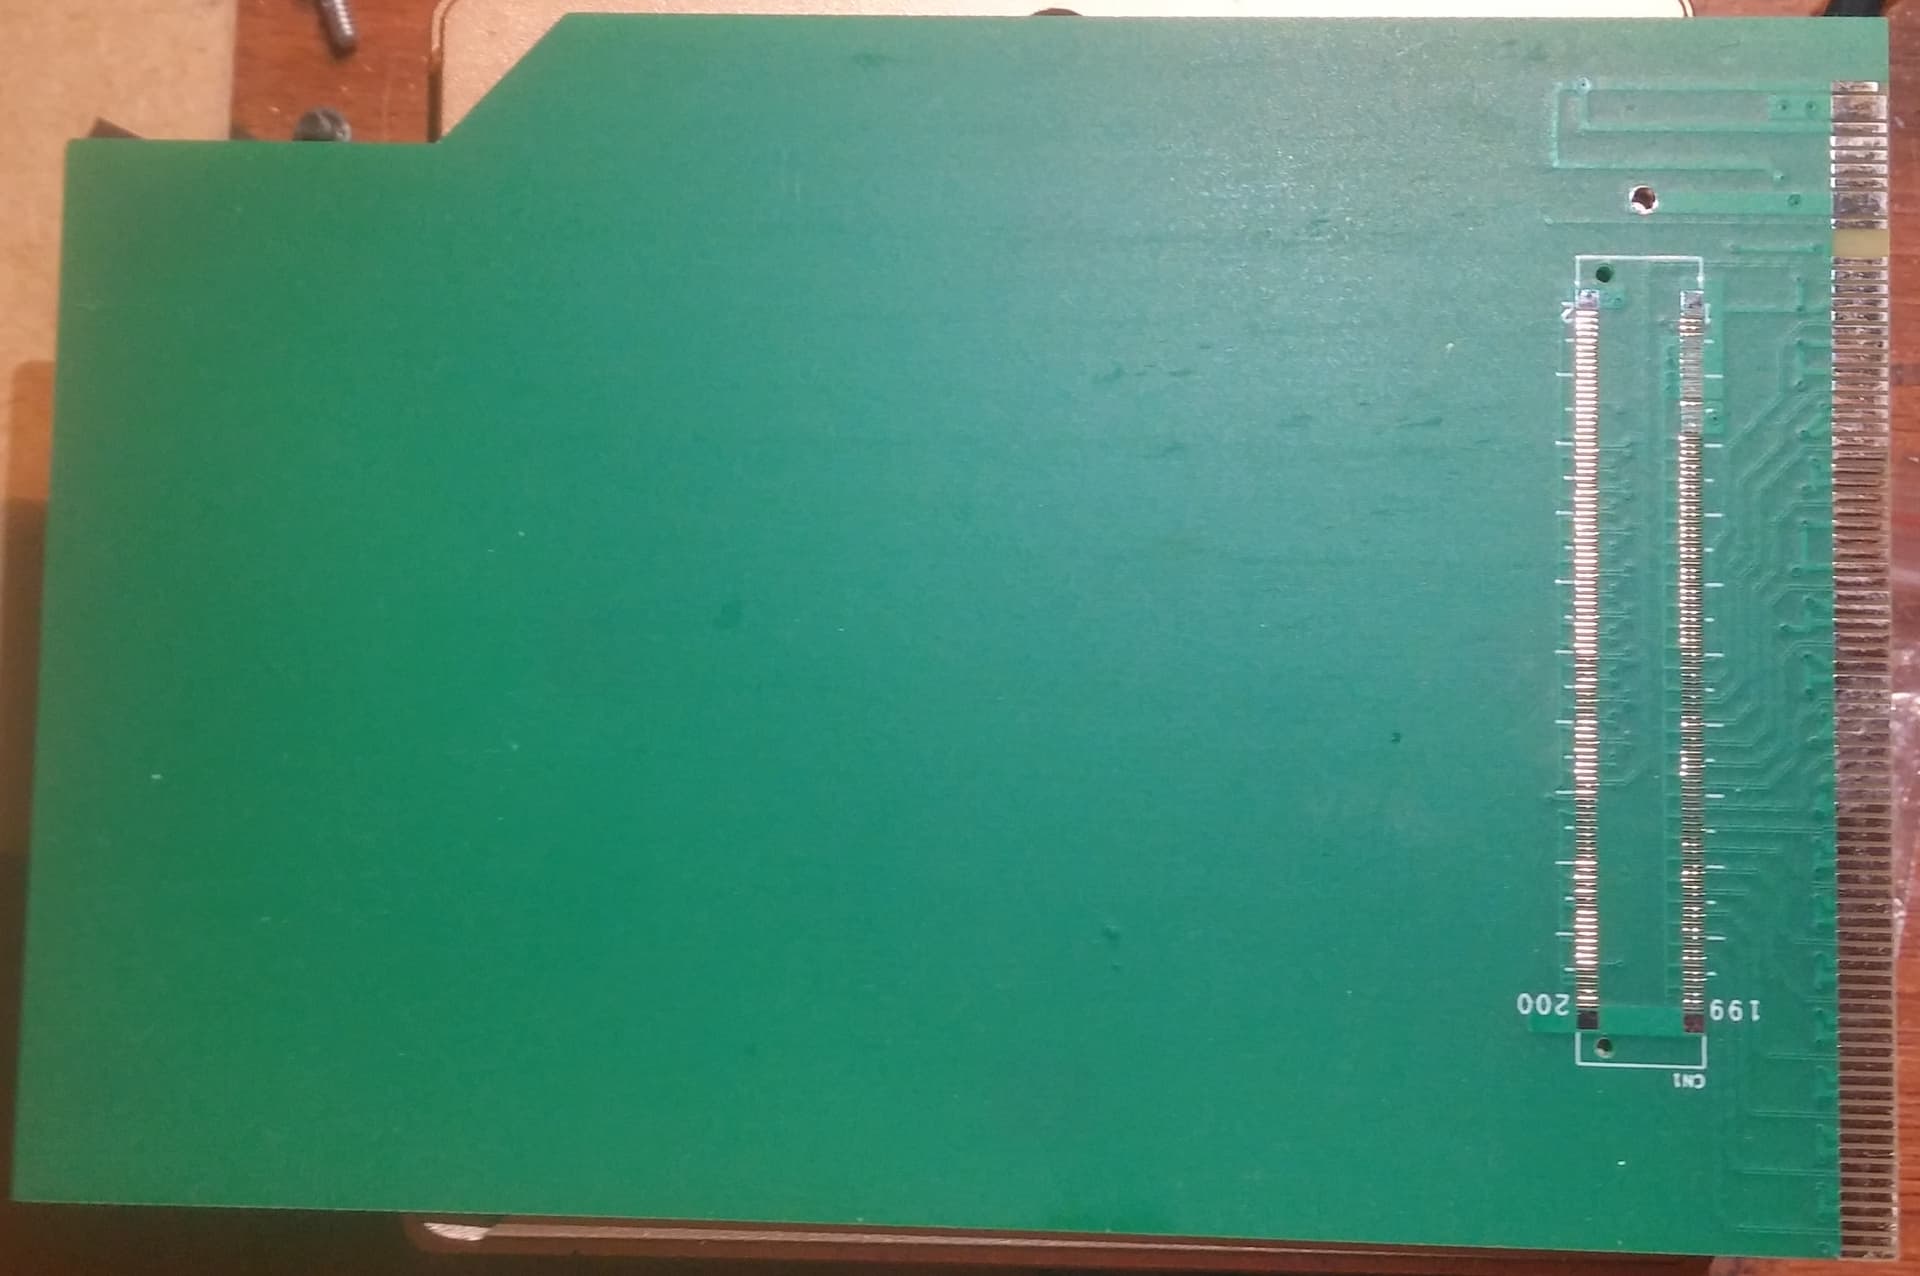
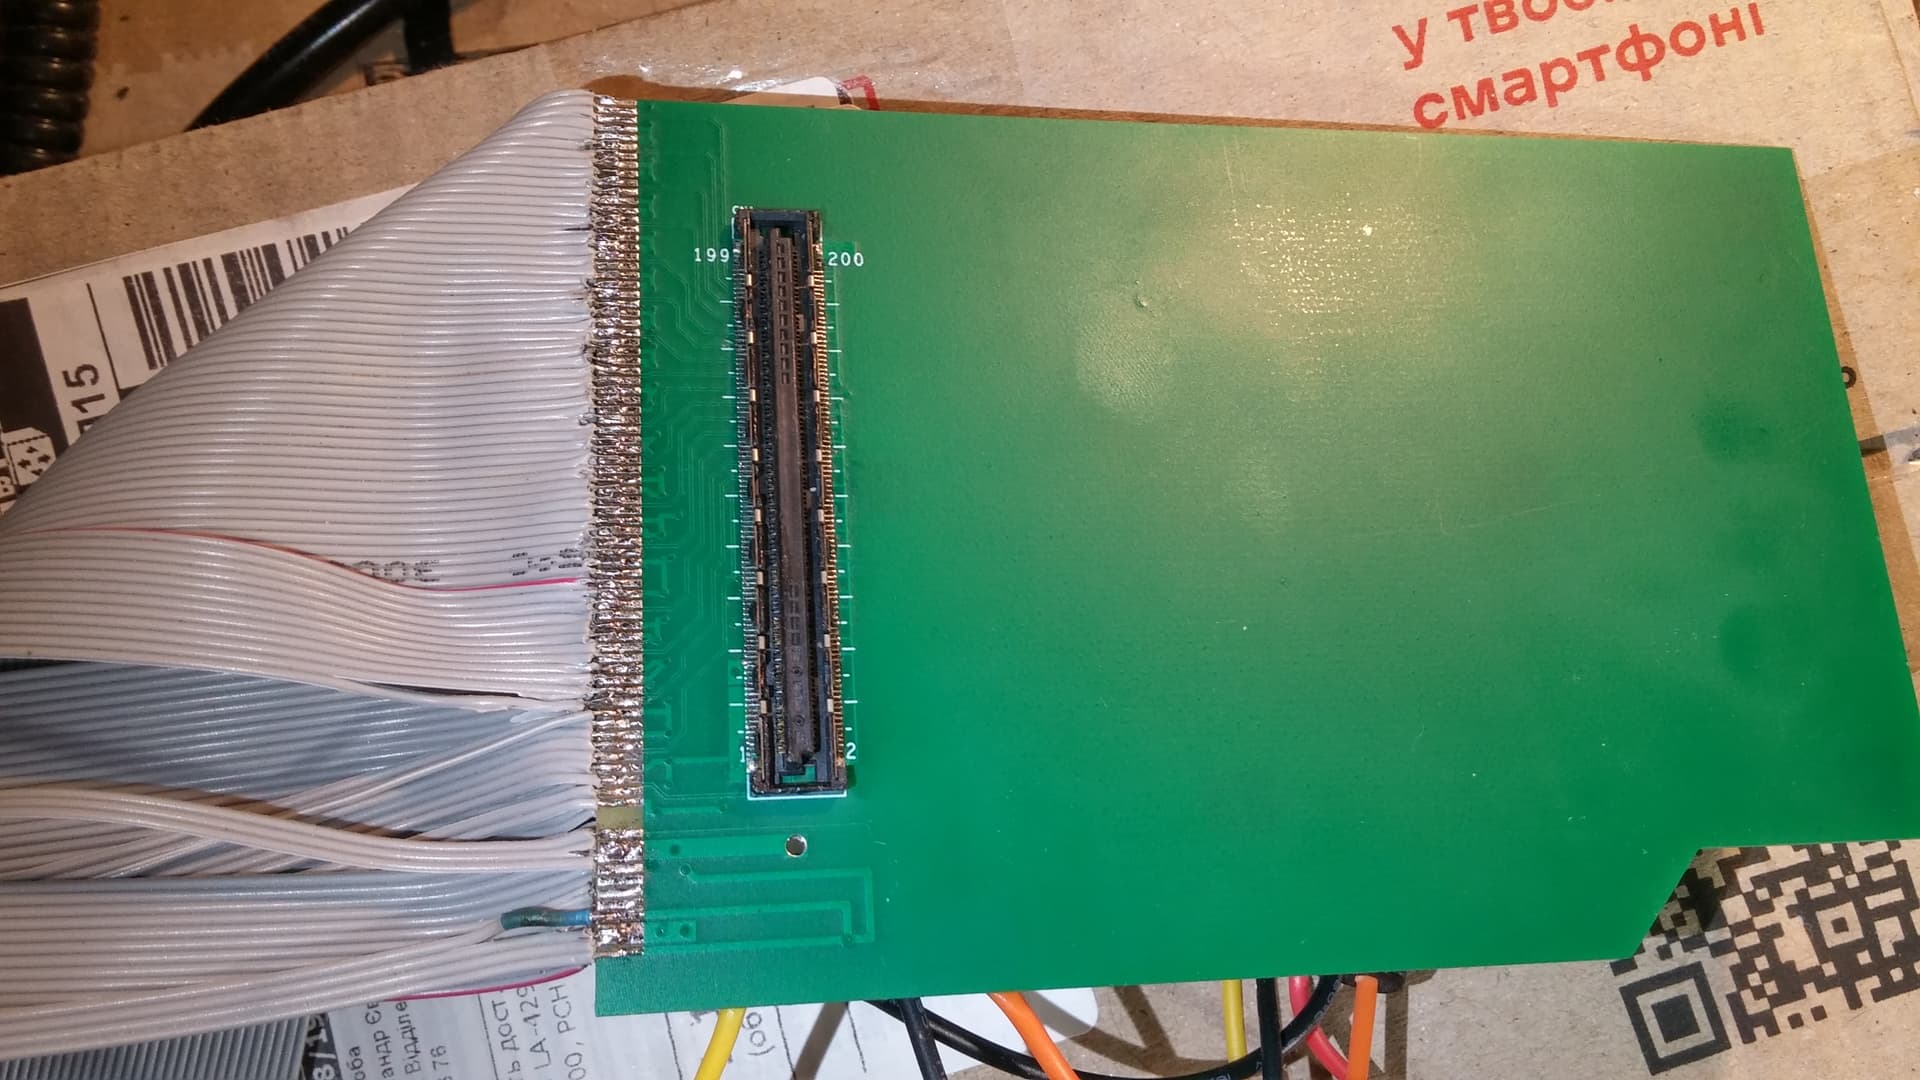
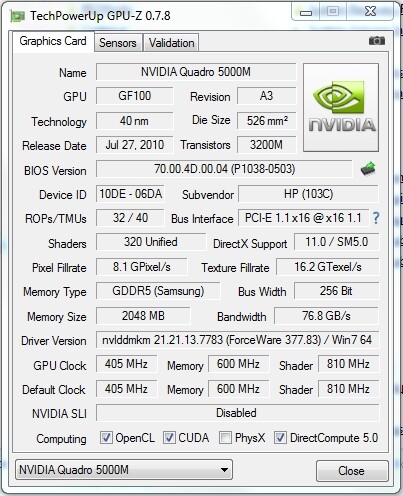
Another impressive experiment has been completed by me. This time it was a Quadro 5000M mod. I developed an MXM adapter for custom Dell video cards which use a JAE WB3F200VD1 female connector.

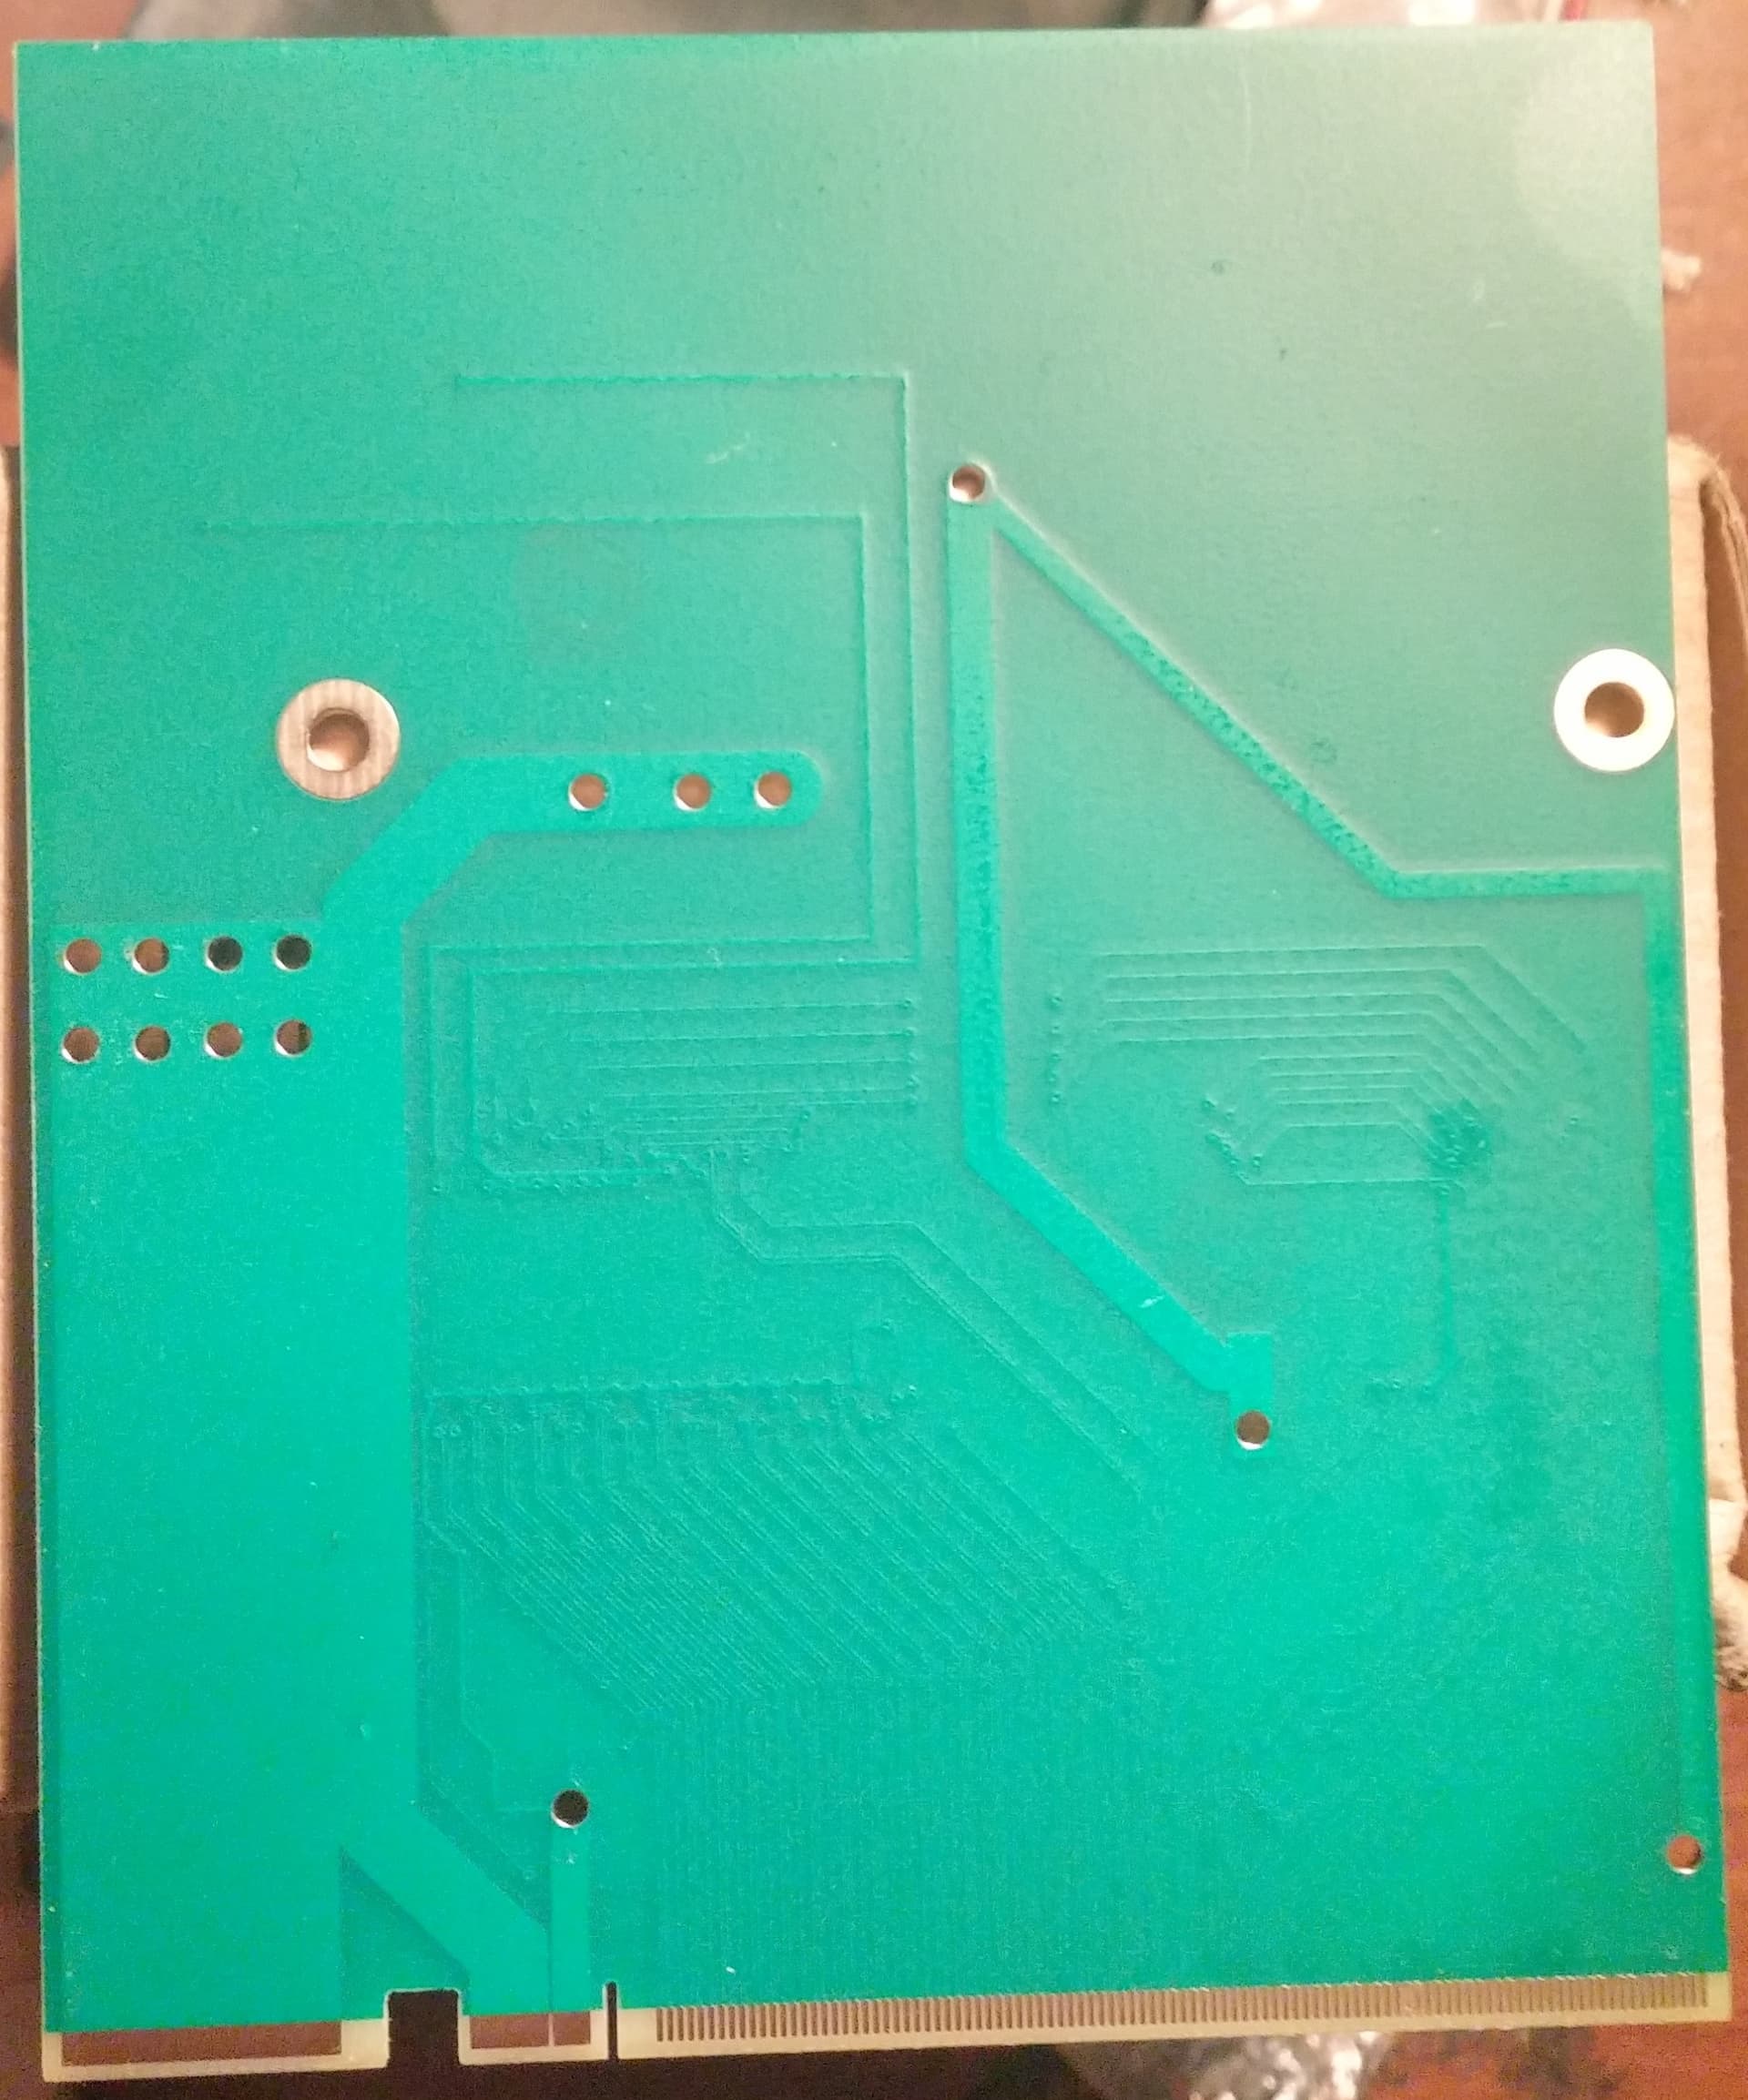
I needed just one, but the minimum quantity order was 5pcs. Actually, I received 10 for an unknown reason, so if anyone wants to get one, just let me know.
It needs to be improved, but I doubt if I ever need to use it again. Maybe I will before developing a modded 5000M if I come up with this idea.
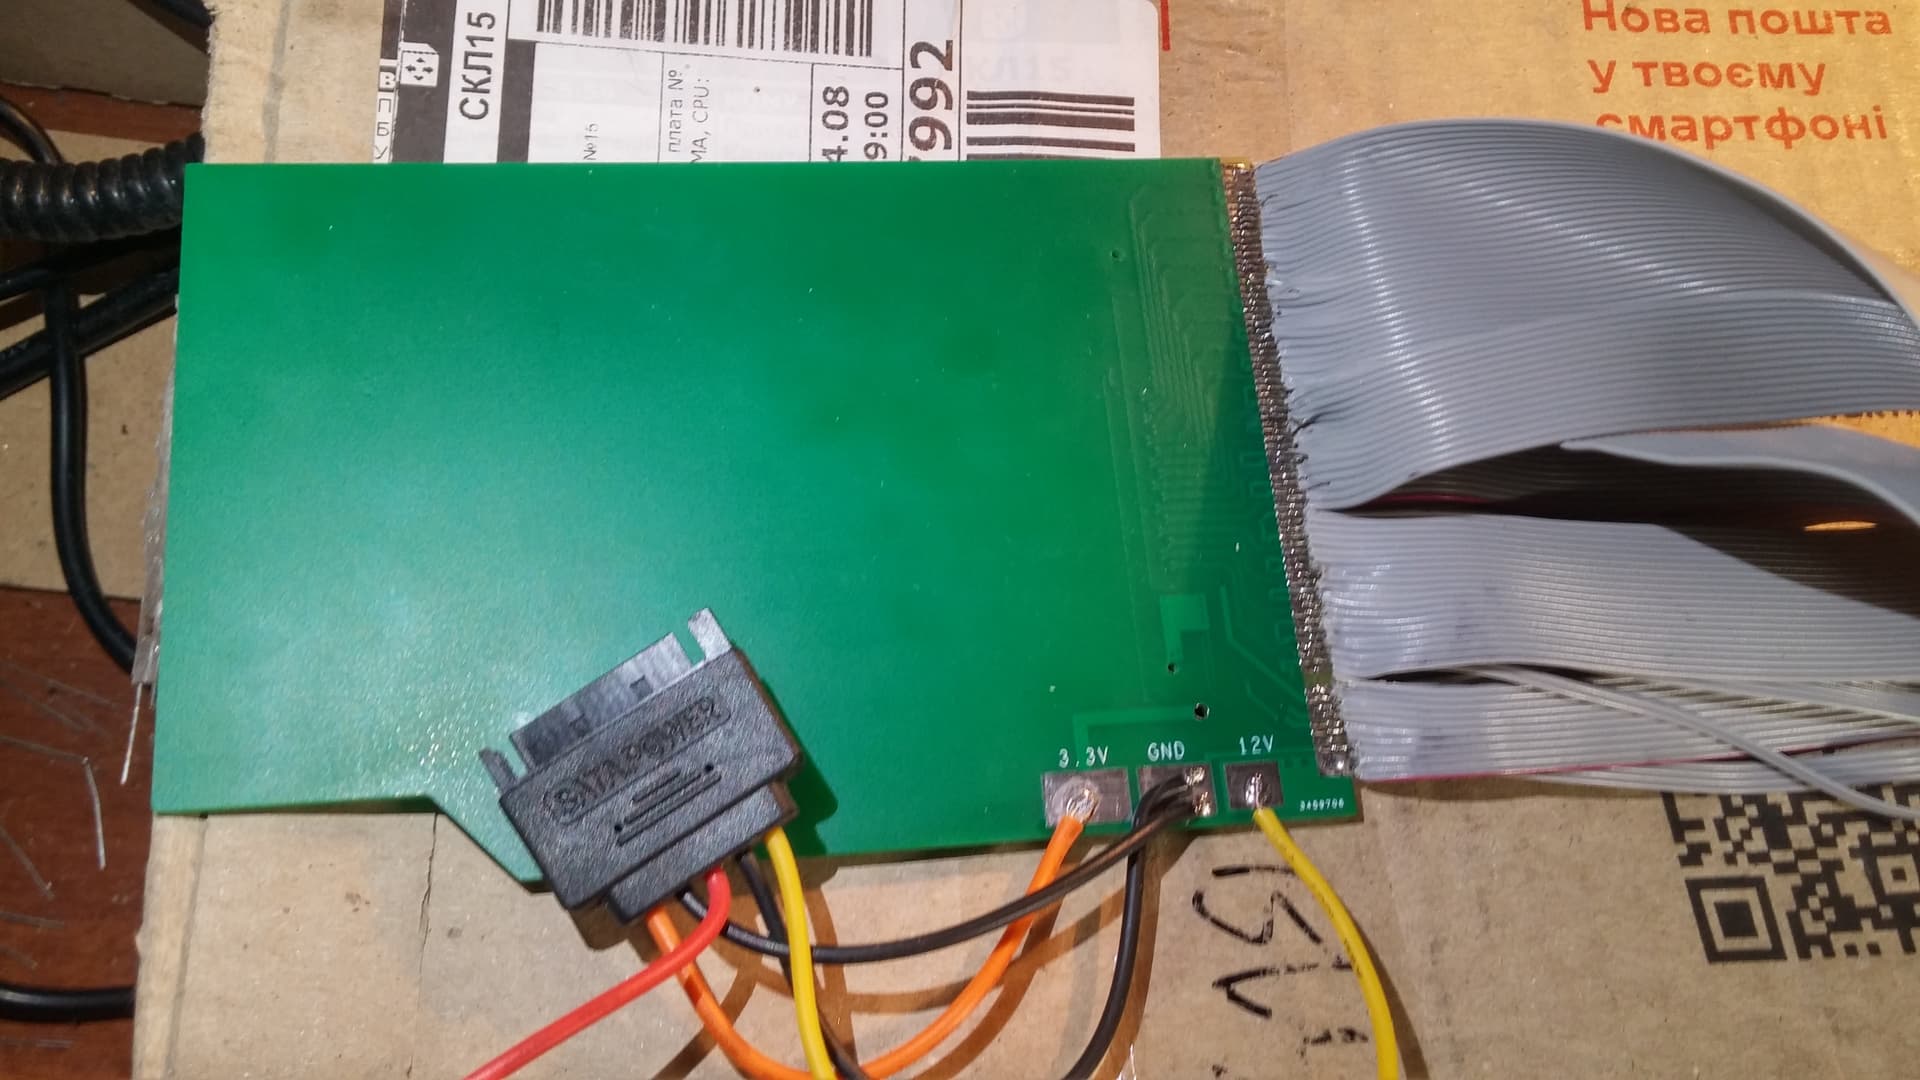
The main reason for making the demo adapter was to understand if Dell video cards would work with our Dragon. On the pictures below you can see how it looked after the installation. I was using an ATI version of the Dragon as you can see, so I restored the missing power connection at the connector. But it was useless because the power was not enough in the end, so I ended up using an external power supply

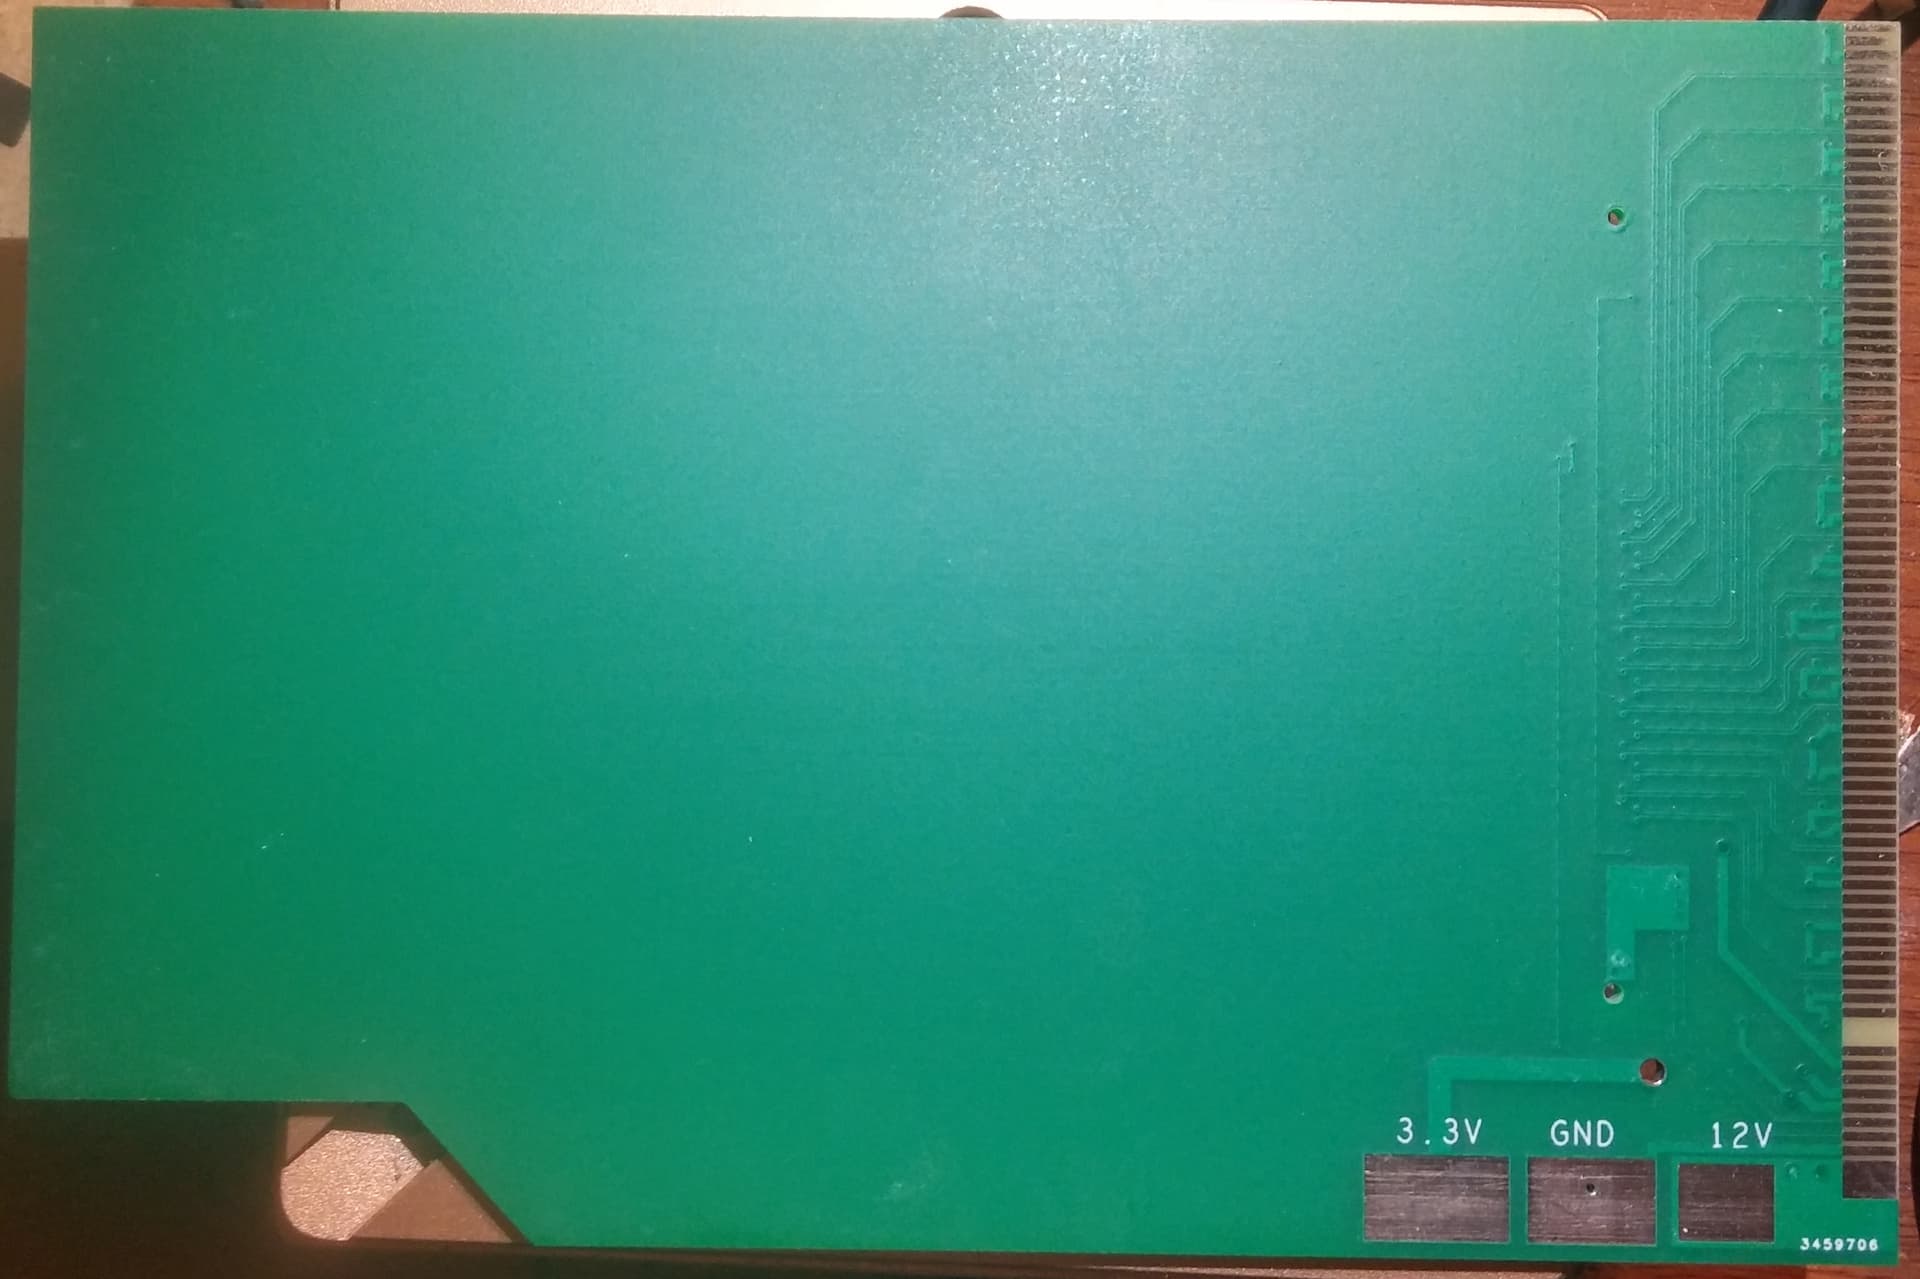
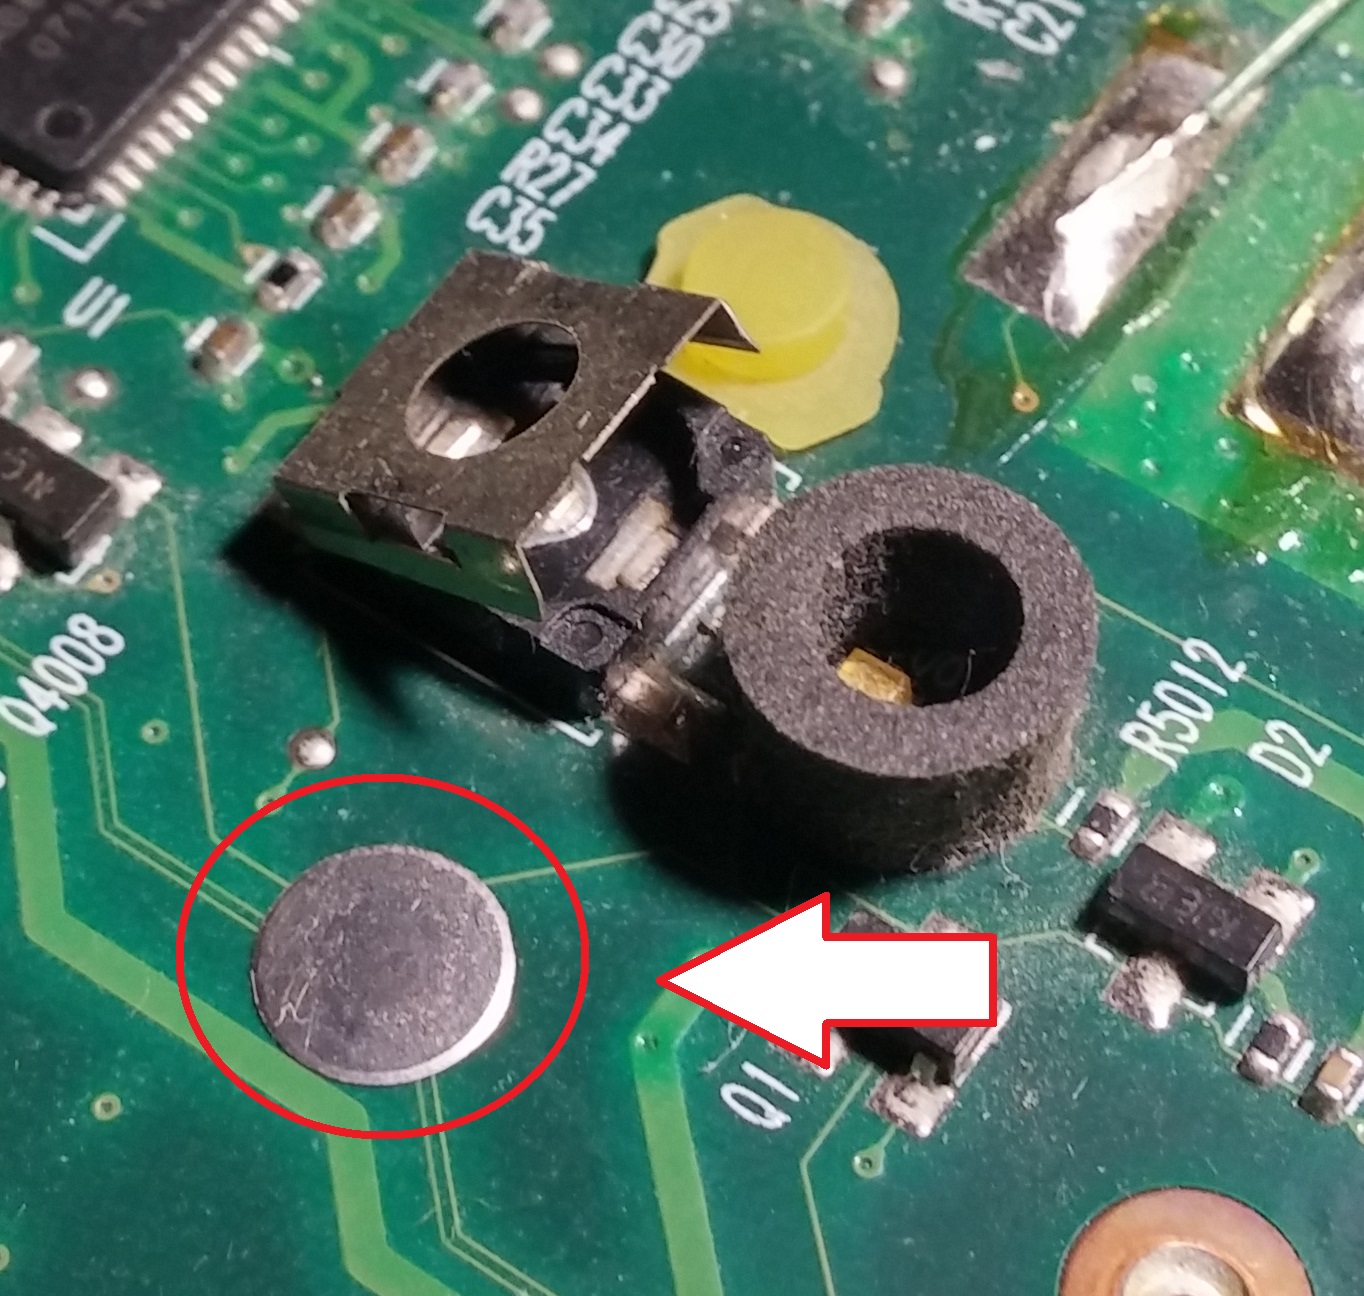
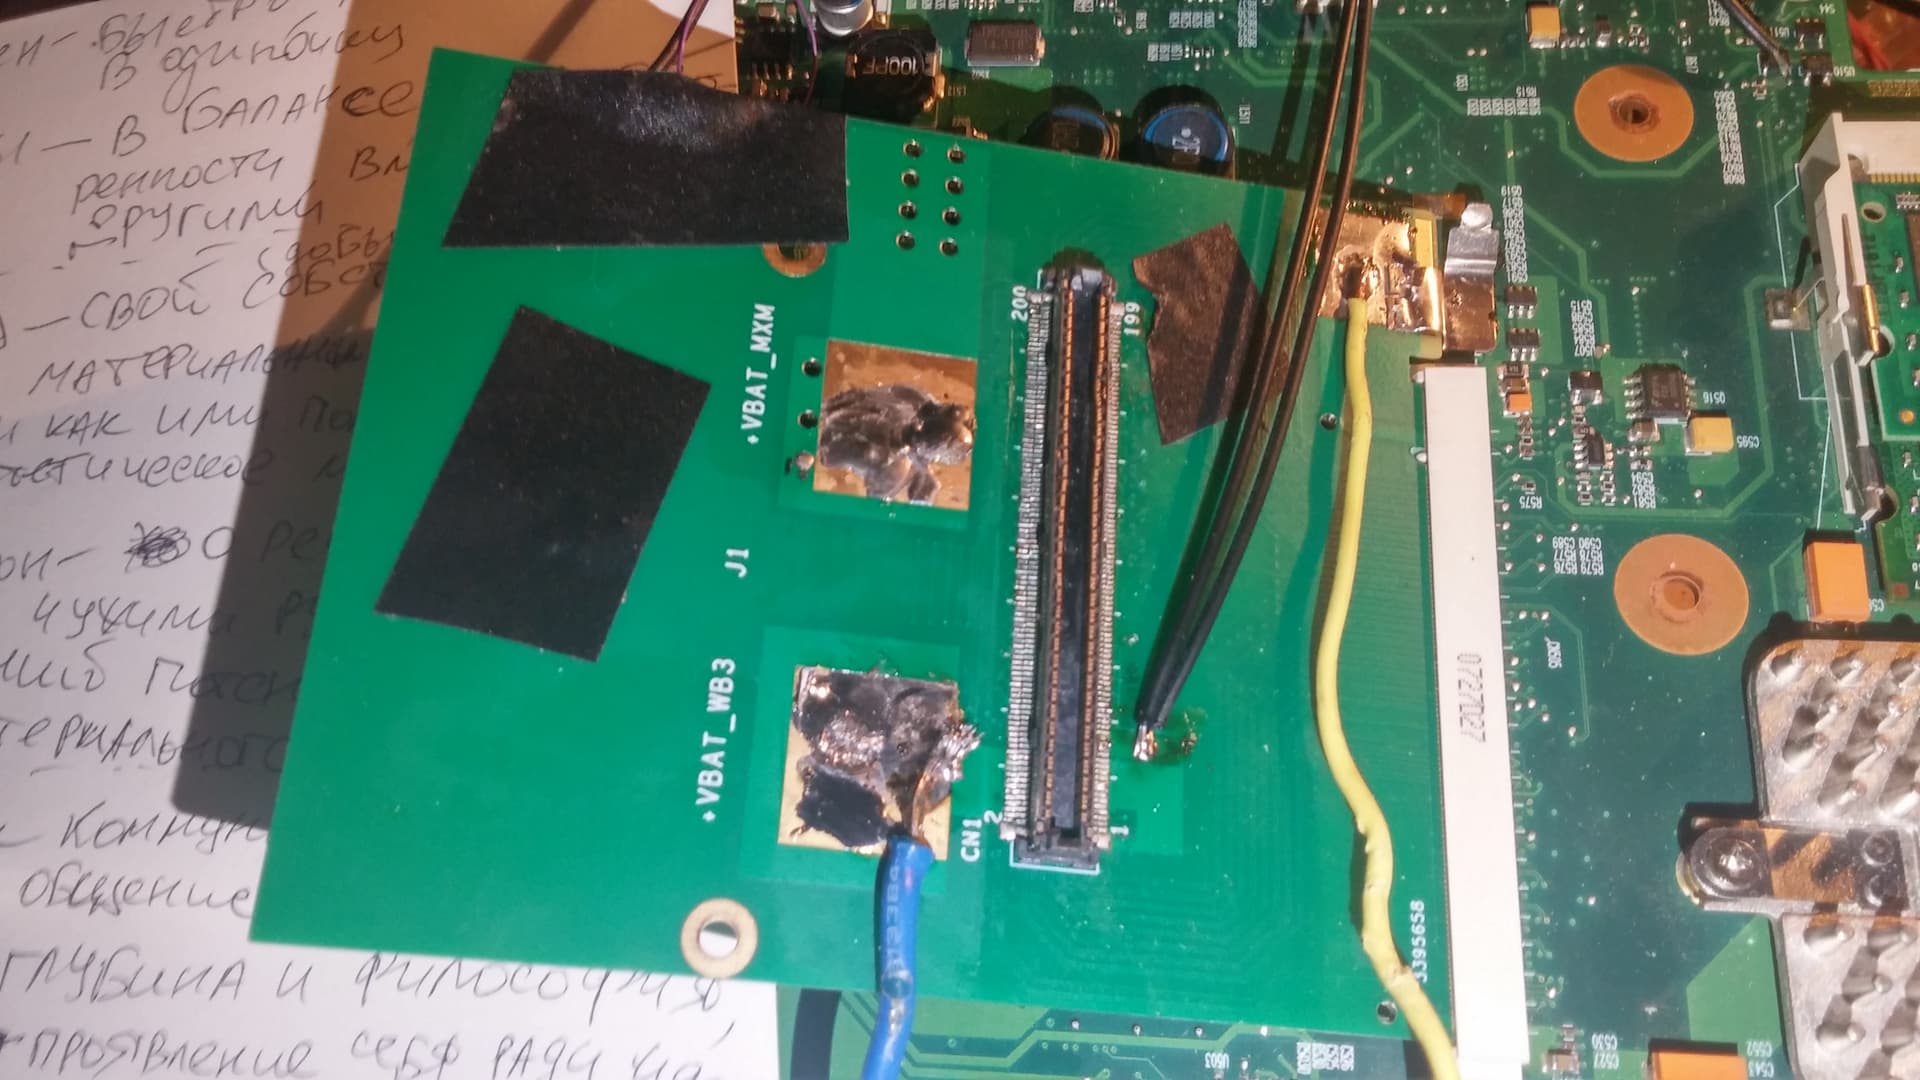
The J1 is a jumper connector and it includes 2 pads: +VBAT_WB3 (WB3M200VD2 male connector side) and +VBAT_MXM (MXM side). It is the main power rail for the video card. I made these pads just right for this case when there’s a need to use external power source. It turned out to be the case because I was getting crashes (just a black screen) during the final tests which were the most power consumptive. I left this jumper open to cut off power coming from the Dragon and used an external 700W power supply from Eurocom, it allowed me to monitor current at each stage of testing and see the peak of power consumption.
+V3S is a 3.3v power rail in the Dragon. I had to cut the copper track (I should have made another jumper in the design for this reason) on the adapter and use another external power supply with current monitoring because the number of MXM pins was not enough. But I’m wondering why 3 pins were not enough to provide 1A current (the Dell is using 5 pins for this connection while the Dragon does only 3), but the situation improved when I connected an external 3.3V.
Interestingly, when a VGA monitor is used instead of LVDS, there is no need to use any external power supplies to do all the Passmark 3D tests. The LVDS connection requires more power to be delivered through both +VBATR and +V3S.
+V3AL and +V5AL are required for Dell video cards, but they are not hardwired in the MXM connector, so I had to wire them out as external pads and get them elsewhere from the main board.
+15V_ALW is used to switch on LVDS LCD power according to Dell’s schematics, but I don’t know why it wasn’t working that way. The screen was working well without the 15V. Additional investigation needs to be done into this.
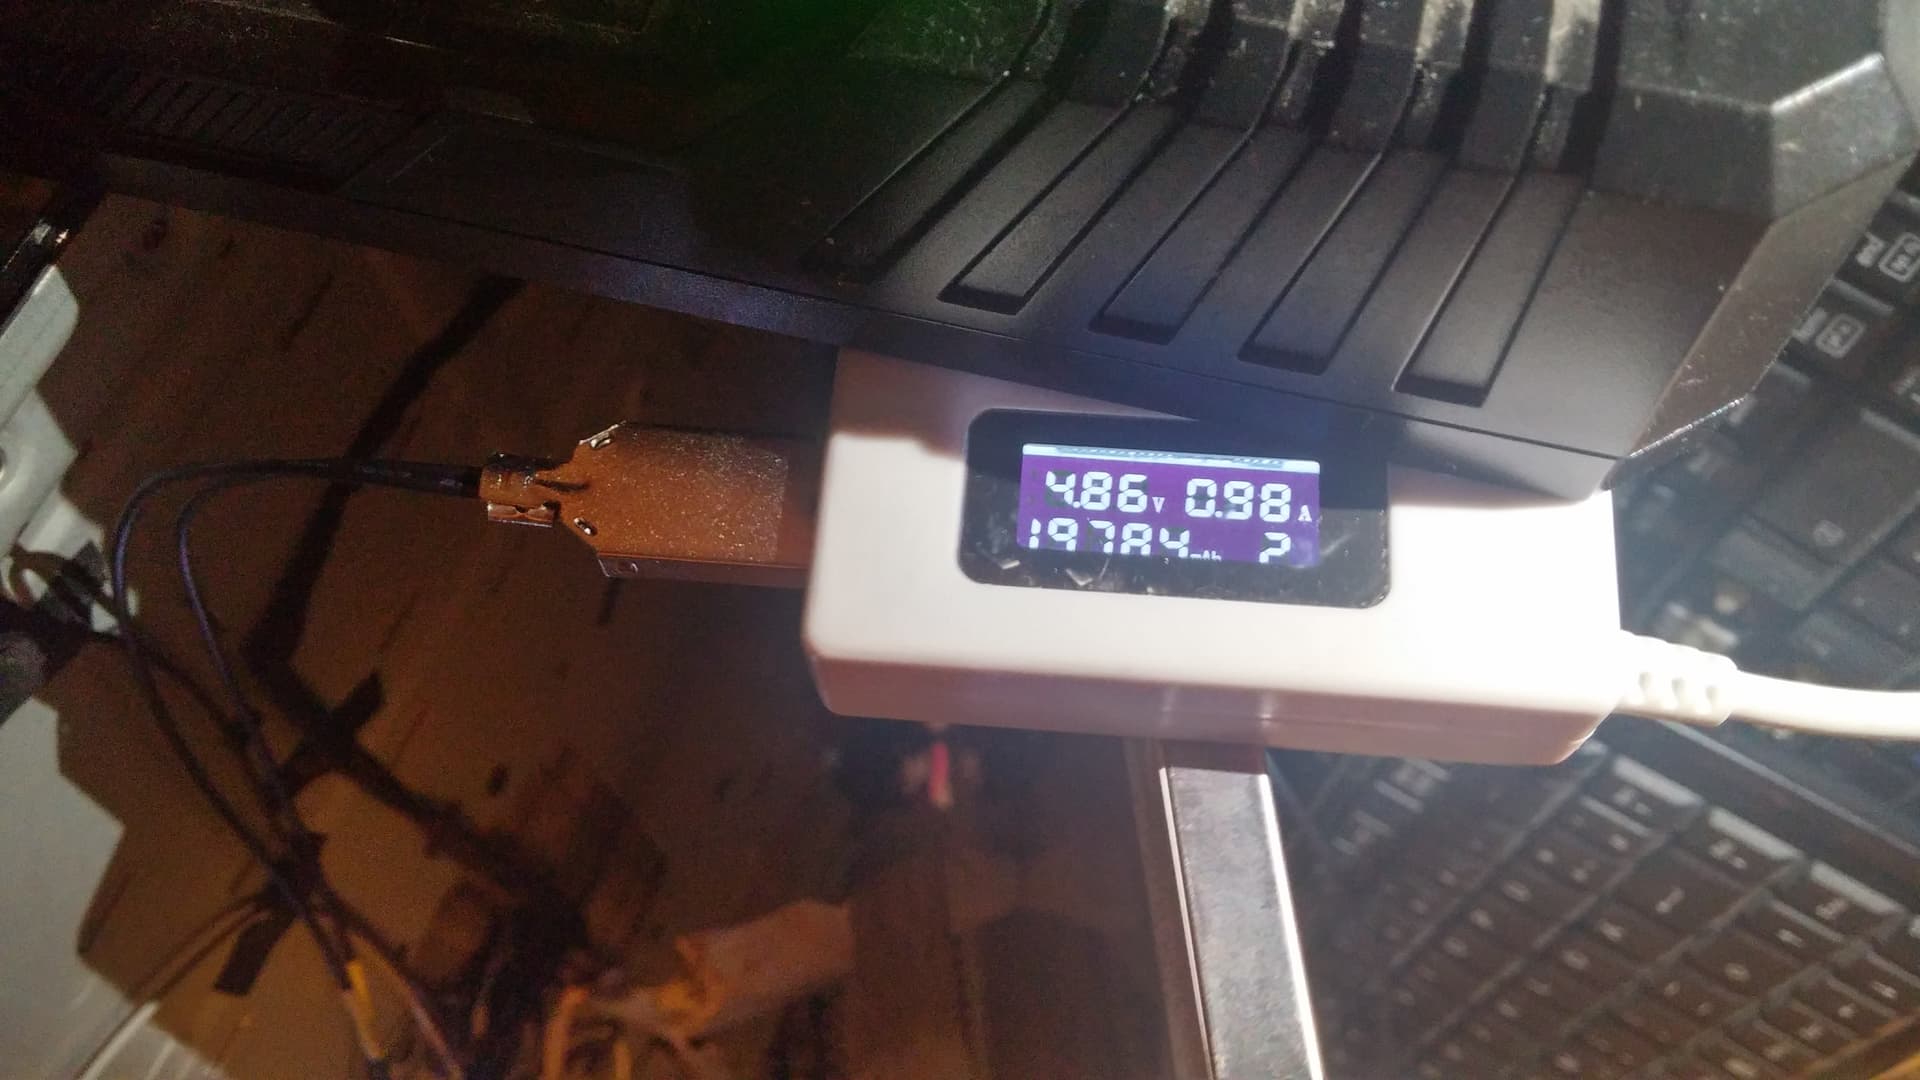
I used Dell M6400’s native 1200p screen first, but there was no backlight for an unknown reason. So I ended up using the Dragon’s Chi Mei 1920x1200 screen. But the main motherboard was starting automatically right after attaching power supply and it didn’t POST. The reason was the 5V power rail which didn’t provide enough power to the Dragons screen. It was consuming 550mAh when power is off. It wasn’t enough which probably led to triggering an overcurrent protection and abnormal behavior of the Dragon’s motherboard. It was sorted after I connected an external 5V to the screen directly (by using USB to LVDS connection). You will see in my further video I was using this white USB power meter. The LVDS current at 5V can go above 1A when the screen is active.

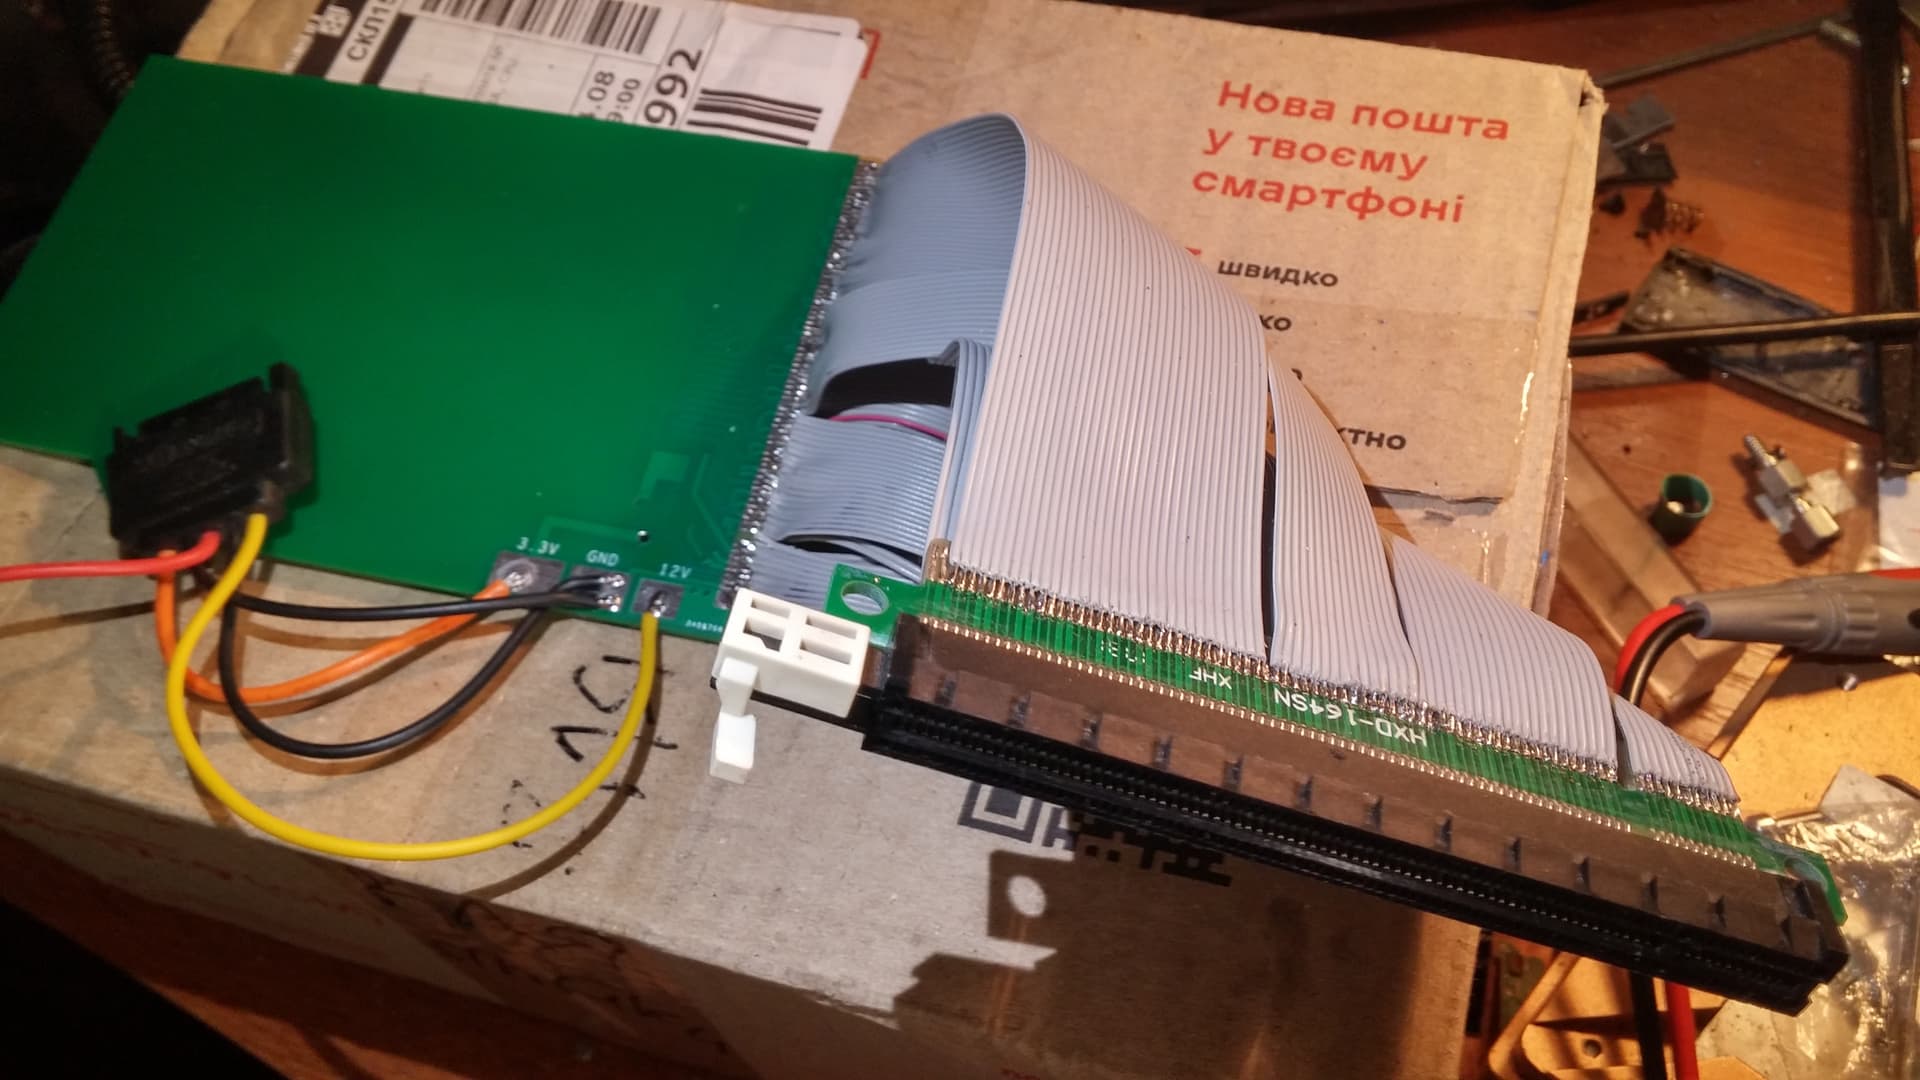
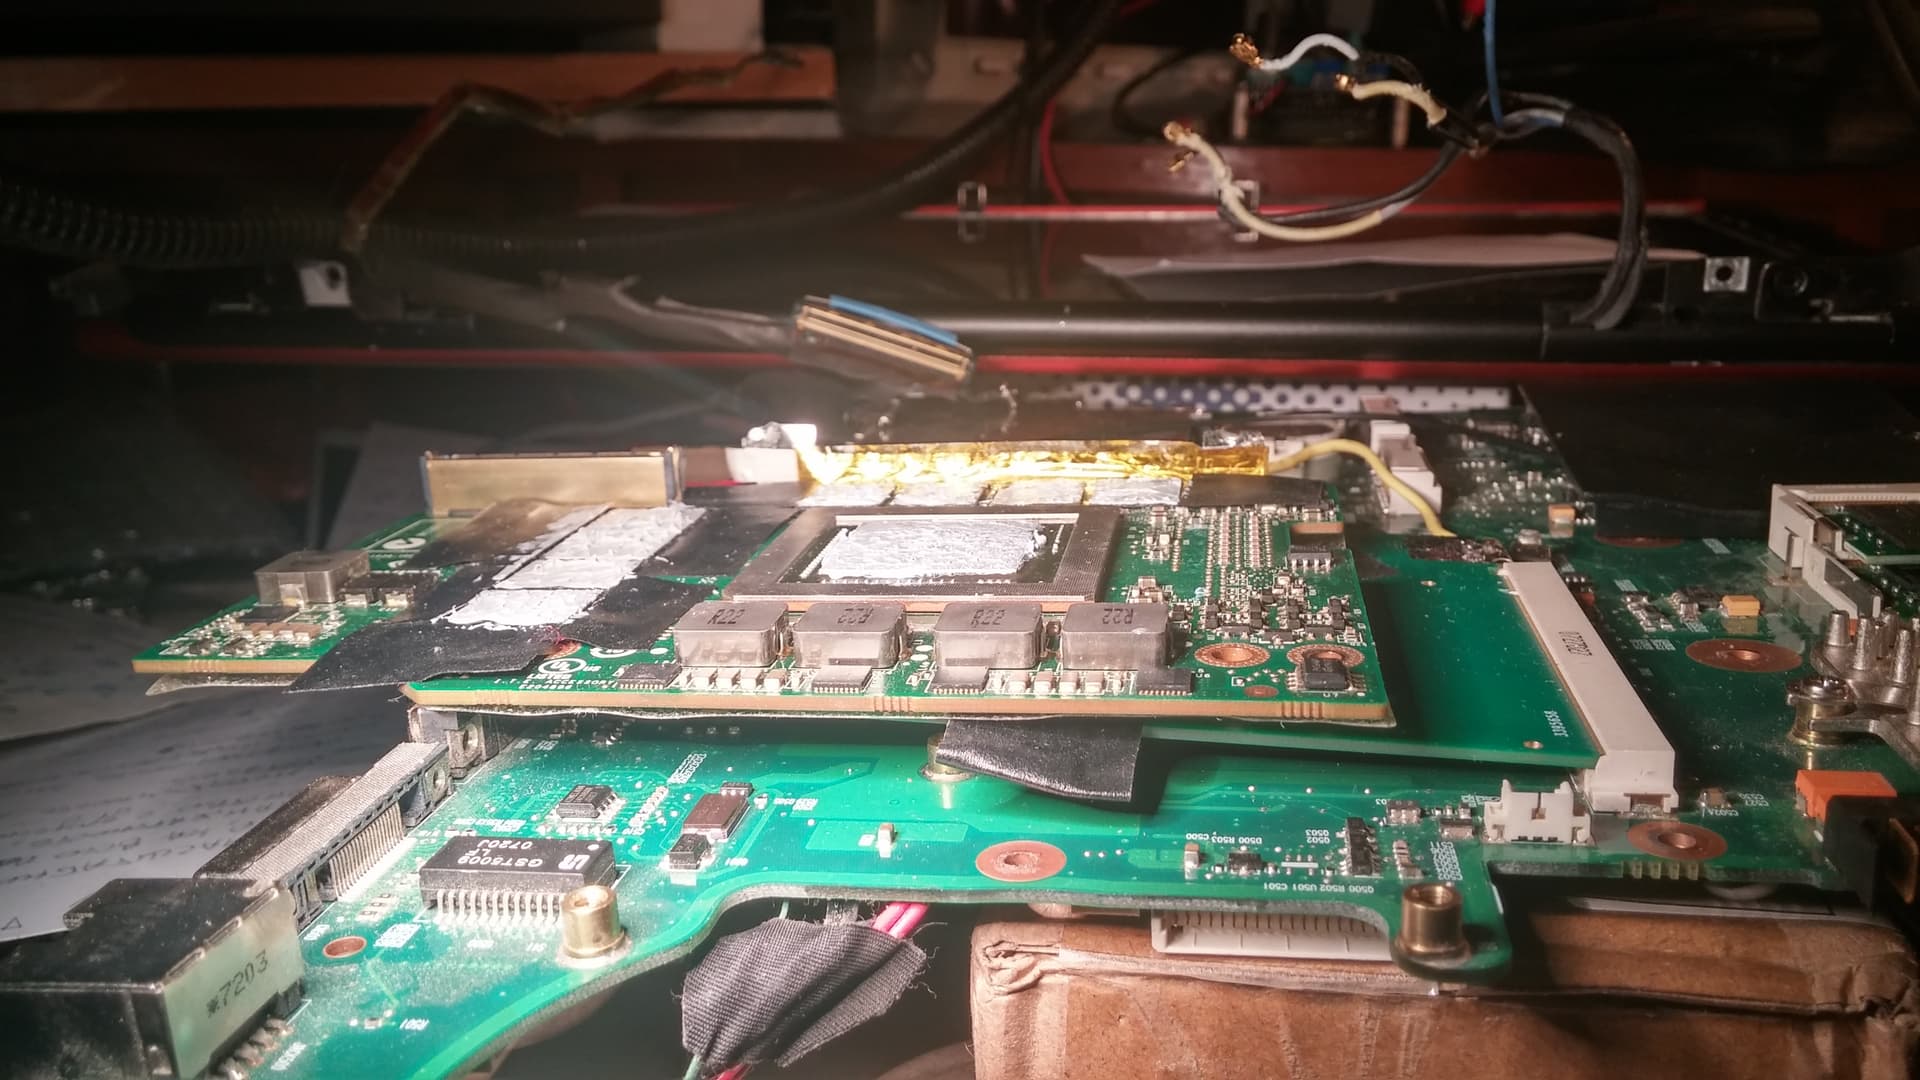
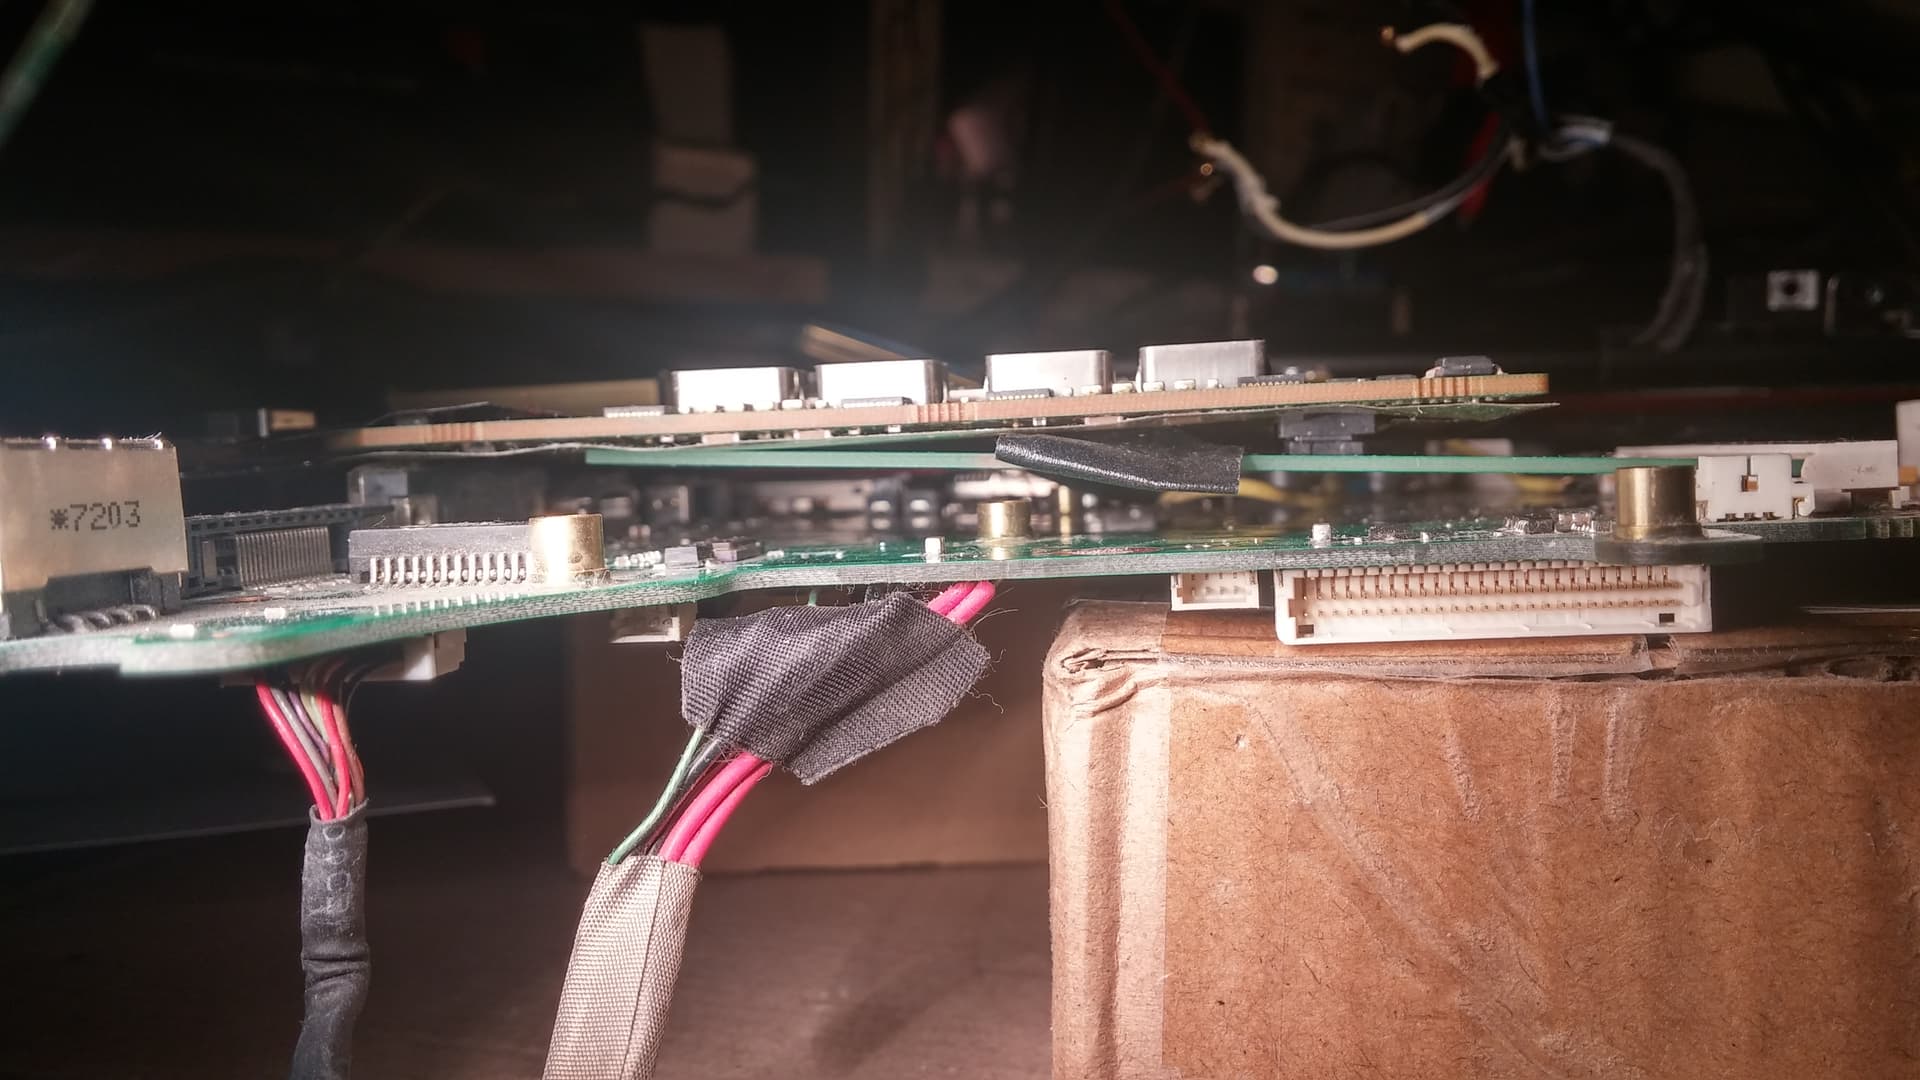
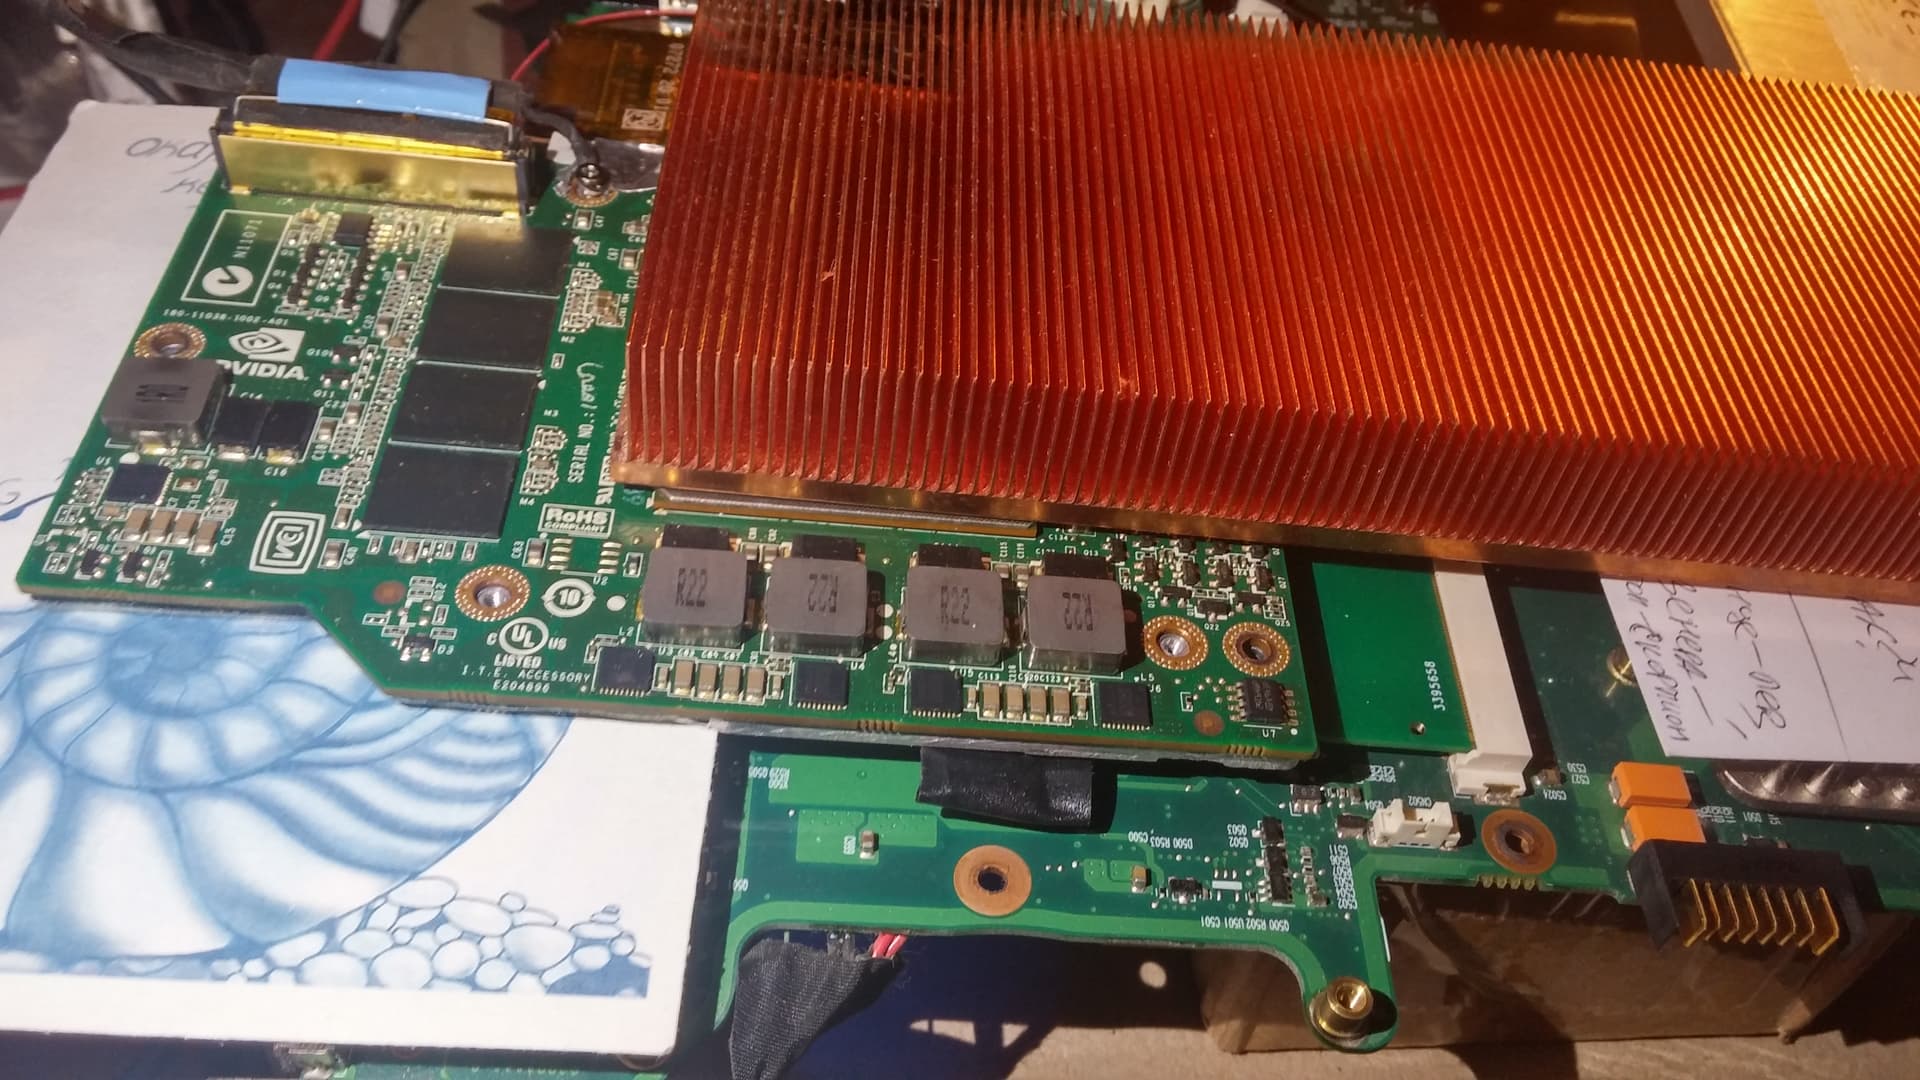
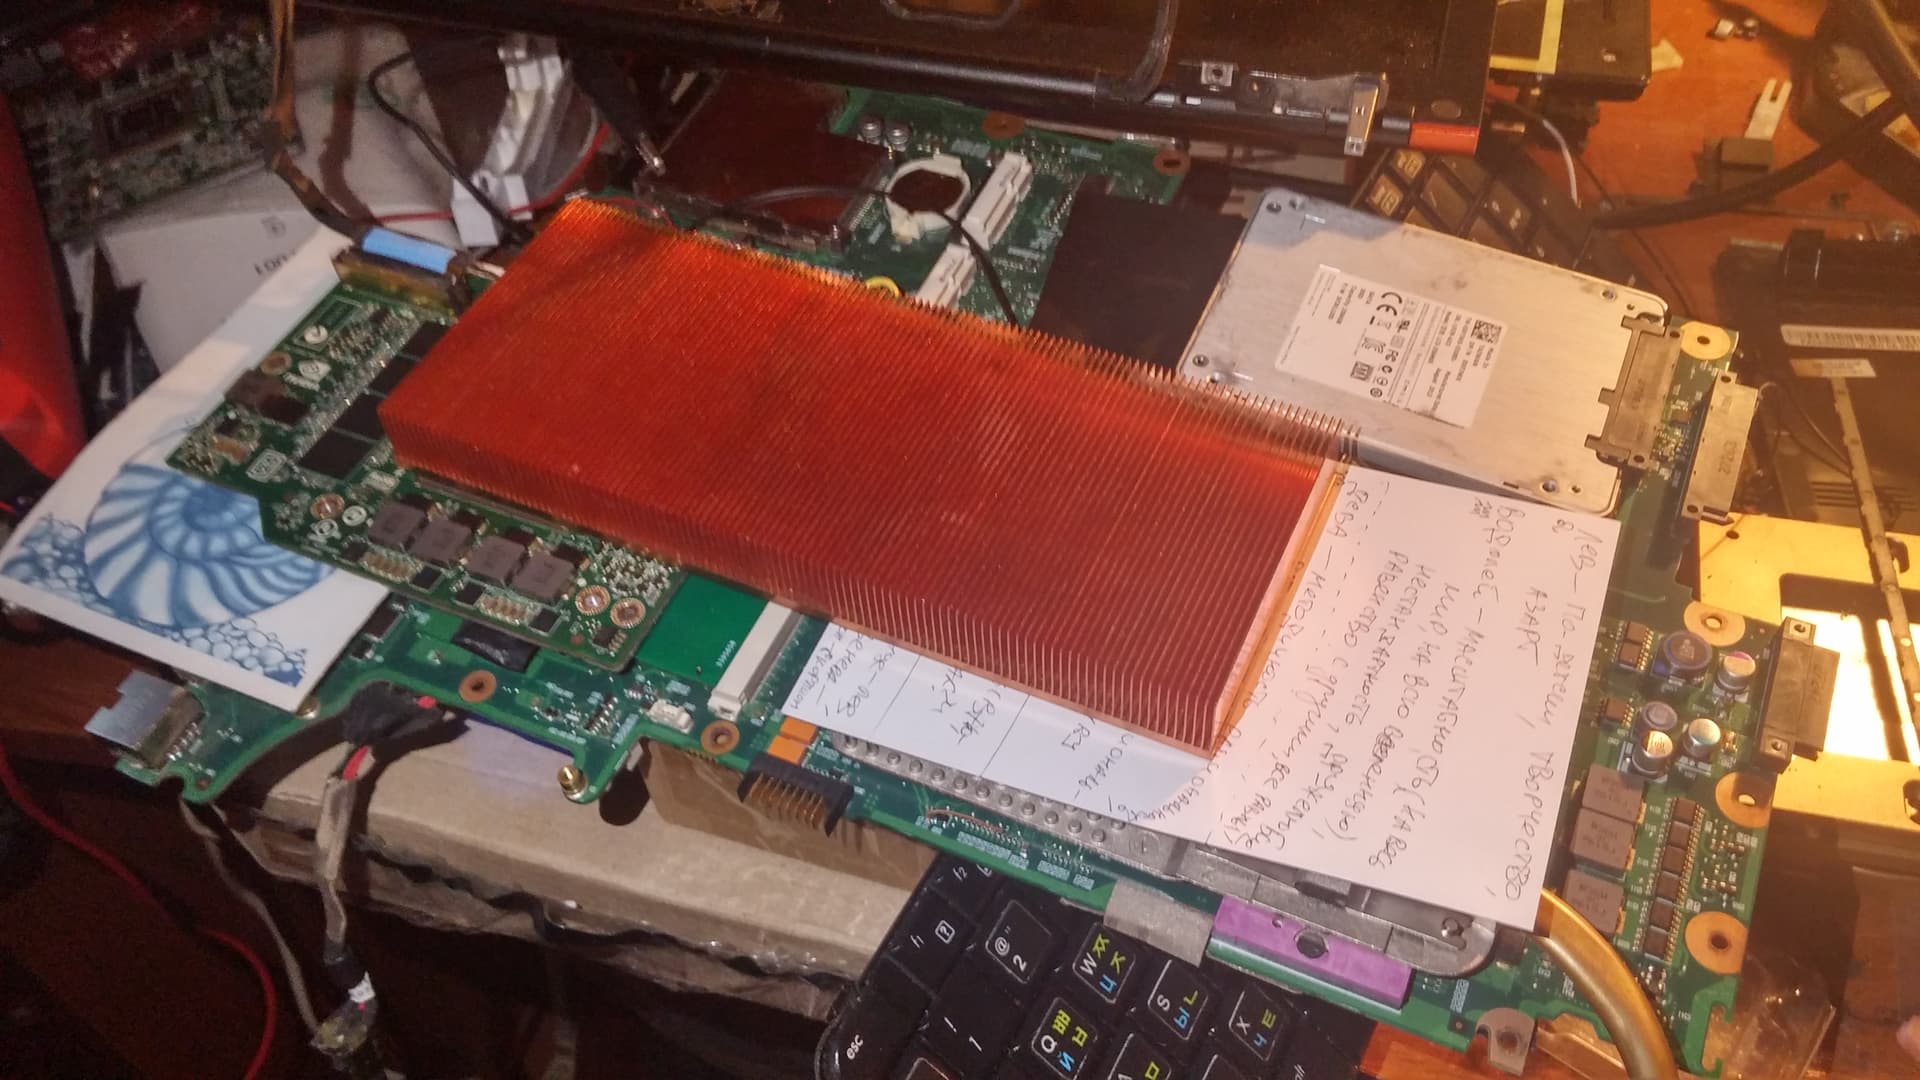
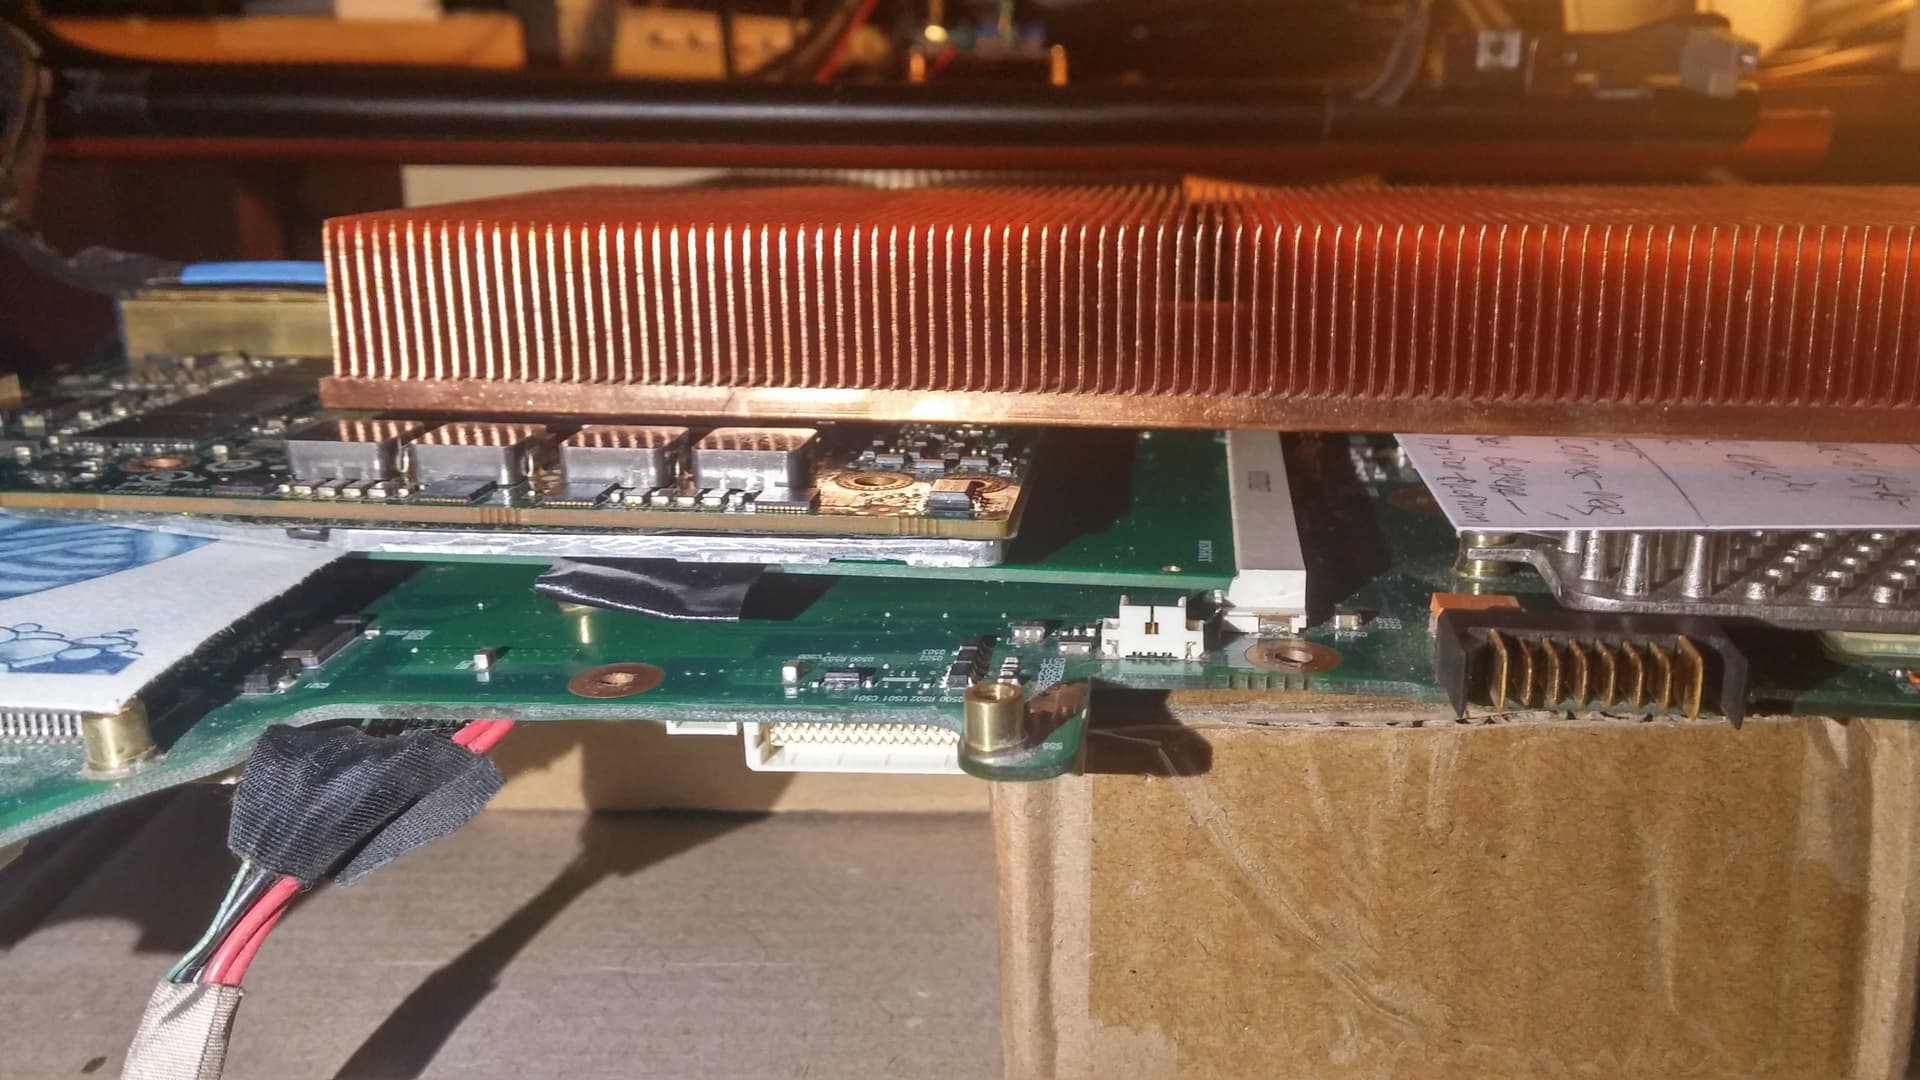
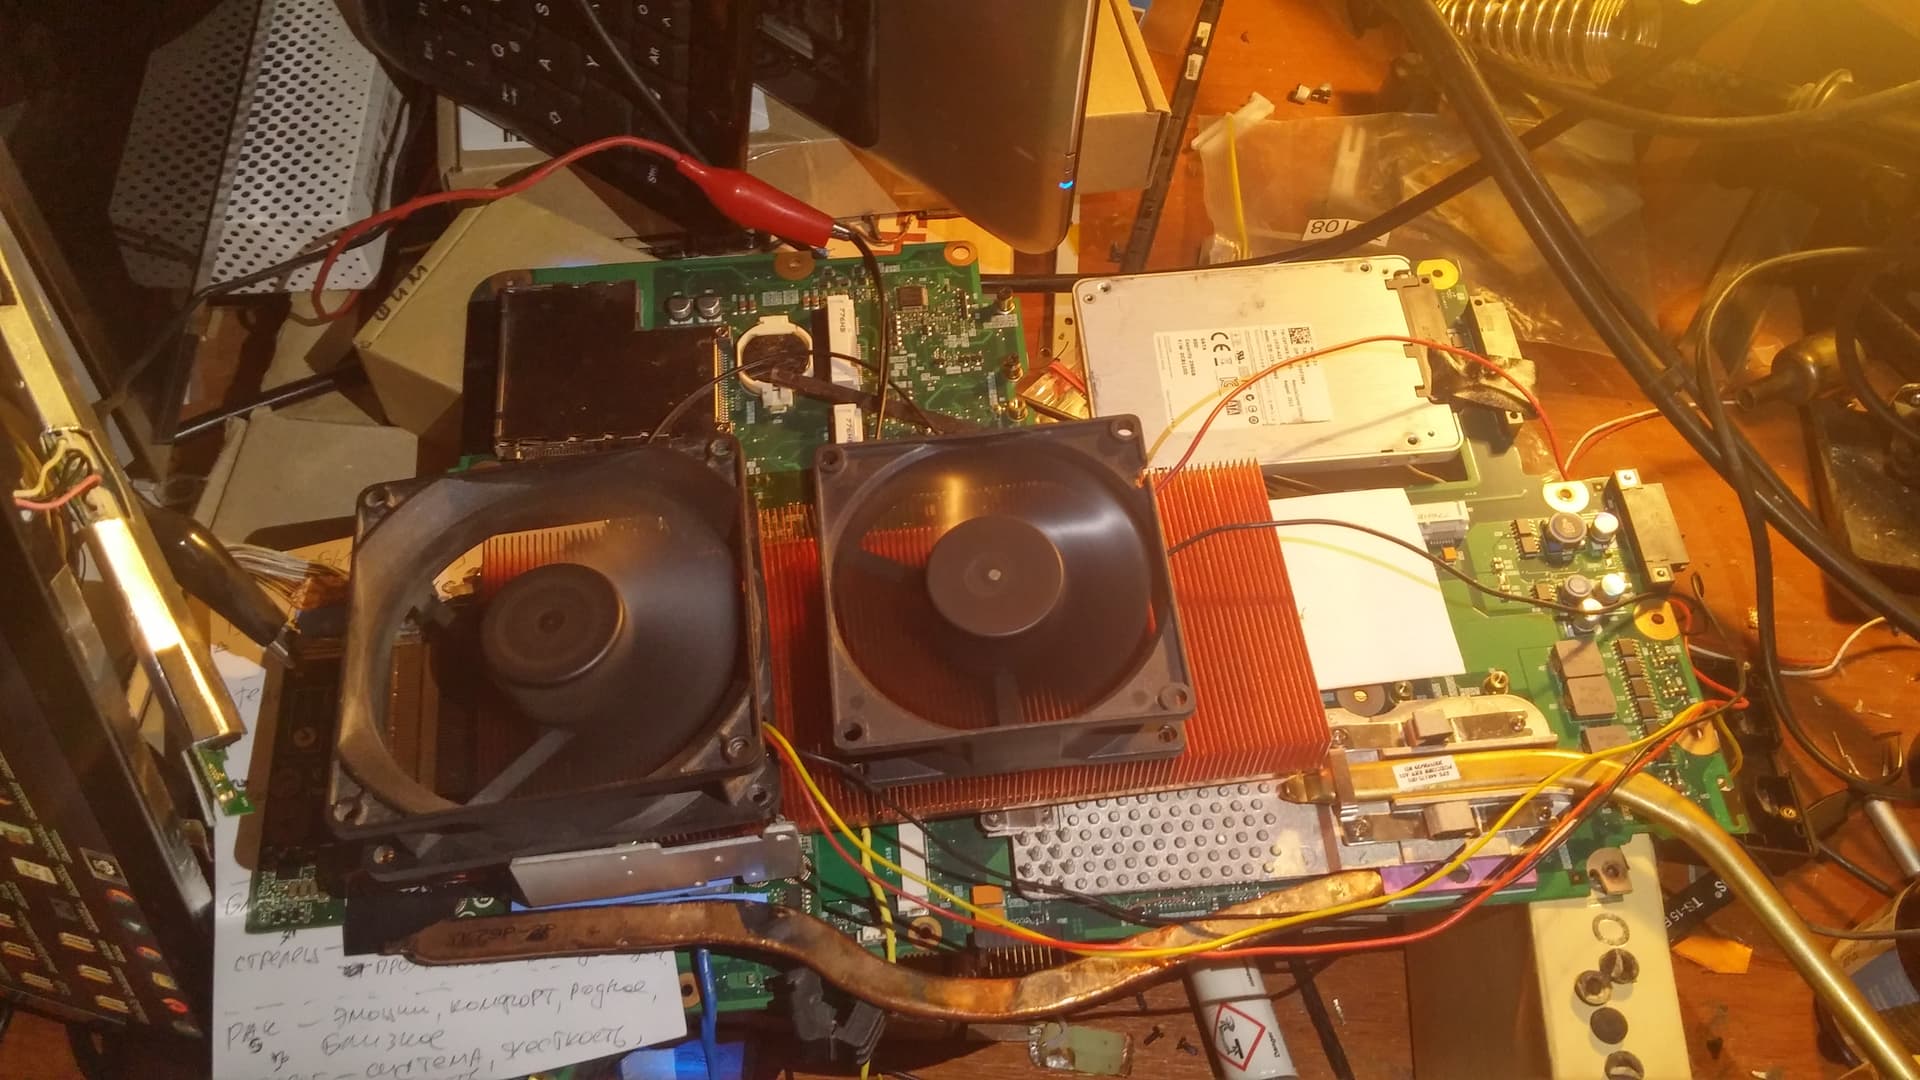
The picture below shows the adapter installed

I wasn’t able to mount it with screws because the video card was pretty long and the Dragon’s side connectors became an obstacle.

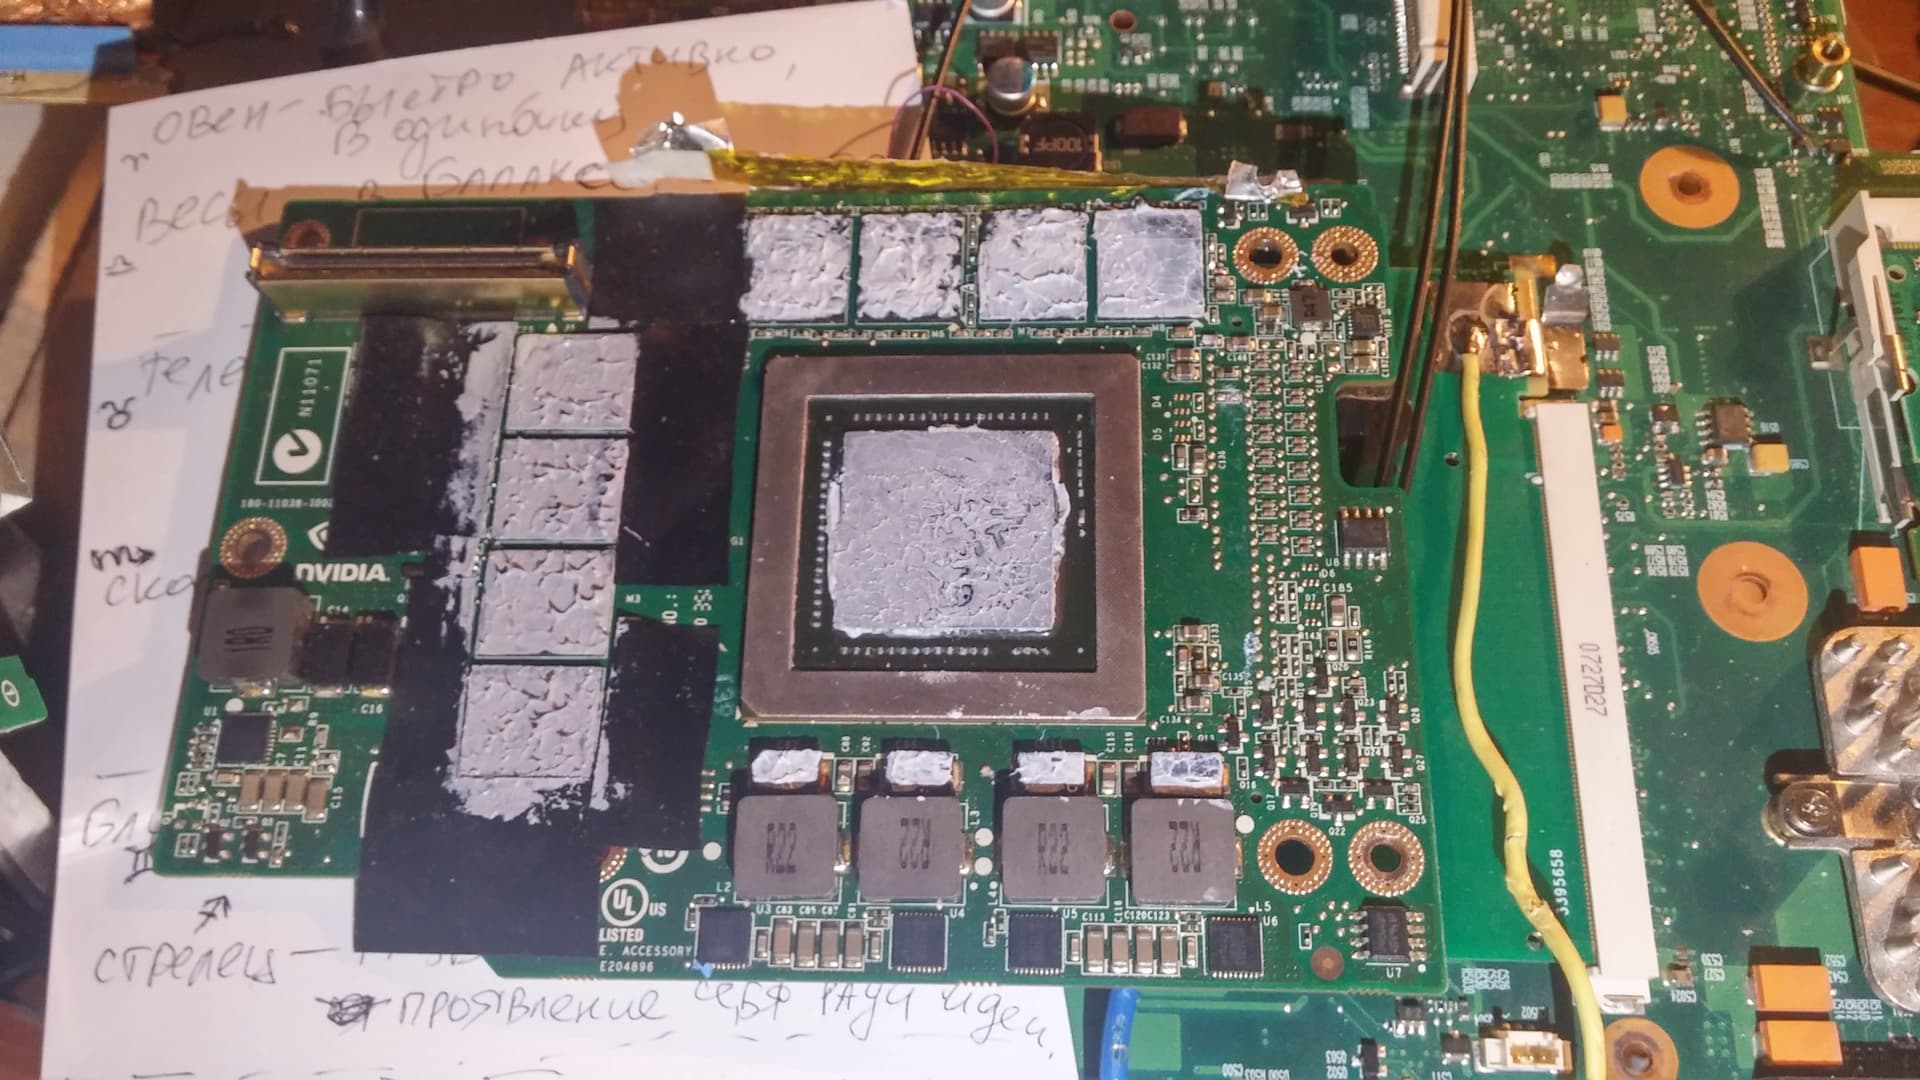
I had to remove 5000M’s native heatsink because it didn’t fit. So I used a big and heavy copper heatsink instead. I grabbed it from Aliexpress some years ago.

I also had to cover RAM and some GPU power parts with something for heat dissipation. They were going hot like crazy while RAM power elements stayed warm.

The video card has its own LVDS connector, so I didn’t have to go in trouble with swapping any LVDS pins on the Dragon’s board. The only thing I had to take care of was the M6400’s LVDS cable. I had to do a pin shift inside it to get the Dragon’s screen to work. I did it once a long time ago, so the cable was just sitting in the box prepared. The only problem was the inverter. I had to use another Dragon to provide power for backlight. I remember I tried to get the original Dell’s LVDS cable to work with the Dragon’s inverter, but the connector was gone when I opened the box. I removed it back then.

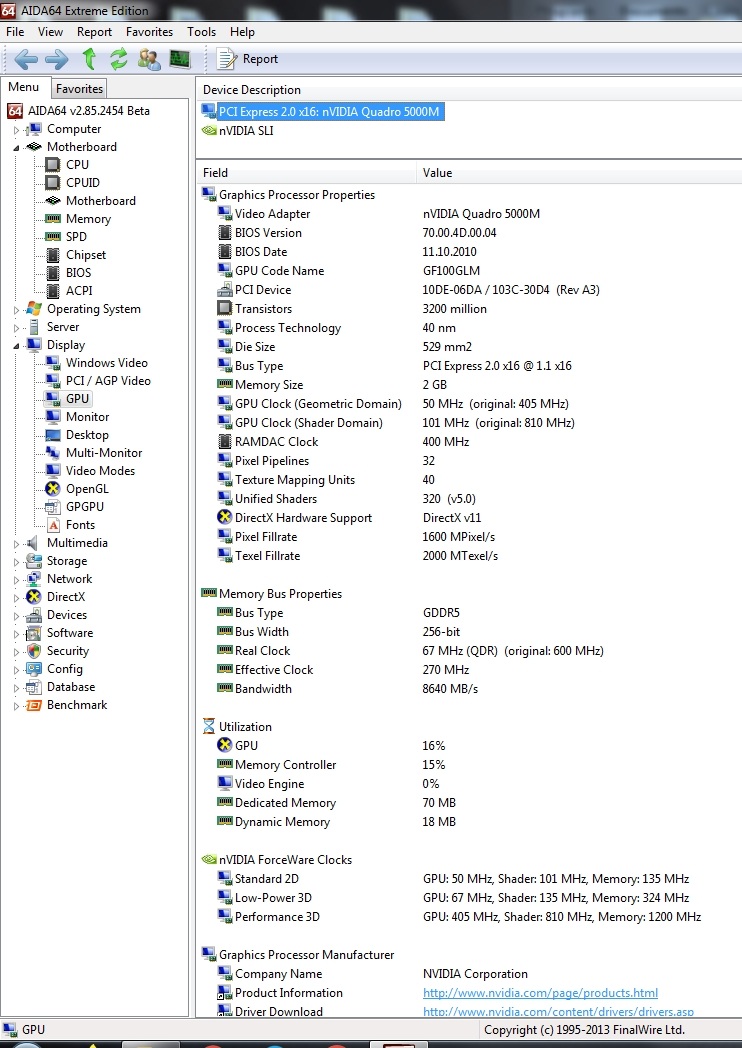
My biggest concern was the PCIe lanes. I was worrying that I could mess up with them during the PCB development because the wiring rules are quite strict, but the interface was working fine after the installation.
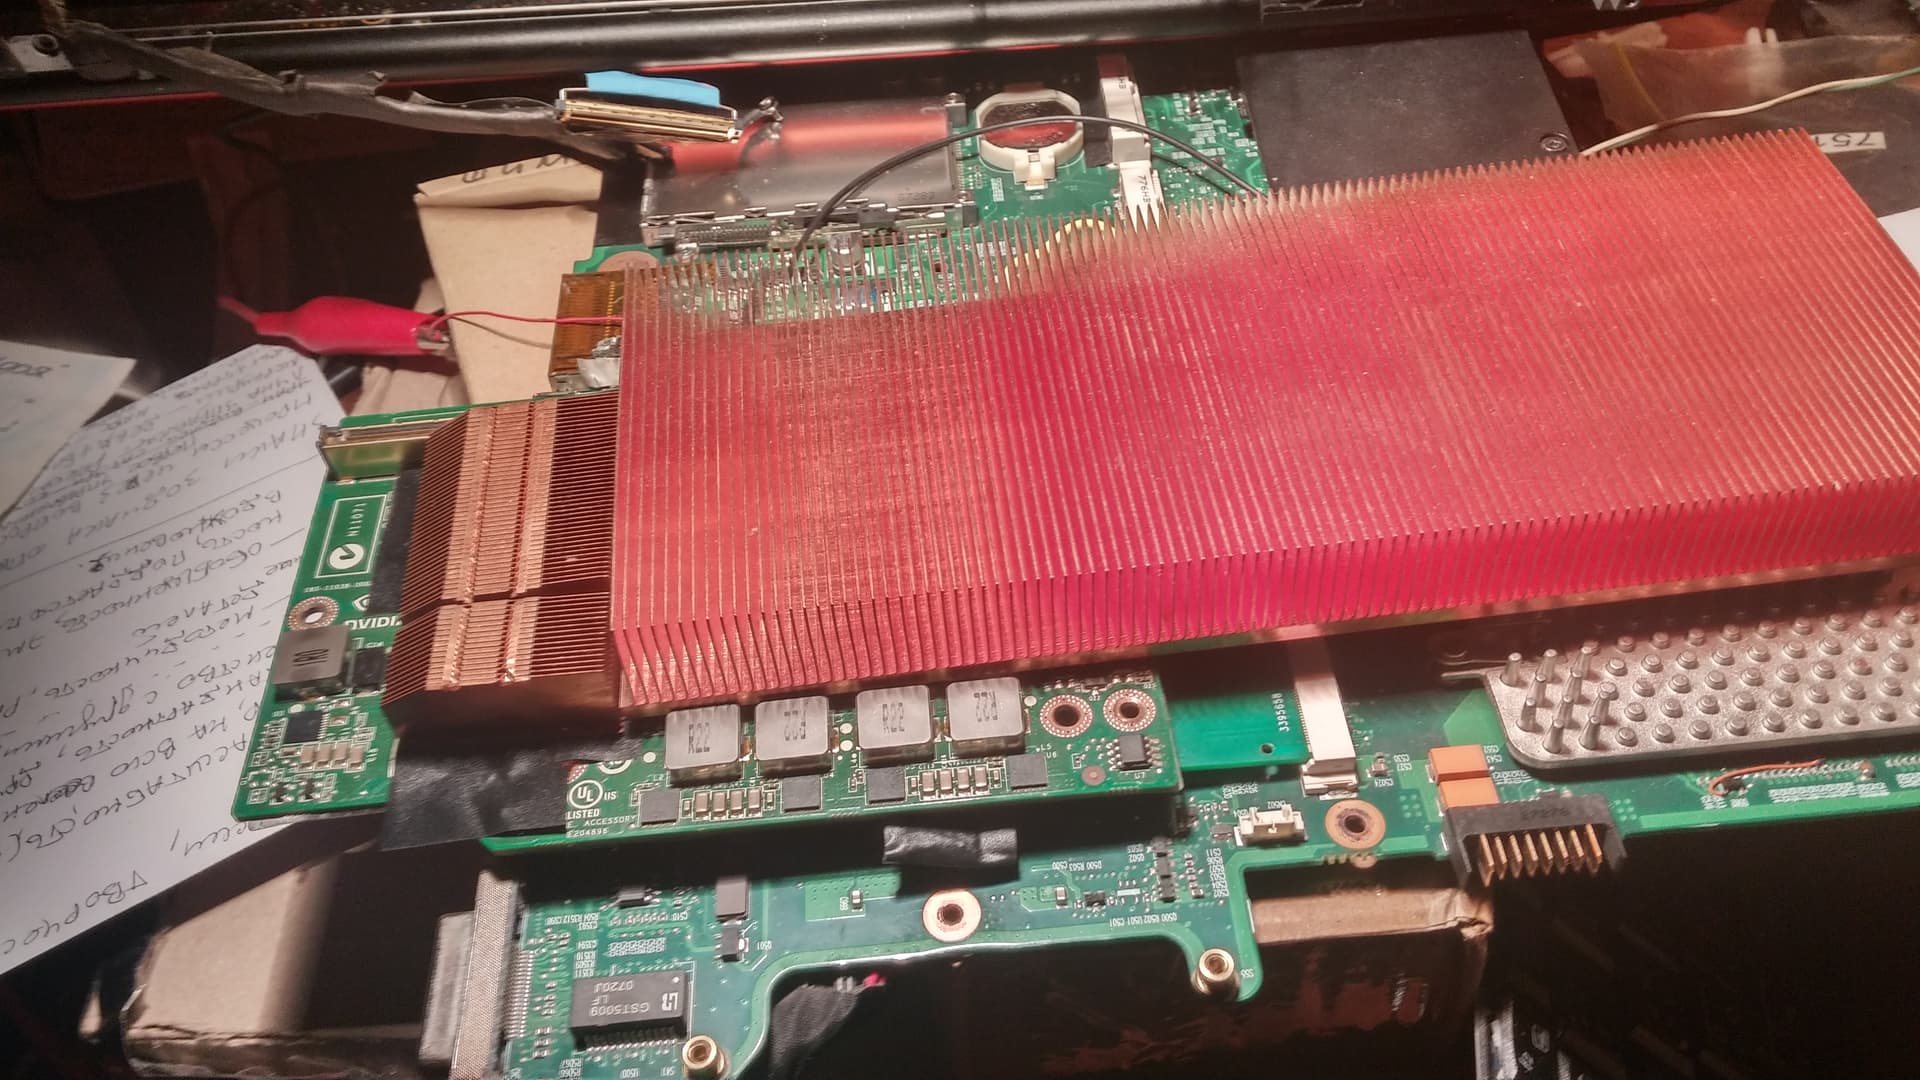
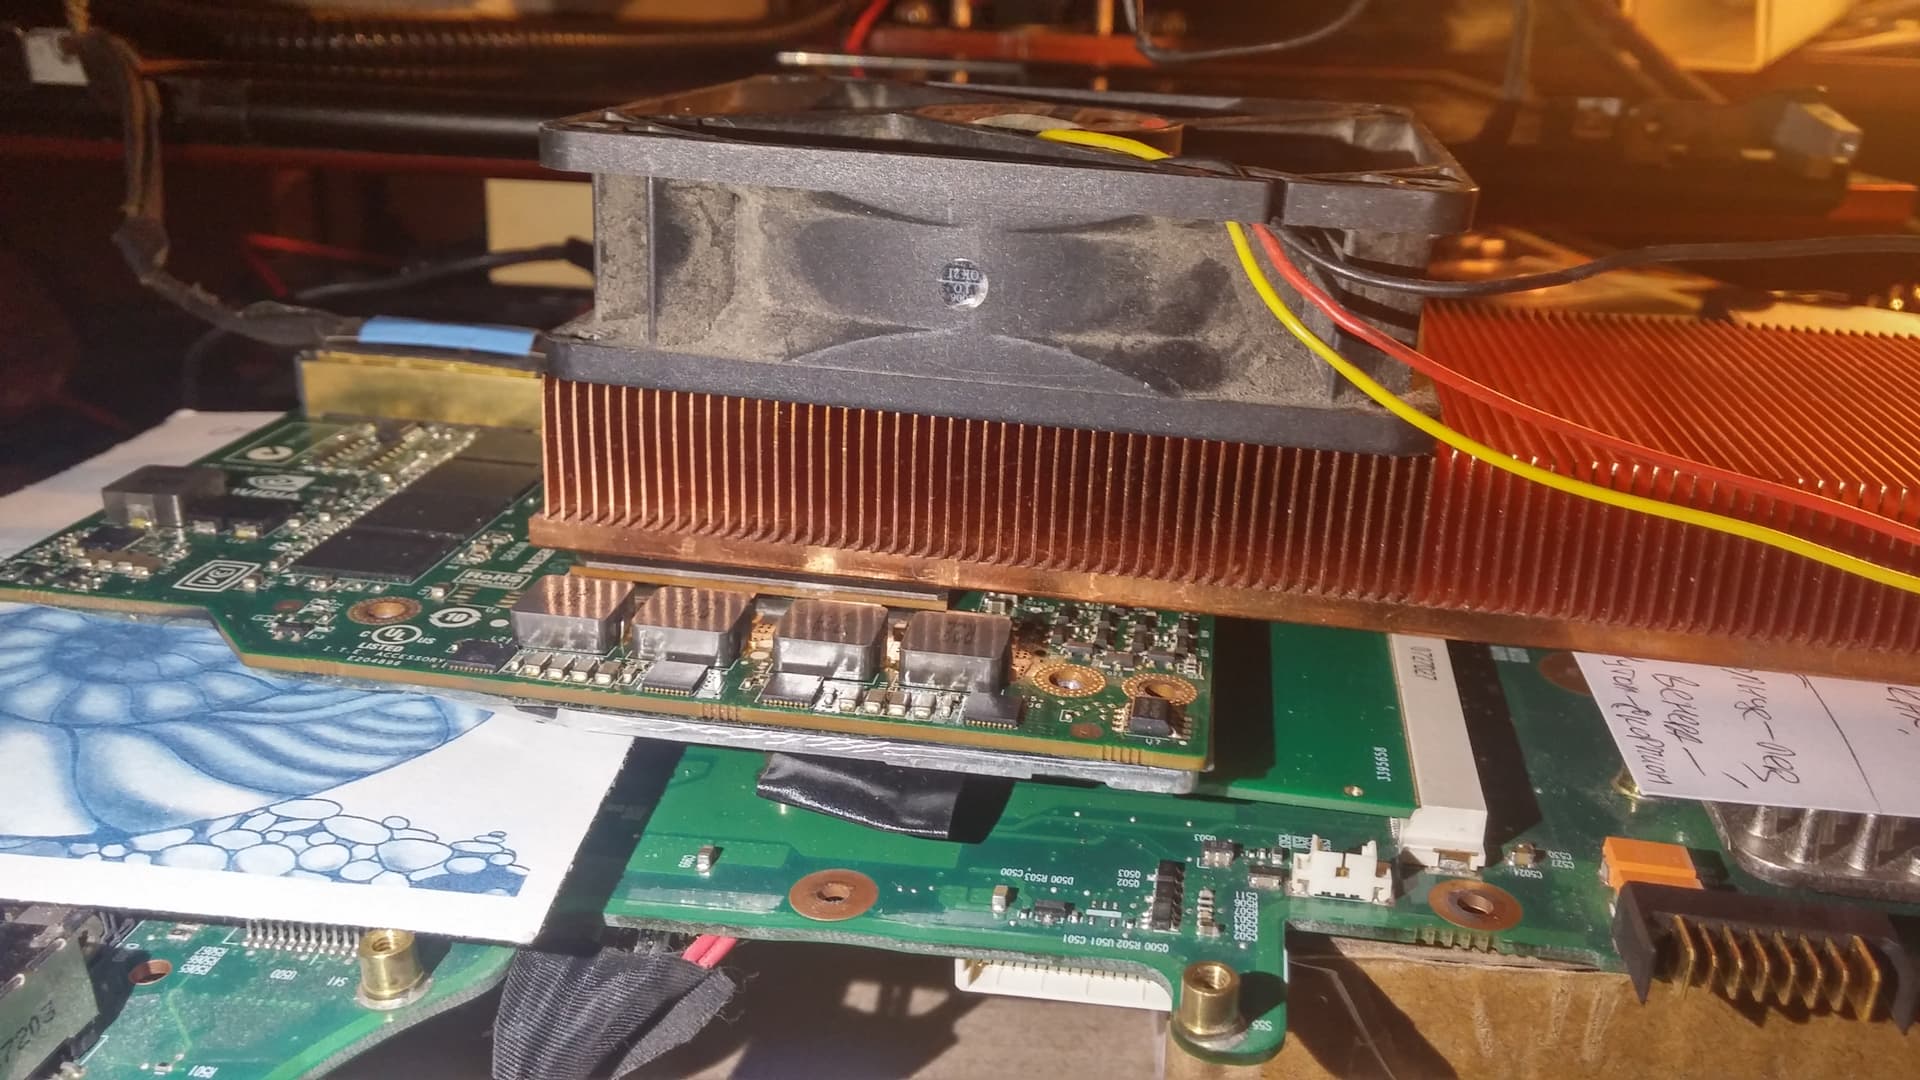
The final setup:

My biggest regret was that I wasn’t able to connect the Dragon’s keyboard because the connector was on the opposite side and it was hardly or inaccessible at all. Even when I got to connecting the keyboard somehow, the keys were unresponsive (maybe due to bad contact). So I wasn’t able to check hot keys for screen switching.

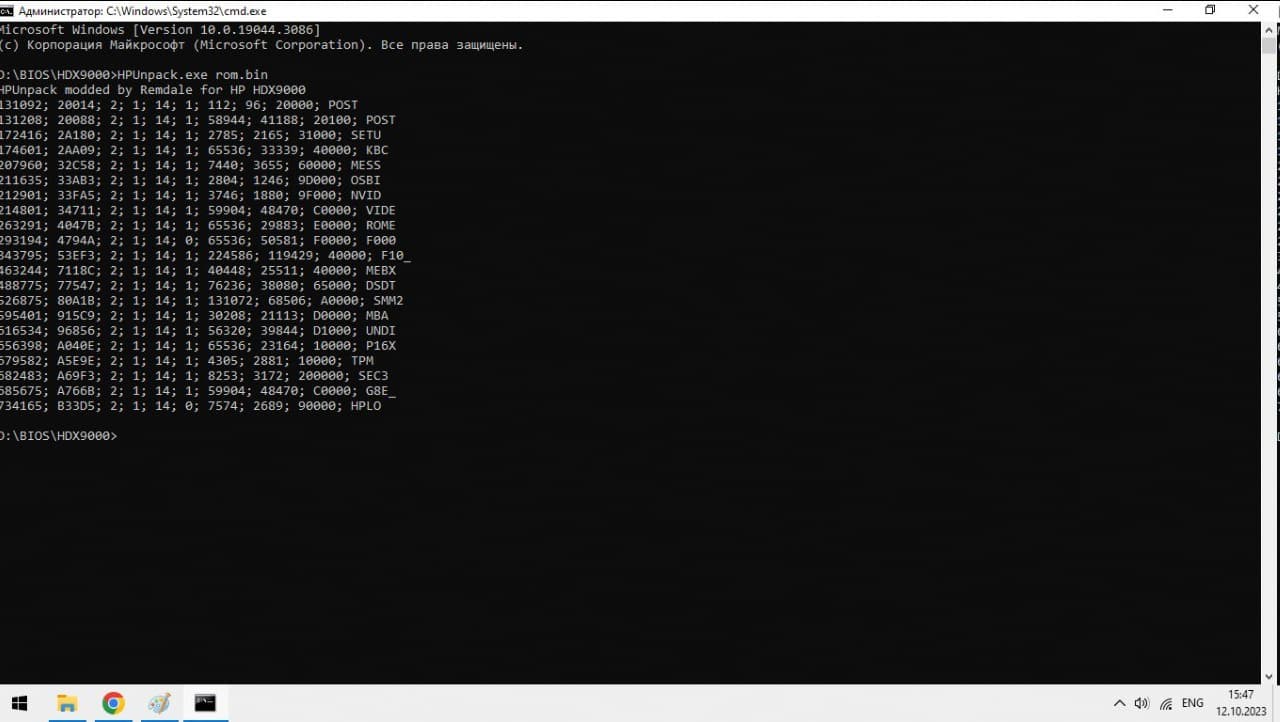
In order to get the 5000M to work, I replaced vBIOS in the system BIOS with the same HPUnpack which I modded for use with HDX9000 models. This is the BIOS (Quadro 5000M vBIOS, CPU microcodes updated, quad core DSDT, EIST, no wifi whitelist, G8E useless video module removed, CompuTrace and MEBX (Intel ME extension) not removed)
https://www.mediafire.com/file/mpdv3aprc2izp5r/HDX9000_5000m_BIOS.BIN/file
Here’s HPUnpack for HDX9000
https://www.mediafire.com/file/i7nz502ukk7bcr5/HPUnpack.exe/file

The video driver I was using was coming from Dell. Just needed to mod the inf file in order to install. I forgot to test the HP version, but I think it would be the same as it was with FX3700M.

One thing to mention. The picture quality on the VGA screen was not satisfying. It was the same problem like with the FX3700M. Too much brightness and EMI. The EMI waves were pretty much visible. Maybe the brightness can somehow be adjusted in the settings, but I’m not sure if it can be achieved. I’m wondering why the picture gets distorted at all. Maybe it has something to do the how the Dragons BIOS works or maybe it’s because of not enough EMI filtering, I don’t know.

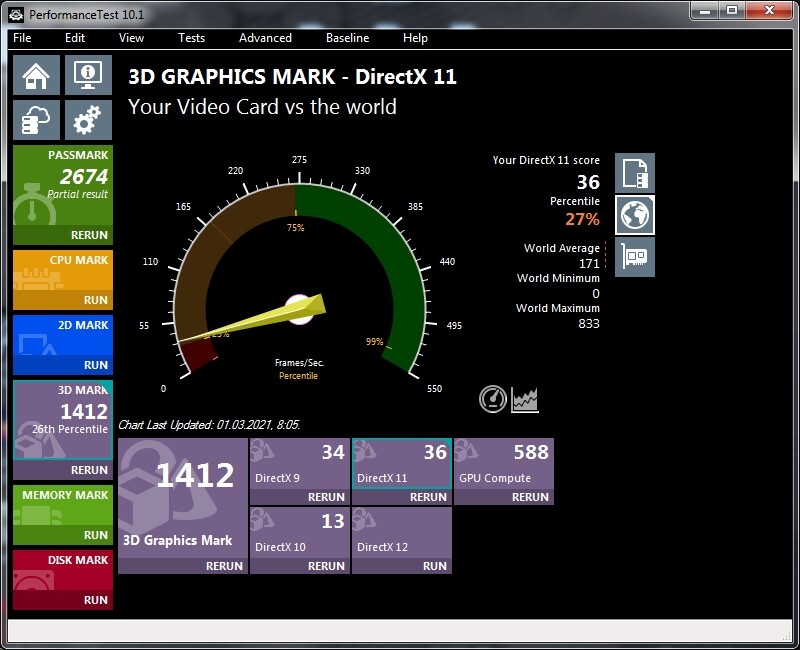
Now, the most impressive part. Testing.

14

I was stunned after seeing the results. I thought the FX3700M mod showed us the limits of the PCIe 1.1 interface, but 5000M has crushed my theory. I can now conclude that FX3700M can’t possibly deal well with PCIe 1.1.

I will remind you the results of the 8800M GTS and FX3700M just for comparison:

In the video below I’m showing you power consumption of the 5000M upon each stage of the test. During the most power consumptive GPU Compute test the power consumption maxed out at 104W. The Dragon can’t handle it for sure nevermind the poor GPU heatsink. The 8800M GTS’s power design is only 50W (if google is correct).

https://www.mediafire.com/file/5fgm06wp0crsuvd/Tests.mp4/file

I played Driver San Francisco using a VGA monitor

https://www.mediafire.com/file/deco3d1p7fl9r57/Driver_San_Francisco.mp4/file

The DC connection of the Dragon is very poor. Dell M6400 is using the same power plug, but it has more pins inside and should be capable of providing more power. I think it would be enough to replace the power connector in the Dragon and wire out a direct connection from it to the MXM slot. It’s pretty much achievable with the MXM-HE connector which can provide up to 16A according to the specification.5000M requires 5A, so we would definitely have to use a 240W power supply.

The maximum temperature of the 5000M got around 75 degrees with that huge heatsink and those 2 fans. I can’t guarantee that the heatsink was sitting perfectly on the GPU die, so I assume the temps could be lower. Especially if the die was in the middle of the heatsink.
The problem I have now is the CPU and GPU fans are running at max speed even after reverting back to 8800M GTS. Maybe there’s a driver issue or it’s an electrical malfunction. Will sort this out later.

Conclusion

The 5000M is pretty good, but requires a lot of power and good heatsink. It’s possible to replicate it, but it will definitely take a plenty of time because I don’t have its schematics. It’s utilizing LDVS, VGA and two Display Ports. 1 display port can be converted into HDMI right on the video card by building in some small DisplayPort-to-HDMI chip, so we could have a working HDMI port. The other DisplayPort could be wired out as a separate connector inside the Dragon’s chassis or used for conversion into S-Video.
This all can be done, but the original Dragon’s heatsink and 1 small fan would not be enough for good heat dissipation.

Another experiment is coming up soon which is about figuring out if a desktop PCIe video card can be installed somehow. I have a converter PCB already. It’s designed for Dell M6400, but it doesn’t matter since M6400’s video cards work fine with the Dragon.

1 Like

I have a big progress with the M6400 adapter. It’s working, but not all video cards can be accepted by the BIOS of Dell M6400. FX1500 seemed to work fine even though I didn’t run any tests. The video card was faulty, so it might have gotten in trouble if I installed the driver. Also, I definitely violated the PCIe specification as to the PCIe wire length difference. This might have also resulted in some trouble.
AMD HD 5700 ended up with a blinking cursor without getting to the POST screen. Powercolor Devil 13 R9 290X2 didn’t display anything on the screen at all.
I hope that the Dragon’s BIOS is not that problematic. Just need to make an MXM adapter for it.

Here are some photos and videos. Sorry for slow navigation in the BIOS. I wanted to use my mouse, but it didn’t work there. So I switched to using keyboard instead, but it was pretty far from me.

Video: BIOS setup screen

Video: OS boot

Let me clarify that this is going to be an MXM adapter for connecting desktop videocards to HDX9000

I reserviced my power button a while ago because it lost contact. I took it apart for cleaning up the oxidization. You know there’s a metal round thing for shorting the contacts inside. To my surprise they were 2. After removing the oxidization I put just one of them back in. Now the button pressing sounds softer and I don’t need to apply much pressure anymore. No soldering is required for this unless the metal housing gives up if you move it several times back and forth

Yowza! I’ve spent the better part of an hour reading your work on this machine. I’ve spent a few months with mine now, got a Core 2 Extreme X7900 in it with no issues (the X9000 feels too overpriced for only a little more of L2 cache).

I wanted to see if a QX9300 could go in it and for some reason I read the BUS speed of the HDX 9300+ boards (464591-001) was capable of a 1066mhz bus, but I was wrong.

I have hardware issues with my ATI 2600XT, I think the memory is failing. So I wanted to get the Nvidia GeForce 8800GTS that the 9300+ has, but on closer look, those boards have an extra finger length on the MXM slot, so I’ll need to do a motherboard swap. I was hoping it was just extra connectors for power or something, but I decided I’m just gonna do it right.

I also want to swap the HD DVD drive for a Blu-ray one, but it’s IDE and those aren’t cheap either. I tried getting HD DVD to work but not even their reddit board knows of any software.

But the poor dual core has a hard time decoding h.264 .mkv videos anyway so I don’t even know if Blu-ray will be effective.

So I’m looking at about $250 for the board, $100 for the GPU and $120 for a Blu-ray drive. I only paid $100 for the machine! So I’m patently checking for better deals.

Either way, it can do streaming fine. And this machine is a head turner everywhere I bring it.

Never heard of x7900, but it seems to be older than x9000. I’d get one to compare performance just out of curiosity.
The quad mod was put on hold until some clever reverse engineering hero shows up somewhere to insert the APIC table for quads. But it’s gonna be a hard time for the weak CPU heat pipe I guess.
This is my second Dragon which is working at 1066 FSB fine (x9100 CPU). If your mod failed, tell me the details. You must be doing something wrong,

It’s not a big deal to install 8800M into an ATI motherboard, just need to solder a couple of thick wires from the extra power pins on the videocard to the unpopulated area next to the MXM connector on the Dragon.

Which h.264 mkv video are you talking about in particular? 4K will definitely fail. But 1080p videos are playing fine for me. Even the hardest Bluray mvk video of the concert of Hatsune Miku (2016) is playing fine under 90% CPU load (X9100 3.06GHz@1066 FSB). The video config is: AVC (H.264), High 10 Profile, Level 5.0, 1920x1080, 59.940 fps
You need to do the 1066 mod for sure.

I’m not interested in the DVD drive much. Moreover, I find it unfair to occupy the relatively fast IDE bus with such a slow device. I would prefer unlocking UDMA modes for the IDE connector and using a SATA converter, but I don’t know how to do the unlock. Bios needs to be modded.

By the way, I’m making a small board for replacing the bluetooth module and use its USB connection for a mouse receiver or a flash drive instead. I now have a mouse receiver inside the Dragon, so 1 external USB port has become free

1 Like

Well clearly you’re way more of a power user than I will ever be because I find the four ports on it to be rather sufficient. Haha.

Regarding the cooling system the x7900 is a 44 watt CPU and under full sustain load I have no problem with thermals. When I bought it I pulled out a brick of dust that was covering the heat sink and then I had to replace the fan because it was rattling really bad. But I never see above 70° C under full sustained load. Most of the time it’s in silent mode and doesn’t even spin up, usually when I hammer it with a game or decoding a higher resolution video.

The only on paper difference I saw between the x7900 and the x9000, is the L2 cache is doubled on the x9000. But it’s also over 100 bucks whereas the X7900 was 30 bucks. It’s leagues better than the t7500 it came with though haha.

I haven’t done any modding to get the FSB overclocked, honestly I’m too scared to with such a rare machine and the process you had to go through in order to do it. I am watching a couple eBay listings if I can get a spare one then I might do the tinkering on one and keep a working one to the side because this machine does have sentimental value for me, as I’ve always loved this era of HP laptop, and when I was in college a dorm hall meet had one of these things and I never got a chance to actually see it but the whole concept of 20-in laptop was fascinating to me. And I was actually looking for an HDX 18 with the AMD Phenom and GeForce 180M when I ran across this and it just unlocked a bunch of nostalgia. So I got it with a yolo bid.

It is the perfect all in one solution for retro gaming for me.

I just don’t like accidental interference with wires and other stuff that’s connected to the USB ports. My mouse pad is very close to the laptop because of not enough free space around it.

When I mentioned about the heatpipe I was talking about QX9300. By the way, your x7900 is probably running cooler because you don’t have an overclocked 1920x1200 screen along with 8800M. My CPU temps increased by 10 degrees more when I installed 8800M. ATI cannot provide 108Hz refresh rate while Nvidia can, this is the frequency my screen is now working at. Maybe that’s one of the reasons why the CPU temps got higher.
You’re lucky to have your cooler running silently. Mine started spinning up and down with every action after I installed the 8800M. It was so annoying and distracting. Funny enough, something went wrong later and the CPU fan stuck at the max speed forever. The automatic speed adjustment is dead for an unknown reason, so I connected the fan through a potentiometer and now I can adjust the speed to whatever is convenient for me.

You can do the FSB mod if you know how to use a solder iron, that’s pretty simple.

Our laptop is very incredible by its design, but it’s pretty weak now. Consider looking at Panasonic Toughpad FZ-Y1 (or UT-MA6 or UT-MB5). I think this huge 20" 4K tablet can be installed into the Dragon and I would enjoy having a capacitive screen. But its aspect ratio is 15:10 which is why I don’t feel excited enough about getting it. What do you think?

Okay, I’m fed up with the Radeon HD2600XT. I bought Mobility Radeon HD4850 512MB, which is lying unused and collecting dust. I want to change that. Upgrading from HD2600XT to HD4850 will give an unimaginable performance boost, so I want to know how to convert BIOS to replace vbios of Radeon HD2600XT with HD4850. I want to take a risk and check whether the card from the MSI GT729 laptop will work in the HDX 9000.
I know there was a BIOS editing program (I don’t remember which one), but I would like to know where in the BIOS I should replace Vbios HD2600XT with HD4850. I have already added 8 GB of RAM and changed the processor to T9300.
I have an MSI HD4850 Vbios from Techpowerup with a .rom extension and I’m ready to take the risk.

There are some things need to be kept in mind regarding replacing the video card:

  1. MSI GT729 is following MXM hardware specification while HDX9000 has the LVDS interface inverted (upper and lower (i.e. even and odd) LVDS traces need to be swapped) on the LVDS connector.
  2. If the donor laptop is following MXM hardware specification, then most likely the software specification will be followed as well. It means that MSI GT729 has an MXM structure sitting in its video card and it’s bound with callbacks both in the system BIOS and the vBIOS. So whenever you start your HDX9000 with an MXM software compliant card, you’ll get a 30 sec delay caused by a startup message saying that the MXM structure is missing. While HDX9000 is not following the MXM software spec and HD2600XT is treated like a normal PCIe card. The message itself can be skipped by editing vBIOS somewhere, but I don’t know where.
  3. HD4850 seems to be a PCIe 2.0 card and who knows if it’s going to perform better in the PCIe 1.1 mode than HD2600XT. In my case FX3700M performed worse than GTS 8800M.
  4. There will most likely be a problem with setting contrast through the VGA connector because of the contrast setting device (or function) having a different address either in vBIOS or system BIOS.
  5. Brightness adjustment most likely will not work.
  6. What’s most important is that MSI GT729 is using a 6-bit LVDS LCD while the Dragons LCD interface is 8-bit. You’ll need to find out if HD4850 can switch to 8-bit mode. I don’t know what will happen if a 8-bit LCD is commanded to work in a 6-bit mode. 6 bits means 262K colors on the screen compared to 16.7M in the 8-bit mode.

I can share the utility for replacing vBIOS in the main BIOS, but it will take me a while to make up a guide. So just let me know if you still want to give it a go.

I’d also recommend you to go for the 1066 FSB mod and install X9100. This is my stable config for the moment, RAM (SPD flashed) working at CL4 at 1.96 volts

Despite everything, I still want to replace the HD 2600 XT with the HD 4850. If the HD 4850 produces annoying errors, I will flash back the original bios and go back to the HD2600XT.
Is the CH341A programmer compatible with the BIOS chip in HDX9000? Where is the BIOS chip located on the motherboard?
If the HD4850 works with HP, then my next step will be to increase the FSB bus to 1066 and hunt for the X9100. Any progress on quad-core processors?

Here’s the utility
https://www.mediafire.com/file_premium/i7nz502ukk7bcr5/HPUnpack.exe/file

This is the command for replacing vBIOS
hpunpack HDX9000_BIOS.BIN replace C0000 VIDE your_vBIOS.bin

Just make sure to replace the file names with yours and look for “newBios.rom” file after finishing, it will be your modified BIOS to be flashed.

And here’s the location of the BIOS chip (SST25VF080B), it’s under the keyboard in the left bottom corner. Your programmer should support that chip.

image

Speaking of quads. I’m talking to Maxinator500, maybe he will help us insert the extended APIC table for quads into the BIOS

HPUnpack reports an error while flashing:

hpunpack HDX9000.BIN replace C0000 VIDE HD4850.rom

HPUnpack modded by Remdale for HDX9000
Performing action: replace, target address: C0000, name: VIDE, source file: HD4850.rom

Unhandled Exception: System.ArgumentException: The offset and length values are out of range of the array or the number exceeds the number of elements between the index and the end of the source queue.
in System.Buffer.BlockCopy (Array src, Int32 srcOffset, Array dst, Int32 dstOffset, Int32 count)
in HPUnpack.Program.Main(String[ ] args)

CMD running as administrator. I also changed the Vbios extension from .rom to .bin and still the same error.
Windows 8.1 64bit.

Seriously, I don’t know how to explain this magic. It’s the same for me now on my HDX9000, but I have tried to do the unpacking procedure on another PC and it worked fine. Just have a look

Try doing it on another computer or give me the vBIOS file and I’ll do that for you. But the program works well with 8710W’s BIOS. Get it from the web and use it as an agent to replace the video module and then move it into the Dragon’s BIOS via a hex editor.

I have figured out that the BIOS file was wrong. That was the reason for the crash. I have tried another file I had and it worked well. Here’s a working ATI version for you. Try replacing the module here
https://www.mediafire.com/file/2juj3afxy0y3hkq/BIOS+ATI+(no+whitelist+microcodes).bin/file

I didn’t notice your previous post. I’ll check if it works soon.

It worked!
We’ll see if the Radeon HD4850 will work in the HDX9000.

What program is used to change the bios? I remember that I did it with some Windows program. I had this program from the old forum about HDX9000, but this forum was closed and I cannot find this program on my disk.

There’s just this command line utility. The config you want to have is set up through a text file which you then upload into the utility, but not all parameters work. Examples included
https://www.mediafire.com/file_premium/h2v7bf7qjdz2yk4/HP_BIOS_Configuration_Utility_%2528BCU%2529.zip/file

I want to flash the bios. This program is from what I read in the pdf file for editing the bios. I remembered that previously I had a bios .exe file that flashed the bios. Here I have a file with the .rom extension. I looked for the option to flash from USB in the BIOS but there is nothing there.
How do I flash the bios from a .rom file?