Several counter-questions. 1) Do your current updates work? 2) If I understand correctly, then can not you update VBIOS? But if you use the UEFI mode, then updating the VBIOS does not make sense.
Link to exact BIOS exe download from Acer you want modified and I will see if I can update all the microcodes for you. If I can, I will tell you how I did it so you can next time around.
@winactive You’re welcome! I can find hidden links
I tried normal method I would use to do this, extract file that has the microcodes with UEFITool, edit in hex edit, replace, but this BIOS is broken and poorly coded by default so when UEFITool tries to rebuild and correct it fails.
So in this instance direct hex edit is suggested. Open copy of the old microcode in hex editor, new microcode, and BIOS. Select all, copy on the old microcode, go to BIOS file search by hex using the copied old microcode file and use “Find All” if you have that option so it selects the entire code once found. Once found go to new microcode select all and copy, then go back to the BIOS file and paste new over old. Save BIOS, done. If you’re hex editor does not allow you to search by pasting entire microcode or does not select all once it finds it, here is the location and size (Size 4800 / 18KB / 18,432 bytes - located at 00610cc0 starting position, ends at 006154bf)
FIT Table correction not needed this time around because microcode replacement is exact same size as old version.
Since this is now modified BIOS, you may not be able to flash with OEM tools, you may need to use AFU/AFUWin or FPT. If using FPT use -bios flag to flash BIOS region only, since that is all that’s needed (So FPTw -bios -f BDW.fd). You may need to rename .fd file to .bin or .rom for FPT, that is fine. If you get error along lines of BIOS region protected, etc, then follow guide below
@Lost_N_BIOS sorry, the tutorial is way over my head. Not sure what I am looking for.
I have the tools from the start of the tutorial.
Taken a break three times, don’t understand how to progress from Step 6. as something refers to a value from Step 5. but the search string looks specific to that mainboard?
Everything is still reported as messed up when opening the modded image so not even sure what I am looking for is even in either tool.
I assumed it would be locked BIOS. Please follow the guide I mentioned, but only from #6 onward, I gave you the value you need from step 5 >> 0x4AB << This is that value, so when you boot to grub you will type >> Setup_Var 0x4AB 0x0 That’s all.
I have no clue what you mean about “Everything is still reported as messed up when opening the modded image so not even sure what I am looking for is even in either tool”? What is messed up, and how, and in what tools? You do not need to do anything to this BIOS, except flash it, no further modifcations or changes should be done to the file, so I’m lost as to what you’re opening it with and what is messed up, ect. Nothing to check with it, get past the flashing mod BIOS problem and you’re done.
I wanted to understand how you arrived at the value I needed, but I don’t follow the earlier steps in the tutorial. I was referring to the fact that the UEFITool programs still complain about the image being in a mess with overlap etc.
I am not being critical of your work and sorry if this has caused you any frustration.
It’s OK, sorry I didn’t explain better/more. I arrived at the values using the first steps of the process.
No frustration here, not at all, only wasn’t sure what you were talking about, and thought maybe you were still trying to make more changes or something like that. If stock BIOS has errors in UEFITool, that’s how it always will be usually, unless it’s able to fix something’s which it does sometimes. My goal is, if errors on stock, hopefully same once edited, except maybe a checksum fixed or something like that. In this instance, all errors match in stock and post-mod, not even checksum is corrected, so goal accomplished. It’s due to poor BIOS coding by the manufacturer
Booting to this, is only to change the variable, once done you exit and boot to windows. On the password, secure boot, all boards differ but usually just delete the keys will allow you to then disable, but no matter how you arrived there it’s done now.
Are you asking me what we are trying to achieve? If yes, then the goal is to do this to allow you to flash the BIOS per the commands I gave in post #66 Doing this in grub (white text, no yellow) allows you to disable the BIOS lock, that gave you the error you received in post #67 when using FPT
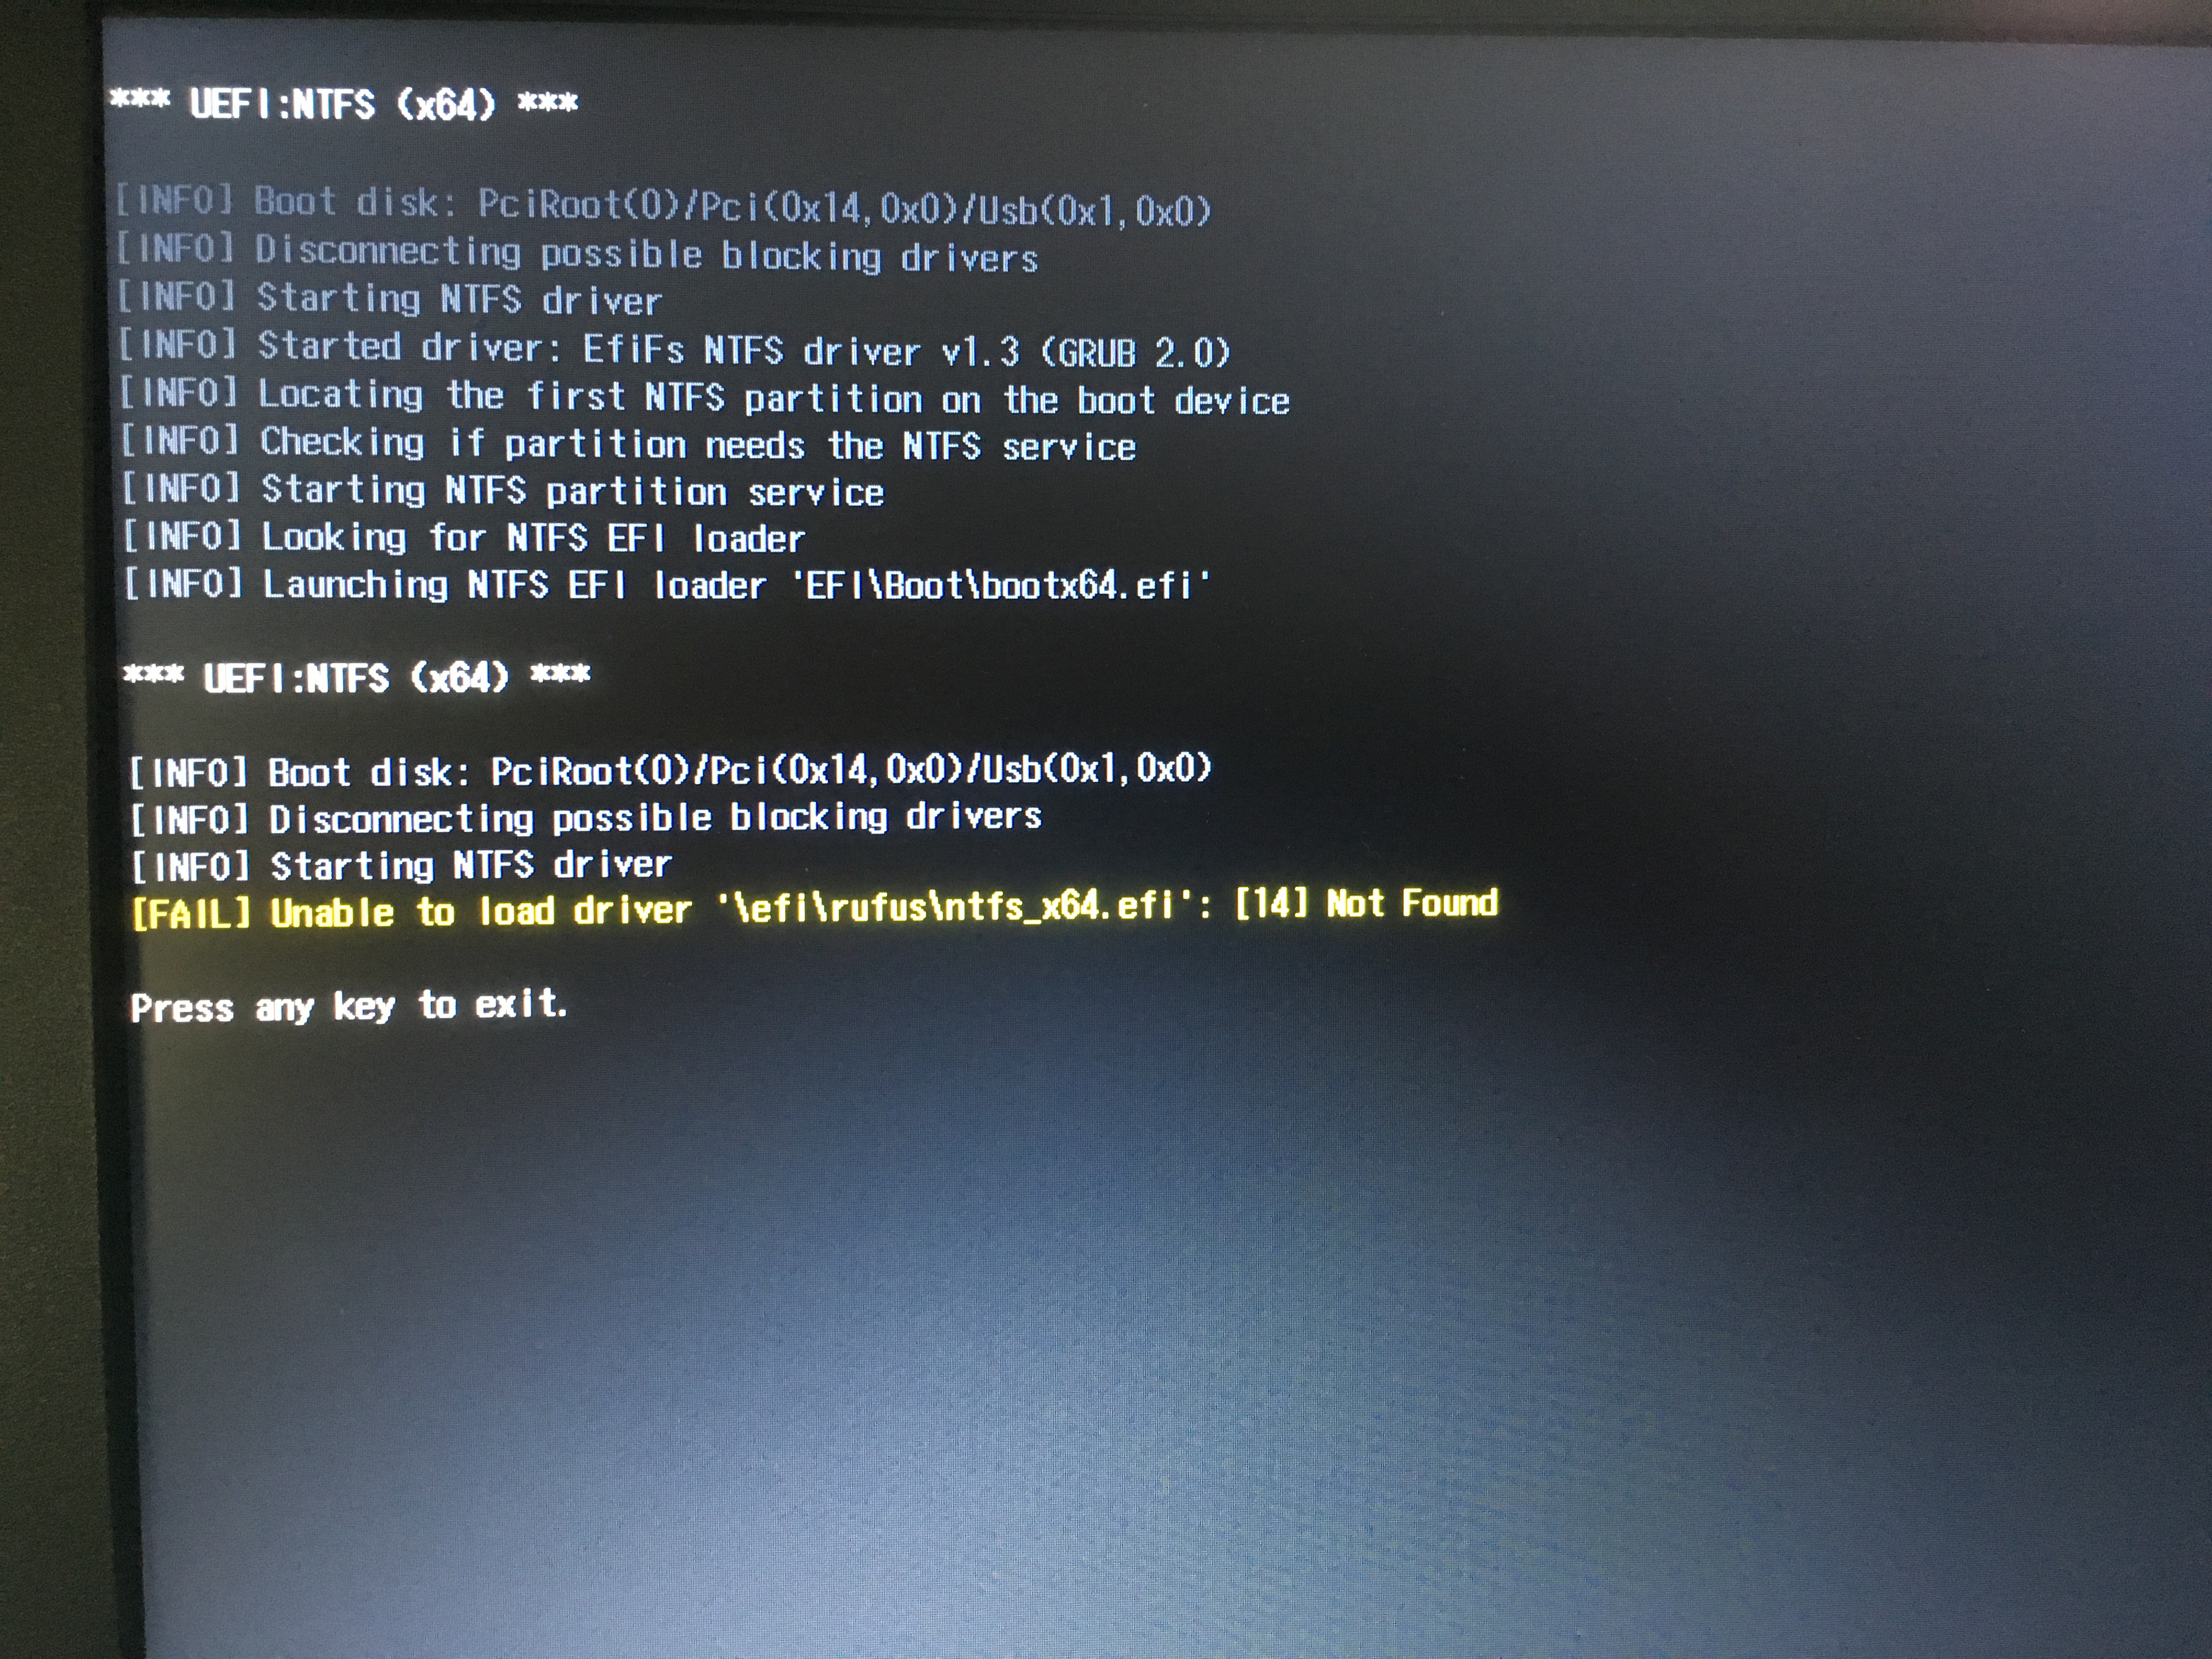
HP Tool will not work. Apparently all my USB drives are write-protected. (They’re not, it’s just that tool is from the ark and I use modern high-speed, high capacity USB drives.)
It goes so far as to tell me one drive has bad blocks - it does not, once I reformat it in Windows it works fine.
Edit: So I don’t give up and I try RUFUS again, this time I get to GRUB and do the setup_var 0x4AB 0x00 (this was successful)
Reboot into Windows with CTRL-ALT-DEL (also tried REBOOT command)
Did a bit more reading, tried the Sleep trick, didn’t work either.
I have never seen any issue with the HP tool and any USB drive new or old. Please try on a small cheap USB stick then.
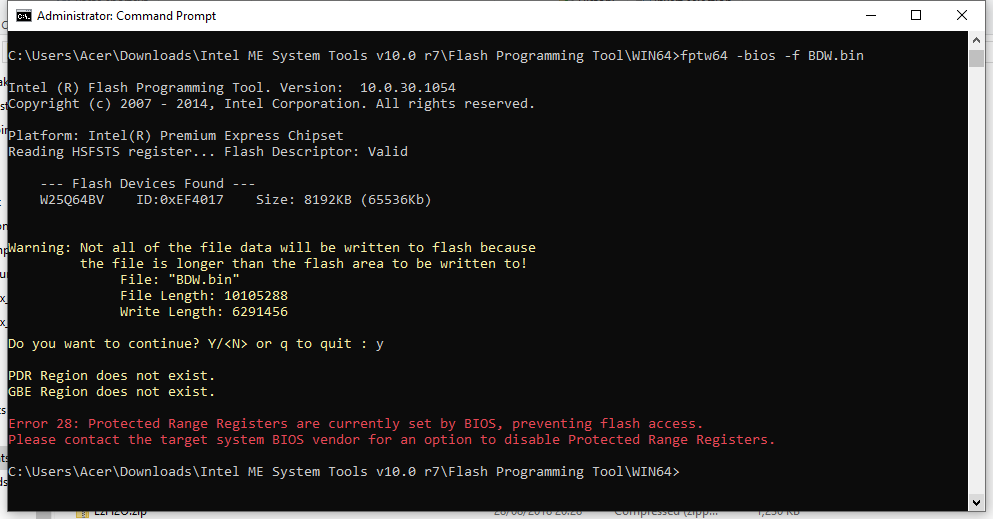
Your image is bad, with yellow warning and size error, should never proceed, glad your board is OK! That was correct, you have it unlocked now, but are using the wrong kind of BIOS file/format for this type of flash it seems. Now that it’s unlocked, which you may need to do again, flash with AFU instead. I see PRR set error though, another worse BIOS lock than previous one, so you may only be able to flash using official tools and unmodified BIOS (unless you can edit the official tool’s platform.ini file to not do security checks)
Did you order the $3 flash programmer yet? If not, get that done so it will arrive soon, then none of this will be an issue anymore
I meant your picture of the FPT process with yellow warning is bad, when I mentioned image, sorry for any confusion on that.
I think ini edit, or flash programmer is your only option due to the other lock (@28 error). I will see if I can find anything that may help in the ini file