Hey guys, new member here. Firstly, I’d like to give a big THANK YOU to Fernando, and to the OP of this thread for putting all of this together. I went through the painstaking process of learning this whole procedure and have now successfully installed windows 10 onto my new Samsung 970 EVO NVME chip via a Rivo PCI express adapter I got off of amazon >> https://www.amazon.com/Rivo-PCI-Riser-Ex…r/dp/B0773ZR6L8… So after installing everything I decided to run a benchmark (ATTO disk benchmark) and my results were pitiful. With a 256mb packet my MAX read/write speeds were in and around 380MB… I ran the very same benchmark on my old SATA 2.5 SSD and was seeing read/writes as high as 520mbs…So my question is what’s happening? How do I remove this bottleneck to get the full NVME speeds?
@Bryaneff - Do you have BIOS set to AHCI? What slot do you have the adapter installed into? You want it in a Red slot
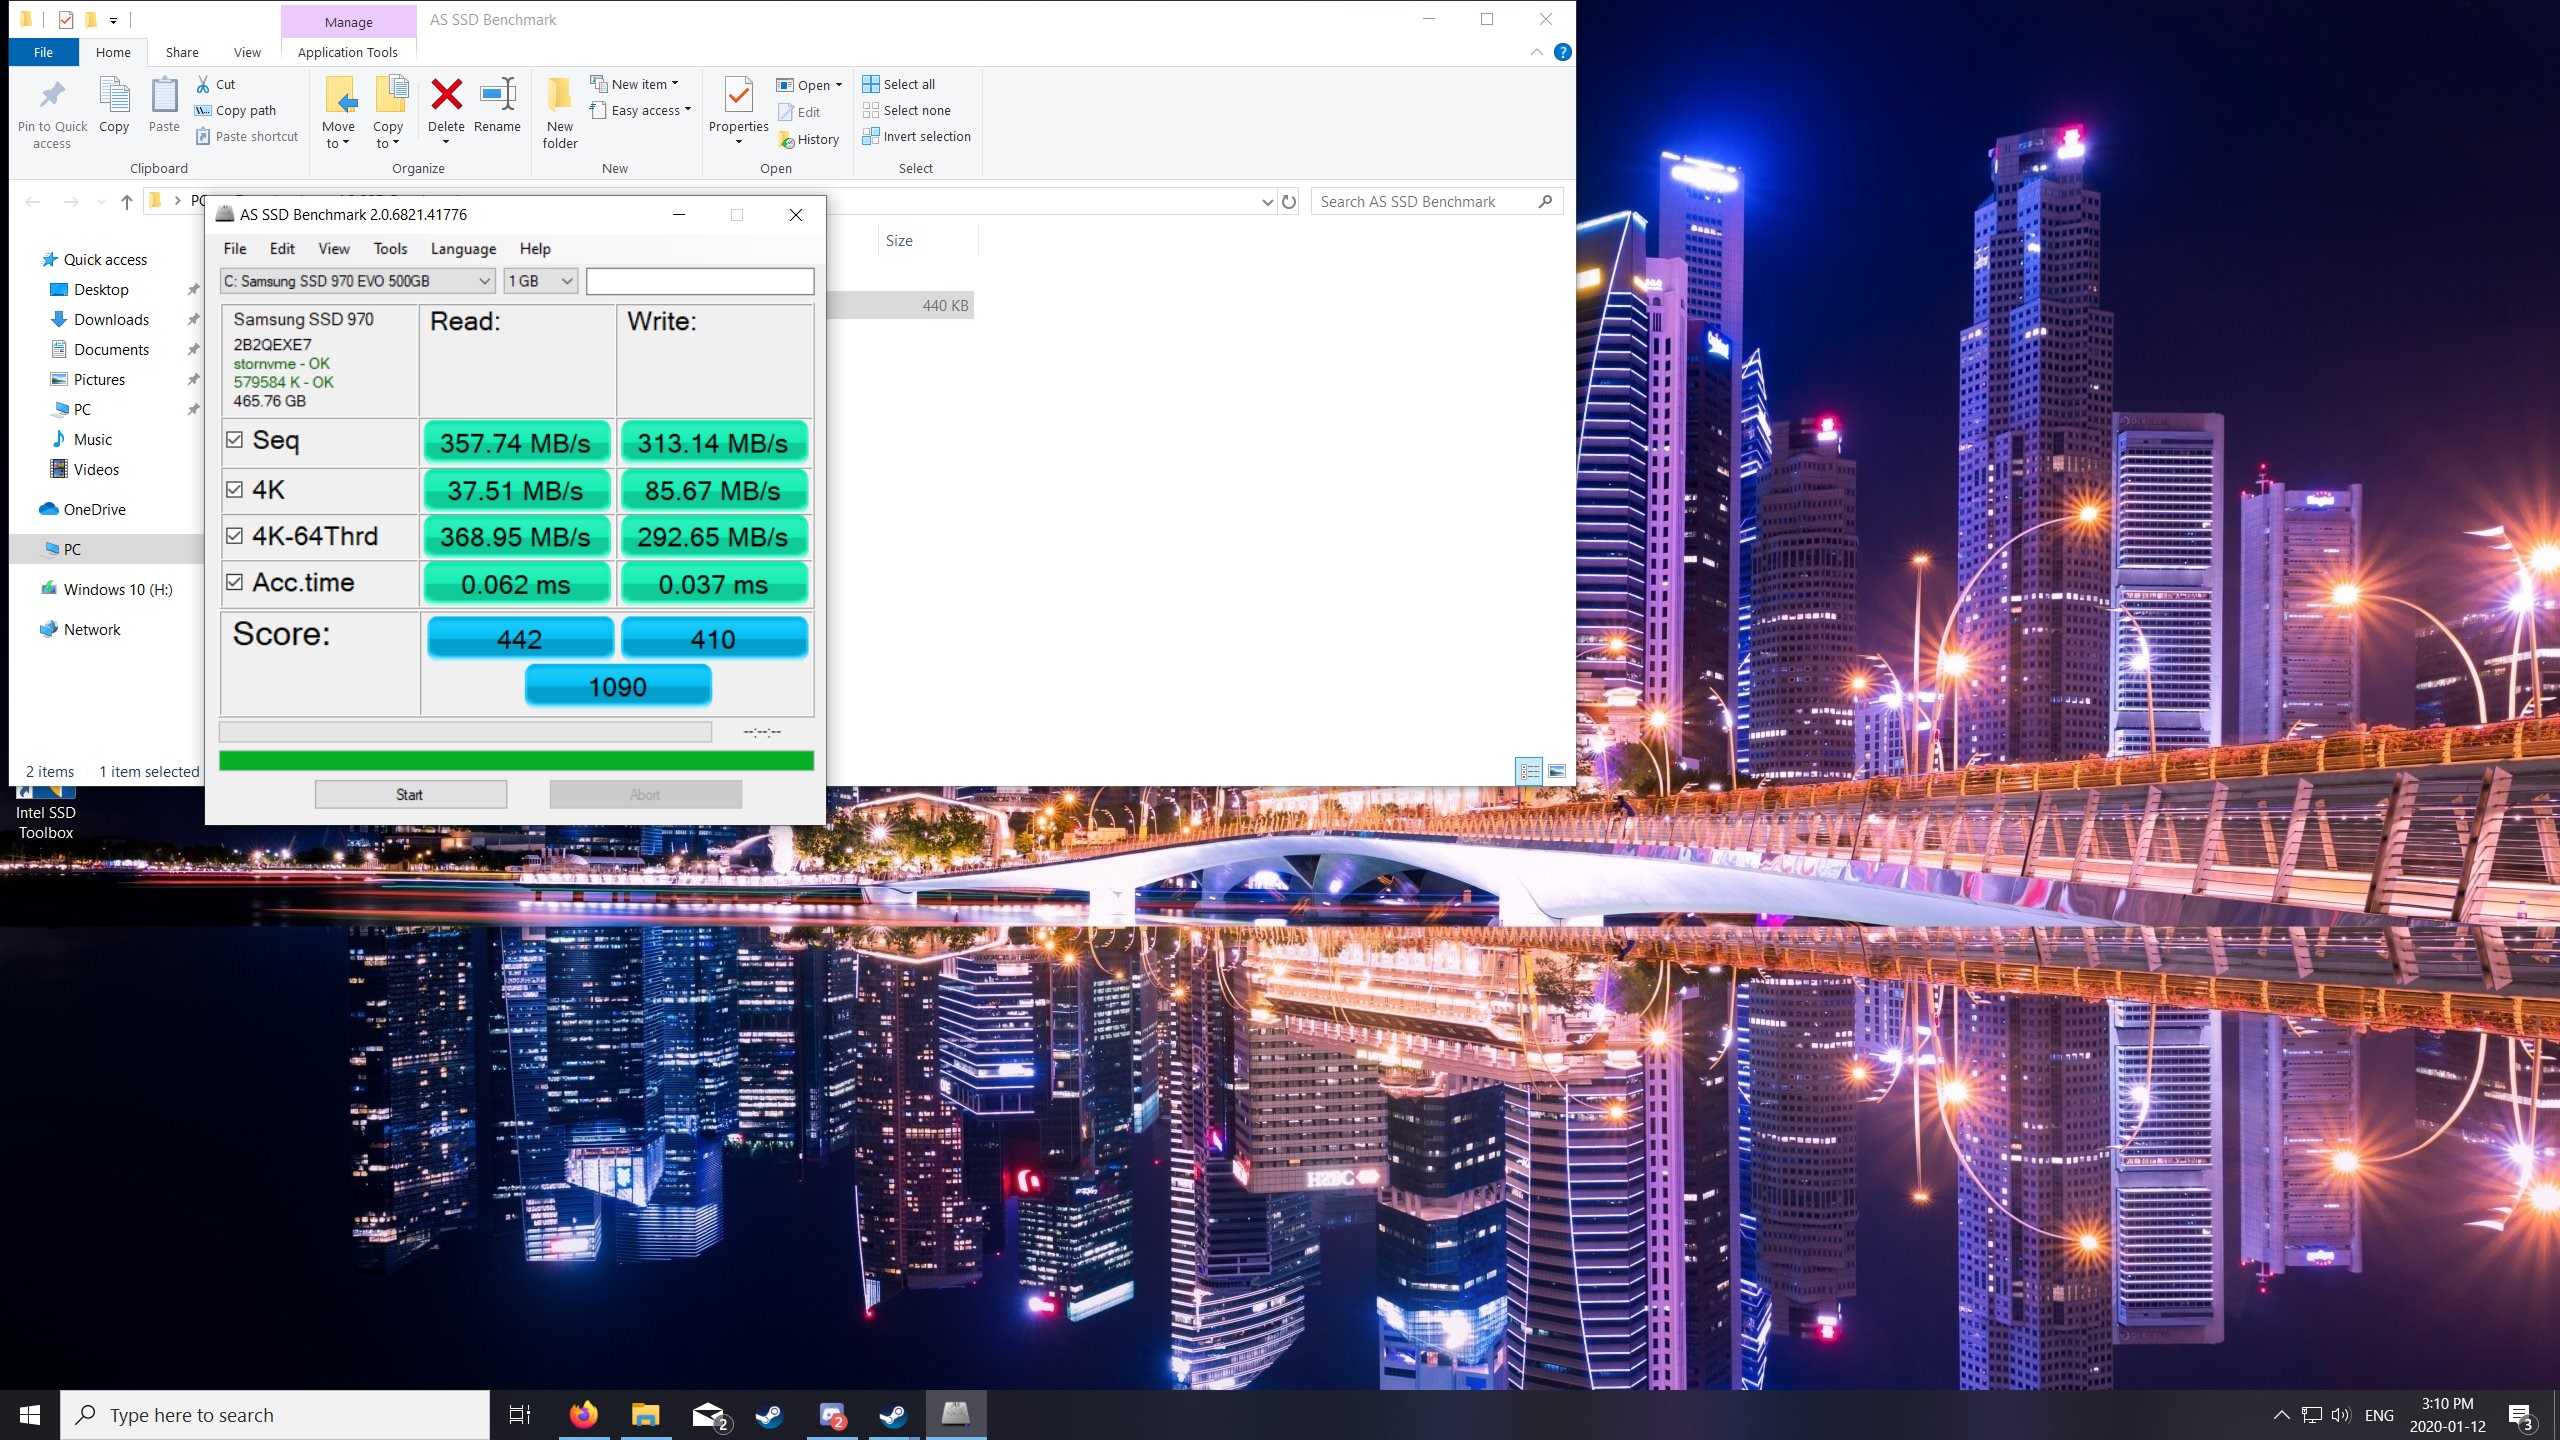
Please download AS SSD benchmark, download is at the bottom of page, little box/package
https://www.alex-is.de/PHP/fusion/downlo…p?download_id=9
Run this, select your C drive, run the benchmark and show me image of entire window/results.
Also, download CrystalDiskInfo, run this, at top in menu list, select “Disk” and choose your NVME, then show me image of the entire window of this too
https://crystalmark.info/en/software/crystaldiskinfo/
So I checked my BIOS and was in AHCI. The second step was to switch from the black PCI-E port to the RED one and boot. Ran an overall system benchmark and was surprised by the MASSIVE jump in R/W… But still performing short of expectations… So then I ran Crystal Disk Mark and here were the results… Before/After
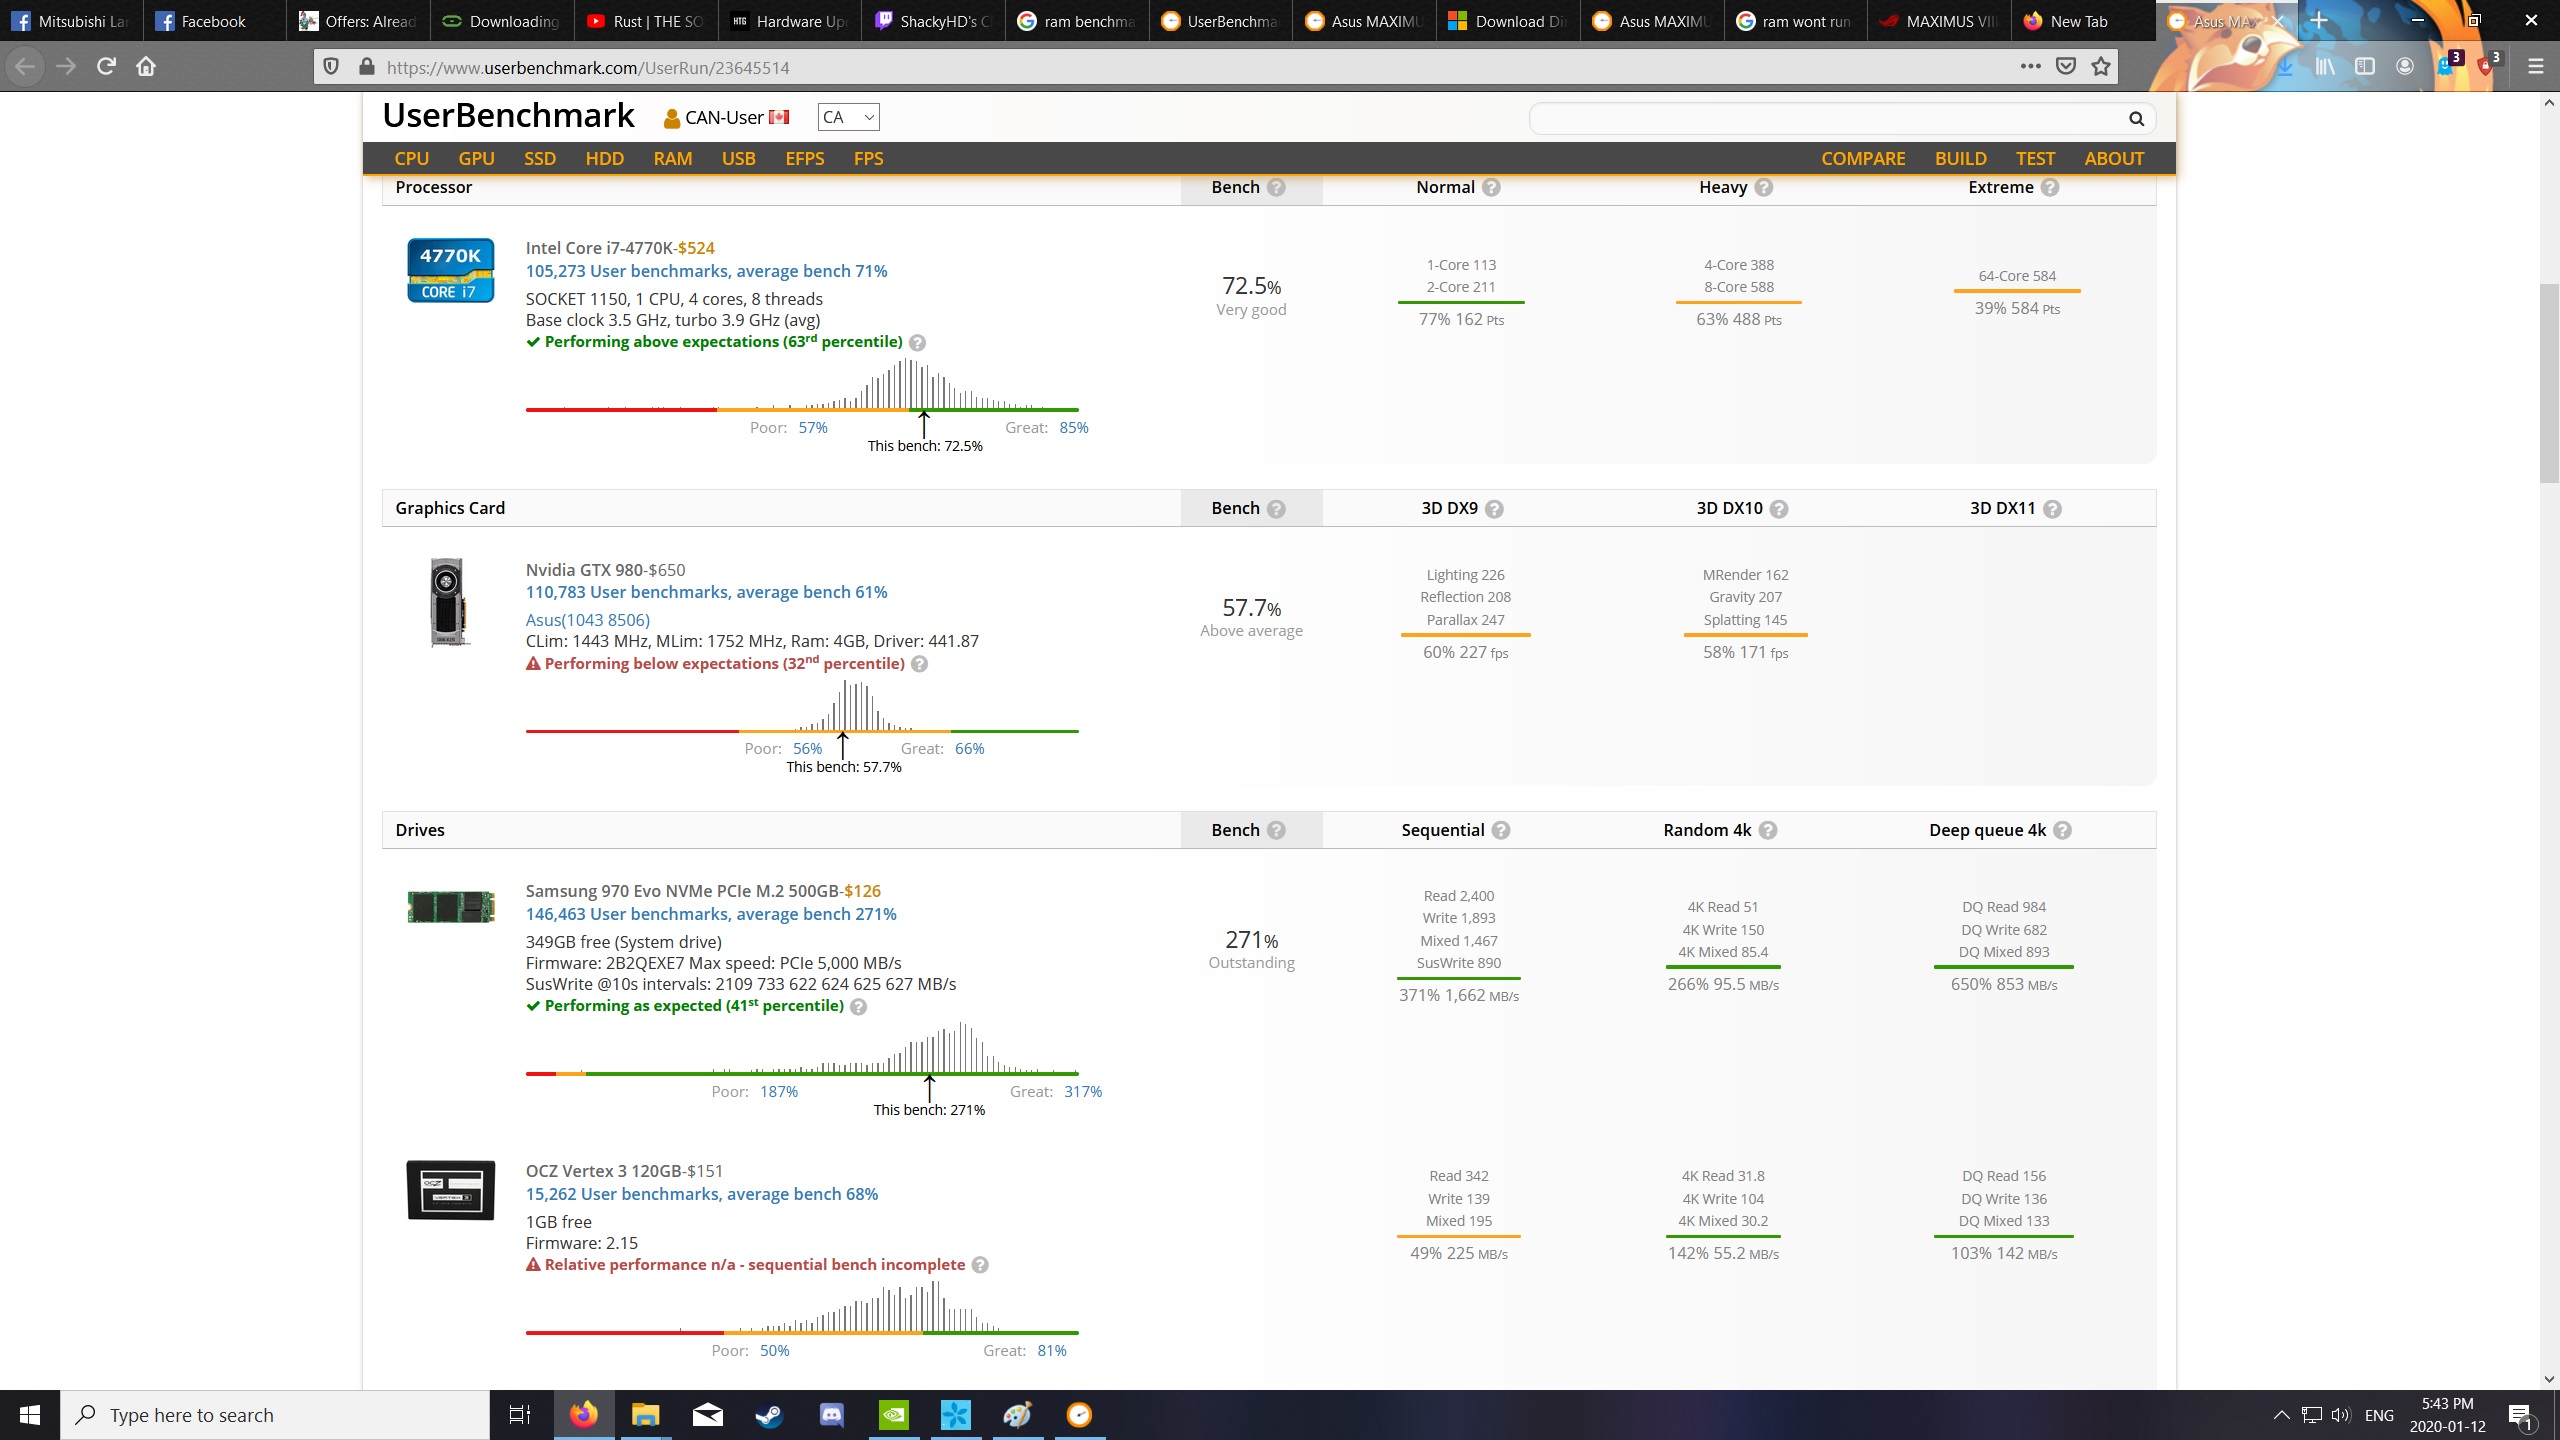
Would you say that these results are optimal? A general benchmark I ran (userbenchmark.com) told me I was "Performing below expectations (37th percentile"

Also, I noticed others were posting about this and was wondering if any solution was found? I have 4 sticks of ram @ 4gb each 2400 CL10 and I have tried all sorts of stuff to get them to perform at their max speed including changing the Xmp profile twice and following ASUS guide to manually changing the ram frequency and timing profiles… Saved and reboot and STILL capped at 1600… I was reading online that my haswell CPU 4770k is limited to 1600 and will automatically de-clock any installed ram. But further research showed that it’s very possible to do, and stable as well. I’m at a witt’s end as to what to do to unluck it’s full potential… Thank you in advance guys!

bump
2
3
4
5
6
7
8
9
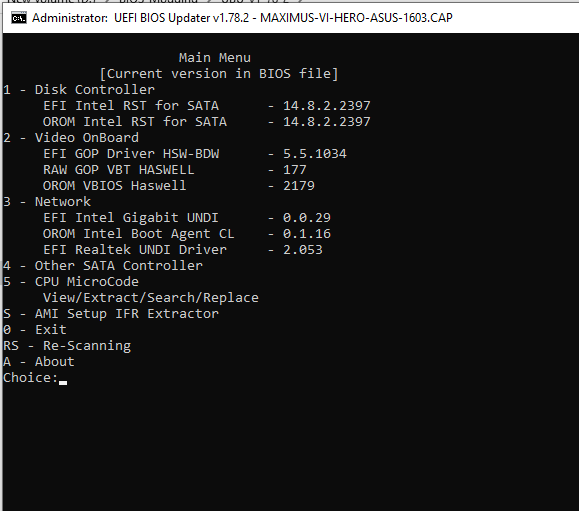
Components BuiltIn (1603) Modded
======================= ============== =======
EFI IRST RAID for SATA 12.7.0.1936 ----> 13.2.0.134 + 13.2.2.2224
EFI GOP Driver Haswell 5.0.1036 ----> 5.5.1034
EFI Intel Gigabit UNDI 5.4.19 ----> 0.0.29
OROM Intel Boot Agent GE 1.5.43 ----> 0.1.16
EFI Realtek UNDI 2.020 ----> 2.053
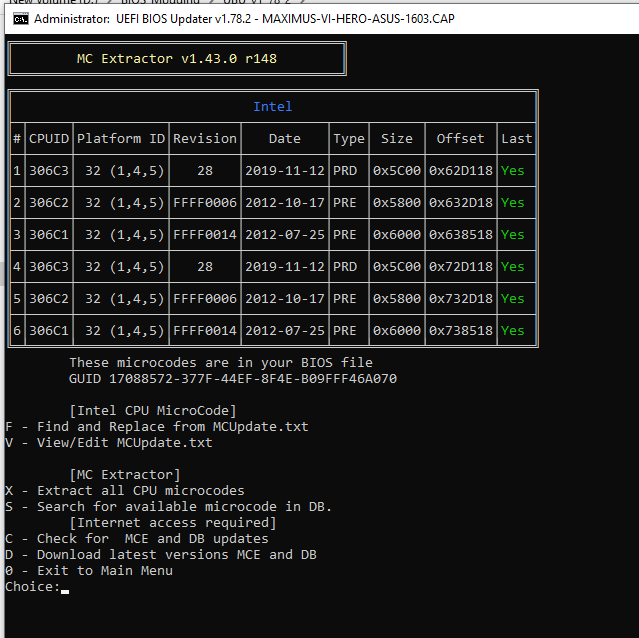
CPU 306C3 microcode 19 ----> 28
NVMe Support Not Exist ----> NvmExpressDxe_4.ffs
* Fully updated with UBU 1.77 + NVMe support (manually with MMTool 4.50.0.23) ! c3r3b3llum's modded bios only have NVMe support and microcode update (27).
* There is no RAM problems in this mode ( I confirm that the modded bios in the first post is broken about detection of memory with the right frequency.)
* We need AFUDOS because of /GAN support & to prevent "Security Verification Failed" error.
* IRST EFI/OROM version's are Fernando's best recommended, EFI (13.2.0.134) + OROM (13.2.2.2224).
* Best with RST 13.2.8.1002 drivers. Search forum and you can find it.
* I have no idea about how microcode 28 is performing on overclocking. Maybe you can share your results here.
* It is your responsibility to use this BIOS. No Warranty, No Guarantee..
! You need to flash BIOS with below procedures to prevent ASUS specific "Security Verification Failed" error.
In my tests;
- ASUS EZ Flash is not working,
- ASUS USB Flash method is also not working because of "Security Verification Failed" error.
1) Get rufus and create a FreeDOS USB disk,
2) Get the Modded BIOS ( MH6.rom ) + Original BIOS ( MH6.cap ) + AFUDOS + Automation BAT's > here <
3) There are total 5 files, copy them to FreeDOS USB disk,
4) Boot from USB disk and select desired language format
5) First run "ganori.bat", typing "ganori" is ok to run .bat file,
6) After completed run "ganmod.bat", typing "ganmod" is ok to run .bat file,
Enjoy with modded BIOS.
~Hasan
EDIT: UBU Version added.
Hi,
does anyone have tried the modded bios by oldschoolh ?
thanks
Hello everyone,
I’ve loaded the oldschoolh bios, and thank you by the way
non problem so far. Memory full detected. microcode 28.
geek bench stats are the same as with my version
thans for everything,
Good to hear that my modded bios is stable for you, ops may edit the first post and link to my stable bios links. Hancor’s is broken anyway.
~Hasan
Hello @oldschoolh
Could you update version 2103 for Z-87 PRO?
[OFFER] ASUS Z87 PRO v2103 complete mod
There are also problems with memory, unfortunately.
Sorry, this process was tricky and time consuming for me.
The tricky part that i remember is you have to add nvme support as a last step after all other moddings done.
Also you need to use AFUDOS method that i explained my >> old post <<.
~Hasan
@oldschoolh
Very sorry. It remains to be hoped that @hancor will redo the mod, there in the theme, it seems to have been asked about it.
@junior @vladovmike @Rashad624 @dosmond @GrimmBeard @changf @Spekulatiuscreme @c3r3b3llum @DrPest @NeO29 @Bryaneff @oldschoolh @lemoff
On my lengthy to do list, after tax filing season and redoing my network at the moment.
I’ll get there eventually.
Cheers
Mods to EFI_ROM are as follows with v28 microcode.
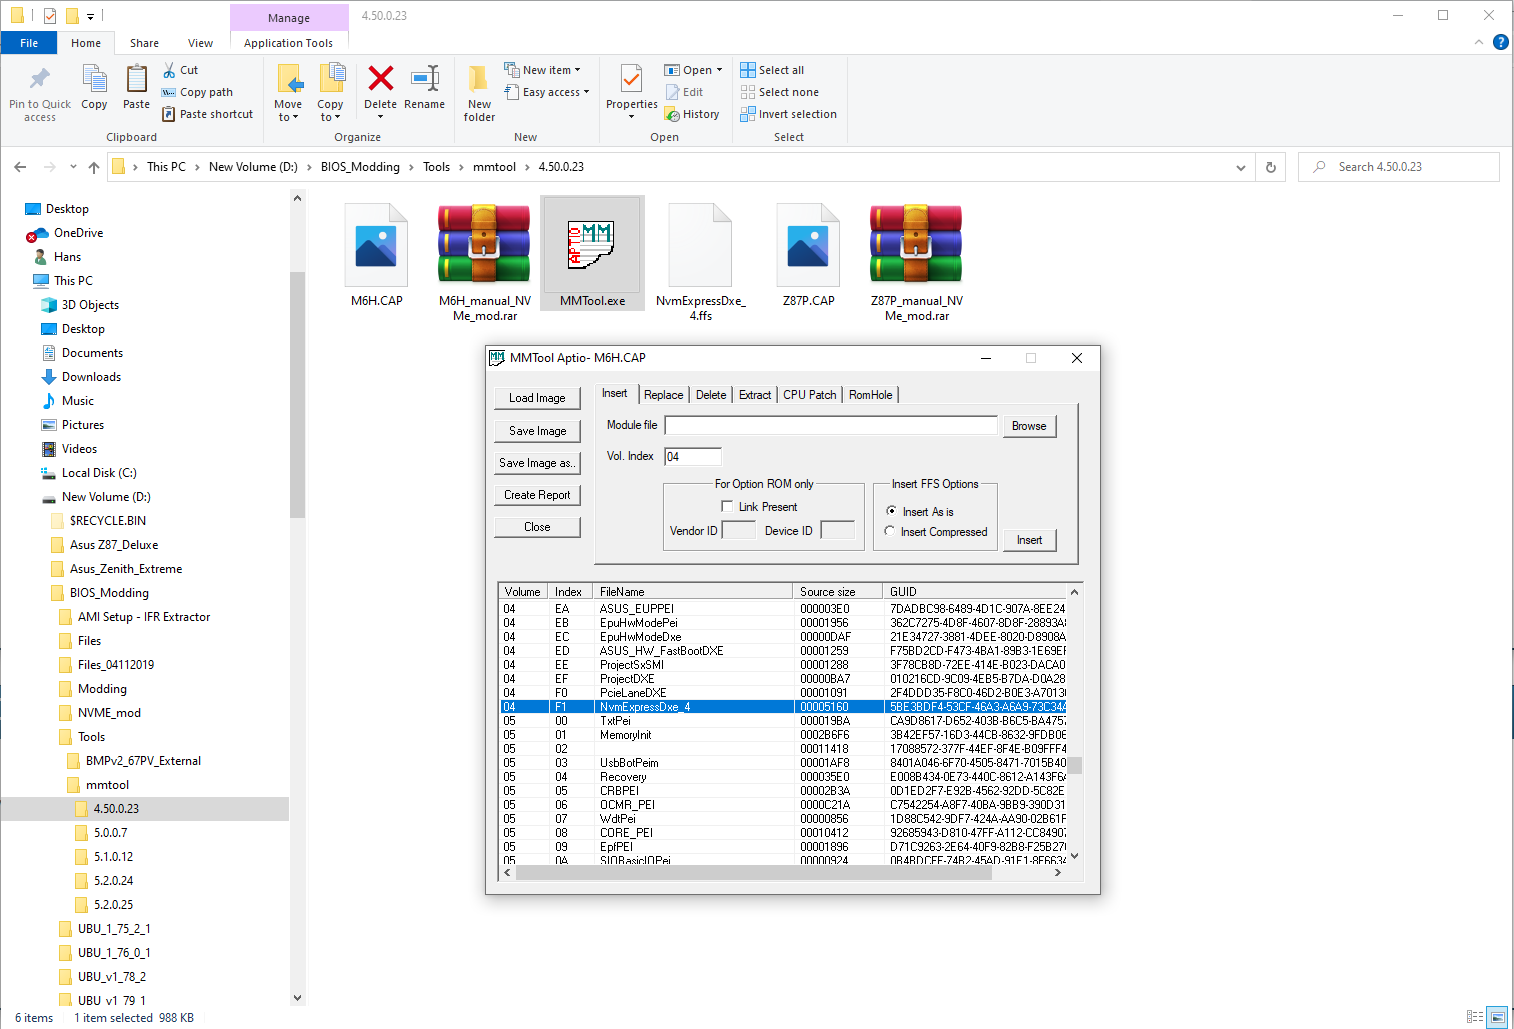
Now modded with the Manual NVMe mod insertion via MMTool v 4.50.0.23
Try this and let me know how it goes.
NOTE POST #1 last edited July 16th 2020 updates with work shown

Enjoy! 


M6H_manual_NVMe_mod.rar (4.73 MB)
Thanks for the answer. I will wait until you fix the 2103 Asus Z-PRO mod. There, rаm operates on the frequency 1333 and does not want to accept other values assigned to it.
Regards
@lemoff
Ok, Asus Z87 PRO mod redone using manual NVMe insertion via MMTool v4.50.0.23
[OFFER] ASUS Z87 PRO v2103 complete mod
Try that and see how it goes.
Cheers
@junior @vladovmike @Rashad624 @dosmond @GrimmBeard @changf @Spekulatiuscreme @c3r3b3llum @DrPest @NeO29 @Bryaneff @oldschoolh @lemoff
Corrected and updated first post with manual NVMe insertion via mmtool 4.50.0.23
Hallo Oldschoolh,
I would like to use your modded bios, but I have seen that you have renamed the file like: MH6.cap, but the original file name is M6H.cap
is it a mistake or is it completely irrelevant? how is it better to write it on usb disk? I must also write .CAP (or is it just the file extension?) or only M6H ?
thanks for your great work…
Viktor
Hello Viktor,
Filename is not issue becoz we don’t use ASUS USB Flash or ASUS EZ here.
This is AFUDOS method that i have explained every step in my post.
If you don’t feel comfortable with my method or you are not a experienced bios flasher you can try @Hancor’s one.
He says he fixed the moded-bios in first post –>
Hi Hancor,
Thank for everyting,
of course I’m not very practical in bios … Sorry !
I just wanted to know if with this new bios 1603 you have updated, can i proceed via USB BIOS Flashback easily update the bios without entering the existing
operating system ?
Thank you !
Viktor
@Viktor72
The USB flashback port is visually located on page 2-11 of your manual. ie one down and to the right of the USB flashback button.
Typically you use a USB drive formatted in FAT32 with the modded unzipped M6H.CAP file found in the post #1 or the post #46. You may have to experiment to find the right USB stick to work for your motherboard. On my own Z87-Deluxe I used a FAT32 formatted USB 3.0, some other boards may need USB 2.0.
Shutdown your computer, have only standby power on. (ie plugged into wall, power switch ON, but NOT fully booted up.)
Plug in your USB drive into the "USB Flashback Port" found on page 2-11 above.
Then press and hold the flashback button until it starts blinking, slowly at first and then it speeds up toward the end.
Wait until the flashback button STOPS blinking COMPLETELY. Only then reboot, hit del, and Load Setup Defaults. Reboot.
DO NOT REMOVE THE USB STICK OR PULL THE POWER PLUG WHILE FLASHING!
Then you can reload your favorite BIOS/UEFI settings.
Make sure you make a backup of all your important files, BEFORE updating your BIOS