Hallo,
Well, I built myself HTPC, currently running Win 8.1 x64 with this HW configuration: ASUS A88XM-A board, AMD A8-6500 CPU with integrated Radeon HD 8570D GPU, 2x4GB PATRIOT DDR3@1866, 2x1TB HDD in MIRROR RAID. The PCI-E x16 slot is free…
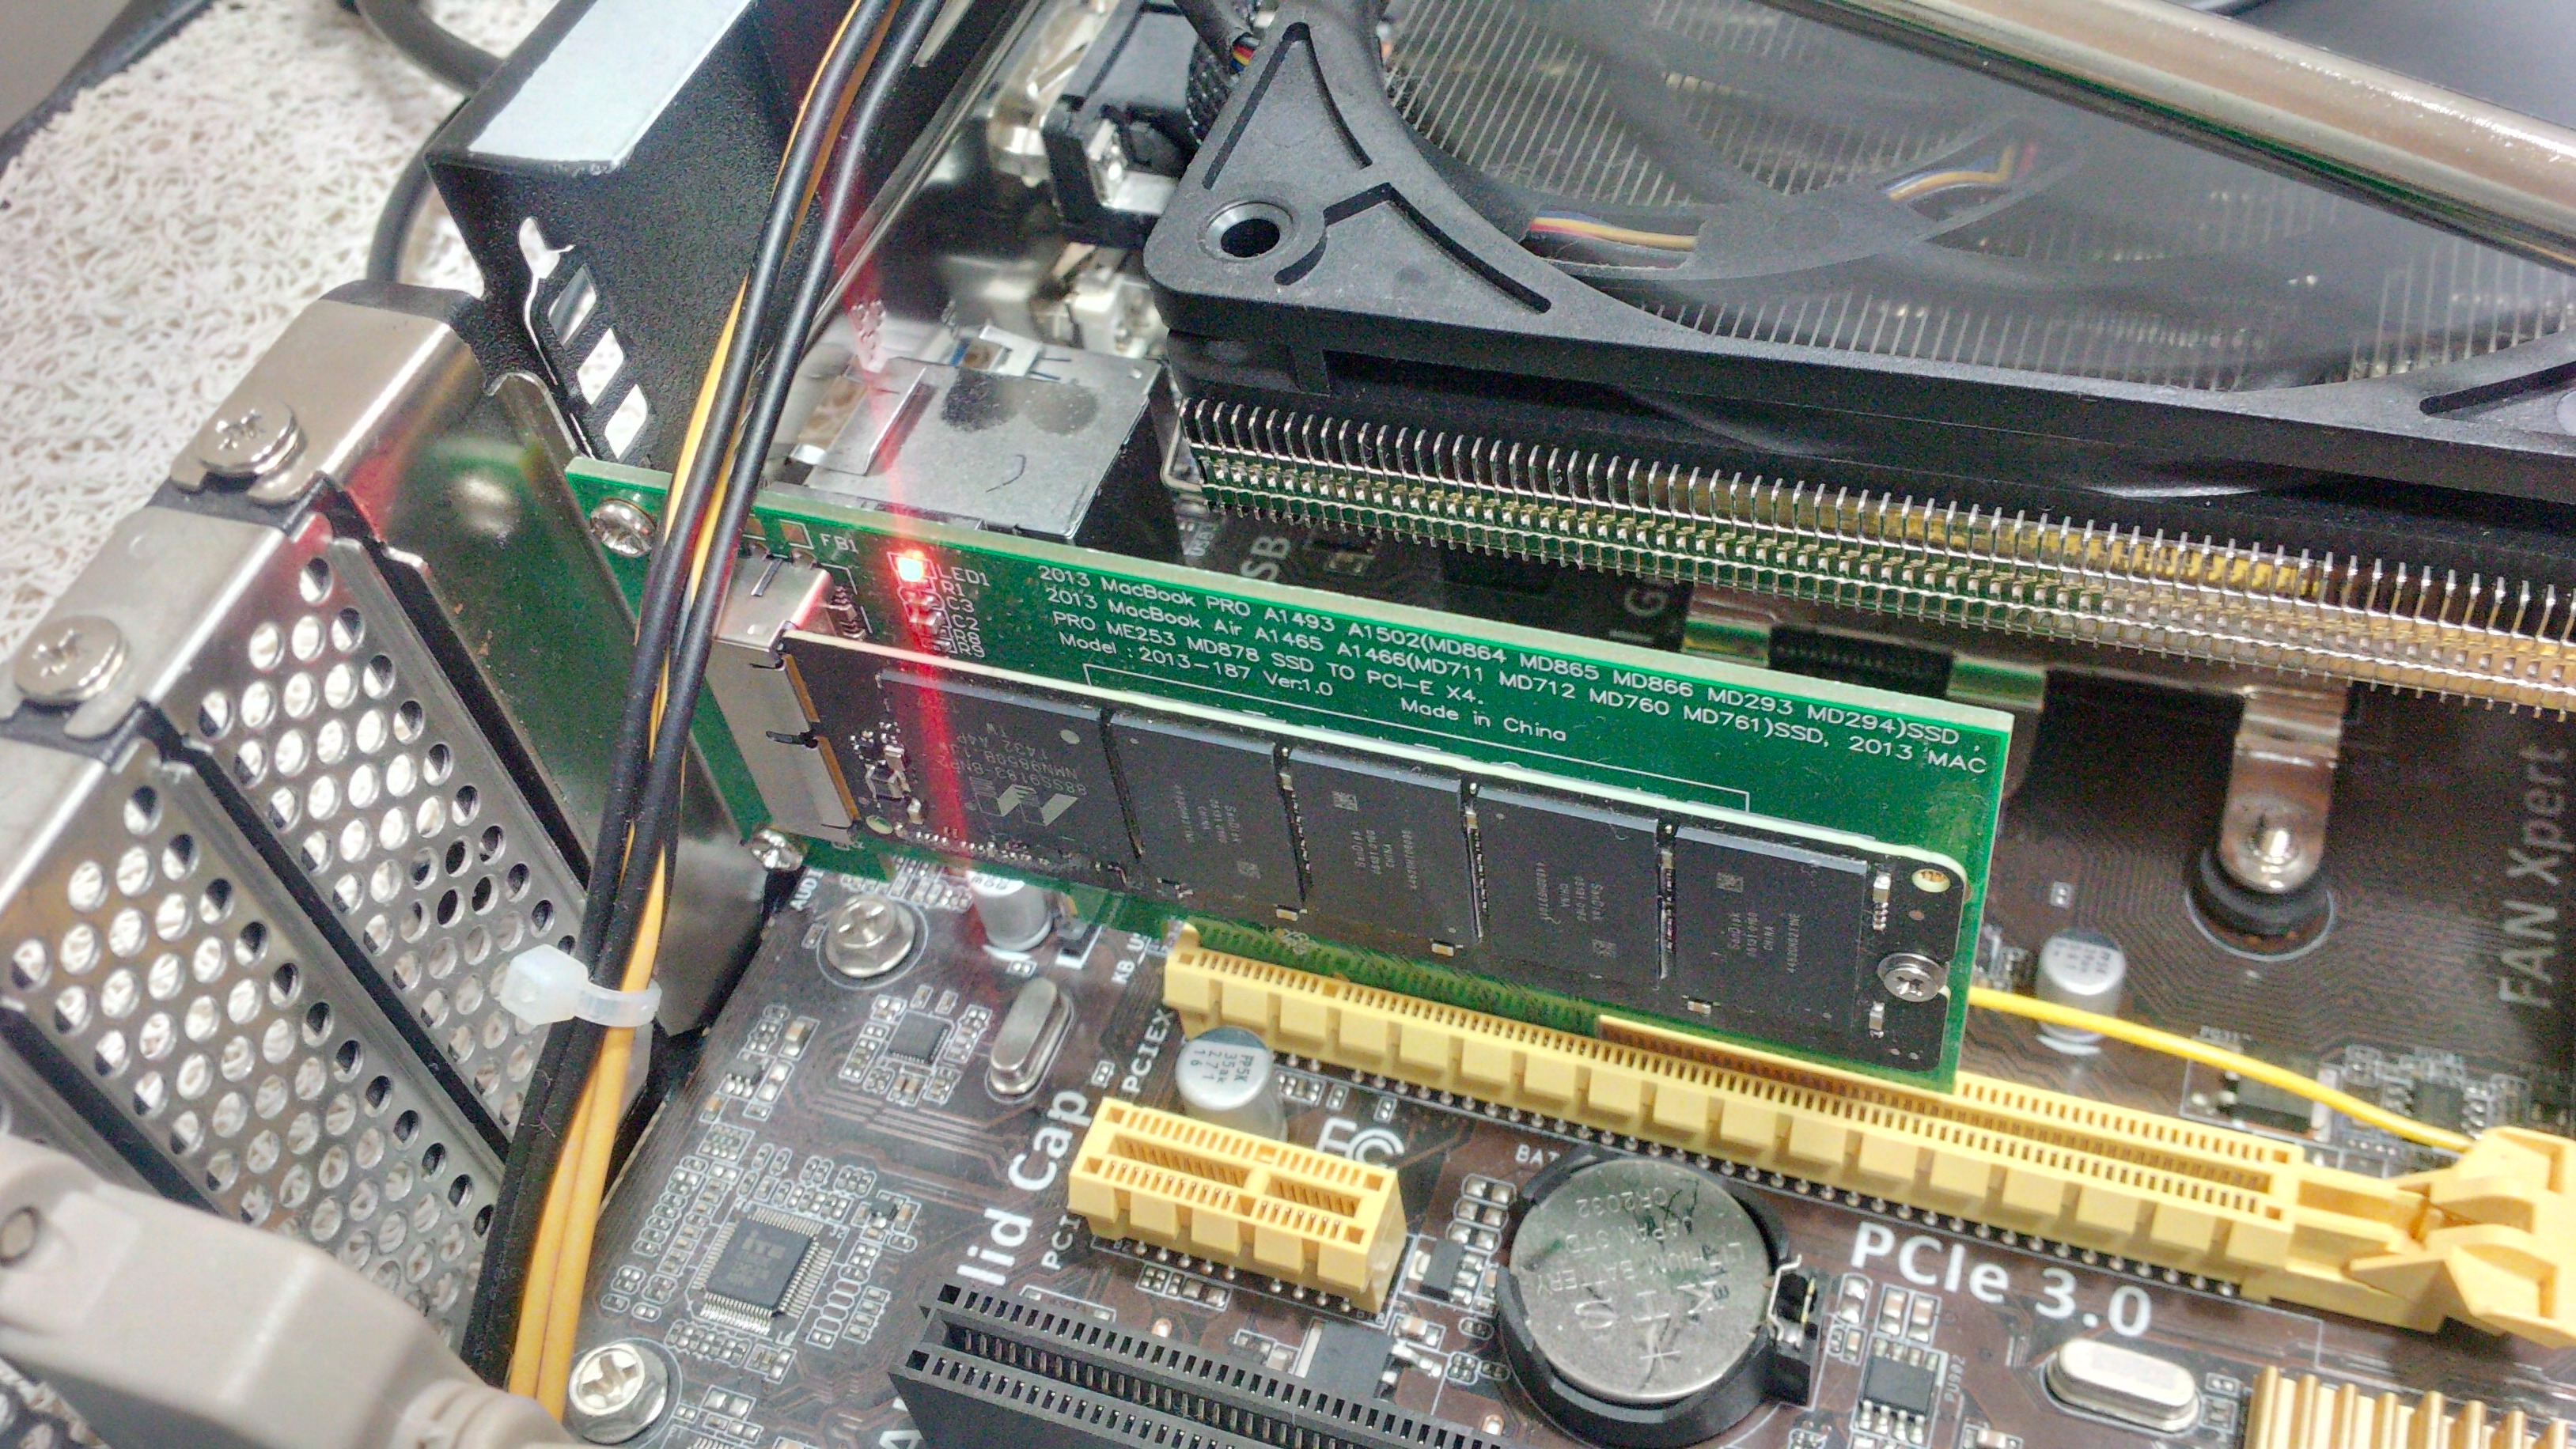
Now I got to an PCI-E x4 adapter (http://www.aliexpress.com/item/Adapter-C…7a8-36e4abf3885) along with an Apple 128GB NVMe SSD.
Windows detects this drive as APPLE SM 128G SSD fine. When booted from USB stick and removing all partititons from the SSD, I am able to install the OS. But afer first reboot the Windows tells me it is not able to boot and I shall go to BIOS, and allow to boot from PCI-E.
I already used this guide([HowTo] Get full NVMe support for all Systems with an AMI UEFI BIOS) to inject the NVMe driver in to the latest (3001) bios .CAP file and it went quite well. Though I know, A88X is an AMD chipset, while the guide speaks about Intel chipsets +6 Series, I guessed the PCI-E\NVMe should work the same way… And mayby I completely wrong. However, there is CSM option in the bios and also some security options regarding booting EFI Windows or Other OS…
Now the problem is that when I try to flash the bios with this modded file (via the bios built-in tool), I get error message “Security Verification Failed”.
How can I restore the security of the file? Or shall I somehow override the verification of the file? Or shall I use a different bios tool to write that file in it? Any help will come handy!
Thanks
EDIT by Fernando: Thread moved into the correct Sub-Forum and thread title customized
@GeorgettaCZ :
Welcome at Win-RAID Forum!
Since you obviously were able to install the Win8.1 onto your PCIe connected NVMe SSD and to boot off it, there seems to be no need to insert any additional NVMe module into the BIOS of your mainboard. The only problem, which has to be solved, is the fact, that the BIOS or the OS doesn’t find the Windows Boot Manager while rebooting.
Questions:
1. Did you istall the OS in LEGACY or in UEFI mode? Which Partition Table (MBR or GPT) did you create?
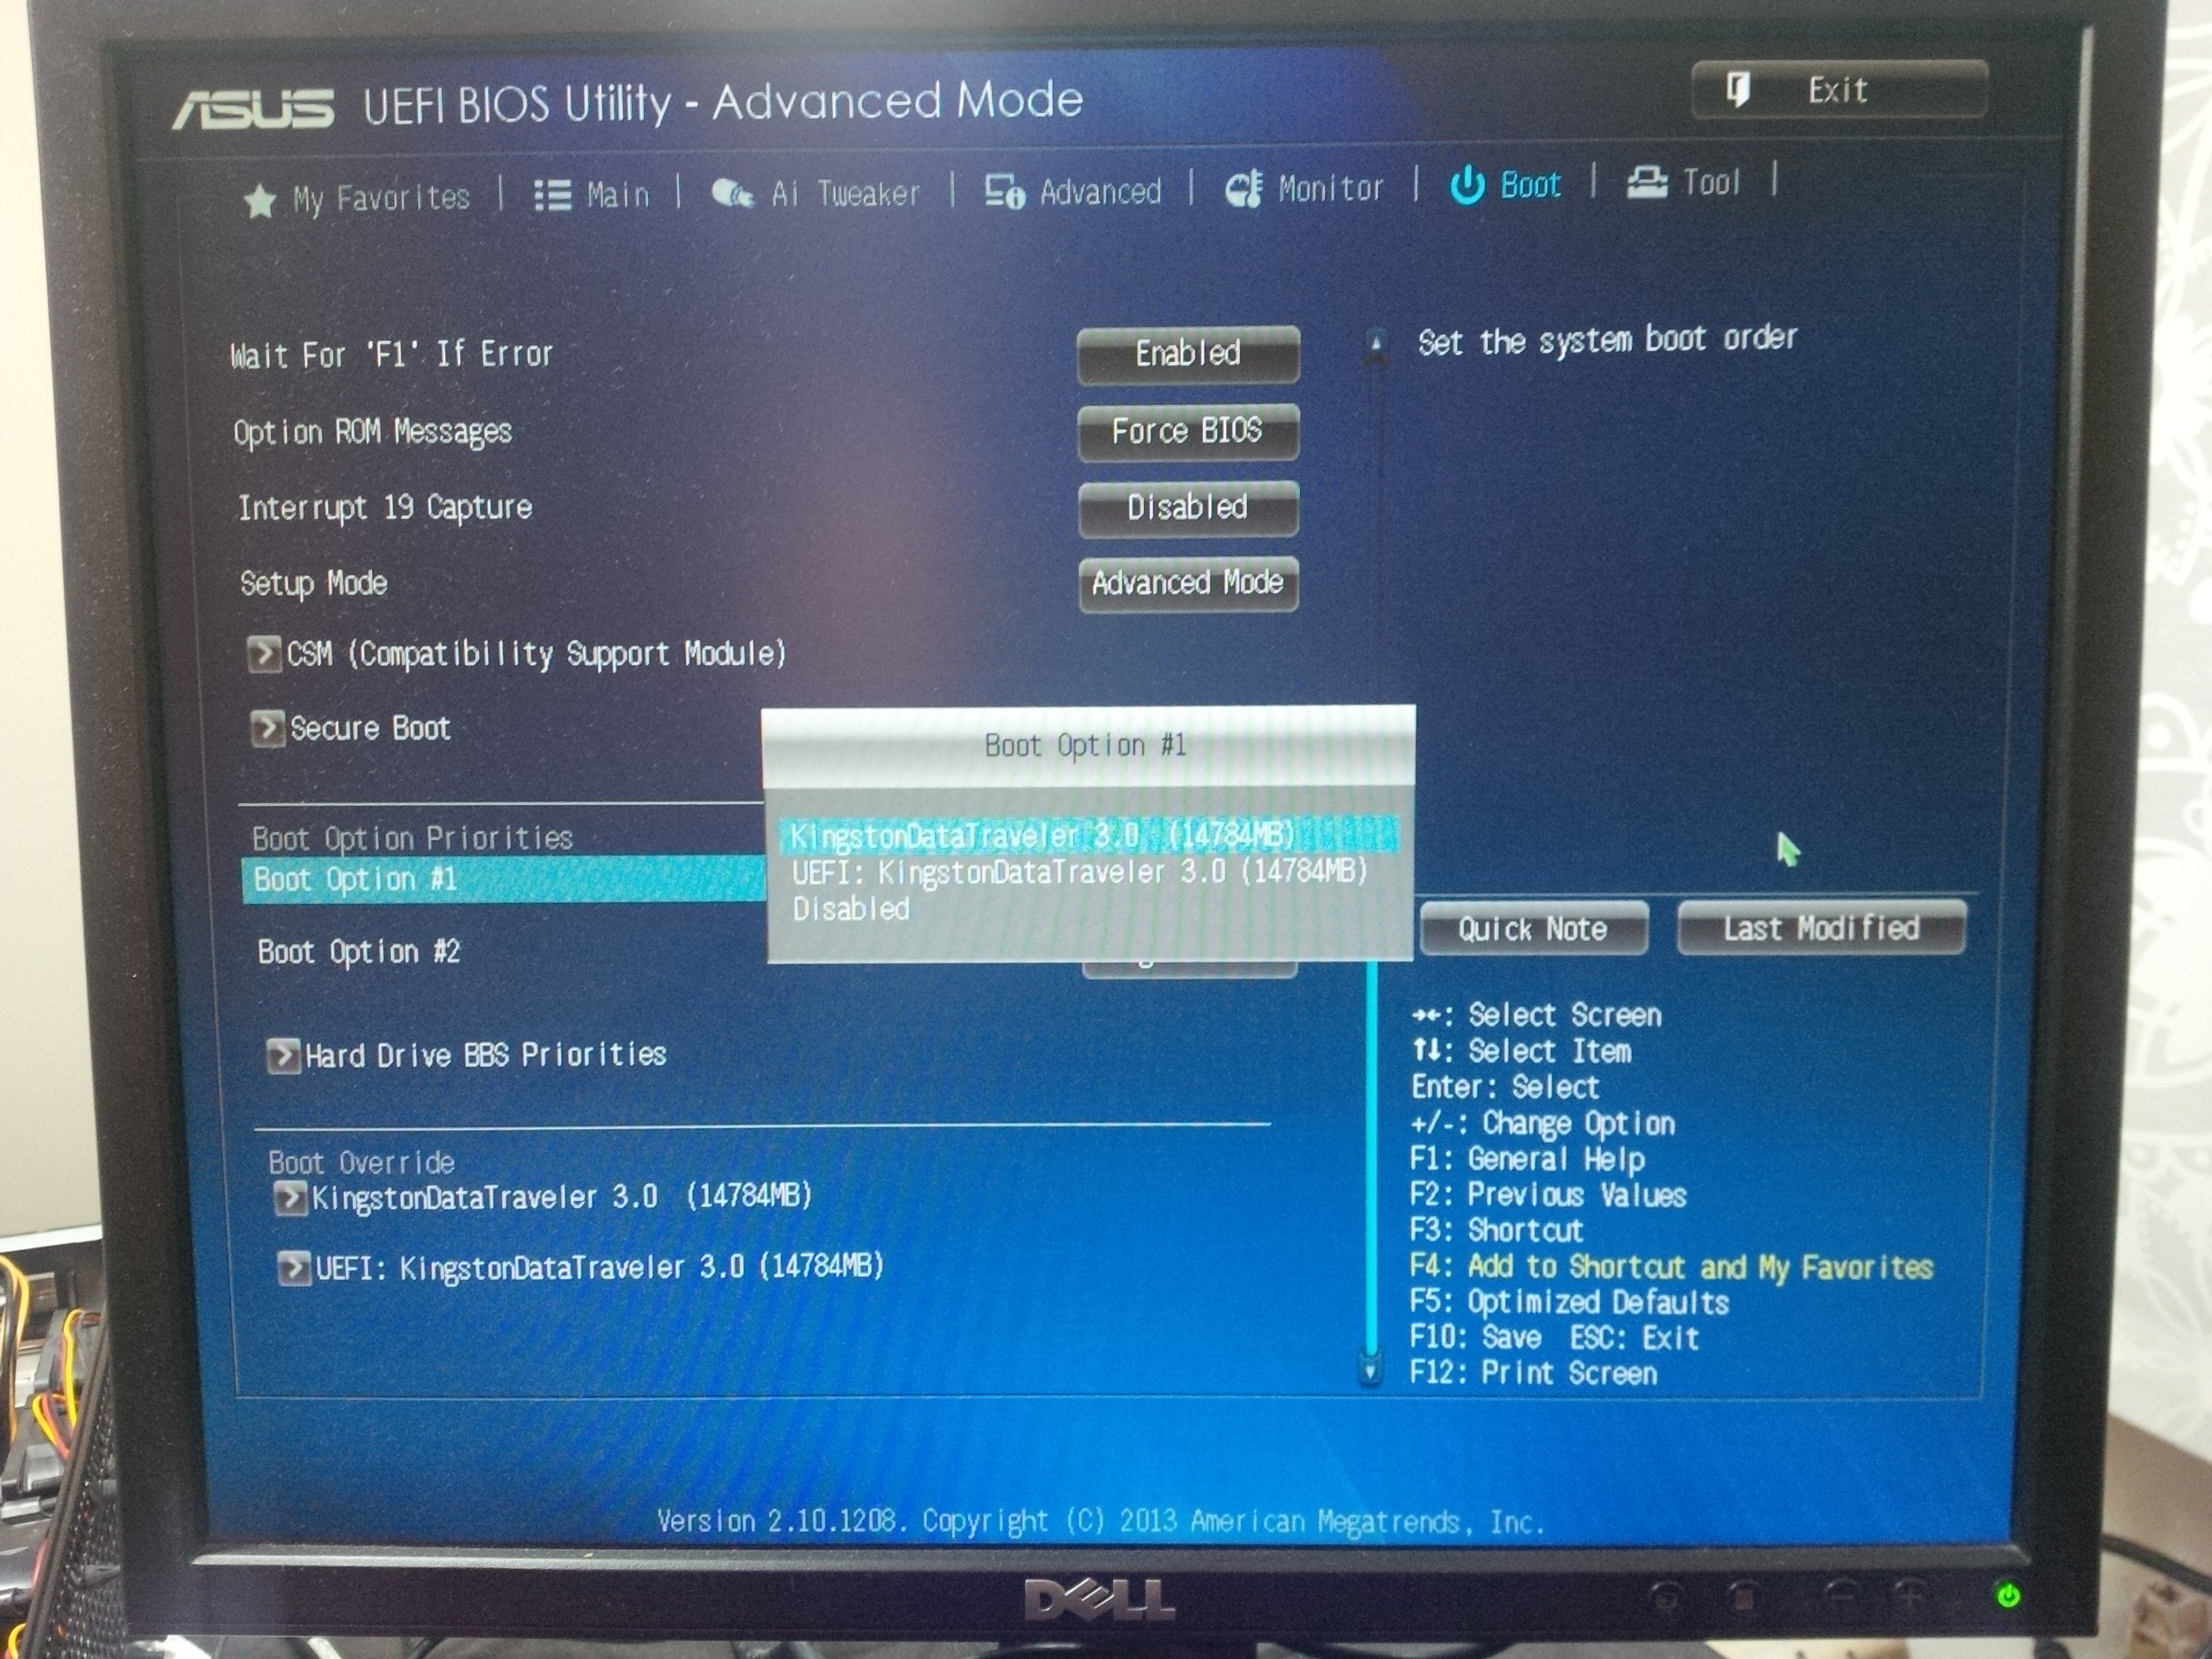
2. Which BIOS settings did you choose within the BOOT section (especially regarding CSM) and which bootable devices are shown there?
Flashing of a modded BIOS into the BIOS chip of an ASUS BIOS chip can easily be done by using the specific ASUS "USB Flashback" feature, but I don’t know, whether your mainboard supports it.
Regards
Dieter (alias Fernando)
Hallo Fernando,
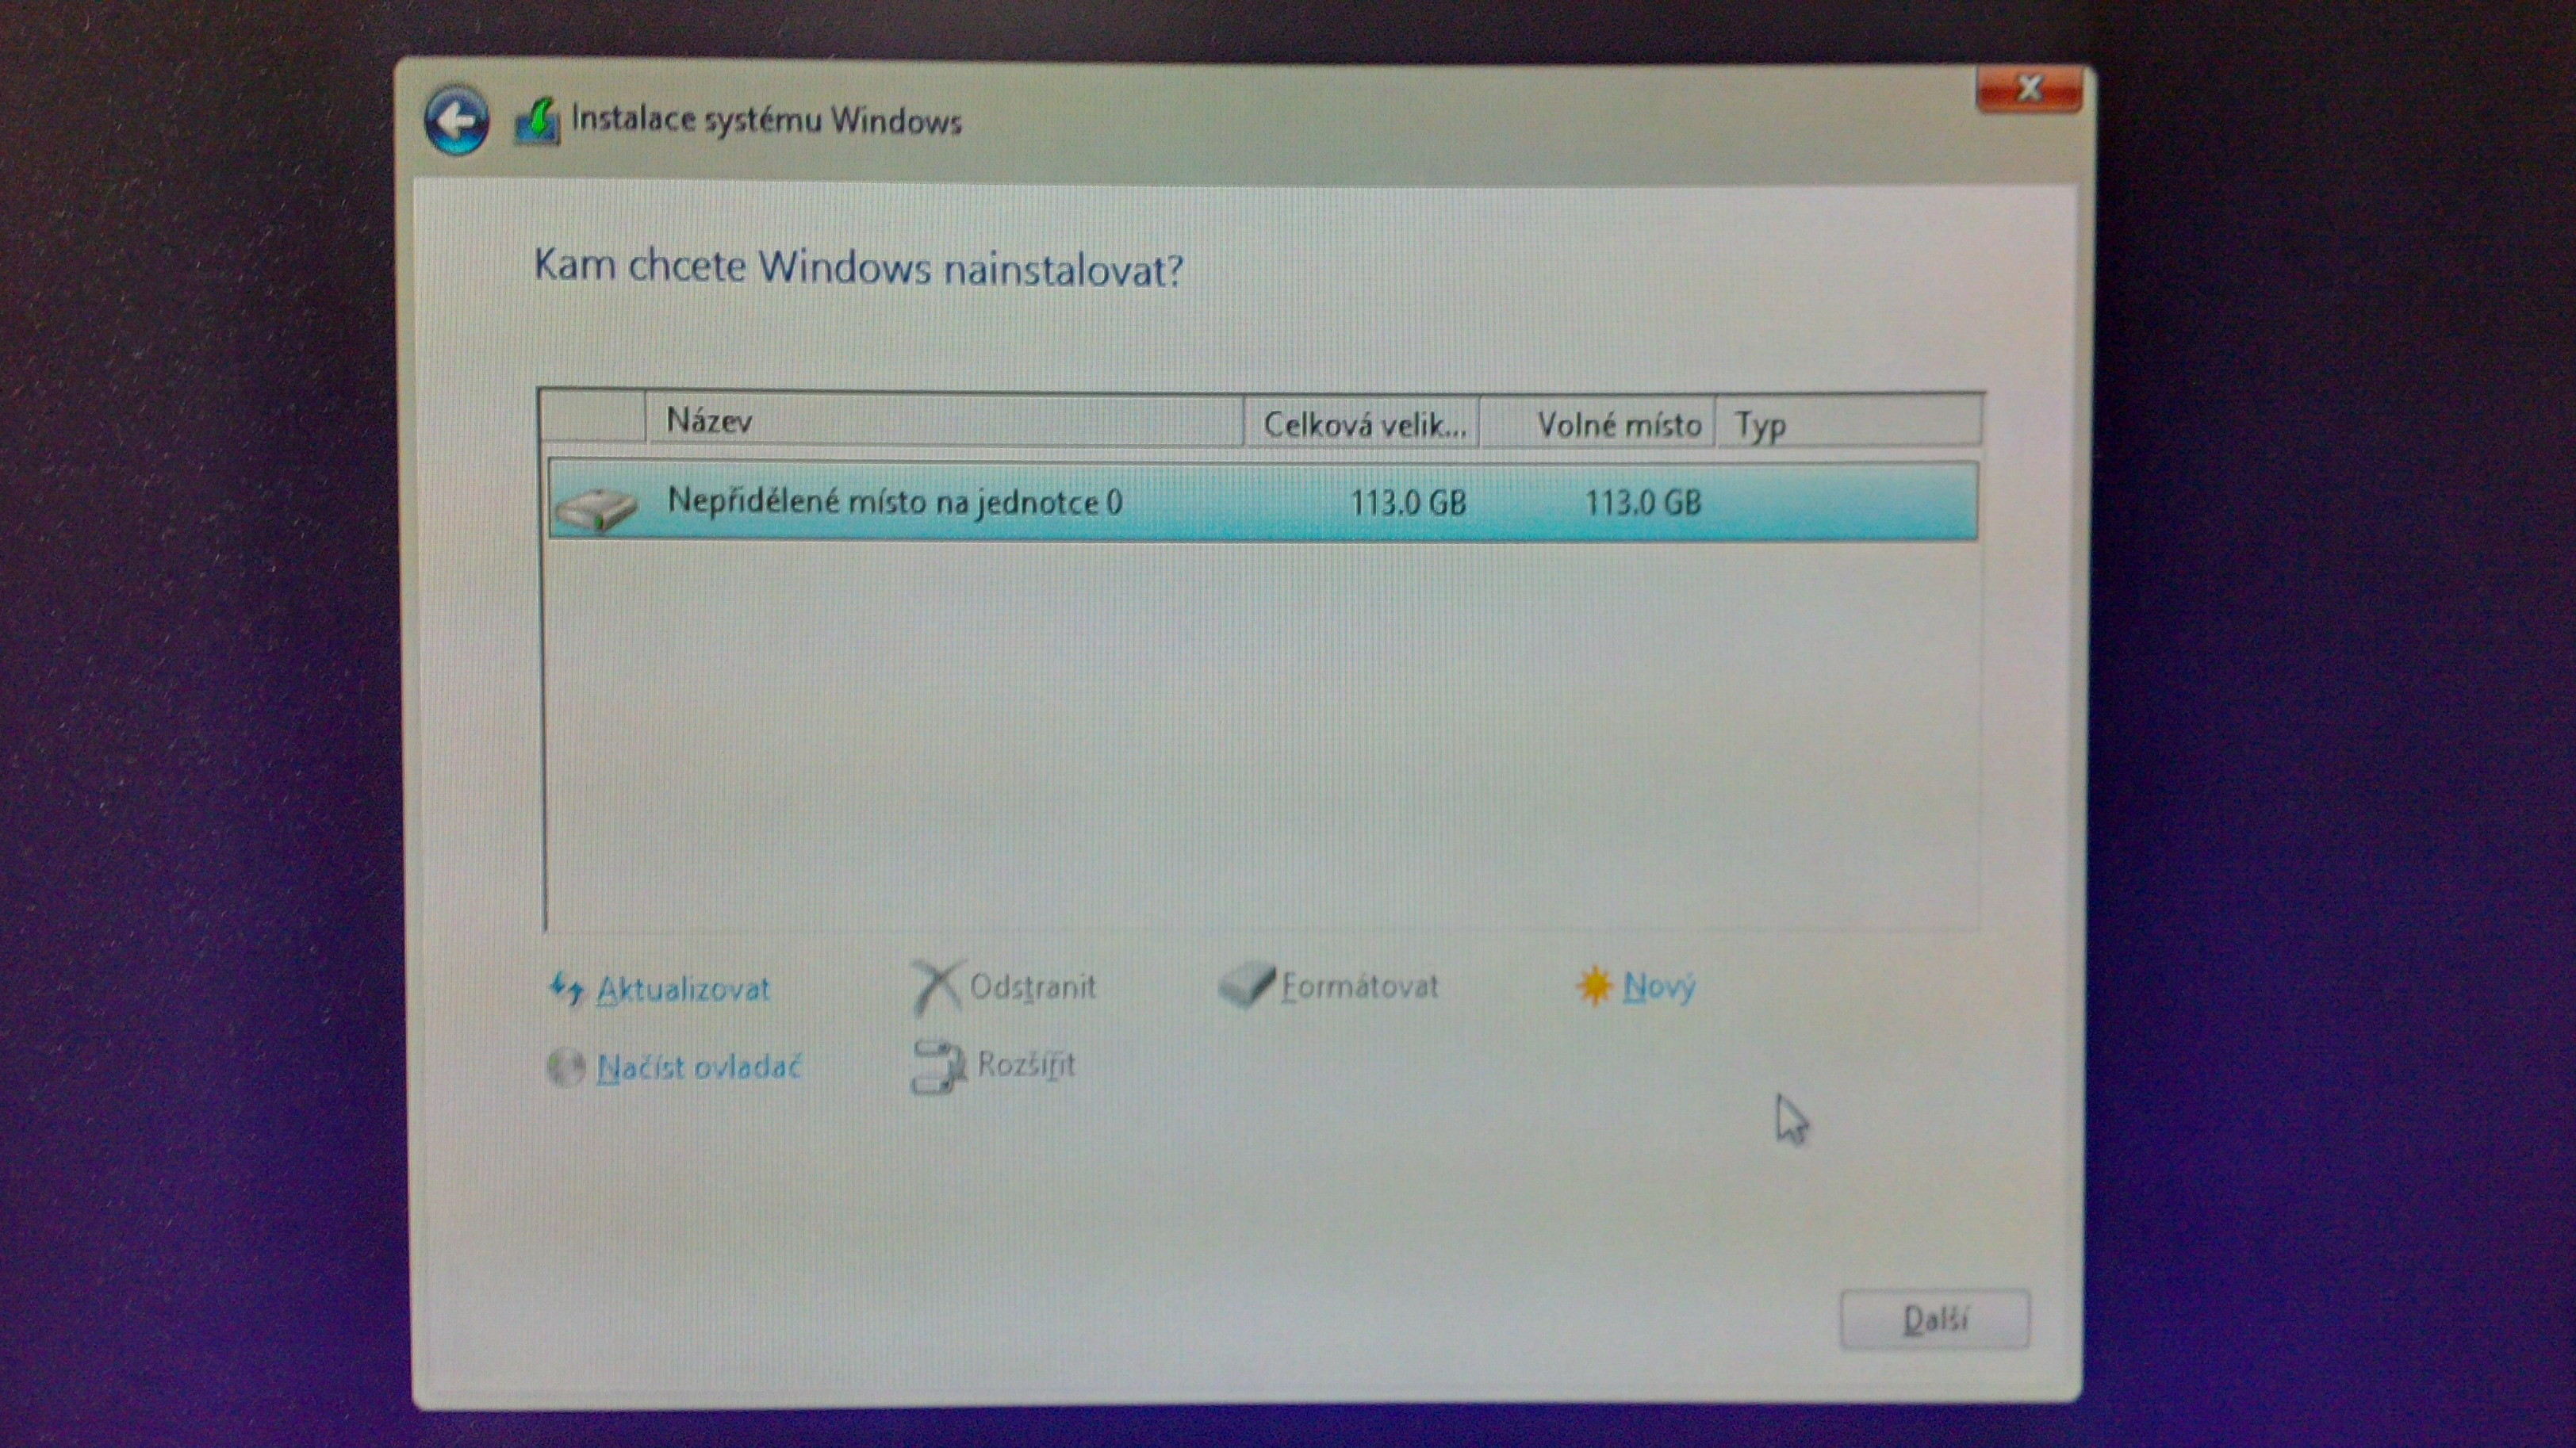
There is a misunderstanding. I booted from USB stick with WIN8.1x64 install. Then during the installation, in the window where you configure your disks and partitions, there was one full capacity MBR partition created already, by me from a different PC, the system denies me to install OS on that SSD drive. I had to remove the current MBR partition. I only had Unlocated (or Unused) space on the entire the capacity of 112,8GB on the SSD.
Then I clicked on this unused space and clicked Next. So the installation program used some automated partitioning scenario for the whole capacity of the SSD and created 3 partitions. Now the SSD partition table looks like |–350MB NTFS BOOT–||–100MB FAT32 Recovery–||–112,3GB NTFS DATA–|.
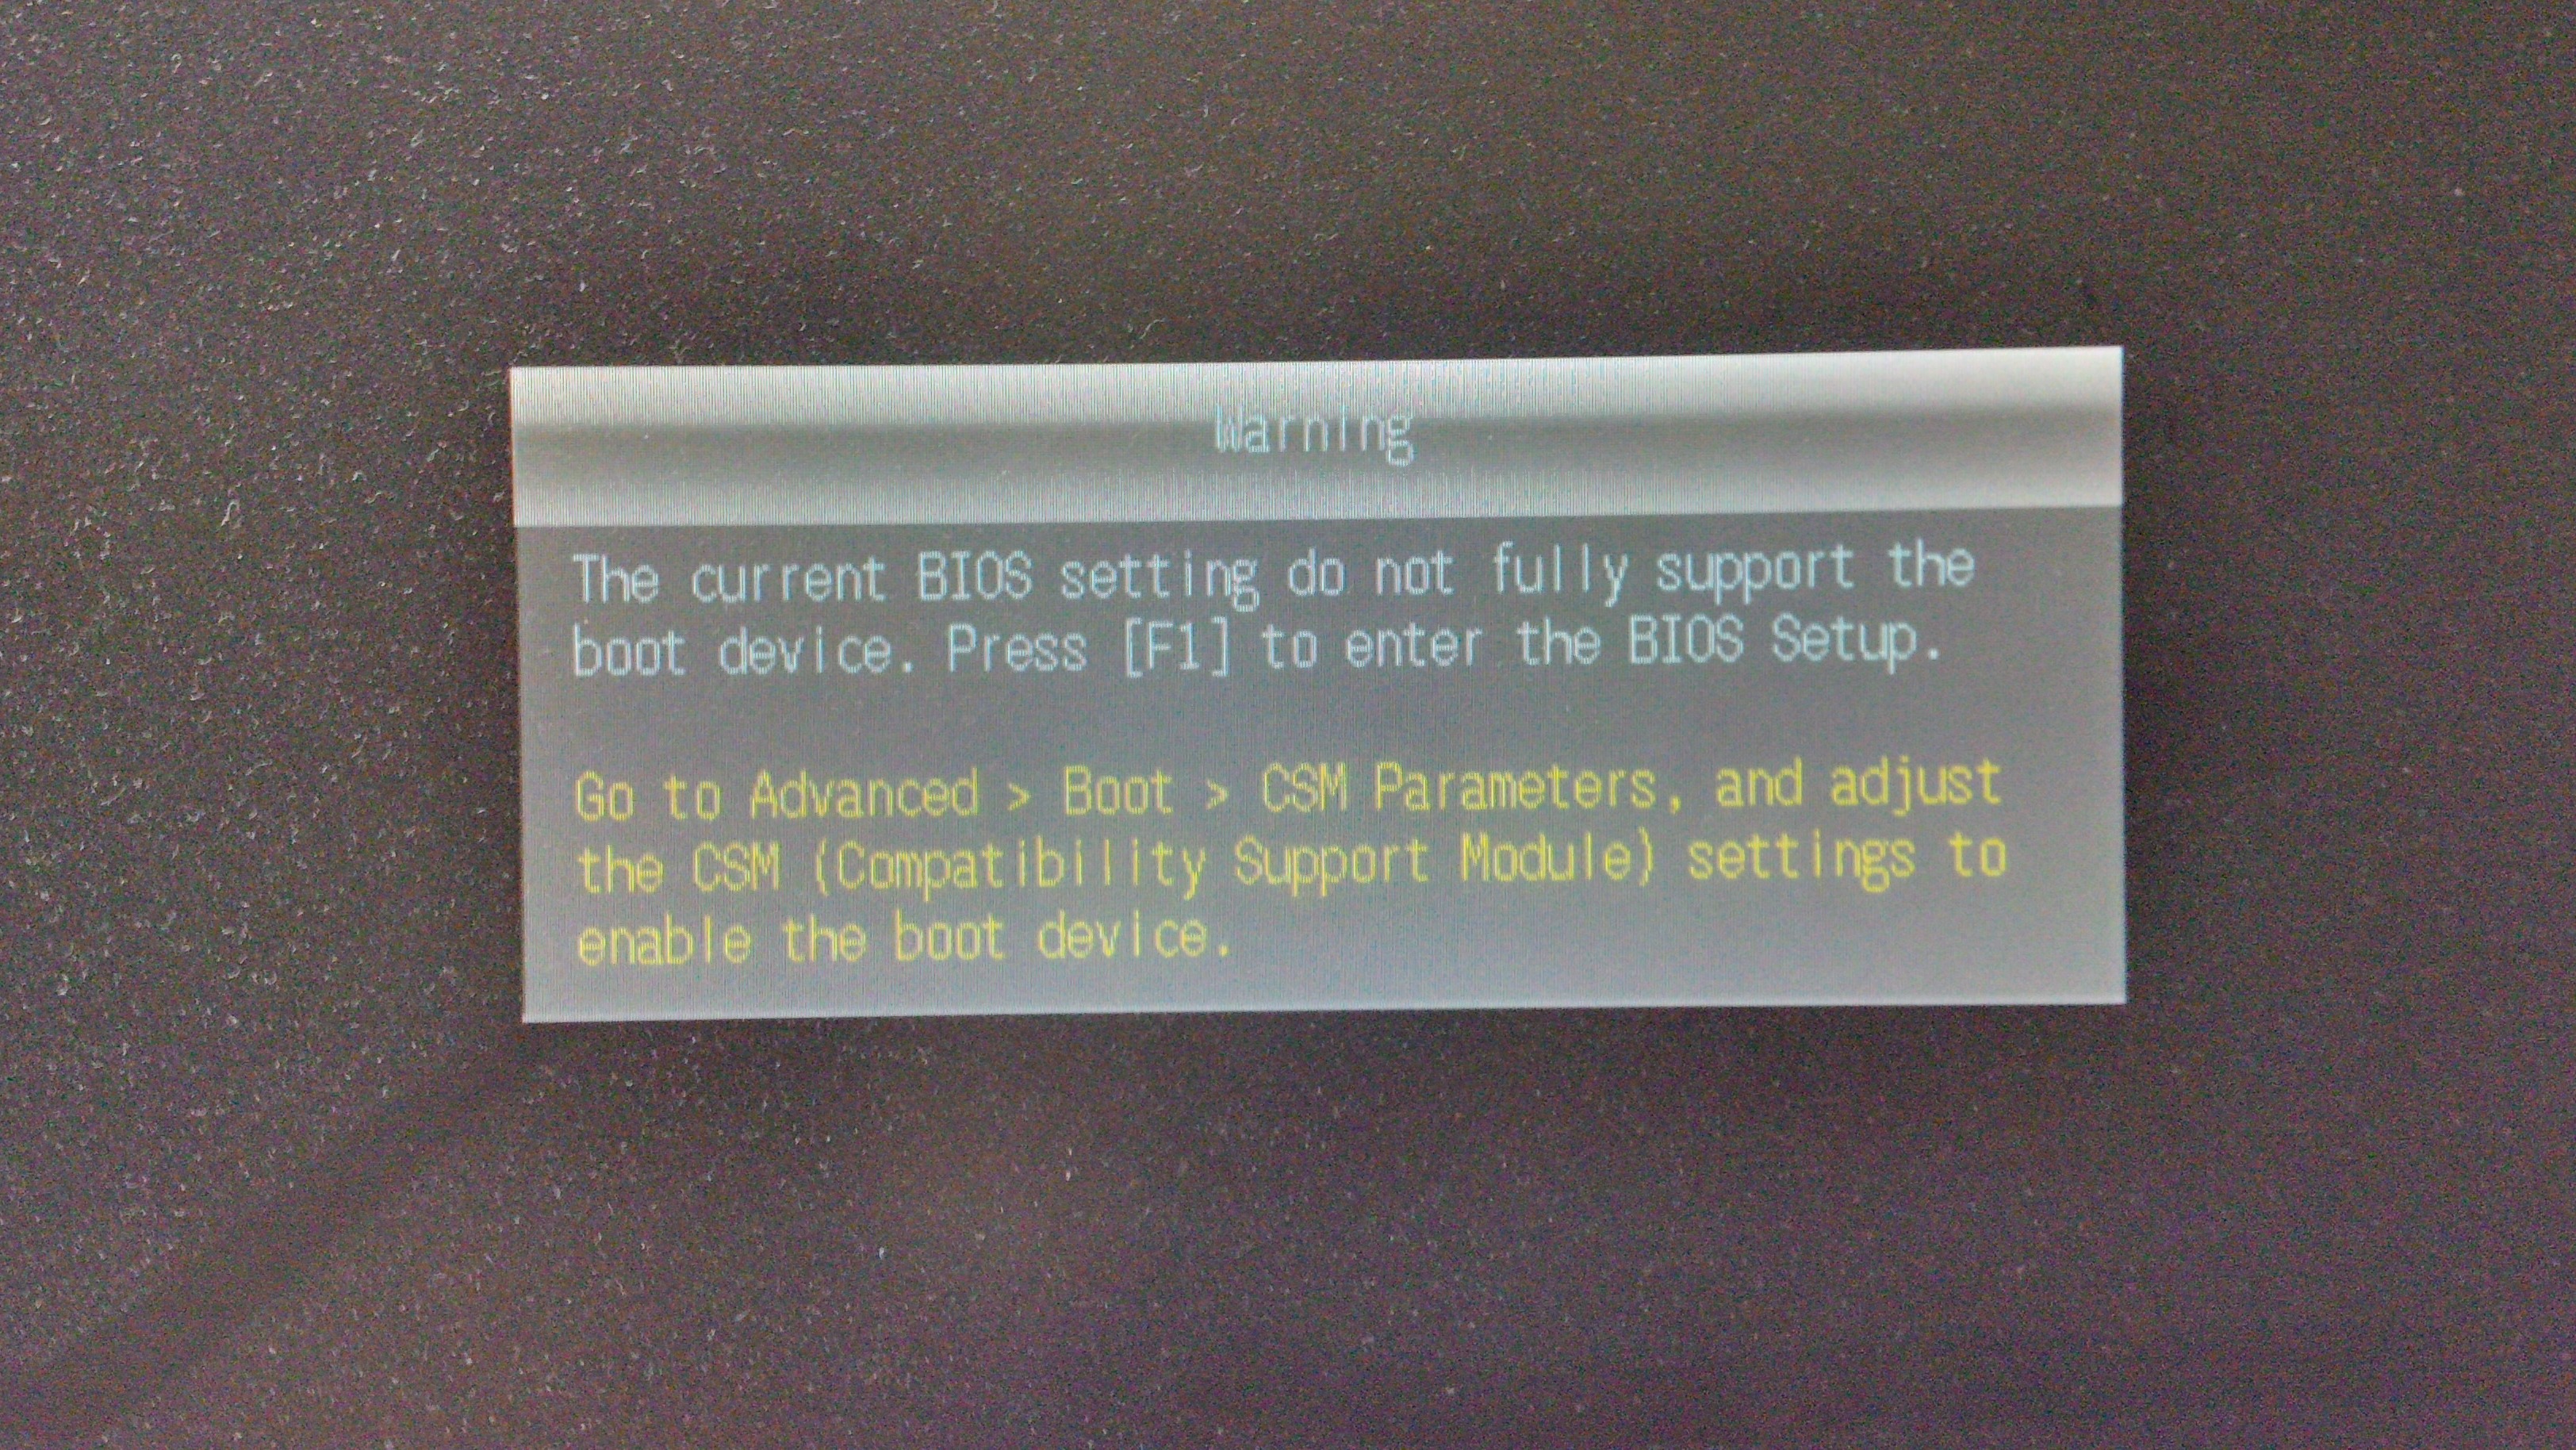
After successful OS installation the PC rebooted but then IT DID NOT BOOT TO WINDOWS NORMALLY. I ended up with a UEFI BIOS error message instead, telling me to go to BIOS=>Security=>CSM and enable the proper PCI-E… blah blah blah… I dont remember exactly what it said… , but anyway it did not boot the newly installed Windows.
Do you think, to boot up in UEFI and then create GPT partition would help? But how do I select whether to create a MBR or a GPT partition tabel on the SSD? I think I havent seen such option during configuration part of the installation at all. So I would have to create a GPT partition prior to the installation, i.e. on a different PC?
Answers to your questions:
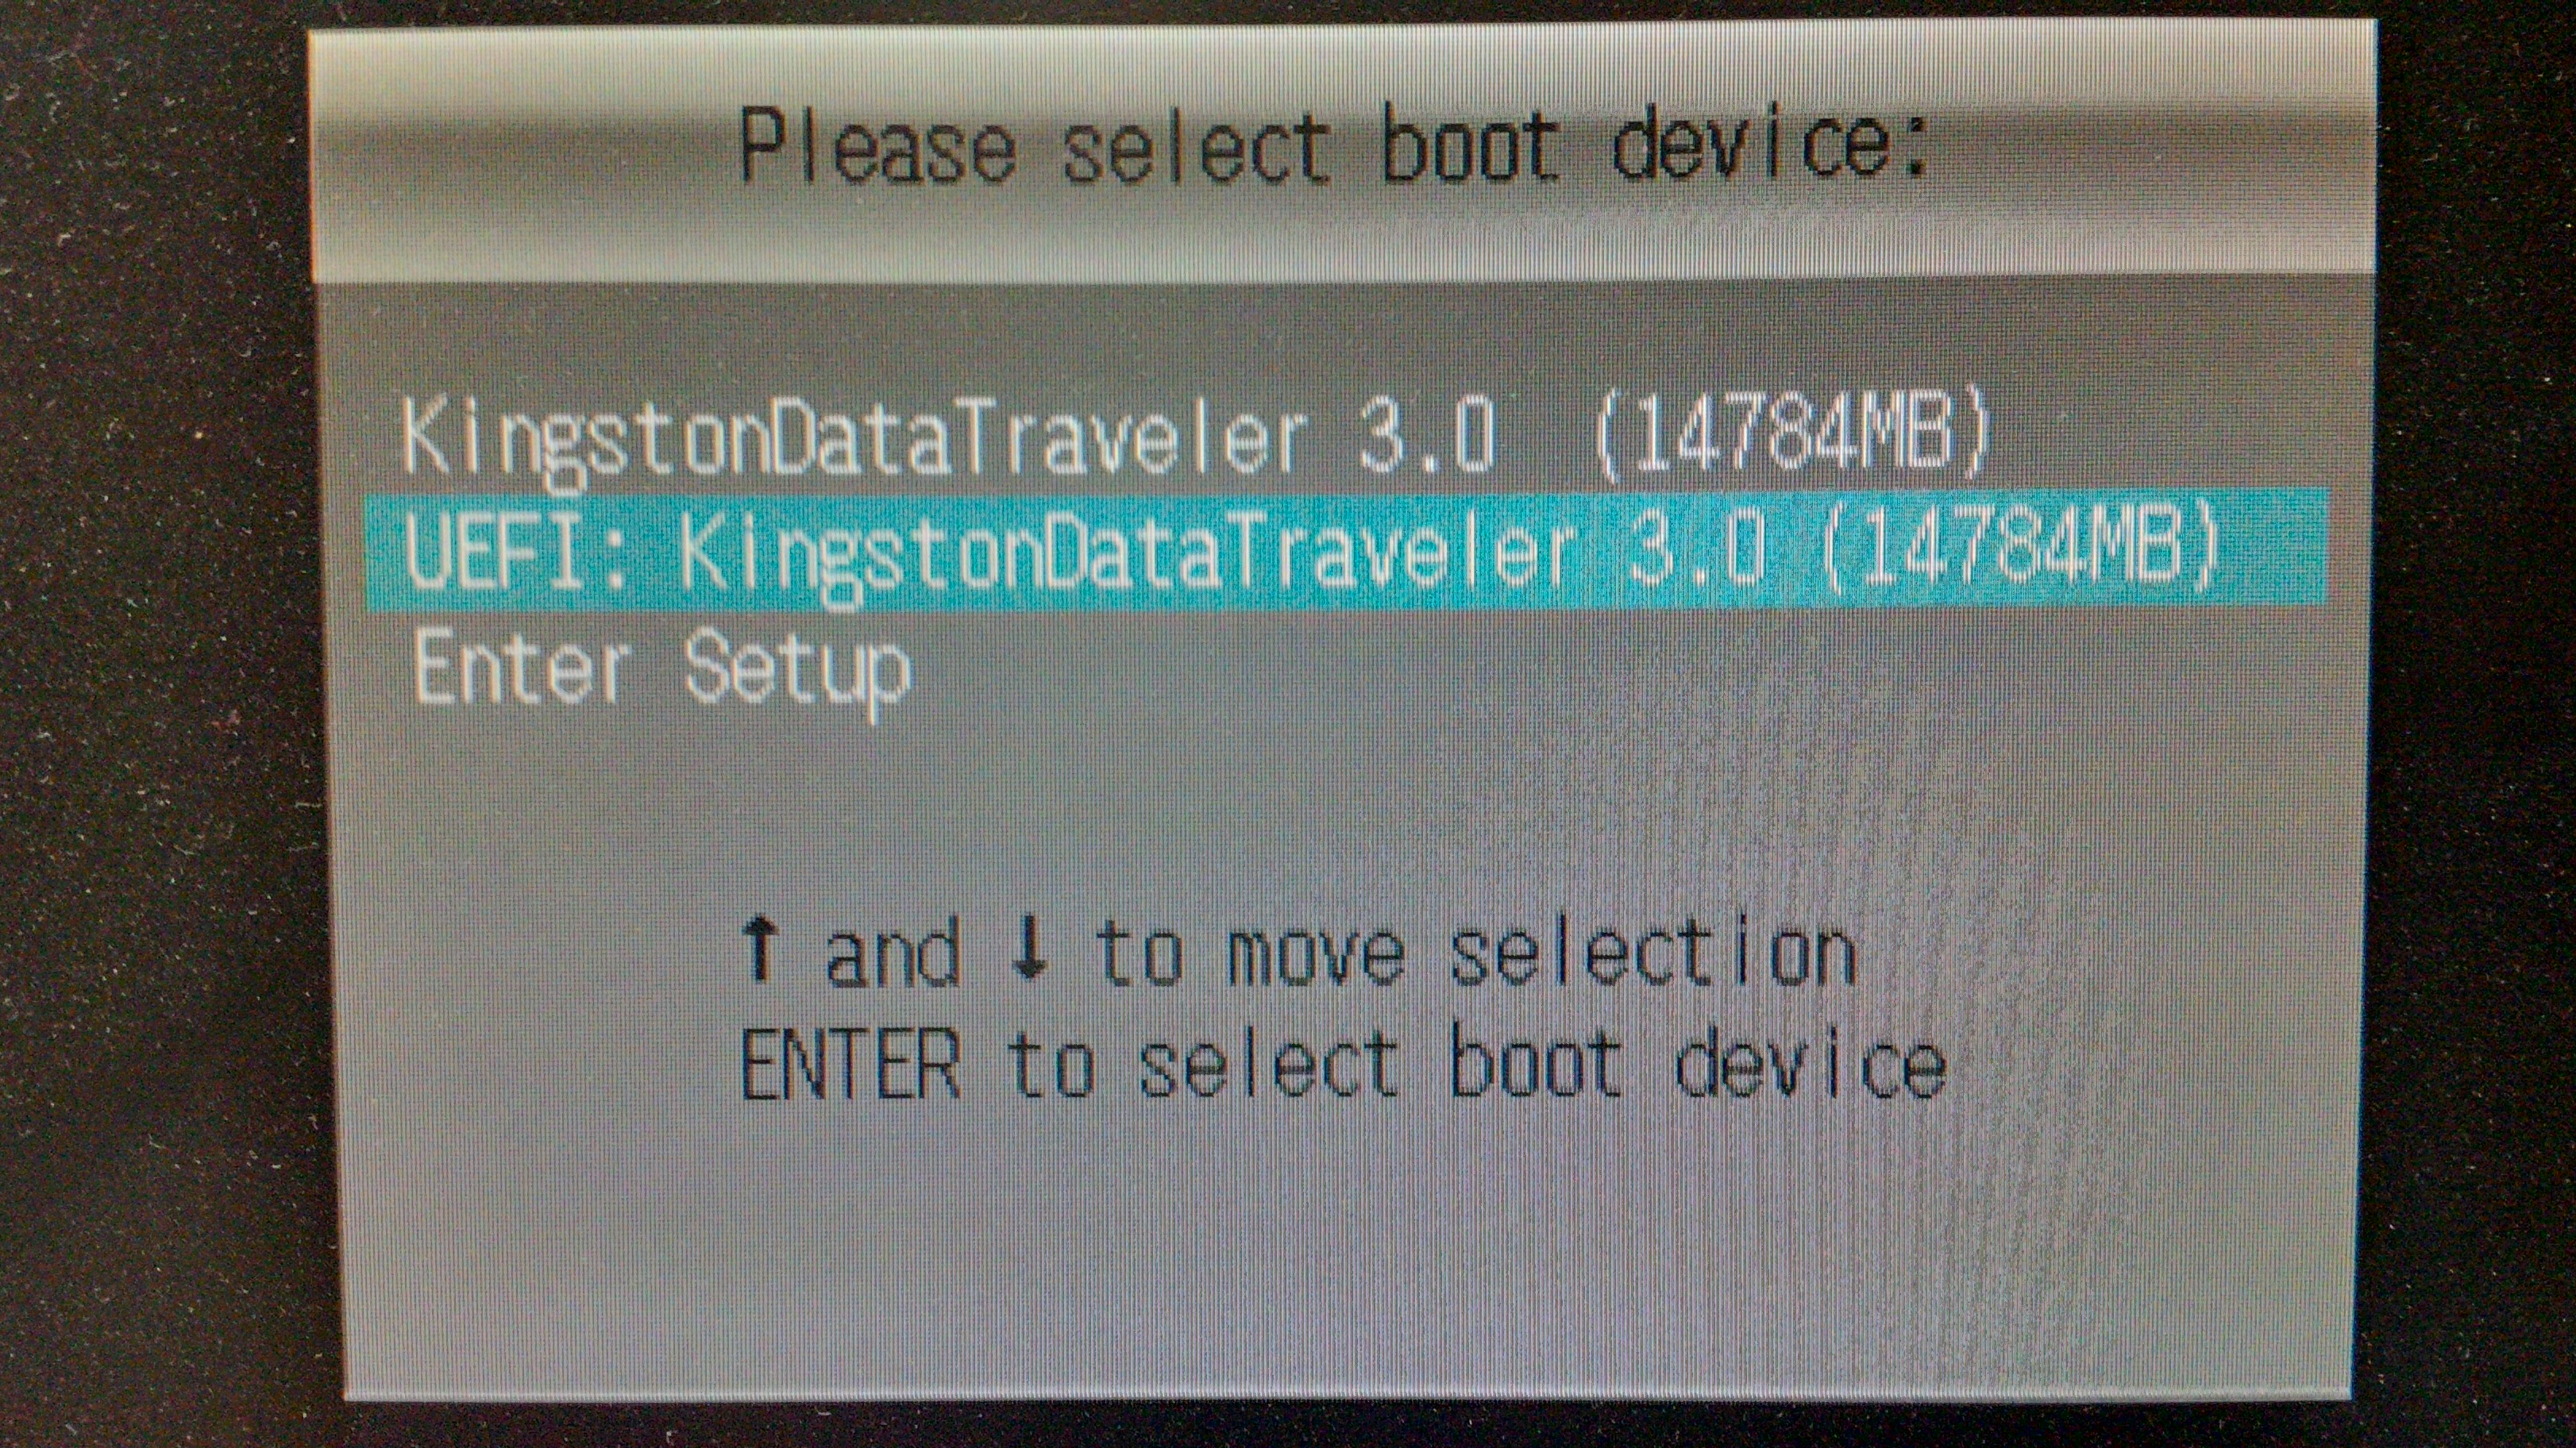
1. It was in UEFI mode I believe. You know when you press F8 (I guess) you will get an option menu to boot either from the USB or from the USB in UEFI mode.
2. I will do some pictures and post them soon.
Regards
That is correct, if you booted the USB Flash Drive in UEFI mode, because the OS installation in UEFI mode requires the GUIMode Partition Table (GPT) and doesn’t work with the LEGACY mode MBR boot sector.
You obviously missed the option to create the size of the target partition for the OS yourself. You should have used the "New" button!
I don’t know the exact reason, but it may have to do with your procedure at the beginning of the OS installation.
This is what I recommend to do:
1. Create a bootable USB Flash Drive with your desired OS on it by using the tool Rufus. Important: Choose the GUImode Partition Table as partition scheme!
2. Unplug all HDDs/SSDs except the target NVMe SSD.
3. Boot off the USB Flash Drive in UEFI mode (should be shown ny the Windows Boot Manager as "[UEFI]<name of the USB drive>").
4. When you have to decide, where you want to install the OS, delete all shown partitions of the NVMe SSD (don’t mix it with the USB Flash Drive), then click onto the button "New" and let the Setup create a system drive partition with a size of your choice.
5. After having done that, the Setup will create at least 3 new partitions, but only the 3rd one has enough place for the OS installation.
6. Point to this big sized new partition and let the OS Setup continue and finish its work.
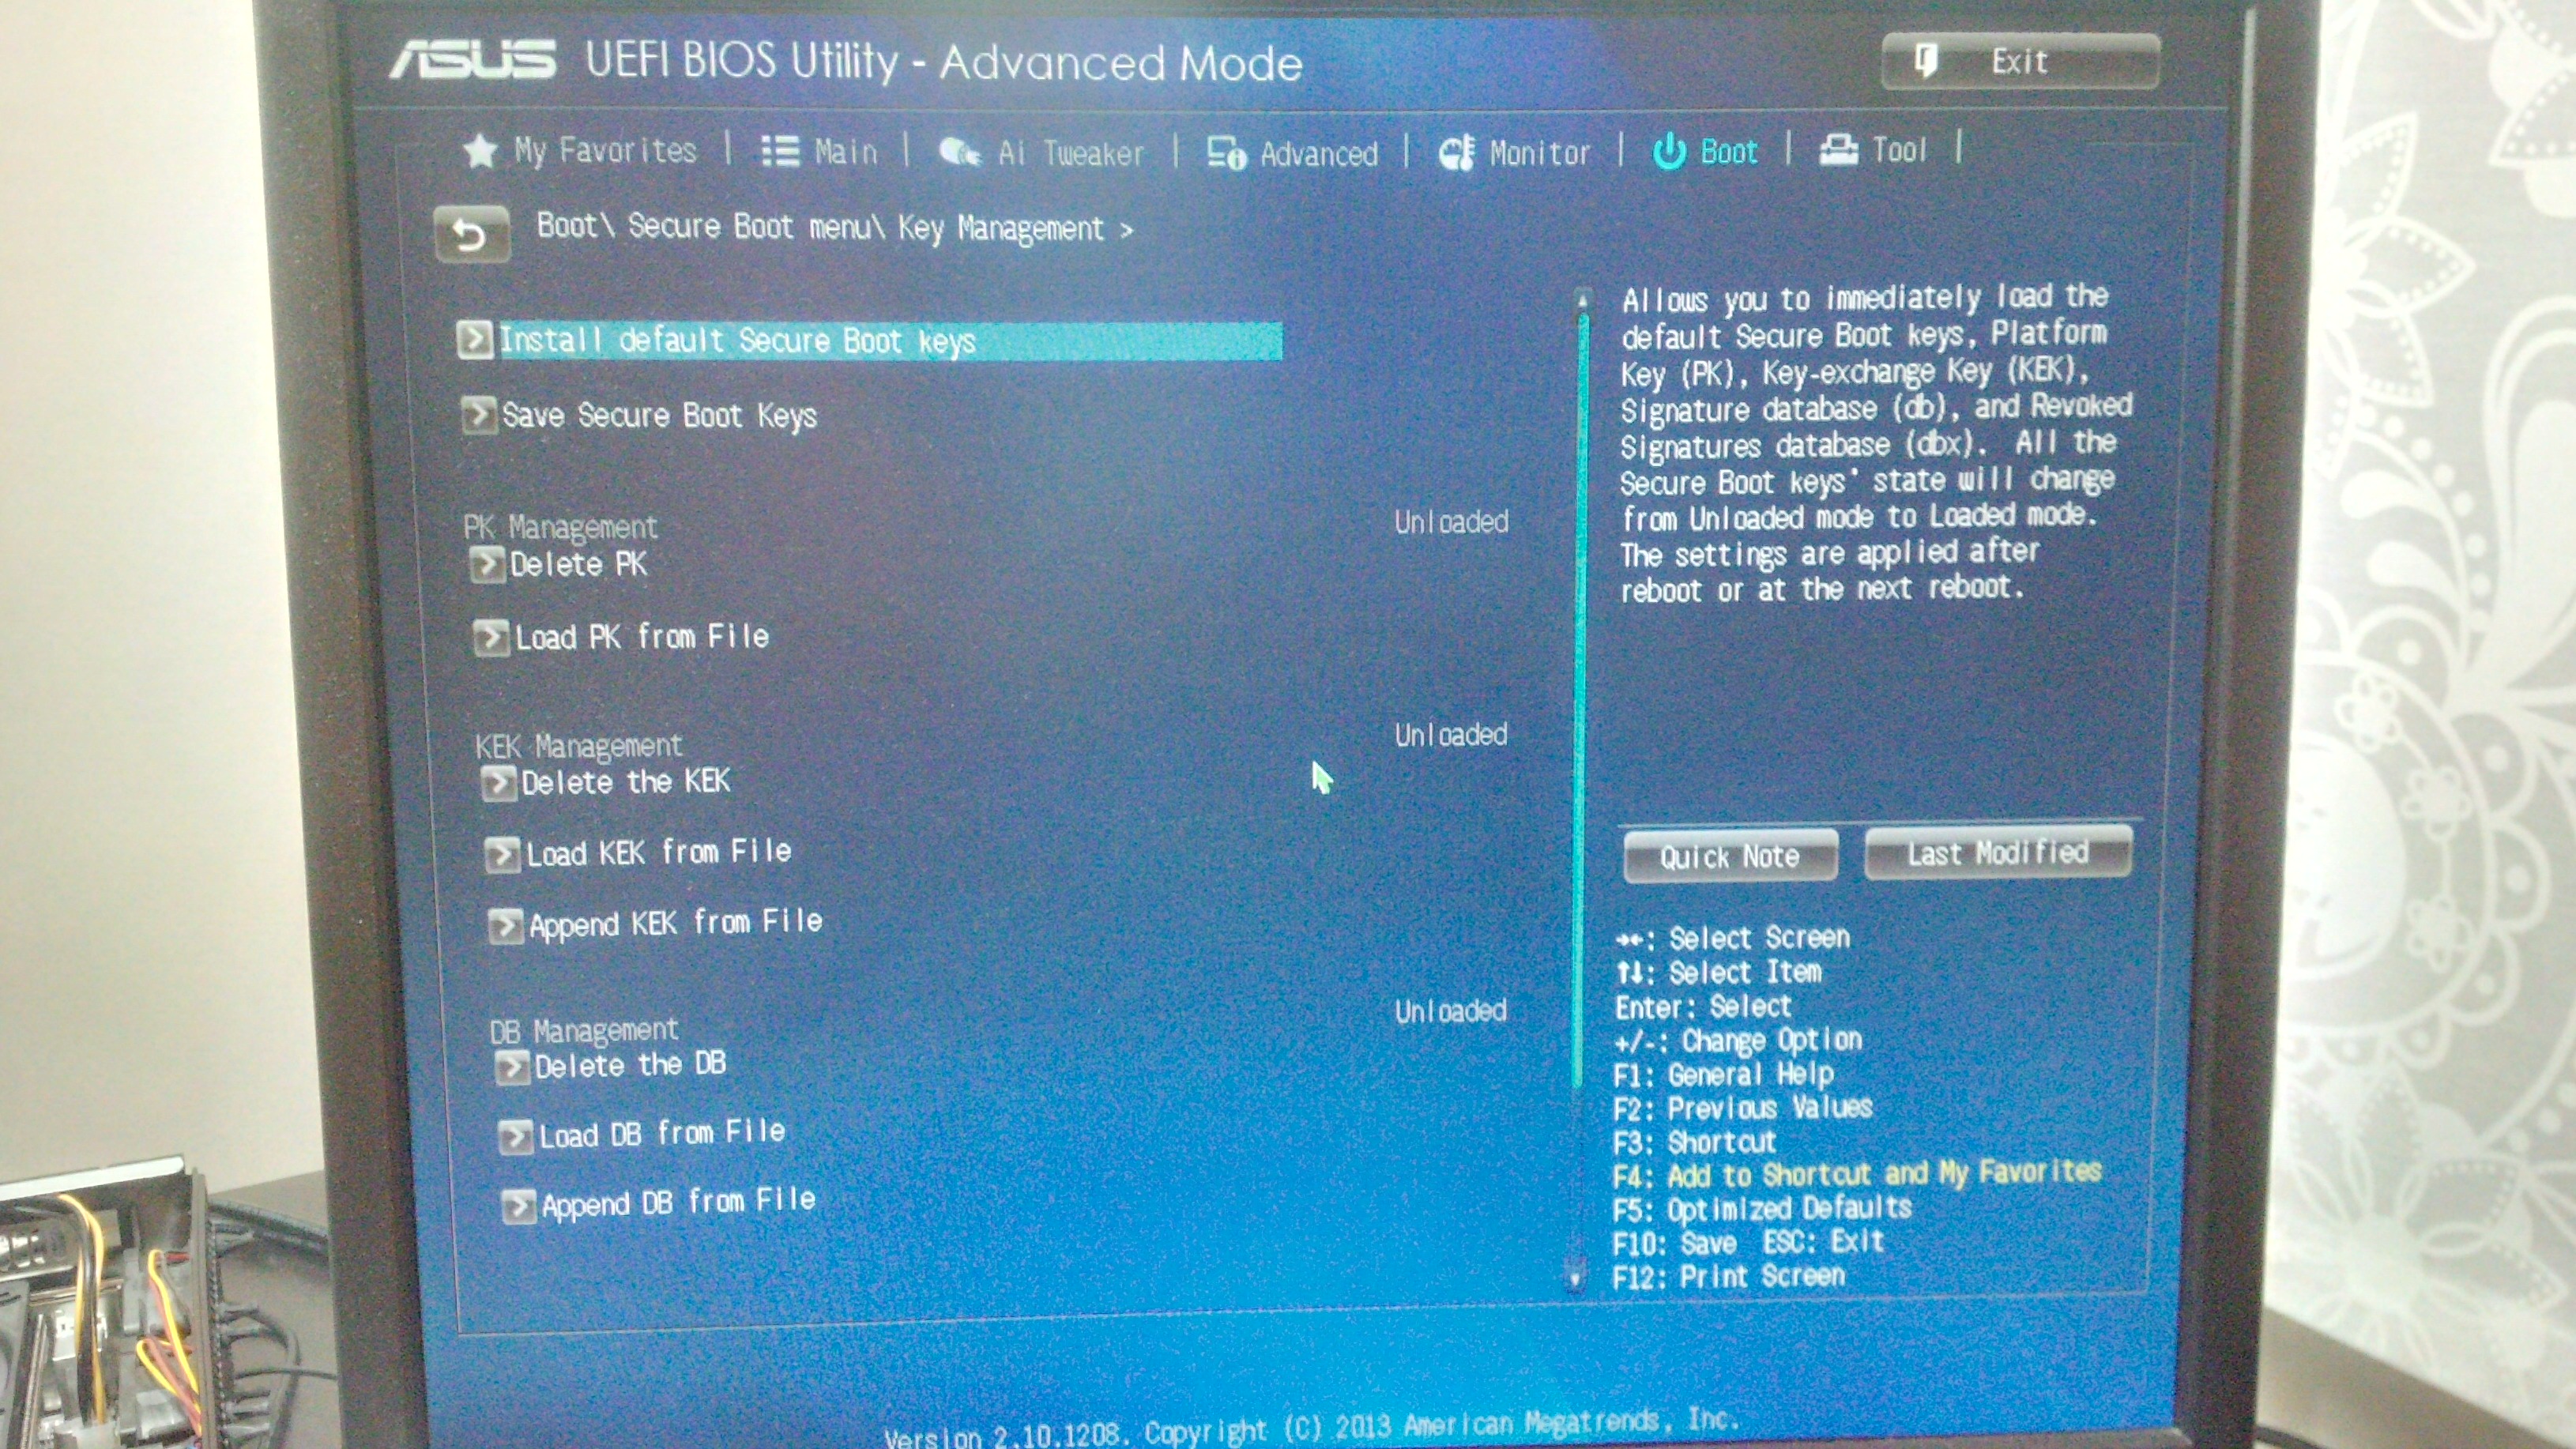
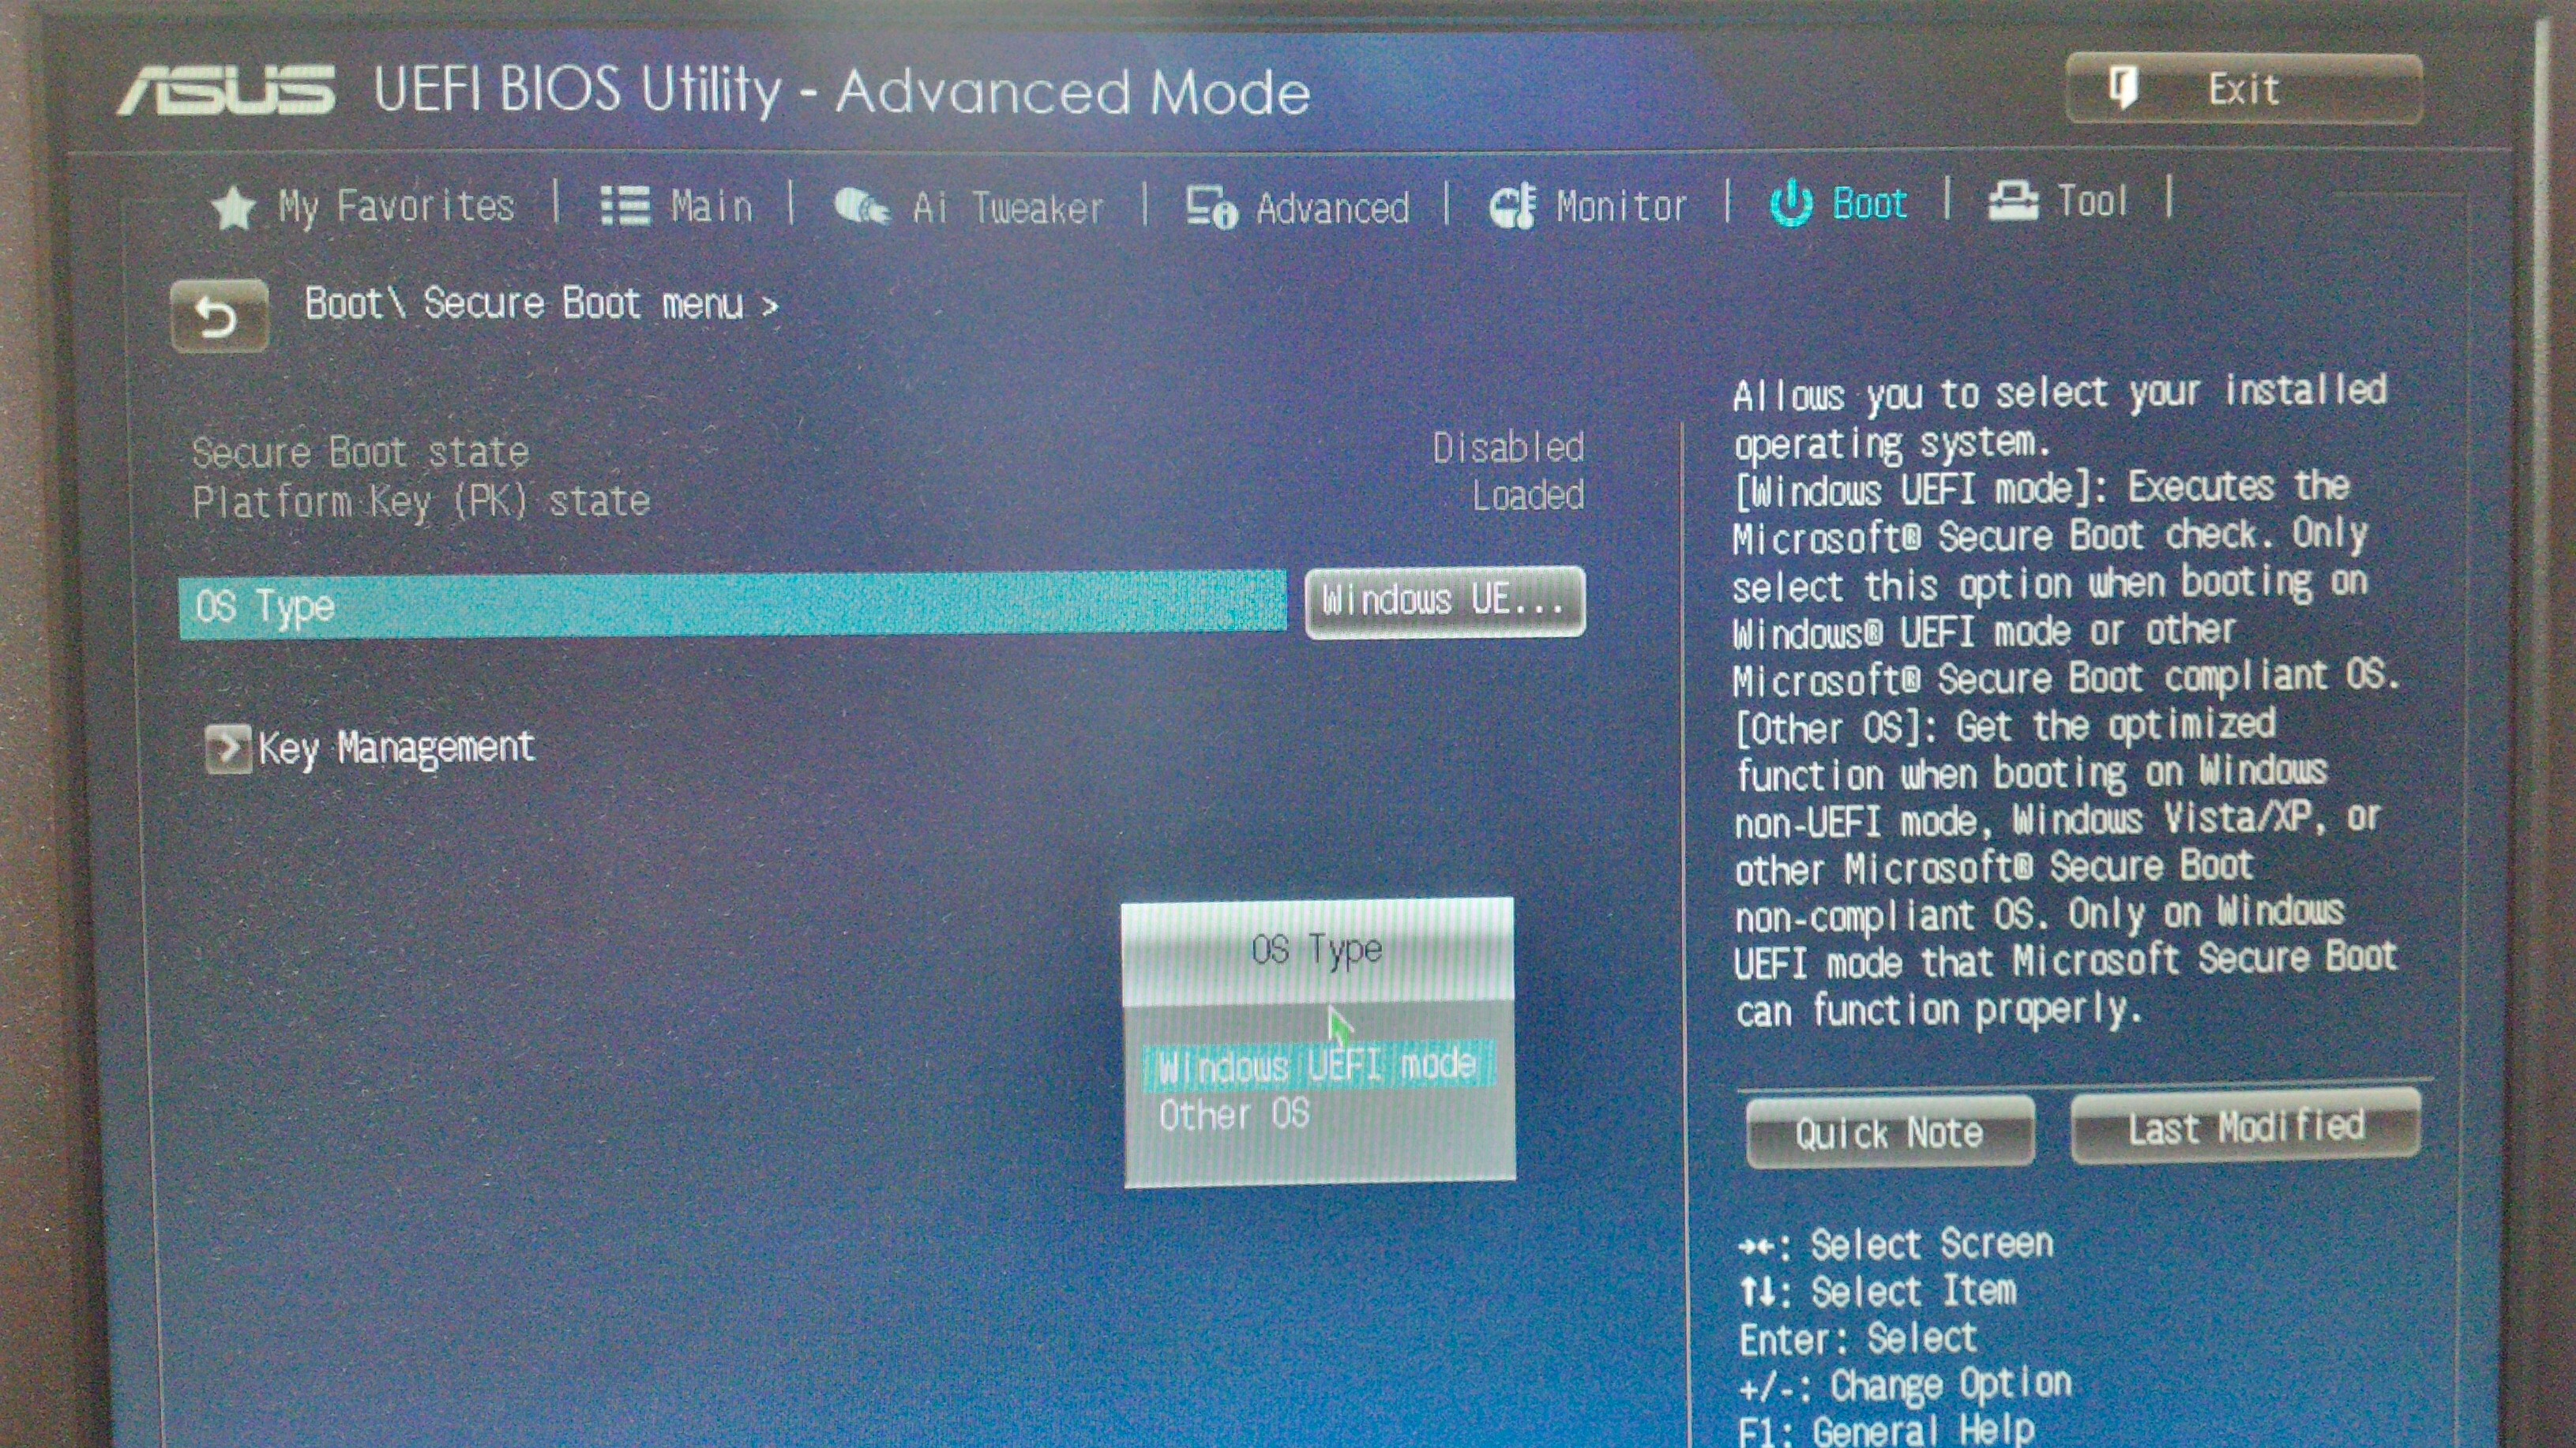
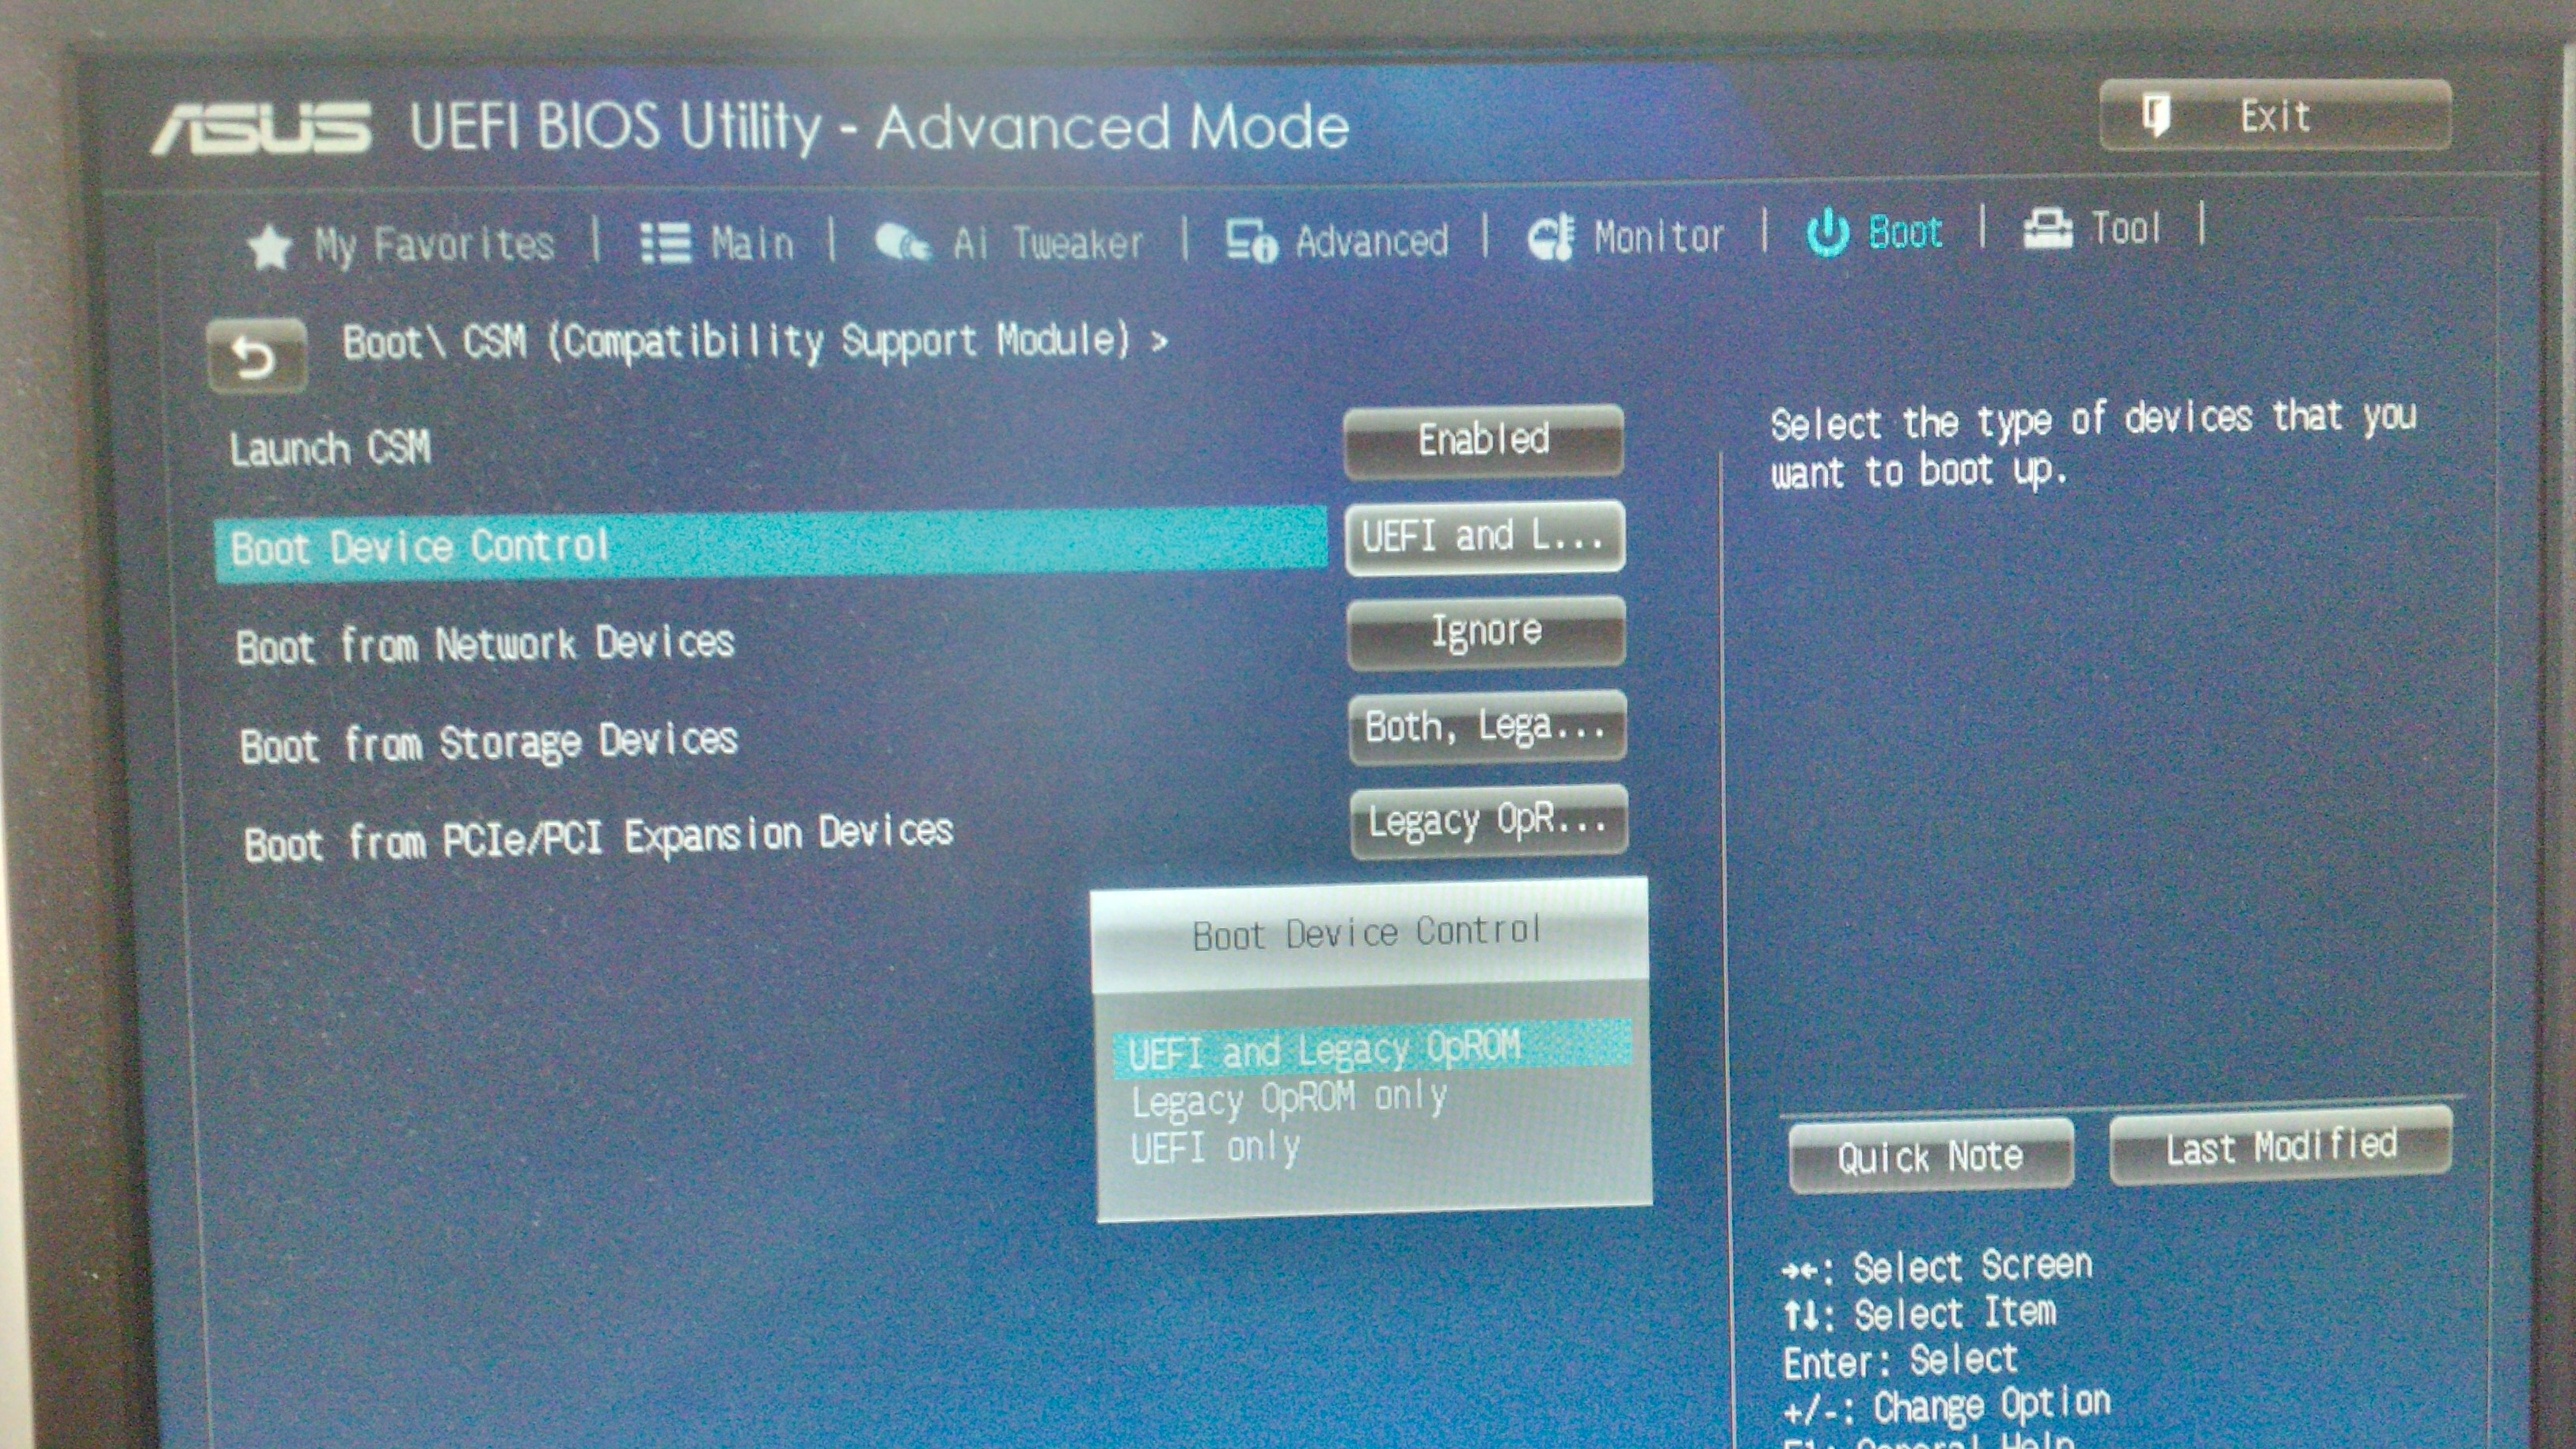

So, here are the pictures! I hope you will be able to tell me how to set it up all correctly, watch the pictures ant tell me wher to put what option.
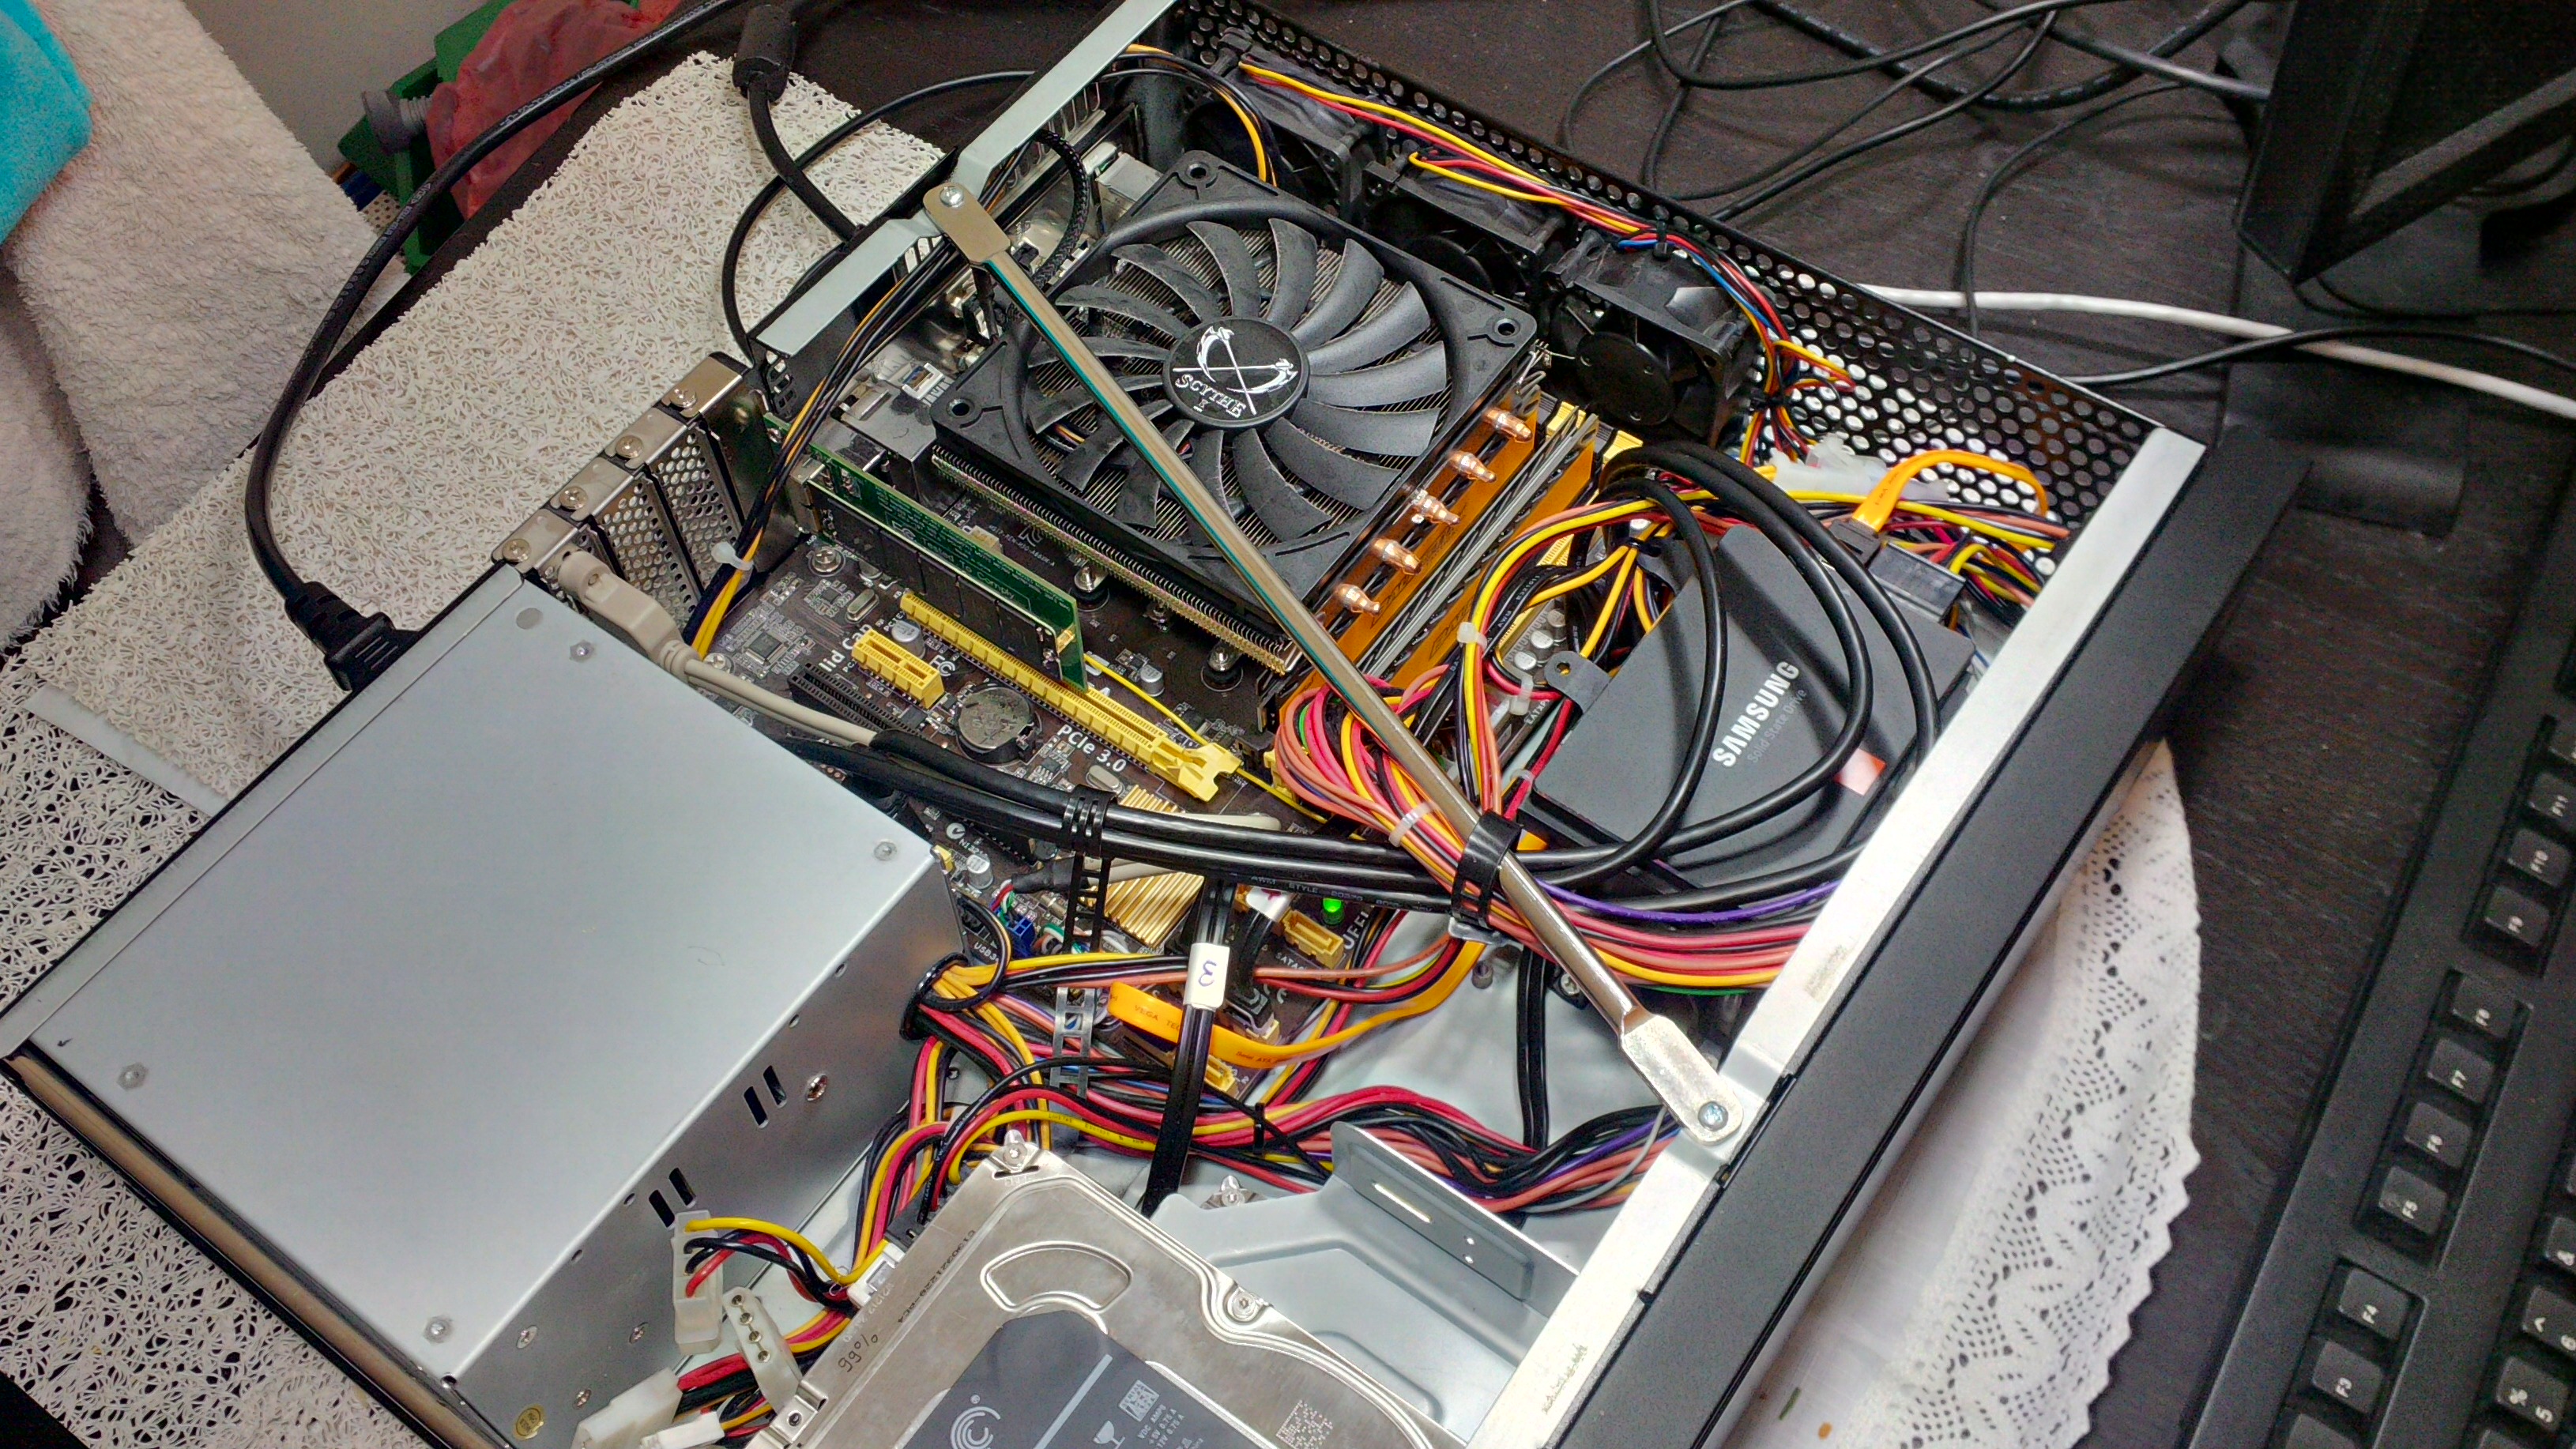
Generally, if I understand it well, I should keep the CSM enabled and the Secure Boot disabled. Then I only need to set up correctly the EFI boot options for the “classic” storages and PCIE/optional storage devices and I might be ready to boot from the SSD, right? You can see it is not a M.2 or whatever but it is an Apple 2013 SSD. I got one 1TB SSD in exact the same PCI-E x4 adapter in the PC I am currently writing from, running Win 8.1 x64 with no problem! So I know how it works and I know it is possible to boot from this HW. All I need is to set it up correctly. Then the installation of Win 8.1 x64 only takes about 6 minutes ( comparing to half-day installation of Win 98, hehe).
Thanks anyway!
EDIT by Fernando: Attached pictures resized and duplicate removed (to save space, the pictures can easily be enlarged by clicking onto them)
@GeorgettaCZ :
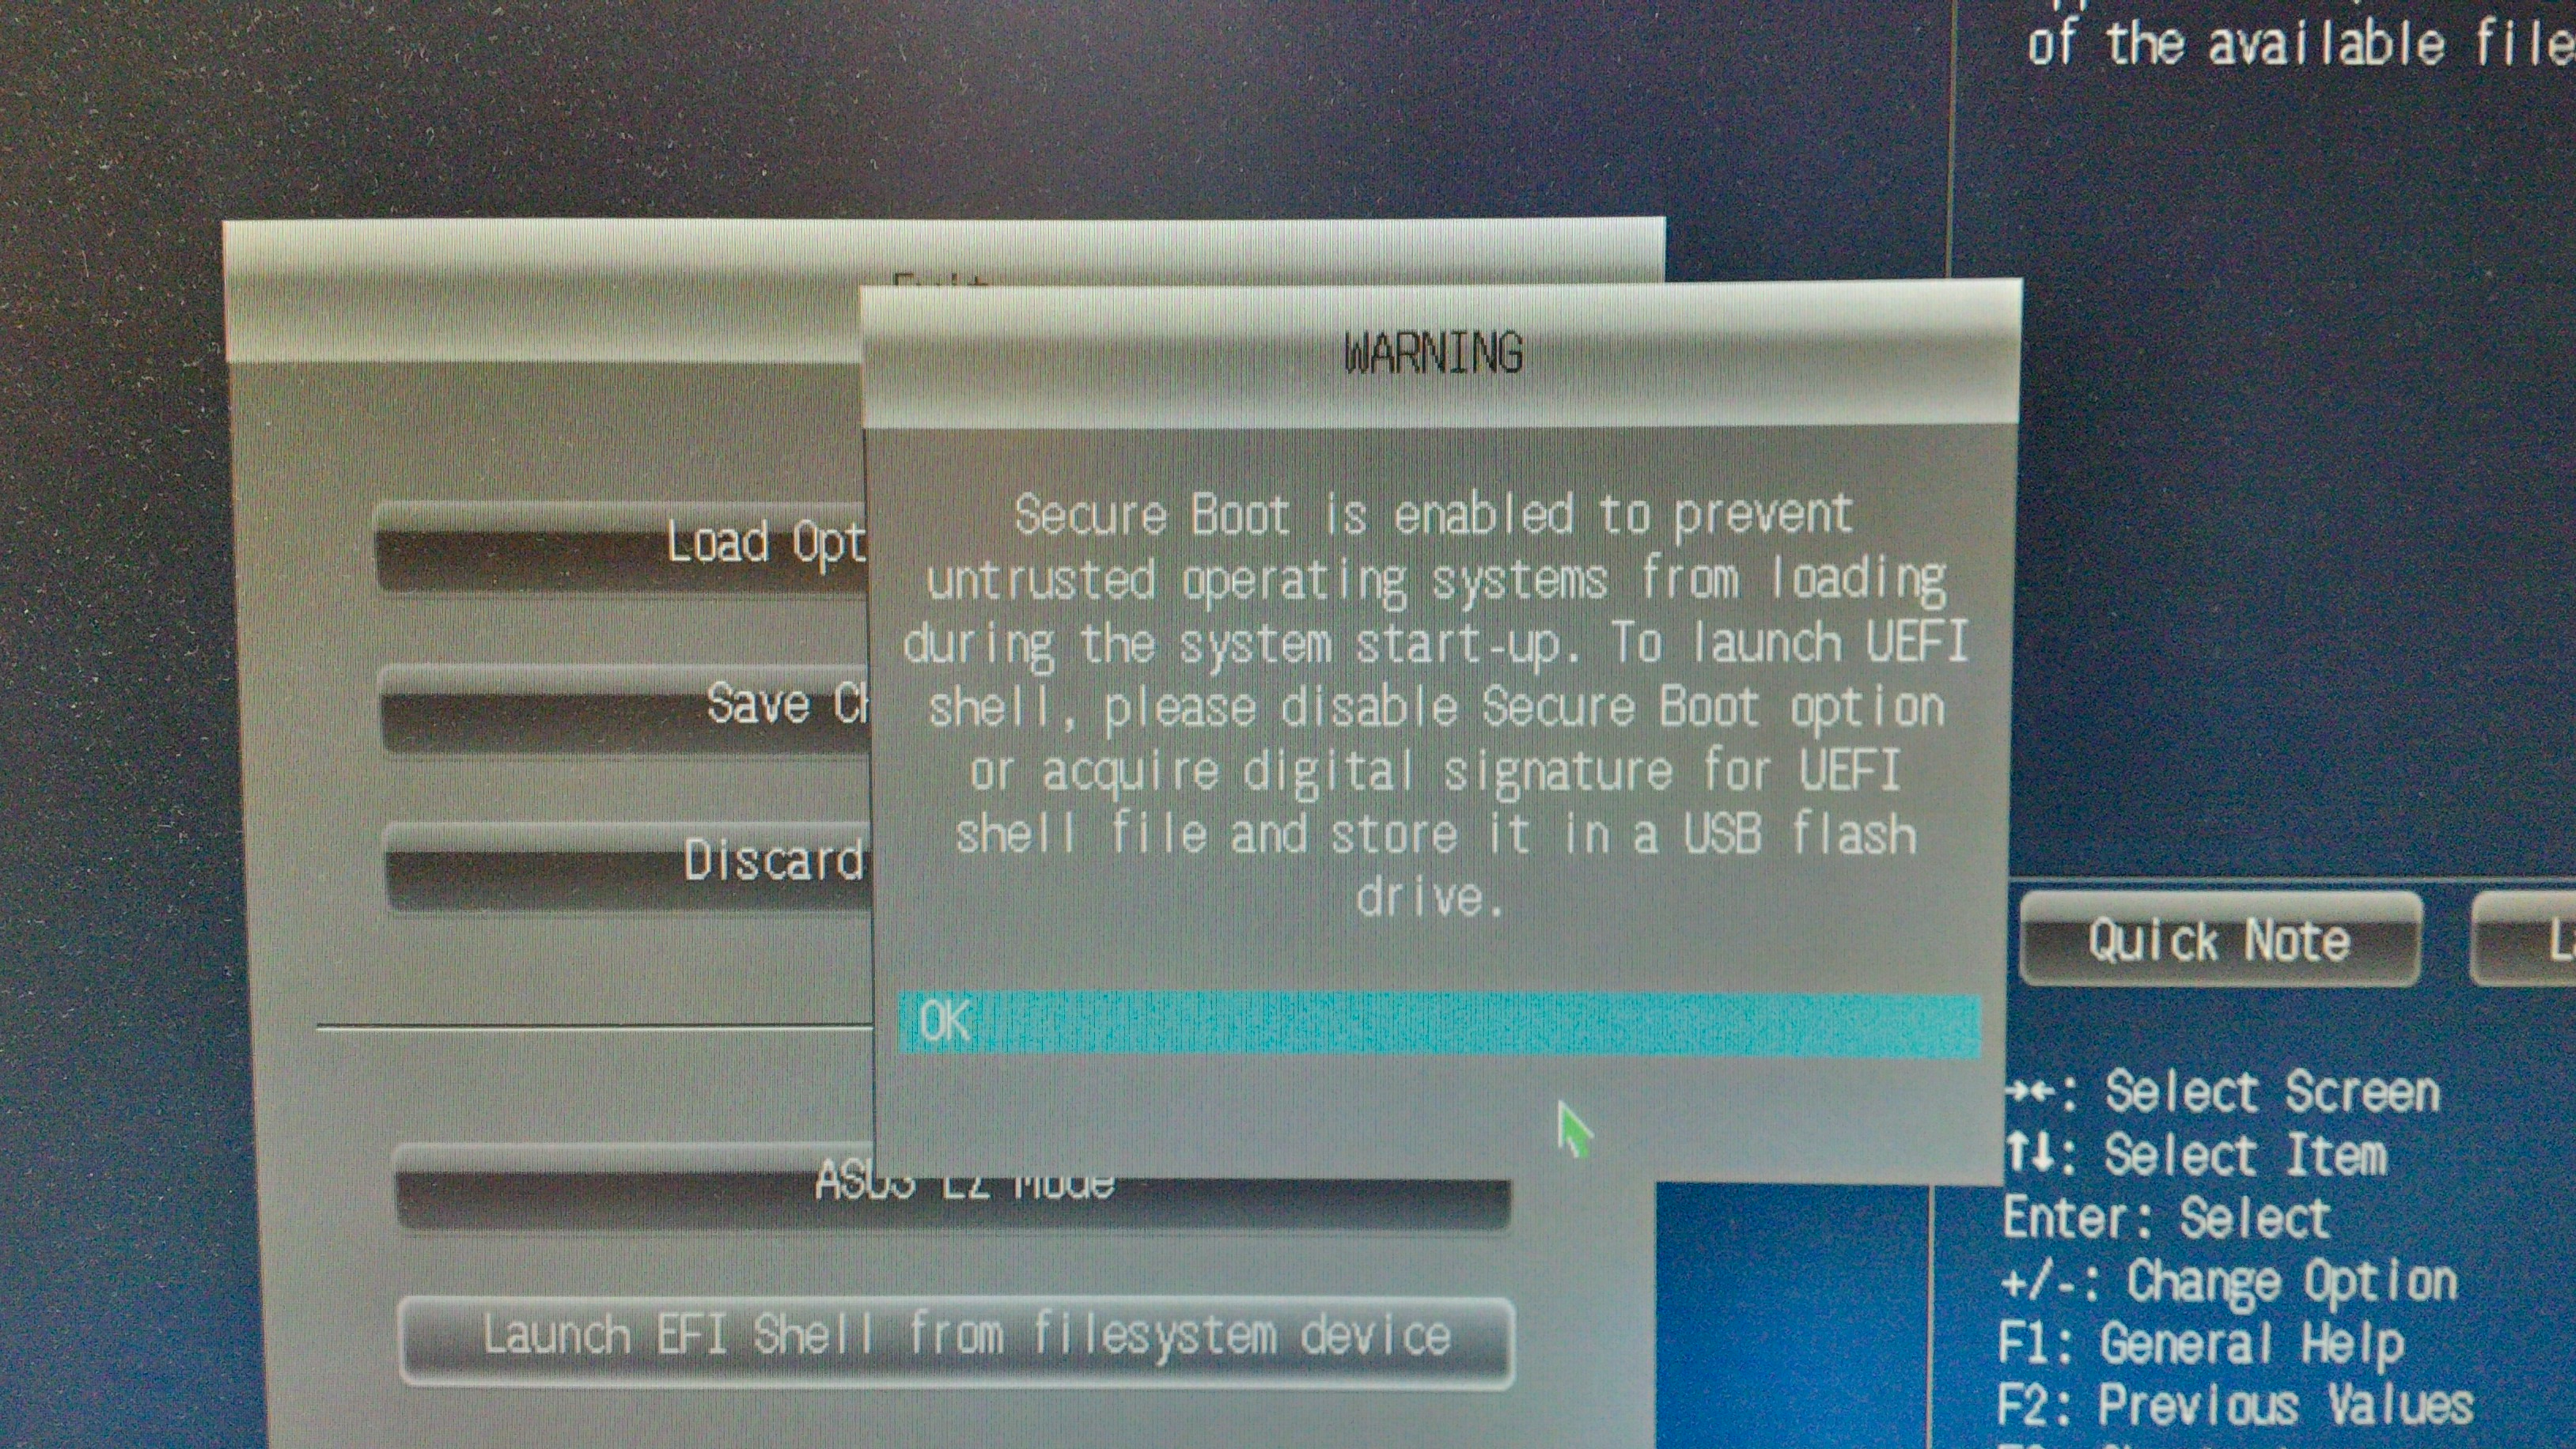
My tip: Disable the "Secure Boot" option.
Hi Ferko,
First of all, thanks for resizing the pics and removing duplicates. Sorry I did the pictures and the post on the fly while on the way to pub with my wifie :o)))
I did, what you suggested BEFORE you suggested it… but the result was that after the reboot the PC jumped directly to BIOS instead of boot to Windoze :o((
I will go on tomorrow…
@GeorgettaCZ :
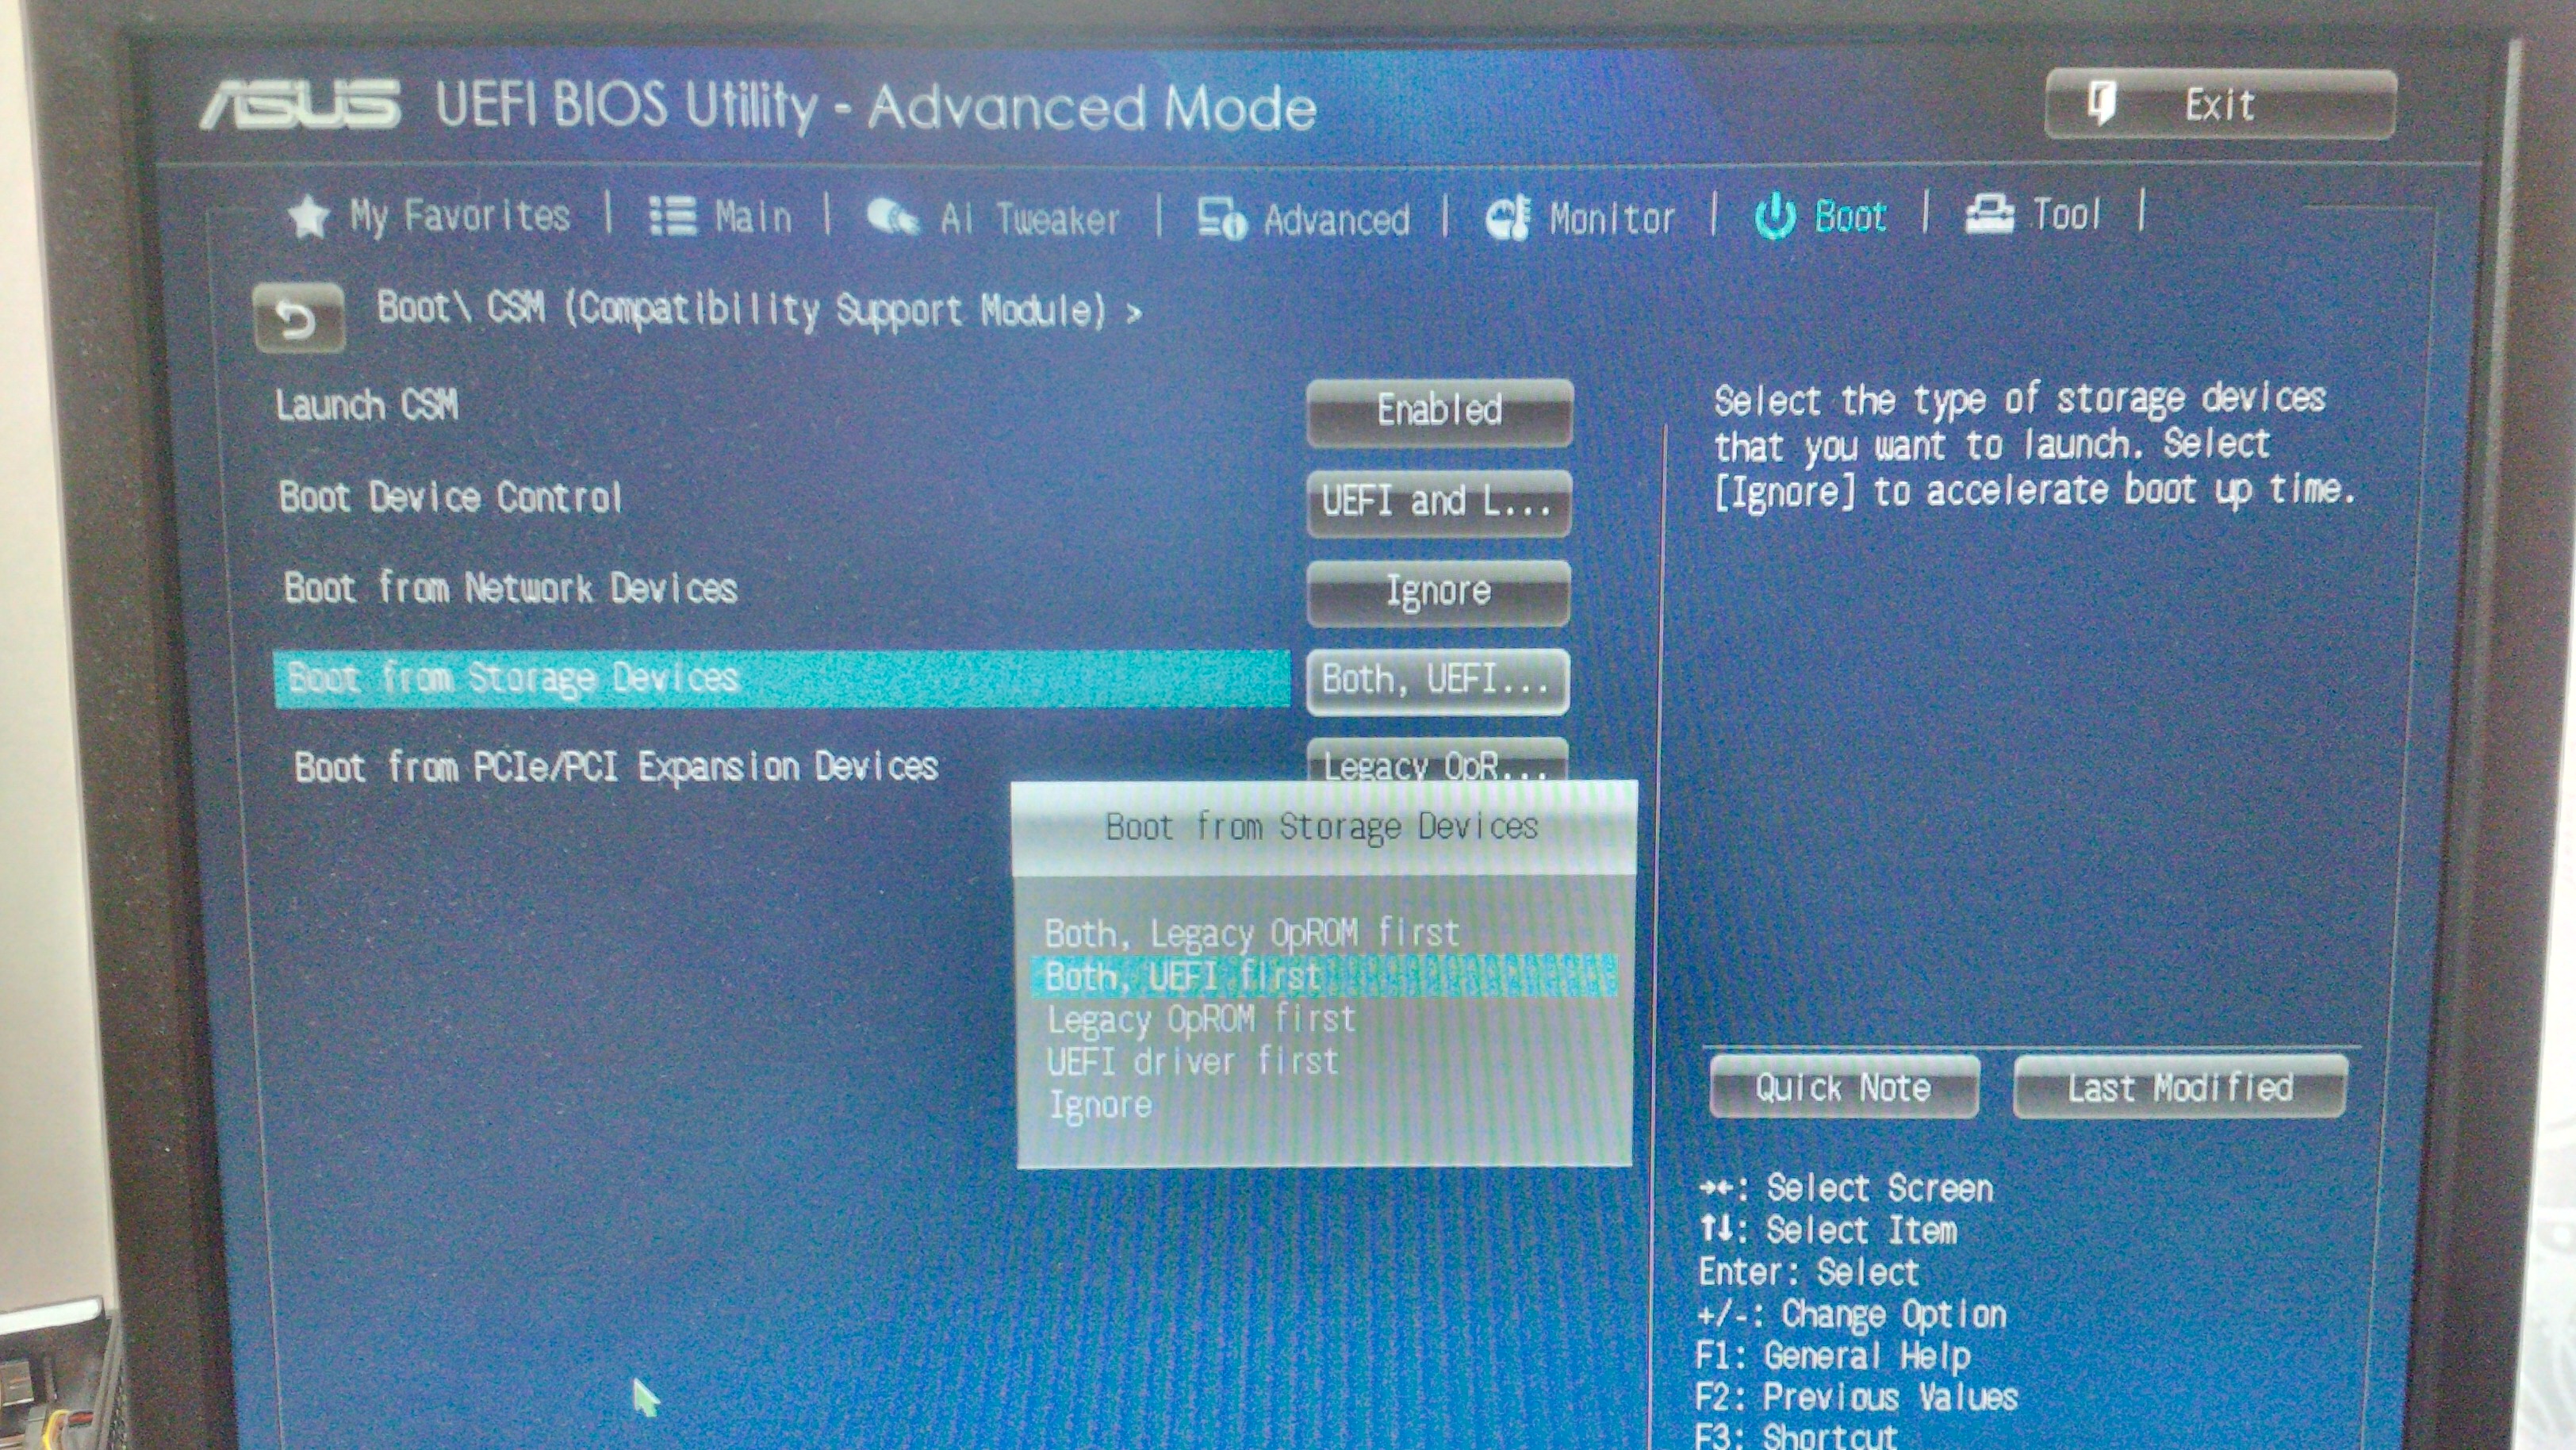
Another tip from my side: Within the CSM section you should choose "UEFI" priority for the "Boot from Storage Devices" and "Boot from PCIe/PCI Expansion Devices" settings.
Note: All my recommendations are only valid, if there is an NVMe EFI module within the BIOS of your current system. Have you ever checked that?
Good morning!
Aaand here we go again, finding ourselves back on the start, where I wrote that the latest bios for my A88XM-A motherboard probably does not contain NVMe driver/module. Though its one of the latest AMD chipsets, that supports nearly everything that i.e. intel Z97 or X99 chupsets support, it does not contain NVMe module. How do I know?
Well, I compared latest BIOS .CAP file from my ASUS Z97 Deluxe board with latest BIOS .CAP file from my ASUS A88XM-A board. I found out that the A88XM BIOS file is completely lacking from Nvme* lines wheras Z97 BIOS file has multiple lines named Nvme, NvmeMms, NvmeINIT13.
So, as I wrote in my first post, I tried to inject the NVMe driver according to the guide from this web, to the A88XM BIOS file. Then I realized that it was guide for Intel chipset but I am convinced that the NVMe driver, no metter what chipset what platform, should work the same way. So I downloaded the mmtool and the .ffs files, I followed the guide and saved the modded bios file. That new file even has exactly the same size as the origial file! But when I tried to flash it into BIOS, I ended up with "Security Verification Failed" error message. So I am back at the beginning…
@GeorgettaCZ :
Thanks for making clear the fact, that your currently used mainboard BIOS doesn’t contain any NVMe module. So this is the simple reason why you are not able to boot off the NVMe SSD.
I agree with you regarding this point.
This is the normal message all users of an ASUS UEFI mainboard get, when they try to flash a modded .CAP BIOS the normal way. To make it clear: This message doesn’t mean, that you have done any mistake while inserting the required NVMe EFI module into the original BIOS. It is just a security feature implemented by ASUS to prevent, that a user flashes any modified BIOS.
The easiest way to avoid the message you got is to flash the modded BIOS by using the ASUS feature named "USB BIOS Flashback", but I don’t know whether your specific ASUS mainboard does support this feature. Another option is to use the AMI tool AFUDOS. For details please have a look into the start post of >this< thread.
Hi,
Well, unfortunately, according to this list (http://www.asus.com/microsite/mb/AMD_Godavari/#models), the A88XM-A does NOT support USB BIOS flashback… DAMN!!
No bother,I will try the AFUDOS method… boot a DOS USB and then flash it the old school way via CMD, heh ;o)))
I only hope, I wont screw up the board tho…
Hallo again,
SHIT happened!!!
1. I have the modded .CAP file that I created from the offical latest (v.3001) bios .CAP file for my motherboard. I followed THIS guide
2. I created bootable USB and booted FreeDOS and copied the NVME.CAP file as well as the original 3001.CAP file on the USB flash drive along with the AFU program (I shortly named in APTIOAFU.EXE).
3. I followed this guide and launched my APTIOAFU to make a backup of the actual bios, prior to the experimenting… So now I have a backup .ROM file named 3k1BCP.rom (3k1 comes from latest bios version number 3001). APTIOAFU 3k1BCP.rom /O
4. Then I used APTIOAFU NVME.CAP /P /B /K /RECOVERY to flash my .CAP file with security override… After reboot, nothing but black screen.
5. I turned the PC off by I/O button, plug off the PSU, reset BIOS by the RTC clamp on the board, even remove the bios battery for some time, then put it all back. Nothing worked and the board is dead now. It will power up but wont POST.
Luckily, I found the invoice of the board and it is still under warranty… so I am going to claim it by the seller;o))) And since the seller does not sell this model anymore but sells the A88XM-A/USB3.1 for just a little bit higher price, I will buy the new version with USB3.1! Yeah, yeah…
Cheers, bye!
@GeorgettaCZ :
Thanks for your failure report.
It is a pity, that you bricked the mainboard by trying to flash the modded BIOS.
Hopefully you will get a running system back very soon and an analysis given by CodeRush or somebody else about what went wrong at your recent test.
@Fernando ,
I want to report success with booting Windows 8.1 on my A88XM-A motherboard and a MyDigitalSSD MDNVME80-BPX-0256 M.2 in a PCI-E adapter. I had to program the BIOS with an external programmer, transfer the Win8.1 OS disk image with MiniTool Partition Wizard (version 9), reboot into Safe mode, then into normal startup. Here is the benchmark result:
Many thanks to you and fellow forum members for the detailed guide!|addpics|e3a-1-c82d.png-invaddpicsinvv|/addpics|
@www007 :
Welcome at Win-RAID Forum and thanks for your feedback!
It is fine, that you succeeded!
Enjoy it!
Dieter (alias Fernando)
Sorry to necropost but this is very close to what i was going to ask. I have an Asus A88XM-A/USB 3.1 on order. It looks like NVME booting is a no no, i have never modified a bios file and i cannot afford to brick a new board. Thats fine, i can use a sata ssd for os. All i need to know is if i put an nvme drive(on an adapter) in the pci express x16 slot, it will actually work as long as i have the drivers for it, w7 and w10? as my board is a later version of GeorgettaCZ’s.
Hallo again!
It was me almost 4 years ago who started this thread. Today I can proudly anounce and confirm that I finally made it myself. My HTPC finally boots from PCIE dapter with a Samsung NVMe 512GB SSD.
My first attempt years ago ended up with bricked chip and a mothorboard replacement in warranty claim.
Meanwhile I purchased a cheap chinese USB DIP/SOIC/SOP chip flasher (https://www.aliexpress.com/item/32725360255.html) and also gained a lot experience with this toy. I was also lucky that this motherboard has a non-soldered SOP package bios chip but a DIP bed and a DIP package Winbond 25Q64VB chip that is easy to remove and refit.
So after a little thinking about how to get the DXE into the BIOS I found out that instead of messing around with downloded .CAP file and getting “18-Error: Unable to start a Secure Flash session.” while trying to flash the modded file I should dump the working chip and mod the dumped file eventually.
As a source of DXE files I downloaded a confirmed working file Z9PA-D8-ASUS-5602_NVMe.rom from here (https://linustechtips.com/topic/592133-h…omment-13310716) and extracted the the 4 files (File_DXE_driver_NvmeInt13_NVMEINT13.ffs, File_DXE_driver_NvmeSmm_NvmeSmm.ffs, File_DXE_driver_Nvme_Nvme.ffs, File_DXE_driver_1AC7EE15-1290-402C-80E9-F45A86E43F71_SAMSUNG_M2_DXE.ffs) from it. Then I used the insertion method described here [HowTo] Get full NVMe support for all Systems with an AMI UEFI BIOS, using the 2. a) procedure. Finally I checked the file with UEFI tool 0.26 just to see if my new file looks same as the Z9PA-D8-ASUS-5602_NVMe.rom and flashed it back in the chip.
Booted from USB Windows 10 20H2 flash drive and…BINGO! I was free to install Windows on that 512GB Samsung SSD, pictured in my erlier post above. The SSD is originally an Apple SSD from an old MacBook Pro and there is a special Apple-to-PCIE adapter. Basically it is a classic M.2 SSD but the PCB has a proprietary connector. More about it can be found here (https://beetstech.com/blog/apple-proprie…cs-and-upgrades). Attached is a Crystal DiskMark Info screenshot with achieved speeds that I am more than happy with, keeping in mind that it is a 7 years old SSD, still no too bad ;o))) And while I was playing with this my 2 SATA-III 4TB HDDs stay in mirror RAID untouched.
Thats all, volks! Thanks for reading! Any comments appretiaded!
Oh and by the way, since yesterday as I had my second COVID-19 test positive, I am in a 10 day quarantine…
Take care! Be safe!
EDIT by Fernando: Attached files removed, because they are unusable and may confuse other users
Please, you can post this BIOS files in another server? My downloads of these files, always end up corrupted.
Ur right, i got same error, ill post a mod soon.
EDIT: Here u go STOCK CAP 3001 NVMe MOD, as usually files provided is USER OWN RISK, as this board doesn’t have USB BFB function.
Thanks!
Edit:
I already downloaded the file. I’m looking for a new Flash W25Q64 to buy and then do a “Hot Flashing”.
Do you believe this will work or the flash process do not record the entire NEW CHIP (W25Q64)?
(Type: Boot Block, Mac Address, etc. is not writable and will not be recorded in the new BIOS).
Edit:
Alternatively, I know I have here, somewhere a “Flash Serial eeproms 24XX 25XX”, I never used it and so far I have not found it.