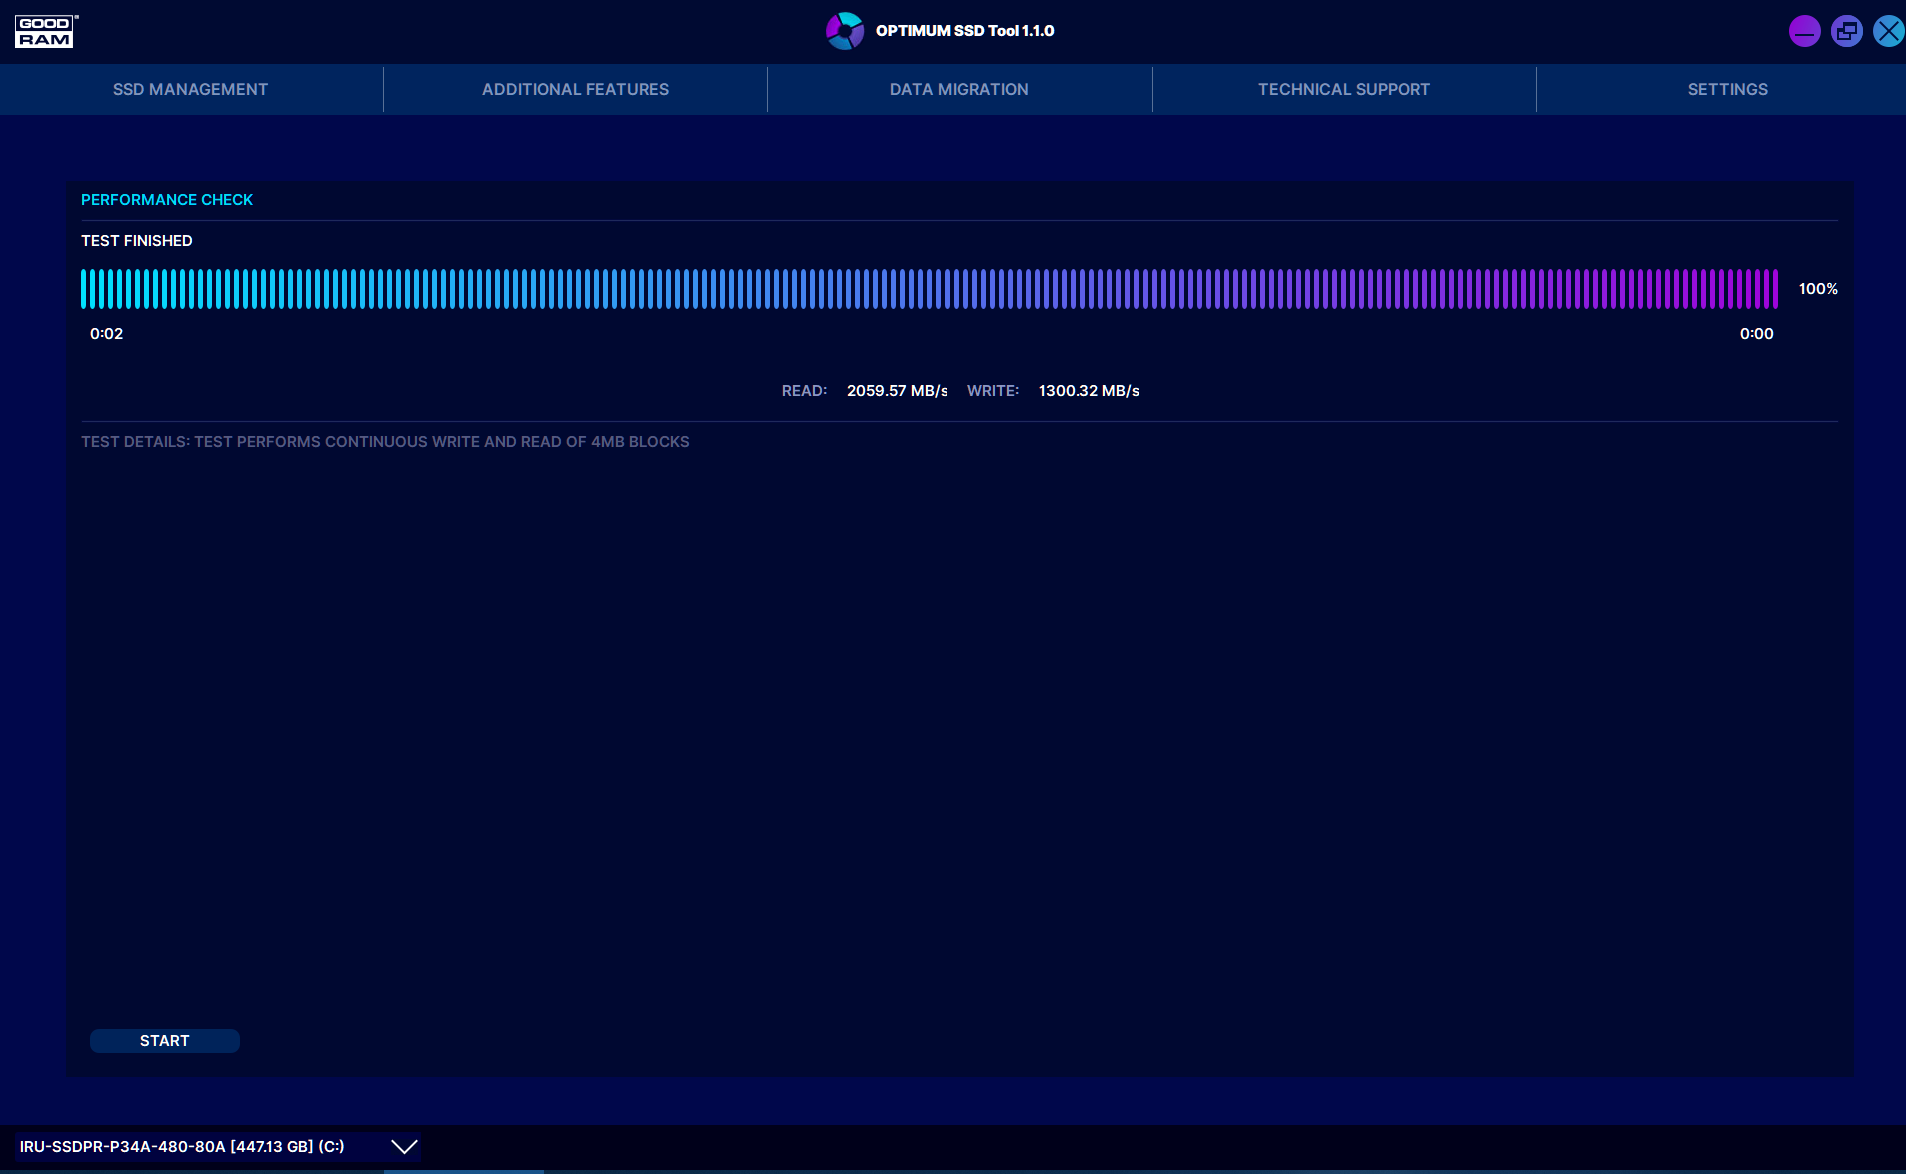
I am new here and I have been looking for a bios for my P9X79 plain bios with the support of NVME to boot from. I have read a lot only to be confused more because my English are not so good so I don’t understand what to do. I have no clue what I should do to create one myself with the UBU tool and to tell the truth about it I am afraid that I could damage my mobo. I have purchased this https://www.goodram.com/en/products/irdm…e-pcie-m-2-ssd/. It is 480 Gb and the official bios doesn’t boot from it. Windows 10 Pro see the drive as a secondary one and the computer can store data on it but it can’t boot from it. Thank you in advance for your help.
EDIT by Fernando: Since the thread opener wanted to get and not to offer an already modded BIOS, I have customized the thread title and moved this thread into the correct Sub-Forum.
I modded the latest bios v_4801 beta from the manufacturers website…
EFI and ROMs updated as per the picture as I’m too lazy to type by hand!
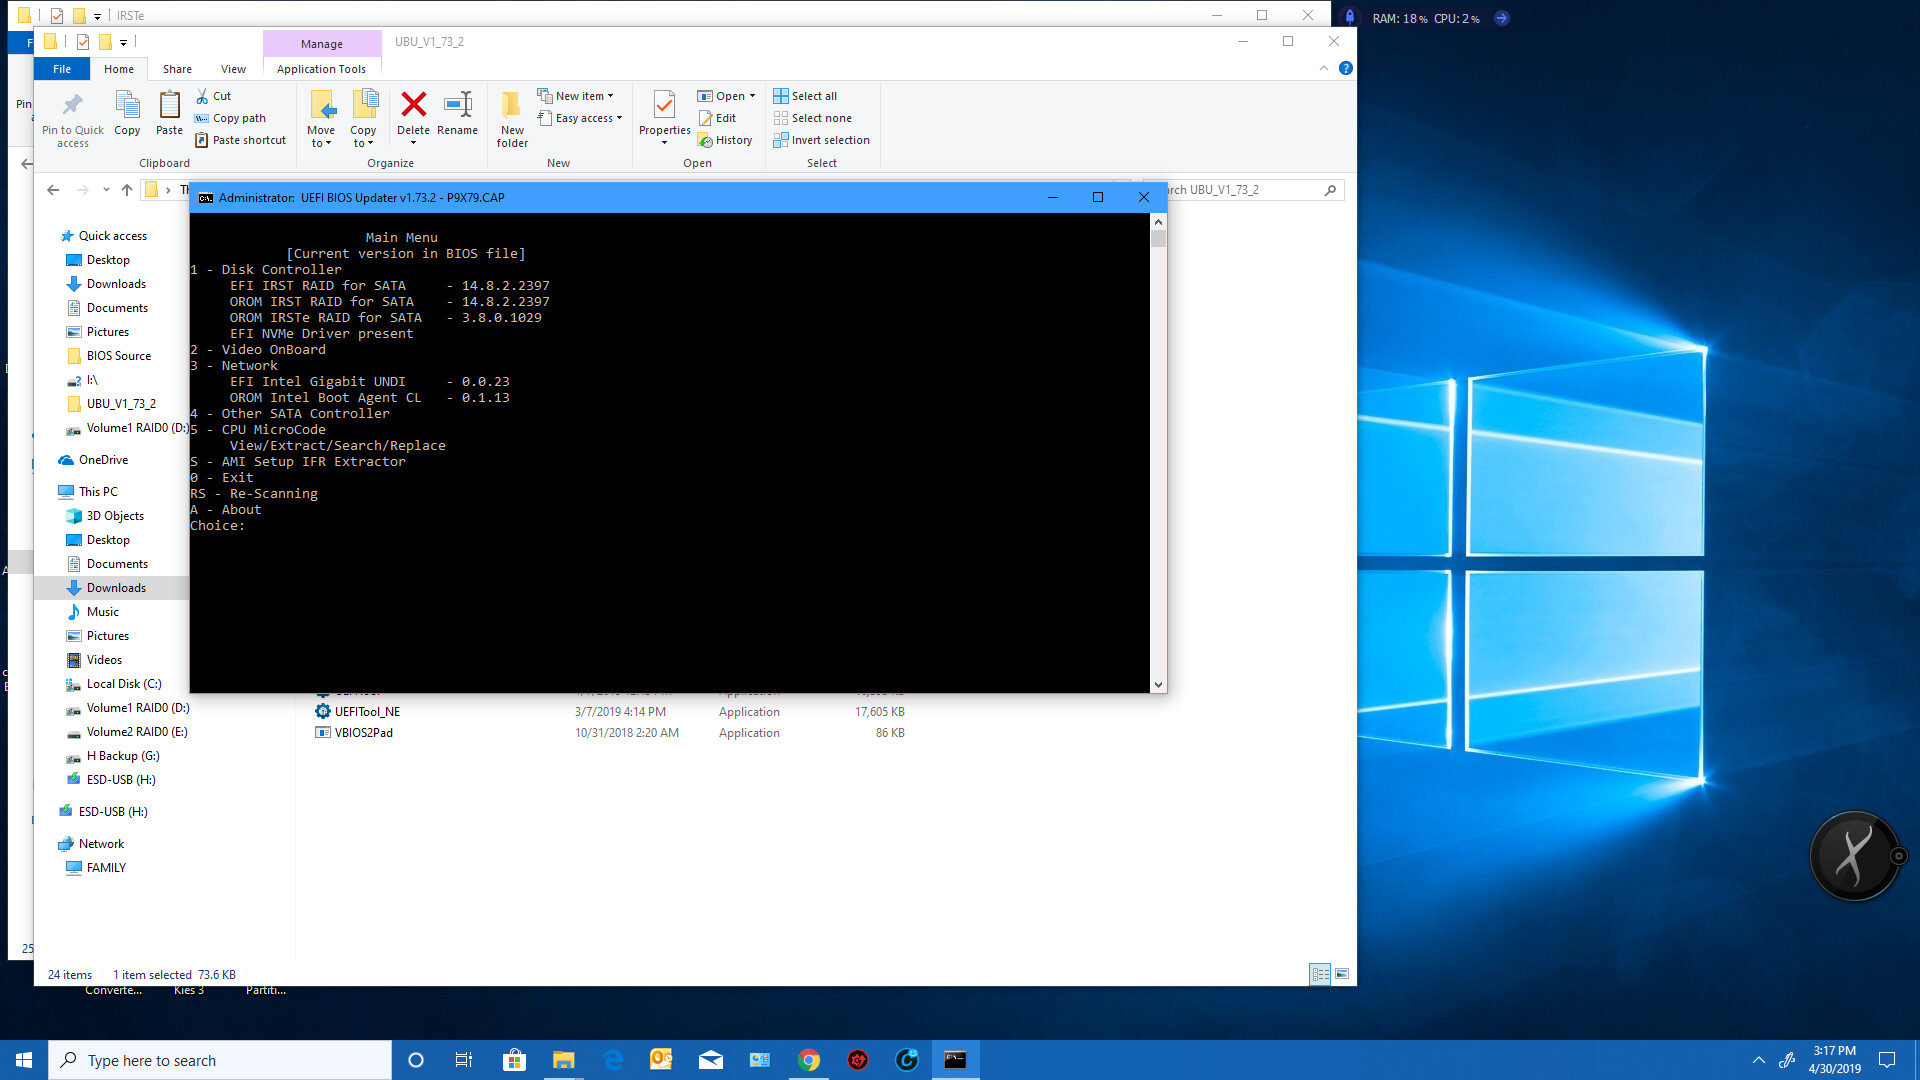
CPU microcodes updated as follows in the picture, which again is way too much to type:
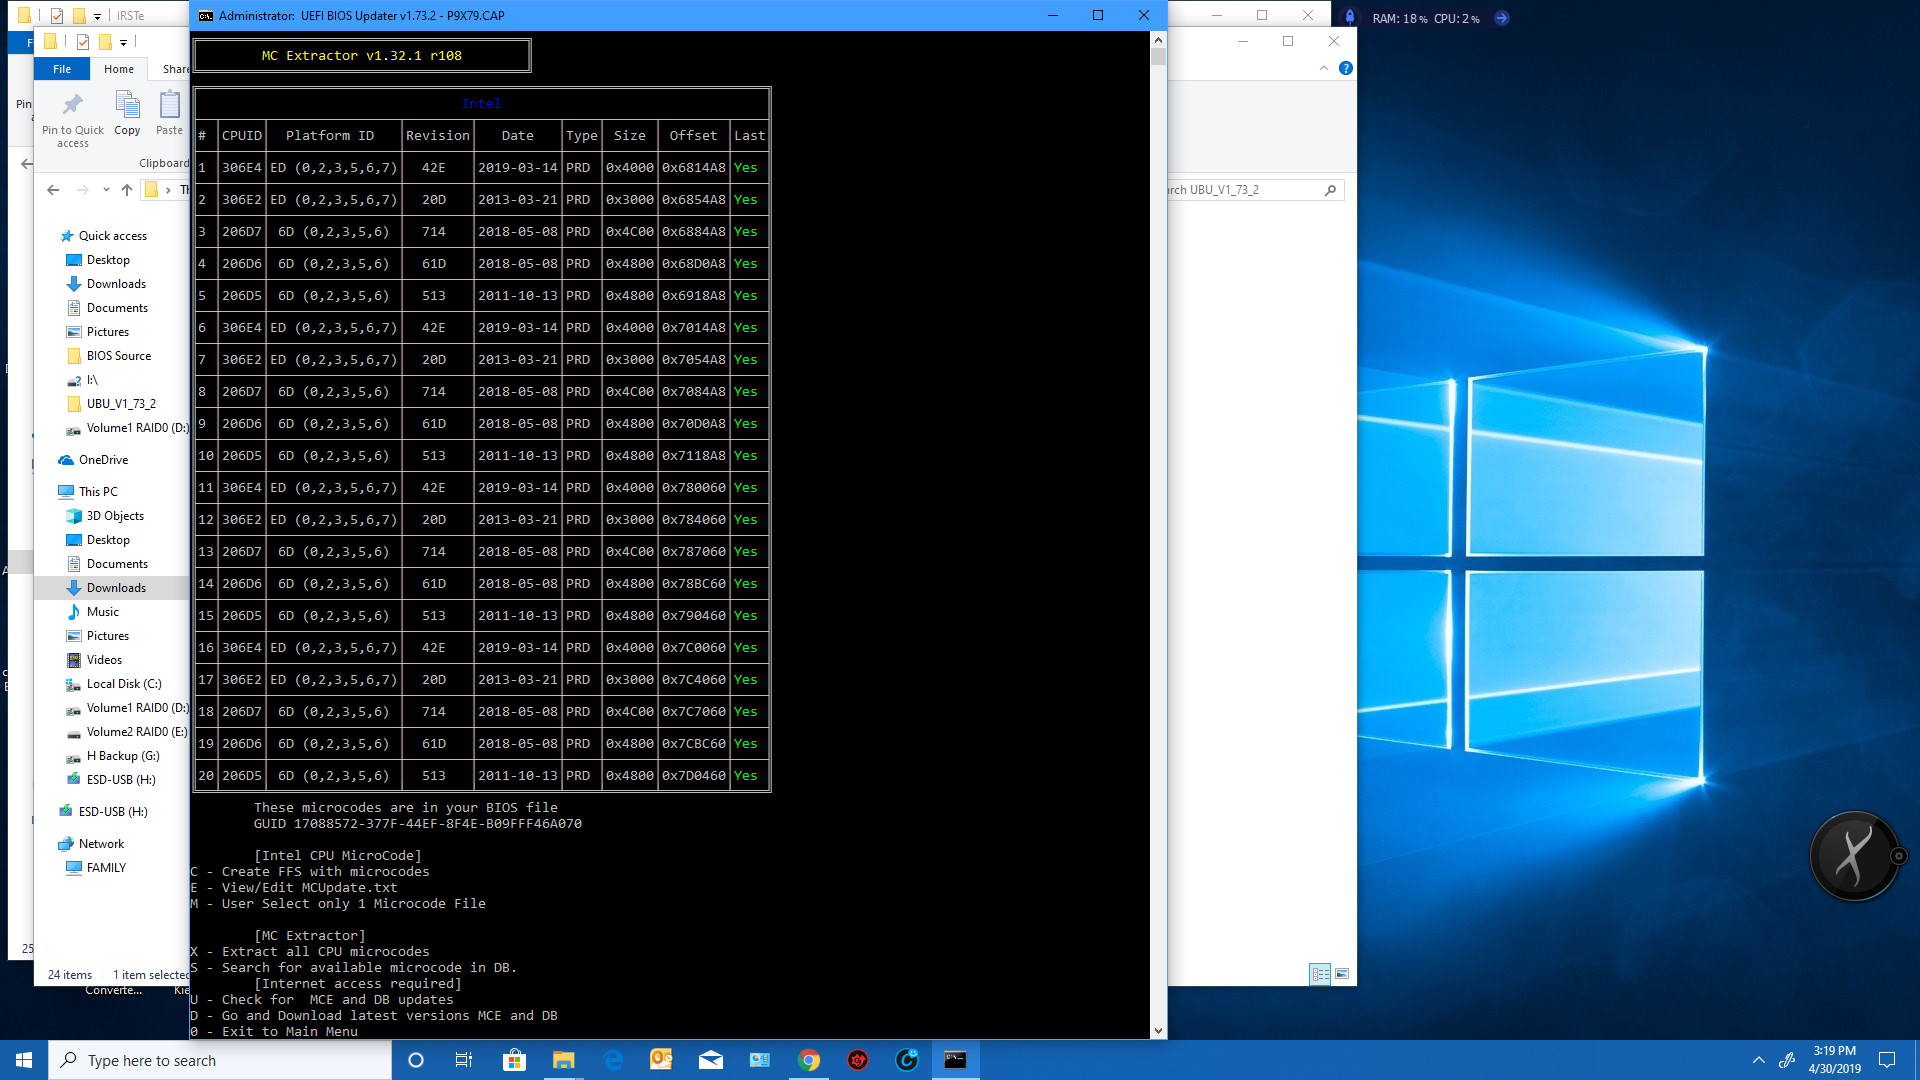
All courtesy of UBU v1.73_2 which made this rather painless once you’ve done the learning curve…
NVMe functionality via ------> NVMe mod to run UEFI NVMe SSDs using module NvmExpressDxe_4.ffs dated 04/18/2018 inserted after CSMCORE for this Aptio IV UEFI/BIOS
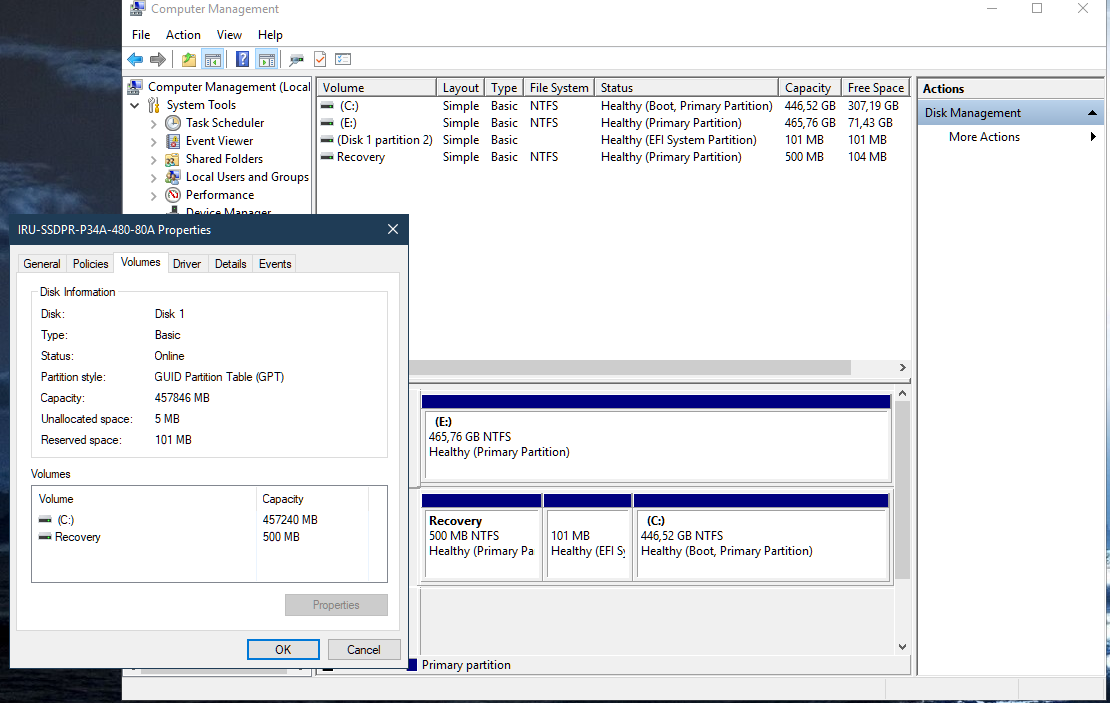
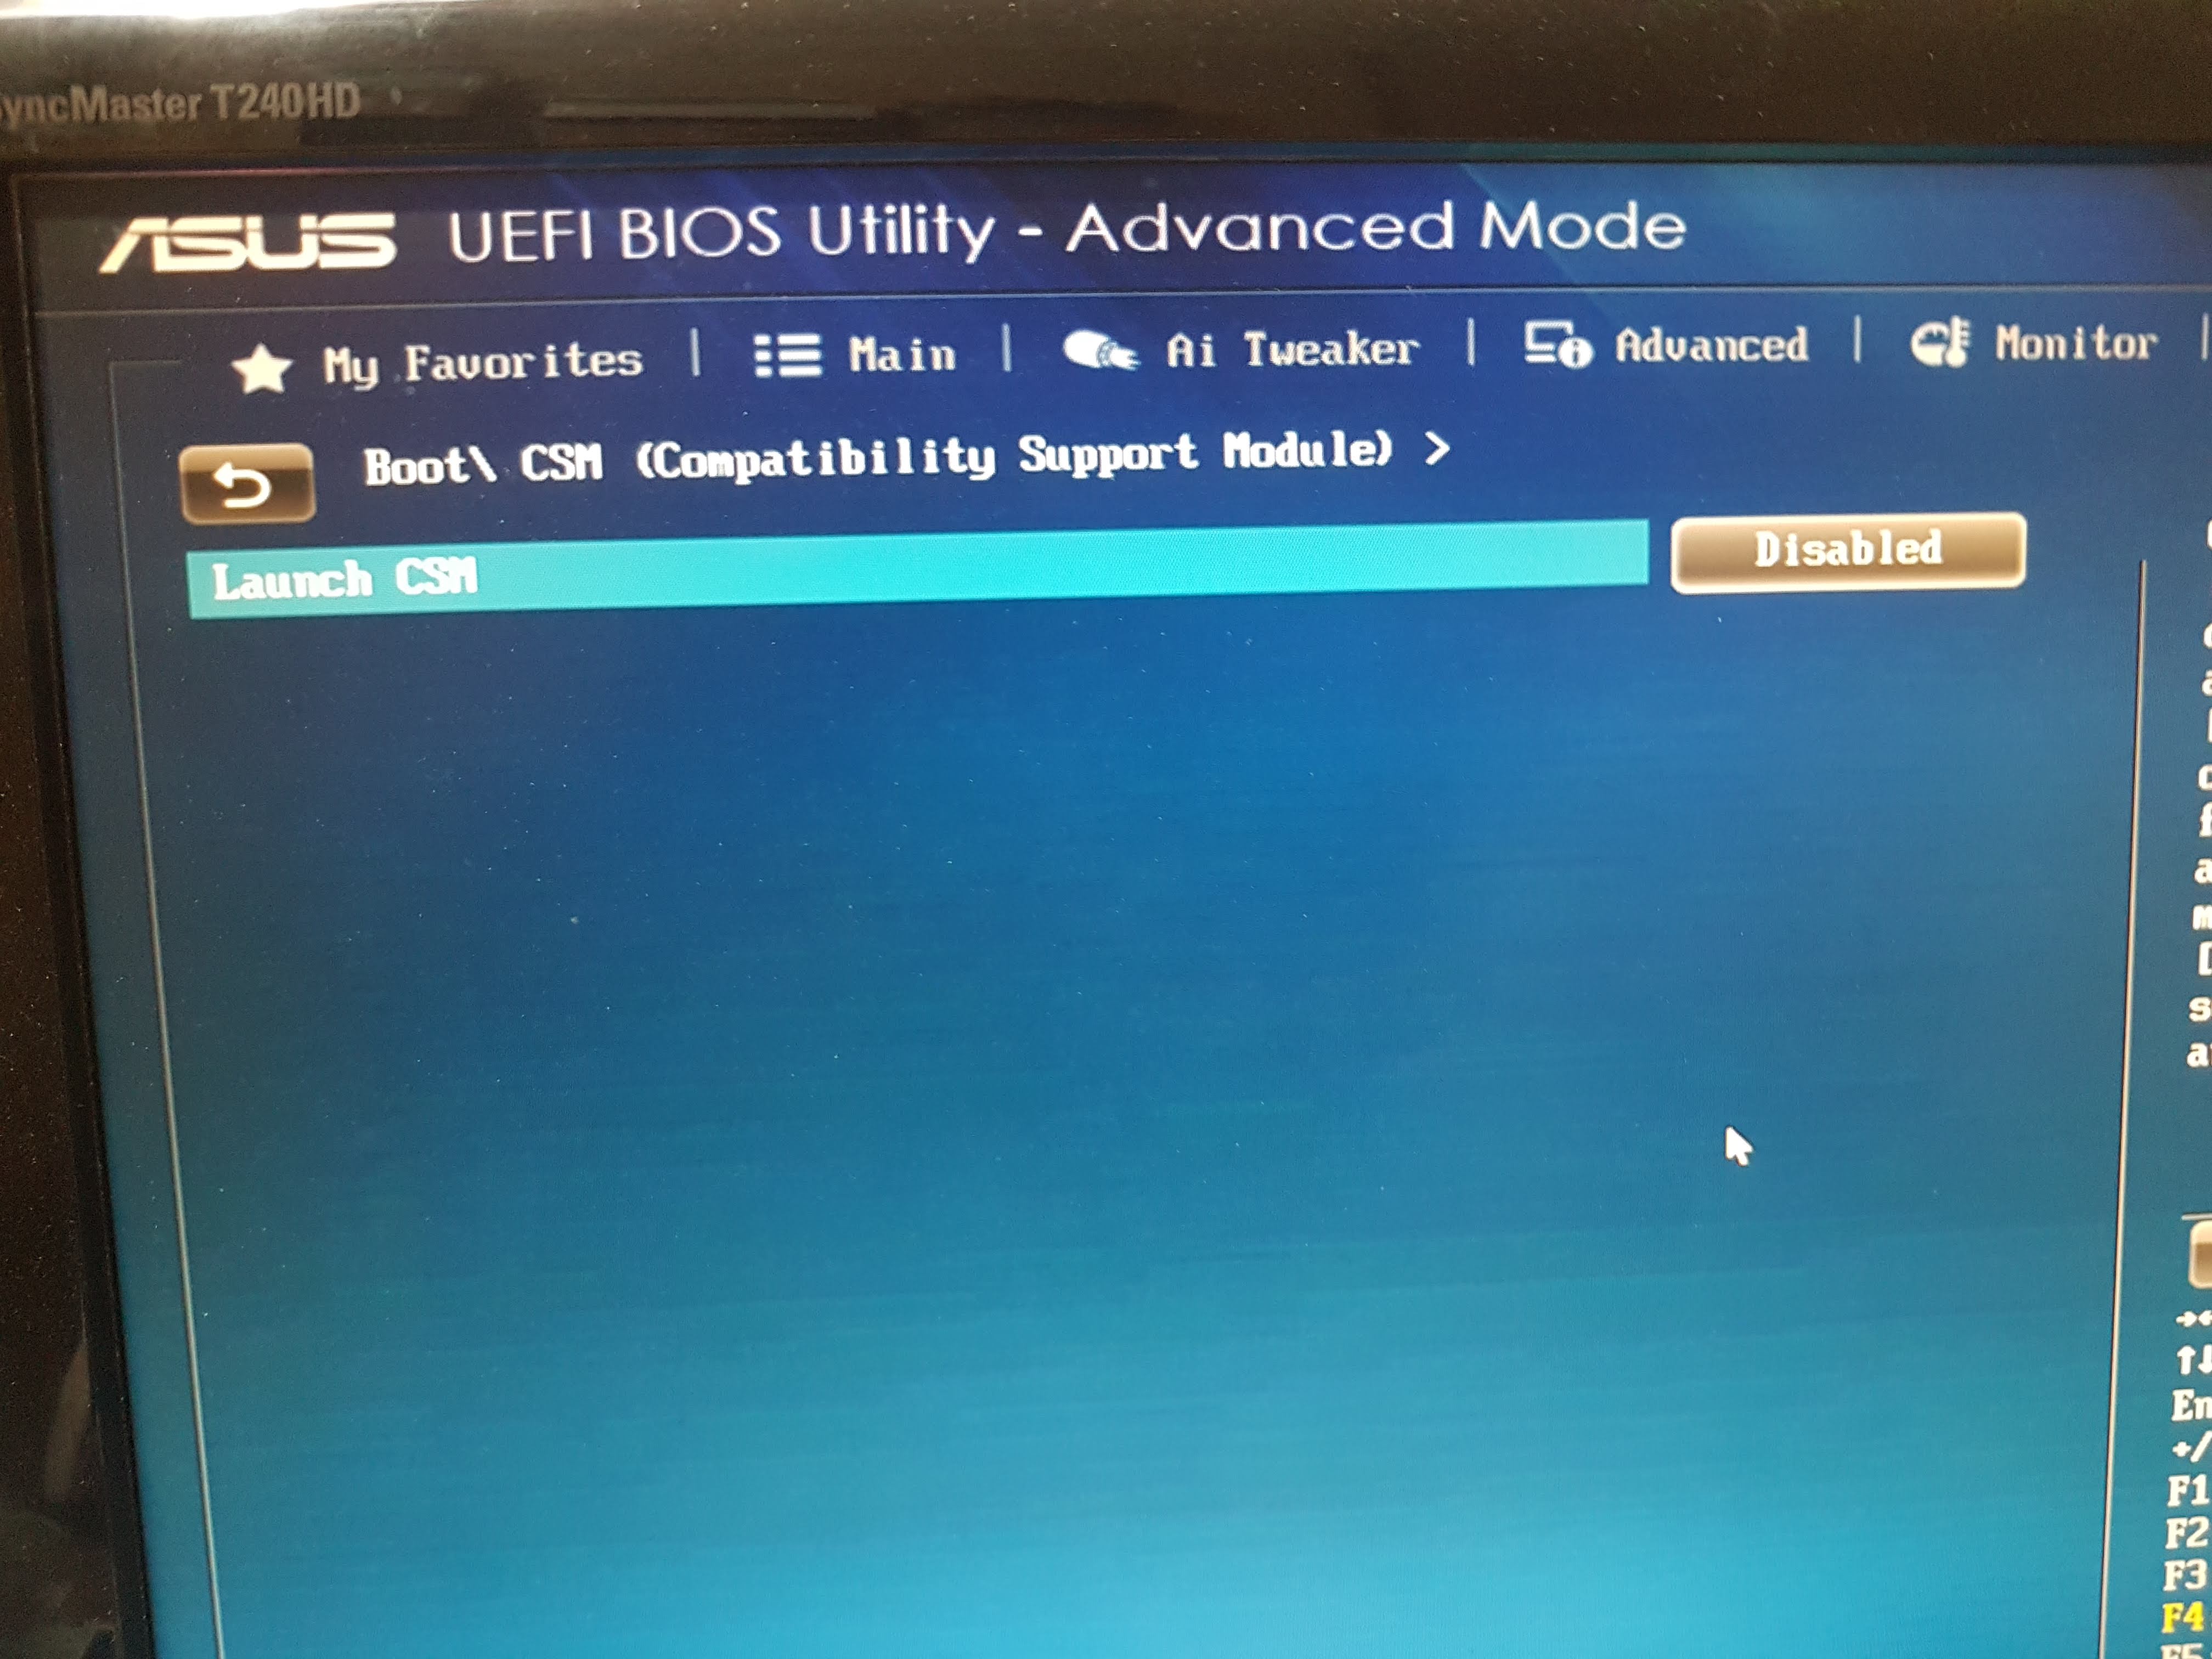
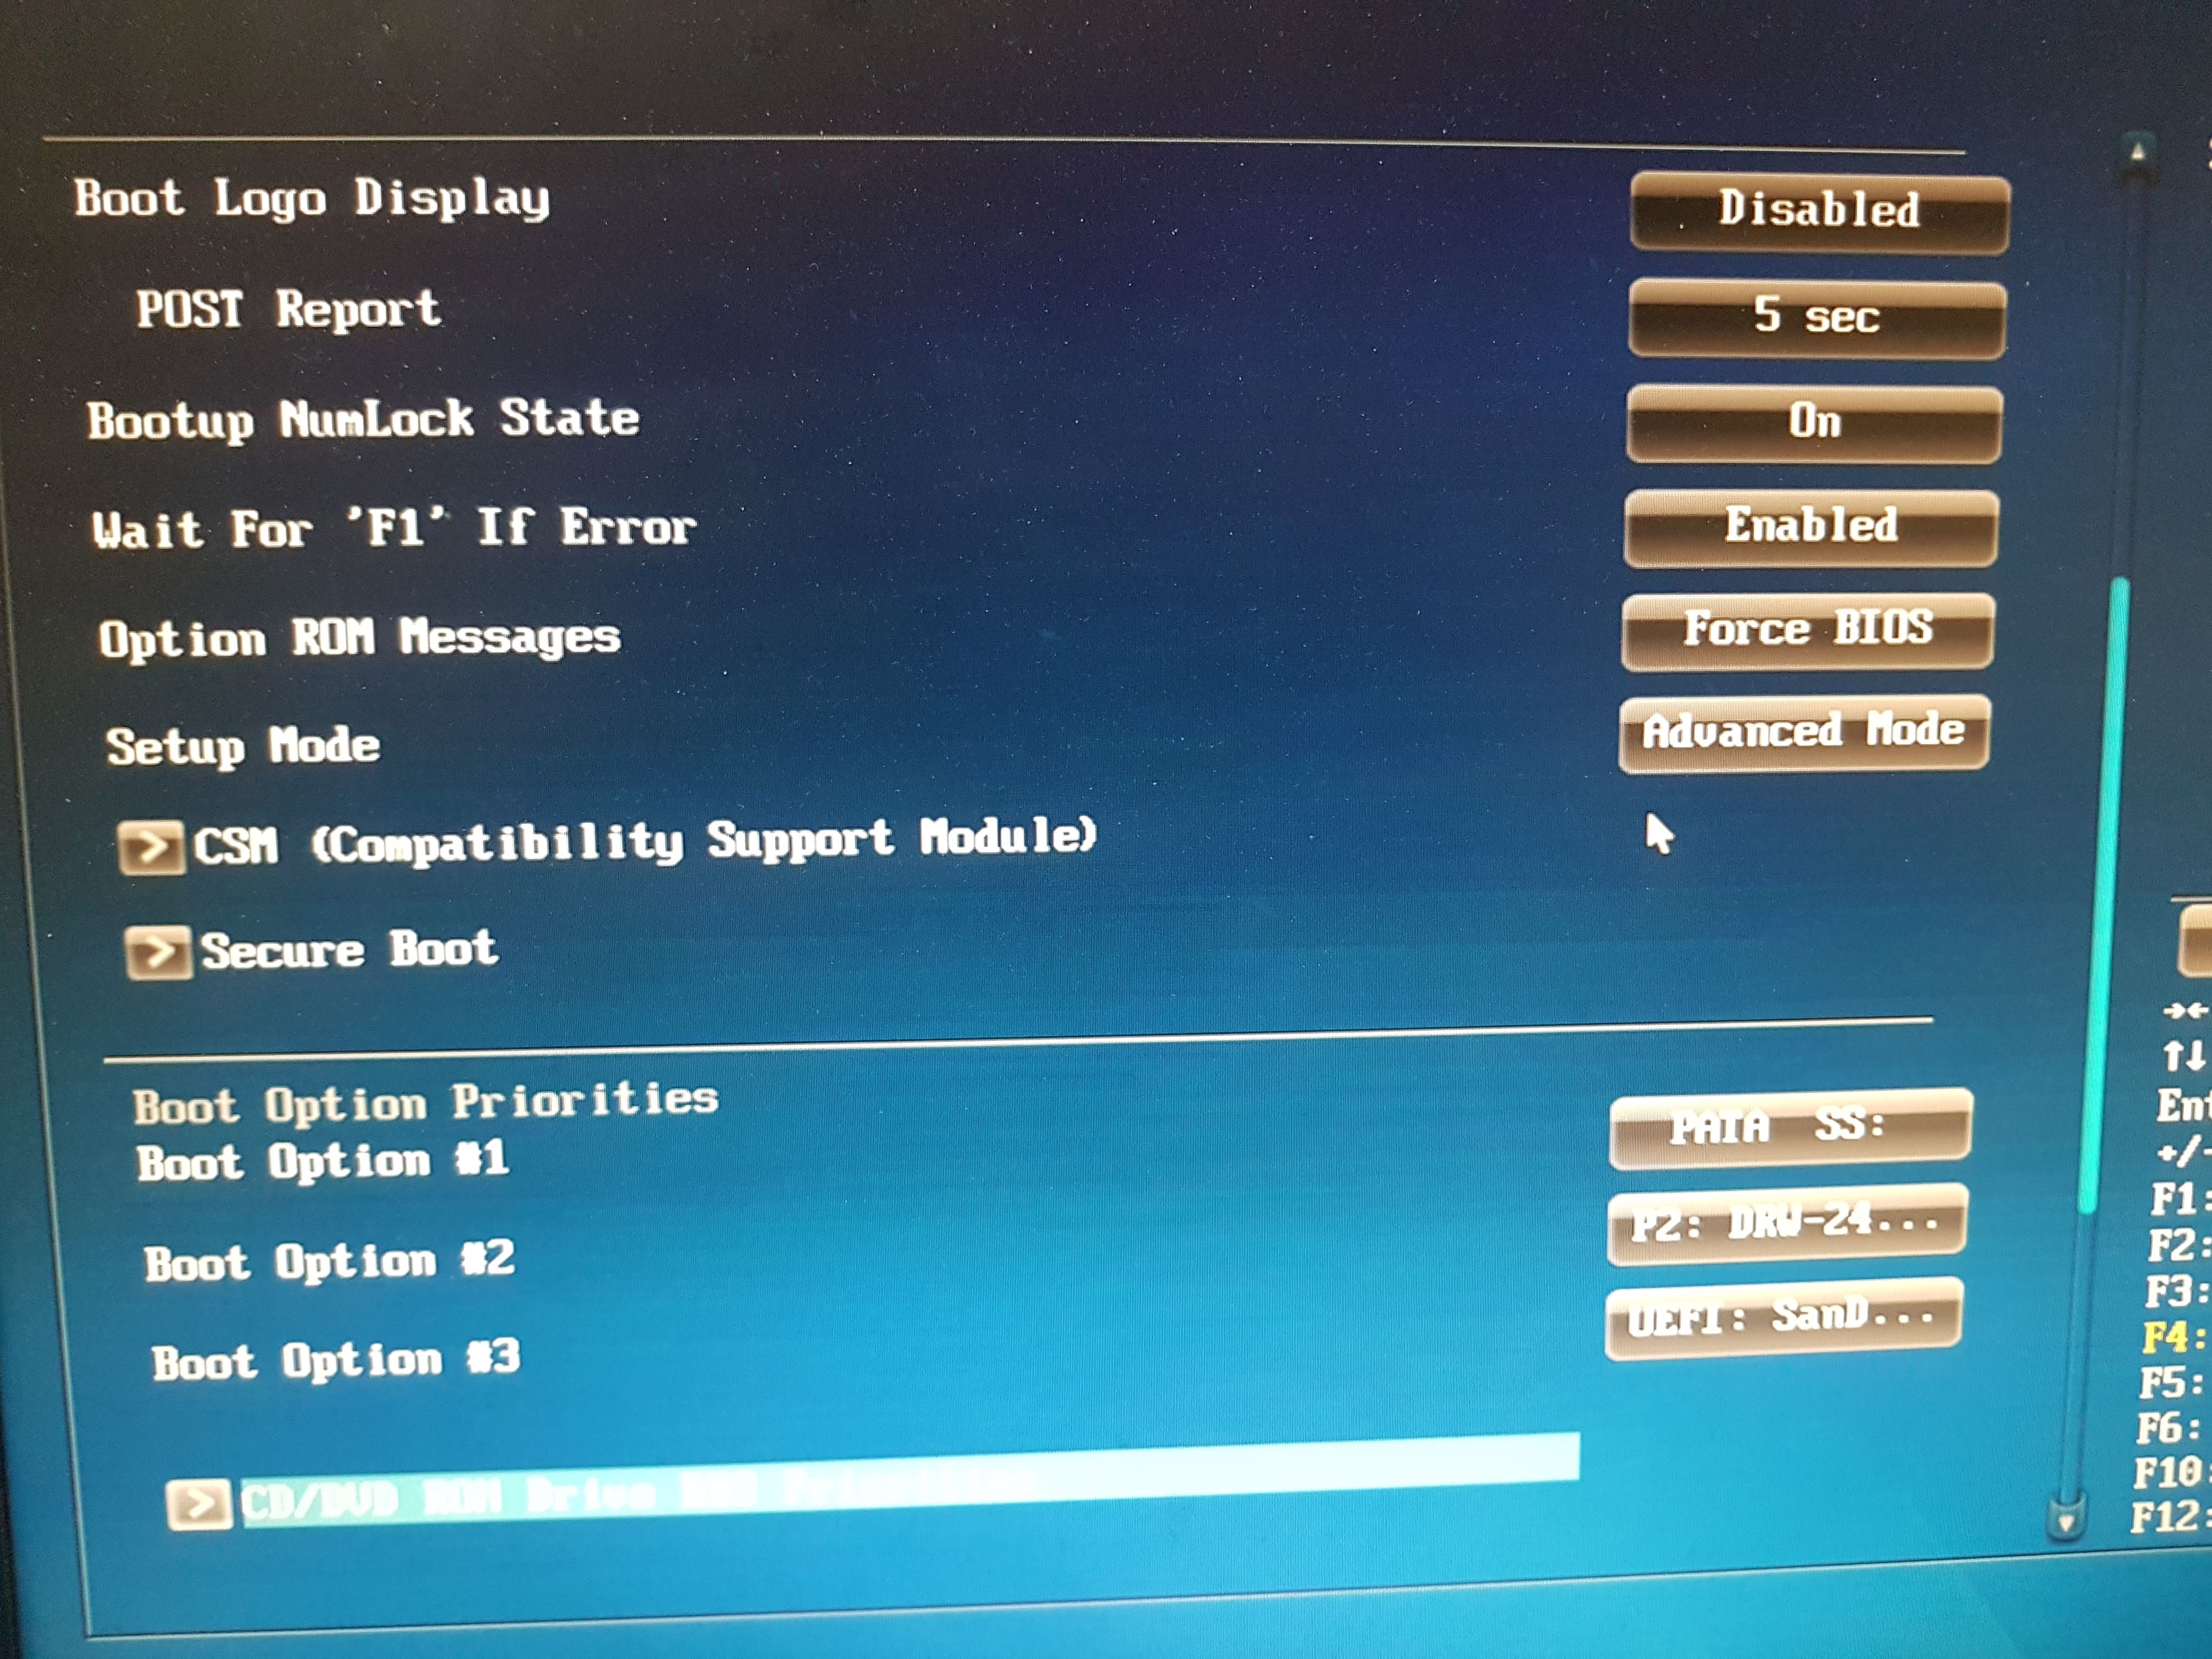
You will have to set CSM (Compatibility Support Mode) to DISABLED in your bios. Then you will see “Windows BOOT MANAGER” to install the OS. Make sure to convert all your drives from MBR (Master Boot Record) to GPT (GUI Partition Table) or the UEFI enabled OS won’t ‘see’ the MBR partitions.
Enjoy your NVMe capable drive!
As always BACKUP your drives and old bios BEFORE flashing…
Good luck and much success!
P9X79.zip (4.76 MB)
@hancor
There are no words to thank you enough my friend. I will do it and I will let you know the results. I hope everything will go as it should be. Thank you from the bottom of my heart.
Use a FAT32 formatted USB 2.0 drive to hold your newly modded bios file…unzipped of course!
Pay particular attention to page 2-43 of your manual to identify the correct USB port to do the Flashback procedure on your motherboard. When ready, (ie computer is on standby power, plugged in; but NOT booted up!) press the bios flashback button, wait for it to flash and release. Don’t pull your power cable out either while flashing the bios, this will lead to extreme ugliness…and much wailing. (You can watch this on youtube as well…)
Towards the end of the procedure the light intervals speed up and then cease. ONLY reboot your computer AFTER the bios flashback button light STOPS flashing completely.
Of course back up your old bios prior to flashing at page 3-51 of your manual; should something inadvertently go sideways… A gram of prevention is worth a metric tonne of headaches.
@montegonexus :
The Sub-Forum "Offer: Already modded special BIOSes" has been designed for users, who had successfully modded a specific BIOS and want to offer it for other interested users with the same mainboard, but not for users, who want to get a special BIOS modified by someone else.
That is why I have moved this thread into the better matching Sub-Forum about "BIOS Modding Problems".
@Fernando :
Thank you for informing me. What is a "spial" BIOS. I have searched in Google for this word but I cannot find the meaning. My English are not very good and I am struggling to understand what you are saying to me or what I read in the forum.
@hancor :
Thank you again for the info. To be honest I was going to boot in the bios to find the “Flashback BIOS” and I would never find such an option. I am that ignorant as you understand. All these are rocket science to me. I am sorry for causing so much trouble and thank you again for your help. I have already downloaded the original 4801 BIOS from ASUS website and have it on a second USB 2.0 drive in case something will go wrong. Instead of backing up I will remove all disks from the computer except the one I mentioned above https://www.goodram.com/en/products/irdm…e-pcie-m-2-ssd/ 480Gb which comes with the AIC HHHL Adapter and before installing Win 10 Pro I will convert it to GPT so that windows will see it as you have advised me to do. After windows setup I will connect the disks again and hopefully windows will see them all again. If not then I will convert the rest that are MBR to GPT. They are not boot drives after all but they are used for storing data. I hope I will get it right. I will keep you posted.
It was a meanwhile corrected typo. I meant "special".
Try viewing this youtube video on the ASUS X79 type boards to use the “Bios Flashback” procedure…
ASUS USB BIOS Flashback Feature
https://www.youtube.com/watch?v=ADcdnwMjd_I
Cheers and much success
@hancor :
I watched that video and many others last night so I have an idea what I should do and what to expect while flashing. Tonight I am going to do it finally and I hope everything will go as it should be. I will post more after the operation "Suicide" LOL.
Operation “Suicide”…?
No, no, no…you’re supposed to live to tell the story!

You’ve done the research, reading and precautions; approach confidently.
Don’t be afraid of a modded bios…make it your friend, who serves you well.
Cheers
@hancor :
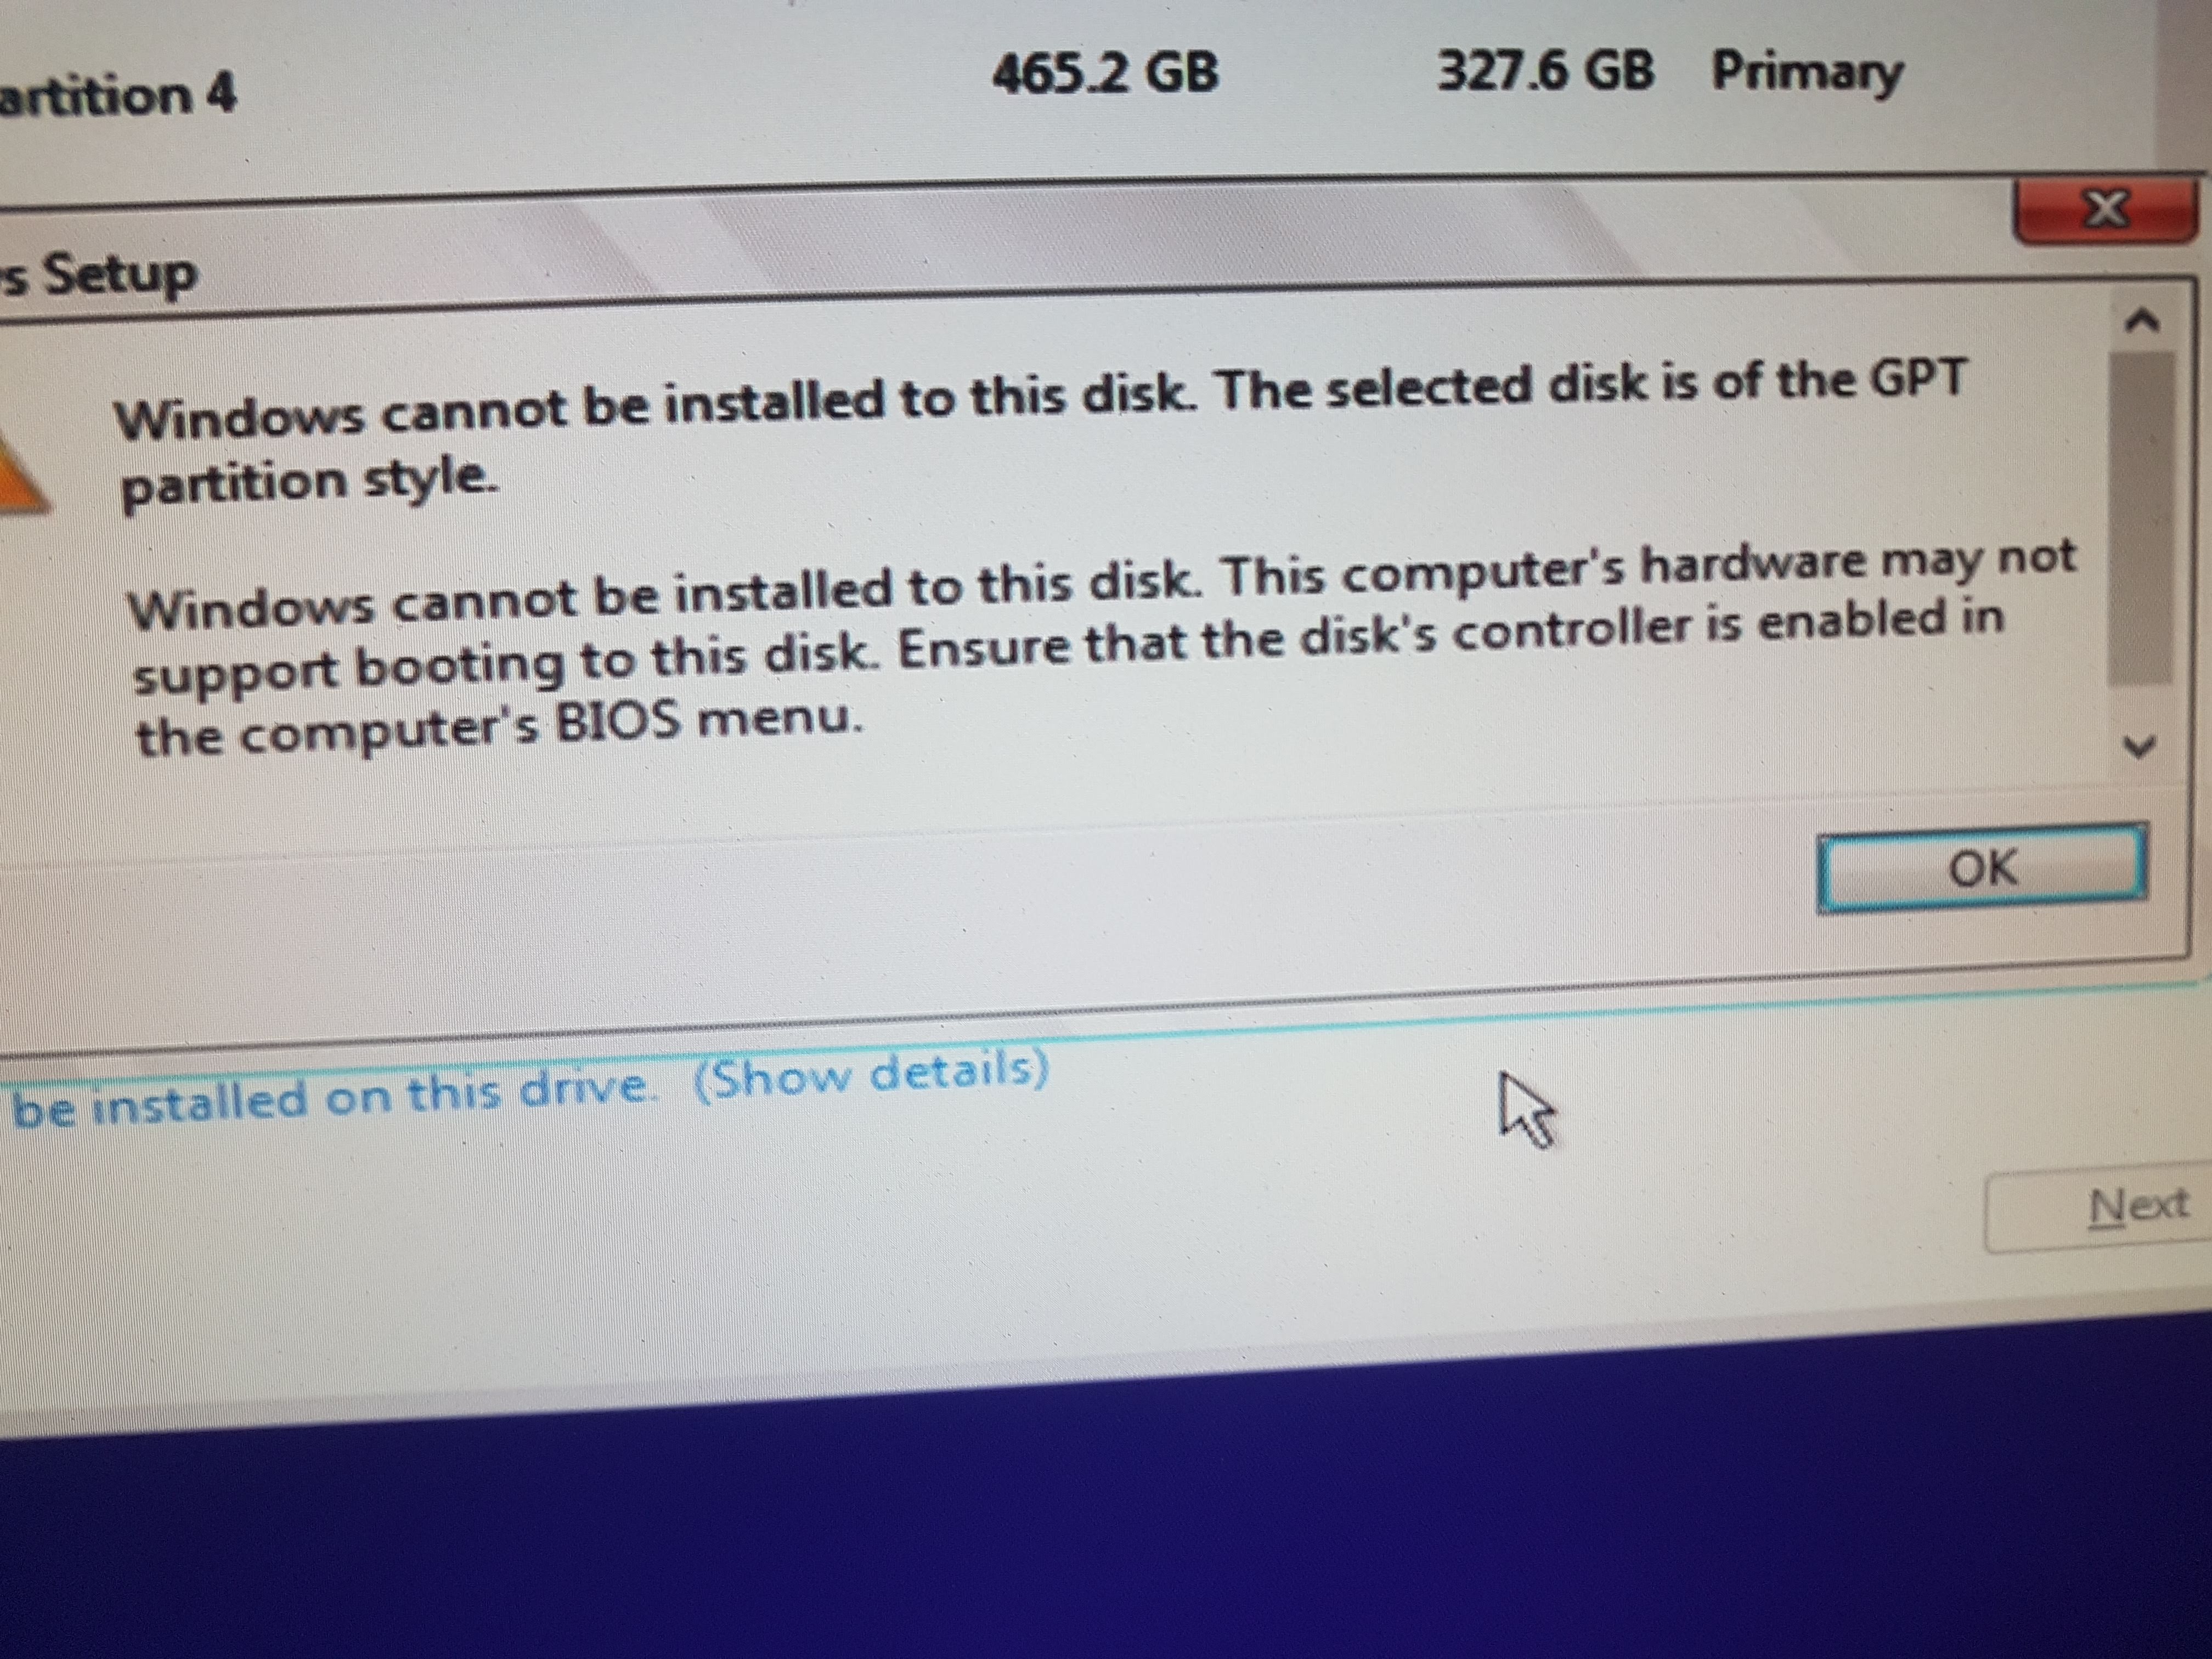
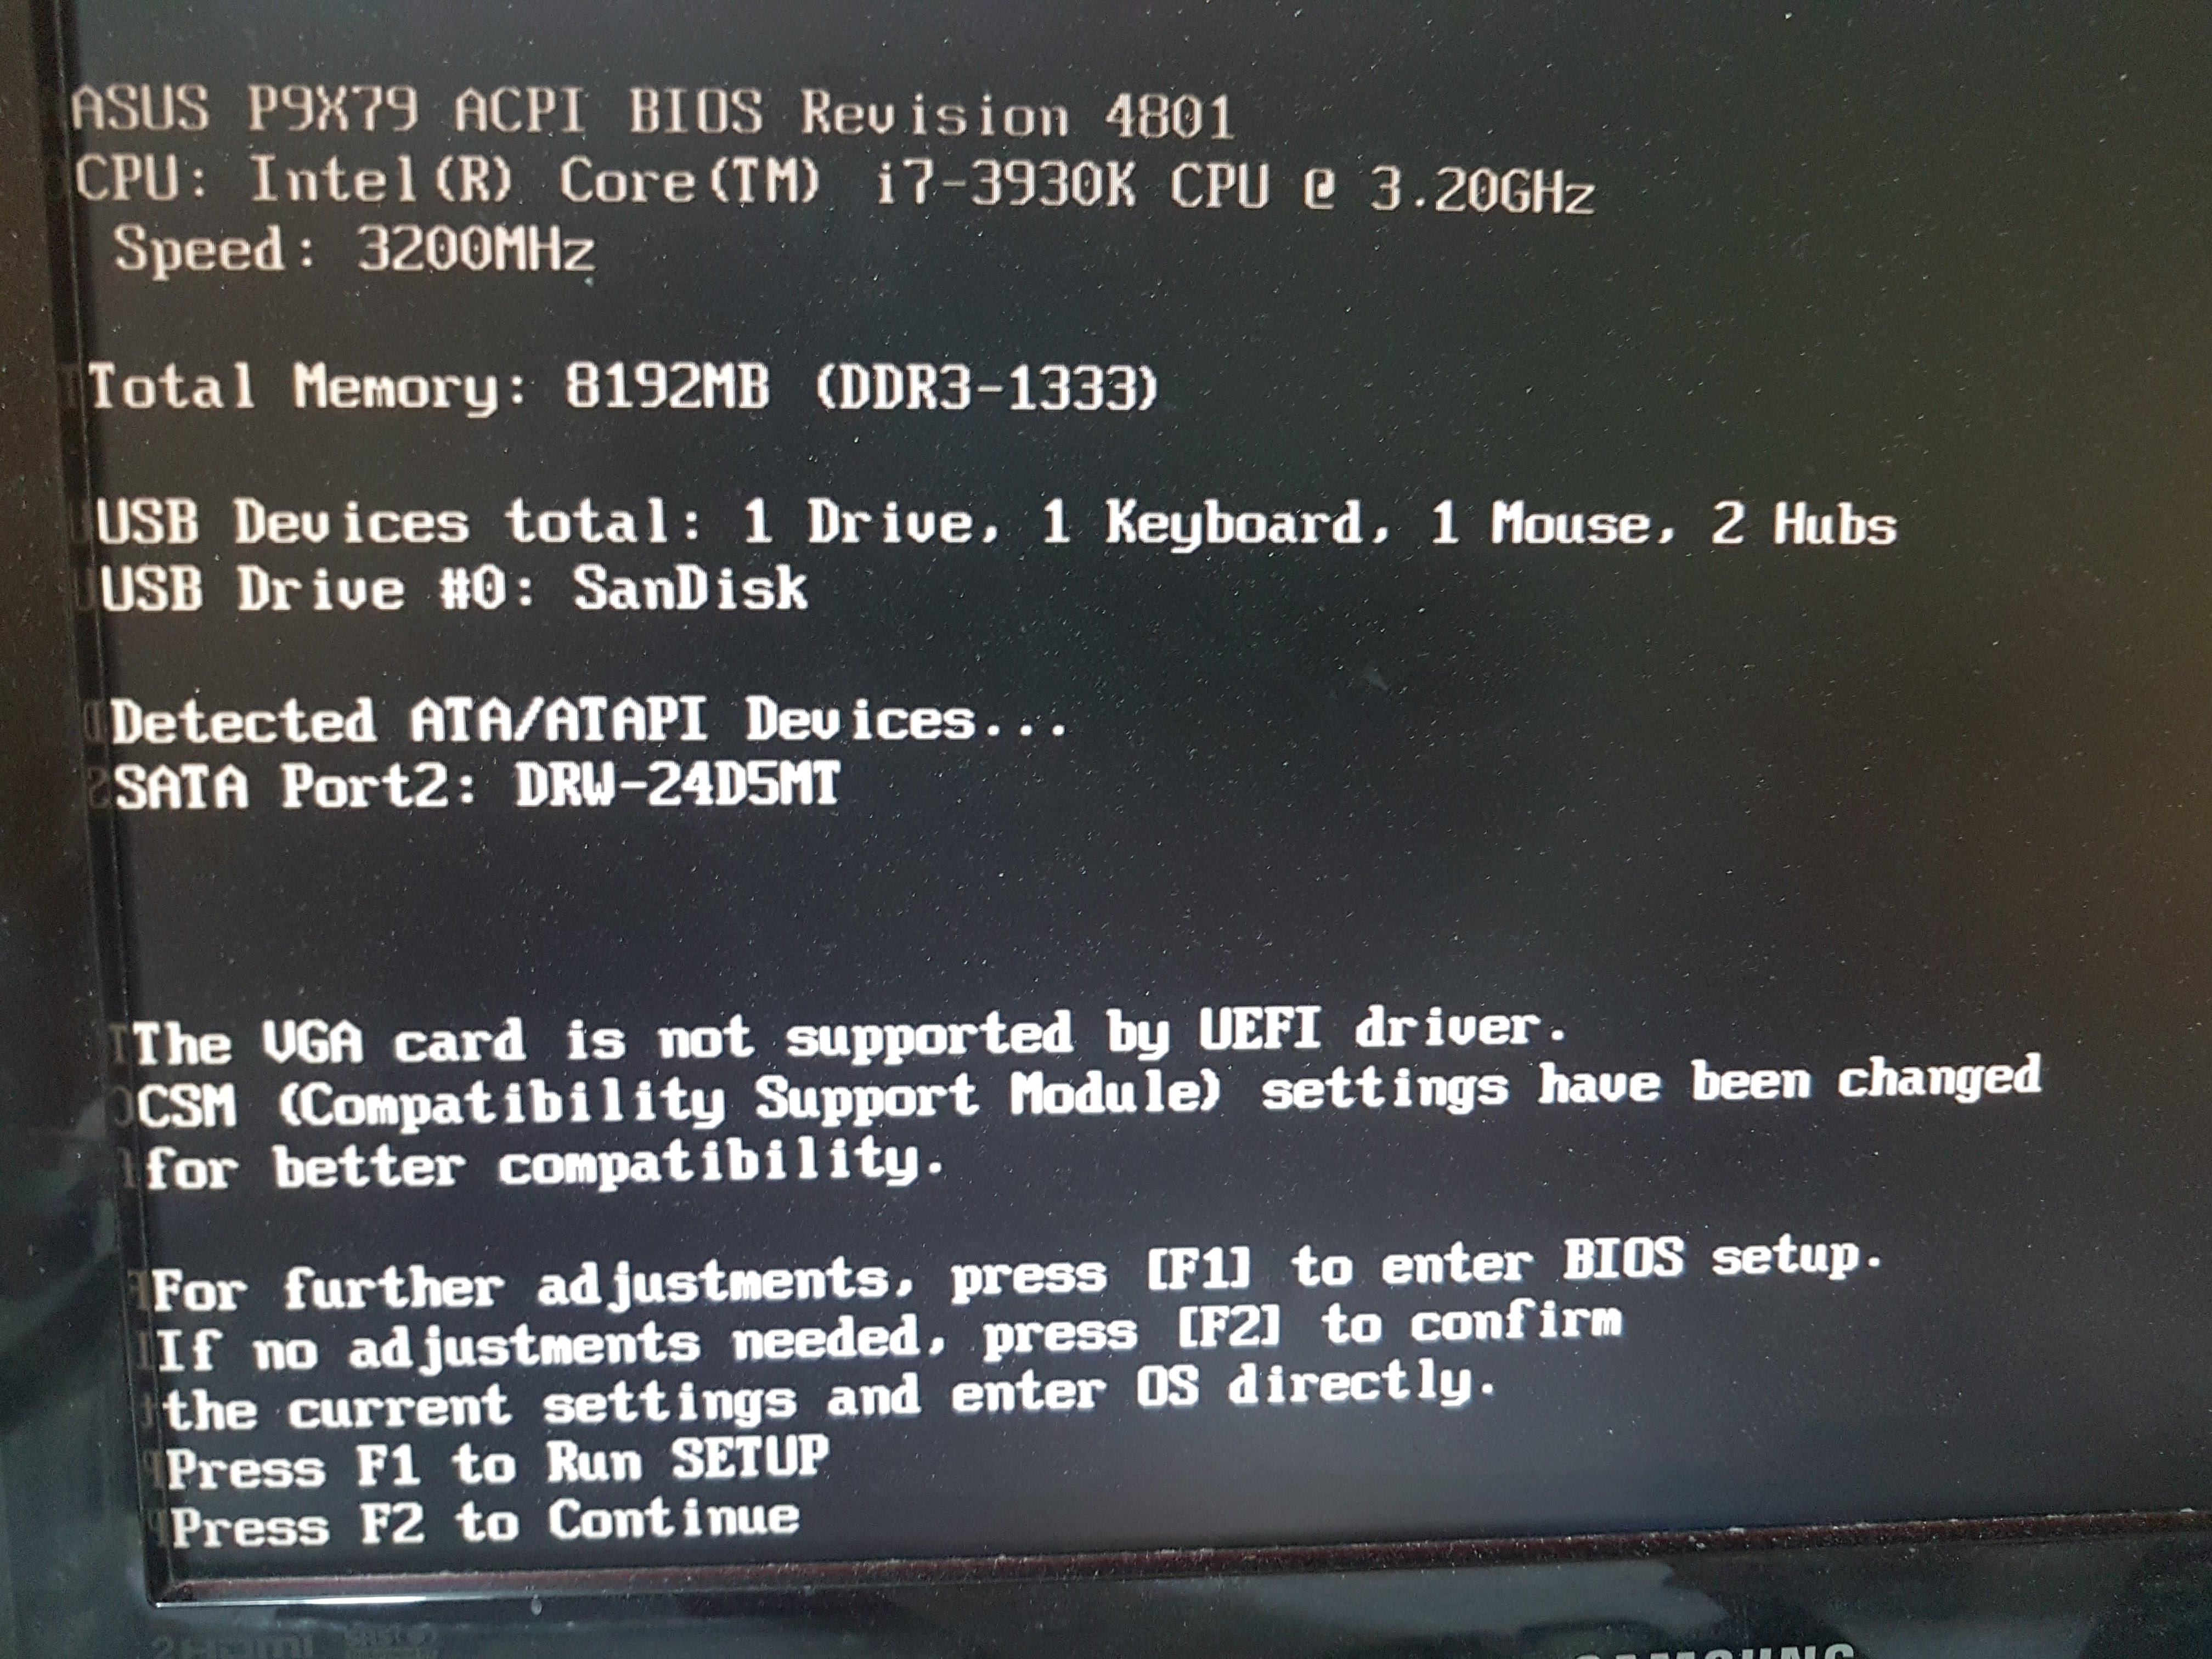
I have updated my bios with the one that you send to me. Everything was good as in the video that you suggested yesterday. Then I have tried to install windows but there is no success. I don’t know how to add pictures here to show you. Win 10 Pro refuse to install on my GPT disk because the message says “The selected disk is of the GPT partition style. This computer’s hardware may not support booting to this disk. Ensure that the disk’s controller is enabled in the computer’s BIOS.” Also I save my BIOS with CSM disabled but before starting it beeps twice and on the first screen it re-enables it automatically and says “The VGA card is not supported by UEFI driver. Press F1 to run setup. Press F2 to continue.” With F1 it gets in the BIOS to change CSM again and reboot to show the same again. With F2 continues but it refuses to install Win 10 Pro. I have pictures but I don’t know how to upload them here for you to see. How can I prevent the BIOS from enabling the CSM to enable automatically? First boot device I have set the PATA SS. The disk is installed on the second PCIe of the motherboard. Should I install it on the third one to the bottom of the case? On the first slot I have the graphics card. I think I just found the way to upload the pictures. Any ideas? Thank you.
I would try unplugging the power and remove the CMOS battery for about one minute to let all the capacitors fully drain.
Reinstall the CMOS battery, hook up the power supply, and see if the behaviour repeats…hopefully not.
Cheers
Edit: saw the pictures much later, see Lost N Bios comment below…
@hancor :
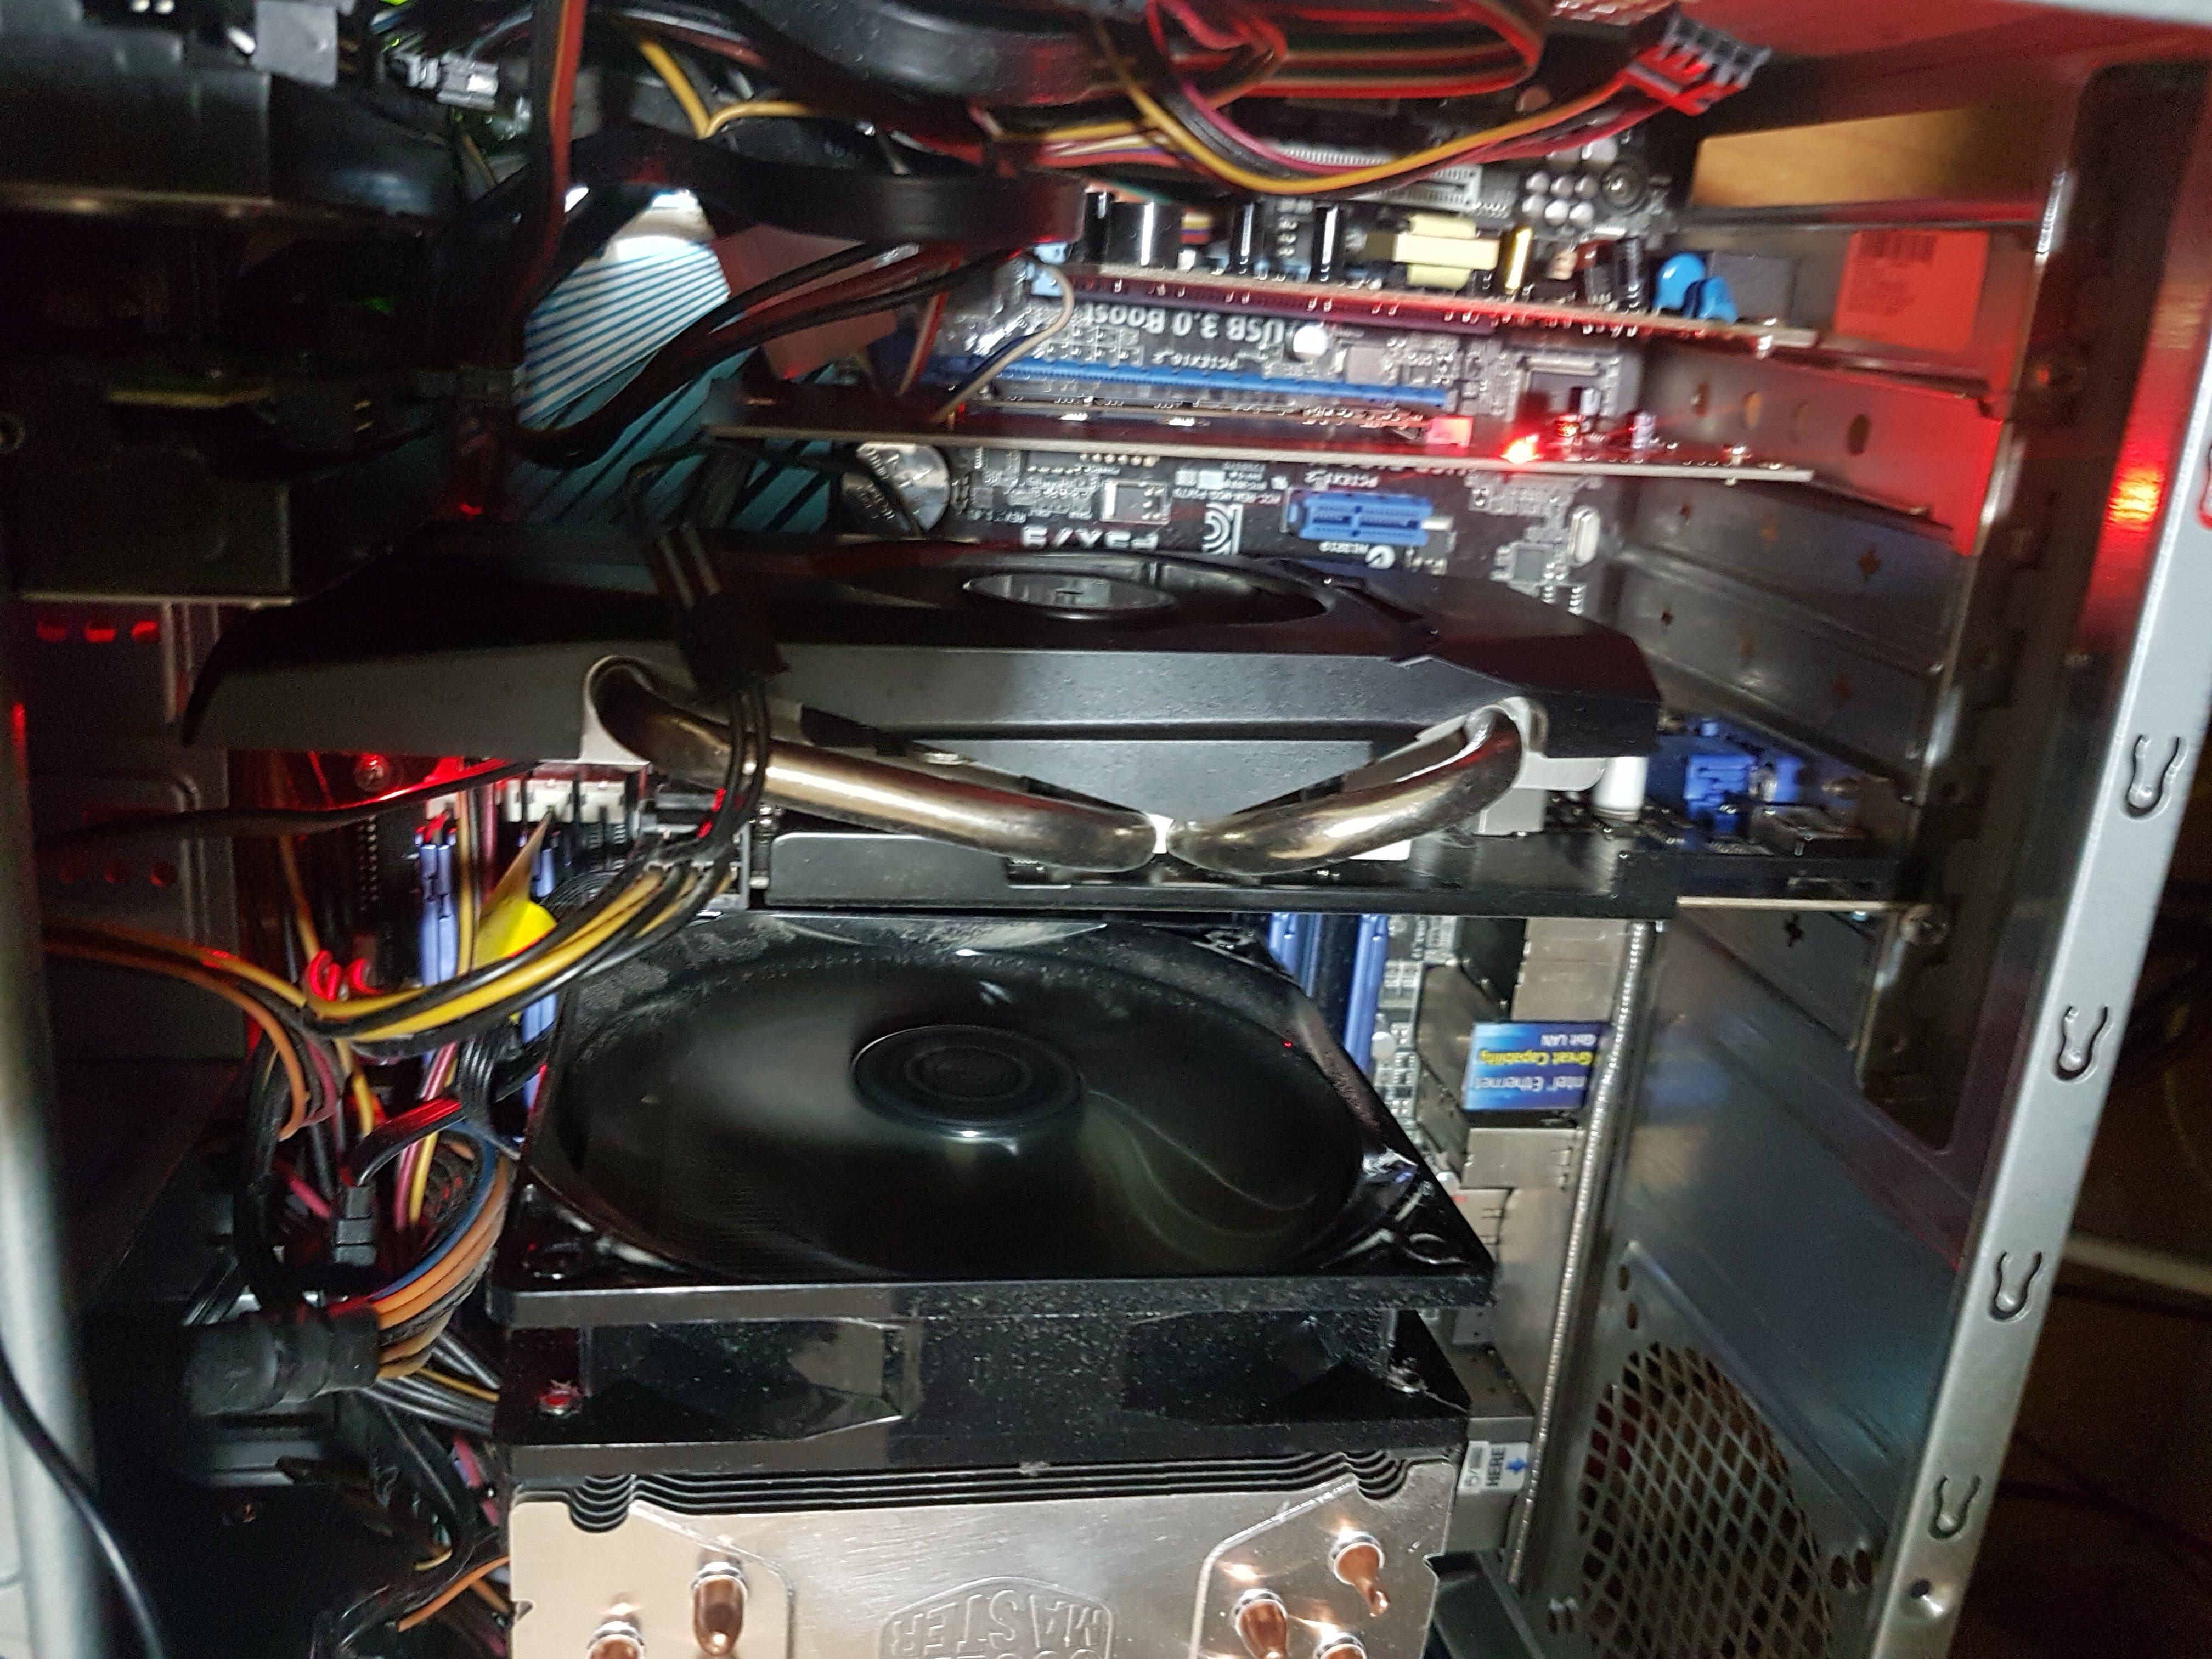
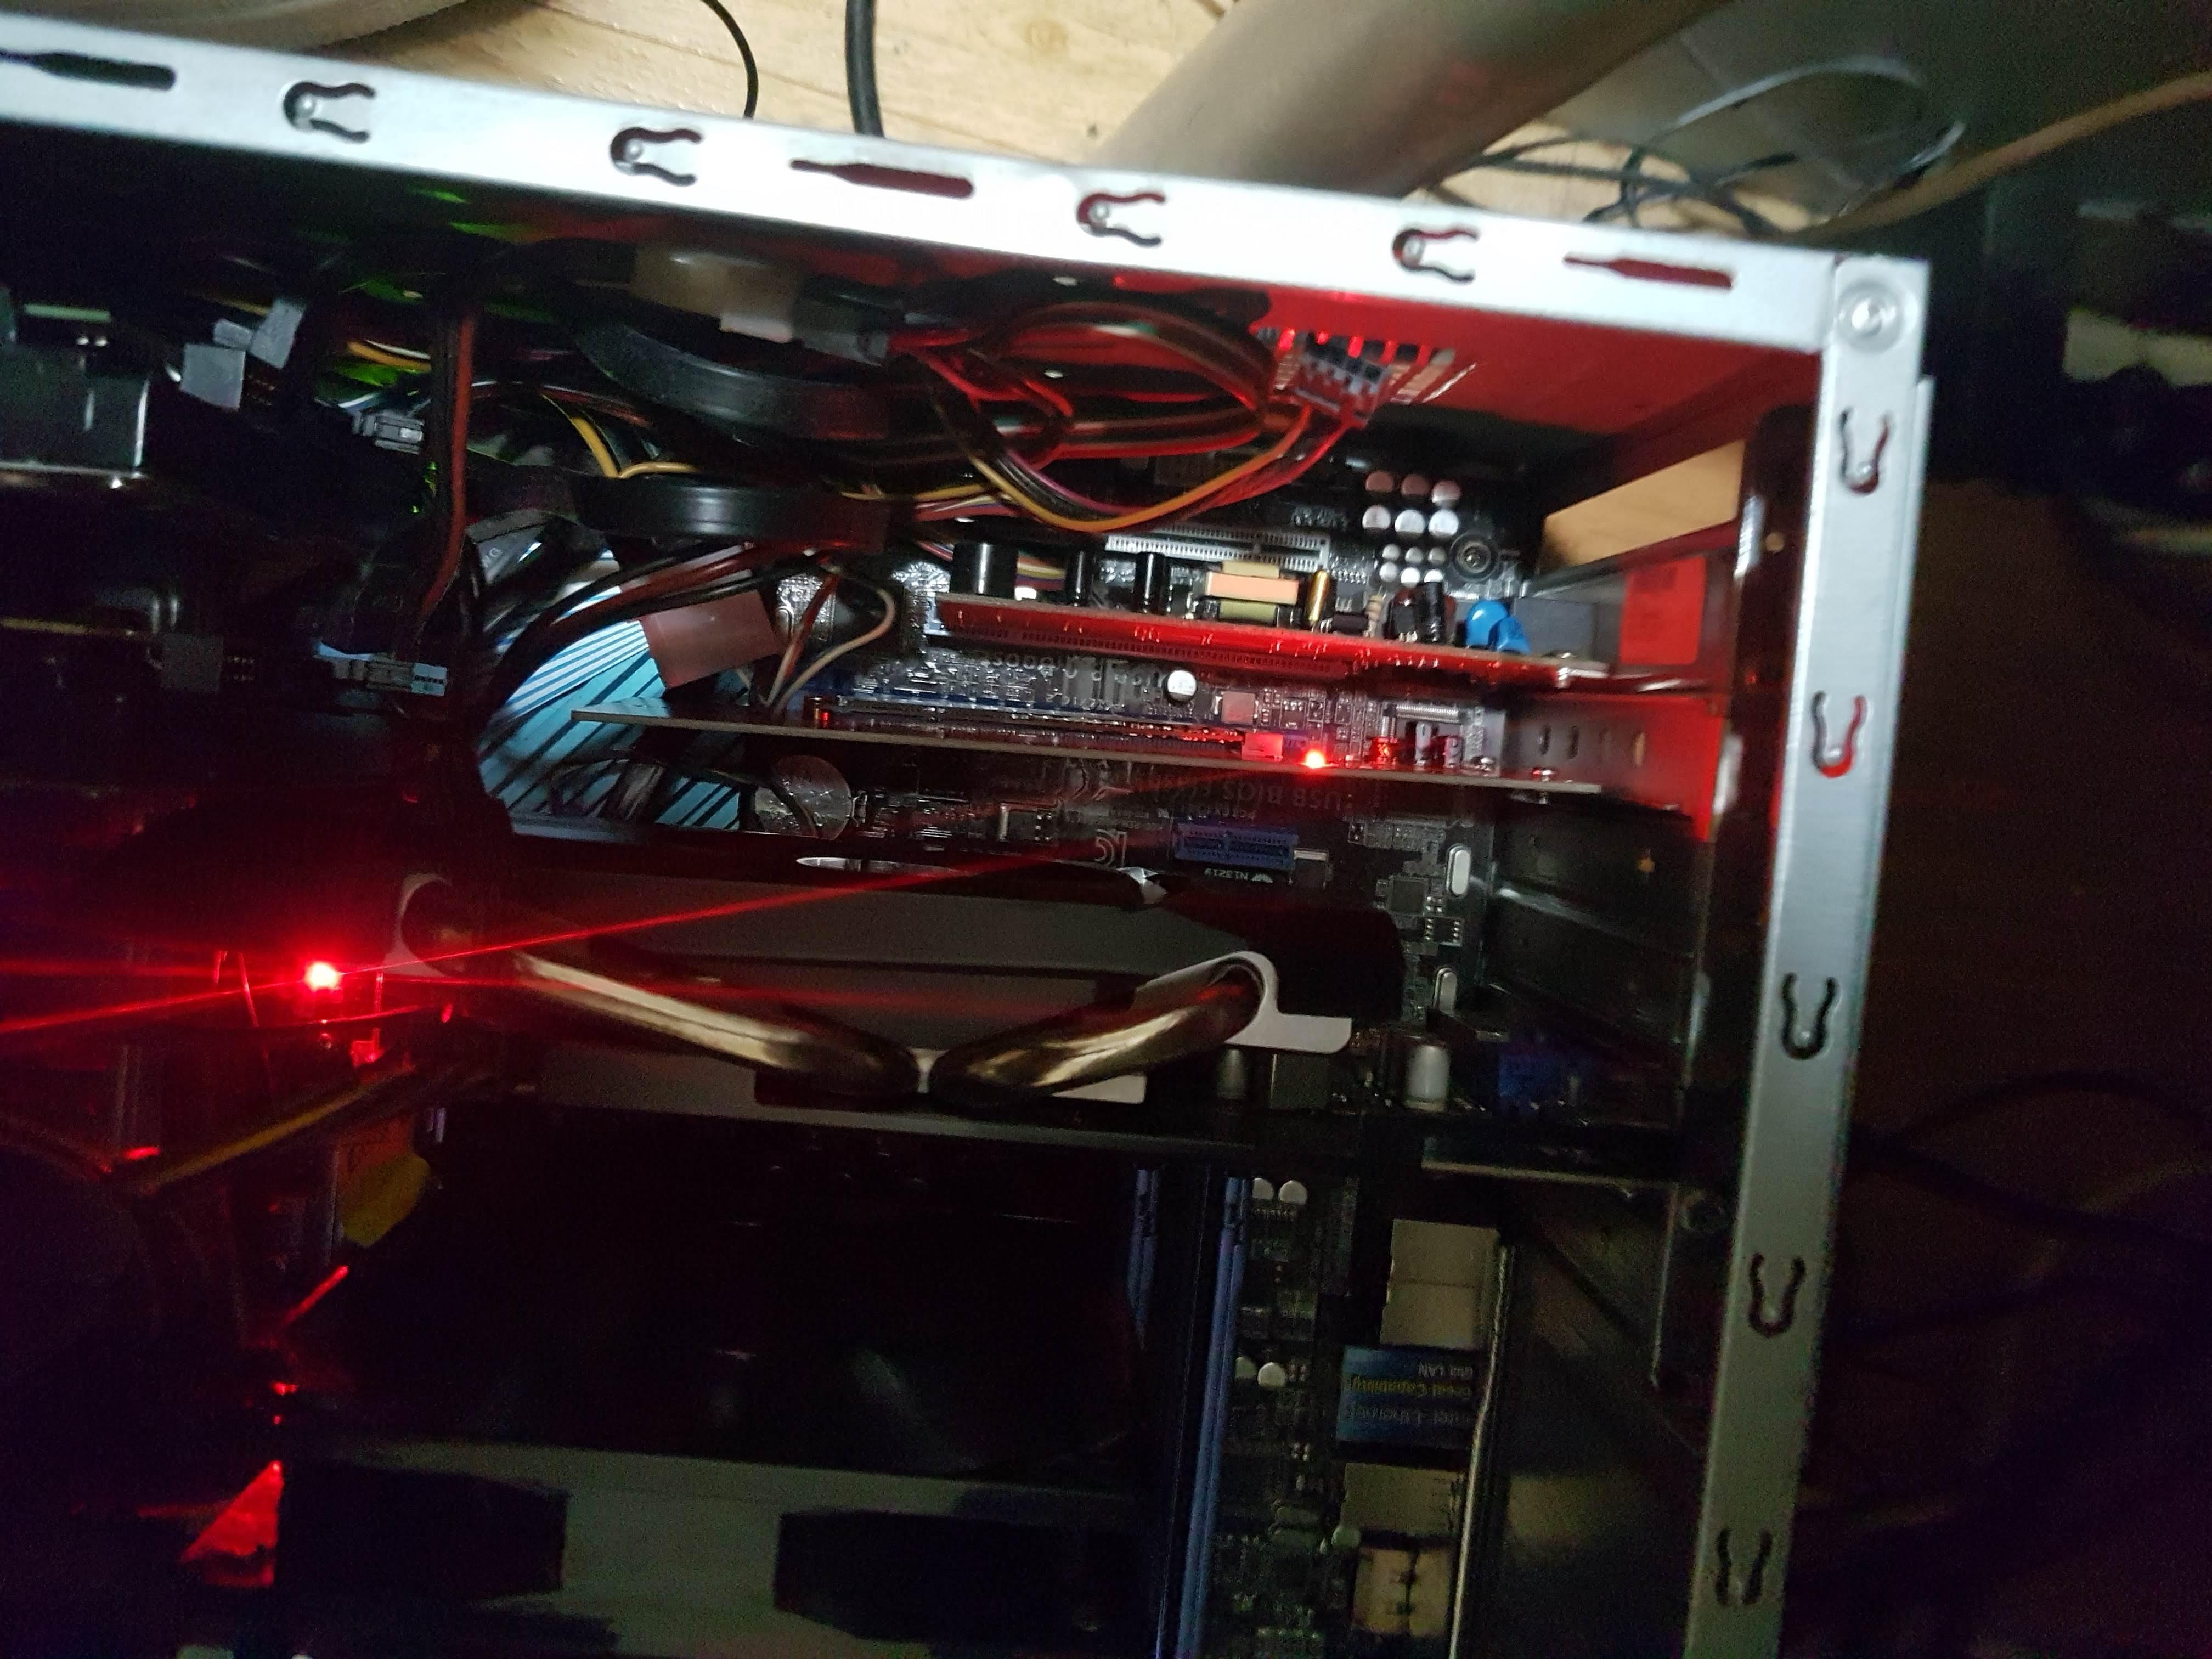
Please inspect the pictures if there is a problem. Also if you please check the URL of the disk I am trying to install. https://www.goodram.com/wp-content/uploa…ultimate-en.pdf Thank you.
Is your windows install source (USB), on a GPT partition too? If you want to install to GPT, it has to be from GPT too. And, if you want to install GPT way, you need to enable "Secure Boot" in BIOS.
Otherwise, disable secure boot in BIOS, enable CSM, install from MBR sourced install Media to MBR partitioned drive (Or, with either method, you can delete all partitions before, and give windows installer a RAW disk to install to, it will setup the partitions)
Sounds like your graphics card is Legacy only (no UEFI vBIOS image), or you need to change this setting to allow both. If you are unsure, show me image of GPU-z, or dump the vBIOS from your graphics card using GPU-z, the dump is a little arrow under the Nvidia or AMD icon on right side
If your graphics card is legacy only, you cannot use secure boot, so cannot install to GPT partition, and you would then need to use MBR partitions and CSM enabled
@hancor :
@Lost_N_BIOS :
My USB stick was created with Microsoft’s media creation tool probably is not a GPT but on my Samsung 860 SSD which is GPT SATA 3 it was installed alright with 4801 stock BIOS. I have already tried to install windows on the disk when it was RAW and I got the same response. Then I converted it to GPT but nothing has changed. The same response. I will get the info you have asked for from the GPU-z and I will remove and re-install the battery as hancor suggested and I will inform you. Thank you both for your help. Much appreciated.
@Lost_N_BIOS :
My card does NOT support UEFI.
You can download the Windows 10 ISO see instructions here:
Download official Windows 10 (ISO file) without Media Creation Tool
https://pureinfotech.com/download-window…-creation-tool/
select the appropriate browser you are using and follow instructions to get ISO without Media Creation Tool
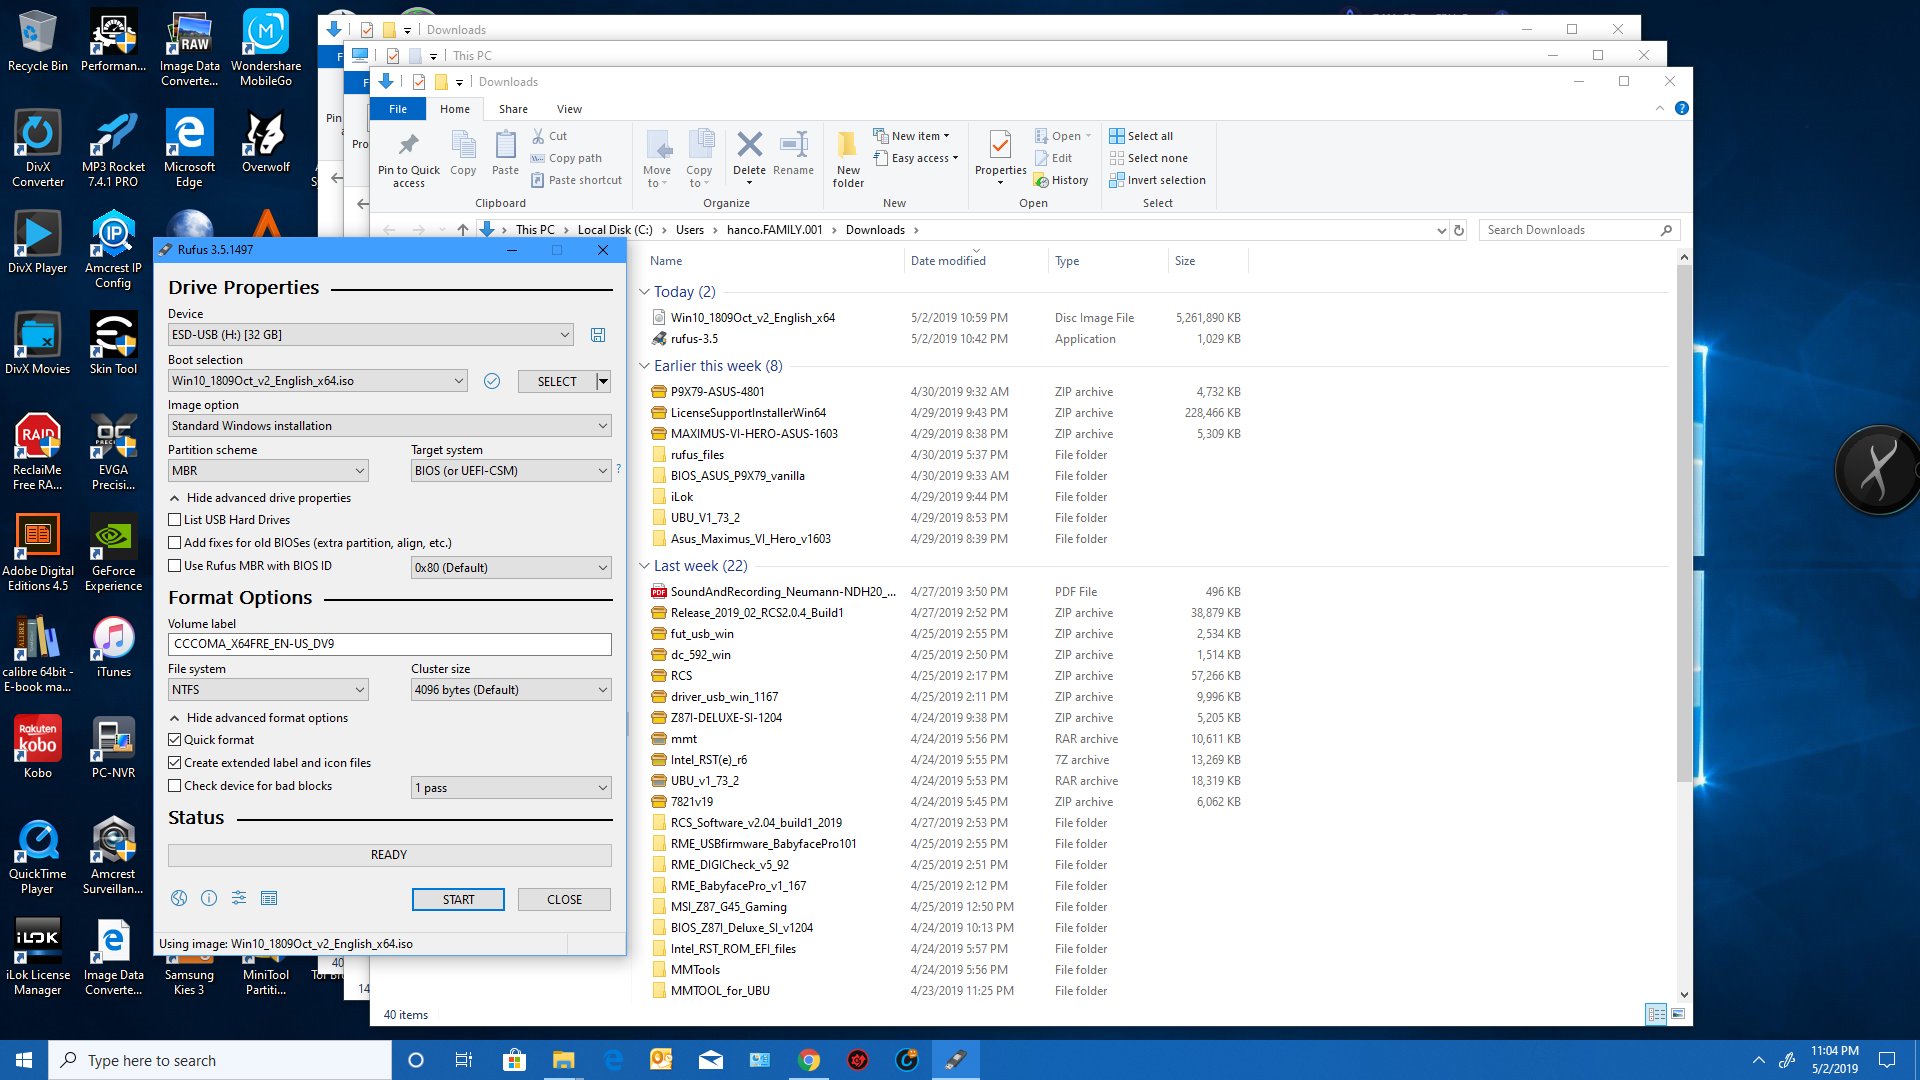
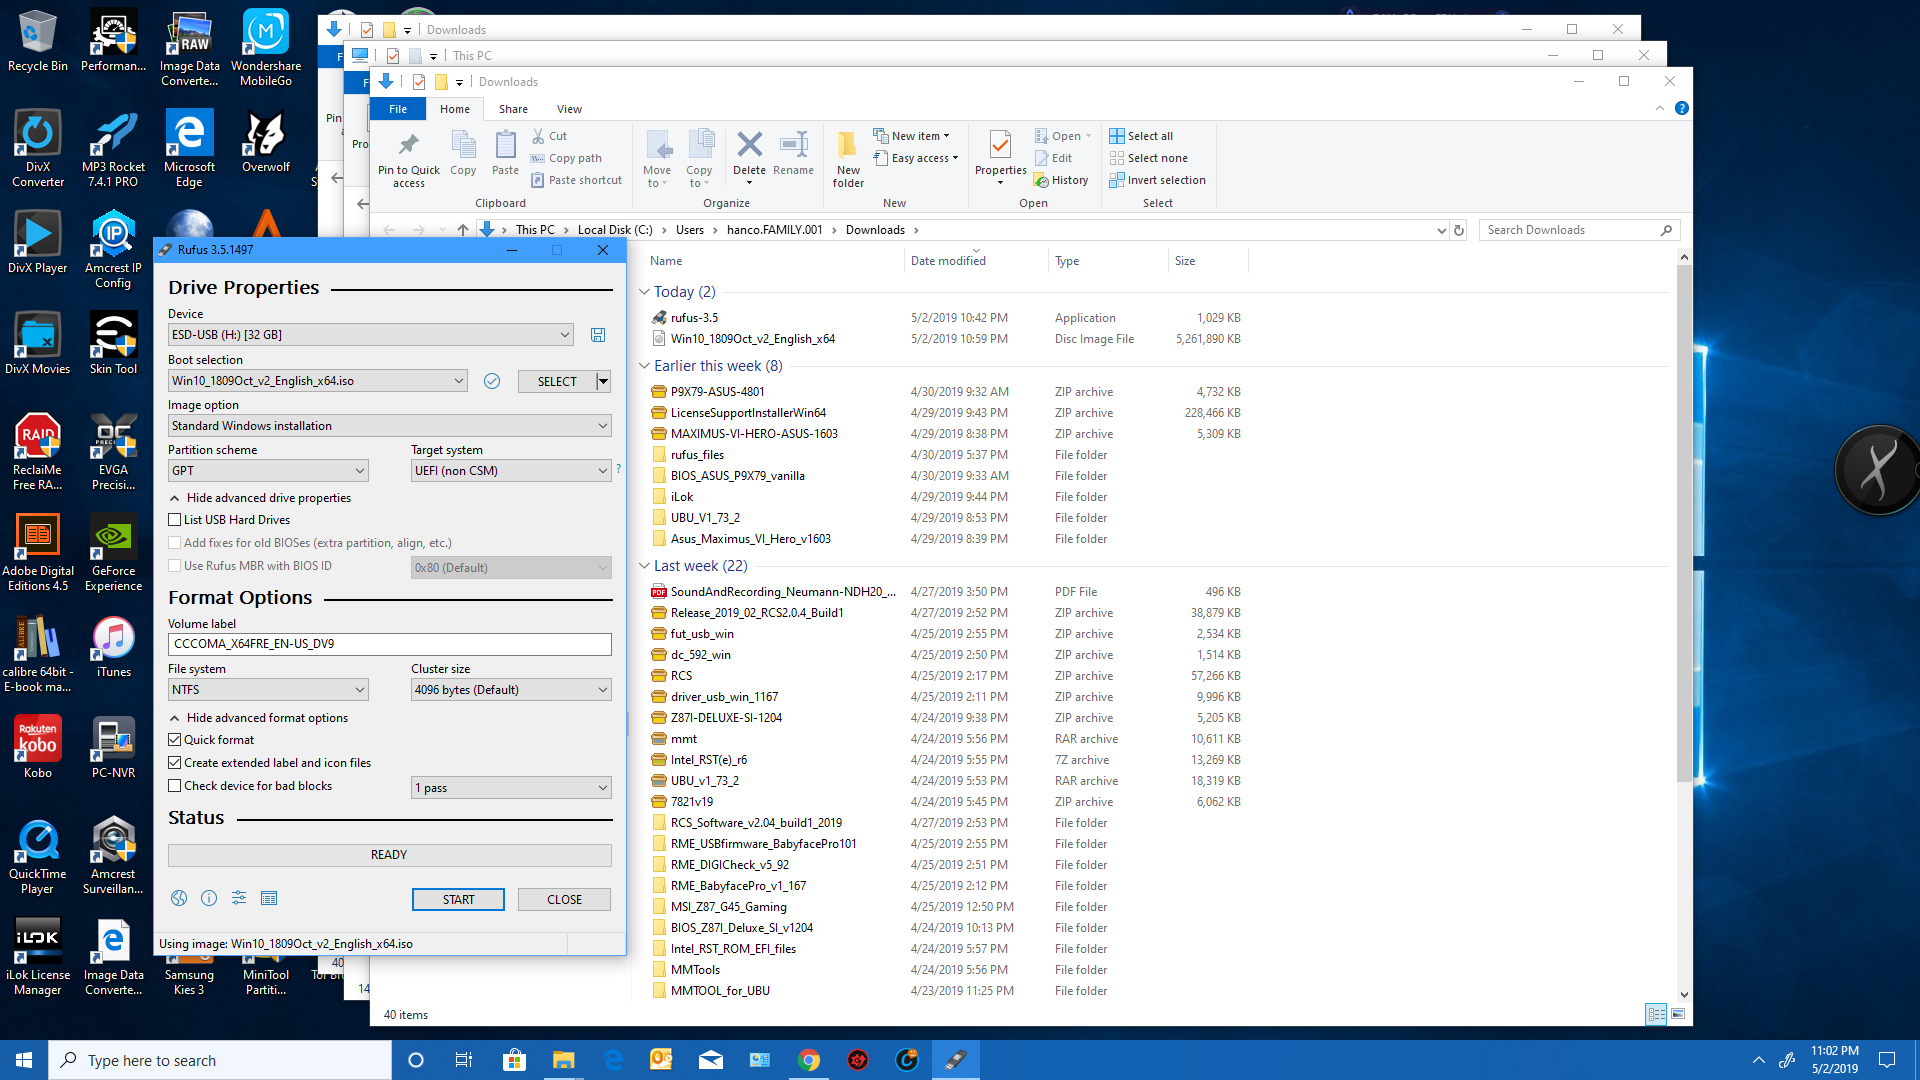
Download Rufus 3.5
https://rufus.ie/
With Rufus 3.5 you can select the appropriate option, in your case MBR if your graphics card is older.
With a newer graphics card supporting UEFI you would select GPT in the Rufus drop down menu "Partition Scheme"
See picture below:
MBR scheme:
GPT scheme:
You can then make the bootable USB drive appropriate to your hardware.
At some point I would upgrade your graphics card to enable the UEFI GPT feature set; as MBR limits your drives to 2TB and you want to extend the life of your machine.
For example my “ancient NVidia GTX 770” allows the UEFI to boot with GPT drives; and game on low settings with 1080P graphics.
What graphics card are you using? You could probably get something cheap or used to get you by for a little while.
Let @Lost N Bios know what graphics gear you have and then you can outline your options.
Essentially you are now 3/4 of the way to NVMe functionality, except for the graphics card element…
Windows can only boot from GPT on UEFI-based computers running 64-bit versions of Windows 10, 8, 7, Vista, and corresponding server versions. All versions of Windows 10, 8, 7, and Vista can read GPT drives and use them for data—they just can’t boot from them without UEFI.
In short, you need a UEFI enabled graphics card to boot your GPT NVMe drive in a UEFI environment; so the “Windows Boot Manager” shows up in the bios.
see again @Lost N Bios recommendations…
Cheers
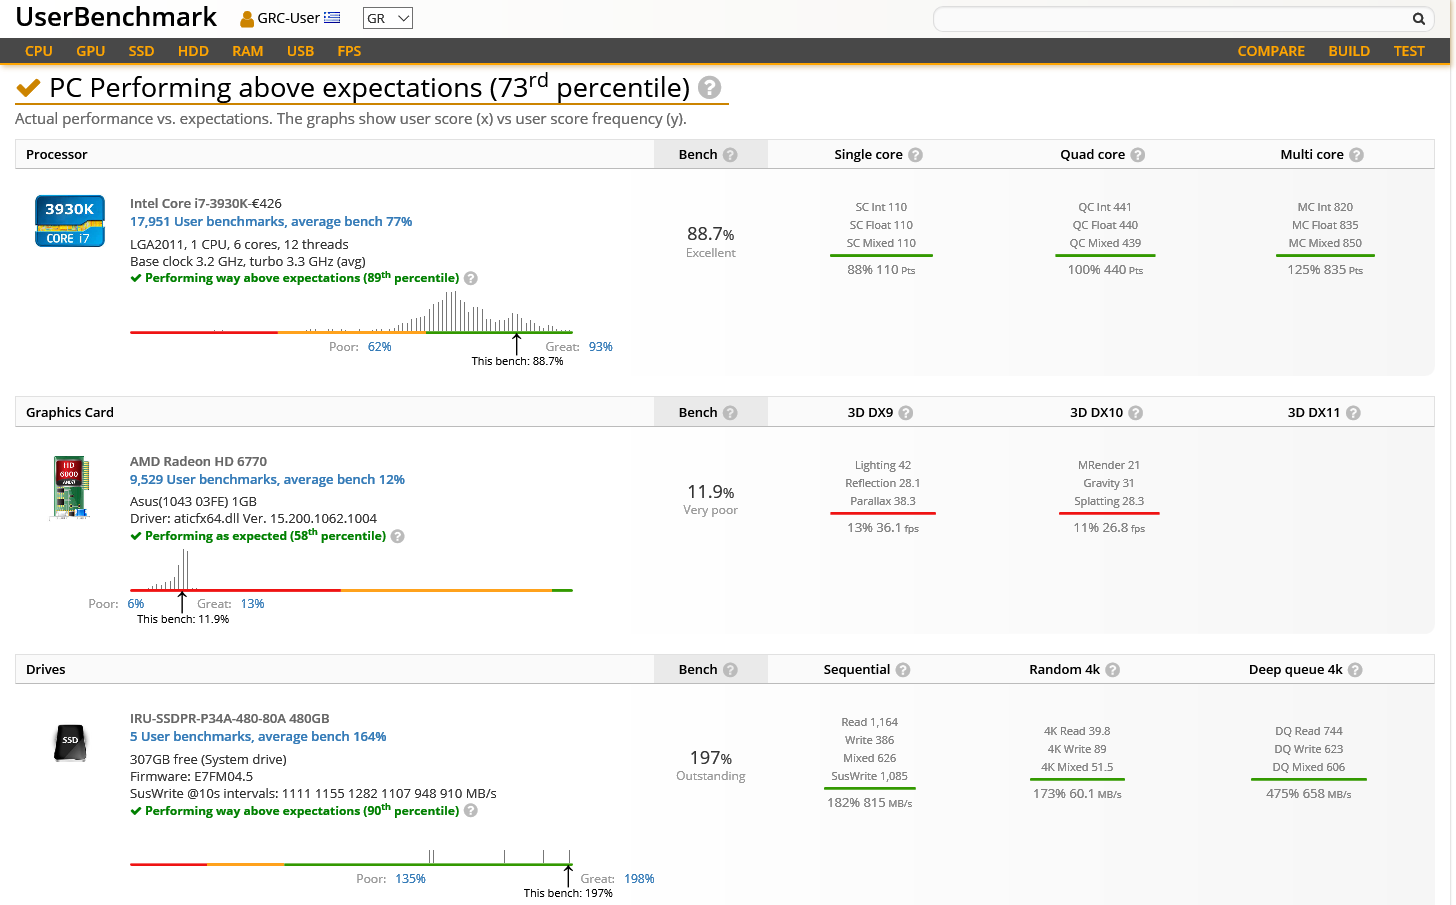
UserBenchmarks: Game 21%, Desk 98%, Work 68%
CPU: Intel Core i7-3930K - 88.7%
GPU: AMD Radeon HD 6770 - 11.9%
SSD: IRU-SSDPR-P34A-480-80A 480GB - 197%
HDD: WD Blue 500GB (2010) - 45.3%
RAM: Kingston HyperX DDR3 2400 C11 4x2GB - 116.4%
MBD: Asus P9X79
@hancor :
@Lost_N_BIOS :
UserBenchmarks: Game 21%, Desk 98%, Work 68%
CPU: Intel Core i7-3930K - 88.7%
GPU: AMD Radeon HD 6770 - 11.9%
SSD: IRU-SSDPR-P34A-480-80A 480GB - 197%
HDD: WD Blue 500GB (2010) - 45.3%
RAM: Kingston HyperX DDR3 2400 C11 4x2GB - 116.4%
MBD: Asus P9X79