In the bios, nvme m.2 is recognized in the unrecognized windows10. bios change , please.
EDIT by Fernando: Thread title customized/specified
Do you need z77m-d3h-mvp NVME mod BIOS? Sorry, your post is not very easy to understand what you need.
Hi, yes I’m in need to update the Z77M-D3H-MVP to add an NVME SSD. Can a BIOS mod be made please?
@hopefuls @lji - Here is latest BIOS w/ NVME mod, flash via Qflash - http://s000.tinyupload.com/index.php?fil…146128224495975
Also, if you want PCIE 3.0 speeds, you need to use IVY CPU and you must install NVME info first/top PCIE x16 slot
The second x16 slot is only x4 PCIE 2.0, this will be max about half or normal NVME speeds (1300-1500MB/s at 2.0 second slot vs 3000+ at 3.0 in first slot)
Speeds will be limited to PCIE 2.0 on either PCIE Slot if using Sandy Bridge CPU
Clean OS install is suggested - Please read step #4 of this guide in the “This is what you should do” section
[Guide] How to get full NVMe support for all Systems with an AMI UEFI BIOS
Or, if you need to clone SSD to NVME
Installing Clean Win7x64 on M2.2280 PCIe Gen3x4 SSD A-DATA SX8200 Pro << My way
[Guide] How to get full NVMe support for all Systems with an AMI UEFI BIOS (330) << Fernando’s way
[Guide] How to migrate Windows 7 64bit boot drive from MBR SATA to UEFI NVMe without data lose << Shawn’s way
Thank you @Lost_N_BIOS ! I’ve downloaded the modded BIOS file, and had a few questions before I proceed as this is the first time I’m flashing with a modded BIOS. Do have an IVY BRIDGE CPU and no graphics card, so the PCIE x16 slot is open.
The modded BIOS file extension (looking via Windows 10 states “.F9a” while the OEM BIOS extension is “.bin”). Hopefully, this is ok. Also, is it possible to revert back to the OEM BIOS in the event something goes wrong? {Edit #1}: Looks like the GA-Z77M-D3H-MVP has the Dual UEFI BIOS and automatically stores a backup, and will revert to the backup BIOS in the event the main BIOS is corrupted/damaged. So, this provides some relief in proceeding. {Edit #2}: Flashed the modded BIOS and all looks ok. Now onto, installing the NVME SSD and deciding how best to proceed with Win 10 (fresh install and then copy back up over or clone existing SATA HD (mechanical) onto new NVME SSD.
Will read through the links you’ve provided above, and wanting to take this step by step, and very much appreciate your help!
@lji - No stock BIOS from Gigabyte is .bin format. Stock BIOS extension is same as the one I used = .F9a
Here, download and see for yourself - https://www.gigabyte.com/Motherboard/GA-…support-dl-bios
All are bin/rom/Fxx - all = same, but Qflash may or may not accept .bin or .rom, depends on the board.
Best to keep it at the stock extension format, which for the latest BIOS that I used is .F9a (previous would be .F8)
Yes, you can always reflash stock BIOS if you do not want NVME to function, provided BIOS is working and not bricked etc. Nothing will go wrong with NVME mod BIOS.
And no, Dual BIOS cannot always save you if BIOS is bricked, even if you have to try and force invoke it, sometimes it cannot recover the BIOS or boot to the other BIOS etc (at best, marketing ploy, but can save you “sometimes” when you get lucky)
Great to hear all flashed in OK! 
If you want to clone, then clone using one of the methods outlined above.
Do not waste time with clean install onto HDD/SSD then clone, if you’re doing a clean install do it directly onto the NVME
You’re welcome! 
If you need anymore help feel free to ask!
Good information @Lost_N_BIOS . For some reason, the new NVME SSD isn’t showing up in BIOS. Tried to isolate the NVME SSD at boot up by unplugging power to the mechanical HDD, but this caused the BIOS to not load anymore. After unplugging a few times and clearing the CMOS, the motherboard restored from the backup BIOS and restored BIOS to version F3. I’ve subsequently flashed this to OEM F8 and then the modded F9a BIOS provided above.
Did have a question on the modded BIOS provided. From the link to Gigabyte’s motherboard support page provided above, looks like this is Rev 1.1 of the Motherboard. I’ve got Rev 1.0 of the Gigabyte motherboard, so wondering if this makes a difference. The modded F9a BIOS provided above flashed just fine, but wondering if there’s something that’s causing the NVME SSD to not show up in BIOS on my Rev 1.0 Gigabyte GA-Z77M-D3H-MVP motherboard.
@lji :
If you see a device named "PATA" or "PATA_SS" in the "BOOT" section of the BIOS, the BIOS modding and the flashing procedure was successful. This name is given by all BIOSes without native NVMe support.
The manufacturer and model of the NVMe SSD never shows up in the BIOS, unless the NVMe support has been injected by the mainboard manufacturer.
Thanks @Fernando . I did see a “PATA” in the “BOOT” section of the BIOS. Also, if I change SATA controller away from IDE to AHCI in BIOS, Windows fails to load on the current HDD and throws a "Something went wrong ![]() " error message. Had to change this back to IDE for Windows 10 to load.
" error message. Had to change this back to IDE for Windows 10 to load.
Have about 120 GB on the mechanical HDD and don’t have a spare HDD/SSD, and reviewing the above documentation to how best to proceed with cloning existing HDD onto the NVME SSD and booting off of it.
----------------------------
A big thanks to @Lost_N_BIOS and @Fernando for the support provided. I was able to successfully boot off of the new NVMe SSD and the speed difference is incredible.
The 10 “easy” steps  taken to get NVMe SSD support and clone existing boot drive over to new NVMe SSD:
1) Flash with modded BIOS provided by @Lost_N_BIOS via Q-Flash (in BIOS utility for Gigabyte motherboards). Verified BIOS / boot integrity via several restarts/shutdowns.
2) Setup new NVMe SSD as a new volume within Windows via Disk Management.
2) Made sure a “PATA” drive was available in BIOS.
3) Cloned existing C:\ (mechanical HDD) over to new NVMe SSD using Macrium Reflect using this tutorial https://www.youtube.com/watch?v=CHCENfs87F4
4) Restarted and went back into BIOS to re-arrange boot sequence (switching to the BIOS GUI simplified this).
5) Subsequent restart went right back to booting from the old C:\ (mechanical HDD). 
6) Shutdown computer and unplugged the mechanical HDD (both power and SATA cables).
7) On startup BIOS successfully booted into new NVMe SSD that had been cloned. SUCCESS!! 
8) Restarted and booted into Macrium Reflect in Windows PE environment via a bootable USB drive to fix any Windows Boot problems (as shown in the Macrium Reflect YouTube link above).
9) Changed BIOS setting for SATA controller to AHCI from IDE. Windows booted up just fine with the new NVMe SSD.
10) Several boots to ensure everything works and it does so GREAT!
Decided that the 1TB NVMe SSD was enough capacity for current use and left old HDD as is (unplugged within case). Also left it as an optional bootable drive in the event NVMe SSD reaches its end of life and need something in short order (may have to change BIOS SATA controller setting back to IDE possibly).
Thankful that a 10+ year old PC (originally an HP one that had its motherboard, CPU and memory replaced/upgraded in 2012) still kicks butt! Works great for its intended use.
@lji - Good to see you finally for it working! Sorry to see the initial hassles! And, sorry I did not mention before, but Rev 1.0 and 1.1 use same BIOS
As Fernando mentioned, NVME does not “Show up in BIOS” with NVME mod BIOS, only PATA or Windows Boot Manager after OS installed.
System should be set to AHCI, if your previous/other windows was installed in IDE mode, that’s non-ideal too, but you wont be using it anymore so it does not matter.
Set BIOS to AHCI, remove all other drives except NVME, then proceed with install to it. Not following the guide I linked, at step #4 was part of your issues, if you had done that you would not have had any issues with your other old drive because it would not have been connected.
I linked you to “My Way” of cloning from HDD/SSD, I use Macrium
I suggest you change to AHCI, if that causes windows to not boot, try startup repair, and if that does not fix it I would do a clean install in AHCI mode
IDE mode will slow performance, even with NVME it will be slower than it should be.
Or, you can use this to change your OS to AHCI possibly, not sure if this is same on Win10 as Win7?
Enable switching between all IDE/AHCI/RAID modes by changing “Start” Values in these keys to 0 in the registry
HKEY_LOCAL_MACHINE\System\CurrentControlSet\Services\Msahci\Start
HKEY_LOCAL_MACHINE\System\CurrentControlSet\Services\Pciide\Start
HKEY_LOCAL_MACHINE\SYSTEM\CurrentControlSet\services\iaStorV\Start
BIOS SATA Controller is now set to AHCI. With the NVMe SSD, this took a few seconds on bootup and then booted right into Windows. Did benchmark the SSD drive and noticed a little uptick in read/write speeds after AHCI was set.
@Lost_N_BIOS I did see this in the motherboard manual. Somewhat sucks that Gigabyte didn’t offer the PCIE x4 slot with PCIE 3.0 since NVMe drives run with x4 anyway. Oh well, don’t really need a graphics card for this computer’s use, but would’ve helped to have this open for future upgradeability. Now, only option if a graphics card is needed would be to downgrade to PCIE 2.0 speeds by moving the NVMe SSD to the PCIE x4 slot. Oh, and thanks again for the modded BIOS!
@lji - You’re welcome! The reason only one PCIE 3.0 is because back when this board launched PCIE 3.0 was just coming out, so support was limited, and only added for IVY CPU at that one slot
If you need to use PCIE card, but don’t need it for gaming, it would be fine to run x16 PCIE graphics card in the X4 slot, it will still work just fine for many tasks (just not gaming)
Cool @Lost_N_BIOS. Looks like that might be the route I’ll go. Since no actual gaming is done, something like a GTX 1050 Ti might fit the bill here running at PCIE 2.0 and using only X4 PCIE lanes.
@lji - You can put x16 card into the x4 slot, you don’t have to hunt down some card limited to x4 lanes being it’s stock value.
Anything you put in the x4 slot will only use x4 lanes, that’s all that’s in that slot electrically (rest of the slot has no pins)
But yes, since you don’t game, but would rather not use onboard graphics, then any PCIE Card you find that fits your budget will be perfect (provided it works good )
Absolutely @Lost_N_BIOS , I get what you’re saying. The second slot is physically an x16 slot, but operates with only 4 PCIE lanes (with the electrical pins being only equivalent to that of a physical x4 slot) and running at PCIE 2.0 speeds.
As this is an old PC, don’t think there are any 6 or 8 pin connectors available from the original stock PSU (250W) to power newer graphics cards. Thinking will have to utilize an older, relatively lower power graphics card that draws power from the PCI bus. Was looking to to see if there’s something that’s a decent price to performance ratio given the draw down in performance that’ll be observed and the 1050 Ti seemed to a good option for around $100 and grabbed one yesterday. Will report how this goes.
@lji - Yes
There is no stock PSU, only what you purchased with the case, or whatever came with it as a bundle. You could buy any PSU you want, or get molex to 6 pin connectors etc
I’ve not looked at budget cards in a while, nor Nvidia anything, so not sure what will be best in regards to price and no additional PSU connector required. Hopefully you picked the good one
Ah, every time I talk to you @Lost_N_BIOS , I learn something new. Wasn’t aware of molex to 6 pin connectors, so that’s indeed an option. By stock PSU, I meant what came with the PC - this is originally an HP PC that came with a 250W PSU that’s had components slowly upgraded over the years. The 1050 Ti requires a 300W PSU per its specs, but there’s enough components disconnected internally and is en route, so will see how this goes.
@lji - Thanks! There is also molex to 8 pin, and I think SATA power to either 6/8 pin too.
I thought maybe this was some pre-configured system. Yes, 250W is low, but it may be OK for that card, you’ll have to see.
I’d look into 350-400W or 500W PSU upgrade next
An update to the upgrade - the 1050 Ti could not be placed into the x16 slot running at PCIE x4 since it’s too close to the power supply and takes up space of two slots. An option was to disassemble the fan shroud and the plate where the DVI/HDMI/DP connectors are and place into the PCIE 4x slot. Did this and there was just enough clearance for the fan, but wasn’t happy that the graphics card mechanical support would be limited to just the PCIE x16 slot.
Moved the NVMe SSD over to the PCIE x16 slot running at x4 to see how bad of a drop off in usability would be and to my surprise it wasn’t much. Did some benchmarks and the read/write speeds were about 200 MB/s less. Decided to keep the NVMe SSD in the PCIE x16 slot running at x4 speeds and the graphics card in the PCIE x16 slot running at x16.
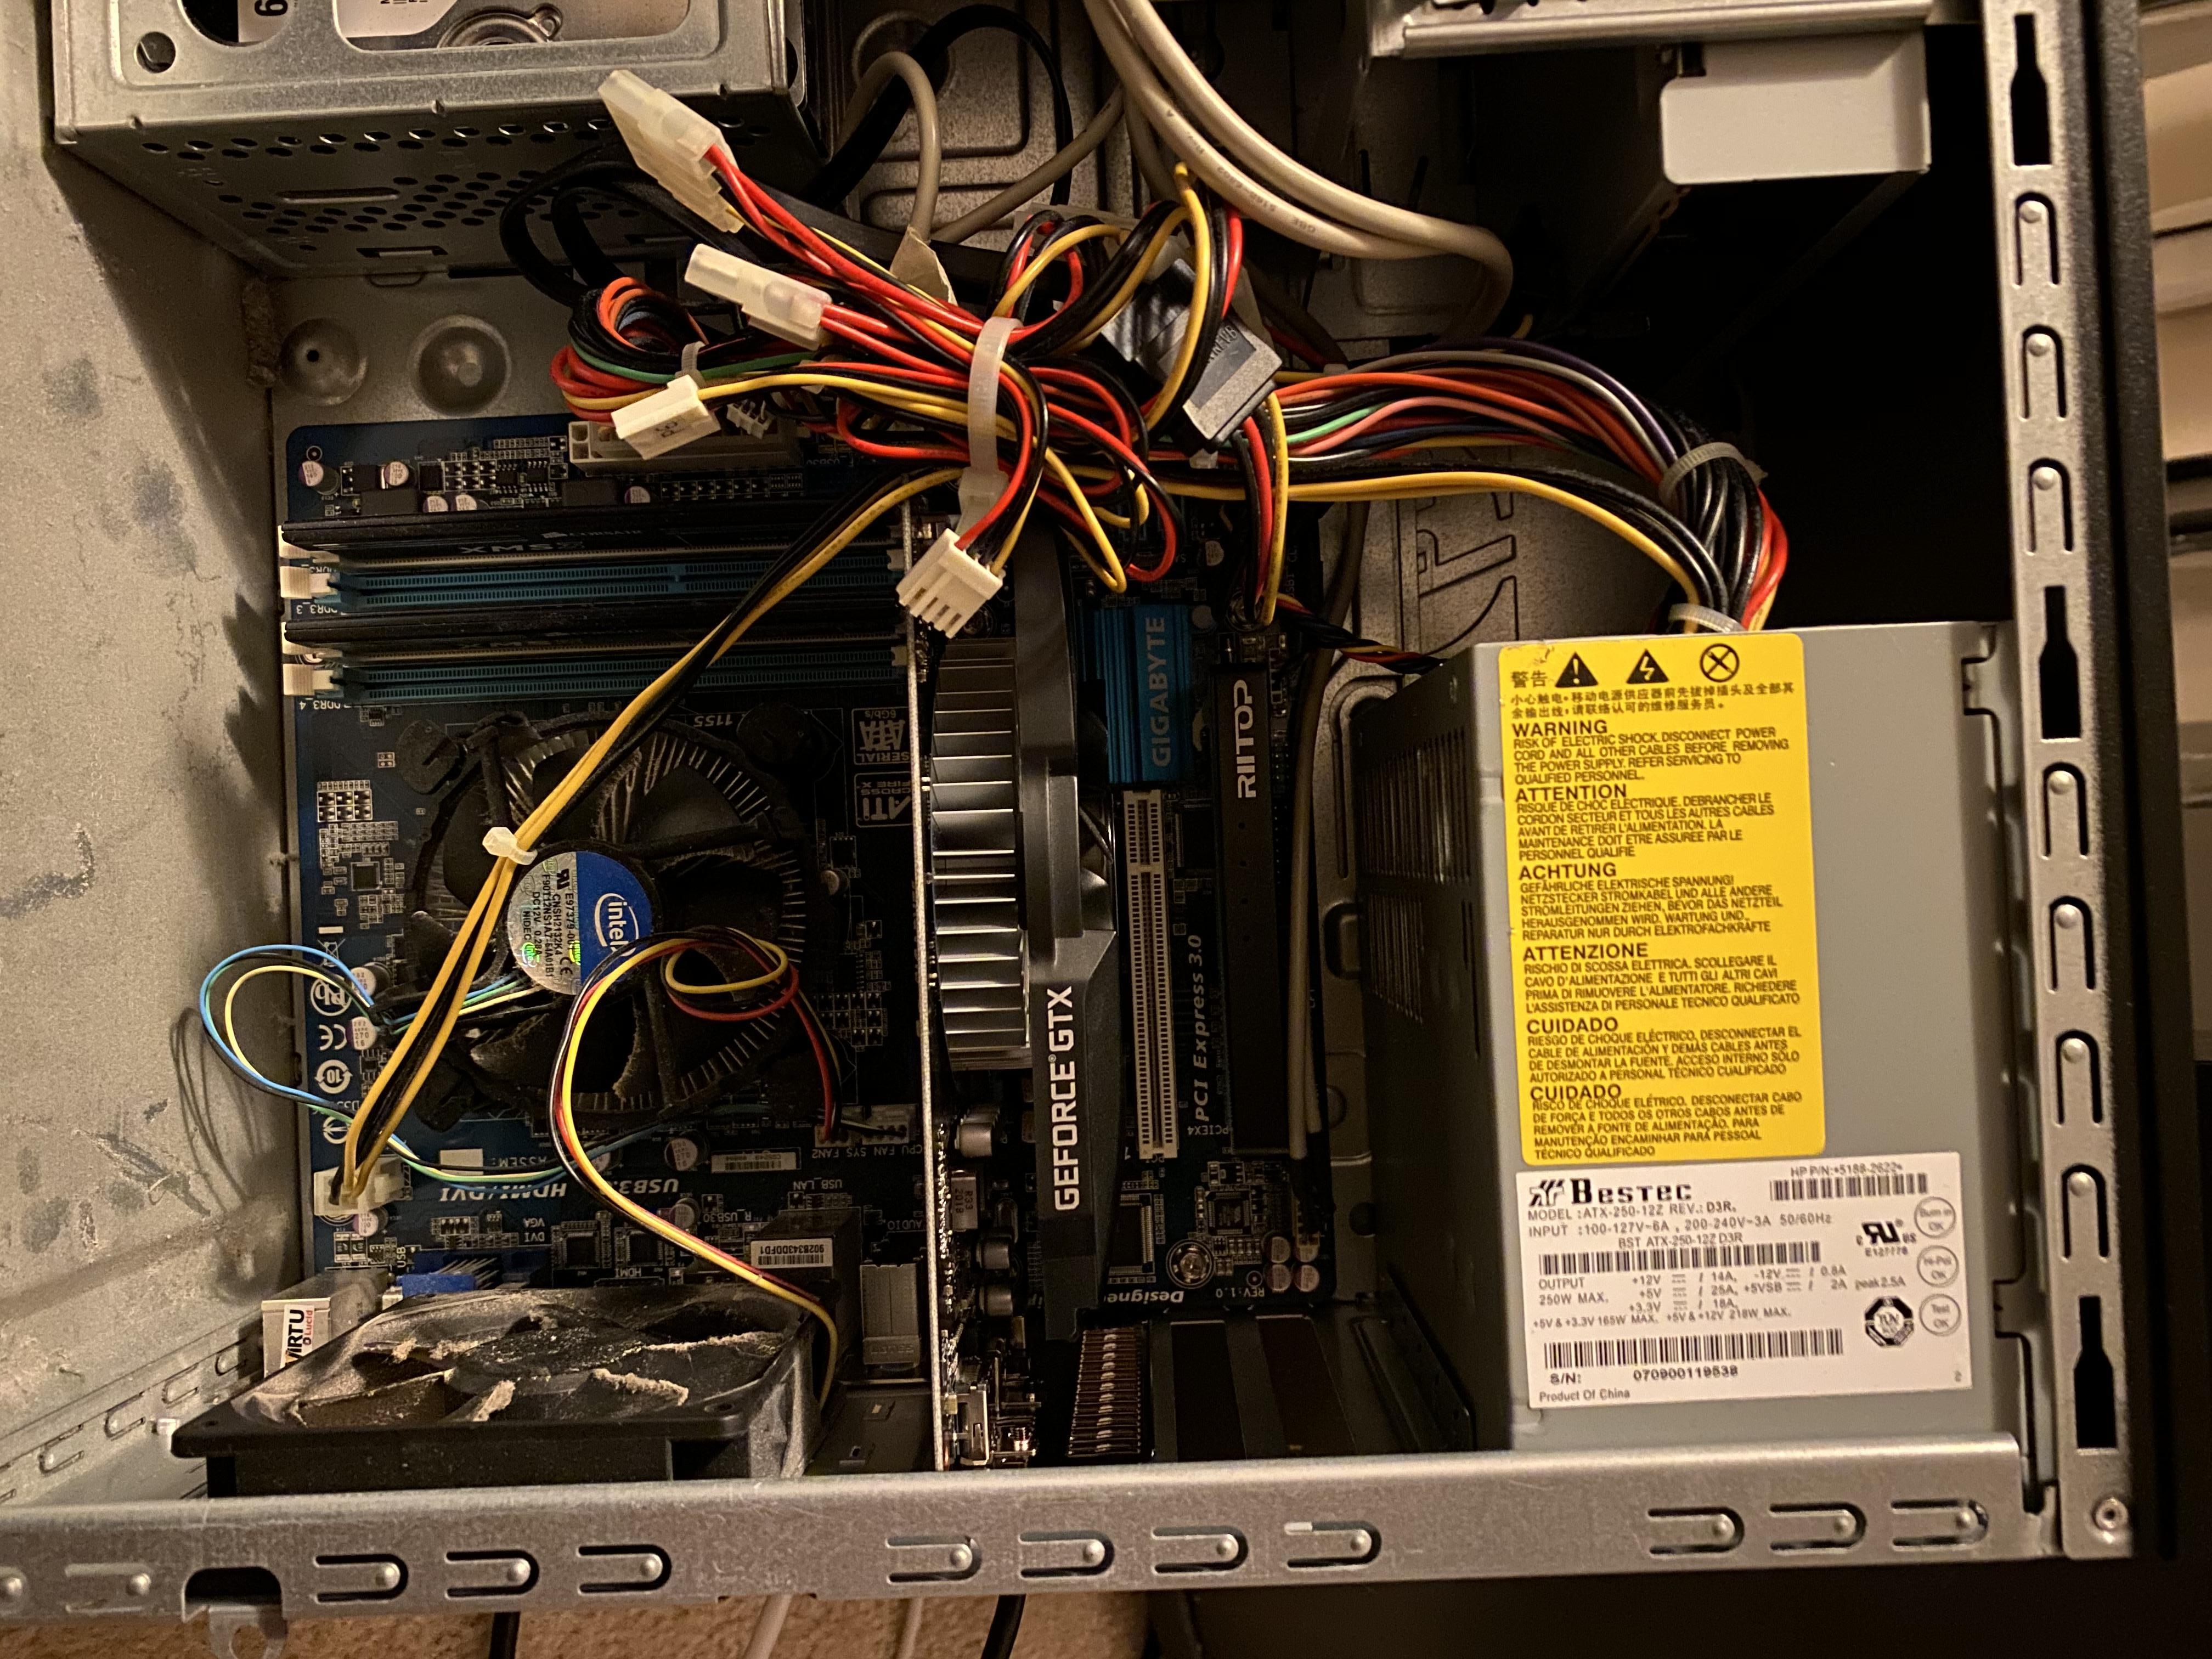
No issues with the 250W power supply powering the 1050 Ti off of the PCIe bus power, so overall satisfied with the upgrade. This setup should work for another 10 years or so! Below picture taken before all the dust was cleaned off
@lji - Are you not using IVY CPU? If not, then it would not matter which slot you use, both would be PCIE 2.0
If you have IVY CPU, then only the first slot would be PCIE 3.0 and speed should be double the speeds of what you’d get in the second slot (ie if 1200-1500 in PCIE 2.0 slot, they would be 3000-3xxx in the PCIE 3.0 first slot)
Reading back, I see you do have IVY CPU, sounds like you may not have compared the speeds correctly, or something is not right with the first PCIE Slot or BIOS settings
Probably “Auto” is not switching it to 3.0, change it manually to 3.0 in the BIOS >> MIT >> Miscellaneous Settings >> PEG Gen3 Slot Configuration (Set Gen3)