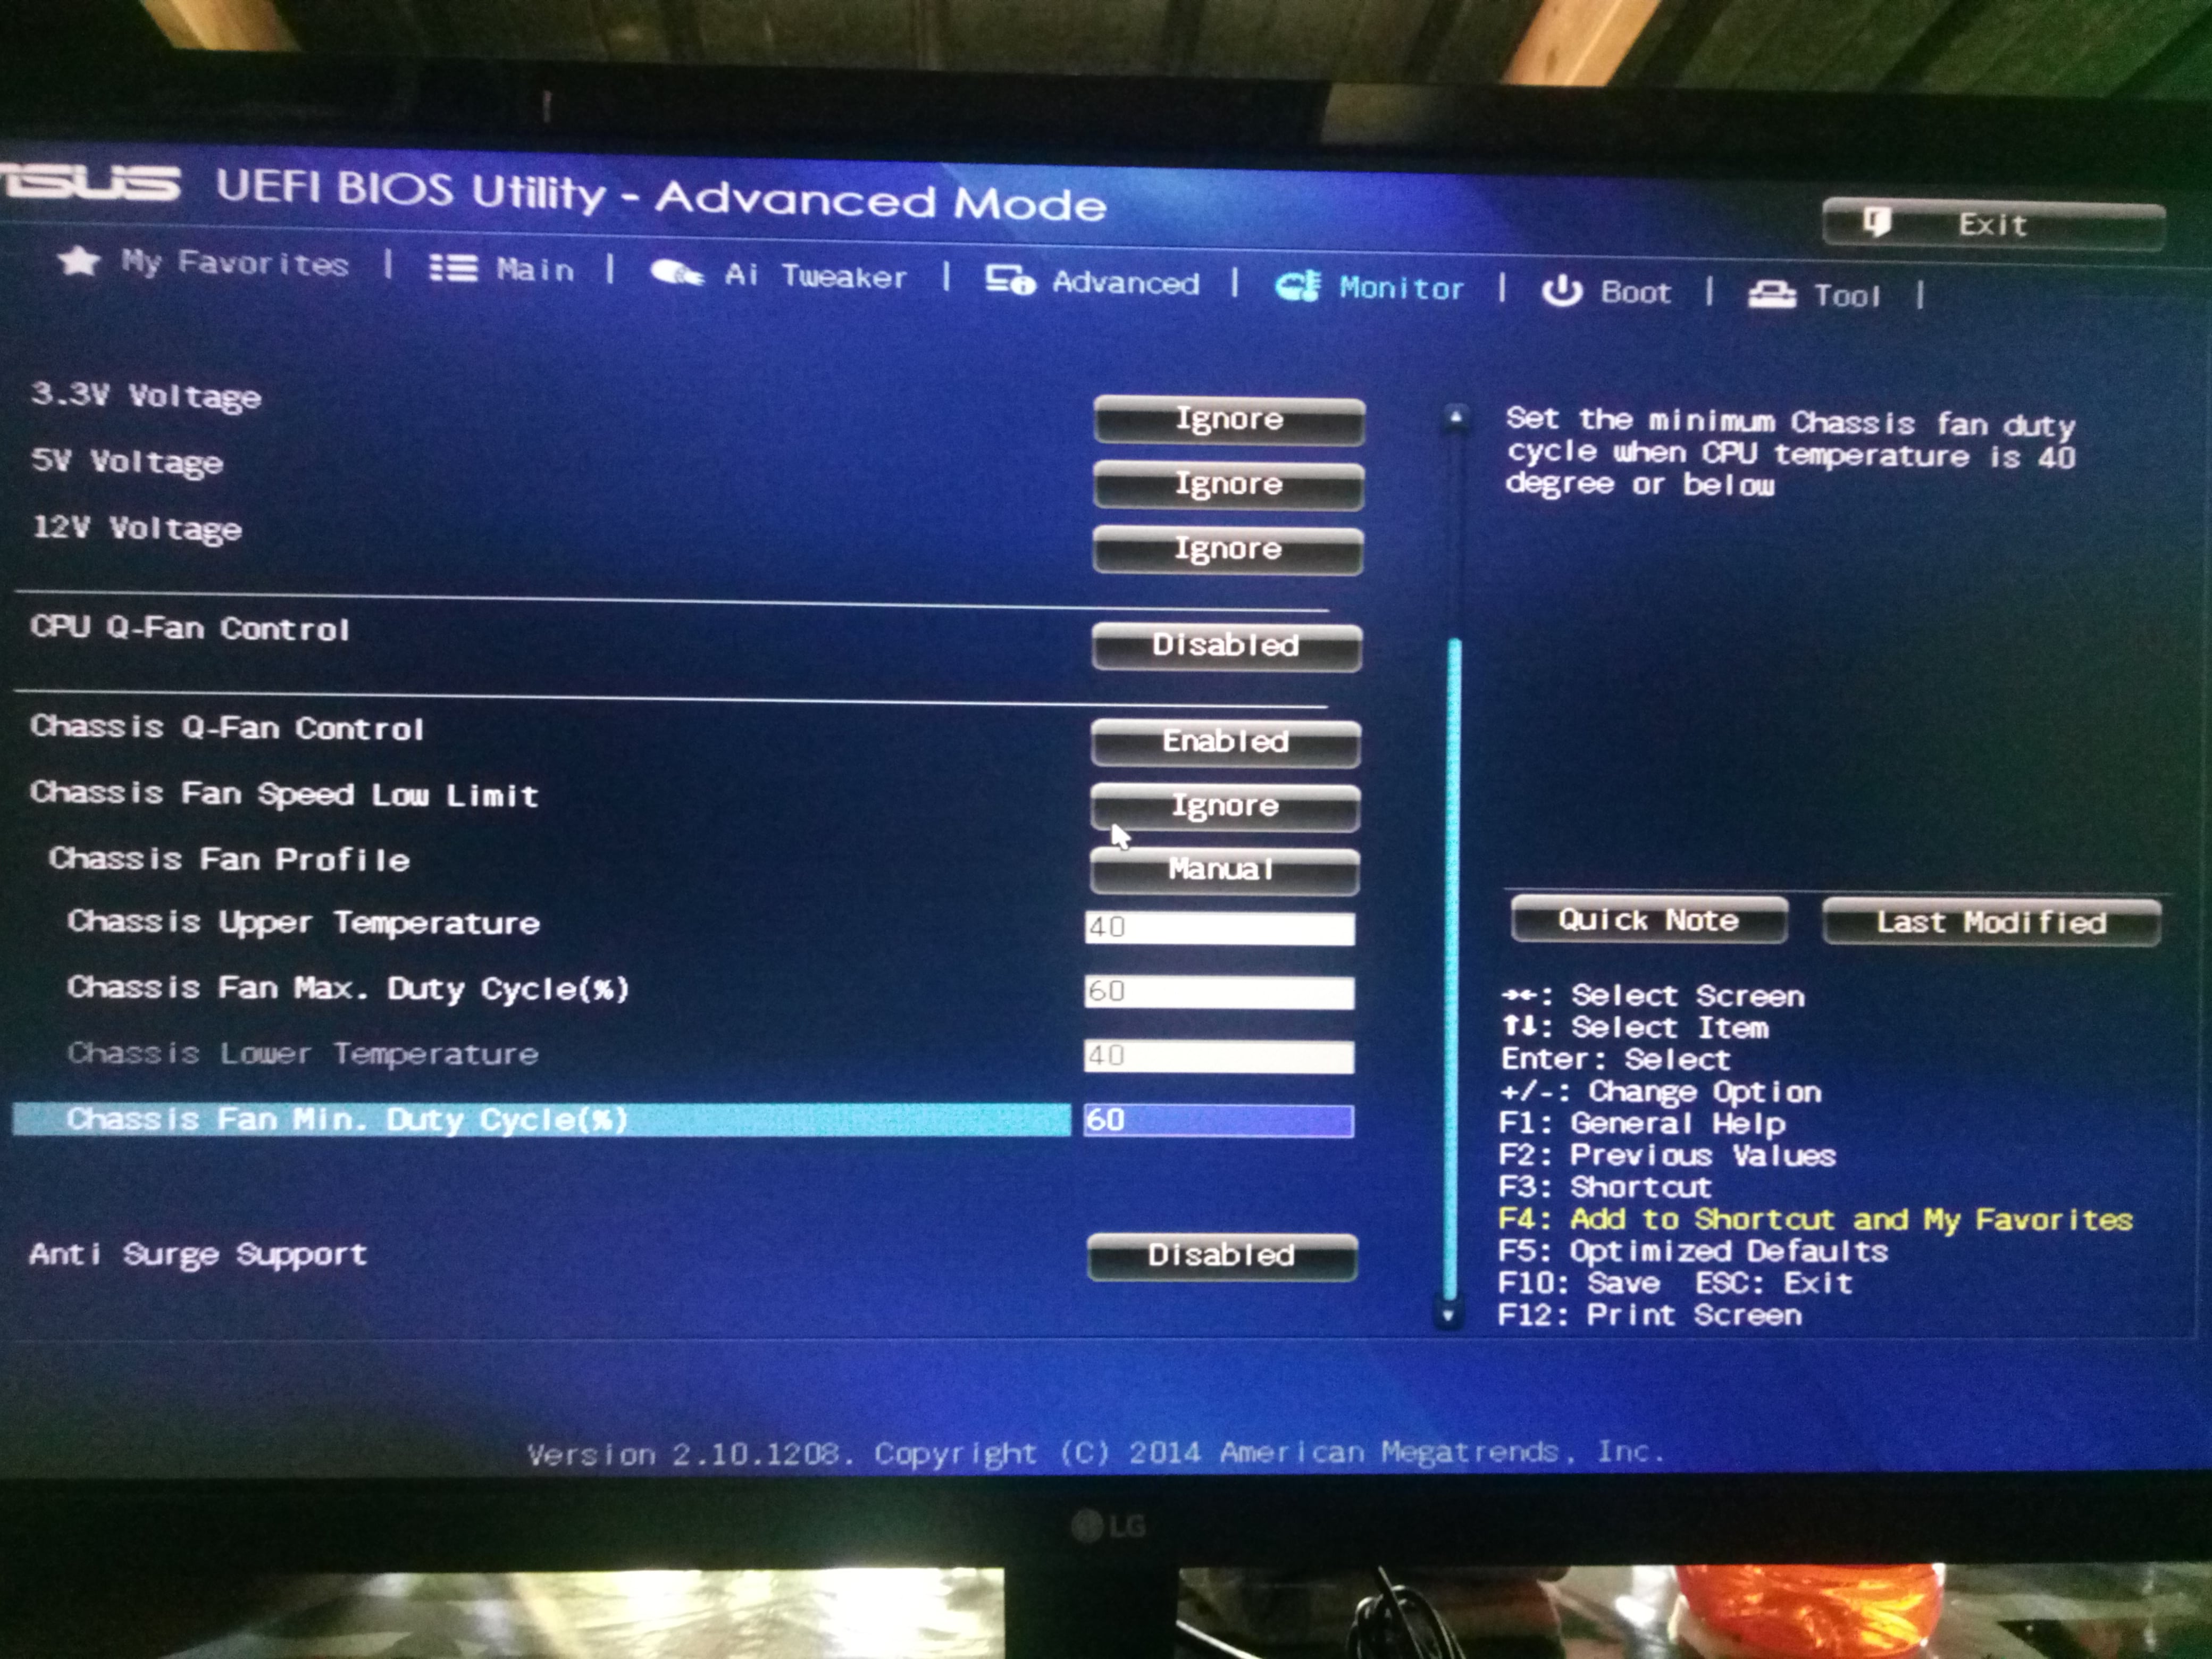
Yes, before i touch it, he was already at 60% before i change to go lower (but nothing) !
Yes I’ve already put ONE fan only on the “Chassis fan” header (without the hub).
I believe you, only asking to confirm. This setting is held in a few places, I assumed the one I changed would over-ride NVRAM ones, but I see it doesn’t, so we change there next!
* Edit - here is next test. There is still many more places to change this in NVRAM next if this one fails, this one is setup module change, first was AMITSE change.
I figured we should try setup module change first anyway since AMIBCP/AMITSE-SetupData change didn’t get used (it’s usually either this, or setup used)
http://s000.tinyupload.com/index.php?fil…519224826807414
If this fails, then I’m sure NVRAM changes would get it next time around!
The second mod not working too ! Proceed to the next change ! Already at 60% before touched it too !
How are you flashing? Please show me your AFU commands or boxes checked if using AFU.
It may simply be the change needs to be done in NVRAM, but I find it curious neither of the two changes we tested already reflected into the BIOS because one of them does in AMIBCP, which usually means it will be used (but not always).
So that’s why I wondered how exactly you’re flashing.
@Lost_N_BIOS I’m flashing like you tell me to do with the following command : FPTw.exe -bios -f biosregm.bin
I’m run CMD with administrator right on FPTw-V11 folder and running "FPTw.exe -bios -f biosregm.bin"
It seems to flash successfully.
Sorry for bad picture quality.

OK, thanks I forgot we were doing that and didn’t look back when I asked. That’s best way, and this way we know it’s all going in, so thanks for confirming
Here is new test, changed at three locations in NVRAM - please test both BIOS and let me know outcome of each - http://s000.tinyupload.com/index.php?fil…200713811736274
And check setting, does it show 60, or 20, and then check actual fan speed, do you think it’s lower despite if BIOS says 60 or not? I think it should show 20 in BIOS now, but just in case it doesn’t, please consider actual fan speed in person too.
No, no BIOS images needed, thanks.
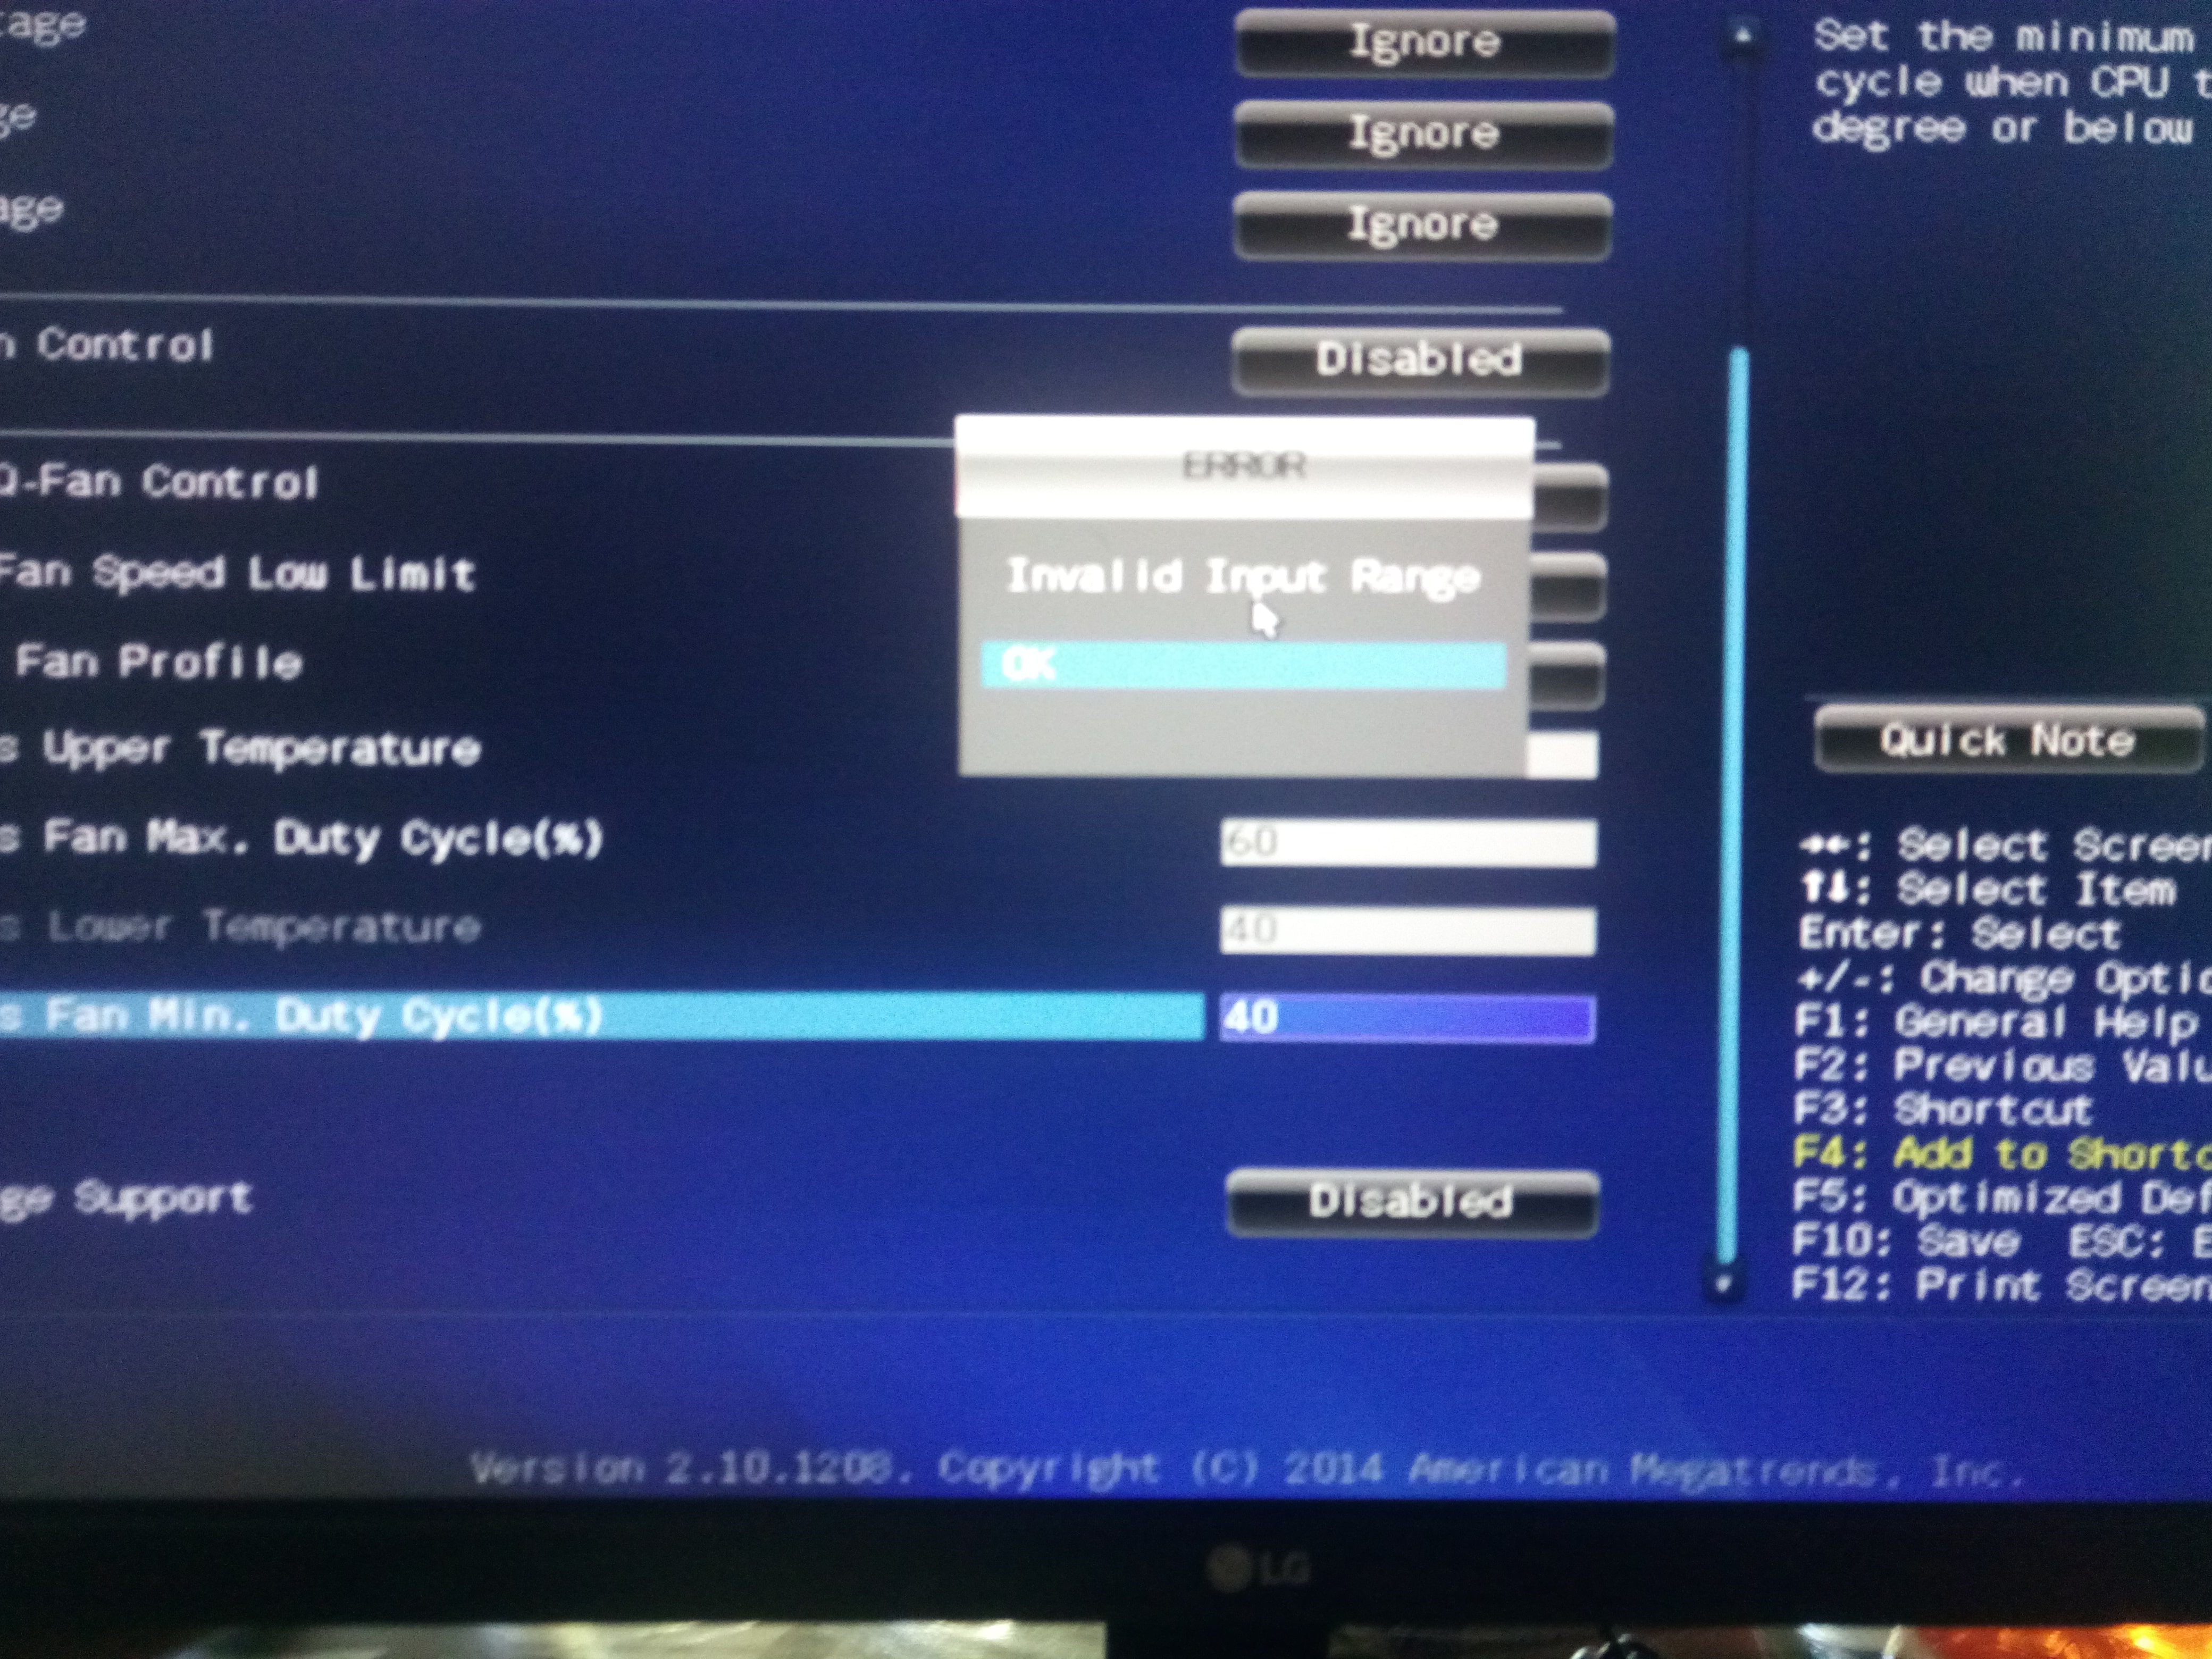
@Lost_N_BIOS Sorry but nothing changed in BIOS for BIOSREGM3.bin & BIOSREGM3-2.bin. Always at 60% in BIOS before change and after change (Invalid Input Range).
Edit : I always check different profile for "Chassis fan" to test any combination possible.
Thanks you for your hardwork for help me. I really appreciate.
I didn’t think you’d be able to change it yet in BIOS, leave at default no matter what is shown. So, no change to actual fan speed in person with either?
For this, you have to use “Custom”, otherwise it’s some other preset value vs the one we’re trying to change.
I will look at it more tonight!
I’ve opened my PC case to check fan change but nothing change with all your 4 modded BIOS. So, no change to actual fan speed. I test all presets to finish with “Custom” presets. Custom presets don’t want to go below 60% (Invalid Input Range) before and after change.
But don’t worry, if nothing works we have trying to do. Thank’s again for help. This is not the success the best part is the helping. (Sorry for bad “English”)
Edit : I can only change speed after “Windows 10” boot, with Speedfan. But in “speedfan”, I need to manually decrease the value from 100% to 0% (at each boot) to calm down the fan (from 2400 RPM to 1200 RPM).
Can’t you simply connect “-” or black wire of your fan, into 5V pin on molex plug ?
As mentioned, use custom and do not try to “Set below 60” Apply custom, reboot and test fan RPM or measure voltage vs stock. I did not change anything yet that will allow you to set lower manually yet, I’ve only changed behind the scenes applied defaults.
@agentx007 Wii I be able to change fan speed after that modification ?
Yes, BUT since instead of 12V you will get 7V max. - I don’t why you would want to…
Also, some fans can’t even start at lower than 7V (so setting less than 100% at the start, may be bad idea).
@agentx007 It seems very difficult to make your modification. You say “Can’t you simply connect” but for me is very difficult ! Should I put the black wire out from the fan connector and connect it on a molex ? I have many fans and the cable management will be very weird in my case ! I can’t really imagine your technique. Can you make a picture or something else ?
I don’t really want to make hardware change to my fan or whatever. I thought that we can only make change to the software level or BIOS level. I preferred the “Speedfan” technique compared to put the black wire out or in worst scenario, buy another motherboard & better fan !
But good to know that we can do like this too !
Please note that I’m in “PWM output” in speedfan & not in “DC output”. (So control fan speed with PWM and not with DC)
PS : I don’t really know if it has a relationship, but I put this information.
@Lost_N_BIOS I tried too to put only custom without any modification (leave it by default). I (think) don’t really need to test voltage because I’m under PWM output (I don’t really know to be honest). And I only need to hear if the fan speed go lower.
I think you miss the point of PWM ![]()
PWM doesn’t mean it’s AC power.
It simply provides fraction of maximum voltage to power the motor (by switching On/Off really fast).
Max. voltage is determined by difference between “+” and “-” (yellow and black wires usually).
Since you get 12V on “+” and 0V on “-”, you can get maximum fan speed range for 12V fans.
In my case, instead of “0V” we use “+5V”. This means you effectively have 7V as maximum voltage (12V - 5V = 7V).
Sorry if it seems complicated.
I tried my best to make it simple…
Here’s two step way of doing this :
Step 1 : Detach black wire from fan connector
Step 2 : Sqeeze it into Molex 5V pin :
Done.
PS. Don’t worry. It works on 4-pin connectors as well (you simply need to find “-” or “ground” wire) ![]()
There is also adapters made for this, here’s a few examples
https://www.amazon.com/Silent-3-Speed-Ca…V/dp/B000XQOQSS
https://www.amazon.com/dp/B00EURESG6/ref…_detail_3?psc=1
https://www.amazon.com/dp/B004CLJ892/ref…_detail_0?psc=1
https://www.amazon.com/dp/B002PNFEM4/ref…4_t2_B000XQOQSS
I’m not certain, but maybe the changes I’ve been making could be working, but only affect DC voltage mode, not PWM? Can you test BIOS I made (first ones, and latest) vs stock, with a voltage 3 pin fan?
THANK’S TO ALL OF YOU FOR HELPING TO UNDERSTAND MORE ON MY FAN ! I REALLY APPRECIATE THIS COMMUNITY !
@elisw Thank you for giving more information about my hardware !
@Lost_N_BIOS Thank you for your hardwork to help to make modded BIOS & help someone unknown in this vast world !
@agentx007 Thank you for your new technique, I never heard that before, I will test this soon !
I will consider all of your reply !
I think it wil be my last “Reply” on this topic !
PS : @Lost_N_BIOS Last question, do I have to re-flashing my latest stock BIOS to recover “Serial number” or whatever modded subsystem ?
@Manaien10 - your serial, UUID etc should all be same as they was, since I only used your dump for all modification BIOS, so all that remained in place.
however, if you want to go back to stock BIOS, without the modifications, reflash your first FPT backup BIOS region via >> FPTw.exe -bios -f biosreg.bin
Do not flash stock BIOS that way, only your original FPT BIOS region dump you created and posted in post #12
So… For me, still unclear if any of this worked or not, at least not with any real certainty  I have Asus Z170 boards here though, so I can find out if these methods work for sure or not on my end via DMM
@elisw will do when I have time!
Hello Sir.
I have same situation with my asus b85m-e. Min fan speed at 60%
All pins is PWM. I try to reduce fan speed from 1115 to 800 rpm.
With ai suite under windows i can change with 5rpm steps (600 - 2200 rpm), but when PC starts - coolers works at full speed, too noisy ![]()
Can you pls help me to modify bios?
I have more experience than a topstarter.
Just tell me what areas of the BIOS are u correcting, and what kind of software u use ![]()
Will log any steps here with results.
@ctacb - Check BIOS main page and see if ME FW version is shown, if not then download HWINFO64 and on the large window on left side, expand motherboard and find ME area, inside that get the ME Firmware version.
Once you have that, go to this thread and in the section “C” download the matching ME System Tools Package (ie if ME FW version = 10.x get V10 package, if 9.0-9.1 get V9.1 package, if 9.5 or above get V9.5 package etc)
Intel Management Engine: Drivers, Firmware & System Tools
Once downloaded, inside you will find Flash Programming Tool folder, and inside that a Windows or Win/Win32 folder. Select that Win folder, hold shift and press right click, choose open command window here (Not power shell).
At the command prompt type the following command and send me the created file to modify >> FPTw.exe -bios -d biosreg.bin
Right after you do that, try to write back the BIOS Region dump and see if you get any error, if you do show me image of the command entered and the error give >> FPTw.exe -bios -f biosreg.bin
If you are stuck on Win10 and cannot easily get command prompt, and method I mentioned above does not work for you, here is some links that should help
Or, copy all contents from the Flash Programming Tool \ DOS folder to the root of a USB Bootable disk and do the dump from DOS (FPT.exe -bios -d biosreg.bin)
https://www.windowscentral.com/how-add-c…creators-update
https://www.windowscentral.com/add-open-…menu-windows-10
https://www.laptopmag.com/articles/open-…ator-privileges