[Request] Lenovo Legion Y540-17IRH Bios Unlocked

I have Y540 w/ Intel 9750h and Nvidia 2060 and Insyde Bios.

I have .fd from version 39 of this bios (latest is 41) I can grab latest .fd if needed through update exe.
I just want the Advanced tab’s settings unlocked. I currently have no Advanced tab visible in bios. I believe it needs to be in debug mode for it to appear.
I am willing try to extract bios other method if needed. I do not currently have SPI programmer.

.fd file too big so I have uploaded elsewhere. I can PM link or post in thread.

EDIT: i have put .fd into compressed

EDIT by Fernando: Thread title customized and shortened

bios.zip (5.54 MB)

Since I don’t have an SPI programmer I am thinking of using mikebdp2’s insydeH20-advanced-settings-tools found on his github. It should allow me to change values in write protected bios, so no need for reflash.

I have offsets readout as txt file. I just need to know the values to change to make all the tabs appear. TXT file is attached.

Any ideas @BDMaster @Lost_N_BIOS ?

FE3542FE-C1D3-4EF8-657C-8048606FF670_918 IFR.txt (1.25 MB)

hi hriend,
it depends of variables, GUIDs , protections, etc, the powerfull efi shell at moment is RU Shell.
So let me get some Menu Tabs shots to see your bios and find submenu, so i can know what we are talking about, then i wll read the EFI IFR to check which variable a patchable.
Let me know
Regards

@BDMaster Hello friend, i can attach pictures of the bios and each tab. Some notes: it seems to me that greyed out values cannot be adjusted or highlighted. ‘Supressed’ forms/items from IFR might be the ones that don’t show up but are still there hidden. Please let me know if you need anything.

NOTE: THESE ARE NOT THE DEFAULT VALUES FROM IFR. Some things have changed. If you would like me to reset BIOS to default and send new pics let me know.

IMG_20210429_092022.jpg

IMG_20210429_092025.jpg

IMG_20210429_092028.jpg

IMG_20210429_092030.jpg

IMG_20210429_092046.jpg

Here is the Bios folder without the file .fd as we don’t want to flash anything, but make a bios backup by H2OFFT-w.exe :

https://www.mediafire.com/file/q8g3nvh8n…CN39WW.rar/file

Extract the folder into C:\ HD place and open a command line interface from it.

Execute H2OFFT-W.exe -g to get a bios backup.
Executing the command H2OFFT-w.exe -h it give :


Insyde H2OFFT (Flash Firmware Tool) Version 6.28
Copyright (C) 2000-2020 Insyde Software Corp. All Rights Reserved.


Usage: H2OFFT-W [BIOS_Filename] [-Option]

-h This flash utility help.
-b Force suspend BitLocker.
-ecp Update non-share EC block by block.
-edt#@:“VALUE” # : The type ID. Value 4 ~ C.
@ : The data format. Value F, S, W, DW.
F for file,
S for string (Unicode string),
W for word value,
DW for double word value.
Example:
Update type 4 data, the source is file.
And update type 5 data, the source is string.
-edt4f:logo.jpg -edt5s:"Input string."
Update a type 9 data, the source is WORD.
-edt9w:“0x1234"
Update a type C data, the source is DWORD.
-edtcdw:“0x12345678”
-extrfd OUT_PATH Extract BIOS file from single package to OUT_PATH.
-forceit Skip BIOS version check.
-forcetype Skip model name check.
-g Read current ROM and save to file.
-iv Show utility and onboard BIOS supported IHISI
version.
-mfg Tell BIOS current run is in manufacture mode.
-n Do not reboot after flash.
-noconfirm Do not popup flash confirm dialog.
-nopause Will not prompt the user for command line input
during flash update.
-OemCus Tell BIOS to do OEM custmization feature.
-pbi:TYPE Flash specified type of BIOS protect region.
TYPE is the protected region type BYTE value in hex.
-pi Query BVDT protection/private region MAP in input
BIOS file.
-pq Query BIOS protection region MAP in current ROM.
-pr Query external region MAP in current ROM.
-priv Query BIOS private region MAP in current ROM.
-pw Query whole region MAP in current ROM.
-pwd:PASSWORD Input password for the feature which need password.
-r Reboot the system to complete the update.
NOTE: Requires -s option. Only available with -s.
-s Run as silent mode.

So looking there is an option -g to make a bios backup !
I removed the bios file to avoid issue, so it’s only program. if you do you want try it , let me know.
Regards

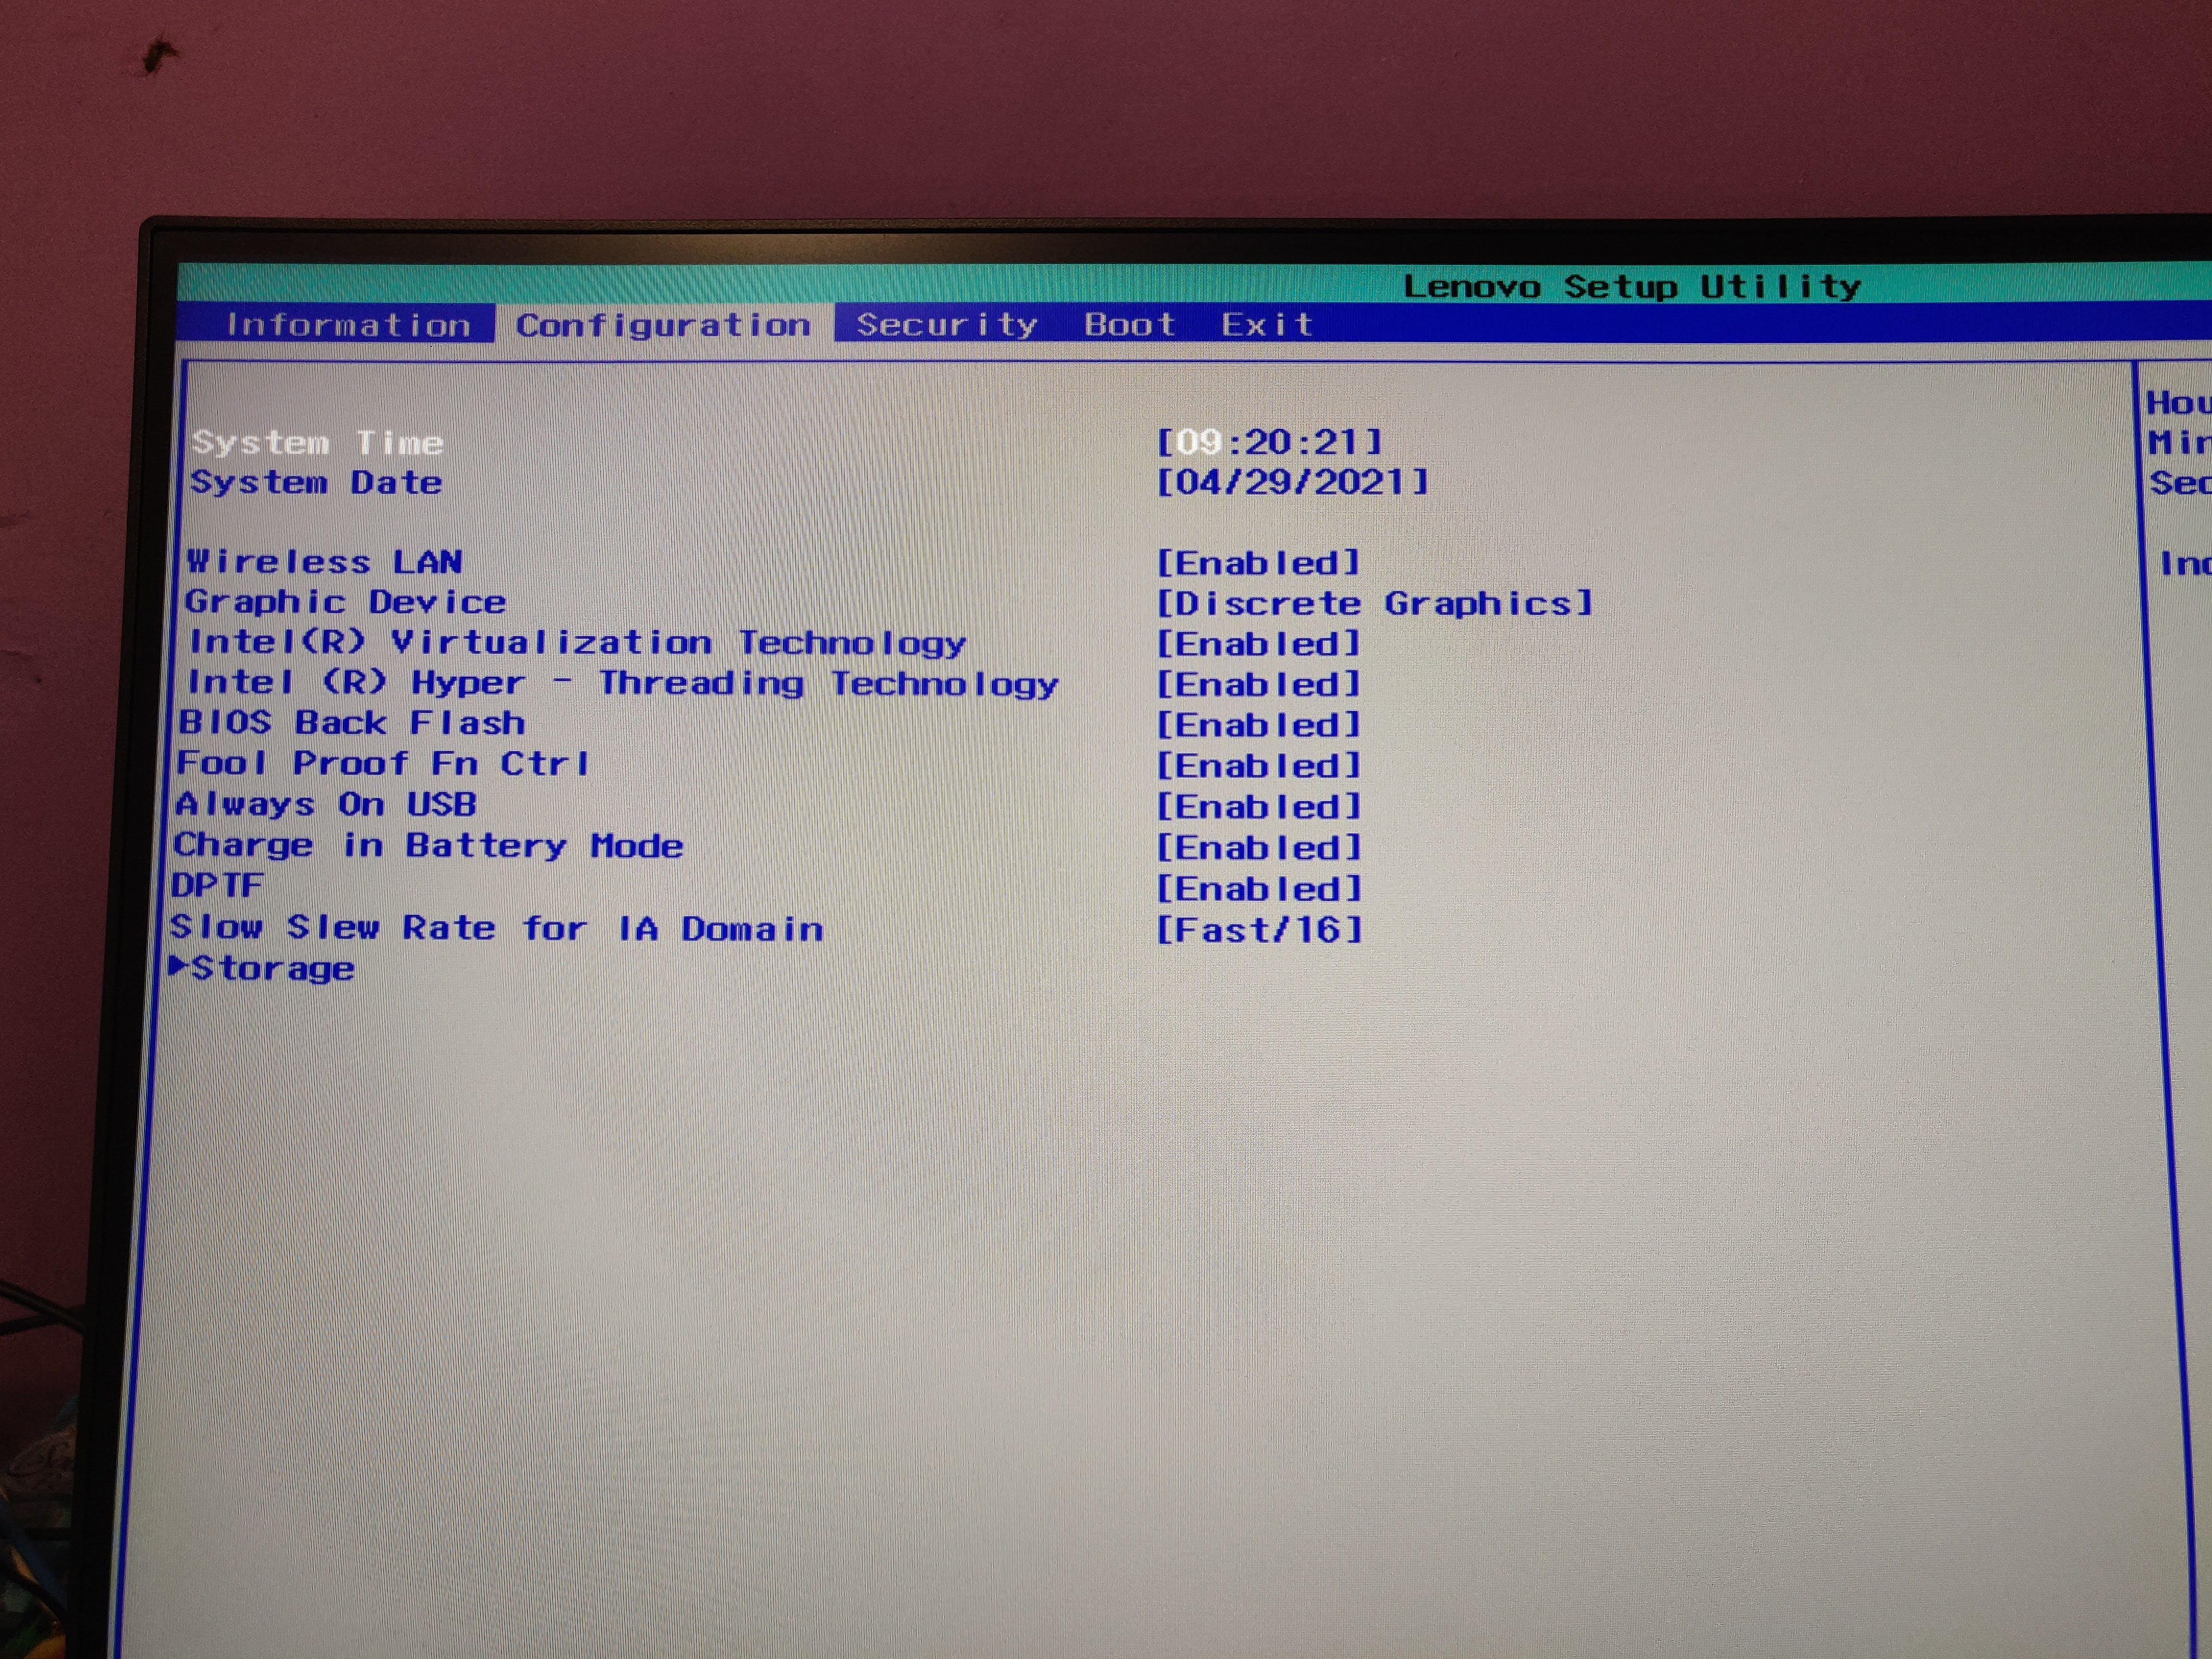
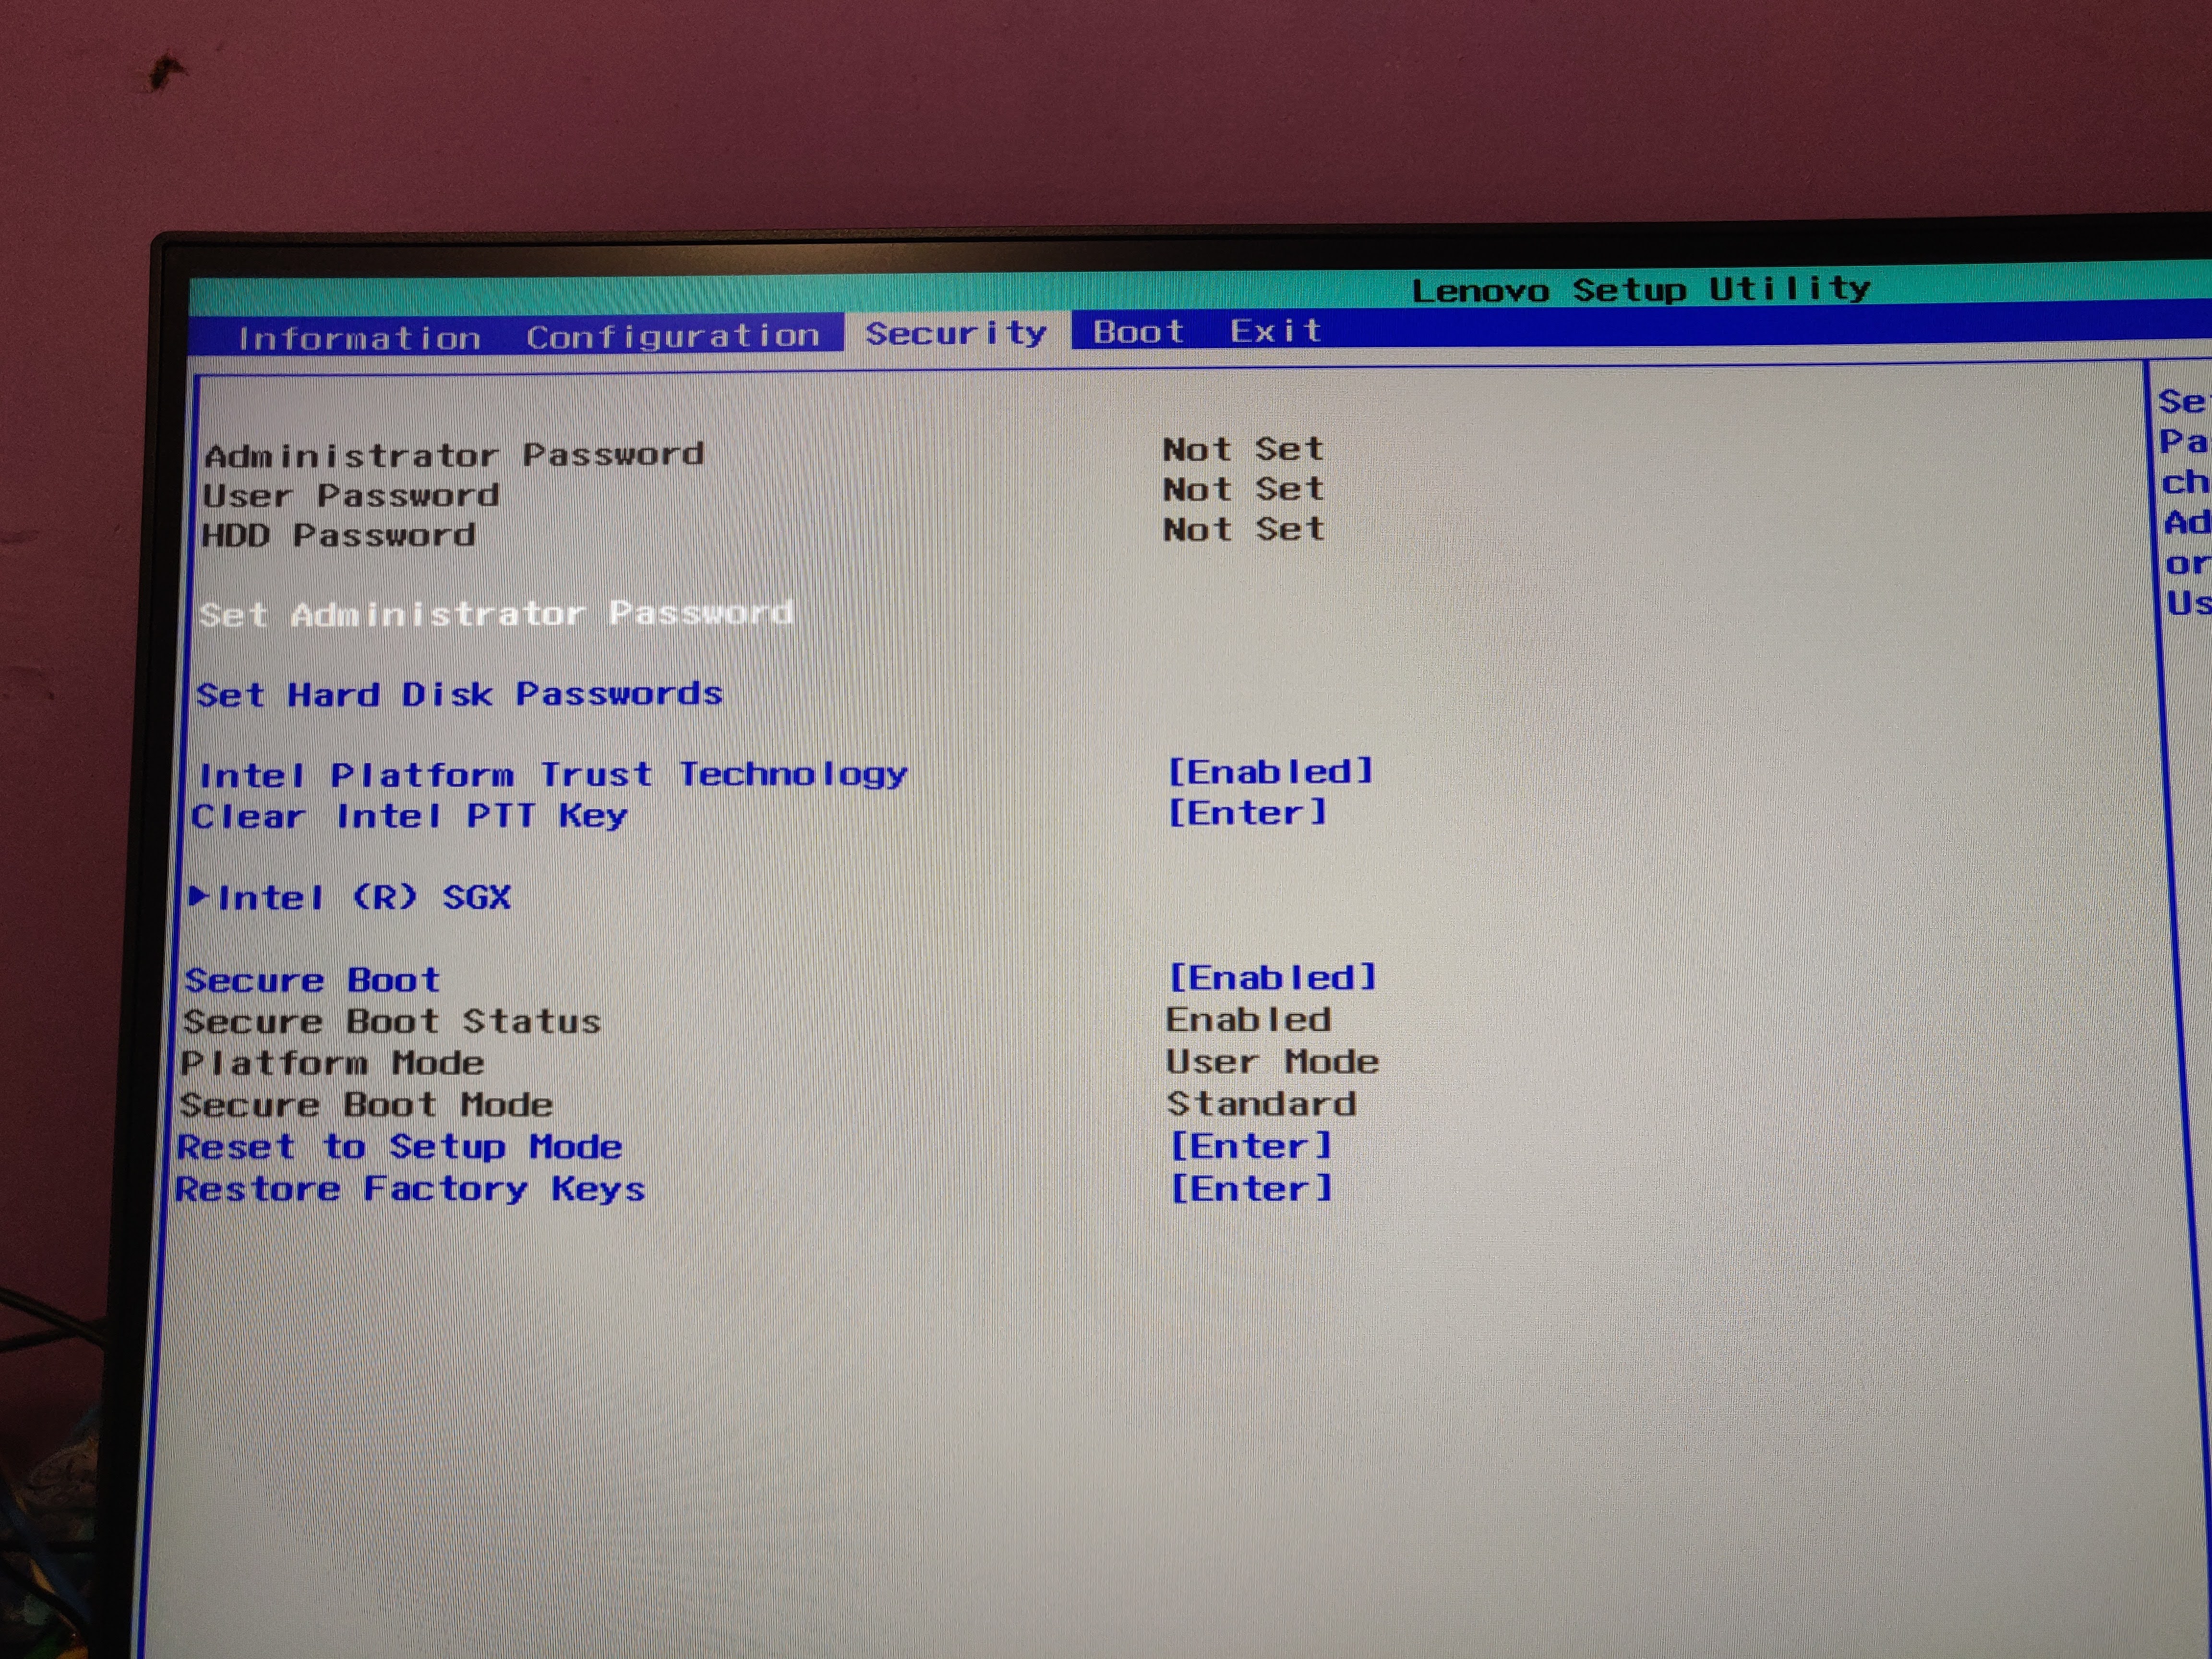
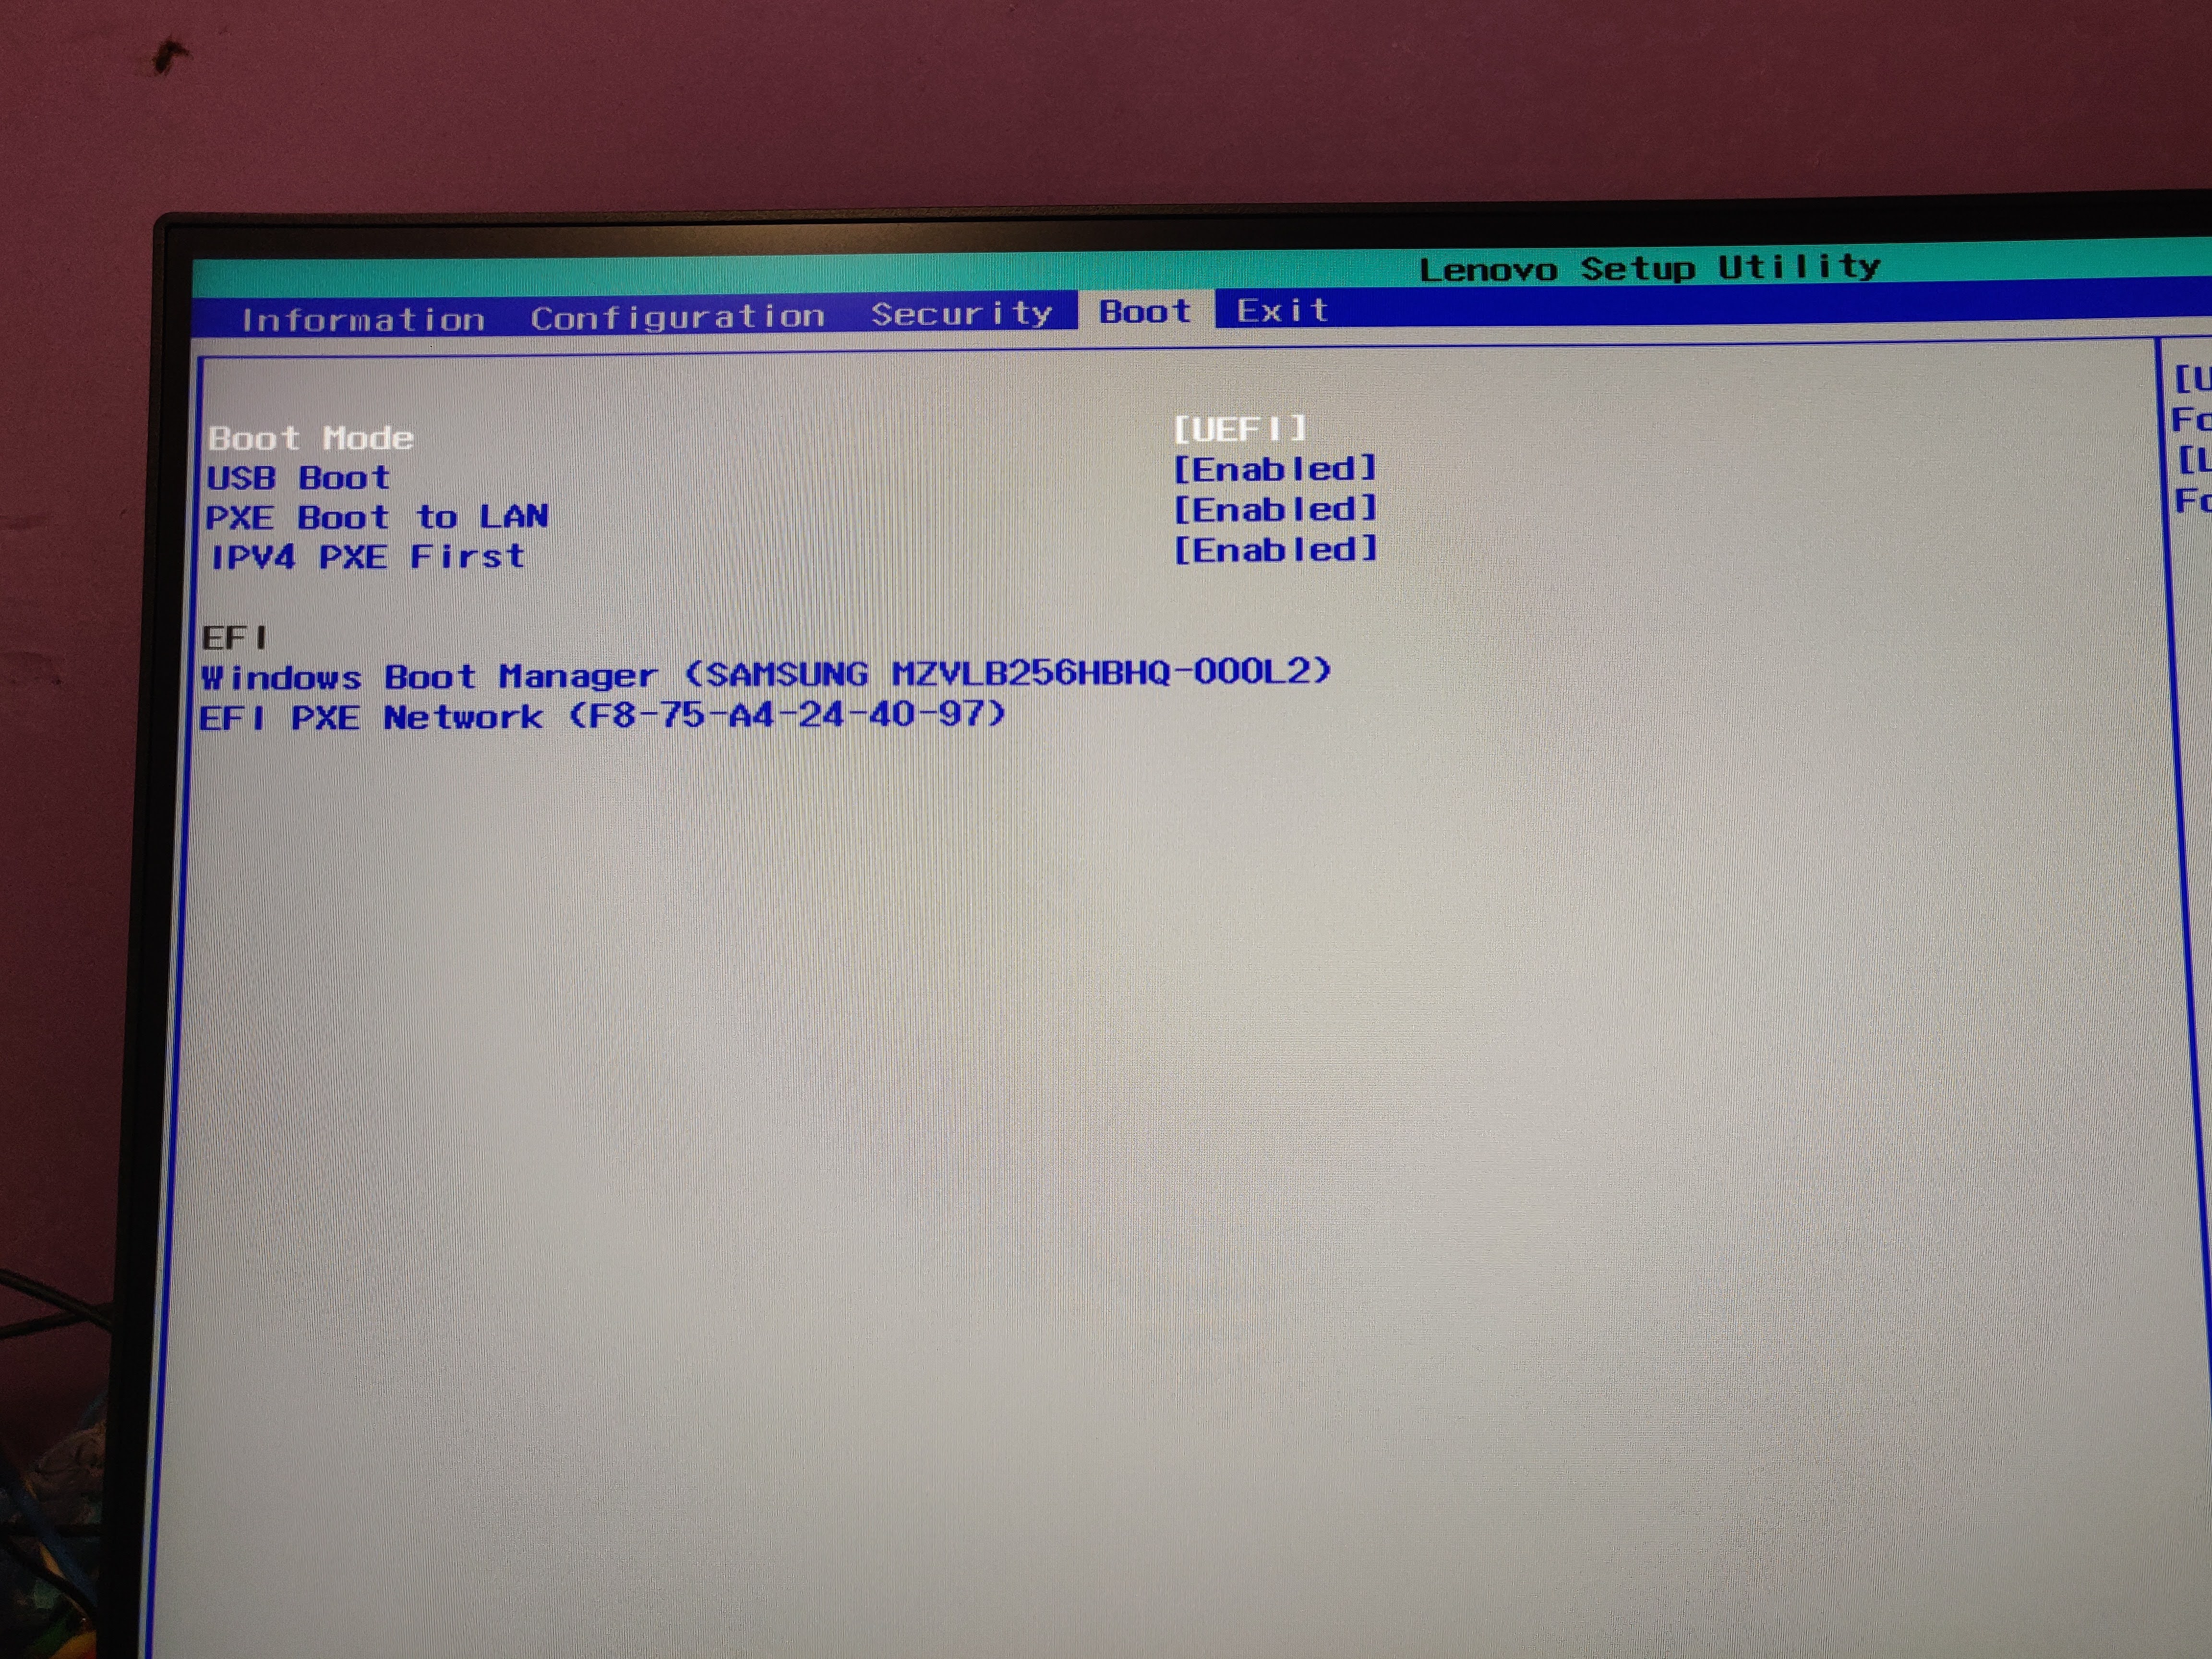
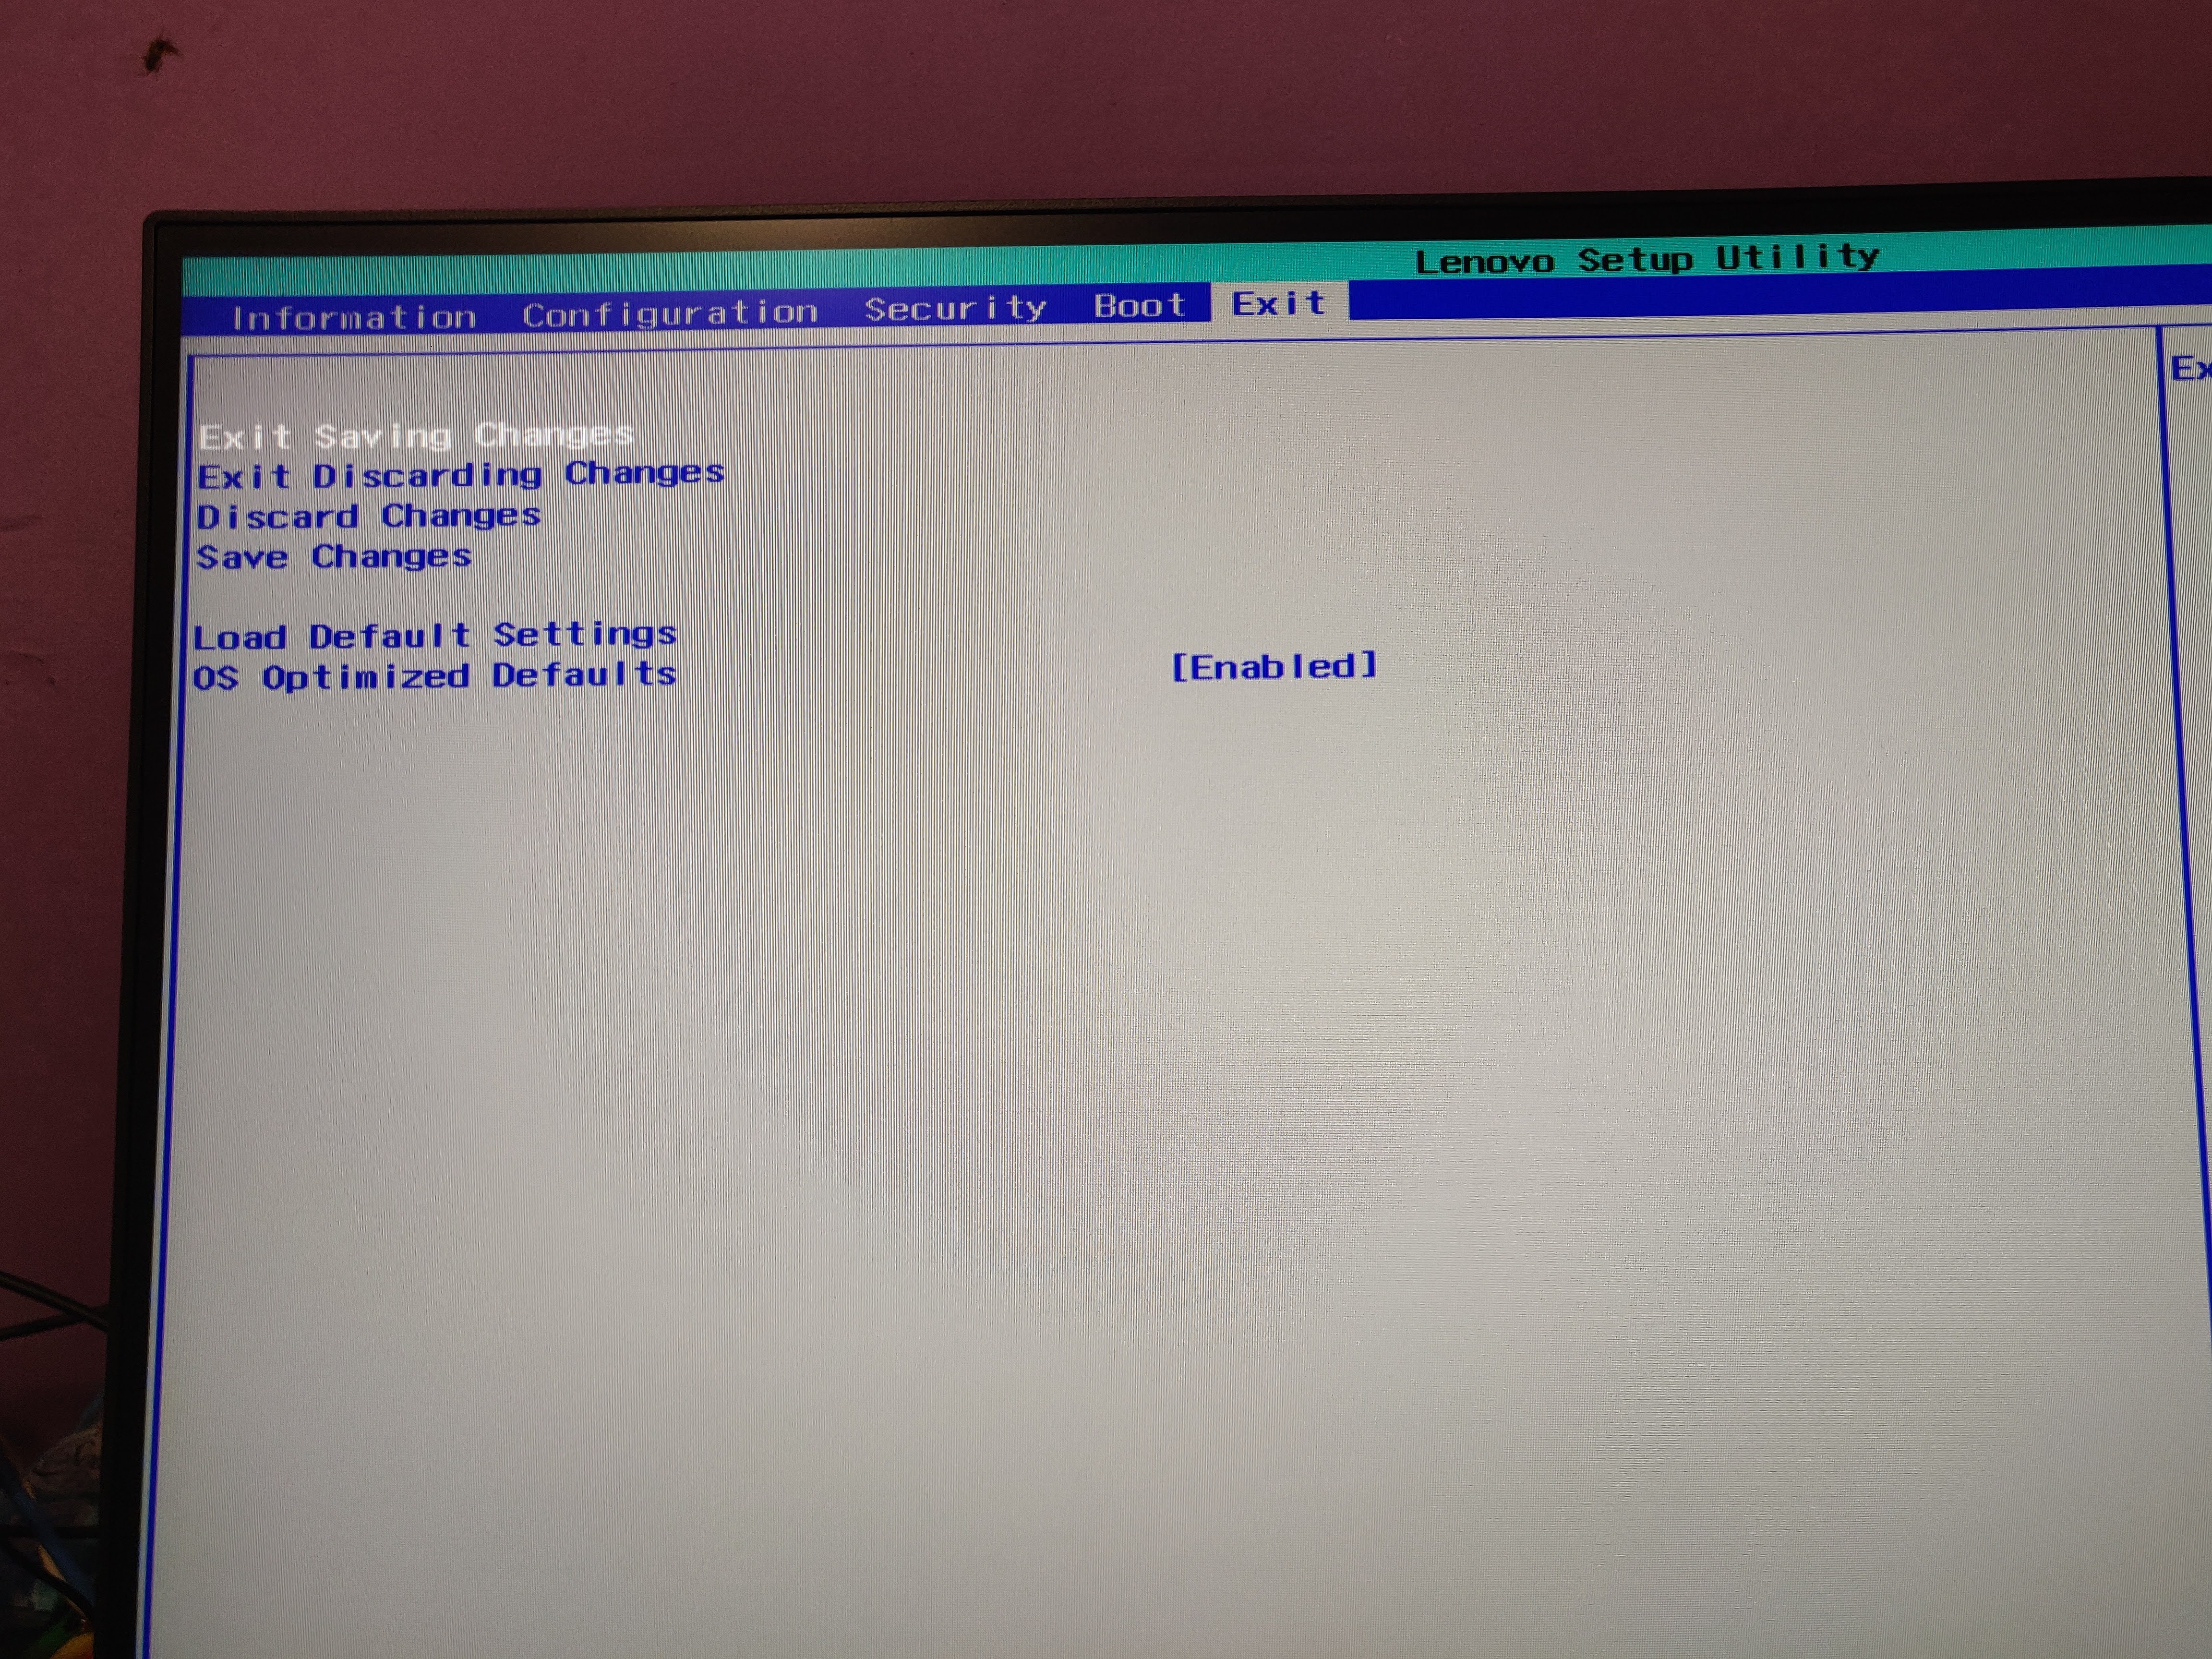
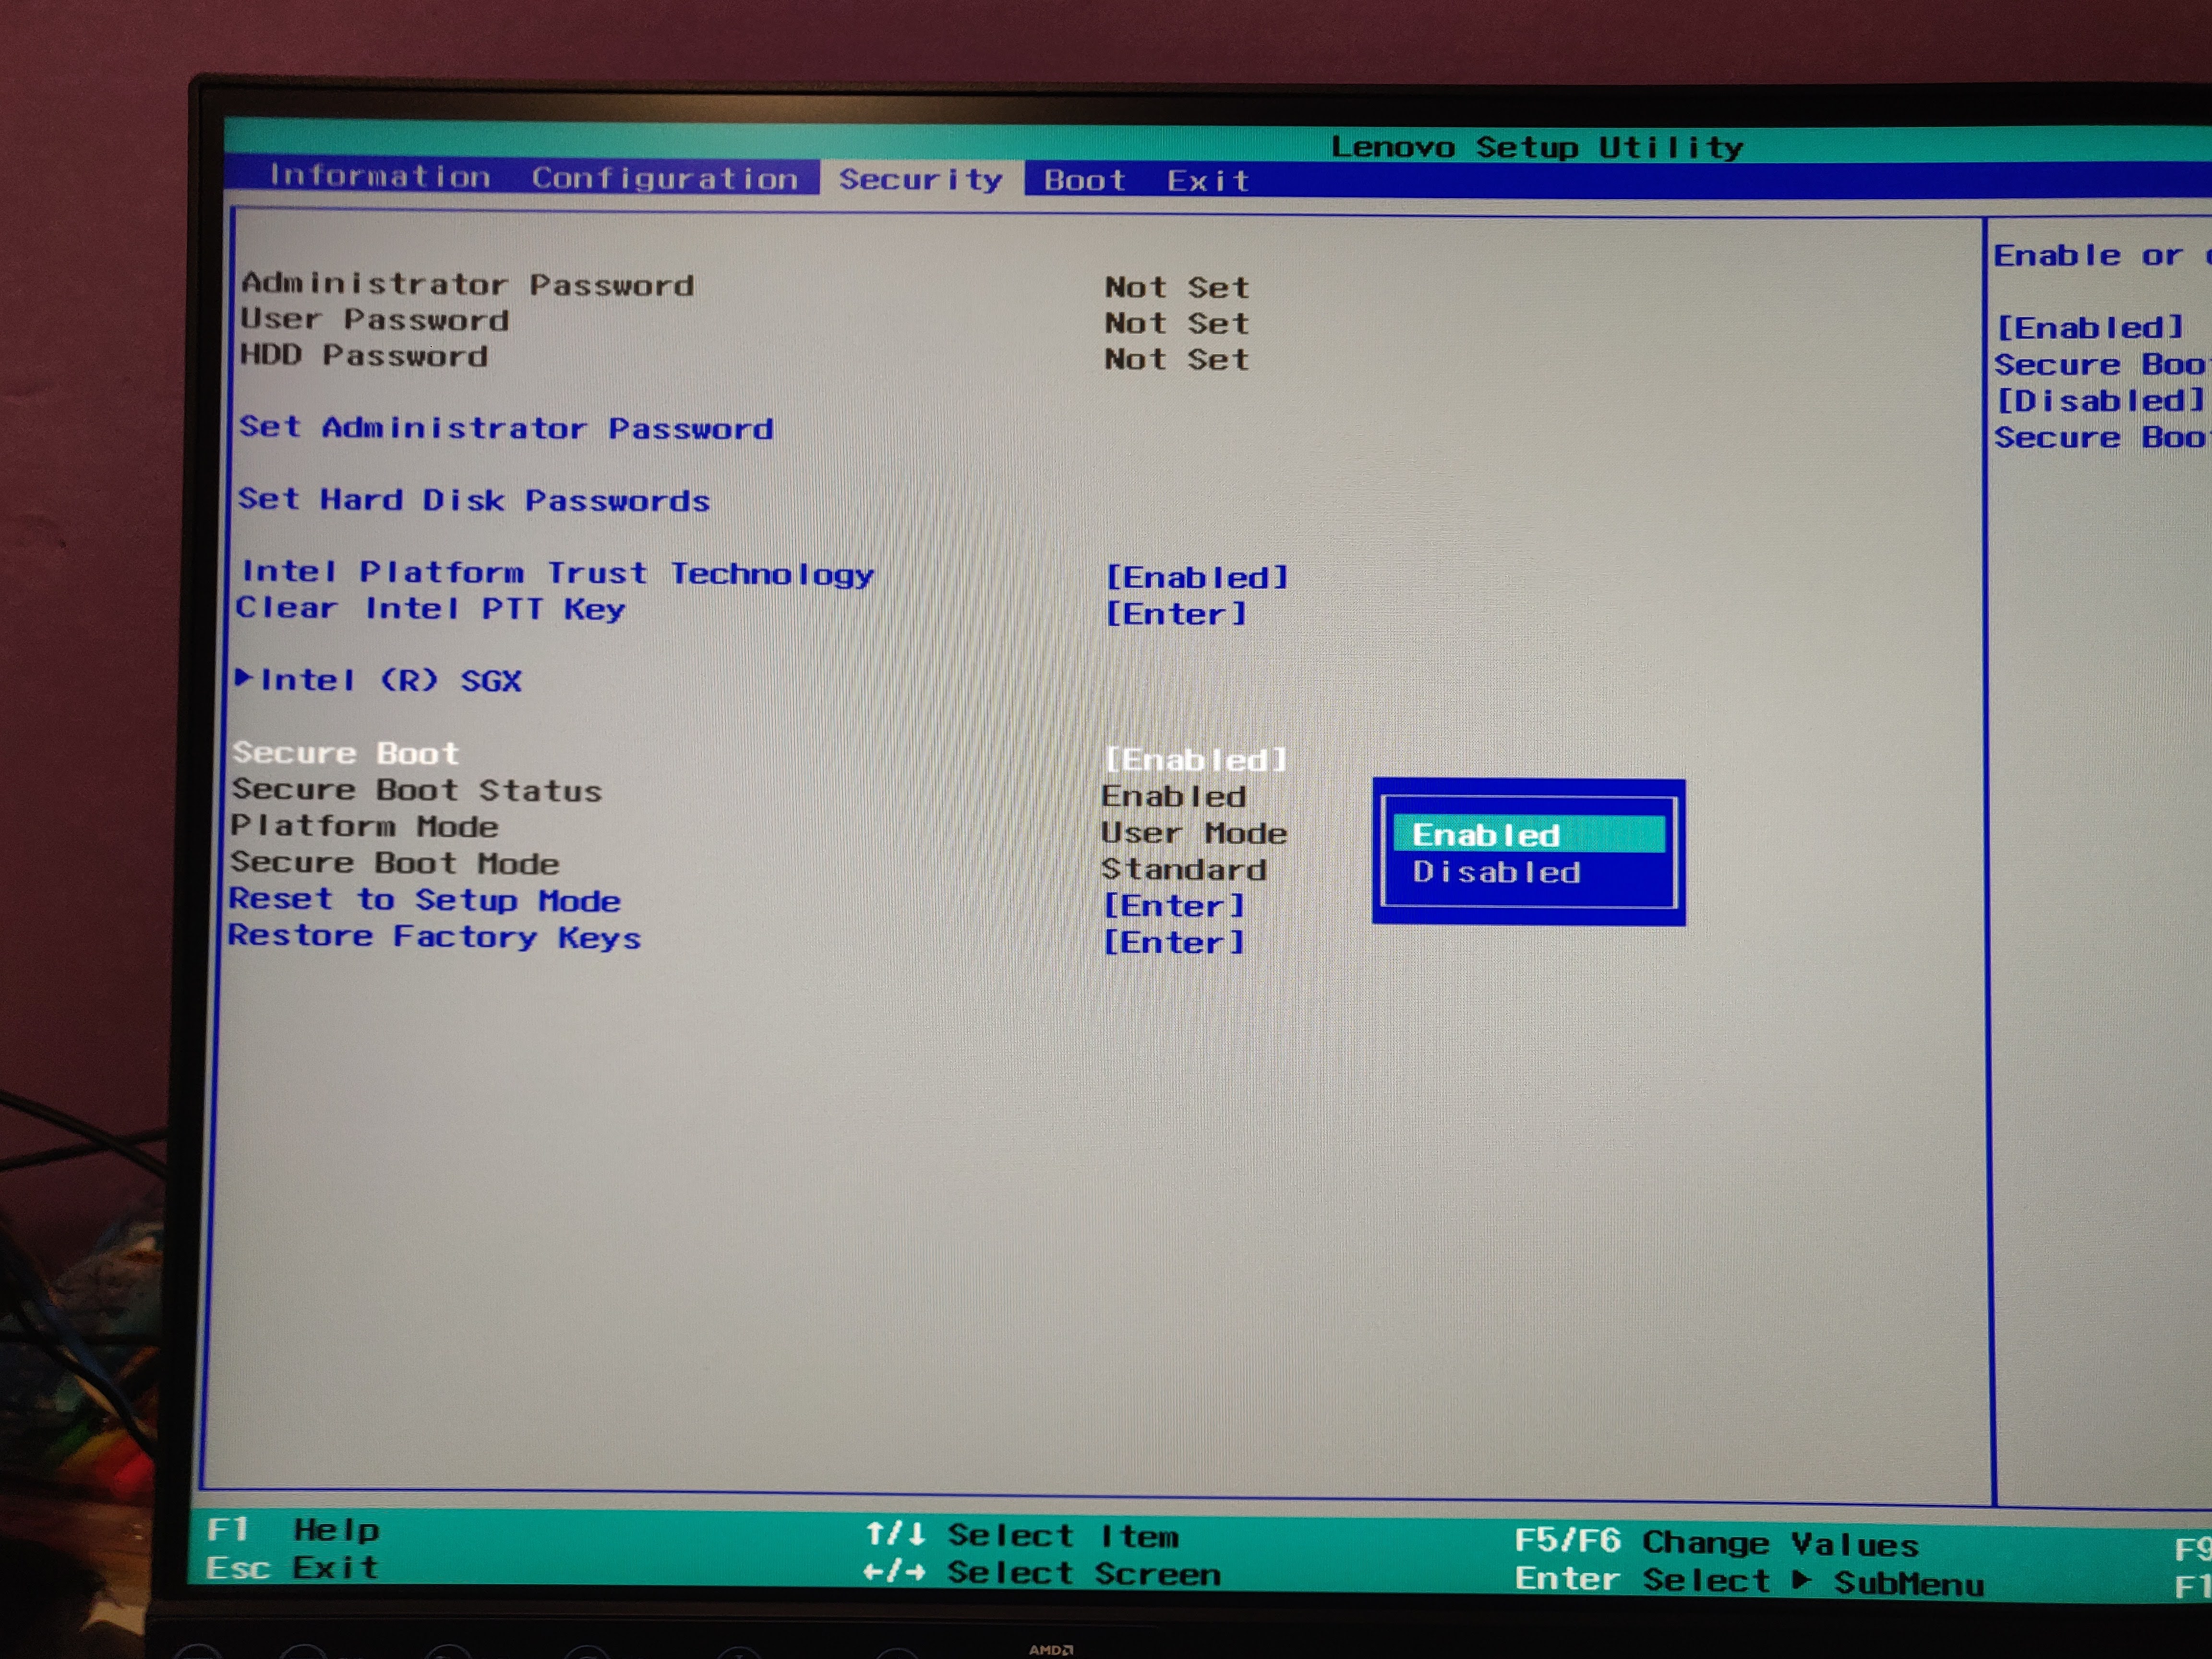
This Bios has the Debug Mode active so we can try to show the hidden page by the Fn+D key using this procedure :

Boot to Bios and quickly Press key Fn + key D, then release Fn and quickly press F10 to save and exit.
Boot again to Bios and look if Debug Mode is actived , so all Menu tabs showed …

Here many tricks worked on different Y Series :

Lenovo Legion 7i Advanced Bios Menu

That work:

- enter BIOS by tapping F2 while booting up
- Click “more settings”
- hold Fn, then slide your finger through all the alphabetical keys (Q to P, A to L, Z to M)
- release Fn, then quickly press F10
- save and exit
- enter BIOS again and more settings will be unlocked


Lenovo Legion Y740

You can access this by entering the bios, hitting FN + hit every key on the keyboard individually or what i did,
was just drag my finger across the rows of keys, then hit F10, yes.
Then hit FN+F2 (or just F2) and enter the bios. Boom, debug mode.

Hello! I watched your video in no way could enter the BIOS with advanced settings (lenovo Y740 -17”)
And when I was already desperate, I decided to try the last time and ran a finger along the entire row with the FN key pressed,
including the side buttons: Q-\ A-Enter Z-shift , and then I reloaded the BIOS and Oh miracle :slight_smile:
everything worked out :slight_smile:

Now I have a few questions, to which I will be very grateful :

1. where in the BIOS I can find a line where I can set the keyboard backlighting parameters at startup (this rainbow is very annoying)
2. I would like to reduce the acceleration delay of the fans when the set temperature is reached. For example,
when the processor reaches 75 degrees, the fans operate at 100 percent, but this does not happen right away.
I would like to reduce the reaction time. Perhaps you know where I can find this menu.
3. It would be great if you had a tutorial on all BIOS parameters :slight_smile:


Steps to enable advanced BIOS:

1. Goto BIOS
2. Hold Fn and press the qwerty row: Q to P, asd row: A to L, zxc row: Z to M. Release Fn
3. Press F10, select save when it asks you to save settings in the BIOS (yes you didn’t do anything apart from step 2 in the BIOS).
4. When the system reboots, open BIOS by pressing Fn + F2.
5. You should now have the advanced BIOS, exercise strong caution before messing up the settings.

A ton of thanks to CodeHusky for this.
So far, it works on his Y740 9750H and my Y740 8750H. May work for other legion models, try and report.


This worked for me, but only when I slid my finger across the row like others had mentioned.
When I pressed each button carefully it wouldn’t work so maybe I was too slow.
I was hoping to find a flashing ‘Enable G-Sync’ option in there but no luck so far


You stop windows not restart and at startup press continuously on F2 alone


With the y530 it was Hidden Features:

Fn + Tab, Fn + ASDFGH, Fn + O, F10 (Yes)


More keys combinaison, doesn’t work on C340IML, While in bios hold FN then run your finger across the keyboard,
Q-P,
A-L,
Z-M,
let go off FN,
F10,
Save Yes.

Let me know
Regards

@BDMaster

Hello again, sorry for late reply. I tried the many methods described to enter Debug mode for BIOS but was unsuccessful. I have tried many times before. I know when I had first received this laptop I was able to enter Debug mode right after a flash but was never able to reproduce even after trying to downgrade and reflash same bios.


In regards to H2OFFT I receive the following when trying -g :

Error:
Invalid File.

Perhaps it is read protected as well?

EDIT: NVM I was able to get it, seems to hate CMD but works in PowerShell

https://mega.nz/file/UMNh3I6Y#oftElmHgyi…qyuG9NqFhCAPRjM

Form a command window with admin priviles use this command :

HOFFT-W.exe biosreg,bin /g

Here is the guide :

https://www.mediafire.com/file/mn5362v5b…_v5.31.pdf/file

Let me know
Regards

@BDMaster Yes Yes, I was able to get it, perhaps I edited too late

I named file biosreg.bin and link is here: https://mega.nz/file/UMNh3I6Y#oftElmHgyi…qyuG9NqFhCAPRjM

Once again thank you for your help so far. Is there anything I can do to help? Perhaps get some things ready ahead of time?

@BDMaster Any progress or thoughts on where to go from here? The offsets and Addresses listed in IFR are from this biosreg.bin dump yea? I just have to find each part in bios that has a suppress if condition from IFR and change the variable at that address it checks to make it not suppressed? And then I flash somehow with H2O?

Ok friend,
try this one , but i don’t think thata H2OTT-W will elude the sign on bios, so it will not flash it :

https://we.tl/t-Uh8aA1uuQD

Let me know
Regards

@BDMaster yea no luck with H2O, i was reading perhaps in manual you provided I can somehow sign if I get QA Cert from other bios, but thats a rabbit hole I don’t know if I want to go down. Is there another method I can perhaps use to set vars and flash or will I just have to get physical Programmer?

Yes we can try using H2OUVE or RU Shell …

0xB5E06 Setting: Flash Protection Range Registers (FPRR), Variable: 0x6D1 {05 91 75 0D 76 0D 08 05 05 00 D1 06 10 10 00 01 00}
0xB5E17 Option: Disabled, Value: 0x0 {09 07 04 00 00 00 00}
0xB5E1E Option: Enabled, Value: 0x1 {09 07 03 00 30 00 01}
0xB5E25 End of Options {29 02}


0xC27A6 Suppress If: {0A 82}
0xC27A8 Variable 0x7C equals value in list (0x1) {14 08 7C 00 01 00 01 00}
0xC27B0 Setting: BIOS Lock, Variable: 0x17 {05 91 D2 06 D3 06 13 0A 05 00 17 00 10 10 00 01 00}
0xC27C1 Option: Disabled, Value: 0x0 {09 07 04 00 00 00 00}
0xC27C8 Option: Enabled, Value: 0x1 {09 07 03 00 30 00 01}
0xC27CF End of Options {29 02}
0xC27D1 End If {29 02}


Variables Bios lock 0x17 and FPRR 0x6D1

[022] “PchSetup”

GUID: 4570B7F1-ADE8-4943-8DC3-406472842384

Attributes: 0x7

DataSize: 0x6E0

Data:

Using RU Shell search the GUUID 4570B7F1-ADE8-4943-8DC3-406472842384 and then modify that variables 0x17 and 0x6D1 set both to 0x00

Or …

Please use this tool to get a vars backup then upload it for me …

https://www.mediafire.com/file/6ikxoahbi…16.08.rar/file

https://www.mediafire.com/file/akygpyd8t…00.9.2.rar/file

Try with 1st and then with 2nd , unpack and get into the mai folder the H2OUVE.exe tool , then form a command window witth
admin privileges, execute this command :

H2OUVE.exe -gv vars.txt

Let me know
Regards

@BDMaster hello friend!

I first decided to grab vars backup. All good, first H20UVE worked fine
I then decided to go ahead with RU Shell since I am familiar with efi shells and such. I used RU Shell by James Wang from http://ruexe.blogspot.com/
All good, I found bytes and changed both, wrote, and rebooted and double checked that they stayed 0. OK!

No brick so far. Am able to boot into BIOS and Windows. Once I got back to Windows I decided to dump vars again just out of curiosity. To my shock the bytes have not been reported changed?!?!??! New vars dump from H2O show that they are still 0x1 in value. I will upload vars.txt . I will go back into RU Shell and triple check GUUID and byte changes. Let me know if this is expected or if I have done something wrong somewhere.

EDIT: NEVERMIND I was looking at old vars.txt silly me.

vars.txt (188 KB)

Here you have also :


[02C] “Custom”
GUID: 4570B7F1-ADE8-4943-8DC3-406472842384
Attributes: 0x7
DataSize: 0x6E0
Data:
00000000: 00 00 C4 3E 00 01 00 00 03 01 02 00 01 01 00 00
00000010: 01 01 02 03 00 00 01 01 00 00 00 01 00 01 01 FF
00000020: 01 00 00 00 01 01 01 01 00 01 00 00 01 00 00 00
00000030: 00 01 00 00 01 01 01 01 00 00 00 00 00 00 00 01
00000040: 01 00 00 01 00 00 00 00 01 00 01 00 00 00 00 00
00000050: 00 00 00 00 00 00 01 01 01 01 01 01 01 01 00 00
00000060: 00 00 00 00 00 00 00 00 00 00 00 00 00 00 00 00
00000070: 00 00 00 00 00 00 00 00 00 00 00 00 00 00 01 01
00000080: 01 01 01 01 01 01 01 01 00 00 00 01 01 00 01 00
00000090: 00 00 00 00 00 00 00 00 00 00 00 00 00 00 00 00
000000A0: 71 02 71 02 71 02 71 02 71 02 71 02 71 02 71 02
000000B0: 0F 0F 0F 0F 0F 0F 0F 0F 00 00 00 00 00 00 00 00
000000C0: 01 00 00 00 00 00 00 00 00 00 00 00 00 00 00 00
000000D0: 00 00 00 00 00 00 00 00 00 00 00 00 00 00 00 00
000000E0: 00 00 00 00 00 00 00 00 00 00 00 00 00 00 00 00
000000F0: 00 00 00 00 00 00 00 00 00 00 00 00 00 00 01 01
00000100: 01 01 01 01 00 00 01 00 00 00 00 00 00 00 04 04
00000110: 04 04 04 04 04 04 03 03 03 03 03 03 04 04 03 04
00000120: 04 04 04 04 04 04 00 00 00 00 00 00 00 00 00 00
00000130: 00 00 00 00 00 00 00 00 00 00 00 00 00 00 00 00
00000140: 00 00 00 00 00 00 00 00 00 00 00 00 00 00 00 00
00000150: 00 00 00 00 00 00 00 00 00 00 00 00 00 00 00 00
00000160: 00 00 00 00 00 00 00 00 00 00 00 00 00 00 00 00
00000170: 00 00 00 00 00 00 00 00 00 00 00 00 00 00 00 00
00000180: 00 00 00 00 00 00 00 00 00 00 00 00 00 00 00 00
00000190: 00 00 00 00 00 00 00 00 00 00 00 00 00 00 00 00
000001A0: 00 00 00 00 00 00 00 00 00 00 00 00 00 00 00 00
000001B0: 00 00 00 00 00 00 00 00 00 00 00 00 00 00 00 00
000001C0: 00 00 00 00 00 00 00 00 00 00 00 00 00 00 00 00
000001D0: 00 00 00 00 00 00 00 00 00 00 00 00 00 00 00 00
000001E0: 00 00 00 00 00 00 00 00 00 00 00 00 00 00 00 00
000001F0: 00 00 00 00 00 00 00 00 00 00 00 00 00 00 01 01
00000200: 01 01 01 01 01 01 01 01 01 01 01 01 01 01 01 01
00000210: 01 01 01 01 01 01 00 00 00 00 00 00 00 00 00 00
00000220: 00 00 00 00 00 00 00 00 00 00 00 00 00 00 01 01
00000230: 01 01 01 01 01 01 00 00 00 00 00 00 01 01 00 01
00000240: 01 01 01 01 01 01 00 00 00 00 00 00 00 00 00 00
00000250: 00 00 00 00 00 00 00 00 00 00 00 00 00 00 00 00
00000260: 00 00 00 00 00 00 00 00 00 00 00 00 00 00 00 00
00000270: 00 00 00 00 00 00 02 02 02 02 02 02 02 02 02 02
00000280: 02 02 02 02 02 02 02 02 02 02 02 02 02 02 01 01
00000290: 01 01 01 01 01 01 01 01 01 01 01 01 01 01 01 01
000002A0: 01 01 01 01 01 01 01 01 01 01 01 01 01 01 01 01
000002B0: 01 01 01 01 01 01 01 01 01 01 01 01 01 01 01 01
000002C0: 01 01 01 01 01 01 01 01 01 01 01 01 01 01 01 01
000002D0: 01 01 01 01 01 01 01 01 01 01 01 01 01 01 01 01
000002E0: 01 01 01 01 01 01 01 01 01 01 01 01 01 01 01 01
000002F0: 01 01 01 01 01 01 01 01 01 01 01 01 01 01 01 01
00000300: 01 01 01 01 01 01 05 05 05 05 05 05 05 05 05 05
00000310: 05 05 05 05 05 05 05 05 05 05 05 05 05 05 07 07
00000320: 07 07 07 07 07 07 07 07 07 07 07 07 07 07 07 07
00000330: 07 07 07 07 07 07 06 06 06 06 06 06 06 06 06 06
00000340: 06 06 06 06 06 06 06 06 06 06 00 00 00 00 02 02
00000350: 02 02 02 02 02 02 02 02 02 02 02 02 02 02 02 02
00000360: 02 02 00 00 00 00 05 05 05 05 05 05 05 05 05 05
00000370: 05 05 05 05 05 05 05 05 05 05 05 05 05 05 01 01
00000380: 01 01 01 01 01 01 01 01 01 01 01 01 01 01 01 01
00000390: 01 01 01 01 01 01 00 00 00 00 00 00 00 00 00 00
000003A0: 00 00 00 00 00 00 00 00 00 00 00 00 00 00 00 00
000003B0: 00 00 00 00 00 00 00 00 00 00 00 00 00 00 00 00
000003C0: 00 00 00 00 00 00 00 00 00 00 00 00 00 00 00 00
000003D0: 00 00 00 00 00 00 00 00 00 00 00 00 00 00 00 00
000003E0: 04 06 08 0A 0C 08 02 06 08 02 00 00 00 01 01 01
000003F0: 01 01 01 01 01 01 01 01 01 01 01 01 01 01 01 01
00000400: 01 01 01 01 01 01 00 00 00 00 00 00 00 00 00 00
00000410: 00 00 00 00 00 00 00 00 00 00 00 00 00 00 02 02
00000420: 02 02 02 02 02 02 02 02 02 02 02 02 02 02 02 02
00000430: 02 02 02 02 02 02 02 02 02 02 02 02 02 02 02 02
00000440: 02 02 02 02 02 02 02 02 02 02 02 02 02 02 02 02
00000450: 02 02 02 02 02 02 02 02 02 02 02 02 02 02 02 02
00000460: 02 02 02 02 02 02 02 02 02 02 02 02 02 02 02 02
00000470: 02 02 02 02 02 02 02 02 02 02 02 02 02 02 3C 00
00000480: 3C 00 3C 00 3C 00 3C 00 3C 00 3C 00 3C 00 3C 00
00000490: 3C 00 3C 00 3C 00 3C 00 3C 00 3C 00 3C 00 3C 00
000004A0: 3C 00 3C 00 3C 00 3C 00 3C 00 3C 00 3C 00 3C 00
000004B0: 3C 00 3C 00 3C 00 3C 00 3C 00 3C 00 3C 00 3C 00
000004C0: 3C 00 3C 00 3C 00 3C 00 3C 00 3C 00 3C 00 3C 00
000004D0: 3C 00 3C 00 3C 00 3C 00 3C 00 3C 00 3C 00 00 00
000004E0: 00 00 00 00 00 00 00 00 00 00 00 00 00 00 00 00
000004F0: 00 00 00 00 00 00 04 00 00 00 00 00 00 00 00 00
00000500: 00 00 00 00 00 00 00 00 00 00 00 00 00 00 00 0A
00000510: 00 0A 00 0A 00 0A 00 0A 00 0A 00 0A 00 0A 00 0A
00000520: 00 0A 00 0A 00 0A 00 0A 00 0A 00 0A 00 0A 00 0A
00000530: 00 0A 00 0A 00 0A 00 0A 00 0A 00 0A 00 0A 00 04
00000540: 04 04 04 04 04 04 04 04 04 04 04 04 04 04 04 04
00000550: 04 04 04 04 04 04 04 01 00 00 01 00 00 01 01 01
00000560: 00 00 00 00 00 00 00 00 00 00 02 04 00 00 00 00
00000570: 00 02 00 00 00 00 00 00 00 00 00 00 00 00 00 00
00000580: 00 00 00 00 00 00 00 00 00 00 00 00 00 00 00 00
00000590: 00 00 00 00 00 00 00 00 00 00 00 00 00 00 00 00
000005A0: 00 00 00 00 00 00 00 00 00 00 00 00 00 00 00 00
000005B0: 00 00 00 00 00 00 00 00 00 00 00 00 00 00 00 00
000005C0: 00 00 00 00 00 00 00 00 00 00 00 00 00 00 00 00
000005D0: 00 00 00 00 00 00 00 00 00 00 00 00 00 00 00 00
000005E0: 00 00 00 00 00 00 00 00 00 00 00 00 00 00 00 00
000005F0: 00 00 00 00 00 00 00 00 00 00 00 00 00 00 00 00
00000600: 00 00 00 00 00 00 00 00 00 00 00 00 00 00 00 00
00000610: 00 00 00 00 00 00 00 00 00 00 00 00 00 00 00 00
00000620: 00 00 00 00 00 00 00 00 00 00 00 00 00 00 00 00
00000630: 00 00 00 00 00 00 00 00 00 00 00 00 00 00 00 00
00000640: 00 00 00 00 00 00 00 00 00 00 00 00 00 00 00 00
00000650: 00 00 00 00 00 00 00 00 00 00 00 00 00 00 00 00
00000660: 00 00 00 00 00 00 00 00 00 00 00 00 00 00 00 00
00000670: 00 00 00 00 00 00 00 00 00 00 00 01 01 01 01 01
00000680: 00 00 00 00 00 00 01 01 00 01 01 01 01 01 01 01
00000690: 00 00 00 00 01 01 00 00 01 00 00 00 00 01 00 00
000006A0: 00 00 0E 00 00 00 00 01 00 01 01 01 00 03 03 01
000006B0: 00 00 00 00 00 00 00 00 00 01 03 02 01 00 00 01
000006C0: 01 02 03 00 00 00 01 02 03 00 00 00 01 00 00 01
000006D0: 00 01 00 00 00 00 00 00 01 01 01 00 00 00 02 00


Look the GUID is the same as PchSetup 4570B7F1-ADE8-4943-8DC3-406472842384

So if you want to edit the vars.txt have to change both “Custom” and PchSetup" and then
rewrite the vars.txt.
After that reboot the pc and try to flash the bios backup to check the errors , if you can to do the flash, then you bypassed the checks.
Let me know

@BDMaster Ok Ok I see. I made changes to Custom with same GUUID. I was able to flash backup of unmodded bios. No error or integrity check error. Flash successful. Bytes were also returned to expected 0x1 values after flash. I presume now we find a way to flash the modded bios without sig check?

Yes friend :frowning:


Why sad face friend? Am I screwed from this point?

@BDMaster ok. so I used IntelME system tools flasher (FPTW64.exe) v12 to flash. I took the biosreg.bin.patched file v3.2 you provided from zip in post #10 and renamed it biosreg.bin. I prepared all my backups onto external USB in case of brick.

Executed command FPTW64.exe -bios -f biosreg.bin


And flashed worked! OK, you are genius finding the bytes to change to allow fpt to flash.

Unfortunately the new bios still doesnt have the Advanced tab, and the PchSetup & Custom vars we changed are back to default values again (0x1). What am I doing wrong? No brick but BIOS seems unchanged.

@BDMaster I am supposed to flash v3.2 biosreg.bin.patched right? Also what is UEFIsetup from zip for?

Yes friend, flashing the bios backup , you replaced the NVRAM variables with older ones (i forget to say that we have to patch for that the bios mod).
You asked about what is UEFIPatch’s CodeRush Tool , them it’s the tool which i use to create a patch unique for all users.
So now you have to remake the trick to unlock eeprom to be flashed, but you have to backup that bios with NVRAM variables unlocked and upload it for me,
then i will prepare the bios eeprom unlocked to flash, so after that we haven’t to make the trick yet.
After we will contuine the tests, and i have to use the bios unlocked to make new mods.
Let me know
Regards