@EthanWalker - please explain what’s going on, what happened, what did you do etc? Or did you just mean your programmer itself was a bad sample (DOA, shorted on arrival etc)?
The programmer was defected. I cannot say what it had but the Power LED was not working/lightning when fully plugged into Usb…it showed up red only when half way plugged
but even so, it was not detected by the PC ( and no, it wasn’t the same system ![]() )
)
I asked the Amazon for a replacement.
I found another programmer in a local repair shop, it wasn’t for sale, I borrowed it.
When I connected it, the PC reacted with sound and notification, as if connecting any other device.
The C341A software also detected it (connected status on down-right-corner).
I did everything as instructed:
Unchecked the Erase and Blank options before connecting the programmer. Restarted the software and then I opened again the Settings, to verify and to be sure that those two options were unchecked. Exit the software.
Removed the CMOS battery on the patient motherboard.
Connected the clip to Bios chip ( detected in software as Winbond 25X40C )
Connected the programmer to Usb ( detected by the Windows 7 and by the CH341A_c.exe software )
Read.
Verified.
Saved.
Opened in the Hex editor - No FF’s.
*made saves from different versions of Ch341 software (1.17; 1.18; 1.29; 1.34) then opened them in HxD -> and did a Data comparison analysis: all of the saves/*bin are identical.
Thanks for your time and patience. ![]()
biosdumb.zip (139 KB)
Sounds like a bad short inside the USB connector, hopefully they replace for you without too much hassle. Cool that someone let you borrow a programmer, that’s nice of them!
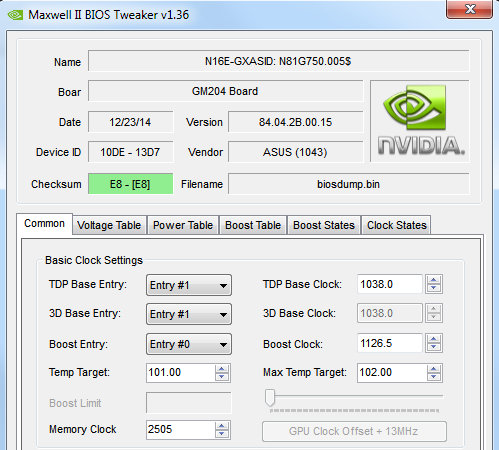
Looks like a good dump to me, probably… However, this is not the BIOS chip, BIOS will be 8MB and this is 512KB dump. When you mentioned the chip ID I thought that looked odd, but I didn’t look it up, until I checked your attached file
Ahh yes, this is your vBIOS, see image below  Then, try again, this time with correct chip, it should have 64 in the chip ID
Ouch, shame on me ![]()
Found it.
So, I couldn’t connect. Spent almost 2 hours doing this…no success.
● If I connect the programmer to the USB with NO clip attached to the chip - the PC detects the programmer and it stays connected.
● When connecting the programmer with the clip attached to the Bios chip - the Pc detects the programmer (usb connected sound), and then it disconnects the programmer (like it was ejected from the usb)
The Run LED is flashing strangely and the programmer’s usb plug is getting hot. Short circuit symptoms.
If I take the clip from the Bios chip - the PC detects the programmer again and it keeps connected.
With the clip attached to the chip, the programmer keeps disconnecting from the PC.
I verified the clip, all the pins are Ok, I verified the clip when attached to the chip, all the pins are in place on the Bios chip.
Verified if the clip is connected correctly, with the red wire on the dot side on chip / pin 1 on the programmer.
I even tried twice to connect to the vBios chip (just to check), it works, the software detects the chip - everything is ok.
Yes, that’s more like it For W25Q64FV use software 1.30 or 1.34 and choose ID W25Q64BV
Yes, hot means something is backwards! Double check your connections again. Make sure you are connecting cable correctly to chip, red wire top pin1 on chip (bottom left corner) and be sure red wire goes into programmer in the middle slot, red wire on lever side.
If you are unsure, please upload image of how you are connecting to the chip, and a few shots of how you have the cable in the programmer.
Make sure you are not accidentally touching any of those tiny resistors by the BIOS chip. The two black 0402 above Winbond look pretty close to the legs there, so may be accidental contact. Tape them off with electric or polyimide/kapton tape if you have, then we can rule that out
Also, remove CMOS and main battery, and main power supply if you did not already, then try again. Then test adding each of those back one at a time, sometimes all must be removed, sometimes all must be connected.
However, this may have nothing to do with the above, since both the symptoms you mention (hot and disconnect) = short somewhere
In general, I have USB programmer plugged in already, and then connect the cable to the chip once I am ready (often many times until it connects properly). I’m not sure if any of that matters, but sounds like you doing it different than I do, so mentioning in case it helps.
I have shorted chips this way too, where they get hot like you mention, not kill the chips or anything I just mean in general when connecting the clip it may look correct and be correct, but still short. remove it and re-clup carefully again.
Usually I’d say out of 100 clips, I get the following made up example of results >> 50% = no chip detected, re-clip / 10% = Short / 40% = Success after many attempts of previous short or no detection
I find it best to hold the clamp down to the board, spread open already, so that the plastic is setting on/against the PCB, then slowly release pressure so it clamps to chip. This may not be possible on your setup due to those 0402 resistors, tape those off I bet that is where it’s shorting
@Lost_N_BIOS
The 1st programmer I had - has been returned to Amazon due to the defected plug.
The 2nd I returned to the local service center (I kept the SOIC8 clip)
Now I bought another programmer (without clip because I have one). The programmer works with no problems: no half plugging, no weird flashing leds etc.
Anyway I couldn’t get the job done. The same problem, the same symptoms.![]() The notebook has no battery, I removed it 2 years ago.
The notebook has no battery, I removed it 2 years ago. ![]() The CMOS battery has been removed since the first test with the programmer.
The CMOS battery has been removed since the first test with the programmer.![]() I tried to connect the clip in many ways.
I tried to connect the clip in many ways.![]() Atached the clip THEN connected the programmer / Connected the programmer THEN attached the clip in various positions.
Atached the clip THEN connected the programmer / Connected the programmer THEN attached the clip in various positions.![]() Plugged the programmer into 1 notebook then I tried on a desktop.
Plugged the programmer into 1 notebook then I tried on a desktop.![]() My paranoia told me that I should try to plug the programmer into a USB 2.0 instead of 3.0 and 3.1, so I did that.
My paranoia told me that I should try to plug the programmer into a USB 2.0 instead of 3.0 and 3.1, so I did that.![]() Applied kapton tape on the resistors.
Applied kapton tape on the resistors.![]() Tried not to breathe during the working process.
Tried not to breathe during the working process.![]() And the final method that IMHO had to be done from the beginning, tried to attach the clip looking through magnifying glass and verifying each pin on the chip/clip.
And the final method that IMHO had to be done from the beginning, tried to attach the clip looking through magnifying glass and verifying each pin on the chip/clip.
Nothing worked for me. It makes me sad because now, the only way is to take off the chip from the board, which I don’t really want to do.
Sorry for the quality, shaking hands… It is not so easy to hold the phone and attach the clip at the same time 
@EthanWalker - Are you sure the cables are attached to the pins, can you test continuity from each pin tip to the end of cable, so you know it’s connecting to the programmer properly?
Some cables are cheap, have broken or barely attached cable to pin tips etc. Can you still dump the other vBIOS chip you dumped before, and get same resulting file? If yes, cables/connection OK.
Magnifying glass not needed, you can eyeball if it’s connecting good usually. It is tight in there though, did you stop getting a HOT BIOS chip after you tapped off the resistors?
Also, you did not mention, did you ever try with/without main power cable attached to this board? Some systems may need this, and some may need the main battery attached too (And/or re Main)
I know you don’t have battery, this doesn’t mean you don’t need just because you don’t have, especially if you have never been able to connect/see this chip with any programmer/cable.
You aren’t going to be able to remove that chip from the board very easily, or if at all, unless you are super familiar with lead-free soldering and in tight space, otherwise you’ll remove/loose those resistors beside the chip, they’re too close unless you are really good.
This is a LOT of hassle for you, isn’t the board actually in working order now anyway? If yes, maybe leave it alone and do your playing/learning about programmer and FPT etc on some other system later.
Hi.
Could anybody explain me why my laptop does not reboot properly? If I try to reboot from Windows 10, firstly, all is ok, but when laptop try to boot Windows and I get black screen until I turn off computer by power button. I flashed modified BIOS which I made following guide from this https://rog.asus.com/forum/showthread.ph…de-Step-by-Step, and I used BIOS which was modified by Svan. Everything was OK except problem that I describe above. And I don’t know what I have to do. I have Asus ROG 751JY with modified BIOS 213 and SSD M.2 ADATA SX6000 Lite.
Thank you.
@Pilot_819
Do you have a bios backup ? Explain how did you proceed to backup and flash the modified bios by @Lost_N_BIOS ? (Tools version can help too)
Remember that this modded bios is only for G751JY with CPU I7-4710HQ.
I can not talk about the mod bios you did by yourself.
@Pilot_819 - Any BIOS posted here for Svan was probably specific to his system too (contains his UUID, Serial, etc) . I did not check, and do not know which BIOS you used from here, so I could be wrong and it could be stock BIOS edited. You’ll have to be more specific if you want 100% sure answer
And if you did not update your BIOS/ME to same version before you flashed in his BIOS region, then BIOS region may not match up with your old ME FW if you had old BIOS on there, so that could cause some issues like you describe (ME FW related issues)
Hopefully you have a backup of your BIOS region from before you did anything!
Hi! I used this BIOS Specific BIOS modding problems with an ASUS ROG G751-JY notebook. Also, I created backup my current BIOS (213) by using AFUWINGUI v.3.05.04 and then I made modified BIOS from my backup. For it I used UEFITool v. 0.26.0. I have similar results for ADATA SX 6000 Lite both BIOS. But another SSD M.2 Samsung MZVLV128HCGR has not such problem. Moreover I did the same by using AFUDOS. Maybe is it the drive? For example the drive has incompatibility and during reboot BIOS cannot recognize it. But on the other hand normal system start has not any problems. only reboot.
I have G751JY with CPU I7-4710HQ.
I understand. I have to pay attention ME of my BIOS. But I don’t know how do it.
@Pilot_819
If you use the modified bios by “Lost_N_Bios” this is the originial bios downloaded from Asus and modded so you everybody can use it (with the right CPU).
Did you install windows after you flashed your bios ?
Recheck the link you posted earlier, I modified the comannd you should use to flash.
If you want to use your mod may be you should post it here and “Lost_N_Bios” can check if everything fine in your bios.
Update : Just for testing purpose. I installed Windows 10 on a Samsing 970 evo plus 512GB reboot working 100%
@Lost_N_BIOS hi please check next post
Yes, after flashing BIOS by modified BIOS I installed Windows and I had problems with reboot during installation. I was forced to use power button to reboot my laptop. Below, I attached BIOS that I modified from backup original BIOS 213.
My English so so)) that’s why sometimes I may misunderstand some information.
p.s. I modified BIOS from backup and modified BIOS from original file which I downloaded from Asus. As for last variant, before, I extracted BIOS from capsule and then modified it. Result was the same.
Now I’m about to try flash again. I mean “Recheck the link you posted earlier, I modified the comannd you should use to flash.”
I repeated flash and got the same result. It seams that there are problems with my ssd m.2 probably. For example Samsung 970 PRO 512 gb SSD M.2 has MLC memory but ADATA SX 6000 Lite has TLC memory. Maybe it caused problems with reboot? But I am not sure.
I found topics about similar problems:
Windows 8.1 and Adata SX8200 Pro: how to read nvme drive smart parameters?
213nvme.zip (2.32 MB)
@Pilot_819 - first, please flash back your original BIOS backup >> AFU filename /P /B /N
Then flash STOCK BIOS via normal Asus update procedure (ie EZ Flash, or whatever comes with the stock BIOS package), or flash this BIOS from post #9 Specific BIOS modding problems with an ASUS ROG G751-JY notebook
That is the only BIOS here I made from stock BIOS. If you flash stock BIOS instead and want me to make a specific mod for you, tell me what mods you need done and I will do for you and tell you how we will proceed.
I guess, you should probably flash stock BIOS at step 2 here, and let me make you a similar BIOS, since that one has 40661 microcode in main volume instead of 306C3 which is for your CPU.
Your issue, sounds to me like messed up ME FW. Can you see ME FW version in BIOS main page, or in HWINFO64 and on the large window on left side, expand motherboard and find ME area. Do you see ME at all, if yes, does it show version inside there or only 0.0.0.0 or N/A?
Thank you for you help. I have already resolved my problem. I bought the other SSD m.2 512 gb Samsung 970 PRO. it works without any problems))) it seems that ADATA is so-so ssd))
Hey @svan
I have the G751JY with the CPU I7-4720HQ. Does the exact processor make a difference, or will this work without issue? It’s a work machine so I need to be certain I won’t brick it ![]()
Here are my specs:
My System Specs:
- ASUS ROG G751JY
- i7-4720HQ @ 2.60 GHz, 2594 Mhz
- BIOS 213 (6/11/2019)
- 24GB RAM
- Replacing 250GB M.2 AHCI SSD with 1TB NVMe SSD
- Secondary drive: 1TB spinner
- Running Windows 10 build version 10.0.18362
Thanks ![]()
@edival @Lost_N_BIOS
Sorry was a lot busy since the bios story and needed to travel abroad a lot. What you can do first is to check with UBU if you got the identical numbers for your CPU (3rd picture from the left) : [GUIDE] Update CPU Microcode + Fix FIT Using UEFITool / Hex.
Earlier on this thread : Post #57 you should be able to flash with “AFUDOS modbios.bin /P”. That will not flash microcodes part.
Wait for help also from Lost_N_Bios. He is the master here. If microcodes are different than my CPU he can do a specific bios mod for your CPU.
Don’t forget to always do a full bios backup whatever you try with your bios !
Cheers.
@Svan - @edival - I am not sure what is needed here, please clarify. I assume he needs updated microcode for I7-4720HQ, but with what BIOS? And I heavily suggest against the use of AFU, so Svan that would be up to you to help him with that if he decides to go that route instead of FPT
Hi @svan and @Lost_N_BIOS , thank you so much for your replies. I’m lost.
What can I provide to have this done?
I’m considering just picking up a 512GB M.2 SSD from eBay which is the ACHI SSD instead of the NVMe SSD (there is one compatible with my machine that is no longer made). Of course, eBay can be flakey ![]()
Let me know, please.