Hi @Lost_N_BIOS
This is the only BIOS I believe I havent sent to you, if this is also corrupted then all the back ups are corrupted except the one made with afuwin,
Asus BIOS CH341AFree
And yes I am picking the right size now, after sending all those unnecessary backups I learned to always select 16M while using CH341AFree
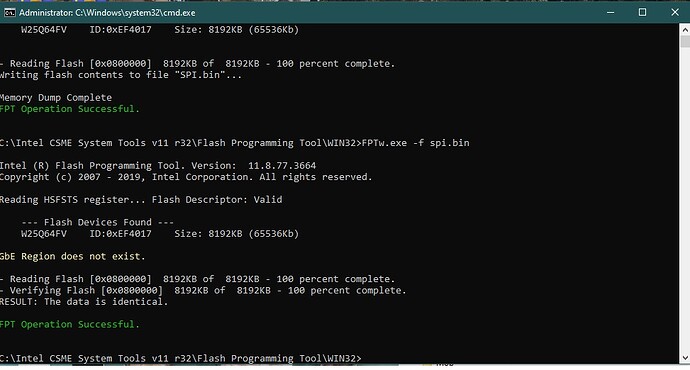
@ArashMiniStar - Before I do anything, confirm you can write entire BIOS with FPT or not >> FPTw.exe -f spi.bin
Show me image so I can see what all it writes or not
@kazp3r - I can’t download that without signing in. You sent me 16MB dump after EZ Flash >> clean back up 16m.bin << This is corrupted
Please do test write and dump/compare with hex editor using ASProgrammer as I mentioned, do that with CTTWOALL and then once done see if system will start or not.
It is safe to flash FPT with my dumped spi.bin file ? because i heard some dumped file from bios maybe corrupted.
@ArashMiniStar - Yes, or I would not have told you to 
FPT does not corrupt dumps, it reads correctly and properly direct from chip, corrupted dump only happens with programmers and software
Thanks, I guess maybe we can’t tell this way, due to content = 100% same/same. We’ll know for sure when I send you BIOS, please wait, I’ll try to have done in about 10 minutes 
* Edit - @ArashMiniStar
Flash this way, stop and do nothing, DO NOT reboot and let me know, if you see any error other than GbE or PDR error (especially any Red or Size error) >>>
1. FPTw.exe -me -f SPIM.bin
2. FPTw.exe -bios -f SPIM.bin
3. FPTw.exe -desc -f SPIM.bin
4. FPTw.exe -greset
http://s000.tinyupload.com/index.php?fil…740373647728989
At #4, be ready, have all files closed etc, system should auto reboot. IF it does not auto reboot, then shut down system. Pull 24/8 pin PSU power cables, then clear CMOS via short clear CMOS Pins for few seconds.
Then press and hold case power on button for 10-15 seconds, or short pins for 10-15 seconds if board is outside of case. Then let system sit for one full minute with zero power.
Then connect power cables, and boot to BIOS, load optimal defaults, save and reboot back to BIOS to make all other changes you want.
*** WARNING *** - This BIOS is user specific! If you are not user ArashMiniStar at Win-RAID.com forum, DO NOT USE THIS BIOS!!
If you do, and you are not ArashMiniStar, then you will loose your serial, UUID, OG NVRAM, and possibly LAN MAC ID as well.
You have been warned!!!
thank you veryyyyyyyy much 
can i know which settings did you use for editing my bios ? (did you use coffetime for that or other app?)
Hello @Lost_N_BIOS
So every time I try to verify if the write or erase was made correctly, I get an error message of ASProgrammer it says
Verify memory…
Verification error on address: 00000000
Execution time: 0:00:00
and on CH341AFree I also get the error message that the chip is not null when I check blanks and That the info does not match when I verify after writing
I attempted to flash the CTTWOALL and the process goes trough however I get the same error messages when I try to verify
and my system will not turn on with either of the CPU processors.
This backup I made it after you told me that the previous one made with CH341AFree was corrupt, but then I tried with ASProgrammer and that is the one that I uploaded
Asus Z270 Prime CH341AFree backup
I dont know if this has any to do with it, but every time I perform a dump from the BIOS Chip the file looks different on the hex editor.
I tried to flash the dump after the Flas with the ASUS EZ Tool but is still giving me the same error once I try to verify
What do you advise to do next I am lost here
EDIT: My roomate has the same motherboard as I do and his has not been modified, will a dump from his MB help?
@kazp3r - Before doing read or writes with ASProgrammer, try also clicking “unprotect” icon (padlock), don’t click into it’s dropout menu, just click the icon itself
Backups from before, for now, really do not matter, since I made you BIOS from stock anyway, and I have all important details for your board, so “Dump” is not important. The above one is seemingly OK. But, what we need to solve right now is what will properly write to the chip (usually this also means proper read as well)
This is very odd that nothing is working, after I’ve known several users to use and confirm both read/write with both things we’re using here. Maybe this is 1.8V chip and you just didn’t try enough before with adapter? Or, maybe you need to leave power connected, or remove, vs what you’re doing now
Always be sure you close app between a write, and a new dump where you plan to dump to manually confirm contents.
You can try flashrom, there is “Windows version” here w/ GUI (post #510) - [Guide] Using CH341A-based programmer to flash SPI EEPROM (34)
And here is normal method guide, you have to boot to Linux or Ubuntu etc - [GUIDE] The Beginners Guide to Using a CH341A SPI Programmer/Flasher (With Pictures!)
You can also try 1.30 and 1.34, and choose “Common” and pick correct size, not sure if anyone tested this yet or not.
I know 1.18 will get valid read, but CANNOT write, so you could dump with this instead of whatever you write with, and should be valid read for sure in case what you write with is not reading properly but is writing OK (ie Colibri or ASProgrammer)
@ArashMiniStar - Great to hear it, very nice eh!! 

On your dumped BIOS, I used CoffeeTime Advanced mode only, doing all 1-8 but stopping there and no microcodes done with CoffeeTime, then did Microcode edit with MMTool 5.02.0024
Registered to say THANK YOU!
I used CoffeeTime by svarmod. All in one tool give me vbios errors. All you people on this forum deserve respect. I red a lot of forums in last quarter of century, but did not find as informative as WIN RAID forum.
Matherboard is Gigabyte z170x gaming 5, bios f22f. Cpu mod with kopton tape(not kapton), all colors in diagram(yelow,red blue)
Procesor ES 8700k (QN8G), family 6, ext family 6, model E, ext model 9E, stepping A, revision U0.
Interesting thing, I got AVX options in bios menu that was not there with 6600k ![]()
Keep up the magnificent work and do not stop!
@kazp3r - Try this ASprogrammer (2.0.0a14) attached at last post here - https://www.badcaps.net/forum/showthread.php?t=82992
Also, try 1.38 and ASProgrammer (2.1.0.13) from this download as well - https://www.mdclab.it/lab-usb-programmer-ch341a.html
Hey,
I have a G20CI too and a i9 9900K R0 Stepping (SRG19). Trying to get this to work, but unfortunately booting stucks at Bootlogo. Currently my programmer writes a nologo version, hope to see something. But runs with my 7700k
what i did:
isolated pins. but my measurements said, that this should not necessary btw. but ok, for sure i isolated.
Automodtool selecting P0 and R0. fails at vbios. since that pc does not have integrated graphics I ignored this.
x.syncallcoreRatio fails with several errors (some files are not found)
UBU microcode update
Some ideas? I read that someone got the 9900k to work…
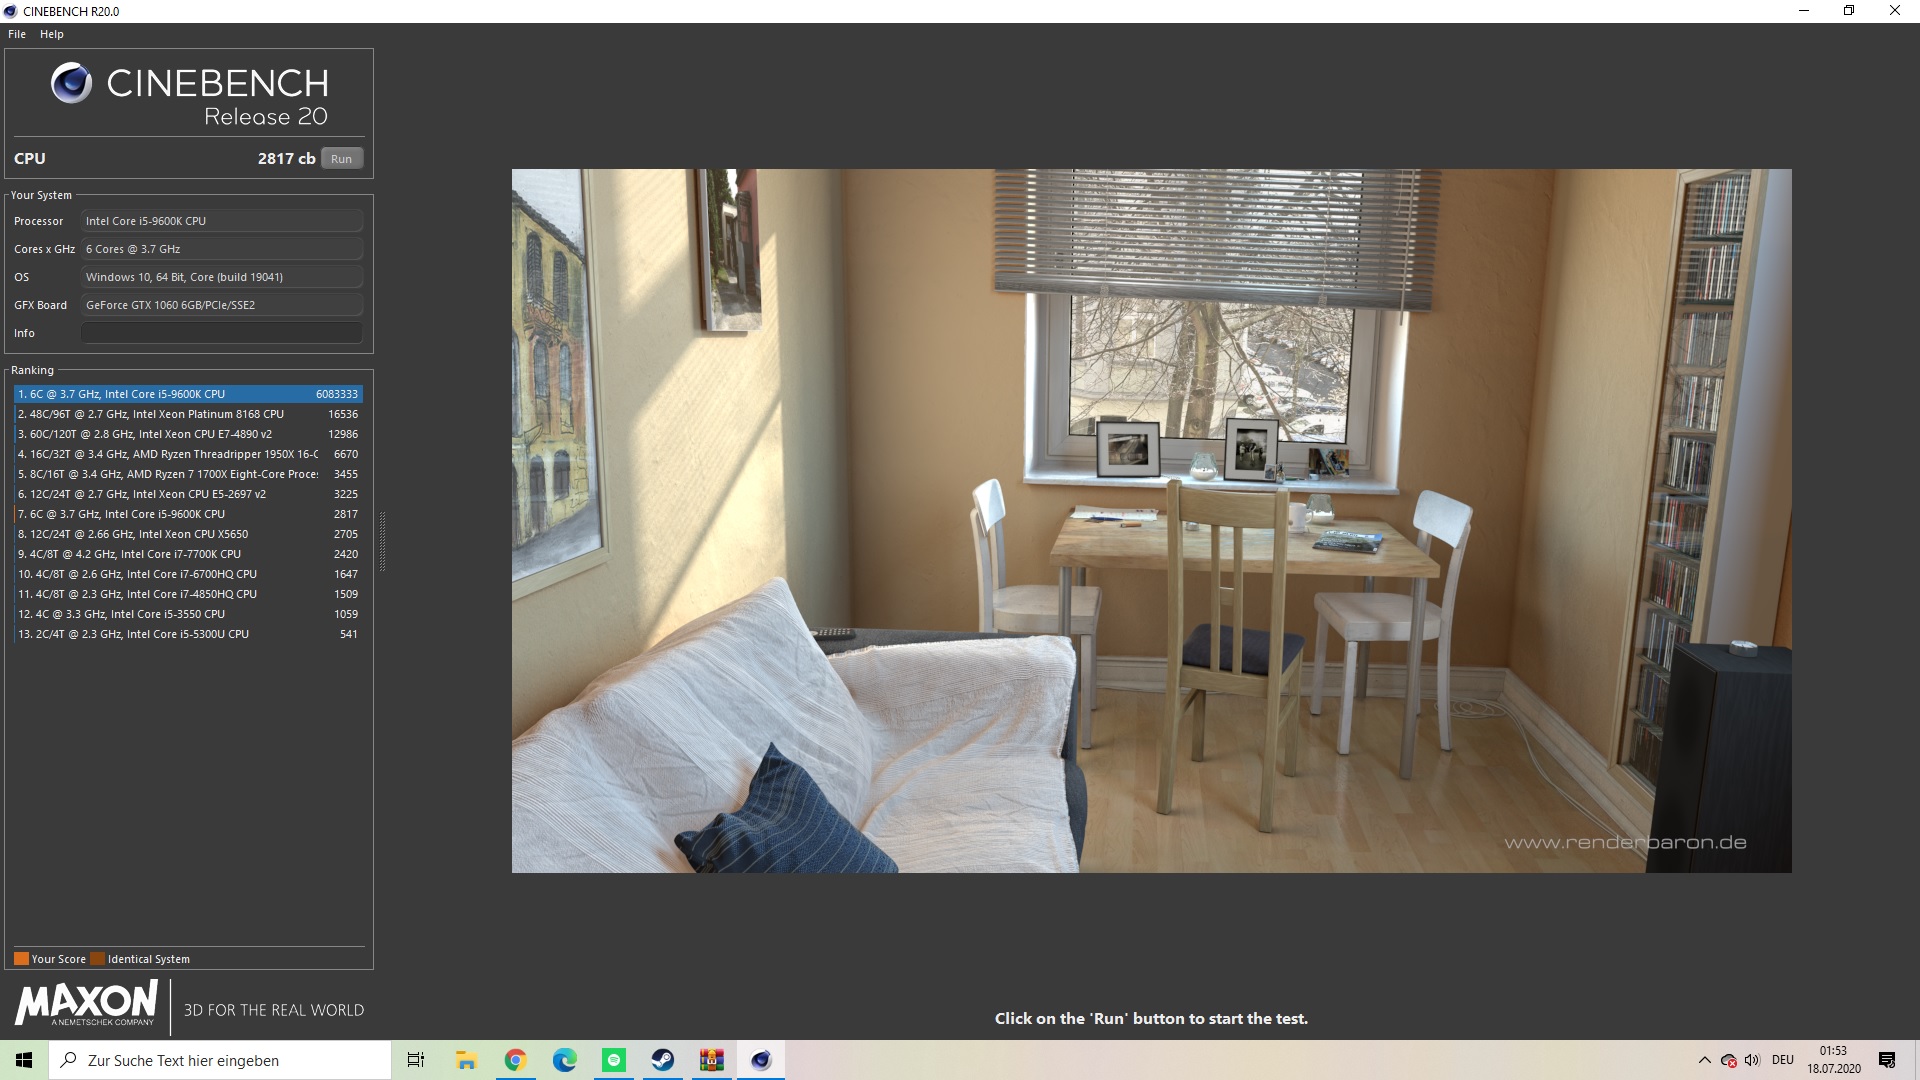
so I can still only overclock with Intel XTU but when I benchmark it once inside the XTU the overclock stays when rebooting & stuff so it’s all fine now. 4.8 [email protected] with 4.5 ghz cache(cinebench r20 run attached) is this a good OC?

@reactive - Send me your unmodified dump and I will make you BIOS to test. Nice to see you back! 
If yes to above, about sorting it out previously, for some other CPU maybe? Then I hope/assume you are using that as your new starting base, if so, send me that, and I will just further update it for your 9900K R0 (906ED)
@Lost_N_BIOS - The G20CB modification still runs with a 7700k. Unfortunately I lost everything I made. So I never touched it again, you now, never change a running system.
Now I got a G20CI and a 9900k R0 (906ED) for cheap, and found, that it is possible to run a 9900k on it. So here I am.
Meanwhile I got bootlogo disabled, but it shows nothing.
What I did is extracting creisseys unlocked bios menu and importing it to my bios. Everything runs fine with the 7700.
I would like to know what steps I am missing.
I will send you my bios soon
@reactive - Ohh, OK, yes, I see now, not even same system 

I have already unlocked (Some stuff user wanted) and did Coffee mod with success (BIOS here, but user specific - post #972), success report here #983
So, I can for sure do successful Coffee Mod BIOS for you, but you need to send me programmer dump
Sorry, not sure what you keep mentioning about boot logo? What is this about? Do you mean you are changing a BIOS setting to disable boot logo, but it still shows? Boot Logo >> Disabled would mean Disabled and no logo (as you describe)
For the BIOS menu edits, from BIOS I made for creisey, I see you found the file I linked above already 
For the menu edits you should have extracted and replaced two files and it HAS to be while you are using that SAME Exact BIOS version (1402) AND Build Date (03/20/2018), since Asus notorious for updating/changing BIOS and using same version #
Extract/Replace Setup PE32 & AMITSE>> SetupData (FE612B72-203C-47B1-8560-A66D946EB371)
You could use that BIOS, if you wanted to, but you’d have to edit in your system specific data into several modules/areas. Probably best for us to just make you BIOS from your dumped BIOS
@Lost_N_BIOS - Following your Unlocking Guide (thanks a lot for this) I replaced 3 sections (899407D7-99FE-43D8-9A21-79EC328CAC21, FE612B72-203C-47B1-8560-A66D946EB371 and B1DA0ADF-4F77-4070-A88E-BFFE1C60529A). Had access to the new features.
I could try creisseys version… Avoided that because of that specific data.
Everything else is identical . 1402, date…
Startup stucks at boot logo (hit f2 to enter bios default message). I wanted to see post messages and disabled BOOT logo via amibcp. When powering up, everything starts as with bootlogo, but I don’t see any post message, nothing. Only a blank screen.
@reactive - B1DA0ADF-4F77-4070-A88E-BFFE1C60529A >> Includes >> FE612B72-203C-47B1-8560-A66D946EB371 >> And that << + 899407D7-99FE-43D8-9A21-79EC328CAC21 is all you needed to swap on this BIOS edit
Or just B1DA0ADF-4F77-4070-A88E-BFFE1C60529A (Setup) as whole and 99FE-43D8-9A21-79EC328CAC21 (AMITSE) as whole
But yes, you got it 
 You’re welcome
Yes, board specific data would all need swapped, which is doable, but better to just edit yours due to all NVRAM contents will be specific to your system too then.
Try spamming Tab or Shift during POST with Boot Logo on Auto and Disabled. Disabled hides it of course, but you may still be able to hit tab/shift and see POST info, not sure.
It may not be possible to view it on this model? It may also matter if you are using Secure boot, CSM enabled or disable too, not sure. What do you need to see there anyway, or do you just not like the logo? If you don’t like the logo, we can replace it
Was not sure, but thought it, that it would be the same…
Just wanted to see, if something strange shows up. Everything is fine with that logo. Nothing needs to be replaced
That’s confusing, I don’t understand your first line at all
Nothing strange should show up, usually memory count, CPU info, disk info etc. You may be able to get it to show as I mentioned, you’ll have to try with logo Auto/Disabled and trey Shift/Tab to see.
@reactive - mod BIOS sent in PM 


