Unable to enable TPM on ASUS laptop after motherboard repair

I’m having trouble enabling TPM 2.0 on my ASUS laptop, which is preventing me from playing Valorant. When I try to launch the game, I receive an error message stating:

Your account does not meet the following requirements in order to play - TPM 2.0 enabled.

Upon checking the TPM Management Console, I see a message stating Compatible TPM cannot be found. My laptop’s UEFI Firmware settings do not have any option related to TPM. The only related option available is for enabling or disabling Secure Boot.

What I’ve tried:

  1. Restoring Secure Boot Keys to factory settings
  2. Resetting the BIOS
  3. Reflashing the latest BIOS
  4. Performing a CMOS reset.

None of these attempts have resolved the issue.

Background:

I can confirm that my laptop originally had a TPM chip, as I successfully installed Windows 11 on it a few months after its launch without using any TPM-related workarounds. However, I reverted to Windows 10 after a brief period due to personal preferences. Additionally, Asus lists my device as being compatible with Windows 11 (ASUS|Introducing Windows 11 on ASUS laptops and devices).

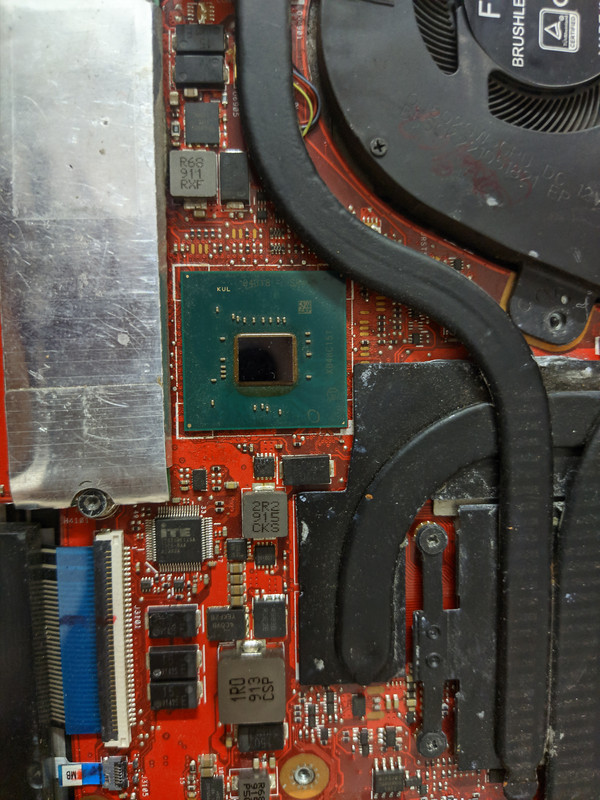
Approximately a year ago, I accidentally damaged my laptop’s LCD panel. In an attempt to fix it, I tried connecting an internal LCD panel from another laptop, which unfortunately resulted in damaging the motherboard. I sent the laptop to a local repair shop, and they returned it after two months, explaining that the delay was due to difficulty in acquiring a compatible 144Hz display.

At the time, I didn’t inquire about which specific components they repaired or replaced on the motherboard. Now, I’m considering the possibility that they might have had to disable TPM and/or Intel ME to make the laptop functional with the replaced components.

Additional Information:

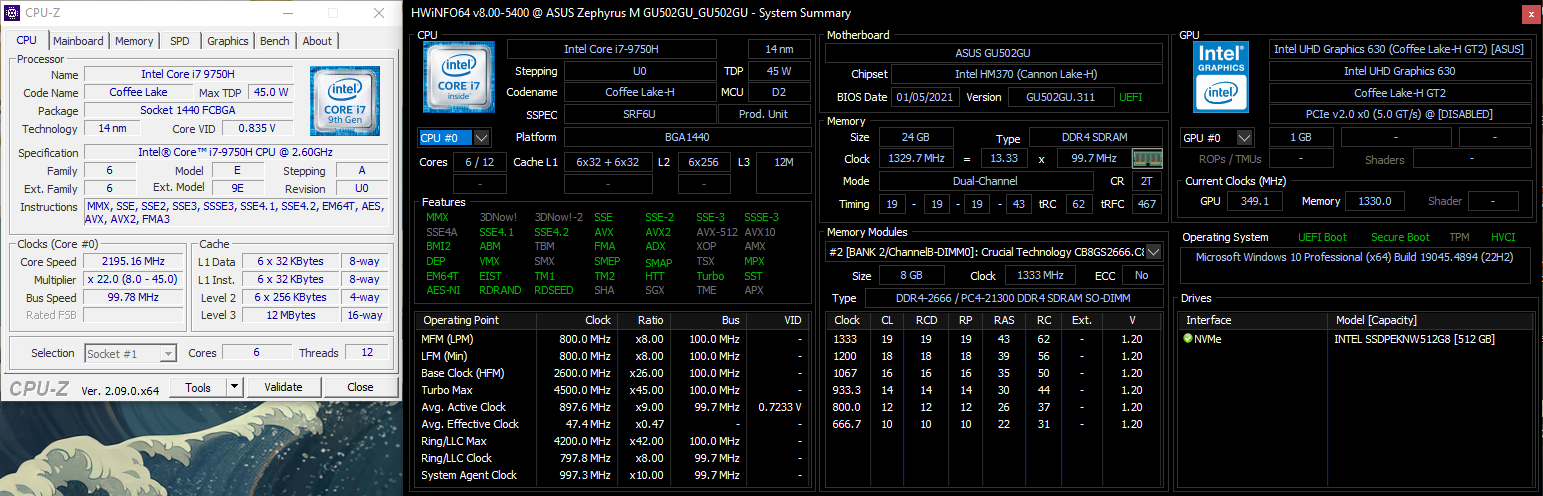
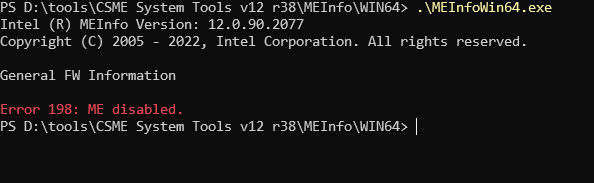
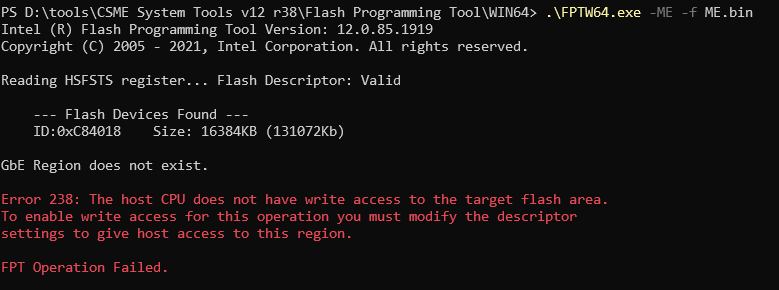
Currently, the Intel ME option under PCH-FW in the UEFI firmware settings appears as disabled for my device. The laptop has an Intel i7-9750H processor. The product page for this processor indicates support for Intel Software Guard Extensions (which is related to Intel ME), but HWiNFO System Summary shows it as disabled.

Furthermore, while the processor’s product page states support for Intel Virtualization Technology (VT-x), CPU-Z shows it as disabled, even though I have enabled Virtualization in the UEFI Firmware Settings.

Questions:

  1. Is TPM related to Intel SGX and/or Intel ME?
  2. Could the repair shop have disabled TPM, Intel ME, or replaced components affecting these features?
  3. Is it possible that the repair shop replaced the PCH but forgot to flash the ME firmware, resulting in Intel ME, Intel SGX, and TPM all being disabled?

Any advice or information to help resolve this issue would be greatly appreciated.

My Setup:

Model: ASUS ROG Zephyrus M GU502GU
Edition: Windows 10 Pro
Version: 22H2
Installed on: ‎15-‎09-‎2024
OS build: 19045.4780
Experience: Windows Feature Experience Pack 1000.19060.1000.0
CPU: i7 9750H
GPU: GTX 1660Ti

I tried to get some specifications for this thing, but Asus doesn’t provide them- not even in the manual?

Might be firmware TPM located in ME region. This (and other functions) aren’t working when ME is disabled.

Try to get a complete firmware dump with Intel Flash Programming Tool (fpt) from ME tools 12 package. Can be found here- 1st post
Command would be FPTW64 -d spi.bin (might give an error message related to read access rights though)

Attach the file here or post a link to the dump.

Run MEInfo from the same package and post the complete output here.

Here’s the firmware dump. I didn’t get any error message related to read accss rights: 16 MB file on MEGA

MEInfo

OK. You most probably should have a fTPM / Intel Platform Trust Technology (PTT). It’s supported and enabled at startup. I don’t assume Asus has installed a discrete TPM in addition.

There are some reasons for this behaviour- some bioses have options to disable ME, fptw64 does have an option -disableme, it might happen after PCH got exchanged and ME no cleaned/ freshly initialized, might be hardware, too. In the best case this machine has a servce jumper which wasn’t removed from the shop, but I doubt that…

So if you can’t find any service jumper or service solderings pads bridged with a wire I’d recommend to clean re- configure the ME and begin with an empty NVRAM.

Cleaning ME:

After having cleaned the ME:
Empty NVRAM- the easiest thing would be to take a bios region from latest Asus bios update (has to be extracted) and to transfer the padding marked with a green arrow to this bios region, thereafter replacing the bios region as one piece.

Stock bios region with expanded NVRAM for comparison

That’s the easy part.

Since the ME region and FD are locked for writing, the bios might be protected by other means and since I suppose this machine doesn’t have a service jumper it’s the hardware programming, probably.

That’s the only way to re-enable an ME again, to my knowledge there’s no way by software, the region has to be re-flashed.

An easy but a little dangerous way to find out if the ME is disabled for servicing would be dumping the ME region and wrting it back unchanged instantly:

FPTW64 -ME -d ME.bin
FPTW64 -ME -f ME.bin

But this might- as all the other things discussed- brick your machine when going wrong. But most probably it’ll end with a simple error message.

Can you take a look at this picture and tell me if you think they replaced the PCH?

Here are some others. Please ignore the red electrical tape, which I used to secure the fan so it doesn’t rattle during operation.

I am not familiar with modding and/or programming BIOS, so I don’t even understand half the things you said here.

I assume you’re talking about using some kind of a flash programmer? Like the ones they use to repair a corrupted BIOS.

I don’t have enough experience to say somthing about the PCH being resoldered. I with my simpy unexperienced mind would maybe think that this region did get some heat looking an the 7 solderblobs under the PCH and be a little concerned for the solder under the PCH itself. But as written, no experience.

Yes, the only way I can think of ti fix this possibly is to use a programmer.

Regarding the rest- you downloaded the Intel tools already and you have a proper dump (=backup). So for the cleaning it’s just following the guide to the letter. The other part won’t be too difficult either.

But there’s no warranty, given the history of your board and what it’s been through I’m not too optimistic.

What exactly do you mean by this?

I obviously don’t have even the tiniest bit of experience with reprogramming an SPI flash chip, so I want to know:

  1. Is there a possibility of bricking the motherboard when using an SPI programmer?
  2. Can you give me an idea of what could go wrong?
  3. Is there anything a beginner like me should know before attempting it? Any advice would be appreciated.

As written there might be other (board related) reasons for a disbled ME. And your board has been through an unknown repair process- you just know that it has been repaired but not what and how.
But you’ll never know if it’s firmware related if you don’t try a clean ME and ‘empty’ bios settings (NVRAM).
On the other side you have a running board now. And maybe you find out that reflashing doesn’t work and it’s hardware. But without a TPM for example you might no longer get Windows 11 running or updated if MS closes the backdoors for circumventing the hardware requirements.

Yes

People kicked of SMD parts from their board when trying to fix the soic clamp, for example. People flashed the wrong chip without backing it up first. Wrong positioning of the soic clamp might shorten pins. …

Do some reading, there’s a lot of stuff within this forum. I linked two guides already.

General rules:
Find the correct chip, check voltage, get the correct clamp / adapter (SOIC vs. WSON)
Always read the chip you want to overwrite, make 2 dumps which have to be a 100% identical and have the same structure than the file you intend to flash (UEFIToolNE) - that way you know that your setup is OK and that you’re on the correct chip.
(“If you can’t read properly you can’t write properly”)

Until here it’s quite safe since you shouldn’t change the content of the chip by just reading.

Thats how the file should look like- ME reconfigured, empty NVRAM from stock
Asus_ME_NVram.zip (8.5 MB)

  1. Is this firmware compatible with my exact model? So if I decide to do this in the future, the final firmware file I get after following the guides you linked above should have the same MD5 hash as this file you linked, right?

  2. I have a question about the guide you linked. It states:

Do I need to get an SPI/BIOS image dump from another laptop that has a properly working MEI, or will the dump I made earlier using the command FPTW64 -d spi.bin suffice?

Get maybe used to use UEFIToolNE and a hex editor, HxD for example. Even a file just containing FF will have a nice MD5 hash.

Use the Hex editor to compare your own spi.bin to the file I created. For HxD Ctrl-K compares two files, F6 hops to the next difference, Shift F6 hops to the last difference / searches backwards.
Check the addresses where differences are in UEFIToolNE, Ctrl G lets you hop to a specific address and marks it in the structure- window.
You’ll find that the bios region of the file attached is identical to your spi.bin except for the NVRAM- volume (0x440000 to 0x460000).
Flash descriptor (0x0 to 0x1000) has one difference that I assume is based on different tool (FIT) versions. A lot of differences in ME region are expected since it’s configured and not yet initialized- that happens at first boot.

If you open both files in FIT and save the configuration as xml, you can compare the files for example with notepad++. The only expected differences should be file locations for the extracted firmware image. There are two other changes which aren’t relevant and are most probably caused in using a newer FIT version than the one used from Asus,

No, your spi.bin is all you need here.

I have seen FPTW64.exe -greset being recommended to people who are facing Intel ME issues. Is this similar to a CMOS reset, and would you recommend that I try it? Hopefully, it doesn’t brick anything.

That’s not really a reset of settings, it’s kinda cold boot for the ME.

Can you help me locate the SPI/BIOS chip that I need to flash? I have found the schematics for the motherboard (attached in this post) and narrowed my search down to 3 chips:

  1. Winbond 25Q80EWSNIG on Page 78.
  2. 05006-00090900 FLASH MXIC MX25L12873FM2I-10G 128M SOP-8L on Page 28.
  3. 05006-00093100 FLASH GD25B127DSIGG IGADEVICE 128MB SOP8, also on Page 28.

I have managed to locate the Winbond chip on the motherboard physically.


The second chip, MXIC MX25L12873FM2I-10G, is hidden beneath a heat pipe and would not be accessible without removing the entire heat sink assembly. The third chip, however, remains a mystery. Unlike the other two chips, the schematic doesn’t have a component designator for it, so I couldn’t locate it in the motherboard’s boardview diagram. Which of these chips is the correct one that I need to flash using the CH314A programmer?

Hey, one more thing: I saw a post on HP forums about Intel ME firmware being corrupted, and the OP solved it by replacing the CMOS battery on their laptop. I’ve had my laptop for 4 years now, so do you think replacing the CMOS battery might help in my case too?

Unfortunately both the 128 Mbit chips. The smaller Winbond is possibly graphics firmware according to the diagram.

HP and Lenovo sometimes have routines to reset NVRAM with a reset procedure or triggered by removing all batteries. I don’t assume this will do anything, but possibly no harm either.
Battery voltage can be checked with a multimeter, battery disconnected. Disconnect all batteries for some minutes can be done, too.

I can’t even find the third chip on the boardview. How am I supposed to find it?

It’s just to search the board thoroughly from both sides. Documents might not be complete / for a slightly different model / have changed.
If there’s really only one chip even better.